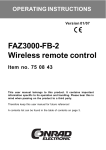
1
http://www.conrad.com OPERATING INSTRUCTIONS Version 01/07 FAZ 3000-PIR-2 Wireless PIR motion detector Item no. 75 03 32 Imprint These operating instructions are published by Conrad Electronic SE, Klaus-ConradStr. 1, D-92240 Hirschau/Germany. All rights reserved. 100% recycled paper. Bleached without chlorine. No reproduction (including translation) is permitted in whole or part e.g. photocopying, microfilming or storage in electronic data processing equipment, without the express written consent of the publisher. The operating instructions reflect the current technical specifications at the time of print. We reserve the right to change the technical or physical specifications. © Copyright 2007 by Conrad Electronic SE. Printed in Germany. This user manual belongs to this product. It contains important information specific to its operation and handling. Please bear this in mind when passing on the product to a third party. Therefore keep this user manual for future reference! A contents list can be found in the table of contents on page 2. Table of contents Page 1. Introduction .......................................................................................... 3 2. Prescribed use ..................................................................................... 4 3. Scope of delivery ................................................................................ 4 4. Explanation of icons ............................................................................ 5 5. Safety instructions .............................................................................. 5 a) General information ....................................................................... 5 b) Batteries and rechargeable batteries ............................................ 6 6. Features and functions ....................................................................... 7 7. Installation ............................................................................................ 8 a) General information ....................................................................... 8 b) Installing the bracket ................................................................... 10 8. Registering the PIR motion detector with the alarm base station ... 13 9. Explanation of ‘Internal/external sensor’ and ‘closure group’ .......... 16 a) Internal/external sensor ............................................................... 16 b) Closure group ............................................................................... 17 10. Setting the detection area of the PIR motion .................................. 18 11. Opening the PIR motion detector casing, replacing the batteries ... 20 12. Maintenance and cleaning ................................................................. 22 13. Disposal ............................................................................................. 22 a) General information ..................................................................... 22 b) Batteries and rechargeable batteries .......................................... 22 14. Information on the range ................................................................... 23 15. Technical specifications .................................................................... 24 16. Brief instructions ............................................................................... 25 a) Registering a PIR motion detector with the alarm base station 25 b) Setting the detection area of the PIR motion ............................. 25 c) Opening the casing, replacing the batteries ............................... 25 17. Declaration of conformity (DOC) ..................................................... 26 2 1. Introduction Dear customer, Thank you for purchasing this product. This product meets the requirements of both current national and European guidelines. In order to ensure continued fulfilment of legal requirements and safe operation of this product, we kindly ask you to carefully follow the instructions in this user manual! Please read the user manual completely and observe the safety and operation instructions before using the product! All company and product names contained herein are trademarks of their respective owners. All rights reserved. Should you have any further questions, please contact our technical service: Germany: Tel. no.: +49 9604 / 40 88 80 Fax. no.: +49 9604 / 40 88 48 Email: [email protected] Mon. to Thur. 8.00am to 4.30pm Fri. 8.00am to 2.00pm 3 2. Prescribed use The wireless PIR motion detector ‘FAZ 3000-PIR-2’ is only suitable for use with the ‘FAZ 3000’ wireless alarm system. The PIR motion detector registers infrared radiation (heat) of moving people and warm-blooded animals (for the latter, a minimum size is required to trigger the PIR motion detector). The PIR motion detector features an internal sabotage contact that immediately sets off an alarm at the alarm base station if a meddler opens the housing of the device. Batteries must be used for the power supply. Make sure that the product does not get damp or wet. When installing outdoors (for example garage or barn, etc.) it must therefore be mounted in an appropriately protected location. Any use other than the one described above may damage the product and can also increase the risk of short-circuit, fire, electric shock, etc. No part of the product may be modified or adapted. The device may only be operated when its casing is fully closed. All the safety instructions and installation notes in this manual must be observed without fail. 3. Scope of delivery • Wireless PIR motion detector ‘FAZ 3000-PIR-2’ with removable wall bracket • User manual 4 4. Explanation of icons The icon with a lightning flash in a triangle is used to alert you to potential personal injury hazards such as electric shock. The icon with an exclamation mark in a triangle points to important information in this user manual that must be observed. The ‘hand’ symbol indicates special tips and information on operation. 5. Safety instructions The product’s guarantee becomes invalid, if the product is damaged as a result of the failure to observe these operating instructions! We do not assume any liability for any resulting damages! We do not assume liability for damage to property or personal injury caused by improper use or failure to observe the safety instructions. In such cases the product’s guarantee becomes invalid. Dear customer, the following safety instructions are intended to protect you as well as the device. Please take time to read through the following points: a) General information • If you are not sure how to assemble, connect and install the device or if you have doubts about its mode of operation, contact a skilled technician. • For safety and licensing (CE) reasons any unauthorised alterations to and/ or modification of the product are not permitted. 5 • Make sure that the product does not get damp or wet. When installing outdoors it must therefore be mounted in an appropriately protected location. • This product is not a toy and should be kept out of the reach of children. • Do not leave packaging material lying around. This may become a dangerous plaything in the hands of children. • Handle the product with care; knocks, blows or even a fall from a low height can damage it. b) Batteries and rechargeable batteries • Keep batteries/rechargeable batteries out of the reach of children. • When inserting the batteries/rechargeable batteries make sure that the polarity is correct. • Do not leave batteries/rechargeable batteries lying around as they could be swallowed by children or pets. In such case seek immediate medical care. • Leaking or damaged batteries/rechargeable batteries may cause acid burns, if they come into contact with skin. Therefore, please make sure you use suitable protective gloves. • Make sure that batteries/rechargeable batteries are not short-circuited or thrown into a fire. They might explode! • Never take batteries/rechargeable batteries apart! • Conventional batteries must not be recharged. They might explode! • If the device is not used for a longer period of time (for example, when stored), remove the inserted batteries/rechargeable batteries to prevent them from leaking and causing damage. The PIR motion detector can be operated with rechargeable batteries. However, due to the lower voltage (rechargeable battery= 1.2V, battery = 1.5V) and the lower capacity, the period of operation and the range are reduced. In some instances powering with rechargeable batteries may not be possible when the PIR motion detector sends a ‘battery empty’ message to the alarm base station even when the batteries are full and therefore immediately generates a disturbance message. Therefore, to ensure safe operation, only use high-quality alkaline batteries. 6 6. Features and functions • Detects heat motion (for example, the movement of a person or an animal in front of a static background of a different temperature) and activates an alarm • Adjustable sensor characteristics (range up to approx. 12m, detection angle 90°) • Creep zone protection • May be installed on walls or ceilings • Sensitivity adjustment via alarm base station ‘FAZ 3000-Z’ possible • Battery operation (3 AA batteries) • Sabotage contact (alarm set off by a meddler opening the device casing) • Function test 7 7. Installation a) General information • The detection lens of the ‘FAZ-PIR’ is supplied with 4 detection levels with 9 upper, 8 middle and 5 lower segments, as well as 2 additional creep segments. The main sensor at the front can attain a range of up to 12m at a detection angle of 90°. Please note: The detection area is determined by the installation height of the motion detector, as well as the adjustment of the frontal lens opening. When mounted in a holder the sensor can be turned approx. 45°, which makes it easier to adjust the detection area later on. • For additional security, the ‘FAZ 3000-PIR-2’ is equipped with so-called ‘creep protection’ so that an intruder cannot ‘creep’ undetected under the detection area of the main lens. The creep zone protection consists of an additional lens on the under side of the PIR motion detector which is positioned downward. This mini dome lens with 17 segments covers an area of 3.75m x 3.75m when the PIR motion detector is installed at a height of 2m. A larger area can, of course, be covered, when the PIR motion detector is installed higher up. • In order to avoid household pets from setting off a false alarm, keep them away from protected areas when possible. In particularly difficult reception areas portions of lenses may be covered with non-transparent insulating tape in order to reduce the reception area. Bear in mind that household pets can also jump up onto cupboards or chairs, for example, and can thus enter the detection area and activate the motion detector. • Select an appropriate installation location with area conditions in mind. The installation height is dependent upon the desired detection area. 8 • Do not expose the PIR motion detector to direct sunlight, car headlights and so on. Please also refrain from installing it near a heat source such as above a radiator, for example. The heat source could disturb the PIR motion detector, and rising environmental temperatures can also reduce its sensitivity. • The detection area should be aimed at a wall or the floor, but not directly toward heaters or other sources of heat. • Detection through glass is not possible (in that case, the PIR motion detector only recognises the temperature of the glass). A person behind the glass will not set off the alarm. • The effectiveness of the detection depends on the temperature difference between the moving object and its respective background. • When installing the PIR motion detector make sure that you do not position it directly on or near large metal objects (heaters or aluminium laminated walls, such as those found in prefabricated houses), as this reduces the wireless range. 9 b) Installing the bracket • The PIR motion detector is equipped with a holder, which means that you can mount it to a wall or to a ceiling. Because the motion detector may be adjusted 45° degrees when in the bracket, the detection area may be set at almost any angle from the wall and may also be further adjusted after installation. Ceiling installation, however, allows the detector to be freely mounted in a room, in order to exclude specific routes from the detection area in a hall, for instance. • Select a suitable installation location for the PIR motion detector in the room that is to be monitored. • Pull the wall/ceiling bracket up and off the base device of the PIR motion detector. The bracket is released, see figure to right. • The two slotted holes ‘A’ are used for mounting the device to a wall. The slotted holes make it particularly easy to align the holder vertically. The central hole ‘B’ is used for mounting the holder to a ceiling. • Position the holder at a suitable location on a wall or on the ceiling. • Use a sharp pencil to mark where the holder is to be mounted through the screw holes. 10 • Depending on the type of surface you may have to drill holes and insert suitable dowels. When drilling or fastening screws be careful not to accidentally damage any power supply lines, gas or water pipes; this may pose life-threatening danger. • Now use screws to attach the holder to the wall or to the ceiling. • The batteries should not be inserted yet! 11 8. Registering the PIR motion detector ‘FAZ 3000-PIR-2’ with the base station To register the sensors, the alarm base station must first be set to receive radio signals. Make sure that you also read the user manual of the ‘FAZ 3000-Z’ alarm base station. Remove any batteries that may already be inserted into the PIR wireless motion detector! Carry out the following steps on the ‘FAZ 3000-Z’ alarm base station: Description of procedure Display on LCD • The alarm base station must be in the top level. The LCD should appear as on the right, for example, with the time and the date. disarm 16:30 14.12 • Briefly press the ‘Menü a/A’ button on the control unit of the ‘FAZ-Z’ alarm base station. troubles sensors • Use the ‘y’ and ‘z’ buttons to select the ‘sensors sensors’ menu. sensors • Confirm your selection by briefly pressing the ‘OK’ sensors add button. ‘sensors add’ appears on the LCD. sensors add • Press the ‘OK’ button again. X’ character here stands for the number of The ‘X sensors that have already been registered plus one. sensor clear X Now the alarm base station is ready to receive the registration from the ‘FAZ 3000-PIR-2’ PIR motion detector. • Go to the PIR motion detector that you wish to register with the alarm base station. 12 After installing the PIR motion detector (see section 6. b) the casing of the device is still open and the batteries are not yet inserted. • To access the battery compartment, slide the cover upwards a little. • Insert 3 AA batteries observing the correct polarity (plus/+ and minus/-) into the 3 battery holders. The correct battery positioning is indicated inside the battery holder, see figure to the right. • The PIR motion detector contacts the alarm base station by sending a radio transmission. The LED of the PIR motion detector briefly lights up, the alarm base station emits a short signal tone to confirm signal reception. • Put on the battery compartment cover. • Clip the PIR motion detector into the bracket. Do not use force, otherwise the clips on the bracket may break off. • Go back to the alarm base station, whose display has changed, see description on the next page. 13 • The LCD appears, for example, as shown on the 2 ’ is the consecutive sensor right. The number ‘2 number (and not ‘the second PIR motion detector’). motion _ 2 motion garage 2 close : intern: N N close : intern: N Y For example, when you have already registered 7 different sensors with the alarm base station, the sensor number displays ‘8’. • Use the buttons on the alarm base station to enter garage the name of the sensor (‘garage garage’, in the example on the right). f To enter letters use the buttons 2-9, each representing multiple letters (click through as with a mobile phone by repeated quick pressing of the same button). f Numbers and umlauts can also be found on the buttons. f Use the ‘0’ button to enter a space character. f Special characters can be entered using the ‘y’ and ‘z’ buttons. f You can use the ‘Menü a/A’ button to switch between lower and upper case. f The cursor automatically jumps to the next position approx. one second after the last button was pressed. f You can use the ‘wC’ button to delete a character you entered incorrectly by mistake. • Once you have fully entered the name you require, press the ‘OK’ button. The display indicated in the figure to the right appears in the LCD of the alarm base station. • Use the ‘x’ button to set the PIR motion detector intern:Y as an internal sensor (‘intern:Y intern:Y’) or an external intern:N sensor (‘intern:N intern:N’). 14 ‘intern: N’ External sensor; alarm set off intern: N for ‘internally armed’ and ‘externally armed’ ‘intern: Y’ Internal sensor; alarm set off intern: Y only for ‘externally armed’ More information on this can be found in section 9 on the next page (or in the user manual of the alarm base station). • By pressing the ‘y’ button you can access the N’ in the upper line is closure group settings (the ‘N underlined). close : intern: N N • Using the ‘x’ button you can select whether the PIR Y’) motion detector belongs to the closure group (‘Y N ’). (i.e., yes) or not (‘N You can find further information on this in section 9, page 17 (or in the alarm base station’s user manual). • Press the ‘OK’ button to access the sensitivity settings. The response sensitivity of the PIR motion detector can be set to a value between 1 and 4, whereby ‘4’ represents the highest degree of sensitivity. The response sensitivity is factory set 3’. Use the ‘y’ or ‘z’ button to select the value to ‘3 you require. sensit. • Confirm your setting by pressing the ‘OK’ button. You arrive at the registration of the next sensor. X’ on the right in the figure stands for the The ‘X number of the next free sensor memory location. sensor clear • Press the ‘wC’ button three times to exit the alarm base station’s registration mode. You are in the normal display mode again (top level) of the alarm base station. 3 X disarm 16:52 14.12 15 9. Explanation of ‘Internal/external sensor’ and ‘closure group’ a) Internal/external sensor By assigning a sensor as an internal or an external sensor, you can determine how each sensor responds: Intern: N External sensor; alarm is set off for ‘internally armed’ and ‘externally armed’ Intern: Y Internal sensor; alarm is set off only for ‘externally armed’ The alarm base station has two activation options: 1. ‘Internally armed’ The ‘internally armed’ function provides protection to the exterior of a building, such as, when you are in your house at night, for instance. Only sensors that are involved in protecting the exterior of the building are allowed to respond. These include door/window detectors in an apartment or PIR motion detectors that are mounted externally. PIR motion detectors located inside the apartment are not allowed to respond Intern: Y and must therefore be set to ‘Intern: Y’. 2. ‘Externally armed’ The ‘externally armed’ function is used to monitor an unoccupied building such as a house, when no one is at home, for instance. The exterior shell of the building is monitored (using door/window detectors, for example) as well as the indoor areas (provided that internal PIR motion detectors are installed). All the sensors set off the alarm, irrespective of how they are assigned. 16 b) Closure group All sensors that directly protect external doors such as door/ window detectors and PIR motion detectors that are mounted outside should be assigned to the so-called ‘closure group’. When the alarm system is activated and in the case of an alarm the sensors in the ‘closure group’ initially only set off the internal siren of the ‘FAZ 3000Z’ alarm base station (the default setting for the alarm duration is 30 seconds, which you can adjust). Only afterwards is the ‘normal’ alarm set off (for example, externally via a siren and a strobe light). Advantage: If you forget to deactivate the alarm system when you enter your house, initially only the internal siren is set off. You then have 30 seconds in which you can deactivate the alarm system, before the external siren (and the alarm dialler or PC interface, for example) signal the alarm outside the building. Disadvantage: When there is a ‘real’ break-in, this also forewarns the intruder. The intruder could then attempt to destroy the alarm system or parts of the alarm system, if these devices are easily accessible and are not protected against force. To avoid this problem it makes sense to use the ‘FAZ 3000-SE’ radio activation switch with a bolt switching contact. This device deactivates the alarm system when the house door is opened properly, and consequently prevents false alarms. At the same time the alarm is set off without a delay, if one of the sensors activates. 17 10. Setting the detection area of the PIR motion detector a) Set the alarm base station to the ‘run test’ mode. To do this press the ‘Menü a/A’ button on the alarm base station and select run test the ‘run test’ menu by pressing the ‘y’ and ‘z’ buttons. run Confirm your selection by pressing the ‘OK’ button, the display reads ‘run test active active’. Caution! Wait about 10 minutes, before testing the function of the sensors. The alarm base station must first inform all the sensors that a function test is to be carried out (status signals between the alarm base station and the sensors are sent approx. every 10 minutes). Otherwise a situation may arise where a sensor does not send a return signal to the alarm base station and you then needlessly search for the cause of the error! b) Walk back and forth across the desired detection area (the help of a second person to monitor the function transmission to the alarm base station is useful!). Recognised movements result in the LED on the PIR motion detector lighting up (difficult to notice during daylight) and the alarm base station emitting a short signal tone. c) If the detection area is not to your liking, rotate the PIR motion detector in the bracket. An alternate installation location may be required. You may also try to reduce the detection area by partially covering lenses (with non-transparent insulating tape). d) If necessary, repeat steps b) and c) until the detection area is ideal for your needs. 18 e) End the ‘run test’ mode by pressing the ‘wC’ button on the alarm base station 2 times. The activation sensitivity of the PIR motion detector may be adjusted via the ‘FAZ-Z’ alarm base station. To do this press the ‘Menü a/A’ button on the alarm base station sensors sensors’ menu by using the ‘y’ and ‘z’ buttons and select the ‘sensors and then press the ‘OK’ button. sensors attributes With the ‘y’ and ‘z’ buttons, select the ‘sensors attributes’ menu and confirm by pressing the ‘OK’ button. Select the desired sensor (using the ‘y’ and ‘z’ buttons) and press the ‘OK’ button. Proceed as described at the end of section 8. 19 11. Opening the PIR motion detector casing, replacing the batteries Before the casing of the PIR motion detector ‘FAZ 3000-PIR-2’ may be opened, it must be set to maintenance mode. Otherwise the alarm base station immediately sets off the sabotage alarm when the casing is opened. To place the PIR motion detector in maintenance mode, proceed as follows: • The alarm base station must be in the top level. The LCD should appear as on the right, for example, with the time and the date. disarm 17:25 15.12 • Briefly press the ‘Menü a/A’ button on the operating unit of the ‘FAZ 3000-Z’ alarm base station. troubles service • Use the ‘y’ and ‘z’ buttons to select the ‘service service’ menu. See the figure on the right. service • Confirm your selection by briefly pressing the ‘OK’ button. The first sensor that was registered with the alarm base station is displayed. contact livingr 1 W1 • Use the ‘y’ and ‘z’ buttons to select the sensor that you wish to open (in order to replace the batteries, for instance). motion garage 2 Other devices may be selected with the ‘x’ button (signal transmitter, activation switch, alarm dialler, PC interface and alarm base station). • Confirm your selection by briefly pressing the ‘OK’ button. The PIR motion detector may be removed from the bracket without setting off a sabotage alarm. 20 motion 2 - service - • You may now safely replace the batteries. No data is lost and the sensor or the device does not need to be registered again afterwards. In addition to replacing the batteries, you may also install the PIR motion detector in another location if desired. Once the new batteries have been inserted the sensor’s LED briefly blinks once. The radio connection to the alarm base station has been established and checked. • Replace the battery compartment cover and place the PIR motion detector correctly in the bracket. • Briefly press the ‘OK’ button on the alarm base station to end the maintenance. You are now in the sensor list again. You can use the ‘y’ and ‘z’ buttons to select another sensor (or select a device using the ‘x’ button). motion garage • You can exit the ‘Wartung’ (maintenance) mode by pressing the ‘wC’ button three times. This returns you to the normal display mode (top level) of the alarm base station. disarm 17:47 15.12 2 21 12. Maintenance and cleaning The product requires no servicing except for battery replacement. Any repairs should be carried out by a skilled technician or professional workshop! Clean the product with a soft, clean, dry and lint-free cloth. To remove heavier dirt, use a cloth which is slightly moistened with lukewarm water. Do not use any solvent-based cleaning agents as these may damage the plastic casing. 13. Disposal a) General information When the product is no longer usable, dispose of it in accordance with the applicable statutory regulations. b) Batteries and rechargeable batteries As the consumer, you are legally obliged to return all your used batteries and rechargeable batteries. Do not dispose of your used batteries via the household rubbish! Batteries/rechargeable batteries containing harmful substances are marked with the following icons, which alert you to the fact that disposal via the household rubbish is prohibited. The identifiers for the respective heavy metals are: Cd=cadmium, Hg=mercury, Pb=lead (identifier is on the battery/rechargeable battery, for example, under the rubbish bin icons on the left). You can return your used batteries/rechargeable batteries free of charge to any authorised disposal station in your area, in our stores or in any other store where batteries/rechargeable batteries are sold. By doing so you comply with your legal obligations and also make a contribution to environmental protection. 22 14. Information on the range Ranges and interference • The PIR motion detector operates in the 868MHz range, which is also used by other radio services. Therefore devices that operate on the same or neighbouring frequencies may restrict both its operation and its range. • The specified range of 300m is the free-field range, which means the range with visual contact between the transmitter and receiver. In practice, however, ceilings, walls, garages or neighbouring buildings between the transmitter and the receiver may affect and reduce the range accordingly. • The range also depends on the version of the available alarm base station. Earlier versions of the alarm base station had a range of up to 100m; for others, an external antenna (‘FAZ-HF’) permitted larger ranges. • The actual attainable distance between the transmitter and the receiver in normal operation greatly depends on the installation location and the surroundings. As a rule – when mounted in a family home, for example – all the components should work properly and there should be no radio reception problems. Other causes of reduced ranges: • All types of high-frequency interference • Any buildings or vegetation • Conductive metal parts that are located near the devices or within or near their transmission path, for example, radiators, metallised insulation glass windows, reinforced concrete ceilings and so on • Influence on the radiation pattern of antennas due to the distance from the transmitter or receiver to conductive surfaces or objects (also to human bodies or the ground) • Broadband interference in urban areas that reduces the signal-to-noise ratio; the signal is no longer recognised due to this ‘noise’ • Interference radiation resulting from insufficiently shielded electronic devices, for example, operating computers or similar 23 15. Technical specifications • Operation: ................................... passive IR sensor • Sensor characteristics: Main lens PIR sensor range: ...................... up to 12m Detection angle: ......................... approx. 90° Creep zone protection Range: ........................................ up to 4m Detection angle: ......................... approx. 43° • PIR sensitivity adjustable via the ‘FAZ 3000-Z’ alarm base station. • Batteries: .................................... 3 x AA batteries (LR06) • Dimensions (dia. x H): ............... 55mm x 132mm • Frequency: ................................. 868.35MHz • Range: ........................................ up to 300m in free-field (*) (*) 24 The range depends on the version of the ‘FAZ 3000-Z’ alarm base station that is used. Earlier versions only permitted a range of up to 100m. 16. Brief instructions a) Registering a PIR motion detector with the alarm base station • • • • • • • • Install bracket, but do not insert batteries Set the alarm base station to the sensor search mode Insert batteries into the battery compartment of the PIR motion detector Put on the battery compartment cover and place the PIR motion detector in the holder Return to the alarm base station, this must have recognised the PIR motion detector Input name Set properties (closure group and internal/external sensors) Return to the top level of the alarm base station (press the ‘wC’ button three times) b) Setting the detection area of the PIR motion detector • Set the alarm base station to the ‘run test’ mode • Conduct the function test, rotate the PIR motion detector or partially cover lens, if necessary • Exit ‘run test’ mode (press ‘wC’ button 2 times) • If necessary, adjust the sensitivity of the PIR motion detector via the alarm base station c) Opening the casing, replacing the batteries • Using the alarm base station, set the PIR motion detector to maintenance mode. • Remove the PIR motion detector from the bracket • Remove the battery compartment cover • Replacing the batteries • Put on the battery compartment cover and place the PIR motion detector in the holder • Exit the maintenance mode of the alarm base station (press ‘wC’ 3 times) 25 17. Declaration of conformity (DOC) We, Conrad Electronic, Klaus-Conrad-Straße 1, 92240 Hirschau (Germany), hereby declare that this product complies with the fundamental requirements and other relevant regulations of directive 1999/5/EC. 26 You can find the declaration of conformity for this product at www.conrad.com 27