1
Print and Save
“We Deliver and Ship - 7 Days a Week”
Main Clinic Supply is
registered and credentialed to
deliver 7 days a week to both
Mayo Clinic hospitals.
Call 1-800-775-0942
We also deliver for free to all
Rochester Minnesota hotels.
We also ship FedEx 7 days a
week to anywhere in the USA.
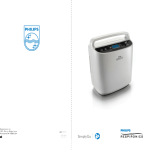
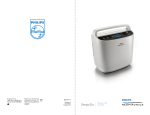
Philips Respironics SimplyGo !
$2,179
►Price good for 3 days from day of email ◄
Better Business Bureau A+ Rating
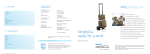
SimplyGo Includes:
- SimplyGo Travel Case
- Shoulder Strap
- SimplyGo Mobile Cart
- Accessory Case
- Wall A/C Power Supply
- Car D/C Power Supply
- Free FedEx Shipping
Discount battery options from 1 to 5
batteries. Call for discount pricing.
CALL 1-800-775-0942
See Spec Sheet & Quick Start Below
SimplyGo
Quick-start guide
Getting started
This guide is intended to help you get started using the SimplyGo
portable oxygen concentrator. If you have questions that are not
answered in this guide, please consult the SimplyGo User Manual
or contact your homecare provider.
Important: The first time you charge the battery, be sure to charge it fully.
Do not use the DC power cord for initial charge; instead use AC power.
Charge the battery using the AC power cord.
Before using SimplyGo for the first time, the battery requires an
initial uninterrupted charging time of four hours minimum. This can
be accomplished by installing the battery (see step 2 of Quick-start
instructions) and using the AC power cord.
To charge the battery using the AC power cord provided with your
system, follow these steps:
1. Connect the AC power supply’s output cable to the SimplyGo power
input connector located on the upper right side of the unit.
2. Connect the AC power cord’s connector to the AC power supply.
3. Connect the AC power cord’s plug to an AC outlet.
Control panel display
1
2
3
4
5
6
1. Power Turns SimplyGo on and off
2. Alarm silence Turns the audible alarm off
3. Mode Selects one of the three possible operating modes
4. Display screen Shows information about the operating
status of the device
5. Plus (+)/minus (-) + Increases the displayed setting;
- Decreases the displayed setting
6. Cannula connector Oxygen output and connection
point for cannula
Quick-start instructions
1. Attach the shoulder strap to
the carrying case.
Slide SimplyGo into carrying case,
secure, and attach shoulder strap if
desired. SimplyGo can be operated in
or out of the case.
2. Insert the charged battery into
the device.
There is only one way the battery can be
inserted into SimplyGo. Using its handle,
position the battery over the battery
compartment, lower into place, and press
until it snaps into place. After the battery
is inserted, check to make sure the
battery handle is level with or slightly
below the top of the plastic case.
3. Connect a nasal cannula to the
oxygen outlet on top of the device.
Connect a nasal cannula to the top of
SimplyGo. To avoid a disruption of oxygen,
route the cannula so that it is not pinched
or kinked. A standard single lumen nasal
cannula and tubing should be used.
SimplyGo works with cannula tubing up to
30 ft. (9 m).
4. Turn on SimplyGo.
Turn the device on by pressing the
Power button twice. After the first
press, the display screen and the button
backlights turn on. Press the Power
button a second time to place the device
in operating mode. This second
press helps prevent unwanted starts
or inadvertent changes in oxygen flow.
The introductory screen momentarily
appears followed by the final operating
mode screen.
5. Set the mode.
Press the Mode button. Note: If the
device is operating and the screen
is dark, the first press turns on the
screen backlight. In this case, press
the button a second time to select
the mode. Continue pressing the
Mode button to scroll through the
Pulse, Continuous Flow, or Sleep
modes. When the desired mode
appears in the display, stop pressing
the button and wait. The display
will return to the run time screen
of the mode you selected, and the
device will operate in this mode.
6. Set the flow rate.
To set the device’s flow setting, press
either the + or – button. To increase
the flow setting, press the + button.
To decrease the flow setting, press the
– button. The device can be set to 1,
1.5, 2, 2.5, 3, 3.5, 4, 4.5, 5, 5.5, and 6
in Pulse or Sleep mode. SimplyGo can
be set to 0.5, 1, 1.5, and 2 in Continuous
Flow mode. Always verify the flow rate
when turning on SimplyGo.
Mobile cart operation
To set up and use the mobile cart,
follow these easy steps.
1. Set the mobile cart on a level surface, hold the handle
with one hand, and open the base support.
2. With SimplyGo properly positioned in its carrying case,
place the device on the base of the cart and secure
using the elastic strap on the back of the case.
Oxygen delivery modes
Pulse mode
When SimplyGo is in the Pulse mode, it detects when the user
begins to take a breath and then delivers a pulsed volume of oxygen
determined by the setting number.
Continuous Flow mode
In Continuous Flow mode, a constant flow of oxygen is supplied based
on the setting number (in liters per minute). When the desired mode
appears in the display, stop pressing the button and wait. The display
will return to the run time screen of the mode you selected and the
device will operate in this mode.
Sleep mode
Sleep mode is similar to the Pulse mode; SimplyGo detects when the
user begins to take a breath and then delivers a pulsed volume of
oxygen determined by the setting number. The Sleep mode differs
from Pulse mode in that it has a more sensitive triggering level and
delivers a softer, more comfortable pulse for sleeping. If no breath
is detected for a period of time, the system automatically delivers
a continuous flow of oxygen at a rate consistent with the last used
Continuous Flow mode setting.
3. Press down on the “PUSH” button located at the top
of the handle. Then pull the handle upward to extend
the cart arm to the desired height.
4. Attach the accessory bag around the cart handle using
the bag’s elastic strap.
SimplyGo specifications
Product specifications
Oxygen concentrations*
Outlet pressure
Flow settings and pulse volumes
Pulse mode bolus size
Continuous flow settings
1 = 12 ml, 1.5 = 18 ml, 2 = 24 ml, 2.5 = 30 ml, 3 = 36 ml, 3.5 = 42 ml,
4 = 48 ml, 4.5 = 54 ml, 5 = 60 ml, 5.5 = 66 ml, 6 = 72 ml
+/- 10% or 3 ml whichever is greater (average of 20 consecutive
breaths) up to a max of 2000 ml/min +/- 200 ml
0.5 LPM, 1 LPM, 1.5 LPM, 2 LPM
+/- 10% or 100 ml/min whichever is greater
(3 minute running average)
≤43 dB (nominal) at pulse setting 2
Sound level
Physical characteristics
Size
Weight
User interface
Filtration
Operating conditions
Operational temperature
Relative humidity
Altitude
Storage conditions
Temperature
Relative humidity
AC power
Input
Output
Power consumption
11.5 in x 10 in x 6 in (29.2 cm x 25.4 cm x 15.2 cm)
10 lbs (4.5 kg) with battery installed
Push buttons, back-lit liquid crystal display (LCD)
Internal: air inlet filter (gross particle), main-flow bacteria filter
41° to 104°F (5° to 40°C)
15 to 95%
Up to 10,000 ft (3048 m)
-4° to 140°F (-20° to 60°C) unit only
Up to 95%, non condensing
100 to 240 VAC, 50/60 Hz, 2.0 A
19 VDC 7.9 A max
150W while charging
120W while not charging
DC power
Input
Audible alarm
Sound level
Alarm type
Battery
Chemistry
Dimensions
Weight
Charge time
Battery duration
Number of batteries
1
2
3
4
87 to 96% at all settings
3 PSI
12 to 19 VDC 8.0 A max
50 dB (nominal) at 39 in (1 m)
Low oxygen purity, No breath, High breath rate, No flow,
Low battery, Depleted battery, Wrong battery, System technical fault
Lithium Ion 14.4 VDC (nominal)
0.9" x 7.4" x 4.6" (2.7 cm x 18.8 cm x 11.7 cm)
1.5 lbs (0.7 kg)
Approximately 2 to 3 hours per battery from fully discharged
Pulse dose setting of 2**
3.5 hours
7 hours
10.5 hours
14 hours
Continuous flow 1 LPM
2.3 hours
4.6 hours
6.9 hours
9.2 hours
* Based on an atmospheric pressure of 14.7 psia (101 kPa) at 70°F (21°C)
** Based on 20 breaths per minute
Continuous flow 2 LPM
.7 hours
1.4 hours
2.1 hours
2.8 hours