1
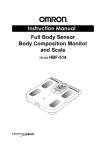
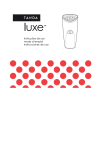
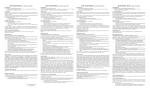
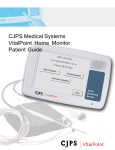
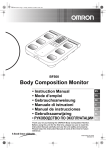
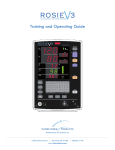
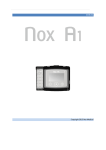
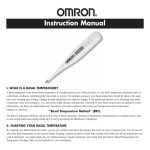
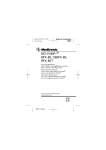
Chapter 8: The VelaSmooth™ Basic Technique:How to do it!
This chapter addresses the actual foundation device of the LipoLite™ program, the
VelaSmooth™. The Vela large head only protocol is used twice weekly throughout the
entire LipoLite™ program and there is a finesse, an endpoint and some technical
refinements to operating it effectively. With the Vela large and small head dual protocol,
Vela treatments are performed once weekly for 8 weeks. One must establish and achieve
the clinical endpoints with the Vela in order to ensure effective and optimal outcomes.
(I) The LipoLite™ VelaSmooth™ device: Large Head
You must of course read thoroughly your VelaSmooth™ user manual and
will have been given an in-service on the operation and use of the device.
To start the VelaSmooth™, turn the key located on the front of the machine,
clockwise.
Figure. The Vela. Turning it on
The LipoLite™ physician training digital video, available at www.MulhollandMd.com
website showcases all the techniques you will be seeing and you will be able to review
them in the comfort of your own home. Please contact Jina Kim, VP Marketing for
SpaMedica and Mulholland DR University (MDU) to gain access. Jina can be reached at
[email protected].
36
Wait for the system to run through a self-test of controller memory. During this
test, the screen blinks, and when the first row of lights (level 0) on the operator
panel is on, the system is ready for use.
Figure. Vela control settings. Far left
is the suction, the middle is the RF and
the far right is the Infrared.
Define the Treatment Mode Intensity on the Vela.
The operator panel is located on the top of the applicator. The panel consists of
three treatment mode buttons and an information screen. There is the IR mode
(Infrared light energy). The RF mode (Radio Frequency), and the vacuum
shaping mode.
Use the mode buttons to control the intensity of IR, RF, and vacuum-suction
applied to the patient. Each time you press this button, you move the intensity up
to the next level as indicated by the lights on the control panel.
37
Figure. Adjust the intensity settings
for each of the modalities by
depressing the blue buttons.
as the intensity increases the
bar lights increase (1, 2 or 3 bars).
During the first treatment for each patient, the initial few minutes of this first
treatment for each contour and cellulite zone, you should use the moderate (2 bar)
setting to determine how well the patient will tolerate it. The settings should be
increased as soon as possible to achieve the greatest results. Generally for anterior
(anterior thighs, abdomen, waist) the strongest settings (3 bars) for each modality,
RF-IR and suction will be tolerated quickly. In most patients the lateral (thigh,
waist, and calf) and posterior (thigh, calf and arm) are very tolerant of maximal
intensity. It is on the medial surfaces (inner thigh, inner knee and arm) that some
patients experience sensitivity and one should start out with less intensity
(one bar on the suction and 2 bars on RF and IR) and then move up the RF-IR
quickly and the suction as tolerated.
LipoLite™ VelaSmooth™ Treatments: Basic Technique
The LipoLite™ program has as its foundation the VelaSmooth™ lipo-contouring,
cellulite smoothening and skin tightening. Like performing a good FotoFacial
RF™ treatment, there is definitely some finesse in achieving a good treatment.
What defines a good Vela LipoLytic treatment? There needs to be an endpoint.
Once we ascertain the adequate clinical endpoint, then there are specific
maneuvers of achieving these endpoints gently, safely and effectively for
each zone and anatomic area.
38
The LipoLite™ Vela Smooth Endpoint
The endpoint is reached for all of these areas when the skin being treated is quite
erythematous and radiates a deep warmth to touch. When you are done and the
spray has been wiped off, the skin will still be pink and will gradually start to
warm up. Most patients describe their skin radiating this deep warmth for up to an
hour after a good LipoLite™ Vela treatment.
YOU MUST continue performing multiple passes until the erythema and heat
radiation occurs!!! Often 3-8 passes per large zone will be required. Each pass is
very slow and methodical in order to achieve the necessary deep adipocyte,
lipolytic heating. It is not recommended to stop with the hand piece while on the
long sustained (3 bar) suction, as there is a risk of thermal injury and the suction
in one spot may increase the risk of purpura and petechia.
Repeat all these steps in all zones until all desired areas have been treated. It is
important to keep the skin moist with the conductive fluid. When the skin is
dry, the patient will complain of feeling” and too much heat as well as a pinching
sensation caused by the suction. It is also easier for the operator to slide the
applicator along the skin when the skin is wet.
Figure. Conductive fluid prior to LipoLite™ Vela
applicator
39
Figure ……. The endpoint. After 3-6 slow methodical
passes, check to see if the skin is warm and
erythematous
1. Outer Thighs :
The outer thigh is a common area for focal lipodystrophy and relatively common
zone for cellulite and skin texture concerns. Generally, the outer thigh will form a
portion of the women’s focal lipodystrophy triad of the “double bubble and pot”.
Diet and exercise will be frustrating for women in this region as any weight loss
will be systemic and usually not reflected in the outer thigh proportion.
The outer thigh is not an overly sensitive region, being poorly subserved by the
posterior hypothalamus and has very indiscriminate perception. As such, the outer
thighs can generally undergo a very aggressive LipoLite™ Vela treatment even
from the very beginning. The outer thighs can usually tolerate higher settings than
other areas of the body.
Start with the leg closest to you and moisten the treatment area with conductive
fluid. Place the VelaSmooth™ head on the patient’s skin and apply downward
pressure so that both rotating electrodes are in close contact with the skin. Once
the applicator is in motion, press the button located on the handle.
40
Figure. Applying the Vela applicator to the thigh
By moving the machine first, you prevent burns to the skin. You may advance the
vela head away from you, or you may run the vela head backwards towards
yourself. The directionality is not as important as the technique. Firm pressure
(not so firm as to exsanguinate the vascular plexus) depressing the skin 1-2
inches and then move the Vela slowly, approximately at a velocity of 1 inch /
second. Make a slow methodical pass, 1 inch / second. It usually takes at least 4
to 8 slow passes (4-8 passes) to reach the desired endpoint of erythema and
warmth to touch. You have only achieved the end point when the skin (skin type
1-3 this will be easier to visualize than skin type 4 or 5) is pink. There should be a
deep, radiant heat from the skin.
Figure. Slow applicator movements
along the outer thighs upward
towards the groin
41
With the outer thighs, it is easiest to move the applicator in an upwards direction
towards the groin which will also aid in lymphatic drainage. After each pass,
pause to check and feel the skin of the outer thigh. If the skin is not very warm
and erythematous, then continue treating until the end point is reached.
Imaging passing the VelaSmooth™ as if you are performing LIPOSUCTION.
Visualize the fat under the skin or the area you are treating. Just as if you had a
canula under the skin moving back and forth contouring the fat collection, so
with the Vela during your LipoLite™, you are moving back and forth across the
surface of the outer thigh until a metabolic, tissue effect is produced (Lipolysis),
which is manifested by erythematous, radiantly warm skin. If there happens to
be cellulite over the surface of the outer thigh, then naturally, this will be treated
at the same time.
2. Anterior Thighs:
As for the tough outer thigh skin, the anterior thigh can usually tolerate
a reasonable degree of force. Perform 3-8 passes and checking for erythema
and warmth each pass. Take that opportunity after the third pass to also ensure
that you apply adequate conductive fluid as the patient will feel an uncomfortable
pinching of the thin skin of the anterior and inner thighs if the electrodes are not
in direct contact with the skin at all times. Move the VelaSmooth™ head slowly
until you reach your endpoint. You may move towards, or away from yourself,
just ensure that adequate pressure, 1-2” depression is applied and you move
slowly and methodically, at 1 inch/second.
Anterior Thigh Vela Treatment
42
3. Inner thigh:
This area generally has looser skin than other areas of the leg and is more
sensitive and therefore requires you to lower the pulsatile suction mode, at 1 bar.
Start with the lowest setting of the suction mode but the patient should be able to
tolerate at least the medium IR and RF mode. Eventually you will be able to
increase both the pulsatile suction and IR and RF modes. You have to move the
applicator slowly towards yourself, making sure not to lose contact with the skin.
It is easier to work on the leg closest to you at all times and make shorter passes
than on other areas of the leg. The amount of passes will vary considerably with
each patient but the inner thigh area usually requires fewer passes and lower
suction to reach the endpoint.
Inner Thigh
4. Inner Knee:
To properly treat this area it is again easier to start with the leg closest to you.
Using the same downward pressure as in the other areas, push the VelaSmooth™
head smoothly towards the groin, or alternatively you may move the vela head in
reverse towards you if you stand at the head of the patient. You must be careful
not to burn the knee as this is a bony area and contact must be maintained at all
times with the skin. Curve the applicator a little as you move upwards to cover the
entire inner knee area.
43
4. Stomach (waist):
You can treat this area in a couple of different ways. You can move the applicator
in a sideways direction towards the belly button and run it from one side of the
patient to the other. The same principles of multiple, methodical passes until the
clinical end points are achieved.
Usually this is not an overly sensitive area and the patient can tolerate the highest
settings. You can also move the applicator in a downwards direction using short
passes across the tummy from one side to the next. Experiment with the different
techniques to see which you and your patient prefer.
5. Upper Arm and Calf:
For larger patients with focal lipodystrophies of the calf and arm, these
anatomic parts need to be large enough for the standard vela head and its
two RF rollers to maintain in constant contact. Multiple vertical passes, towards
or away from yourself, with firm pressure and definable endpoints.
6. Hips and Braline:
Again, treat these areas, as with all LipoLite™ Vela treatments, as if you were
performing liposuction with a cannula. Multiple passes, firm pressure with
erythema and radiation heat as the end points.
44
5.
Buttock, Posterior Thigh and Outer Thighs:
These areas are relatively insensitive and can generally
tolerate the greatest degree of pressure. Move slowly and develop
your endpoints.
5.
The endpoint is reached for all of these areas when the skin being treated is quite
red and radiates a deep warmth.
Continue with these steps until all desired areas have been treated. It is helpful to
keep the skin moistened with the conductive fluid. When the skin is dry, the
patient will complain of feeling too much heat as well as a pinching sensation
caused by the suction. (Thus, the dry Vela technique may NOT be desireable.)
It is also easier for the operator to slide the applicator along the skin when the skin
is wet. You may move the vela head in reverse back towards yourself, or forwards
away from your body, as long as the movement is slow (1 inch per second) and
there is 1-2” of skin depression when the vela applicator is applied.
6.
Maintain contact at all times with the skin and to use some downward pressure.
Always go in the direction of the lymphatic glands where possible.
It is recommended to perform ten minute treatments to each body site. The passes
should be performed slowly to deposit as much heat as possible into the tissue.
45
7. Firm Pressure at all times (1-2” Depression). Firm enough to engage the skin up
between the RF electrode vacuum between the rollers, but not too firm as to
exsanguinate the vascular tree.
8. Turn off the VelaSmooth™ when finished the procedure, turn the key counterclockwise.
(II) Advanced Vela Large Head Protocol:
The Thermogenic goal of the IR/RF Vela hand piece is a contour improvement
through the stimulation of Lipolysis. Lipolysis is related to critical peri-adipocyte
temperature rise for a certain time duration and then there is a stimulation of
B-receptor mediated Trigylceride breakdown.
The precise temperature rise and duration of heating that is required is not known,
however, based upon thermographic photography and empirical vela based
circumferential reductions, it is felt that a 10 degree rise in peri-adipocyte temperature
is required to stimulate the lipolytic process.
The Advanced Vela Large Head protocol was developed to create a technique that
might more predictably achieve the desired rise in subcutaneous temperature.
Technique:
#1
Perform 2-3 standard continuous Vela Large head passes over
The zone of lipodystrophy. Treat until there is erythema and warmth.
#2
Perform a single pass of “stacked” Large head treatments over the
area of Lipodystrophy. Hold the large head in one spot with the
following settings:
RF =
Suction =
IR =
3 Bar
3 Bar
3 Bar
Use the Vela Spray on the skin hold the Large head in one spot and
continue pulsing until the patient complains the skin is too warm and then
stop the range in the number of stacked pulses that can be tolerated is 1030.
#3
The end point of the “stacked pulse” technique should be patient
46
pain and discomfort. There will, of course, be redness and warmth.
#4
Move to the next adjacent spot and treat with approximately 20% overlap
and perform another series of stacked pulses to the prescribed end point
of patient discomfort.
#5
Continue with the single pass of Stacked pulses until the entire
lipodystrophic zone has been treated.
#6
The theory behind the pulse stacking is with each IR/RF pulsed the
temperature rises and falls, but the next stacked pulse will experience a
higher subcutaneous set point temperature than is higher than the previous
and the temperature rise will be sequentially higher, as process called
Heat Stacking, which should increase the likelihood of critical periadipocyte lipolytic thermogenesis.
#7
Most of the patient discomfort with be dermal heating, due to
the fact that heat being driven in by the vela is being combined with
heat being “pulled out by the suction” and the dermis is the a point
where much of the heat “sink” occurs.
Using the Large Vela Head will still require 16 treatments over 8 weeks,
but will ensure optimal circumferential reduction can be achieved in the
majority of patients.
(III) Small Vela “Contour Head”
The Small Vela head is a vacuum coupled, Bipolar RF without rollers.
The Vela small head was originally developed to treat some of the hard
to access calf, or submental areas. During trial therapy, I found the critical
dermal and subcutaneous temperatures were higher. It was then my belief
that this head could be modified to provide a much greater likelihood of
critical periadipocyte heating
Specifications:
Vacuum coupled, Infrared and Bipolar Radiofrequency treatments
Spot Size
30 mm X 30 mm
Heat Generation is twice the large head as 25 Watts are delivered
47
in a smaller spot size.
The stacked, static suction technique helps to deliver deeper RF and
thermogenic effect than the larger vela head.
3 Bar suction = 10 mm RF penetration
2 Bar suction = 7 mm RF penetration
1 Bar suction = 5 mm RF penetration
ON 3 Bar suction and 1-3 Bar IR and 3 Bar RF -> 15 sec pulse duration->
Should get periadipocyte RF heating to 10 degree Celsius at a depth
Of 10 mm
15 secs = 10 degrees at 10 mm
Vela Small Head Protocol
#1
#2
#3
#4
#5
#6
#7
#8
Thin Gel layer
Suction on 3 Bar
IR on 1 Bar
RF on 3 Bar
Apply to skin and begin stacking pulses
Continue to treat until the END point, which
Is patient discomfort and heat
Generally 15-30 pulses are tolerated
If patient complains of “pinching” -> decrease suction
If patient complains of “burning” -> decrease # pulses
Should be significant warmth and redness
Move to the adjacent spot and overlap 50%
Continue to treat the entire lipodystrophic zone
until all the surface has been covered and then
move on to a new zone.
End Point = Thermal induced pain. The pain is dermal as the
fat only increases 10 degrees Celsius, while the skin may get to 45-50 degrees
as the suction is pulling heat out across the dermal heat sink, while the device is
propelling heat across and within the skin.
48
(IV) Combination Therapy: Dual Vela Large and Small head therapy
The Dual Head protocol was designed to deliver circumferential reduction
results but with fewer treatments.
The Dual Head protocol uses the faster treatments of the Large Vela Head
to increase the peri-adipocyte set point temperature and then immediate deployment of
the small vela “contour”head, using its pulse stacking protocol
to additional raise the peri-adipocyte temperature
The combination therapy deploys the Vela Heads in the following sequence.
Large Vela Head First
#1
2 Standard Vela passes in the target zon(e), with feathering to
adjacent zone(s).
#2
1 pass of the Large Vela Head “pulse stacking” treatment
over the Lipodystrophic target zone(s)
Small Vela “Contour” Head
#3
Small Vela Head stacked pulse technique over target zone.
The 8 TREATMENT LIPOLITE PROGRAM
-Combination 2 Head TherapyThe addition of the Small Vela “Contour” Head has provided the opportunity
to achieve comparable circumferential reduction results in one half the number
of treatments as the original LipoLite™ larger vela head program. This 8 treatnment
program is a combination program, that is, a combination of the large and small Vela
head, in addition, to mesotherapy and carboxytherapy.
The 8 Treatment LipoLite™ Protocol
#1
#2
#3
8 visits, once weekly for 8 weeks
Each Visit, the patient receives a Dual Vela Head Treatment
To the target lipodystrophic zone
To the Dual Vela Head treatment is added the two needle based
Therapies
49
(i)
(ii)
4 PTC mesotherapy sessions
4 Carboxy therapy sessions
These needle based LipoLytic therapies are deployed in alternate weeks
#4
#5
Weekly Treatment Schedule
WK 1 =
Dual Vela Large and Small Head Treatment +
PC/DC or DC only Mesotherapy
WK 2 =
Dual Vela Large and Small Head Treatment +
Carboxytherapy
WK 3 =
Dual Vela Large and Small Head Treatment +
PC/DC or DC only Mesotherapy
WK 4 =
Dual Vela Large and Small Head Treatment +
Carboxytherapy
WK 5 =
Dual Vela Large and Small Head Treatment +
PC/DC or DC only Mesotherapy
WK 6 =
Dual Vela Large and Small Head Treatment +
Carboxytherapy
WK 7 =
Dual Vela Large and Small Head Treatment +
PC/DC or DC only Mesotherapy
WK 8 =
Dual Vela Large and Small Head Treatment +
Carboxytherapy
Money Back Guarantee Program
Rx #1 =
Vela Large and Small Head Treatment + DC Mesotherapy
And Carboxy
Measure pre-treatment and measure 4 weeks post
$750
50