Transcript
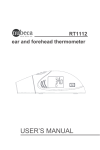
21x36cm
F11-A1/12
Non-Contact
RT7112 (GE-TF11) Infrared Thermometer
At this segment, we can choose the type
of measurement (body or wide
temperature) by pressing the scan
button 7 .
3
PRECAUTIONS FOR USE
1. Any potential difference will happen due to user’s operating way and environments.
2. Use of the device is not intended to be a substitute for consultation with your physician.
3. Before you use the unit, please read this user manual thoroughly and carefully.
4. Disregarding the information given in this instruction manual is considered to be
abnormal use.
5. The device is for indoor use only. Please do not use the device under a noisy
environment.
6. After showering, exercising, eating or drinking, wait for 30 minutes before you intend to
measure your temperature.
7. Sweat will affect the reading result on the forehead, so please make sure your forehead
is clean before measuring.
8. Keep the thermometer out of reach of children.
9. Do not drop the unit and protect it from severe impact and shock. Once it happens, do
not use the unit until it is recalibrated.
10. Do not expose the unit to direct sunlight or high temperatures.
11. Normally speaking, body temperatures in the morning (lower) will be different from those
in the afternoon (higher). So, please measure your body temperature in the same place
and at the same time of day.
Place the battery cover 5 on the top of battery
compartment.
RT7xxx
Before we push the cover back, please note this
salient should be inserted in the hole as indicated
in the drawing.
RT7xxx
salient
hole
After that, forehead/bottle symbol will be
shown with “---“ symbol on the LCD
screen
for system-check.
5
6
Finally, when you see “
” on the LCD
screen , it means the thermometer is
ready to measure.
6
Aim the probe sensor at the center of the
forehead with a distance not exceeding 5
cm. Press the scan button for 1 second
only.If the forehead is covered with hair,
sweat, or dirt, please remove the obstacle
beforehand to improve reading accuracy.
7
34°C ~ 42°C (93.2°F ~ 107.6°F)
±0.2°C (±0.4°F) - 35.5°C ~ 42°C (95.9°F ~ 107.6°F)
±0.3°C (±0.5°F) - 34°C ~ 35.4°C (93.2°F ~ 95.7°F)
ERROR INDICATIONS
Error signals
Q: If the temperature is below 34°C/93.2°F (body temperature) or
0°C/32°F (wide temperature), the LCD displays “Lo”.
A: Recheck the measured object before measuring.
Q: Informing battery replacement time.
A: Replace the battery.
Q: Informing inactivity due to low battery.
A: Replace the battery.
34°C ~ 37.7°C (93.2°F ~ 99.9°F)
The LCD screen
measured value.
OR
9
Wide temperatures
0°C ~ 100°C (32°F ~ 212°F)
±1°C (±2°F)
Not applicable
0°C ~ 100°C (32°F ~ 212°F)
General specification
0.1°C or °F
O n e L ith iu m C R 2 0 3 2 b a tte r y
1,000 measurements approximately (under normal use)
A p p r o x . 4 0 g r a m s in c lu d in g b a tte r y
126 mm x 38.2 mm x 31.6 mm
16°C ~ 35°C (61°F ~ 95°F)
Storage (transport) condition:
Applying standards:
-25°C ~ 55°C (-13°F ~ 131°F)
EN 60601-1, EN 60601-1-2, EN12470-5, ASTM E1965
Classification:
According to IEC 60601-1, the whole unit is
●
type BF applied parts
● IPX0
● not suitable for use in an oxygen rich environment
● continuous operation
Clinical repeatability:
Clinical repeatability has been carried out in
accordance with EN12470-5:2003, section 6.3.4.
The test result proves that it complies with the
requirement, i.e. the clinical repeatability does not
exceed ±0.3°C.
displays the
When “
” mode:
If the LCD screen
shows temperatures
between 37.8°C ~ 42°C (100°F ~ 107.6°F),
the fever alarm function will be activated
by short “bi-bi-bi” sound and the LED
indicator
will show “red”.
10
Display unit:
B a tte r y :
Battery life:
Weight:
Dimensions:
Operation condition:
Q: Operation temperature is out of range.
A: Put the device in a place with normal room temperature
(16°C ~ 35°C/61°F ~ 95°F) for, at least, 30 minutes before measuring.
If it still displays “Err”, it means the device does not work properly
and please consult the distributor.
The date of manufacture is included in the LOT . The LOT has 5 numbers.
The first number means the year (0-9). The second number means the month
(Jan. - Sep.: 1-9, Oct.: A, Nov.: B, Dec.: C). The third and fourth numbers mean the date
(1-31). And the last number means the batch of the month.
12
To turn off the thermometer, press the
on/off button
again.
Example: LOT 95051
MEMORY MODE
The thermometer automatically stores 8 memories. To check last 8 measured values,
please follow instructions as below.
1. Press the scan button
“M” icon.
when power off. Then, the LCD screen
will display the
month batch of the month
CLEANING AND MAINTENANCE
1. Sensor in the front of the probe is an extremely sensitive part. For accurate measurement,
always keep it clean and do not damage it.
2. Place the thermometer back to the storage case, and put the probe face down to prevent
any dirt or liquid into it.
3. Carefully clean the sensor by using a cotton-stick with alcohol (95%). After cleaning,
allow, at least, 1-hour drying time for measurement.
4. The outside of the probe should be cleaned with soft cloth moistened in alcohol or water.
5. Do not immerse the product in water or any other liquid.
6. Keep the device under normal room temperature (16°C ~ 35°C/61°F ~ 95°F).
7. We recommend verifying the accuracy by an authorized laboratory every 2 years.
DISPOSAL
1. Please dispose of the product and the battery separately.
2. The product and the battery should not be disposed of with household waste.
3. Please follow local waste / battery disposal regulations.
2. Press the scan button
once again. The LCD screen
then it will display the first memory automatically.
will display “M1”, and
salient
hole
.
3. Press the scan button
again. The LCD screen
will display “M2”, and then it
will display the second memory automatically, and so on.
OPERATION
Instructions
1
Press the on/off button
thermometer on.
to turn the
2
The LCD screen
will display all
segments for 1 second.
BATTERY REPLACEMENT
When the battery symbol “
” is displayed on the LCD screen
replace the battery and follow instructions as below.
Steps
Drawings
Read instructions in Printer
Manual.
, please
Instructions
1
Gently press the top of the battery cover 4 so as
to release the battery cover 5 .
2
Slide back the battery cover 5 .
IP X0
Degree of protection from
Liquids.
RT7xxx
RT7xxx
SYMBOL AND EXPLANATION
The CE mark and Notified
Body Registration Numbers,
the requirement of Annex II
article 3 from Medical Device
Directive 93/42/EEC are met.
RT7xxx
RT7xxx
LIMITED WARRANTY
°C / °F SWITCH
Drawings
RT7xxx
This thermometer is guaranteed for 2 years from the date of purchase against
Manufacturer's defect under normal use. If your unit does not function properly due
to defective parts or assembly, we will repair it free of charge. All parts are covered by this
warranty except the battery and damage to the unit due to improper handling.
To switch between °C and °F, press and keep pressing the scan button 7 for 5 seconds
when power off, then the LCD screen
will show the opposite unit (if default is “°C”, it will
show “°F”). After that, the thermometer will turn on automatically.
Steps
RT7xxx
EXPLANATION OF LOT NUMBER
For re-measurement, please wait for 2
seconds until “C” and “ ” start to flicker
again.
If the power is left on, the thermometer will automatically shut off after 1 minute to
save power.
For all types of thermometers, slight temperature variations can happen. Therefore,
it is recommended to take several readings (removing the thermometer from the
forehead between each measurement) and take the highest one into account.
The thermometer is delivered with a lithium battery (CR2032) already in place. However,
in order to extend the battery life, we’ve inserted a strip in the battery compartment. Therefore,
before your first use, please follow instructions below so as to take off the strip.
Before we push Replace the
the cover back, battery cover
please note this
salient should be
inserted in the
hole as indicated
in the drawing.
RT7xxx
The device does not work properly and please consult the distributor.
11
BEFORE FIRST USE
Place the
battery cover
on the top
of battery
compartment.
RT7xxx
year date
This thermometer converts the forehead temperature to display its“oral equivalent.”
(according to the result of the clinical evaluation)
Remove the
strip.
Problems & Solutions
Q: If the temperature is more than 42°C/107.6°F (body temperature)
or 100°C/212°F (wide temperature), the LCD displays “Hi”.
A: Recheck the measured object before measuring.
37.8°C ~ 42°C (100°F ~ 107.6°F)
Gently press
Slide back the
the top of the
battery cover.
battery cover
so as to release
the battery cover.
RT7xxx
Do not attempt to disassemble the unit except battery replacement.
Remove the probe sensor
from the
forehead and you will hear one beep sound,
which means the measurement is finished.
8
Red LED:
Green LED:
RT7xxx
Do not dispose of the battery in fire as it may explode.
Body temperatures
Measurement range:
A c c u ra c y :
RT7xxx
Replace the battery cover 5 .
Do not recharge the battery.
PRODUCT SPECIFICATION
Red LED:
Green LED:
4
RT7xxx
Do not swallow the battery which may be fatal.
1. Probe sensor
2. LCD screen
3. On/Off button
4. Battery hole
5. Battery cover
6. LED indicator
7. Scan button
Accuracy:
Use a stick to take the battery out.When placing a
new battery, please make sure the polarity of
battery (“+” is upward) is correct.
5
PRODUCT DESCRIPTION
Measurement range:
3
Then, the last measured value will be
shown on the LCD screen
with the "M"
icon (memory).
OR
4
F11-A1/12
RT7xxx
RT7xxx
Manufacturer
Authorized representative in
the European Community.
Indicates this device is subject
to the Waste Electrical and
Electronic Equipment Directive
in The European Union.