1
Contacting ArcSoft
Main:
ArcSoft, Inc.
46601 Fremont Blvd.
Fremont, CA 94538
USA
M-F 8:30AM - 5:30PM (PST)
Phone: 1-510-440-9901
Fax: 1-510-440-1270
Email: [email protected]
Technical Support:
Phone:1-510-440-9901
Fax: 1-510-440-1270
M-F 8:30AM - 5:30PM (PST )
Email: [email protected]
Websites:
www.arcsoft.com
www.photoisland.com
Internet options:
PhotoPrinter can link you directly to ArcSoft’s PhotoPrinter webpage, where you can find the latest additions to your program
(e.g. templates, more frames), as well as new product info and customer support. Just click on the ArcSoft logo on any
PhotoPrinter screen. You will see another ArcSoft logo. Click on that logo to go to the webpage. There is also a “Web Services”
option in the Start Menu, or for Win 3.1x users, the Program Manager Screen. Web Services contains helpful ArcSoft services,
such as tips and technical support. You’ll find it’s easy to stay in touch with ArcSoft!
How to Register:
Mail or fax the built-in registration form to receive technical support and information on new products and releases.
Windows 95, 98 or NT users: Go to Start/Programs/ArcSoft PhotoPrinter/Register & Upgrade.
Windows 3.1x users: Click the Register & Upgrade icon from the PhotoPrinter program group.
ArcSoft Imaging Suite users: Please refer to the ReadMe documentation enclosed in the ArcSoft Imaging Suite.
Copyright 1998 by ArcSoft, Inc. All rights reserved. PhotoPrinter is a trademark of A rcSoft, Inc.
Kodak and Digital Science are trademarks of Eastman Kodak Company.
Avery and all Avery codes are registered trademarks of Avery Dennison Corporation.
All other brands and pr oduct names are trademark or registered trademarks of their respectives holders.
Photo management
and presentation
made easy
2.0 SE
Powerful tools to organize and present your digital photos.
Software Licensing Agreement
The following is a legal software license agreement between you, the software end user, and ArcSoft, Inc. Carefully read this license
agreement before using the product. Using the product indicates that you have read this license agreement and agree to its terms. If
you do not agree to the terms, promptly return the package to the place where you purchased it within 10 days of the date you
acquired it for a full refund.
Grant of License. This license permits you to use one copy of the software included in this package on any single computer. For each
software licensee, the program can be in use on only one computer at any given time. The software is in use when it is either loaded
into RAM or installed into the hard disk or other permanent memory.
A multi-seat license permit from ArcSoft is required if the program is going to be installed on a network server for the sole purpose
of distribution by other computers, or if the program is going to be installed on and used by more than one computer.
Copyright. The software contained in this package is owned by ArcSoft and is protected by United States copyright laws,international
treaty provisions, and all other applicable national laws. The software must be treated like all other copyrighted materials (e.g. books
and musical recordings). This license does not allow the software to be rented or leased, and the written materials accompanying the
software (if any) may not be copied.
Limited Warranty. ArcSoft, Inc., warrants that the software contained herein will perform substantially in accordance with the
accompanying documentation. No Other Warranties. ArcSoft disclaims all other warranties, either express or implied, including but
not limited to implied warranties of merchantability and fitness for a particular purpose, with respect to the Software,the
accompanying written materials, and any accompanying hardware (if any).
No Liability for Consequential Damages. In no event shall ArcSoft or its suppliers be liable for any damages whatsoever
(including but not limited to damages for loss of business profits, business interruption, loss of business information, or any other
pecuniary loss) which results fr om an inability to use this software, even if ArcSoft, Inc. has been advised of the possibility of such
damages. Because some states/jurisdictions do not allow the exclusion or limitation of consequential or incidental damages,
the above limitations may not apply to you.
U.S. Government Restricted Rights. The Software and documentation are provided with Restricted Rights. Use, duplication,
or disclosure by the U.S. Government is subject to restrictions as set forth in subparagraph (c)(1)(ii) of the Rights in Technical
Data and Computer Software clause at DFARS 252.227-7013 or subparag raphs (c)(1),(2), and (3) of the Commercial Computer
Software - Restricted Rights at 48 CFR 52.227-19, as applicable, and any amendments thereto.
The manufacturer is ArcSoft, Inc., 46601 Fremont Blvd., Fremont,CA 94538.
If this product was purchased in the United States, this Agreement is governed by the laws of the state of California;
otherwise,local laws may apply.
PhotoBase 2.0 SE Quick Start Guide
Table of Contents:
INTRODUCTION
Welcome to PhotoBase...................................................................................3
System Requirements......................................................................................3
Installing and Starting PhotoBase..................................................................3
GETTING ACQUAINTED
Important Terms.............................................................................................4
The Basics........................................................................................................4
USING PHOTOBASE
Find your files using the Sort and Search Features.......................................6
Archives your files by copying them to a different location.........................6
Create a Slide Show........................................................................................7
Create Web Album..........................................................................................7
Create a Video Card........................................................................................7
Set up and use the Application “Hotlink Bar”...............................................7
Use the PhotoBase Image Editing Tools........................................................7
Print your selected images or the entire album ............................................8
2
3
PhotoBase 2.0 SE Quick Start Guide
INTRODUCTION
Welcome to ArcSoft PhotoBase™ 2.0, the ultimate multimedia organizer that lets you store,manage and access important image, audio,
video and even document files. Mastering PhotoBase is easy! Simply create albums of your files and enter information in the
customizable Information Fields. Then, choose from a wide variety of activities:
• Find files easily with the powerful Sort and keyword Search functions
• Drag-and-drop files within an album or into other albums
• Organize your hard drive by creating catalogs of all your multimedia files
• Send video postcards with background images, video and audio
• Archive and share important files by copying and/or moving entire albums to floppy disks,CDs and other removable media
• Launch third-party programs from PhotoBase by dragging and dropping the appropriate files into the "Hotlink” bar
• Print thumbnail albums in different sizes with frames, borders and descriptions
This Quick Start Guide shows you how easy it is to get started in PhotoBase! It contains a “Getting Acquainted”section to teach you the
basics in PhotoBase, as well as a section on “Using PhotoBase” to take you through key activities and projects. You will find step-by-step
instructions, tips and notes throughout this guide. In addition to this Quick Start Guide, you can learn more about PhotoBase by using
the program’s online Help (located in the Help menu). Online Help provides easy-to-find information on specific features and
commands, and is most helpful when printed out. For important notices about PhotoBase, please review the ReadMe documentation
located in the PhotoBase directory.
System Requirements:
• Windows 95, 98 or NT 4.0
• VGA monitor w/16-bit color (or better) display
• CD-ROM drive for installation
• 30 MB hard disk space (additional 20 MB for Xerox TextBridge® Classic 2.0)
• 486-based PC (Pentium recommended)
• 8 MB RAM (16 MB recommended)
• CD-ROM drive for installation
• Mouse
Supports:
• Popular multimedia formats including BMP, TIF, JPG, GIF, PCD,
• PCX, TGA, FlashPix, AVI and WAV
• TWAIN-compliant devices
• CD-Recorder or CD-Rewriteable drives
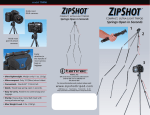
• ArcSoft Zipshot and other video capture devices or cards
• Video for Windows-compliant devices
• Sound cards
Installing and Starting PhotoBase
To install, insert the PhotoBase CD in your CD-ROM drive. Click Start/Run and type D:\Setup.exe (where "D" is your CD-ROM drive).
Click OK. Follow the instructions on the screen. To start, click on Start/Programs/ArcSoft PhotoBase/PhotoBase. (To uninstall, click
Start/Programs/ArcSoft PhotoBase/Uninstall.)
ArcSoft Imaging Suite Users: To install and start PhotoBase, please refer to the ReadMe documentation enclosed in the Imaging Suite.
PhotoBase 2.0 SE Quick Start Guide
4
GETTING ACQUAINTED
Important Terms
• Left and Right Clicking - Throughout this guide, you’ll be asked to use both the left and right mouse buttons. In general, “click”
means “click once on the left mouse button”. “Right-click” means “click once on the right mouse button”. “Double-click” means “
click twice on the left mouse button”.
• Album Thumbnails - Thumbnails are small visual representations of actual files. Right-click on a thumbnail to view file
properties (the location and size o f a file,and the date it was created). By deleting a file or moving it to a new location, the existing
thumbnail will no longer be linked to that file. Therefore, you would need to create a new thumbnail for the new file location.
Likewise, if you double click on a thumbnail to open an image on a floppy, without the floppy in the drive, you will not be able to
access the image.
• Shift/Control Keys - Use these keys to make more than one selection at a time. To select multiple sequential thumbnails in an
album, click on the first thumbnail, hold down the Shift key, then click on the last thumbnail. To select multiple non-sequential
thumbnails in an album, click on one of the thumbnails, hold down the Control key, then click on all other thumbnails.
The Basics
This section shows you the basics of using an album in PhotoBase. Follow these steps in order while referring to Fig. 1.
Title Bar
Tool Bar
Menu Bar
Album Title Menu
Scroll Bar
Album Thumbnails
Label Names
Information
Fields
Status Bar
Application “Hotlink” Bar
Fig.1 PhotoBase Application Window
1. Open a new album
There are two ways to open a new empty album. You can either start PhotoBase, which automatically defaults to opening a new
album. Or, if you are already in PhotoBase you can click on the Album Title Menu and select the album titled [New].
2. Add files to the album
PhotoBase represents the following files as thumbnails in the album: BMP, TIF, JPG, GIF, PCD, PCX, TGA,FlashPix, AVI and WAV. In
addition, you can include documents, spreadsheets and other files in an album to create a “storyboard”z of related files.
a. Click the Add Tool from the Tool Bar. The Add to Album dialog box will appear.
5
PhotoBase 2.0 SE Quick Start Guide
b.
c.
d.
e.
f.
Note: The default Files of Type category is "All Image Files". This automatically displays image file types such as BMP, TIF and
JPG. Similarly, the default Look In directory is "Photos", which displays sample PhotoBase images.
Add one image by clicking on one of the sample PhotoBase files. Click Open.
Click the Add Tool again.
Add several images by holding down your Shift or Control key while clicking on different files. Click Open.
Click the Add Tool again.
Add non-image files by changing the Files of Type category to “All File Types”. This allows files other than images (e.g . DOC, TXT,
XLS, HTML, MPEG) to be inserted in your album. Select one or more of these files,then click Open.
Note: PhotoBase supports standard variations of the following image file formats: BMP, JPG, GIF, PCD, PCX, TGA and FlashPix.
However if one of your images does not open,it may be an uncommon variation that PhotoBase d oes not support. If this is the case,
try opening the file with the software that created it. Save the file in a common file format.
3. Add images to the album using a TWAIN device
If you do not have a digital camera, scanner or other TWAIN device, you may skip to the next step.
a. Click the Acquire Tool from the Tool Bar. The Select Source dialog box will appear, listing all TWAIN devices
installed on your system.
b. Click the device you want to use. Click Select. A TWAIN interface with acquiring options specific to your device will appear.
(For instructions on acquiring, consult the manual that came with your TWAIN device.)
c. Acquired images will automatically be added to your current album.
Special Note for scanner users: If you have text that you want to scan into your computer for editing purposes, you can use
TextBridge Classic which comes included with PhotoBase. This is an OCR (optical character resolution) program that takes
scanned images and converts them into plain text. To use TextBridge Classic, first scan an image (in 1-bit black and white) to a
PhotoBase Album. Right click on the image thumbnail and select Convert To Text. A Save As dialog box will open, prompting you
to name the text file before it gets created. The image will then automatically open in TextBridge Classic. At this point, see the
program's online Help or User’s manual to convert the image to text. Once you are done, the new text file will automatically be
placed in the current PhotoBase album.
4. Save the album
Always remember to save your changes! Click the Save Tool from the Tool Bar to save your current album.
5. Open an existing album
To view and open other available albums, click on the Album Title Menu. For learning purposes,select the sample album titled
PHOTOS. Your screen should look similar to the one pictured in Fig. 1 (although you may have more rows of thumbnails depending
on the resolution setting of your monitor).
6. Add descriptive text
To document important information about a file and make it easy to sort and search, add descriptive text to the Information Fields
and customize the Label Names. See Fig. 1.
a. Using the current album, click on any thumbnail.
b. The default label names should read Title, Date and Description. To customize, click on Label Names from the Album Menu.
Type “Today's Date” instead of “Date”, then click OK. The album will show the change.
c. In the Information Fields, enter up to 3 lines of descriptive text.
d. Click the Save Tool to save your changes.
7. More Cool Features
See online Help for information on how to use...
• Delete - lets you delete files from the current album
• Delete an Album - lets you delete the current album and its contents
• Duplicate an Album - lets you make a copy of the current album while retaining its original
• Capture - lets you capture still images, video and audio
• Record Audio - lets you record audio WAV files that can be atta ched to image files
PhotoBase 2.0 SE Quick Start Guide
• Album Properties - displays helpful information about the current album including: the name of the album, number of
thumbnails, size of the album, total size of files in the album and a description.
• File Properties - displays the image file location,image size (in pixels),file size (in bytes) and file date.
Now that you know the basics in PhotoBase, you are ready to start “Using PhotoBase”!
USING PHOTOBASE
Here you will be shown step-by-step instructions for accomplishing key tasks and projects in PhotoBase:
• Find your file using the Sort and Search features
• Archive your files by copying them to a different location
• Create a Video Postcard
• Set up and use the Application "Hotlink" bar
• Use the PhotoBase Image Editing Tools
• Print your selected images or the entire album
Find your file using the Sort and Search features
Sort and Search offer you a variety of ways for locating files.
• Sort organizes files in your cur rent album by Name (of file), Type (of file format), Size (of file), Date (of file creation),
Description (or the third Information Field) or Reverse order (of these sort options).
1. Open the album you want to organize.
2. Click Sort from the Edit Menu. Choose from the available sort options.
3. Click Exit. The album will automatically be sorted.
Search looks throughout selected albums for a particular file(s). It then moves your search results to another album.
1. Click Search from the Image Menu. A Search dialog box will appear.
2. Under "Search In", choose the album you want to search. To choose more than
one album,hold down the control or shift key while making your selection.
3. Under "Store In", choose the album for storing your search results.
4. Under "Search For", type the keyword.
5. Under "Search Field", select where the keyword should appear.
6. Click Search. The search results will appear in the designated "Store In" album.
7. Click the Save Tool if you want to save the new album.
Archive your files by copying them to a different location
The “Copy Image(s) To” command lets you easily make backups of your files on floppy disk or removable media, without changing
the thumbnails or original locations of the files.
1. Open the album containing the files you want to move.
2. Click once on the first thumbnail to select it. While holding down the shift key, click once on the last thumbnail. All thumbnails
will be selected. (To select only certain images,use your control key instead of your shift key.)
3. Click Copy Image(s) To from the Image Menu.
4. Click the Browse button to specify where you want the files copied.
5. Click Copy to confirm.
Note: In addition to the “Copy Image(s) To” command,there are other options for creating backups of your important files. The
“Move Album” command moves (not copies) all files in the current album from their current locations to a new directory. This
command also updates the thumbnails accordingly. The “Copy Album” command makes a copy of the current album and its
thumbnails, while leaving files in their current locations. (For information on these commands, see online Help.)
6
7
PhotoBase 2.0 SE Quick Start Guide
Create a Video Postcard
Design digital “postcards” containing video, audio, images and text.
1. Click the Make Presentation Tool from the Tool Bar. Choose "Create a Video Postcard". A "Wizard" will take you through
the creation process.
2. Follow the instructions on selecting a template, writing a postcard message and sele cting your video (AVI,MPEG or
MOV) file. Click Next after each selection.
3. Once you get to the Select Destination window, specify where you want to save your postcard - either to a disk, blank
writeable CD-ROM or another directory.
4. Click Finish. Your video postcard will be saved to the specified location as an EXE file. Copies of the postcard contents
(the video and image or background files) will also be created and saved to the same directory.
5. To play the postcard, locate the EXE file and double-click on it.
Note: If you experience problems in playing the postcard, make sure the EXE file and all postcard contents are
contained in the same directory.
Set up and use the Application “Hotlink” bar
Launch files right into your favorite programs using PhotoBase's “Hotlink” Application bar. Just create shortcut icons of your
programs in the “Hotlink” bar, then drag your desired file to the icon.
1. Click Setup Applications from the Album Menu, or right-click on an empty area of the “Hotlink” bar. The Setup Application
dialog box will appear.
2. Click Select to locate the EXE file of your desired application. For learning purposes, choose a digital imaging program
such as ArcSoft PhotoStudio (pstudio.exe).(If you do not have an imaging program, your Internet browser can also open
images; use Iexplorer.exe for Internet Explorer or Netscape for Netscape Navigator.) Click Open.
3. Type a description in the Name field, such as TESTAPP. Click Add. An icon representing TESTAPP will appear in the “Hotlink” bar.
4. Open an album containing the image you want to drag into TESTAPP.
5. Place your cursor on the thumbnail. Hold down the left mouse button and drag the thumbnail to the TESTAPP icon.
Your image will automatically open in TESTAPP.
Tip: To launch an application from the Hotlink bar, simply click once on its icon.
Note: PhotoBase’s “Hotlink” bar is compatible with many popular programs including desktop publishing, image editing, word
processing and Internet browsing applications. However, if a thumbnail is dragged to a program that is not compatible with that
program,the application may not open the file. (For example, a BMP image file cannot be dragged into MS Word. The file must be a
DOC file.)
Use the PhotoBase Image Editing Tools
PhotoBase gives you convenient, easy-to-use tools for editing and enhancing your selected image.
1. Double-click on the image thumbnail that you want to edit. The edit window will appear with the following options.(Make as
many edits as you need.)
• Crop Tool - discards the portion of the image surrounding the “crop selection box”. Click the Crop Tool. Draw a crop selection box
by placing your cursor where you want to start the “corner” of the box. While holding down the left mouse button, drag the cursor
to the opposite “corner”. Let go of the mouse when you have drawn your desired box. (To center the box on the image, see “Center
Crop Area Tool”.) To crop the image, right-click inside the box.
• Rotate Tool - turns the entire image clockwise or counter-clockwise. Click the Rotate Tool. Place your cursor on the image. Hold
down the left mouse b utton to “grab” the image. Then rotate the image to any position. Let go of the mouse when you are finished.
• Adjust Brightness Tool - adjusts the brightness of the image. Click the Adjust Brightness Tool. Use the slide bar to apply the effect.
• Adjust Contrast Tool - adjusts the contrast of the image. Click the Adjust Contrast Tool. Use the slide bar to apply the effect.
• Adjust Saturation Tool - adjusts the color saturation of the image. Click the Adjust Saturation Tool. Use the slide
bar to apply the effect.
• Center Crop Area Tool - works in conjunction with the Crop Tool to center the “crop selection box”. Once you’ve drawn
your box with the Crop Tool,use the Center Crop Area Tool to center the box on the image. To crop, right-click inside the box.
• Zoom In Tool - zooms in on the image for a closer look. Click the Zoom In Tool as many times as ne eded.
• Zoom Out Tool - zooms away from the image. Click the Zoom Out Tool as many times as needed.
8
• Sharpen Image Tool - sharpens areas that appear fuzzy. Click the Sharpen Image Use the slide bar to apply the effect.
• Undo Tool - removes the last edit made. Click the Undo Tool. The last change made to the image will automatically be undone.
• Record Audio Tool - lets you record and attach an audio WAV file to the image. Click the Record Audio Tool. The Audio Capture
dialog box will appear. Use the tape recorder-like features to record from a microphone (See online Help for more information on
capturing audio.) Click the "X" button to exit the audio window.
• Play Audio Tool - plays the WAV file attached to the image. (If a WAV file is not attached to the image,this tool will be unavailable.)
Click the Play Audio Tool.
2. Once you’ve edited your image, click the “X” button in the top right corner to exit the edit window. You will be prompted
to Save (using the same file name), Save As (using a different file name), or Don’t Change.
3. If you choose Save or Save As, right-click on the album thumbnail you just edited and select Refresh to update it.
Print your selected images or the entire album
The Print command offers you many options for creating customized printouts of your images with frames, borders, backgrounds
and descriptions.
1. Open the album containing the image(s) you want to print.
2. Click on the image you want to print. Use your shift/control keys to select multiple images.
3. Once you’ve selected your images, click Print from the Album Menu. In the Print dialog box, several printing options will appear:
• Print Context - lets you print all the thumbnails in the album, just the selected thumbnails, or a range based on
the placement of thumbnails in the album.
• Print Banner - lets you include descriptions or names at the top (Header) and bottom (Footer) of each printed page.
• Print Quality - determines the quality of your printout. Low Quality is recommended for fast printing and test printouts.
High Quality is recommended for the best color/sharpness.
• Print Size - lets you print your images in different sizes. On a standard 8.5" x 11" sheet of paper, you can print up to 16 Small,
9 Medium or 4 Large images.
• Print Description Text - when selected, this option will print the text from the Information Fields below
the corresponding image.
• Print Uniform Image Size - when selected, this option will crop images to fit a uniform print size for all of the images.
This will create a unified look for the entire album.
• Print Page Number - when selected, the page number will appear at the bottom center of each page.
• Print Multimedia Thumbnails - when selected, both image and non-image thumbnails will print.
• Frame Options - lets you add a frame and/or background to your images. To view the available frames and backgrounds,
drag the slide bar and click on your desired choice.
• Preview - shows you how your printout will look.
• Print - begins printing your page with the selected print options.
• Print Setup - lets you change printers and printer settings.
• Exit - lets you exit without p rinting.
4. Once you have selected your print options and are ready to print, click the Print button.