1
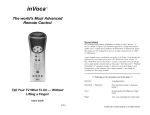
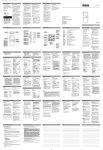
RCU600M_IB_resized.qxd
3/24/04
4:10 AM
Page 1
U N I V E R S A L
Remote
Home Theatre™ Keys
take full advantage
of your Home
Theatre equipment
with Surround
Sound Control
Compatible with
today’s most
popular brands.
remote
universal
Consolidates
up to 6 remotes
MultiBrand Use
See back
for most
popular brands.
RCU600M
RCU600M_IB_resized.qxd
3/24/04
4:10 AM
Page 2
Table of Contents
Product Diagram...................................................................................... 2
Introduction .............................................................................................. 3
Battery Information and Installation.................................................... 3
Key Descriptions ...................................................................................... 3
Primary Key Descriptions for VIDEO Operations............................ 4
Secondary Key Descriptions for AUDIO Operations ...................... 5
Program for TV—Direct Entry Method .............................................. 5
Program for VCR—Direct Entry Method .......................................... 6
Program for DVD/CD Systems—Direct Entry Method.............. 6–7
Program for SATELLITE—Direct Entry Method .............................. 7
Program for CABLE BOX—Direct Entry Method ............................ 8
Program for AUDIO Systems—Direct Entry Method.................. 8–9
Operating AUDIO System Functions .................................................. 9
Code Search Methods .......................................................................... 10
Manual Code Search.................................................................... 10
Auto Code Search ........................................................................ 10
Code Retrieval ........................................................................................ 11
Sleep Feature .......................................................................................... 11
Programming the Sleep Timer .................................................. 11
Canceling the Sleep Timer .......................................................... 11
On-screen Menus .................................................................................. 12
Accessing a Menu System .......................................................... 12
Highlighting and Selecting Menu Items.................................. 12
Exiting a Menu System................................................................ 12
Troubleshooting................................................................................ 13–14
Limited 90-Day Warranty .................................................................... 15
Indicator Light
CHAN and VOL
keys have dual
functions. They
act as navigation
keys (up, down,
left, right) in
menu systems.
Component Keys
(TV, VCR, DVD,
DBS·SAT,
CABLE, AUDIO)
Dedicated
MENU key for
DVD disc menus,
some TVs and
satellite receivers.
SELECT
key chooses
highlighted choice.
ENTER key
Use with Manual
or Auto Code Search
to accept code.
BACKLIGHT key
2
Actual model may vary from picture shown.
RCU600M_IB_resized.qxd
3/24/04
4:10 AM
Page 3
6 Component
Universal Remote
Congratulations on your purchase of the six-component universal remote
by RCA. This universal remote controls up to six electronic components
and makes juggling remote controls a thing of the past. You can program
this RCA universal remote to operate most models of most brands of
infrared, remote-controlled components manufactured after 1990. (See
enclosed Code List for a complete list of brands.) The six-component
universal remote is easy to use, easy to program and gives you control
at the touch of your fingertips.
Note: The six-component universal remote is already programmed to operate
most RCA, GE and PROSCAN branded TVs, VCRs, DVD players and
SATELLITE receivers (DBS). Just press the corresponding component key—
TV, VCR, DVD, DBS•SAT, CABLE, AUDIO—and your six-component universal
remote is ready to go!
Battery Information and Installation
Your universal remote requires two new AA alkaline batteries (batteries may or
may not be included, depending on the model). To install the batteries:
1. Remove the battery compartment cover.
2. Insert the batteries, matching the batteries
to the (+) and (-) marks inside the
battery case.
3. Replace the battery cover.
Note: Reprogramming may be required
after batteries are replaced.
Key Descriptions
Indicator Light—flashes when a valid key is
pressed to indicate the remote is working.
Status of this light is important when you are
programming the remote.
Component Keys (TV, VCR, DVD, DBS•SAT,
CABLE, AUDIO)—selects the component you
want the remote to operate.
For example, after you’ve programmed the
remote to operate your TV, you must press
the TV key first to put the remote in TV Mode.
While in TV Mode, the CHAN keys change the
channel on the TV, the VOL keys adjust the
TV’s volume, etc.
Transport Keys—REVERSE, PLAY, FORWARD,
STOP, PAUSE, RECORD—operate the same
as your original VCR or DVD remote control,
although key labels may vary (REWIND,
FAST FORWARD).
Backlight Key (select models only)—turns
backlighting on and off. Backlighting remains
on for approximately six seconds after the last
keypress to conserve battery life.
3
RCU600M_IB_resized.qxd
3/24/04
4:10 AM
Page 4
Primary Key Descriptions For VIDEO Operations
Other Keys (Listed Alphabetically)
Certain keys on the six-component universal remote have dual functions.
Primary functions are printed in black. Secondary key functions are printed
in blue on the remote and are used for AUDIO operations.
0-9 (Number Keys): operate the same
as number keys on your original
remote and are used to enter
component codes when
programming the remote control
with Direct Entry method.
ANTENNA: in TV Mode, switches
between the signal coming from a
satellite receiver or cable box and an
off-air antenna. In VCR Mode,
switches between the signal coming
from a VCR and a TV.
CH+ and CH- (CHANNEL UP and
CHANNEL DOWN): goes to the next
highest or lowest channel number
in the component channel list,
respectively, except for DVDs. In
DVDs, the CH+ and CH- keys refers
to the NEXT/PREVIOUS chapter.
CLEAR: removes the on-screen
display to return to normal viewing.
CODE SEARCH: use to program
the remote.
ENTER: use with Manual or
Automatic Code Search method to
accept code (See Code Lists enclosed).
Also, some brands require you to
press the ENTER key after you enter
a channel number. In some menu
systems, you must press the ENTER
key to select a highlighted item.
GO BACK: switches back to previous
channel– operates the same as PREV CH,
LAST CHANNEL or RECALL keys
found on some brands of remote controls.
GUIDE: brings up the on-screen TV
program guide, if your TV is
equipped with that feature.
INFO: shows program information,
if your component is equipped with
this feature. Functions the same as a
DISPLAY key.
INPUT: selects the video inputs of your TV, if equipped with this feature.
MENU•PROG: accesses DVD disc menus when playing a DVD disc. Accesses
menu systems of some TVs, a few RCA brand VCRs and satellite receivers.
(For more information, refer to the On-screen Menus section on page 12).
MUTE: lowers the TV’s volume to its minimum level.
NAVIGATION KEYS & SELECT: used to move through on-screen menus and
guides. Use the NAVIGATION keys to move the highlighted choice up, down,
left or right.
ON•OFF: turns component on and off.
Note: Some RCA, GE and PROSCAN models require that you press the
component key to turn the component on and the ON•OFF key to turn the
component off.
PIP: (Picture-in-Picture) and SWAP operate your TV’s Picture-in-Picture,
if your TV is equipped with this feature.
RECORD: use with VCR to record programming. You must press the
RECORD key twice to start recording.
SLEEP: allows you to set a time to turn off your TV automatically.
VOL: increases or decreases the TV or AUDIO system’s volume level.
4
RCU600M_IB_resized.qxd
3/24/04
4:10 AM
Page 5
Secondary Key Descriptions For AUDIO Operations
Certain keys on the six-component universal remote have dual functions. Secondary
key functions are printed in blue on the remote and are used for AUDIO operations.
Not all functions work for all brands. Experiment with your AUDIO system to
determine which functions work with your components.
See the enclosed AUDIO Code List to operate your brand of equipment.
Press the AUDIO key to enable the Audio Mode.
AM•FM: allows you to select the AM•FM band on your AUDIO receiver.
CD, TAPE, TUNER, TV, VIDEO 1, VIDEO 2: For some AUDIO systems, these
keys will select the corresponding component input.
DELAY-, ON, DELAY+: increases or decreases the delay between the surround and
main speakers when the receiver is in the Surround Sound Mode.
DSP ON•OFF: enables the receiver’s Digital Signal Processing Mode.
DSP MODE: When the DSP mode is enabled, pressing this key allows the
user to cycle through the various DSP Modes.
FRONT, CENTER, REAR, TEST: adjusts the levels of the front, center, and
rear speakers used with LEVEL+/ LEVEL-. The test tone must be enabled
first by pressing the TEST key.
FUNCTION: selects the different AUDIO input components. The number keys
also select the function labeled below the keys when in Audio Mode.
LEVEL+/LEVEL-: sets the level of the speakers during Test Tone Mode.
PRESET: cycles through preset channels while the Tuner input on your
AUDIO system is active.
Program for TV—Direct Entry Method
In order for the six-component universal remote to control your TV, you must
program it with the TV code that matches your TV. These instructions explain
the preferred method of programming the remote—the Direct Entry
method. To program your remote to control your TV, follow these steps:
1. Manually turn on the TV.
2. Locate the enclosed TV Code List. Find
your brand of TV.
Note: If your brand is not listed, use one
of the Code Search methods to program
this remote control. (See section on
Code Search.)
CODE INDICATOR
LIGHT
SEARCH
TV
(BLINK)
3. Press and hold the CODE SEARCH key
until the indicator light illuminates.
Then release the CODE SEARCH key.
4. Press and release the TV key. The indicator
light blinks and then remains lit.
5. Use the number keys to enter the first
code listed for your brand. After you
enter a valid three-digit code, the
indicator light turns off.
Note: If you enter an invalid code, the
LED flashes rapidly for two seconds.
Start over at step 3.
6. Aim the remote at your TV and press
the ON•OFF key. If your TV turns off,
you have found the correct code.
(OFF)
ON•OFF
7. Enter the code in the box provided on
this page for future reference.
8. If your TV doesn’t turn off, repeat steps
3-6 above, entering the next code for
your brand.
TV CODE
If none of the codes work or your brand
is not listed, use one of the Code Search
methods to program this remote.
(See Code Search section on page 10.)
5
RCU600M_IB_resized.qxd
3/24/04
4:10 AM
Page 6
Program for VCR—Direct Entry Method
In order for the six-component universal remote to control your VCR, you
must program it with the code that matches your VCR. To program your
remote to control your VCR, follow these steps:
1. Manually turn on the VCR.
2. Locate the enclosed VCR Code List.
Find your brand in the VCR Codes.
Note: If your brand isn’t listed, use one
of the Code Search methods to program
this remote control. (See section on
Code Search on page 10).
CODE INDICATOR
LIGHT
SEARCH
VCR
(BLINK)
3. Press and hold the CODE SEARCH key
until the indicator light illuminates.
Then release the CODE SEARCH key.
4. Press and release the VCR key. The
indicator light blinks and then remains lit.
(OFF)
5. Use the number keys on the remote to
enter the first code listed for your brand.
After you enter a valid three-digit code,
the indicator light turns off.
Note: If you enter an invalid code, the
LED flashes rapidly for two seconds.
Start over at step 3.
6. Aim the remote at your VCR. Press the
ON•OFF key. If your VCR turns off, you
have found the correct code.
ON•OFF
VCR CODE
7. Enter the code in the box provided on
this page for future reference.
8. If your VCR does not turn off, repeat
steps 3-6 above, entering the next code
for your brand.
If none of the codes work or your brand
is not listed, use one of the Code Search
methods to program this remote.
(See Code Search section on page 10).
Program for DVD/CD Systems—
Direct Entry Method
In order for the six-component universal remote to control your DVD or CD
systems, you must program it with the code that matches your component.
To program your remote to control your DVD/CD system, follow these steps:
1. Manually turn on the DVD/CD system.
2. Locate the enclosed DVD or CD Code
List. Find your brand in the DVD or
CD Codes.
Note: If your brand isn’t listed, use one
of the Code Search methods to program
this remote control. (See section on
Code Search on page 10).
CODE INDICATOR
LIGHT
SEARCH
DVD
(BLINK)
3. Press and hold the CODE SEARCH key
until the indicator light illuminates.
Then release the CODE SEARCH key.
4. Press and release the DVD key. The
indicator light blinks and then remains lit.
5. Use the number keys on the remote to
enter the first code listed for your brand.
After you enter a valid three-digit code,
the indicator light turns off.
Note: If you enter an invalid code, the
LED flashes rapidly for two seconds.
Start over at step 3.
6
(OFF)
RCU600M_IB_resized.qxd
3/24/04
6. Aim the remote at the component.
Press the ON•OFF key. If your
DVD/CD system turns off, you have
found the correct code.
4:10 AM
Page 7
ON•OFF
7. Enter the code in the box provided on
this page for future reference.
8. If your DVD/CD system does not turn
off, repeat steps 3-6 above, entering the
next code for your brand.
DVD OR CD CODE
If none of the codes work or your
brand is not listed, use one of the
Code Search methods to program
this remote. (See Code Search
section on page 10).
Program for SATELLITE—Direct Entry Method
In order for the six-component universal remote to control your DBS system,
you must program it with the code that matches your SATELLITE receiver.
To program your remote to control your DBS system, follow these steps:
1. Manually turn on the satellite receiver.
2. Locate the enclosed SATELLITE Code
List. Find your brand in the
SATELLITE Codes.
Note: If your brand isn’t listed, use one
of the Code Search methods to program
this remote control. (See section on
Code Search on page 10).
CODE INDICATOR
SEARCH
LIGHT
DBS•SAT
(BLINK)
3. Press and hold the CODE SEARCH
key until the indicator light illuminates.
Then release the CODE SEARCH key.
4. Press and release the DBS•SAT key.
The indicator light blinks and then
remains lit.
5. Use the number keys on the remote
to enter the first code listed for your
brand. After you enter a valid three-digit
code, the indicator light turns off.
Note: If you enter an invalid code, the
LED flashes rapidly for two seconds.
Start over at step 3.
(OFF)
ON•OFF
6. Aim the remote at the SATELLITE
receiver. Press the ON•OFF key. If
your SATELLITE receiver turns off,
you have found the correct code.
7. Enter the code in the box provided
on this page for future reference.
DBS (SATELLITE) CODE
8. If your SATELLITE receiver does not
turn off, repeat steps 3-6 above, entering
the next code for your brand.
If none of the codes work or your brand
is not listed, use one of the Code Search
methods to program this remote. (See
Code Search section on page 10).
7
RCU600M_IB_resized.qxd
3/24/04
4:10 AM
Page 8
Program for Cable Box—Direct Entry Method
In order for the six-component universal remote to control your CABLE box,
you must program it with the code that matches your CABLE box.
To program your remote to control your CABLE box, follow these steps:
1. Manually turn on the CABLE box.
2. Locate the enclosed CABLE box Code List.
Find your brand in the CABLE box Codes.
Note: If your brand isn’t listed, use one
of the Code Search methods to program
this remote control. (See section on
Code Search on page 10).
3. Press and hold the CODE SEARCH key
until the indicator light illuminates.
Then release the CODE SEARCH key.
CODE INDICATOR
LIGHT
SEARCH
CABLE
(BLINK)
4. Press and release the CABLE key. The
indicator light blinks and then remains lit.
5. Use the number keys on the remote to
enter the first code listed for your
brand. After you enter a valid threedigit code, the indicator light turns off.
(OFF)
Note: If you enter an invalid code, the
LED flashes rapidly for two seconds.
Start over at step 3.
6. Aim the remote at the CABLE box. Press
the ON•OFF key. If your CABLE box
turns off, you have found the correct code.
ON•OFF
7. Enter the code in the box provided on
this page for future reference.
8. If your CABLE box does not turn off,
repeat steps 3-6 above, entering the next
code for your brand.
CABLE BOX CODE
If none of the codes work or your brand
is not listed, use one of the Code Search
methods to program this remote.
(See Code Search section on page 10).
Program for AUDIO Systems—
Direct Entry Method
This remote control will operate many features found in AUDIO systems. To
program your remote to control your audio component, follow these steps:
Note: CD systems need to be
programmed using the DVD
component key.
CODE INDICATOR
LIGHT
SEARCH
1. Manually turn on the AUDIO
component you wish to control.
2. Locate the enclosed AUDIO system Code
List. Find your brand in the AUDIO Codes.
AUDIO
(BLINK)
Note: If your brand isn’t listed, use one
of the Code Search methods to program
this remote control. (See section on
Code Search on page 10).
3. Press and hold the CODE SEARCH key
until the indicator light illuminates.
Then release the CODE SEARCH key.
4. Press and release the AUDIO key. The
indicator light blinks and then remains lit.
5. Use the number keys on the remote
to enter the first code listed for your
brand. After you enter a valid threedigit code, the indicator light turns off.
Note: If you enter an invalid code, the
LED flashes rapidly for two seconds.
Start over at step 3.
8
(OFF)
RCU600M_IB_resized.qxd
3/24/04
4:10 AM
6. Aim the remote at the AUDIO
component. Press the ON•OFF key. If
your AUDIO component turns off, you
have found the correct code. If your
AUDIO component does not turn off,
repeat steps 3-6 above, entering the next
code for your brand.
Page 9
ON•OFF
VOL+
7. With your AUDIO component on, press
the VOL+ (VOLUME UP) key. If the
AUDIO component responds, no
further programming is required.
8. Enter the code in the box provided on
this page for future reference.
AUDIO SYSTEM CODE
9. If none of the codes work or your brand
is not listed, use one of the Code Search
methods to program this remote.
(See Code Search section on page 10).
Operating AUDIO System Functions
The following is a list of instructions for operating Audio functions. Not all
functions work for all brands. Experiment with your AUDIO system to
determine which functions work with your components. See the enclosed
AUDIO Code List to operate your brand of equipment.
TURNING ON THE RECEIVER
OR MINI-SYSTEM
Point the remote control at the receiver
and press the AUDIO key and then the
ON•OFF key to turn the system on.
SELECTING A
COMPONENT INPUT
Component inputs such as a DVD
player or VCR may be selected
depending on the features of your
receiver or mini-system. Input
selection may be made either by
pressing the labeled number key
or pressing the FUNCTION key to
toggle through the inputs available
on your system.
Note: You may need to experiment
with your system since manufacturers’
products do not all work in the
same manner.
USING THE NUMBER KEYS
TO CHANGE AUDIO INPUTS
To select a component, press the
number key (1-6) that corresponds
with the component you want to
operate (CD, TAPE, TUNER, TV,
VIDEO 1, or VIDEO 2).
USING THE FUNCTION KEY
TO CHANGE AUDIO INPUTS
To select a component, press the
FUNCTION key until the input
you want to operate appears on
your system.
OPERATING A HOME THEATER
SURROUND SOUND SYSTEM
1. Turn the TV on.
2. Press the AUDIO key and then the
ON•OFF key to turn the system on.
3. Select the AUDIO input either by
using the labeled number keys or
the FUNCTION key.
4. Press the VOL+ or VOL- keys to
control volume.
Note: The VOLUME keys may
operate both TV and receiver
volume at the same time. If
this presents a problem, it may be
resolved by entering the TV menu
and disabling the TV speakers.
CONTROLLING THE SURROUND
SOUND FEATURE
1. Press the DELAY+ or DELAY- key
to achieve the desired delay effect.
2. Press the DSP ON•OFF key
to turn DSP (Digital Signal
Processing) on or off.
3. Press the DSP MODE key until
the desired effect is achieved.
4. Press the TEST key to listen to
speaker levels.
5. Press FRONT, CENTER, or REAR
keys to select speakers.
6. Press the LEVEL+ or LEVELkeys to adjust the speaker levels.
OPERATING THE AM·FM TUNER
1. Press the AUDIO key and then the
ON•OFF key to turn the system on.
2. Press the TUNER (3) key.
3. Press the AM·FM key to toggle
between AM and FM.
4. Use the Preset (CH+/CH-) keys to
move up and down channel presets.
9
RCU600M_IB_resized.qxd
3/24/04
4:10 AM
Page 10
Code Search Methods
If your component’s brand is not listed in the Code List or you have tried all
the codes for your brand and the remote does not operate your component,
use one of the Code Search methods below—Manual Code Search or Auto
Code Search. Both Code Search methods search all of the codes since
your component’s code may be listed under another brand in the Code List.
Note: The Code Search method may take a long time because the remote
searches all of the codes in its memory for the code that operates your
component. Therefore, if your brand is listed in the Code List, use the
Direct Entry method described on pages 5-9.
Manual Code Search
1. Manually turn on the component you
want the remote to operate.
2. Press and hold the CODE SEARCH key
until the indicator light illuminates.
Then release the CODE SEARCH key.
3. Press and release the component key
that corresponds to the component you
want the remote to operate (TV, VCR,
DVD, DBS•SAT, CABLE, AUDIO). The
indicator light blinks once and then
remains lit.
CODE INDICATOR
LIGHT
SEARCH
(BLINK)
4. Aim the remote at the component. Press
the ON•OFF key continuously until the
component turns off.
Important: Because there are so many
codes, you may have to press the
ON•OFF key many times—possibly up
to 200 times.
ON•OFF
5. When the component turns off, press
the ENTER key to store the code.
6. Use the Code Retrieval section on the
next page to identify the code for your
component for future reference.
ENTER
(OFF)
Auto Code Search
1. Turn on the component you want the
remote to operate.
2. Press and hold the CODE SEARCH key
until the indicator light illuminates.
Then release the CODE SEARCH key.
CODE INDICATOR
LIGHT
SEARCH
3. Press and release the component key that
corresponds to the component you want
the remote to operate (TV, VCR, DVD,
DBS·SAT, CABLE, AUDIO). The indicator
light blinks once and remains lit.
4. Aim the remote at the component and
press the ON•OFF key once. The remote
automatically sends every code for
the specified component one at a time,
with the three-second delay between
each code. Keep the remote aimed at the
component throughout this process.
(BLINK)
5. As soon as the component turns off, you
must press the ENTER key immediately
so the remote stores the correct
code. If you do not press the ENTER
key within three seconds, the remote
sends the next code in the list, and you
will have to start over from step 2.
ON•OFF
6. Use Code Retrieval section on the next
page to identify the code for your
component for future reference.
10
ENTER
(OFF)
RCU600M_IB_resized.qxd
3/24/04
4:10 AM
Page 11
Code Retrieval
If you used one of the Code Search methods to program your remote, follow
the steps below to find out which code is compatible with your component.
Finding the actual code and writing it down will save you time if you ever
need to program the remote again (e.g., if programming is lost when you
change the batteries).
CODE INDICATOR
LIGHT
SEARCH
1. Press and hold the CODE SEARCH key
until the indicator light illuminates.
Then release the CODE SEARCH key.
2. Press and release the component key
that matches the component’s code you
are retrieving (TV, VCR, DVD,
DBS•SAT, CABLE, AUDIO). The
indicator light blinks once and then
remains lit.
(BLINK)
3. Press and release the CODE SEARCH
key. The indicator light turns off.
4. Starting with 0 on the keypad, press the
number keys in order (0-9) until the
indicator light blinks.
CODE
SEARCH
(OFF)
5. The number that causes the indicator
light to blink is the first digit of your code.
6. Repeat step 4 until you have retrieved
all three numbers of the code.
7. Refer to the code box to write down the
code for your component within the
Direct Entry section (page 5-9) for the
component just programmed.
Sleep Feature
The Sleep feature turns off your TV automatically at a duration you choose
from 1 to 99 minutes. To program your remote to control the Sleep feature,
follow these steps:
Programming the Sleep Timer
1. Press and hold the SLEEP key until the
indicator light illuminates. Release the
SLEEP key.
SLEEP
INDICATOR
LIGHT
2. Enter time in minutes using the
numerical keypad. The indicator light
should turn off. (Minute 1 thru 9: press
0 before the actual number. Maximum:
99 minutes).
3. Leave remote aimed at television.
(IMPORTANT: The Sleep feature
will not work unless remote is left
aimed at television.)
Canceling the Sleep Timer
The Sleep Timer program can be cancelled
and reset to zero by either of the following:
1. Press and hold the SLEEP key until the
indicator light blinks.
OR
ON•OFF
SLEEP
2. Press the ON•OFF key, turning the
TV off.
(BLINK)
11
RCU600M_IB_resized.qxd
3/24/04
4:10 AM
Page 12
On-screen Menus
This remote cannot access every menu system of all models and brands of
consumer electronics components. However, if you’ve successfully
programmed the DVD•AUX key to operate a DVD player, you can access
DVD disc menus with the MENU key.
The MENU key will access TV menu systems for most RCA, GE and
PROSCAN TVs, as well as some other popular brands. In addition, some
RCA VCR menus are supported by this remote’s MENU key. This remote
also supports select SATELLITE receiver menus.
If this remote’s MENU key doesn’t access the menu system for your
component, you’ll need to use the original remote to change menu settings.
Note: This remote’s MENU key doesn’t support CABLE box menu systems
and some VCR menu systems.
Accessing a Menu System
To access a menu system, follow these steps:
1. Make sure your components are
turned on and your TV is set to
the component’s input.
2. Press the component key on the remote
(TV, DVD, DBS•SAT) for the desired
menu screen.
3. Press the MENU key.
MENU•PROG
4. The menu for the component you
have chosen should be visible on
your television.
Highlighting and Selecting
Menu Items
To navigate on-screen menus, use the
ARROW keys.
Note: For RCA, GE or ProScan TVs, press
the MENU key to select the highlighted
item. If menu items have numbers next
to them, you can use the number keys to
select an item. Additionally, the SELECT
key can be used to select menu choices.
• For users of RCA, GE and PROSCAN
DBS products, older DBS models
require that the INFO or MENU key on
this remote be used to make program
selections. Use the SELECT key for
making program selections on newer
RCA, GE and PROSCAN DBS models.
MENU•PROG
SELECT
ENTER
• For Sony products, pressing the ENTER
key while in Menu Mode returns you
to the previous menu.
• In some menu systems, you must
press the ENTER key to select the
highlighted item.
• All functions in competitive models
and brands of products may not be
fully supported.
• Because of the wide variety of menu
formats, some experimenting may
be required.
Exiting a Menu System
To exit the Menu Mode, press the CLEAR
key. The remote reverts back to its
normal operation.
This is an example of a DVD
disc on-screen menu. English
is the menu choice highlighted.
Using this remote control, you
would press the SELECT key
to choose English.
To highlight another language,
press the DOWN ARROW key.
(In the example above, the
highlight would move to Español.)
CLEAR
12
RCU600M_IB_resized.qxd
3/24/04
4:10 AM
Page 13
Troubleshooting
Problem: The remote can’t be programmed to operate
your component.
• You may be too far away from the component or at a wrong angle. This remote
uses IR (infrared) technology to communicate with components. The remote
sends the code and the component’s IR sensor reads the code.
Therefore, there must be an unobstructed path between the remote and
the IR sensor on the component. Move closer and make sure you point
the remote at the component (VCR when programming the VCR key;
DVD when programming the DVD key; TV when programming
the TV key; CABLE box when programming the CABLE key;
SATELLITE receiver when programming the DBS•SAT key).
• If you’ve entered all of the codes for your brand that are in the enclosed
Code Lists and followed the instructions, try one of the Code Search
methods (See Code Search on page 10).
• You must put the remote in the correct mode by pressing the
corresponding component key (TV, VCR, DVD, DBS•SAT, CABLE,
AUDIO) so the remote knows which component you want to operate.
• To program the six-component universal remote to operate a
combination unit (TV/VCR or TV/DVD), first try the VCR or DVD
codes for your brand. Some units, however, require that you program
both the TV key (using the TV codes) and the VCR or DVD key (using
the VCR or DVD codes) for full operation.
• To program the six-component universal remote to operate a combination
unit (VCR/DVD), program the VCR key using the VCR codes and then
program the DVD key using the DVD codes.
Problem: The indicator light does not light when you press a key.
• You must put the remote in the correct mode by pressing the
corresponding component key (TV, VCR, DVD, DBS•SAT, CABLE,
AUDIO) so the remote knows which component you want to operate.
• You may have pressed an invalid key for the mode the remote is in
(e.g., the RECORD key only works in VCR Mode).
• Make sure the batteries are properly installed. (See Battery Installation
on page 3).
• Replace the batteries with two new AA batteries. Reprogramming may
be required.
Problem: The remote does not operate your component.
• You must put the remote in the correct mode by pressing the
corresponding component key (TV, VCR, DVD, DBS•SAT, CABLE,
AUDIO) so the remote knows which component you want to operate.
• Remove any obstacles between the remote and the component. Make
sure to aim the remote at the IR sensor on the component.
• Make sure the batteries are properly installed. (See Battery Installation
on page 3).
• Replace the batteries with two new AA batteries. Reprogramming may
be required.
• Reset the remote. Remove the batteries. Then press and hold the number
1 key on the remote for several seconds to reset the microprocessor
inside the remote. Release the number 1 key, reinstall the batteries, and
try the remote again. Reprogramming will be required.
Problem: The remote is not performing commands properly.
• You must put the remote in the correct mode by pressing the
corresponding component key (TV, VCR, DVD, DBS•SAT, CABLE,
AUDIO) so the remote knows which component you want to operate.
• Make sure the component is “ready” (e.g., DVD player has disc loaded;
VCR has tape loaded, etc.).
• You may have pressed an invalid key for the mode the remote is in
(e.g., the RECORD key only works in VCR Mode).
• If you are trying to turn on an RCA, GE or PROSCAN component, press
the component key (TV, VCR, DVD, DBS•SAT, CABLE, AUDIO) instead
of the ON•OFF key.
• If operating a VCR to record, you must press the RECORD key twice.
• If you’re trying to change channels, try pressing the ENTER key after
entering the channel number as this is a requirement of certain models
and brands.
• There is a possibility that a programmed code may only be able to
control some of your component features (e.g., only turns a component
on and off). Follow the steps provided for programming the remote (See
Programming sections on pages 5-9). If the component can be turned on
and off, make sure you press the CH+/CH- key to see if the component
responds. If not, try the next code from the list.
13
RCU600M_IB_resized.qxd
3/24/04
4:10 AM
Page 14
Troubleshooting (continued)
Problem: The VCR won’t record.
• As a safety feature, you must press the RECORD key twice to
begin recording.
• Make sure the tape is properly loaded in the VCR.
• Make sure the tape is not write-protected. If the safety tab is removed,
the tape is write-protected and you cannot record onto that tape.
Problem: The remote will not change channels.
• You must put the remote in the correct mode by pressing the
corresponding component key (TV, VCR, DVD, DBS•SAT, CABLE,
AUDIO) so the remote knows which component you want to operate.
• Press the ENTER key after you enter a channel number.
Problem: The component’s menu doesn’t appear on the TV screen.
• The TV must be tuned to the Video Input that matches the manner in
which you connected the component to the TV.
For example, if you connected your DVD player to your TV by
connecting audio/video cables (usually color-coded yellow, red and
white) to the TV’s Input 1 jack, you must tune the TV to its Video 1
Input channel. Remember, different manufacturers label these jacks
differently. Consult the instruction manual that came with the TV for
more information.
• You must put the remote in the correct mode by pressing the
corresponding component key (TV, VCR, DVD, DBS•SAT, CABLE,
AUDIO) so the remote knows which component you want
to operate.
• Menu access isn’t supported for all brands. If that’s the case, you
need to use your original remote control to access menu functions
for these components.
If you have further questions, please visit www.rca.com.
14
RCU600M_IB_resized.qxd
3/24/04
4:10 AM
Page 15
Limited 90-Day Warranty
THOMSON INC. warrants that, for 90 days from date of purchase, it will replace
this product if found to be defective in materials or workmanship. Return it
postage paid to the Product Exchange Center address for prompt, no-charge
replacement with a current equivalent. This replacement is THOMSON INC.’s
sole obligation under this warranty. THOMSON INC. will not be responsible
for any incidental or consequential damages or for any loss arising in connection
with the use or inability to use this product. Some states do not allow the
exclusion or limitation of incidental or consequential damages, so the above
limitation or exclusion may not apply to you. This warranty excludes defects
or damage due to misuse, abuse, or neglect. This warranty gives you specific
legal rights, and you may also have other rights, which vary from state to state.
Product Exchange Center
11721 Alameda Avenue
Socorro, TX 79927
15
RCU600M_IB_resized.qxd
3/24/04
4:10 AM
Page 16
Consolidate Six Remote
Controls Into One!
INS SET
TRU UP
INS CTIO
IDE NS
Home Theatre™ Keys
• Take full advantage of your Home Theatre equipment with
Surround Sound Control
Your RCA Universal Remote is compatible with most brands (of infrared remote
controlled components manufactured after 1990). Below is a list showing some
of those brands. Check the enclosed Code List for a complete listing along with
their corresponding popular setup codes for quick and easy reference. The remote
already operates most RCA, GE and PROSCAN products without any programming!
TV
VCR
DVD
CD
SATELLITE
CABLE
AUDIO
Apex
Audiovox
Broksonic
Citizen
Curtis
Mathes
Daewoo
Emerson
GE
Hisense
Hitachi
JC Penney
JVC
Kenwood
KLH
LG(Goldstar)
LXI
Magnavox
Mitsubishi
Montgomery
Ward
NEC
Orion
Panasonic
Philco
Philips
Pioneer
Prima
PROSCAN
Quasar
RadioShack/
Realistic
RCA
Sampo
Samsung
Sanyo
Sears
Sharp
Sony
Sylvania
Tandy
Teknika
Toshiba
Victor
Wards
Yamaha
Zenith
Allegro
Broksonic
Canon
Curtis
Mathes
Daewoo
Emerson
GE
Go Video
Hitachi
JC Penney
JVC
Kenwood
LG
(Goldstar)
LXI
Magnavox
Matsushita
Mitsubishi
Montgomery
Ward
NEC
Panasonic
Philco
Philips
Pioneer
PROSCAN
Quasar
RadioShack/
Realistic
RCA
Samsung
Sanyo
Sears
Sharp
Sony
Sylvania
Tandy
Teknika
Toshiba
Victor
Wards
Yamaha
Zenith
Aiwa
Allegro
Apex
Broksonic
Daewoo
Emerson
Funai
GE
Go Video
Hitachi
JBL
JVC
Kenwood
Konka
Koss
Lasonic
Magnavox
Memorex
Mintek
Mitsubishi
NAD
Onkyo
Oritron
Panasonic
Philips
Pioneer
PROSCAN
Qwestar
RCA
Samsung
Sansui
Sanyo
Sharp
Sony
Sylvania
Toshiba
Venturer
Xbox ®*
Yamaha
Zenith
Aiwa
ADC
ADO
Akai
Denon
Dynatech
Emerson
Fisher
GE
Hitachi
Inkel
JVC
Kenwood
Luxman
NEC
Marantz
MCS
Mitsubishi
Nakamichi
Onkyo
Optimus
Panasonic
Pioneer
RCA
Sanyo
Sears
Sherwood
Sony
Teac
Technics
Toshiba
Yamaha
Alphastar
Bell
ExpressVu
Chaparral
Dish
Network
Drake
Echostar
General
Instruments
GE
Hitachi
Hughes
Network
Systems
JVC
Magnavox
Motorola
Panasonic
Philips
Primestar
PROSCAN
RCA
Realistic
Sony
Star Choice
Toshiba
Uniden
ABC
Antronix
Archer
Cableview
Century
Citizen
Contec
Garrard
GE
Gemini
General
Instruments
Hitachi
Jasco
Jerrold
Magnavox
Motorola
NEC
Panasonic
Philips
Pioneer
PROSCAN
RCA
Realistic
Regency
Samsung
Scientific
Atlanta
Standard
Component
Starcom
Stargate
Starquest
Tocom
TV86
United
Cable
Universal
View Star
Zenith
Aiwa
Denon
Harman
Kardon
JBL
JVC
Kenwood
Koss
Onkyo
Optimus
Panasonic
Philips
Pioneer
Sherwood
Technics
Venturer
RCA
Sony
Yamaha
*Requires Xbox ® DVD playback kit.
No setup required for most models of these brands
Requires two AA batteries (sold separately)
©2004 THOMSON INC.
10330 North Meridian Street
Indianapolis IN 46290
Made In Indonesia
RCU600M NA IB REV A
Trademark(s) ®Registered Marca(s) Registrada(s)
www.rca.com