1
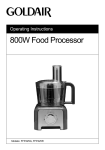
Food Processor
Model FFP410
OPERATING INSTRUCTIONS
FFP410: 220-240V ~, 50Hz, 500W
Thank you for choosing this Goldair Food Processor. This Goldair appliance has been
designed and manufactured to the highest of standards and with proper use and care,
as described in this leaflet, it will give you years of useful service. Please read these
instructions carefully.
GENERAL CARE AND SAFETY GUIDE
Please read all instructions carefully before using this appliance and keep them for
future reference.
ALWAYS
✔ Always ensure hands are dry before
handling the plug or switching on the Food
Processor.
✔ Always use the Food Processor on a
secure, dry, level surface.
✔ Always disconnect the Food Processor
from the supply if it is left unattended and
before assembling, disassembling or cleaning.
✔ Carry out regular checks of the supply cord
to ensure no damage is evident.
✔ Take care when handling the sharp cutting
blades while emptying the bowl and during
cleaning.
NEVER
✘ Never use this food processor outdoors.
✘ Never use this food processor for any
purpose other than its intended use. This food
processor is for household use only.
✘ This food processor is not intended for use
by persons (including children) with reduced
physical, sensory or mental capabilities or lack
of experience and knowledge, unless they are
supervised or have been given instruction
concerning the use of the Food Processor by
a person responsible for their safety.
✘ Close supervision is necessary when the
appliance is near children.
✘ Never place this food processor on or near
a hot gas or electric burner or where it could
touch a heated oven or microwave oven.
✘ Never use harsh, abrasive or caustic
cleaners to clean this appliance.
✘ Never operate the food processor with a
damaged cord or plug, after it malfunctions, or
if it has been damaged in any manner.
✘ The Food Processor is not intended to be
operated by means of an external timer or
separate remote-control system.
✘ Attempt to remove the bottom cover of the
food processor. There are no serviceable
parts inside. Any repairs should be carried out
by an authorised electrical technician.
Components
1. Slicing/Shredding Disc
2. Disc Stem
3. “S” blade
4. Pusher
5. Cover
6. Bowl
7. Body
BEFORE FIRST USE
•
•
When unpacking the product and removing the packaging material, handle the “S”
blade and slicing/shredding disc with great care as these items come presharpened
Wash all parts except the base. Be sure to read this user manual thoroughly, paying
special attention to the “How to Use” and “Care and Cleaning” sections
HOW TO USE
Do not attempt to chop/crush ice in this food processor; it will damage the unit and
dull the chopping blade. This unit will not whip cream, beat egg whites to a
desirable volume, grind coffee beans or spices with a high oil content, slice/shred
hard-cooked eggs/marshmallows/soft cheeses.
•
•
•
Control Panel
Pulse
Pulse button must be pressed and held for unit to operate. When released, unit will
stop. Use Pulse for short processing tasks, such as chopping nuts, raw meats, or
vegetables. This allows you to check processed results and control the fineness.
On
When this button is pressed, unit runs continuously until the Off button is pressed.
Off
Processor should always be left in Off position when unit is not in use.
To process liquid the S blade should be used, never fill the processor bowl above
the maximum
IMPORTANT
For your protection, this unit has an interlock system. The processor will not operate
unless the bowl is properly locked onto the base and the cover is correctly locked
onto the bowl. Be sure the handle of the bowl is turned fully onto the base so that
the handle lines up over the signal light. Do not attempt to operate the unit without
the cover being correctly in place. Be sure base is on a flat, dry, clean surface
before you begin processing.
HOW TO SLICE AND SHRED
1. Place the bowl over the centre post in the base with the handle at the left . Turn the
bowl towards the right until it drops down into place. Click the bowl in so that the
handle lines up straight over the signal light; be sure it locks into place.
2. Slide the disc stem onto the centre post in the bowl, then carefully grasp the
slicing/shredding disc. With the desired side (slice or shred) facing up push down
onto the disc stem.
3. Place the cover onto the bowl so that the food chute is just to the right of the bowl
handle. Twist the food chute/cover toward lock until you hear it click into place.
4. Plug the cord into an electrical outlet. Use the food guide to help you prepare food
for slicing/shredding. Fill the food chute with food and position the pusher over the
food .
5. Press down lightly but firmly on the food pusher while pressing the PULSE (or press
ON for continuous processing). Note: Let the processor do the work, a large
amount of pressure will not speed up the operation.
6. Bowl can not be removed with closed lid
7.
8.
After processing the food, release the pulse button, or if you were using the ON
button, press OFF. Allow the disc to stop rotating, twist the food chute/cover toward
UNLOCK to remove the cover.
Grasp the disc and lift out, carefully pull out the disc stem, unlock the bowl by
turning the handle to the left and lift off the bowl.
HOW TO CHOP
The chopping blade speeds up many everyday tasks and is designed to chop, crumb,
grind, mince and mix quickly.
1. Place the bowl over the centre post on the base with the handle at the left. Turn the
bowl towards the right until it drops down into place. Click the bowl in so that the
handle lines up straight over the signal light; be sure it locks into place.
2. Grasp the chopping blade by its center shaft and slide it down onto the centre post.
3. Place the cover onto the bowl so that the food chute is just to the right of the bowl
handle. Twist the food chute/cover toward LOCK until you hear it click into place.
4. Plug the cord into an electrical outlet. Use the food guide to help you prepare food
for chopping/mincing/mixing and crumbing.
5. Press PULSE (or ON for continuous operation). When pulsing, hole the pulse
position for about 2-3 seconds: check results; repeat for desired consistency. It is
better to use several short operations rather than a single long one unless mixing
ingredients that require longer processing times.
6. Bowl can not be removed with closed lid
7. After processing food, release the pulse, or if you were using continuous ON, press
OFF. Allow the disc to stop rotating. Twist the food chute/cover toward UNLOCK to
remove the cover.
8. Grasp the chopping blade by its shaft and remove. Unlock the bowl by turning the
handle to the left, and lift the bowl off. Empty the processed food.
LIQUID FOOD PROCESSING TIPS
•
Hot liquids (not boiling) and hot foods can be processed in the bowl.
•
Be sure to process small amounts of liquids (2 cups or less at a time). Larger
amounts may leak from the bowl.
CARE AND CLEANING
Note: Do not attempt to sharpen the cutting edges of the chopping blade or the
reversible disc. They are permanently sharpened at the factory and will be ruined if
you attempt to sharpen.
1.
2.
3.
Before cleaning, be sure the unit is switched off and the cord is unplugged.
Whenever possible, rinse parts immediately after processing for easy cleanup.
Wipe the base, control area, and feet with a damp cloth and dry thoroughly.
stubborn spots can be removed by rubbing with a damp cloth and a mild, nonabrasive cleaner. Do not immerse the base in liquid.
4.
5.
6.
It is highly recommended that all removable parts are washed by hand. However,
the removable parts can be washed in a dishwasher
– Wash in hot, sudsy water, rinse, and dry thoroughly. If necessary, use a small
nylon bristle brush to thoroughly clean the bowl and food chute/cover. This
type of brush will also help prevent cutting yourself on the chopping blade and
the slicing/shredding disc.
– If washing in a dishwasher, place removable parts on the top rack only – not
in or near the utensil basket
Do not use rough scouring pads or cleansers on any plastic or metal parts.
Do not fill the bowl with boiling water or place any of the parts in boiling water.
Some foods, such as carrots, may temporarily stain the bowl. To remove stains,
make a paste of 1 tablespoon baking soda and two tablespoons warm water. Apply
the paste to the stains and rub with a cloth, rinse in sudsy water and dry the baking
soda.
FOOD
CABBAGE
CARROTS
POTATOES
ZUCCHINI
SHREDDING GUIDE
COMMENTS
Use shredding disc for very fine cabbage or slaw. Cut into pieces to fit
chute. Shred using light pressure. Empty bowl as cabbage reaches disc.
Position in chute and shred.
Position in chute. Cut large potatoes in half or quarters.
Cut to fit chute, either lengthwise or horizontally.
SLICING GUIDE
COMMENTS
Quarter and stack horizontally in chute. Use firm pressure.
For coarsely shredded results, use slicing side of disc. Cut into pieces
CABBAGE
to fit chute. Empty bowl as cabbage reaches disc.
Cut into 10cm lengths and pack in chute, alternating thick and thin
CARROTS
ends.
CELERY
Remove string, cut stalks into thirds, pack chute for best results.
CUCUMBER
Cut to fit chute if necessary.
NUTS
For coarsely chopped results, fill chute with nuts and slice.
Quarter and fill chute, positioning onions upright for coarsely chopped
ONIONS
results.
Halve or quarter and core. Position upright in chute and slice using
PEACHES/PEARS
light pressure.
Halve and seed. Fit pepper up bottom of chute, squeezing slightly to fit
PEPPERS, GREEN if necessary. Cut large ones into quarters or strips, depending on
desired results. Slice using moderate pressure.
Cut into 8cm lengths. Remove inedible casing. Slice 2 pieces at a time
PEPPERONI
using firm pressure.
Peel if desired. Position in chute, cutting large potatoes in halves or
POTATOES
thirds.
STRAWBERRIES Arrange berries on their sides for lengthwise slices.
Use small tomatoes for whole slices, halve if necessary. Use gentle, but
TOMATOES
firm pressure.
TURNIPS
Peel. Cut turnips to fit chute.
Slice off ends. Use small squash for whole slices; halve larger ones to
ZUCCHINI
fit chute.
FOOD
APPLE
FOOD
BABY FOOD
BREAD CRUMBS
COOKIE/CRACKER
CRUMBS
CRANBERRIES
MINCED
EGGS, CHOPPED
GARLIC, MINCED
MEAT, CHOPPED
(RAW OR COOKED)
MUSHROOMS
CHOPPED
NUTS, CHOPPED
ONIONS, CHOPPED
PARMESAN OR
ROMANO CHEESE,
GRATED
PARSLEY, CHOPPED
PEPPER, GREEN
CHOPPED
PIE DOUGH
SOUPS, PUREED
OR CREAMED
SQUASH
(BUTTERNUT)
MASHED
STRAWBERRIES,
PUREED
TOMATOES,
CHOPPED
CHOPPING GUIDE
AMOUNT
COMMENTS
Add up to 4 cups cooked vegetables and meat to
Up to 4 cups
bowl, along with 1/2 cup cooking liquid/broth.
Process to reach desired fineness.
Break either fresh or dry bread slices into quarters.
Up to 10 slices
Add to bowl and process until finely crumbed.
Use for crumbing graham crackers, chocolate or
Up to 4 cups
vanilla wafers. Break larger crackers into quarters.
Add to bowl and process until fine.
Pulse to chop to desired fineness. Can also add
3 cups
sugar to make cranberry relish.
Peel, dry and halve hard-cooked eggs. Add to
Up to 3 cups
bowl. Pulse to chop, checking fineness after 4-5
pulses.
Drop clove(s) down food chute while unit is
Up to 5
running.
Cut meat into 2.5cm cubes. Add to bowl and pulse
Up to 3 cups
to chop.
Halve large ones and add to bowl. Chop to desired
Up to 20 medium
fineness.
4 cups
Add to Bowl and process to chop.
Quarter, and to bowl. Pulse or 2 times to coarsely
Up to 3 large
chop. For green onions, cut into 2.5cm pieces and
add up to 3 cups.
Allow cheese to reach room temperature. Cut into
Up to 1-1/2 cups 2.5cm cubes. Add to bowl and process to desired
fineness.
Add to bowl and pulse to chop to desired fineness,
Up to 2 cups
abort 10-15 seconds Process other herbs in same
manner (basil, mint).
Cut into 2.5cm pieces. Add to bowl and pulse to
Up to 1 pepper
chop.
Follow food processor recipe for 1 of 2 standard
Up to 2 pie crusts size pie crusts. See One crust standard pie crust
recipe.
Add up to 2 cups hot (not boiling) vegetable soup
2 cups
for pureeing and creaming. Process to desired
smoothness
Add up to 8 cup cooked, drained squash to bowl.
Up to 5 cups,
Process to puree. Works for pumpkin and sweet
2.5cm cubes
potatoes, also.
Hull and halve large berries. Add to bowl and
2 cups
process to chop.
Quarter tomatoes. Add up to 4 and pulse to desired
4 medium
fineness.
Recipes
One Crust Standard Pie Crust
1 cup all-purpose flour
1/2 teaspoon salt
1/4 cup vegetable shortening, room temperature, divided into 3 parts
1 tablespoon butter or margarine, well chilled
3 tablespoons chilled water
1.Position “S” blade in bowl. Add flour, salt, vegetable shortening, and butter. Process
until particles resemble coarse crumbs, about 15 seconds.
2.Add water all at once through food chute with processor running.
3.Process until dough forms a ball, or no more than 20 seconds. If dough does not form
a ball, stop processor. Remove chopping blade. Gently shape dough into a ball with
hands. Roll out for pie, or as directed in recipe. If crust is to be baked before filling,
prick generously with fork. Bake in preheated oven at 230°C until golden brown, about
9-10 minutes.
Makes: 1 (23 cm) pie crust.
Note: If the power supply cord is damaged, it must be replaced by the manufacturer or
its service agent or a similarly qualified person in order to avoid a hazard.
SUPPORT AND TECHNICAL ADVICE
North Shore City, Auckland, New Zealand
Monday – Friday 8am-5pm
Phone: 0800 232 633
Website: www.goldair.co.nz
IMPORTANT: PLEASE RETAIN THIS WARRANTY CARD
NAME:
ADDRESS:
PURCHASED FROM:
SUBURB:
DATE OF PURCHASE:
NAME OF PRODUCT:
MODEL No:
TWO YEAR WARRANTY
Your Goldair product has been inspected and tested and is guaranteed subject to the
following for a period to two years from the date of purchase against defects in
workmanship and materials. During this period, such defects will be rectified by
repair or replacement of the product purchased. Your product contains no user
serviceable components and this warranty becomes invalid if in our opinion the
product has been misused, abused, incorrectly installed, tampered with, connected
to an electrical supply not corresponding with the name plate specification, or
subjected to power surges. The warranty does not include any labour or other
associated expense that may be involved in removal or installation of the product.
Normal wear and tear is expressly excluded.
If your Goldair product fails to operate satisfactorily, please return it to the retailer
from whom it was purchased. To obtain a repair or replacement product under this
warranty, you will need to produce satisfactory evidence of date of purchase. The
completed warranty and purchase receipt must be presented with the product. The
warranty should be filled out at the time of purchase. It is in your interest to make
sure this is done.
If the product is to be replaced (cannot be repaired) then that replacement will be of
the same or similar product or accessory excluding packaging, instruction card etc.
Where a replacement product is supplied, this shall be guaranteed for the balance of
the original warranty period.
Any model that is no longer available will be replaced by a model of a value and with
such features as we consider appropriate in the circumstances. Goldair Ltd is not
responsible for freight forwarding charges, losses or damage in transit.
If service is required after the warranty period has expired, the product should be
returned to a qualified electrical technician. Service outside of the warranty period
will be at your cost.
Consumers Guarantee Act (1993).
In accordance with the above act consumers are advised that: The manufacturer
does not undertake that repair facilities and parts are necessarily available for this
product.
If any of the provisions of the foregoing are contrary to any relevant legislation, then
that provision shall be deemed to be excluded from the warranty and the rest of the
provisions will continue to apply.