1
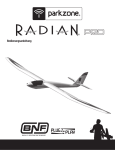
PNP Instruction Manual ParkZone® products are distributed exclusively by Horizon Hobby, Inc. 4105 Fieldstone Road Champaign, IL 61822 Horizon Hobby UK Units 1-4 Ployters Rd Staple Tye Southern Way Harlow Essex CM18 7NS United Kingdom Horizon Hobby Deutschland GmbH Otto Hahn Str. 9a 25337 Elmshorn Germany The Spektrum trademark is used with permission of Bachmann Industries, Inc. © 2008 Horizon Hobby, Inc. parkzone.com 13551 Charge-and-Fly™ Park Flyer Wingspan: 78.7 in (2 m) Length: 44.7 in (1140mm) Weight with Battery: 30 oz Motor: PKZ 480-size, 960Kv brushless outrunner ESC: E-flite 30A brushless ESC with Switch-Mode BEC Radian Instruction Manual The experience of flying just got better. The ParkZone® Radian™ encompasses all the benefits that ParkZone pilots have grown to love. Experience the true essence of flight while quietly gliding on thermals of air—only using the motor to regain altitude, making for much longer flight times than traditional electric aircraft. The Radian is constructed from durable Z-Foam™ for the perfect balance of weight and durability. Its design boasts a large 2-meter wingspan and plug-in wings for easy transportation and storage. The Radian’s large wingspan and elliptical dihedral design improves flight performance and visibility from the ground, while the 3-channel control allows for the ultimate in precision when controlling throttle, rudder and elevator. 3 Lightweight Z-Foam construction also ensures durability, making repairs simple and quick. Of course, every ParkZone plane comes out of the box ready to fly and looking great. You will only need to add your own battery (a 3S 1200+ mAh Li-Po is recommended), as well as a receiver, battery charger and transmitter. In as little as an hour, you can be ready for your first flight with the Radian PNP. This means you can spend your time refining your flying skills, not your building skills. FCC Statement This device complies with part 15 of the FCC rules. Operation is subject to the following two conditions: (1) This device may not cause harmful interference, and (2) this device must accept any interference received, including interference that may cause undesired operation. Caution! Changes or modifications not expressly approved by the party responsible for compliance could void the user’s authority to operate the equipment. Instructions for Disposal of WEEE by Users in the European Union This product must not be disposed of with other waste. Instead, it is the user’s responsibility to dispose of their waste equipment by handing it over to a designated collection point for the recycling of waste electrical and electronic equipment. The separate collection and recycling of your waste equipment at the time of disposal will help to conserve natural resources and ensure that it is recycled in a manner that protects human health and the environment. For more information about where you can drop off your waste equipment for recycling, please contact your local city office, your household waste disposal service or where you purchased the product. 4 Simple Soaring One of the most fascinating and interesting segments of RC flying is Soaring. Finding a thermal and rising without power to unlimited heights is both exhilarating and rewarding. Once the Radian is up to altitude, one will be able to soar for hours relying only on thermal currents and wind to stay aloft. With the current trend towards an eco-friendly society, thermal soaring is free energy and fits well with the environmentally conscious consumer. Gliders were actually man’s first step to powered flight. The Wright brothers used gliders extensively to gather the much needed flight data that allowed them to eventually achieve powered flight. In essence, a glider is defined by the fact it continually descends. NASA space shuttles are in fact gliders by definition. Many of the troop carriers in World War II were also classified as gliders. Often gliders are confused with sailplanes, yet they have completely different functions. A sailplane is similar to a glider, however, there is one primary difference. A sailplane can actually soar—meaning it can rise above its initial launch height. In the late 1920s and early ’30s, Germany led the world with sailplane designs. This was partly due to restrictions placed on them from World War I, when they could not produce powered aircraft. Due to this, some wonderful innovations in sailplane designs were made, and some argue that it was this period that led to our current sailplane designs and theories. With modern sailplane designs, it is not uncommon for fullsize sailplanes to stay aloft for up to 8 hours and cover 1000 miles while averaging over 100 mph. Smaller model sailplanes can fly for long periods using similar flight theories that full-size sailplanes use. If you have never experienced thermal soaring with a sailplane before, you’re really going to enjoy the Radian’s great soaring capabilities and experience the wonderful sport of RC thermal soaring. What Are Thermals? The first step to thermal flying is to have a basic understanding of what thermals are and how they work. If you have some concept of how a thermal works it will help you know where to search for them. A thermal is basically rising air. The temperature of the ground is not consistent. Different textures, colors and even weather conditions can cause uneven ground temperature. The warmer ground temperatures heat up and form a warm air bubble. At this stage, the bubble will hug the ground until something breaks the surface tension to release it, much like a soap bubble breaking away from the water’s surface. Once tripped, 5 perhaps by a tree line or building, the thermal bubble then rises up, continuing to gain energy until it is fully developed many thousands of feet above. Thermals are typically stronger later in the day because the ground has had more time to generate heat. There are still thermals in the morning and evening, but they behave differently. Morning thermals are very narrow, meaning they have a small diameter, and do not typically go very high (20–400 feet). However, there are many small thermals in the morning, and it is recommended that you learn at this time of the day. Morning thermals are very defined yet are safe, as they typically don’t go too high and are not as violent as fully developed thermals. Another benefit is there are many smaller thermals close together in the morning and this will allow you to hop from one thermal to another with ease. Evening thermals are typically large warm air masses, meandering through the sky. They are usually very smooth with soft edges. The middle of the day (noon to 4 p.m.) is when the thermals are at their strongest. The downside is that with every thermal there is also sink. Sink is the surrounding air that is left by the thermal leaving the ground. Typically sink is on the upwind side of the thermal. Sink is created when the warm air has been displaced; colder descending air will fill the area when the warm air has receded. Sink is not necessarily a bad thing—because where there is sink there is also lift close by. The trick is to find lift before you have to land. How to Catch a Thermal Always have a planned search pattern when looking for thermals. Even the most seasoned thermal competition pilot will have a search plan before launching. This is one of the basics of thermal flying. If you have a plan, based on good sound thermal logic, chances are you will more than likely find a thermal. Thermals don’t typically stay in the same location for long, so maintaining a consistent pattern is important to ensure as much ground as possible is covered before landing. Many people just fly straight upwind. Working in an “S” pattern will increase the searched surface. Keep working the Radian upwind to cover a lot more sky for the same loss of height. Also, be on the lookout for ground markers. Although thermals cannot be seen, things that identify them can. Wind direction and velocity are great thermal indicators. Often the colder descending air filling in the hole that the thermal created when it left the ground will be a good indication as to where thermals may be. If the wind has a distinct change of direction, there is a good chance of a nearby thermal. The same would apply if the wind shifted to blow from the right. There would be a good chance the thermal would be to the left and slightly behind you. If you feel the wind strength increase, yet it continues blowing straight into your face, then the thermal is directly behind you. Finally, if the wind reduces in velocity, or even stops from a steady breeze, then the thermal is either ahead of you or right above you. Basically the thermal will be in the direction that the wind is blowing towards. Always pay attention to the general wind direction and look for changes in both its direction and velocity as signs for thermals. Other ground signs are birds. Many birds are capable of soaring, and you will often see them soaring on the thermals. Before launching, always check for birds. Pay close attention to how they are flying or if they are flapping hard—chances are they are also looking for lift. If they are soaring without flapping, then there is a good chance they are in lift. Birds also like to feed on small insects. As thermals initiate from the ground, often they will suck up small insects into the air. Birds will often feed on these insects and indicate another sign that there is lift. If you see birds flying in circles, almost in a feeding frenzy, there is a chance that lift is in their proximity. Another idea that works well is to fly over areas that are darker. Often a freshly plowed field, a parking lot, dirt—anything with a dark color will generate more heat—could also be a good source of generating thermals. One little test you may like to do is to paint various colors on a sheet of paper and place it in the sun. After 30 minutes or so, go and check which colors have created the most heat. Once you know what colors make the most heat, look for natural areas on the ground that match these colors and use those as locations for thermal hunting. What to Do When You Find a Thermal The first thing one needs to be absolutely sure of is that a lift has truly been found. Often a sailplane may find what is called a stick thermal, meaning you may have been carrying some additional speed and the model will climb by pitching upward. One of the best signals when the model is truly in lift is it will slightly speed up and the nose of the aircraft will be down slightly. The model will feel more agile and responsive. Once lift is found, start circling in a moderate circle (50–75 foot radius). Then determine the size of the thermal. If the Radian drops on one side of the thermal and is more buoyant on the other as it circles, it has reached the boundary of the thermal. The parameters of most thermals are clearly marked by the downward flowing air. The center has fast rising air and the outside has downward rolling air (often called the edge of the thermal or the thermal wall). In the middle of the day when thermals are at their strongest, the thermal wall can be very distinct and violent, yet in the morning and late evening they are much softer. The objective is to make sure one is completely inside the thermal. This is called centering or coring the thermal. You will need to constantly make adjustments to keep in the center of the thermal. Maintain climb all the way around each 360-degree circle. Often, especially if it is a windy day, thermals will drift with the wind. Most will travel directly downwind. One thing to remember is your Radian will also drift with the wind, especially when circling, so once the core of the thermal is established, the Radian will naturally drift with the thermal. One mistake people make is they don’t allow their model to drift with the thermal, hence falling out of the front or side of the thermal as it drifts downwind. Slope and Alpine Lift Another form of soaring is slope lift. This lift is caused by wind rushing over a hill, cliff or any solid land mass that has more than 30 degrees of slope. As the air hits the hill or slope, it is redirected in an upward motion, thus creating lift. The best example of this is hang gliders that are soaring on the cliff faces. They maintain flight by soaring on the updrafts created by the sea breezes hitting the cliffs and creating what is known as slope lift. This sort of soaring is a lot of fun with your Radian, as you can always motor back to a safe landing if the lift falls away. The important thing to understand with slope-type lift is the wind must be almost directly blowing up the face of the hill or slope. Any more than a 20-degree variation may cause more turbulence than actual lift. Alpine soaring has been popular in Europe and is also becoming popular in the US. It is the extreme end of thermal soaring. As thermals develop deep on the valley floor, they rise up the mountainside reaching their climax at the top of the mountain. This is often marked by a strong breeze blowing at the top of the mountain, which is in fact a fully developed thermal. One of the benefits of the Radian is that it has power assistance. Even though it does have an electric motor that will allow quite a steep climb, the primary purpose of the motor is a launch device so if the lift does go away, the Radian can motor back to a safe landing point. We hope you enjoy your Radian and, more importantly, experience the art of thermal soaring. As this may be your first electric-powered sailplane, we hope this document has given you the basic ingredients to enhance your enjoyment with this wonderful product. We wish you all the best and happy thermal hunting. 6 Step 1 Charging the Flight Batteries We recommend that you choose either the ParkZone 1300mAh 3S Li-Po (PKZ1033) or the E-flite 1250mAh 3S Li-Po (EFLB12503S) to power your Radian PNP. You may also choose to use an 11.1V 1800-2100mAh Li-Po battery for increased flight time, however you may experience a slight decrease in performance due to the additional weight. The Li-Po battery must be charged with a charger that is specifically designed to Step 3 handle Li-Po batteries, such as the ParkZone 2- to 3-cell Li-Po Charger (PKZ1040) or the E-flite 1- to 5-cell Li-Po charger (EFLC505). Regardless of the battery you choose, always follow the charger and battery instructions in order to avoid any damage to the battery, charger, property or yourself. It is important to have a fully charged flight battery, as well as adequately charged transmitter batteries. These will be used in Step 5 to properly set up the control linkages. Attaching the Wing In order to attach the wing of your Radian, please follow these simple instructions: 3. Slide the wing tube and panel through the opening in the fuselage. Slide the wing panel into the fuselage, making sure it is fully seated. 1. Locate the wing tube, as well as the left and right wing panels. Step 2 Installing the Receiver The Radian PNP features a pre-molded receiver cavity located in front of the servos on the bottom of the fuselage. We recommend that you choose either the Spektrum AR500 5-channel sport receiver (SPMAR500) or the Spektrum AR6200 6-channel receiver (SPMAR6200). It is very important that you select a “full range” receiver for the Radian PNP. We do not recommend using a “park flyer” receiver such as the Spektrum AR6000, AR6100 or AR6300. Thermals can quickly take the Radian out of range when using park flyer receivers. Install the receiver into the allotted space within the fuselage and make sure it is secure. Carefully plug the servo leads into the corresponding channels of the receiver you have chosen. Confirm that the servo leads/plugs are in the correct channel of the receiver by: 1. Turning on the transmitter. 2. Installing a charged flight battery. 3. Plugging the flight battery into the ESC. 4. Checking all functions to ensure proper setup. 2. Slide the wing tube into the socket located in either the left or right wing panel. Confirm the wing tube is fully seated in the socket. 4. Slide the opposite wing panel onto the wing tube. Press the remaining wing panel into the fuselage until it is fully seated. The wing panels are keyed to “lock” when the wing is installed. Note: Use caution when inserting the wing tube into the sockets of the left and right wing panels. Pushing too hard will damage the wing panels. On 3-channel aircraft such as the Radian, it is common to plug the rudder servo into the aileron channel. Keep all body parts away from the propeller. You can also make any trim adjustments to the control surfaces at this time. Once you are satisfied that the channels are functioning correctly, you can unplug the flight battery and turn off the radio system. 7 8 Step 4 Attaching the Horizontal Stabilizer 1.Locate the horizontal stabilizer. 2.Slide the horizontal stabilizer through the slot between the fuselage and the rudder. Make sure the control horn installed in the elevator will properly align with the pushrod exiting the left side of the fuselage. 3.When you are certain the tail is centered correctly, use the tape provided to properly secure the horizontal stabilizer to the fuselage as shown. Use the tape on the top and bottom of each side of the tail (total of 4 applications). 4.Turn on the transmitter, confirming the throttle stick is in the full down/idle position. 5.Remove the canopy from the fuselage (attached with magnets). Plug the blue EC3 connector installed on the battery into the EC3 device connector installed on the speed control. 6.Install the pushrod through the hole in the keeper. Move the elevator to the neutral position and tighten the keeper. The pushrod keeper comes pre-installed in the outermost hole of the control horn. It is recommended to fly the Radian with the pushrods installed in the default positions until you become more comfortable with the controls. Step 5 Note: To make trim adjustments to the elevator or rudder: a. Turn on the transmitter. b. Plug the fully charged 11.1V 1300mAh battery into the ESC. Connecting the Rudder Pushrod 1. Loosen the pushrod keeper installed on the rudder control horn. The pushrod keeper comes preinstalled one hole in from the outermost of the control horn. c. Use the elevator or rudder trim of the transmitter by moving the trim up or down to set the tail at neutral when the gimbal is also at neutral. If these changes are not sufficient, center the transmitter elevator or rudder trims. Loosen the spool from the control horn and move the control surface back to neutral. Re-tighten the spool. Warning: Always keep hands and all objects away from the propeller in case the motor is engaged. A moving propeller can cause severe injury and damage. At this time, your Radian PNP is now complete. Once pre-flight control and range checks have been completed, the Radian is ready to fly. Step 6 ESC Instructions for EFLA1030 The E-flite 30A Pro Brushless ESC is a lightweight, high-quality, efficient sensorless brushless electronic speed control with an integrated switch-mode BEC. It can operate without the need for a separate receiver battery to power your servos and receivers, saving you weight and complication. It is capable of up to 30 amps continuous current when using 3- to 4-series LiPo battery packs. You can drive up to 5 analog or 4 digital sub-micro-sized servos with the BEC on any recommended input voltage. This ESC also features safe power arming along with advanced programmable features such as low voltage cutoff, braking, timing, throttle input range, and more, making this truly a ‘pro series’ speed control. The ESC installed in the Radian 9 2. Insert the rudder pushrod through the hole in the keeper. Move the rudder to the neutral position and tighten the keeper. has been preprogrammed for 3S low voltage cut-off. For detailed programming instructions, please refer to the E-flite 30A ESC instruction sheet included with the Radian. Note: ALWAYS assume the motor and the propeller are live. ALWAYS keep clear of the propeller at all times. The high rpm of the brushless motor can cause severe injury. Note: For E-flite 30A Pro Brushless speed controls included in ParkZone Ready-to-Fly and Plug-N-Play aircraft, the low voltage cut-off has been preprogrammed for 3-cell LiPo batteries. The brake feature found in the ESC has also been activated for use in sailplane applications. 10 Step 7 Flying the Radian Always choose a wide-open space for flying your ParkZone Radian. It is ideal for you to fly at a flying field operated by an AMA chartered club. If you are not flying at an AMA approved site, always avoid flying near houses, trees, wires and buildings. You should also be careful to avoid flying in areas where there are many people, such as busy parks or school yards. Always follow local ordinances. We recommend only flying your Radian in light winds. Note: The AMA does not sanction flying fields, they charter clubs who then operate their own flying fields according to AMA guidelines. Prior to each flight • Always make sure your Radian is properly trimmed. • Always make sure the receiver, ESC and battery are properly secured. • Always verify the propeller is on securely. • Always ensure the servo reversing switches on the transmitter are set correctly. • Always verify the dual rates switch is set at where you plan on flying. We recommend LOW rates for your initial flying. The Radian is very maneuverable on high rates and requires a lot of experience to handle properly. 11 Step 8 Center of Gravity Location The center of gravity on your Radian should be located approximately 2-1/2” (63mm) behind the leading edge of the wing, when measured against the fuselage. This CG location has been determined with the ParkZone 1300mAh 11.1V Li-Po battery installed. Note: The power system installed in the Radian is designed for climbing use in bursts (50% operating time or less). It is not intended to run full throttle for long periods of time. Not following this direction may result in reduced life of the power system. After flying, it is important to recharge the Li-Po battery pack included with the Radian. The Li-Po battery pack should always be stored at least 70% charged to prevent damage to the battery pack. Replacing the Propeller 1.Using a #0 screwdriver, remove the two screws installed in the front of the spinner. Remove the spinner cone and place it aside so it does not get lost. 2.Remove the pins installed in the prop blades. Set them aside with the spinner cone so they do not become lost. 3.Replace the prop blades and reinstall the pins. Make sure the pins are flush when installed, otherwise the spinner cone will not install. 4.Reinstall the spinner and confirm it is properly seated. Reinstall the screws in the front of the spinner. 12 Replacement Parts Make sure that you keep your Radian flying. Replacement parts are available at your local hobby retailer or from Horizon Hobby (www.horizonhobby.com). Please try your local hobby retailer first. By supporting them, they will be there when you need them. Item #: PKZ1017 PKZ1018 PKZ1033 PKZ1040 PKZ1060 PKZ4703 PKZ4713 PKZ4714 PKZ4716 PKZ4720 PKZ4722 PKZ4725 PKZ4767 EFLA1030 Option Parts Item #: EFLB12503S EFLC505 HBZ6513 THP1205P SPMP300 SPM9525 SPM9526 SPMAR500 SPMAR6200 SPM6600 Description: Propeller Blades: Radian Prop Adapter & Spinner Set: Radian 11.1V 1300mAH Li-Po Battery 2-3 DC Li-Po Balancing Charger SV80 3-Wire Sub-Micro Servo Decal Sheet: Radian Canopy: Radian Firewall w/Screws: Radian PKZ 480 Outrunner Brushless Motor: Radian Main Wing with Spar: Radian Pushrods with Clevis: Radian Tail Wing Set: Radian Bare Fuselage: Radian 30-Amp Pro SB Brushless ESC Description: 11.1V 1250mAh Li-Po Battery 1-5 Cell Li-Po Charger with Balancer Alligator Clip: 12V Adapter AC to 12VDC, 5.0A Power Supply: EFLC505 Spektrum Neck Strap Spektrum 1500mAh Ni-MH AA (4) Spektrum 150mA Wall Charger DSM2 5CH Sport Receiver DSM2 6CH Ultralite Receiver DX6i 6 Ch Full Range Tx without Servos Register your product and receive ParkZone updates at www.parkzone.com Warranty and Follow-Up Procedures Warranty Period: Exclusive Warranty- Horizon Hobby, Inc., (Horizon) warranties that the Products purchased (the “Product”) will be free from defects in materials and workmanship at the date of purchase by the Purchaser. Limited Warranty (a) This warranty is limited to the original Purchaser (“Purchaser”) and is not transferable. REPAIR OR REPLACEMENT AS PROVIDED UNDER THIS WARRANTY IS THE EXCLUSIVE REMEDY OF THE PURCHASER. This warranty covers only those Products purchased from an authorized Horizon dealer. Third party transactions are not covered by this warranty. Proof of purchase is required for warranty claims. Further, Horizon reserves the right to change or modify this warranty without notice and disclaims all other warranties, express or implied. (b) Limitations- HORIZON MAKES NO WARRANTY OR REPRESENTATION, EXPRESS OR IMPLIED, ABOUT NON-INFRINGEMENT, MERCHANTABILITY OR FITNESS FOR A PARTICULAR PURPOSE OF THE PRODUCT. THE PURCHASER ACKNOWLEDGES THAT THEY ALONE HAVE DETERMINED THAT THE PRODUCT WILL SUITABLY MEET THE REQUIREMENTS OF THE PURCHASER’S INTENDED USE. (c) Purchaser Remedy- Horizon’s sole obligation hereunder shall be that Horizon will, at its option, (i) repair or (ii) replace, any Product determined by Horizon to be defective. In the event of a defect, these are the Purchaser’s exclusive remedies. Horizon reserves the right to inspect any and all equipment involved in a warranty claim. Repair or replacement decisions are at the sole discretion of Horizon. This warranty does not cover cosmetic damage or damage due to acts of God, accident, misuse, abuse, negligence, commercial use, or modification of or to any part of the Product. This warranty does not cover damage due to improper installation, operation, maintenance, or attempted repair by anyone other than Horizon. Return of any goods by Purchaser must be approved in writing by Horizon before shipment. Damage Limits: HORIZON SHALL NOT BE LIABLE FOR SPECIAL, INDIRECT OR CONSEQUENTIAL DAMAGES, LOSS OF PROFITS OR PRODUCTION OR COMMERCIAL LOSS IN ANY WAY CONNECTED WITH THE PRODUCT, WHETHER SUCH CLAIM IS BASED IN CONTRACT, WARRANTY, NEGLIGENCE, OR STRICT LIABILITY. Further, in no event 13 shall the liability of Horizon exceed the individual price of the Product on which liability is asserted. As Horizon has no control over use, setup, final assembly, modification or misuse, no liability shall be assumed nor accepted for any resulting damage or injury. By the act of use, setup or assembly, the user accepts all resulting liability. If you as the Purchaser or user are not prepared to accept the liability associated with the use of this Product, you are advised to return this Product immediately in new and unused condition to the place of purchase. Law: These Terms are governed by Illinois law (without regard to conflict of law principals). Safety Precautions: This is a sophisticated hobby Product and not a toy. It must be operated with caution and common sense and requires some basic mechanical ability. Failure to operate this Product in a safe and responsible manner could result in injury or damage to the Product or other property. This Product is not intended for use by children without direct adult supervision. The Product manual contains instructions for safety, operation and maintenance. It is essential to read and follow all the instructions and warnings in the manual, prior to assembly, setup or use, in order to operate correctly and avoid damage or injury. Questions, Assistance, and Repairs: Your local hobby store and/or place of purchase cannot provide warranty support or repair. Once assembly, setup or use of the Product has been started, you must contact Horizon directly. This will enable Horizon to better answer your questions and service you in the event that you may need any assistance. For questions or assistance, please direct your email to [email protected], or call 877.504.0233 toll free to speak to a service technician. Inspection or Repairs If this Product needs to be inspected or repaired, please call for a Return Merchandise Authorization (RMA). Pack the Product securely using a shipping carton. Please note that original boxes may be included, but are not designed to withstand the rigors of shipping without additional protection. Ship via a carrier that provides tracking and insurance for lost or damaged parcels, as Horizon is not responsible for merchandise until it arrives and is accepted at our facility. A Service Repair 14 Request is available at www.horizonhobby.com on the “Support” tab. If you do not have internet access, please include a letter with your complete name, street address, email address and phone number where you can be reached during business days, your RMA number, a list of the included items, method of payment for any non-warranty expenses and a brief summary of the problem. Your original sales receipt must also be included for warranty consideration. Be sure your name, address, and RMA number are clearly written on the outside of the shipping carton. Warranty Inspection and Repairs To receive warranty service, you must include your original sales receipt verifying the proof-of-purchase date. Provided warranty conditions have been met, your Product will be repaired or replaced free of charge. Repair or replacement decisions are at the sole discretion of Horizon Hobby. Non-Warranty Repairs Should your repair not be covered by the warranty, the repair will be completed and payment will be required without notification or estimate of the expense unless the expense exceeds 50% of the retail purchase cost. By submitting the item for repair you are agreeing to payment of the repair without notification. Repair estimates are available upon request. You must include this request with your repair. Non-warranty repair estimates will be billed a minimum of ½ hour of labor. In addition you will be billed for return freight. Please advise us of your preferred method of payment. Horizon accepts money orders and cashiers checks, as well as Visa, MasterCard, American Express, and Discover cards. If you choose to pay by credit card, please include your credit card number and expiration date. Any repair left unpaid or unclaimed after 90 days will be considered abandoned and will be disposed of accordingly. Please note: non-warranty repair is only available on electronics and model engines. 15 United States: Electronics and engines requiring inspection or repair should be shipped to the following address: Horizon Service Center 4105 Fieldstone Road Champaign, Illinois 61822 ll other products requiring warranty inspection or repair A should be shipped to the following address: Horizon Support Team 4105 Fieldstone Road Champaign, Illinois 61822 Please call 877.504.0233 or e-mail us at [email protected] with any questions or concerns regarding this product or warranty. United Kingdom: Electronics and engines requiring inspection or repair should be shipped to the following address: Horizon Hobby UK Units 1-4 Ployters Rd Staple Tye Southern Way Harlow Essex CM18 7NS United Kingdom Please call +44 1279 641 097 or [email protected] with any questions or concerns regarding this product or warranty. Germany: Electronics and engines requiring inspection or repair should be shipped to the following address: Horizon Technischer Service Otto Hahn Str. 9a 25337 Elmshorn Germany Please call +49 4121 46199 66 or [email protected] with any questions or concerns regarding this product or warranty. 16