1
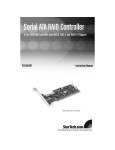
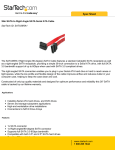
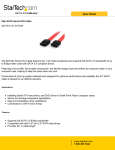
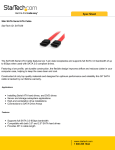
Slot Saver PCI Card
2 Port SATA, Single Channel ATA/133 Slot Saver PCI Card
PCISATA2A133
Instruction Manual
Actual product may vary from photo
FCC Compliance Statement
This equipment has been tested and found to comply with the limits for a Class B digital
device, pursuant to part 15 of the FCC Rules. These limits are designed to provide
reasonable protection against harmful interference in a residential installation. This
equipment generates, uses and can radiate radio frequency energy and, if not installed
and used in accordance with the instructions, may cause harmful interference to radio
communications. However, there is no guarantee that interference will not occur in a
particular installation. If this equipment does cause harmful interference to radio or
television reception, which can be determined by turning the equipment off and on, the
user is encouraged to try to correct the interference by one or more of the following
measures:
• Reorient or relocate the receiving antenna.
• Increase the separation between the equipment and receiver.
• Connect the equipment into an outlet on a circuit different from that to which the
receiver is connected.
• Consult the dealer or an experienced radio/TV technician for help.
Use of Trademarks, Registered Trademarks, and other
Protected Names and Symbols
This manual may make reference to trademarks, registered trademarks, and other
protected names and/or symbols of third-party companies not related in any way to
StarTech.com Where they occur these references are for illustrative purposes only and
do not represent an endorsement of a product or service by StarTech.com, or an
endorsement of the product(s) to which this manual applies by the third-party company in
question. Regardless of any direct acknowledgement elsewhere in the body of this
document, StarTech.com hereby acknowledges that all trademarks, registered
trademarks, service marks, and other protected names and/or symbols contained in this
manual and related documents are the property of their respective holders.
Instruction Manual
Table of Contents
Introduction . . . . . . . . . . . . . . . . . . . . . . . . . . . . . . . . . . . . . . . . . . . . . . . . . . . . .1
Before You Begin . . . . . . . . . . . . . . . . . . . . . . . . . . . . . . . . . . . . . . . . . . . . . . . . .1
System Requirements . . . . . . . . . . . . . . . . . . . . . . . . . . . . . . . . . . . . . . . . . . .1
Contents . . . . . . . . . . . . . . . . . . . . . . . . . . . . . . . . . . . . . . . . . . . . . . . . . . . . .1
Installation . . . . . . . . . . . . . . . . . . . . . . . . . . . . . . . . . . . . . . . . . . . . . . . . . . . . . .2
Installing the Card . . . . . . . . . . . . . . . . . . . . . . . . . . . . . . . . . . . . . . . . . . . . . .2
Installing the Drivers . . . . . . . . . . . . . . . . . . . . . . . . . . . . . . . . . . . . . . . . . . . .3
Verifying Your Installation . . . . . . . . . . . . . . . . . . . . . . . . . . . . . . . . . . . . . . . . .4
Specifications . . . . . . . . . . . . . . . . . . . . . . . . . . . . . . . . . . . . . . . . . . . . . . . . . . .5
Troubleshooting . . . . . . . . . . . . . . . . . . . . . . . . . . . . . . . . . . . . . . . . . . . . . . . . .5
Accessory Products from StarTech.com . . . . . . . . . . . . . . . . . . . . . . . . . . . . .6
Technical Support . . . . . . . . . . . . . . . . . . . . . . . . . . . . . . . . . . . . . . . . . . . . . . . .8
Warranty Information . . . . . . . . . . . . . . . . . . . . . . . . . . . . . . . . . . . . . . . . . . . . .8
i
Instruction Manual
Introduction
Thank you for purchasing a StarTech.com Slot Saver PCI card. This product allows you
to add 2 Serial ATA (SATA) and 3 FireWire 400 ports to your computer using a spacesaving single card design. Perfect for users looking to upgrade their computers to handle
demanding high-speed devices, this card offers easy Plug and Play installation and the
ability to connect peripherals using a variety of popular interfaces.
Features
• Connect two types of devices to your computer using a single PCI card: FireWire 400
and Serial ATA (SATA)
• Perfect for matching the speed of external FireWire devices with high-performance
SATA hard drives
• Backed by StarTech.com’s industry-leading lifetime warranty and technical support
Before You Begin
System Requirements
• One available PCI slot
• One of the following operating systems: Windows 98SE/ME/2000/XP
• A CD-ROM or other optical drive (for software installation)
WARNING! PCI cards, like all computer equipment, can be severely damaged by static
electricity. Be sure that you are properly grounded before opening your computer case or
touching your PCI card. StarTech.com recommends that you wear an anti-static strap
when installing any computer component. If an anti-static strap is unavailable, discharge
yourself of any static electricity build-up by touching a large grounded metal surface
(such as the computer case) for several seconds. Also be careful to handle the PCI card
by its edges and not the gold connectors.
Contents
This package should contain:
• 1 x PCI Slot Saver card
•
1 x Installation disk
•
1 x Supplemental power “Y” cable
•
1 x Low-profile replacement bracket (used only when installing in a low-profile slot)
•
1 x Instruction Manual
1
Instruction Manual
Installation
This section will guide you through the installation of your PCI Slot Saver card. Please
read through the instructions carefully and complete each step in the order listed. If you
are installing the card in a low profile slot, remove the standard size bracket and
replace it with the included low profile replacement bracket before completing
these instructions.
Installing the Card
1. Make sure that your system is unplugged and you are grounded.
2. Remove the cover of your system (see your computer’s user manual for details, if
necessary) and gently turn your computer onto its side.
PCI
Slots
3. Locate an empty PCI slot (usually white in color) and remove the metal plate that
covers the rear bracket. You may need a Phillips screwdriver to perform this step.
Retain this screw! You will need it to secure the card later.
4. Gently insert the PCI card into the empty slot, making sure it is firmly seated.
5. Secure the card in place using the screw you removed in Step 3.
LP4 Connector Male
(to power supply)
6. Connect the SP4 end of the supplemental power
“Y” cable (provided, pictured at right) to the 4-pin
white connector on the edge of the card. The SP4
connector is keyed so it cannot be installed
improperly.
SP4 Connector
(to card)
7. Connect the LP4 male connector on the “Y” cable
to an available power connector from the power
supply. If there is no power connector available, you
may remove one from an existing device (i.e. CD-ROM).
LP4 Connector Female
(to another device, optional)
8. If you removed a power connector from another device in the previous step, connect
the LP4 female connector on the “Y” cable to that device so both that device and the
card can be powered. Otherwise, that end of the cable can be left unplugged and will
be available to power future devices that you may add to your computer.
9. Put the computer case back on.
2
Instruction Manual
Installing the Drivers
Once you have connected your Slot Saver card, the next time you turn on your computer
Windows will automatically detect that you have installed new hardware. Insert the
installation disk in your floppy drive, and follow the instructions below to install the
required software drivers. Note that you may need a Windows OEM CD to complete the
installation of some of the card components, depending on your Windows installation.
This may not be the same as a “Recovery CD” that is included by some manufacturers.
Contact your computer manufacturer if you need an original Windows installation CD.
Windows 98SE/ME
1. On startup, Windows will detect that new hardware has been installed (PCI standard
PCI-to-PCI bridge) and launch the Add New Hardware Wizard. Click Next and
choose the Search for the best driver for your device (Recommended) option.
Click Next.
2. Uncheck all boxes on this screen and click Next.
3. The Wizard will inform you that “Windows is now ready to install the best driver for
this device...” Click Next.. The Wizard will complete the installation. Click Finish.
4. Windows will detect PCI Mass Storage Controller and launch the Add New
Hardware Wizard. Click Next and choose the Search for the best driver for your
device (Recommended) option. Click Next.
5. On the next screen select only Specify a location. Choose Browse.
6. In the file selection box, double click 31/2 Floppy (A:). Click OK.
7. The file location box under Specify a location will now contain the path to the files.
Click Next.
8. The Wizard will inform you that “Windows is now ready to install the best driver for
this device...” Click Next. The Wizard will complete the installation. Click
Finish.
9. Windows will detect that additional new hardware has been installed (NEC
Firewarden OHCI Compliant IEEE 1394 Host Controller) and launch the Add New
Hardware Wizard. Click Next.
10. Choose the Search for the best driver for your device (Recommended) option.
Click Next.
11. Uncheck all boxes on this screen and click Next.
12. Windows will find more than one possible driver for the device. Under “What do you
want to install?” choose The Updated Driver (Recommended) and click Next.
13. The Wizard will inform you that “Windows is now ready to install the best driver for
this device...” Click Next.. If prompted, insert the Windows installation CD
in your CD-ROM or other optical drive The Wizard will complete the installation.
Click Finish.
14. Windows will detect all remaining new hardware and install the drivers without
intervention.
3
Instruction Manual
Windows 2000/XP
Windows 2000/XP includes native support for FireWire and will install the drivers
automatically. Ensure that you have the most current Microsoft Service Pack installed.
When Windows installs these drivers, you may receive a warning that the files have not
been digitally signed. If this occurs, always choose Yes (Windows 2000) or Continue
Anyway (Windows XP) option to complete the installation process. Windows will require
drivers for the Serial ATA controller contained on the card. Complete the following steps
to install the drivers:
1. Windows will launch the Add New Hardware Wizard. Click Next.
2. Choose the Search for a suitable driver... option and click Next.
3. Check only the Floppy disk drives option. Ensure the installation disk is inserted in
the floppy drive. Click Next..
4. Windows will display a message stating that “Windows has found a driver for this
device”. Click Next. Choose Yes or Continue Anyway if you are warned that the
driver file has not been digitally signed.
5. WIndows will display a message that states “Windows has finished installing software
for this device”. Click Finish.
6. Windows will continue to detect and install any remaining new devices. If the Add
New Hardware Wizard is launched again, repeat steps 1 through 5 from above.
Verifying Your Installation
Windows 98SE/ME
1. Go to Start > Settings > Control Panel.
2. Double click System.
3. Click the Hardware tab.
4. If the card does not appear with a red x or yellow exclamation point (!) next to it,
Windows has not detected a problem with the installation and the card should
function normally.
Windows 2000/XP
1. Go to Start > Settings > Control Panel.
2. Double click System.
3. Click the Hardware tab and choose Device Manager.
4. If the card does not appear with a red x or yellow exclamation point (!) next to it,
Windows has not detected a problem with the installation and the card should
function normally.
4
Instruction Manual
Specifications
Form Factor/Interface
PCI 32-bit, ver. 2.2 compliant, 33/66 MHz
Full-sized card
Standards Supported
Serial ATA 1.0
FireWire 400 (IEEE 1394A)
Additional SATA Features
Watch Dog Timer, SATA to PCI interrupt masking, Spread
Spectrum in receiver
Maximum Data Transfer Rates
150 MBytes/sec. (Serial ATA)
400 Mbits/sec. (FireWire)
Number of Ports (by interface type)
SATA: 2 (internal)
FireWire: 3 (2 x 6-pin female, 1 x 4-pin female “i.Link”)
OS Support
Windows 98SE/ME/2000/XP/2003
Fully Plug and Play compliant
Regulatory and Other Certifications
FCC Class B, CE, UL
Troubleshooting
Q: Frames are dropped when I capture from and export to my DV camcorder.
A: Please make sure that DMA (Direct Memory Access) is enabled if you are using IDE
hard disks. DMA access is automatically enabled by default in Windows 2000 and XP.
For Windows 98SE and ME, follow these steps:
1. Right click My Computer and choose Properties from the menu. Click the Hardware
tab.
2. Click the plus (+) sign next to Disk Drives. Highlight your hard disk from the list, right
click it, and choose Properties.
3. Click the Settings tab and check the DMA box. Click OK and restart the computer
when prompted. If needed, repeat these steps for each installed hard disk.
Q: I am having problems with video quality (dropped frames, poor or no audio, signal
noise, etc.) when capturing video from a digital video source over my FireWire card.
How can I correct this?
A: Most problems associated with digital video capture can be minimized or eliminated
by changing the configuration of the video capture software you are using. The default
settings often need to be adjusted to reflect the capabilities of the computer and digital
video source you are using. If you are using the Video Studio software included with
your FireWire card, go to www.ulead.com for detailed support information for your
software, including video quality problems and recommended configuration changes. For
other video capture software visit the manufacturer’s Web site for product support.
Accessory Products from StarTech.com
5
Instruction Manual
Contact your local StarTech.com dealer or visit www.startech.com for cables or other
accessories that will help you get the best performance out of your new product.
6 ft. IEEE-1394 FireWire Cable 4-6 pin M/M
1394_46_6
10 ft. IEEE-1394 Firewire Cable 4-6 pin M/M
1394_46_10
15 ft. IEEE-1394 Firewire Cable 4-6 pin M/M
1394_46_15
6 ft. IEEE-1394 FireWire Cable 6-pin to 6-pin
1394_6
10 ft. IEEE-1394 Firewire Cable 6-6 pin M/M
1394_10
15 ft. IEEE-1394 Firewire Cable 6-6 pin M/M
1394_15
IEEE-1394 Firewire 4-6 pin Adapter M/F
FIRE46MF
Mutant Mods 6 ft. Blue - Green Lava Lamp LED IEEE-1394 FireWire Cable, 6-6 pin
1394_6FLBG
Mutant Mods 6 ft. Red - Yellow Lava Lamp LED IEEE-1394 FireWire Cable, 6-6 pin
1394_6FLRY
Mutant Mods 6 ft. Blue LED IEEE-1394 FireWire Cable, 6-6 pin
1394_6LEDBL
Mutant Mods 6 ft. Red LED IEEE-1394 FireWire Cable, 6-6 pin
1394_6LEDRD
18 in. Serial ATA Data Cable with LP4 Adapter
SATA18POW
18 in. Right Angle Serial ATA Cable (1 end)
SATA18RA1
24 in. Serial ATA Drive Connection Cable
SATA24
24 in. Right Angle Serial ATA Cable (1 end)
SATA24RA1
Serial ATA to ATA/133 Adapter M/F
SATA2ATA133
36 in. Serial ATA Drive Connection Cable
SATA36
36 in. Right Angle Serial ATA Cable (1 end)
6
Instruction Manual
SATA36RA1
24 in. RIght Angle Serial ATA Cable (both ends)
SATARA24
36 in. Right Angle Serial ATA Cable (both ends)
SATARA36
7
Instruction Manual
Technical Support
The following technical resources are available for this StarTech.com product:
On-line help:
We are constantly adding new information to the Tech Support section of our web site. To
access this page, click the Tech Support link on our homepage, www.startech.com. In
the tech support section there are a number of options that can provide assistance with
this product.
Knowledge Base - This tool allows you to search for answers to common issues using
key words that describe the product and your issue.
FAQ - This tool provides quick answers to the top questions asked by our customers.
Downloads - This selection takes you to our driver download page where you can
find the latest drivers for this product.
Call StarTech.com tech support for help:
USA/Canada: 1-800-265-1844
UK/Ireland/Europe: 00-800-7827-8324
Support hours: Monday to Friday 8:30AM to 6:00PM EST (except holidays)
W arranty Information
This product is backed by a lifetime warranty. In addition, StarTech.com warrants its
products against defects in materials and workmanship for the periods noted, following
the initial date of purchase. During this period, the products may be returned for repair, or
replacement with equivalent products at our discretion. The warranty covers parts and
labor costs only. StarTech.com does not warrant its products from defects or damages
arising from misuse, abuse, alteration, or normal wear and tear.
Limitation of Liability
In no event shall the liability of StarTech.com Ltd. and StarTech.com USA LLP (or their
officers, directors, employees or agents) for any damages (whether direct or indirect,
special, punitive, incidental, consequential, or otherwise), loss of profits, loss of business,
or any pecuniary loss, arising out of or related to the use of the product exceed the
actual price paid for the product.
Some states do not allow the exclusion or limitation of incidental or consequential
damages. If such laws apply, the limitations or exclusions contained in this statement
may not apply to you.
8
Revised: 22 September 2004 (Rev. B)