1
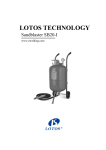
LOTOS TECHNOLOGY Sandblaster SB5 www.uwelding.com TABLE OF CONTENTS SPECIFICATIONS…………………………………………………………….………….3 SAFETY RULES…………………………………………………………………………….3 Air/Abrasive Supply Requirements…………………………………………………………...4 ASSEMBLY……………………………………………………………………………………..5 OPERATION…………………………………………………………………………………....6 Abrasive Selection……………………………………………………………………………6 Loading Abrasive………………………………………………………………………….....6 To Start Abrasive Blasting……………………………………………………………………6 Abrasive Flow Adjustment…………………………………………………………………...7 To Stop Blasting…………………………….………………………………………………...7 To Release Pressure from the Tank…...…...……………………………………….………...7 Nozzle and Rubber Nozzle Seal Replacement……….…...………………………………...7 MAINTENANCE………………………………………………………...……………………8 HEALTH CONSIDERATIONS…………………………………………...……………………8 TROUBLESHOOTING……………………………………………………………….…..9 PARTS LIST AND DIAGRAM ………………………...………………..……………............10 1 WARNING Airborne Dust This is one of the most serious hazards associated with blasting operations. When evaluating this hazard, it is important to consider the concentration of dust and the size of particles. Larger particles, considered ″nuisance″ dust, are normally filtered out in the nose and throat. Smaller particles (10 microns or smaller) can bypass the lung’s filtering system and penetrate deep into the respiratory system, where they may cause serious damage. Safeguards are needed when smaller particles are present in the working environment. Some dust created by abrasive blasting, grinding, and other construction activities contains chemicals known to the State of California to cause cancer, birth defects or other reproductive harm. Your risk from exposure varies, depending on how often you do this work. To reduce your exposure to these chemicals: work in a well-ventilated area, and with approved safety equipment, such as dust masks that are specifically designed to filter out microscopic particles. Metal Dust In addition to the abrasive being used, contributes to the generation of airborne dust. Metals such as lead, cadmium, and manganese, can be extremely toxic when inhaled. Many existing paints are lead-based. Regulations require special handling, trained personnel, and medical monitoring when lead is present. If in doubt, please make sure to double check. Silica Sand This product is a potentially serious health hazard and should NOT be used as an abrasive. If silica containing (quartz) materials are selected for any reason, workers must wear a positive pressure or pressure demand respirator with an assigned protection factor (APF) of either 1000 or 2000. Silica must be contained and disposed of properly. Even if a wet blasting method is selected, silica that is allowed to migrate by either wind or water, will eventually become an airborne contaminant. Air Supply Air-supplied respirators must be used at all times (1) when working inside of blast cleaning rooms, (2) when using portable units in areas without enclosure, and (3) under any circumstances where the operator is not physically separated from the abrasive material by an exhausted enclosure. If airline respirators and compressors are used, make sure the intake hose is placed in an area that provides clean air. An attendant should be in the area at all times, monitoring breathing air and assuring the blaster’s safety. When using pneumatic equipment, basic safety precautions should always be followed to reduce the risk of personal injury and hazards due to over-pressurization. Additional Personal Protective Equipment Blasting operations create high noise levels, so hearing protection is a must-for both the operator and nearby workers! Operators should also wear heavy canvas or leather gloves, aprons, or leggings when appropriate, as well as safety shoes. 2 Always wear eye protection that complies with a recognized standard (CSA or ANSI) when operating or performing maintenance on this tool. User and bystanders. Handling and Storing Abrasive Dust is nearly always created at any point where abrasives are transferred, whether by hand or shovel. Therefore, all points of transfer must be properly exhausted and workers who handle abrasive manually should wear particulate filter respirators. SPECIFICATIONS Model: Tank Volume: Working Pressure Air Consumption: Hose Length: Overall Dimensions: Weight: SB5 5 Gallon 60-125 PSI 6-25CFM 10 Feet L:18.99″x W:11.42″ x H:32.68″ 27lbs SAFETY RULES 1. Keep work area clean. Cluttered areas may cause injuries. 2. Observe work area conditions. Do not use unit in damp, wet or poorly lit locations. Do not expose to rain. Keep work area well-lit. Do not use electrically powered air compressors in the presence of flammable gases or liquids. 3. Keep children away. Children must never be allowed in the work area. Do not let them handle tools, hoses or extension cords. No one, including both users and ystanders, should be in close proximity of the sandblasting area without the proper protective equipment. 4. Do not use inappropriate attachments in an attempt to exceed the unit’s capacities. 5. Dress properly. Do not wear loose clothing or jewelry as they can be caught in the moving parts. Non-skid footwear is recommended. Always wear a hood (included), a dust mask and heavy-duty canvas gloves. 6. Use eye and ear protection. Always wear ANSI approved chemical splash goggles when working with chemical. Wear and ANSI approved dust mask or respirator when working around metal, wood and chemical dusts and mists. 7. Do not force tool. Use correct tools for your application. 8. Do not overreach. Keep proper footing and balance at all times. Do not reach over or across running machines. 9. Keep machine clean for better and safer performance. Follow the instructions for lubricating and changing accessories. Inspect compressors cord periodically and if damaged have it repaired by a qualified technician. Inspect all hoses for leak prior to use. 3 The handle must be kept clean, dry and free from oil and grease at all times. 10. Be sure that keys and adjusting wrenches are removed from the unit or work surface before using. 11. Make sure the air pressure adjustment is set at ″0 PSI″ and the sandblasting gun is in the off position when not in use and before attaching the air compressor. 12. Do not operate the unit when tired or under the influence of alcohol or drugs. 13. Check for alignment and binding of moving parts, any broken parts or mounting fixtures and any other conditions that may affect proper operation before use. Do not use the unit if any switch does not turn on or off properly. 14. When servicing, only use parts and accessories intended for use with this unit. 15. Drain water trapped in the air pressure gauge periodically. 16. Do not allow pressure blaster to be pressurized while unattended or not in use. 17. Make sure all equipment is rated to the appropriate capacity. Make sure that regulator is set no higher than 125PSI. 18. Periodically check the abrasive medium delivery equipment. Valves, hoses and nozzles that carry the abrasive medium after it leaves the pressure tank are subject to the abrasive blasting action and will wear out more quickly than other components. 19. Release the air pressure in the tank before opening. Open the sandblasting gun to release pressure. Make sure pressure gauge reads ″0 PSI″ before opening the tank. Do not attempt any repairs to the pressure blaster until the gauge reads ″0 PSI″. 20. Maintain correct air pressure when working. Do not allow pressure to exceed 125 PSI. If the safety valve does not release excess air pressure, stop all work and open the sandblasting gun to release pressure in the tank. WARNING The warnings and cautions discussed in this instruction manual cannot cover all possible conditions and situations that may occur. It must be understood by the operator that common sense and caution are factors that cannot be built into this product but must be supplied by the operator. AIR/ABRASIVE SUPPLY REQUIREMENTS Hose ID Hose Length Nozzle ID Compressor HP CFM@125 PSI Abrasive Use Per Hour 3/8" 50ft 0.076" 2 6 30lbs 3/8" 25ft 0.098" 4 12 80lbs 1/2" 50ft 0.118" 7 20 120lbs 1/2" 25ft 0.132" 10 25 150lbs Air pressure in the range of 65-125PSI is recommended and will provide the best results 4 ASSEMBLY 1. Attach two wheels (#16) to the axle (#25) using two of the cotter pins for each.(#14) 2. Slide the handle bar (#6) onto the left leg (#7) and the right leg (#17) and secure it with two self-tapping locks. 3. Loosen the hose clamp (#23) on the end of the abrasive hose, slide the hose along the hose clamps (#24) onto the nipple and tighten the hose clamps very securely, which have to resist the force of 65 to 125PSI. 5 OPERATION WARNING Always wear a hood, a dust mask and heavy-duty canvas gloves when operating. Abrasive Selection The kind of abrasive you choose will greatly influence the amount of time needed to clean a given surface area. Abrasive materials include silicon carbide, alumina and many others. Be sure that the abrasive you use is thoroughly dry. Damp abrasive can cause clogging of your pressure blaster. While you may reuse abrasive, remember that the abrasive does wear out. After using, abrasive will become smoother and rounder, thus reducing abrasive’s effectiveness. Reusing abrasive may also cause clogging due to debris contained in the mixture from prior use. Loading Abrasives 1. Disconnect air supply hose from abrasive blaster. 2. Watch the pressure gauge and make sure it reads the zero position. 3. Close the abrasive control valve. 4. Remove the filler cap. 5. Insert the funnel, and pour about 25lbs of abrasive into the tank. Then close the filler cap securely, assuring that the O-ring is in place. WARNING Before opening the tank, be sure that the tank is not pressurized and the pressure gauge reads “0”. To Start Abrasive Blasting Note: Start with all valves in the closed position. 1. With the air compressor off, attach the connector to an air supply hose coming from the air compressor. Tighten securely with a hose clamp. Switch on power to start up the air compressor. 2. Check for leaks at the tank filler cap and along all hoses and fittings as pressurization begins. If leaks are observed release the pressure from the tank and repair them immediately. 3. Point sandblasting gun to a safe direction away from people, pets or anything around you that may be damaged by abrasive spray. 4. Press and hold sandblasting gun until air is flowing though the trigger. 5. While pressing and holding the sandblasting gun, slowly open the abrasive control valve until abrasive material begins to flow out of the sandblasting gun. 6. Adjust the abrasive valve to an appropriate position (about 45°) when desired amount of abrasive material is flowing through the trigger nozzle. 6 7. Begin blasting. Abrasive Flow Adjustment Choose a larger nozzle for a broader spray pattern. Choose a smaller nozzle for more focused abrasive blasting. Adjust abrasive flow with abrasive control valve. Watch for abrasive clogging. Depressurize if necessary and replace the abrasive with drier or cleaner abrasive. To Stop Blasting 1. While continuing to press and hold the sandblasting gun, turn the abrasive control valve to the closed position. 2. When noticing only air is coming out of the sandblasting gun, stop the air flow by releasing the gun. To Release Pressure from the Tank 1. When finished blasting, point sandblasting gun in a safe direction away from people, pets or anything around you that may be damaged by direct or indirect abrasive spray. 2. Switch off power to shut down air compressor. 3. Turn the abrasive control valve to the closed position while pressing and holding the sandblasting gun to expel remaining abrasive material from the abrasive hose. 4. Release pressure on the safety valve. 5. Disconnect air supply hose from abrasive blaster. Nozzle and Rubber Nozzle Seal Replacement 1. Disconnected air supply to sandblasting gun. 2. While holding the sandblasting gun against spring pressure in the open position, unthread the knurled nozzle retaining collar of the sandblasting gun and remove the retaining collar, nozzle and rubber seal. 3. Insert replacement nozzle into the retaining collar followed by the rubber seal, then thread the knurled nozzle retaining collar of the sandblasting gun onto the sandblasting gun and tighten securely. 7 MAINTENANCE 1. Keep your pressure blaster clean and protect from damage. 2. Depressurize after using. 3. When initially pressurizing, check for leaks at the top of the tank and at all hoses and fittings. Leaking joints may be repaired by replacing worn or damaged Teflon tape at joints. 4. Check for worn abrasive hose and fittings. The abrasive control valve, manifold and all parts after the abrasive is ejected from the tank are subject to rapid wear, due to the flow of abrasive. Watch especially for leaks, blistering bulging or thinness of the hose. Replace any parts which appear worn Caution 1. Pay particular attention to the abrasive hose, nozzle sandblasting gun as they will wear out much more quickly than others pieces. 2. The abrasive hose needs replacing when its side walls develop leaks or show blisters in the surface. Do not use if any of these problem are present. For warranty, service, and repair please go to www.uwelding.com HEALTH CONSIDERATIONS Protect yourself and those around you from ″overspray″. Remember that your portable abrasive blaster is shooting a powerful spray of abrasive material. Do not point it at yourself or anyone around you. Wear a filter or mask over your mouth when using this unit. You will create a cloud of abrasive material and debris which is dangerous to inhale. Remove, cover, or protect anything around you that might be damaged from direct or indirect contact with the abrasive spray or particles. Anything subject to contamination damage (computers, electronics, etc.) or anything with a fine surface (automobiles, furniture, etc.) should NOT be near your pressure blaster. 8 TROUBLE SHOOTING PROBLEMS (SYMPTOMS) PROBLEM CAUSE RECOMMENDED ACTION Air pressure too low Too much media u Abrasive control valve open too far Air pressure too low u See ″Lack of Air Pressure″ Adjust abrasive control valve Close slightly u Check pressure gauge u u Debris in media Media size too large Nozzle plugs Purge & Screen Use smaller grit size Use large nozzle or Adjust abrasive control valve Dry media, drain water from air Surging of Blast Flow u Excessive Media Consumption u u u u u Clogging and Plugging of Blast Flow u u Wet media u Moisture in Abrasive Media u u u Wet media Water in air Water in tank u Moderate humidity u u u u u u u Humid Weather u High humidity u u Compressor too small Nozzle size too large Too many leaks in air lines Holes in abrasive hose Air filter on compressor plugged u Compressor too small Supply valves not on full position Nozzle size too large Leaks in air lines Holes in air lines Air filter on compressor plugged Urethane gasket worn or dirty Blaster tank empty Moisture in media Not enough air pressure Abrasive hose kinked Debris in media u u Overtaxed Compressor u u u u u u Lack of Air Pressure u u u u u Lack of Abrasive Flow u u u u 9 u u u u u Change or use dry media Drain water from air lines Empty, dry out and refill Keep media dry as possible Use drier or moisture separator Avoid that period of use if possible Restrict time used Use smaller size Seal & tighten air lines Replace hose Clean filter Use larger compressor Open vales u Use smaller size nozzle Seal & tighten air lines Replace hose Clean filter u Clean or replace gasket u Fill tank Dry media Check system Straighten Clean or screen media u u u u u u u DIAGRAM 10 PARTS LIST ORDRING PART# 01 02 03 04 05 06 07 08 09 10 11 12 13 14 15 16 17 18 19 20 21 22 23 24 25 26 27 28 29 30 31 32 PART DESCRIPTION HOOD SCREW O-RING TANK FILLER CAP SAFETY VALVE HANDLE BAR LEFT LEG CONNECTOR AIR PRESSURE GAUGE JOINT PIPE NIPPLE CONNECTOR INTAKE MANIFOLD ELBOW CONNECTOR COTTER PIN TANK WHEEL RIGHT LEG LEG END CAP FUNNEL AIR HOSE ABRASIVE HOSE HOSE CLAMP HOSE ADAPTOR SANDBLASTING GUN AXLE ABRASIVE CONTROL VALVE SELF-TAPPING LOCK NOZZLE, 2.0mm NOZZLE, 2.5mm NOZZLE, 3.0mm NOZZLE, 3.5mm RUBBER NOZZLE SEAL 11