1
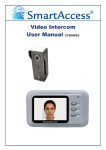
Video Intercom User Manual C10SAVK2 C10SAVK3 System Overview C10SAVK2: Contents: 1 x C10SAVEP2 outdoor station, 1 x C10SAVM2 hands free video monitor, 1 x power supply. Additional components may be purchased as follows: Hands free video monitor - C10SAVM2 (max. 4 per system) Entrance panel - C10SAVEP2 (max. 2 per system) Door Monitoring CCD camera Door Release Speaker Answer Call Microphone Call button Microphone Colour Brightness Call Volume C10SAVK3: Contents: 1 x C10SAVEP2 outdoor station, 1 x C10SAVM3 hands free video monitor, 1 x power supply. Additional components may be purchased as follows: Hands free video monitor - C10SAVM3 (max. 4 per system) Entrance panel - C10SAVEP2 (max. 2 per system) CCD camera Speaker Call button Microphone Answer call Door release Ringer volume Call Volume Colour Brightness Call transfer / internal call Door monitoring 2 System Configuration Notes The system should be wired using standard 4 core alarm cable CAT5 cable is not recommended The system supports up to a maximum of two door stations The system supports up to a maximum of 4 hands free video monitors A DC14.5V transformer is required for every hands free video monitor on the system The maximum distance from the door station to the last monitor is 70 meters Wire in series as above 3 Outdoor Station Mounting Instructions 1. Remove the door station from its rain shield by removing the screw at the base of the unit. 2. Mark and drill 2 holes to mount the rain shield. 3. Insert the rawl plugs supplied and mount the rain shield using the screws supplied. 4. Attach the door station to its rain shield and secure using the screw at the base of the unit. 4 Sample Wiring Diagram One entrance panel - two monitors DC14.5V Transformer DC14.5V Transformer 5 Sample Wiring Diagram Two entrance panels - one monitor DC14.5V Transformer 6 Operating Instructions 1. Call - Visitor pushes call button 2. All video monitors ring and display the live camera image 3. Answer - To speak to the visitor, press this button 4. Door release - Press this button to release the door 5. Monitoring - When the system is in standby, press this button to view door 1. Press again to view door 2 (if connected). Pressing this button will toggle between door 1, door 2 and monitor standby. Note: audio is not activated. 7 Specifications C10SAVEP2 Outdoor Station Camera: Lens: Dimensions: Back Light: Power Supply: Operating Temperature: Weather Resistance: Door Release: Colour 1/3” CCD 3.6mm 135 x 58.5 x 40mm 4 LEDs Power from monitor -20°C to 70°C IP45 Dry Contact N/O going N/C Duration 3 seconds C10SAVM2 Hands Free Video Monitor Monitor: Resolution: Dimensions: Power Supply: Power Consumption: Operating Temperature: 4” TFT LCD colour 960 x 234 190 x 113 x 43 14.5V DC (PSU included) Standby 70mA Online 700mA 0°C to 70°C C10SAVM3 Hands Free Video Monitor Monitor: Resolution: Dimensions: Power Supply: Power Consumption: Operating Temperature: 8 7” TFT LCD colour 480 x 234 241 x 161 x 23 14.5V DC (PSU included) Standby 90mA Online 600mA 0°C to 70°C