1
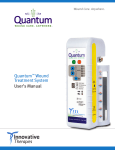
Svedman® Wound Treatment System
User Manual
This SVEDMAN® Wound Treatment System User’s Manual is not a guarantee or
warranty. It is intended only as an operational guide. For additional information and
questions, please contact Innovative Therapies, Inc.’s (ITI) Customer Service department
at 1-866-ITI-NPWT (484-6798).
In order for the SVEDMAN® Wound Treatment System to provide safe, reliable, and
proper performance, the following conditions must be met. Failure to comply with these
conditions will void all pertinent warranties.
All assembly, operation, adjustment, modification, maintenance, and/or repair
must be carried out only by qualified personnel authorized by ITI.
The electrical installation of the room in which the device will be used must
comply with applicable wiring standards and electrical codes.
The product must be used in accordance with this manual and all associated
labeling and the Instructions for Use.
Notice to Users:
CAUTION: Federal law restricts this device to sale by or on the order of a
physician.
As with any prescription medical device, failure to follow product instructions or
changing settings and performing therapy applications without the express direction
and/or supervision of a trained clinical caregiver may lead to improper product
performance and the potential for serious or fatal injury.
Rev I 7/09
SVEDMAN® System User’s Manual
i
TABLE OF CONTENTS
INTRODUCTION _____________________________________________________ 1-1
Indications_______________________________________________________________ 1-1
Contraindications _________________________________________________________ 1-1
Precautions ______________________________________________________________ 1-1
Additional Precautions ____________________________________________________ 1-1
Safety Tips ______________________________________________________________ 1-2
Features _________________________________________________________________ 1-4
CARE & CLEANING __________________________________________________ 2-1
Introduction _____________________________________________________________ 2-1
Protective Equipment _____________________________________________________ 2-1
Disposal _________________________________________________________________ 2-1
Daily Care and Cleaning ___________________________________________________ 2-2
Weekly Care and Cleaning _________________________________________________ 2-2
PATIENT CARE ______________________________________________________ 3-1
Applying the Dressing _____________________________________________________ 3-1
Canister Installation ______________________________________________________ 3-3
Canister Removal _________________________________________________________ 3-4
Dressing Removal _________________________________________________________ 3-4
Disposal of Dressings and Canister __________________________________________ 3-5
OPERATING INSTRUCTIONS __________________________________________ 4-1
Power ON/OFF ___________________________________________________________ 4-1
Power-Up Procedure ______________________________________________________ 4-1
Therapy Setting Adjustment ________________________________________________ 4-2
Battery Operation ________________________________________________________ 4-3
Alarm Operation _________________________________________________________ 4-5
Therapy Selection Lock/Unlock _____________________________________________ 4-6
SPECIFICATIONS ____________________________________________________ 5-1
Symbols _________________________________________________________________ 5-2
REPLACEMENT PARTS _______________________________________________ 6-1
QUESTIONS & INFORMATION ________________________________________ 7-1
Rev I 7/09
SVEDMAN® System User’s Manual
ii
INTRODUCTION
INDICATIONS
The SVEDMAN® Wound Treatment System is indicated for patients who would benefit
from vacuum assisted drainage with delivery of topical wound treatment solutions and
suspensions over the wound bed.
Types of wounds for which the SVEDMAN® Wound Treatment System has been
indicated include chronic, acute, traumatic, subacute, and dehisced wounds,
diabetic ulcers, pressure ulcers, flaps and grafts.
CONTRAINDICATIONS
The SVEDMAN® Wound Treatment System is contraindicated for patients with
malignancy in the wound, untreated osteomyelitis, non-enteric and unexplored fistulas, or
necrotic tissue with eschar present. Do not place the Svamp® Dressing over exposed
blood vessels or organs. The Svamp® Dressings are also contraindicated for hydrogen
peroxide and solutions which are alcohol based or contain alcohol. It is not recommended
to deliver fluids to the thoracic cavity.
PRECAUTIONS
Precautions should be taken for patients with active bleeding, difficult wound hemostasis,
or who are on anticoagulants. When placing the Svamp® Dressing in close proximity to
blood vessels or organs, take care to ensure that they are adequately protected with
overlying fascia, tissue or other protective barriers. Exposed tendon, nerves or blood
vessels should be protected by moving available muscle or fascia over them or by a layer
of synthetic material. Greater care should be taken with respect to weakened, irradiated
or sutured blood vessels or organs. Bone fragments or sharp edges could puncture a
dressing barrier, vessel or organ. Wounds with enteric fistula require special precautions
in order to optimize therapy.
ADDITIONAL PRECAUTIONS
• Defibrillation: Remove the Svamp® Dressing if defibrillation is required in the area
of dressing placement. Failure to remove the dressing may inhibit electrical current
transmission and/or patient resuscitation.
• Magnetic Resonance Imaging (MRI): The SVEDMAN® Wound Treatment Unit is
not MRI-compatible. Do not take into the MRI area.
• Large Canisters: Use of Large Canisters (>500ml) may increase serious risks
associated with excessive fluid loss. Monitor patient status continually. DO NOT
USE for infants or other patients with low fluid volume, nor for patients at high risk
of major hemorrhage.
• The SVEDMAN® Wound Treatment System is intended for use with saline solutions
in a physiologic pH range that can optionally include topical wound treatment
solutions.
Rev I 7/09
SVEDMAN® System User’s Manual
1-1
Introduction
•
•
•
•
•
Various topical agents, such as hydrogen peroxide, are not intended for extended
tissue contact. If in doubt about the appropriateness of using a solution with the
SVEDMAN® Wound Treatment System, contact the solution’s manufacturer.
Do not apply solutions in conflict with the manufacturer’s instructions for use.
During irrigation therapy, the Svamp® Dressing is a closed system and is NOT
vented to atmosphere.
Do not use where temperature of fluid could cause an adverse reaction, such as a
change in patient’s core body temperature.
During irrigation therapy, the IV bag should be checked periodically to ensure proper
fluid delivery. In addition, when a canister fills with fluid, it should be replaced
immediately as irrigation fluid and wound exudate will not be removed from the
dressing once the canister is full.
SAFETY TIPS
KEEP THERAPY ON
The SVEDMAN® Wound Treatment System should be operated at least 22 hours out of
every 24 hour period. Remove the Svamp® Dressing if irrigation therapy is terminated
or is off for more than 2 hours in a 24 hour period.
DRESSING CHANGES
Clean the wound per physician order prior to dressing application. Routine dressing
changes should occur every 48 to 72 hours. Dressing changes for infected wounds should
be accomplished more frequently then 48-72 hours. Always replace with sterile
disposables from unopened packages. Follow established institution protocols regarding
clean versus sterile technique.
MONITORING THE WOUND
Inspect the dressing frequently to ensure that the foam is collapsed and that therapy is
being delivered in a consistent manner. Monitor periwound tissue and exudate for signs
of infection or other complications.* Extra care and attention should be given if there are
any signs of possible infection or related complications. Infection can be serious. With or
without the SVEDMAN® Wound Treatment System, infection can lead to many adverse
complications including pain, discomfort, fever, gangrene, toxic shock, septic shock, and
various other complications. With signs of more serious complications of infection,
discontinue use of the SVEDMAN® Wound Treatment System until the serious infection
is diagnosed and properly treated.
DISCOMFORT / ADHERENCE
If patient complains of discomfort during dressing change, consider pre-medication, use
of a non-adherent prior to foam placement or irrigation of a topical anesthetic agent such
as 1% Lidocaine prior to dressing removal.
Rev I 7/09
SVEDMAN® System User’s Manual
1-2
Introduction
UNSTABLE STRUCTURES
Over unstable body structures such as unstable chest wall or non-intact fascia, use the
lowest pressure setting on the SVEDMAN® Wound Treatment Unit.
SPINAL CORD INJURY
In the event a patient experiences autonomic hyperreflexia (sudden elevation in blood
pressure or heart rate in response to stimulation of the sympathetic nervous
system) discontinue use of the SVEDMAN® Wound Treatment System to help minimize
sensory stimulation.
BODY CAVITY WOUNDS
Underlying structures must be covered by natural tissues or synthetic materials that form
a complete barrier between the underlying structures and the Svamp® Dressing.
Svamp® DRESSING USE
The Svamp® Dressings distributed by Innovative Therapies, Inc. are to be used
exclusively with the SVEDMAN® Wound Treatment System.
NOTE: All dressing components of the SVEDMAN® Wound Treatment System are
packaged sterile. The decision to use clean versus sterile/aseptic technique is dependent
upon wound pathophysiology and physician/clinician preference. All components of the
SVEDMAN® Wound Treatment System disposable set are latex free.
Be sure to comply with all other CONTRAINDICATIONS and PRECAUTIONS for
the SVEDMAN® Wound Treatment System.
*Signs of possible infection may include fever, tenderness, redness, swelling, itching,
rash, increased warmth in the wound area, purulent discharge or a strong odor. Nausea,
vomiting, diarrhea, headache, dizziness, fainting, sore throat with swelling of the mucous
membrane, disorientation, high fever (>102°F, 38.8°C), refractory hypotension,
orthostatic hypotension, or erythroderma (a sunburn-like rash) may be added signs of
more serious complications of infection.
WARNING: Do not pack the Svamp® Dressings into any areas of the wound.
Forcing dressings in a compressed manner into any wound is contrary to approved
protocols.
Rev I 7/09
SVEDMAN® System User’s Manual
1-3
Introduction
FEATURES
Easy-to-use “One Touch” Operation – Therapy can be activated simply with the push
of a single button. Therapy level can be quickly changed by pressing one of three buttons
(-70 mmHg, -120 mmHg and -150 mmHg). Therapy settings can be locked by the
caregiver (see “Therapy Selection Lock/Unlock” Section). Lighted membrane switches
clearly indicate current setting to caregiver.
Intermittent Mode – The SVEDMAN® Wound Treatment System can be set to operate
intermittently (5 minute/2 minute cycle). Unit maintains -25 mmHg vacuum during the
“off” state to prevent loss of dressing seal and increase patient comfort.
NoiseGuard - Unit is virtually silent in its normal operation increasing patient comfort
and compliance.
PowerGuard – An internal battery provides approximately 12 hours of operation from a
single full-charge. Battery charges while unit is operating with the AC adapter. While
running on battery, a low-battery alarm will “chirp” and the OFF button will begin
flashing when remaining capacity of the battery is less than 20%.
TherapyGuard - Automated alarms for leak/low pressure and full canister. Alarms
provide both a visual and audible indication. Alarms will self-reset once a problem is
corrected or can be manually reset by turning the therapy unit OFF and ON.
SafetyGuard - A unique non-Luer Lock connector is provided for irrigation therapy that
will not permit an accidental connection to a patient’s I.V. line.
Integrated I.V. Pole Clamp & Bed Hangers – Pole clamp permits the unit to be
mounted to a wide range of standard I.V. poles: 0.9” to 2” (2.2 to 5.0 cm) in diameter.
Integrated stowable bed hangers permit the unit to be hung from a wide range of hospital
bed foot boards.
SpeedConnect™ – Six-foot dual-lumen tubing set with adhesive flanges to permit easy
connection to dressing.
Single Patient Use Canister – Large volume (1,200 cc) canister for irrigation and highly
exudating wounds.
CAUTION: Use of Large Canisters (>500ml) may increase serious risks associated
with excessive fluid loss. Monitor patient status continually. DO NOT USE for infants or
other patients with low fluid volume, nor for patients at high risk of major hemorrhage.
Rugged Enclosure – The SVEDMAN® Wound Treatment System device is enclosed in
an aluminum case to help prevent damage from drops and impacts.
Rev I 7/09
SVEDMAN® System User’s Manual
1-4
Introduction
Light Weight – The therapy unit weighs only 5.5 Lbs (2,495 g) and can be easily carried
and transported.
Long-life Pump – Diaphragm-type pump with brushless motor increases life expectancy
of the unit and minimizes maintenance requirement.
Rev I 7/09
SVEDMAN® System User’s Manual
1-5
Introduction
CARE & CLEANING
INTRODUCTION
The following instructions are the Innovative Therapies, Inc. (ITI) recommended daily
and weekly cleaning and infection control procedures for the SVEDMAN® Wound
Treatment System. The Caregiver should review this manual in its entirety before
attempting to the use the product. Carefully read the PRECAUTIONS and SAFETY
TIPS in the INTRODUCTION section before attempting to perform cleaning
procedures on the SVEDMAN® Wound Treatment Unit.
PROTECTIVE EQUIPMENT
Universal Safety Precautions should be used to minimize the risk of infection and contact
with contaminated blood or bodily fluids during the dressing changes or disposal, it is
important to protect all exposed skin and mucous membranes. The protective equipment
includes:
Disposable gloves (latex or latex-free).
Protective eyewear to help prevent splashing of cleaning solutions and/or blood or
bodily fluids.
Protective mask (to protect the nose and mouth from inadvertent fluid ingress).
Disposable impervious gown (if splashing of blood or bodily fluids is possible).
DISPOSAL
After patient use, all disposable components of the system should be treated as
contaminated. These include:
The Svamp® Dressing, drape, tubing, and connectors.
The exudate collection canister.
Suction and irrigation tubing, connectors & clamps.
Dispose of all disposable components in accordance with local, state, and federal
regulations and institution protocols.
NOTE: Cleaning procedures should not be performed when unit is connected to a
patient. Disconnect the unit from the patient and power source before cleaning or
servicing.
Rev I 7/09
SVEDMAN® System User’s Manual
2-1
Care & Cleaning
DAILY CARE AND CLEANING
Perform a visual inspection of the unit. Check for any sign of contamination and ensure
that the unit is functioning properly. If the unit is not operating properly, refer to the
Alarm Troubleshooting guide in the OPERATING INSTRUCTIONS section of this
manual or contact ITI to have the unit serviced. If there are visible signs of
contamination or the unit appears dirty, follow the WEEKLY CARE AND CLEANING
instructions below.
WEEKLY CARE AND CLEANING
To help reduce the risk of infection and contact with contaminated blood and bodily
fluids please wear the protective equipment identified above when cleaning the
SVEDMAN® Wound Treatment Unit.
NOTE: Always follow Universal Safety Precautions. Follow established institution
protocols regarding clean versus sterile technique.
The following cleaning procedure must be performed at least once a week and must be
completed between patients. The SVEDMAN® Wound Treatment Unit should be wiped
with either a diluted solution of 5 milliliters bleach in 1 liter of warm water
(approximately 1 teaspoon bleach in 1 quart water) or mild disinfectant. Use a coarse
cloth and wring out any excess solution until the cloth is damp and not dripping. Other
cleaning fluids are not recommended as they may damage the finish of the enclosure.
A.C. ADAPTER INSPECTION
The A.C. Adapter should be inspected regularly for damage and/or unusual wear.
Replace damaged or worn Power Supplies immediately. A.C. Adapters are available
from ITI.
The SVEDMAN® Wound Treatment Unit should only be used with the supplied
A.C. Adapter. Use of an incorrectly rated adapter could create a shock hazard for
the patient or caregiver.
Avoid spilling liquid on any part of the therapy unit. Liquids can cause corrosion
when left on electronic controls which can lead to failure. Component failure may
cause the therapy unit to operate erratically, possibly causing a potential hazard to
the patient or Caregiver.
Rev I 7/09
SVEDMAN® System User’s Manual
2-2
Care & Cleaning
Particular care must be taken when handling undiluted germicide concentrate or
chlorine bleach, including proper shielding of eyes. Always mix by adding
concentrated germicide or chlorine bleach to the water. NEVER intermix
germicides or mix germicides with chlorine bleach.
Rev I 7/09
SVEDMAN® System User’s Manual
2-3
Care & Cleaning
PATIENT CARE
It is recommended that all sections of this manual be reviewed prior to using the product.
Carefully read the INDICATIONS, CONTRAINDICATIONS, PRECAUTIONS and
SAFETY TIPS in the INTRODUCTION section before attempting to perform patient
care for a patient with the SVEDMAN® Wound Treatment System.
APPLYING THE DRESSING
1. Cleanse wound according to institution protocols or physician order.
2. Debride all necrotic tissue including eschar and hardened slough.
3. Be certain the wound has achieved hemostasis.
4. Visually examine and palpate wound bed to locate any blood vessels or delicate
underlying structure in close proximity.
5. Irrigate wound with normal saline or solution per physician order.
6. Prepare area around wound to permit adhesion of the polyurethane drape.
NOTE: If peri-wound area is excessively moist or oily, a medical-grade liquid
adhesive may improve sealing. For fragile skin, use a skin sealant prior to drape
application, or frame the wound with a skin barrier layer, such as Duoderm. Cut the
drape to a size large enough to go over the foam and the barrier layer only.
7. Take measurements of the wound dimensions and note pathology. Cut the
Svamp® Dressing to a size that is appropriate for the wound.
NOTE: Do not trim the dressing over or around the wound site to help prevent
debris from the dressing from falling into the wound.
8. Place the Svamp® Dressing in the wound site taking care to avoid contact with
the peri-wound tissue.
WARNING: Do not pack the Svamp® Dressings into any areas of the wound.
Forcing dressings in a compressed manner into any wound is contrary to
approved protocols.
NOTE: The Svamp® should cover the entire wound margin, including tunneling and
undermining. However, the Svamp® should not be in contact with intact skin.
Rev I 7/09
SVEDMAN® System User’s Manual
3-1
Patient Care
9. Size and trim the Polyurethane Drape to cover dressing plus a 3-5 cm border of
intact skin. (Save the extra drape for later use, if needed). Remove the drape’s
release liner and place over the Svamp® and peri-wound.
10. Pat drape material down around the wound site and over the Svamp® Dressing to
ensure dressing is properly sealed.
11. Cut two 1 cm diameter holes in the top of the drape at both ends of the dressing
(see Fig. 1).
12. Peel the backing from one of the SpeedConnect™ flanges and place it above one
of the holes made in Step 11. Using the tips of the fingers, press around the top of
the SpeedConnect™ to ensure a good seal to the dressing (see Fig. 2).
13. Repeat Step 12 for the second SpeedConnect™ flange (see Fig. 3).
To Fluid Collection
Canister
To Fluid Collection
Canister
To IV Set
®
SVAMP
Dressing
Polyurethane
Drape Material
Fig. 1
Fig. 2
Fig. 3
14. Connect the irrigation-side of the SpeedConnect™ tube with SafetyGuard to the
wound Irrigation Set. NOTE: The solution to be used for wound irrigation
should be appropriate for topical applications (see SVEDMAN® Wound
Treatment System Indications and Precautions for more information on the
suggested types of aqueous wound therapy solutions). Make sure that the clamp
on the Irrigation Tube remains closed until therapy is started.
15. When irrigation is discontinued, for example while changing the fluid reservoir,
place the Tubing Cap on the irrigation-side of the SpeedConnect™ tube.
16. Proceed to the therapy unit instructions to apply negative pressure wound therapy
with irrigation.
Rev I 7/09
SVEDMAN® System User’s Manual
3-2
Patient Care
CANISTER INSTALLATION
1. Ensure that an ITI Fluid Collection Canister is properly placed in the receptacle
located at the front of the therapy unit (see Fig 4).
NOTE: Always use a new canister with a new patient.
2. Inspect the SpeedConnect™ Tube flanges to ensure that they are properly
connected to the Svamp® Dressing and that the connections are well sealed.
3. Connect the distal end of the SpeedConnect™ Tube with the blue tapered
connector to the Patient port of the Canister (see Figure 5). Gently twist and push
the connector on just enough to secure and seal it. Also, make sure that the clamp
on the SpeedConnect™ Tube is open.
4. Insert the “Suction” tube from the Canister to the “SUCTION” connector on the
top-front of the Therapy Unit (see Figure 6).
5. Insert the “Sensing” tube from the Canister to the “SENSING” connector on the
top-front of the Therapy Unit (see Figure 6). The metal tabs on the connectors
may need to be depressed to permit tube insertion.
Suction Tube
Suction Port
Sensing Tube
Power
Jack
Sensing Port
Fig. 7
Fig. 6
Rev I 7/09
SVEDMAN® System User’s Manual
3-3
Patient Care
6. Plug the therapy unit’s A.C. Adapter into a suitable 120 VAC, 60 Hz, 3-prong
outlet. Insert the power plug into the Power Jack on the side of the Therapy Unit
(see Figure 7). Gently rotate clockwise to lock in place.
7. Verify the dressing application is correct, the tubing is connected, the Dressing
Suction Tube clamp is open and the Dressing Irrigation Tube clamp is closed.
8. Begin therapy (see OPERATING INSTRUCTIONS).
CANISTER REMOVAL
1. Press the OFF button to turn the therapy off.
2. Close both tubing clamps (engaged).
3. Remove all tubing connectors from top of canister.
4. Lift canister straight up and out of therapy unit.
5. Dispose of canister according to local, state and federal regulations as well as
institutional protocols.
DRESSING REMOVAL
Carefully read the SAFETY TIPS in the INTRODUCTION section of this guide prior
to removing the dressing.
NOTE: Wounds must be carefully monitored at regular intervals. In a non-infected
wound, dressings should be changed every 48 to 72 hours; but no less than 3 times per
week, with the frequency of dressing change determined by the clinician. Infected
wounds must be monitored continuously. For infected wounds, dressings may need to be
changed more often than 48-72 hours; the dressing change interval should be based on a
clinical evaluation of the wound condition rather than a fixed schedule..
NOTE: The Canister should be replaced when full (the Canister Full alarm activates) or
at least once every week to minimize the potential for contamination and production of
odors.
1. Press the OFF button to turn the therapy off.
2. Close both tubing clamps (engaged).
3. Disconnect SpeedConnect™ Suction and Irrigation tubes. Twisting the tapered
connector will make removing the Suction tube from the Canister easier.
Rev I 7/09
SVEDMAN® System User’s Manual
3-4
Patient Care
4. Slowly pull drape up and away from skin while gently stretching drape.
NOTE: If the Svamp® Dressing adheres to the wound during removal, refer to the
SAFETY TIPS section of this manual.
5. Discard disposables in accordance with applicable rules, regulations and infection
control protocols, and always follow Universal Safety Precautions.
DISPOSAL OF DRESSINGS, CANISTER AND OTHER DISPOSABLES
To minimize the risk of infection and contact with contaminated blood or bodily fluids
during the dressing changes or disposal, it is important to protect all exposed skin and
mucous membranes. The protective equipment includes:
Disposable gloves (latex or latex-free).
Protective eyewear to help prevent splashing of cleaning solutions and/or blood or
bodily fluids.
Protective mask (to protect the nose and mouth from inadvertent fluid ingress).
Disposable impervious gown (if splashing of blood or bodily fluids is possible).
After patient use, all disposable components of the system should be treated as
contaminated. These include:
The Svamp® Dressing and drape.
The exudate collection canister.
SpeedConnect™ tubing, connectors & clamps.
Dispose of all disposable components in accordance with local, state, and federal
regulations and institution protocols.
Rev I 7/09
SVEDMAN® System User’s Manual
3-5
Patient Care
OPERATING INSTRUCTIONS
This section contains instructions for setting and adjusting functions of the SVEDMAN®
Wound Treatment Unit. The section explains the procedure for activating therapy and
explains the major functions that are adjusted from the control panel.
Carefully read the PRECAUTIONS and SAFETY TIPS in the INTRODUCTION
section before attempting to operate and adjust the SVEDMAN® Wound Treatment Unit.
The SVEDMAN® Wound Treatment Unit should only be used with the supplied
A.C. Adapter. Use of an incorrectly rated adapter could create a shock hazard for
the patient or caregiver. The part number for the adapter can be found in the
REPLACEMENT PARTS section of this manual.
POWER ON/OFF
The ON and OFF buttons are located on the left side of the control panel. The ON and
OFF buttons control the application of power to the therapy unit.
POWER-UP PROCEDURE
1. Verify the dressing application is correct, the tubing is connected, the Dressing
Suction Tube clamp is open and the Dressing Irrigation Tube clamp is closed.
2. Place the therapy unit in an upright position as level with the wound as possible.
The device can be placed on a table, hung from a footboard using the integrated
bed hangars or attached to an I.V. pole using the integrated I.V. pole clamp.
Rev I 7/09
SVEDMAN® System User’s Manual
4-1
Operating Instructions
The I.V. pole clamp should only be used on poles that are in excess of 0.9” (2.2
cm) diameter and are securely attached to a bed frame or suitable stand. To
ensure stability of the therapy unit on the I.V. pole, it should be clamped no
higher than two times the width of the pole base. The clamp should be tightened
to ensure that the therapy unit cannot slide down the pole.
3. Hang I.V. bag on the I.V. pole at a level that is higher than the level of the wound.
4. Press the ON button. All LED indicators will illuminate for 1 second during the
power-on self-test, after which, the ON button will steadily light green.
5. Dressing should collapse indicating the presence of vacuum. Once dressing
integrity is verified, open the Dressing Irrigation Tube and adjust drip to a rate
appropriate for desired therapy.
6. Carefully check dressing for vacuum or fluid leaks and repair with additional
Polyurethane drape material as needed.
7. The SVEDMAN® Wound Treatment System should be operated at least 22 hours
out of every 24 hour period. Remove the Svamp® Dressing if irrigation therapy
is terminated or is off for more than 2 hours in a 24 hour period.
THERAPY SETTING ADJUSTMENT
Only a physician can prescribe the proper settings and irrigation protocols for the
therapy unit. Failure to follow product instructions or adjusting settings and
performing therapy application without the express direction and/or supervision of
your trained caregiver may lead to improper product performance and the potential
for serious or fatal injury.
Rev I 7/09
SVEDMAN® System User’s Manual
4-2
Operating Instructions
Negative Pressure Level Adjustment
There are three settings of negative pressure that can be selected: -70 mmHg, -120
mmHg, and -150 mmHg. The negative pressure selector buttons are located on the right
side of the control panel. Use these buttons to select the therapy setting that is
appropriate for the patient.
1. When the unit is powered-up, the default setting of -120 mmHg is automatically
selected (unless therapy setting has been locked previously by caregiver, see
“Therapy Selection Lock/Unlock” Section).
2. To change the setting, simply press the desired setting button.
3. The setting button will flash indicating the selection has been made and will
continue flashing until the desired negative pressure level has been achieved at
which time the button will stay illuminated.
Intermittent Mode ON/OFF (S/W Ver. 2.57 & Higher)
The SVEDMAN® can operate in an intermittent suction mode with a 5 minute “on” and
2 minute “off” cycle. To turn the intermittent mode on, press and hold the desired setting
button then momentarily press the OFF (0) button. The unit will beep “•—•—“ and the
green ON (1) button will begin flashing indicating the unit is now operating in
intermittent mode. Release both buttons.
To turn the intermittent mode off (and return the device to the default continuous mode),
repeat the above steps. The unit will produce a single long beep and the green ON (1)
button will steadily illuminate. The SVEDMAN® will remember the mode setting when
the power is turned OFF and ON.
During intermittent operation, the SVEDMAN® will provide target therapy pressure
throughout the “on” part of the cycle and approximately -25 mmHg throughout the “off”
part of the cycle. By maintaining this lower pressure while the unit is off, the dressing
seal is never compromised. This method of applying intermittent pressure also increases
patient comfort.
BATTERY OPERATION
NOTE: The SVEDMAN® Wound Treatment System is designed to permit use of the
product while the internal battery is charging. The therapy unit will continue to operate
properly while charging is taking place.
Average Battery Life
Rev I 7/09
SVEDMAN® System User’s Manual
4-3
Operating Instructions
The specified battery life of the SVEDMAN® Wound Treatment Unit with a fullycharged battery is approximately 12 hours. The actual life is dependant on the integrity
of the dressing. A leak in the dressing can reduce overall battery longevity significantly.
Average Time for Recharging
To ensure the battery has been fully charged, the unit should be connected to an A.C.
supply for approximately 3 hours. After approximately 2 hours of charging, the unit will
have achieved 80% of total battery capacity.
Low Battery Alarm
While running on battery, a low-battery alarm will “chirp” every 10 seconds and the OFF
button will begin flashing when remaining capacity of the battery is less than 20%.
Typically, the unit will continue to operate for approximately 1 hour after the low-battery
alarm is activated.
Low Battery Shutoff
If the battery charge falls below a critical level, the unit will shutoff automatically and
therapy will be discontinued. At this point, the unit must be plugged into an A.C. power
source for therapy to resume. Once the A.C. Adapter is plugged in, pressing the ON
button will restart the unit.
Recharging the Battery
Plug the power cord from the A.C. Adapter into the power receptacle on the side of the
therapy unit. Rotate the connector clockwise to lock in place. Plug the A.C. Adapter into
a suitable 120 VAC, 60 Hz wall outlet.
When the unit is connected to an AC power source, the GREEN LED above the power
receptacle will illuminate indicating AC power is present and the AMBER LED will
illuminate when the battery is charging.
Once the battery is fully charged, the AMBER LED will extinguish indicating the charge
cycle is complete.
When the SVEDMAN® Wound Treatment Unit is disconnected from the AC power
source, the device will automatically switch over to the internal battery and continue to
operate without interruption.
Rev I 7/09
SVEDMAN® System User’s Manual
4-4
Operating Instructions
ALARM OPERATION
Clearing an Alarm Condition
To clear an alarm condition, turn the therapy unit OFF then ON. The alarm will clear
when the power is cycled.
Alarm Troubleshooting
ALARM TYPE
CANISTER IS FULL
INDICATION
Canister Full LED lights
accompanied by an intermittent
audible alarm.
Unit will continue to alarm until
the canister is replaced.
CORRECTIVE ACTION
Turn unit off by pressing the OFF
button.
Remove canister and replace as
necessary.
Press the ON button to resume
therapy.
LOW PRESSURE/
DRESSING LEAKS
LOW BATTERY
Low Pressure/Leak LED lights
accompanied by an intermittent
audible alarm.
If conditions persist, refer unit for
servicing as the alarm may
indicate an internal problem.
Check all tubing connections
between the therapy unit and
Dressing.
Unit will continue to alarm until
the low pressure/leak condition is
corrected or the alarm is cleared.
Check the security of the
canister’s lid and drain plug.
Check for cracks in the canister.
The OFF button will flash on and
off accompanied by an
intermittent audible “chirp” every
10 seconds.
Pat around drape to check for
leaks. If leak is found, patch with
extra drape material.
Utilizing an approved ITI A.C.
Adapter, connect unit to an A.C.
power source to provide
operating power and to recharge
the internal battery.
The unit will continue to alarm
until connected to an A.C. power
source.
When the charge falls below a
critical level, the therapy will be
discontinued.
NOTE: In the event of an emergency, please contact your treating physician,
caregiver, or your local emergency responders.
NOTE: If an Alarm Condition persists and cannot be resolved, please contact ITI
for further assistance.
Rev I 7/09
SVEDMAN® System User’s Manual
4-5
Operating Instructions
THERAPY SELECTION LOCK/UNLOCK
The SVEDMAN® Wound Treatment Unit is equipped with a therapy locking feature
designed to prevent unauthorized individuals from changing the therapeutic settings
inadvertently.
Locking
To lock the unit, press and hold the desired therapy level (-70, -120, -150 mmHg) for
three seconds until three audible beeps are heard. At this point, the unit is locked.
Pressing any other therapy level will result in three beeps with no change in setting. This
therapeutic setting will be recalled each time the unit is powered OFF and ON, and the
unit will remain locked until it is subsequently unlocked by the caregiver.
Unlocking
To unlock the unit, press and hold the selected therapy button (the lit button) until three
audible beeps are heard. At this point the unit is unlocked and therapy settings can be
changed. Additionally, when the unit is powered OFF and ON, the unit will remain
unlocked and will automatically revert to the default setting of -120 mmHg.
Rev I 7/09
SVEDMAN® System User’s Manual
4-6
Operating Instructions
SPECIFICATIONS*
SVEDMAN® Wound Treatment System
Dimensions…………………………………………13.5 x 7 x 10.5 in. (34.29 x 17.78 x 26.67 cm)
Weight……………………………………………………………………………..5.5 Lbs (2,495 g)
Therapy Settings………………………………………………...…………-70, -120 & -150 mmHg
Canister Volume…………………………………………………...………………………..1,200 cc
Medical Equipment with respect to electric shock, fire, and mechanical hazards only in accordance with UL
60601, IEC60601-1, EN60601-1, and CAN/CSA, C22.2 No. 601.1.
IEC Classification
Medical Equipment
Equipment not suitable for use in presence of flammable anesthetic mixture with air, oxygen, or
nitrous oxide.
Continuous Operation
Type B Applied Part
Class II Internally Powered Equipment
IPXO
Battery
Duration (Fully Charged)……...……………………...………………….…approximately 12 hours
Electrical
External Power Supply Input………………………………..……100-240 VAC, 50-60Hz, 700 mA
External Power Supply Output…………………………………………………….15 VDC, 2 Amps
Patient & Enclosure leakage Current……………………………………...………< 100 Microamps
Environmental Conditions
Storage Conditions
Temperature Range…………………………………….………...….10oF (-12oC) to 110oF (43oC)
Relative Humidity Range…………………………………………...….20 – 95% Non-condensing
Atmospheric Pressure Range…………………..………………………....……..50 kPa to 110 kPa
Operating Conditions
Temperature Range………………………………………….….………40oF (4oC) to 90oF (32oC)
Relative Humidity Range…………………………………….….……..20 - 75% Non-condensing
Atmospheric Pressure Range……………………………………………………50 kPa to 110 kPa
Expected useful life of SVEDMAN® Wound Treatment Unit..…..…………….…………..3 years
CAUTION: Federal law restricts this device to sale by or on the order of a physician.
* Specifications subject to change without notice.
Rev I 7/09
SVEDMAN® System User’s Manual
5-1
Specifications
EXPLANATION OF SYMBOLS
Rev I 7/09
SVEDMAN® System User’s Manual
5-2
Specifications
REPLACEMENT PARTS
Description
Part Number
Therapy Unit
SVEDMAN® Wound Treatment Unit….……………………….…..………..6700032
SVEDMAN® User’s Manual……………………………………………….6700032M
A.C. Power Adapter
FRIWO, Model FW7362M/15………………….………………..............……47-9000
Dressings
SVAMP® Small Foam Dressing Set (10 per case)….……….....…….....…….47-1702
SVAMP® Medium Foam Dressing Set (10 per case)……………...…....…….47-1701
SVAMP® Large Foam Dressing Set (10 per case)…….............….……….….47-1700
SVAMP® X-Large Foam Dressing Set (10 per case)……………...………….47-1703
VIT™ Foam Dressing (10 per case)……………….….…….………..………..47-1751
Canisters
Disposable Canister with Gel, 1,200 cc (10 per case)….…….…….….....……47-3000
Accessories
SpeedConnect™ Tubing……………………………………………………….47-2000
SVAMP® “Y” Connector…………..……….……….…………...……….…...47-2500
Polyurethane Drape (10 per pkg.)...………………….…………………..…….47-7000
NOTE: In order to assure the highest safety, quality and efficacy of the products, the
SVEDMAN® Wound Treatment System should only be used with Innovative Therapies,
Inc.’s disposables, and Svamp® Dressings should only be used with the SVEDMAN®
Wound Treatment Units.
Rev I 7/09
SVEDMAN® System User’s Manual
6-1
Replacement Parts
QUESTIONS & INFORMATION
For additional information pertaining to the SVEDMAN® Wound Treatment System,
please contact your local ITI representative, or:
“We’re all about the patient!”™
Innovative Therapies, Inc.
12 Meem Avenue
Suite C
Gaithersburg, MD 20877
1-866-ITI-NPWT (484-6798)
www.ITINPWT.com
For questions or comments regarding the content of this User’s Manual, please contact
Innovative Therapies, Inc. (ITI) at the above address. Please contact ITI Customer
Service at 1-866-ITI-NPWT (484-6798) for issues concerning the product and its use.
Duoderm® is a trademark of Convatec. All other trademarks designated herein are the
property of ITI. This product is covered by one or more pending patents. Copyright
2009, Innovative Therapies, Inc. All Rights Reserved Worldwide. 07/09 P/N 6700032M
Rev I.
Rev I 7/09
SVEDMAN® System User’s Manual
7-1
Questions & Information