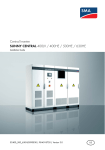
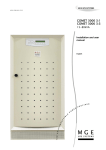
1
OPERATING MANUAL UPS PEGASUS II 10–20–30–40 kVA Rev.A 05/15/2012 OPERATING MANUAL UPS Index of sections/Indice delle sezioni 1– 2– 3– 4– 5– 6– WARNINGS AND GENERAL INFORMATION INSTALLATION AND START-UP OF UPS PEGASUS II 10-40kVA UPS USER MANUAL SPECIFICATIONS 10-20kVA 3/1ph SPECIFICATIONS 10-20kVA 3/3ph SPECIFICATIONS 30-40kVA 3/3ph Code Part 2 Part 3 Part 4 Part 5 Part 6 Part 7 Warnings and general information WARNINGS AND GENERAL INFORMATION Index 1 CONVENTIONS USED ....................................................................... 5 2 DOCUMENTATION NOTES ............................................................... 6 3 CONTACTS ........................................................................................ 6 4 FACTORY WARRANTY ..................................................................... 7 5 LIMITATION OF LIABILITY ................................................................ 9 Warnings and general information Thank you for choosing an EFFKTA® product. This section of the manual contains indications regarding the symbols used in the UPS documentation as well as basic information about the product, including the factory warranty terms. 1 CONVENTIONS USED The following symbols have been used to indicate potential dangers and to highlight useful information, so as to minimize the risks to persons and property. HAZARD “HAZARD” statements contain characteristics and basic instructions for the safety of persons. Non-compliance with such indications may cause serious injury or death. WARNING “WARNING” statements contain characteristics and basic instructions for the safety of persons. Non-compliance with such indications may cause injury. CAUTION “CAUTION” statements contain characteristics and important instructions for the safety of things. Non-compliance with such indications may cause damage to materials. NOTE “NOTE” statements contain characteristics and important instructions for the use of the device and for its optimal operation. Rev.A 05/16/2012 5 Warnings and general information 2 DOCUMENTATION NOTES Storing documentation This manual and any other supporting technical documentation relating to the product must be stored and made accessible to personnel in the immediate vicinity of the UPS. Further information In the event that the information provided in this manual is not sufficiently exhaustive, please contact the manufacturer of the device, whose details are available in the “Contacts” section. 3 CONTACTS For any information about the UPS systems manufactured by EFFKTA®, please contact: EFFEKTA Regeltechnik GmbH Rheinwaldstr. 34 78628 Rottweil Germany Tel. +49 (0) 741 17451 0 Fax +49 (0) 741 17451 22 www.effekta.com [email protected] For help with technical problems or for information concerning device use and maintenance, please contact the technical help service by phoning the above-indicated telephone number, specifying the following data: Type of device and its nominal power Serial number Error code, if applicable. 6 Rev.A 0515/2012 Warnings and general information 4 FACTORY WARRANTY The factory warranty provided by EFFKTA® is called “Green Base Warranty” and is subject to the terms indicated below. Validity a) The present warranty terms only apply to the UPS systems manufactured by EFFKTA® and to their storage batteries, when supplied by EFFKTA®. Duration a) The factory warranty provided by EFFKTA® has a validity of 12 (twelve) months from the startup date of the UPS. The warranty expires at the latest 18 (eighteen) months from the purchasing date (invoicing). General conditions b) The execution of one or more repairs within the warranty time will not alter the original expiry of the warranty. c) If a unit is faulty and/or damaged within the time frame covered by the warranty, it will be repaired or replaced with an equivalent or similar product. Costs a) The warranty covers all the costs resulting from repairs and/or spares to restore the correct operation of the product covered by our factory warranty. b) All other costs, particularly shipping costs, travel and accommodation costs for the service personnel of EFFKTA® for on-site repairs, as well as costs for the customer’s own employees, will not be covered by the factory warranty and will be charged to the end customer. c) In case of service performed following a call made by mistake, or in case our technicians incur extra time and/or costs due to the site inaccessibility or due to work interruptions required by the customer, such costs will be invoiced in accordance with ANIE rates CLASS III COLUMN B. Modes required a) In the event of a fault covered by the warranty, the customer shall notify EFFKTA® in writing of the occurred fault, providing a short description of the fault. b) The customer shall also provide documents showing the validity of the warranty (receipt/purchasing invoice with serial number of the product – report indicating the startup date). Service at the installation site a) During preventive maintenance visits or emergency service, access shall be ensured to the installation site, and the device shall be made available in order to ensure maintenance or repair with no waiting time. b) During the intervention, the customer’s representative must attend service operations at the installation site, so that he/she may operate the control devices outside the equipment. c) In case entry permits are necessary in order to enter the installation site, EFFKTA® must be notified of the time necessary to obtain the documentation required, if any. d) In case of customer’s non-compliance, EFFKTA® reserves the right to refuse warranty service. EFFKTA® will not accept any product returned for repair or replacement without prior agreement. Exclusions Rev.A 05/16/2012 7 Warnings and general information a) Our warranty does not cover the products which are faulty or damaged due to: Transport, Installation or start-up defects caused by the customer’s non-compliance with the installation and use instructions provided by EFFKTA®. Tampering, alterations or repair attempts made without the specific written approval by EFFKTA®. Damage caused by work done by personnel not authorized by EFFKTA®. Damage to the device caused by improper use, negligence, voluntary damage or use of the device beyond the allowed limits; Damage caused by external factors such as dirt, fire, flooding, failed operation of the air conditioning system, etc.; Non-compliance with applicable safety standards; Force majeure (e.g. lightning, surges, natural disasters, fire, acts of war, riots, etc.); Fall or displacement due to incorrect installation; Ordinary wear caused by proper and continuous use of the device. b) Protective devices inside the units (fuses and dischargers) are also excluded from the warranty, unless the failure is due to component faults. Responsibility a) In no event shall EFFKTA® be liable for direct or indirect damage, or any damage whatsoever connected with the execution of warranty services (e.g. possible voltage interruptions during the repair period or assembly and dismantling costs), except for the cases provided for by mandatory laws. b) The present warranty terms do not affect the purchaser’s mandatory rights as by law. 8 Rev.A 0515/2012 Warnings and general information 5 LIMITATION OF LIABILITY All the information contained in the present documentation is the exclusive property of EFFKTA®. Written consent by EFFKTA® is required in order to wholly or partially publish or disclose this information. The present manual constitutes an integral part of the product technical support documentation. Read the warnings with attention, as they give important instructions concerning safe usage. The equipment must be destined exclusively for the use for which it was expressly designed. Any other use is considered improper and therefore hazardous. The manufacturer cannot be held responsible for possible damage arising from improper, erroneous or unreasonable usage. EFFKTA® assumes responsibility for the equipment in its original configuration. Any intervention that alters the structure or the operating cycle of the equipment must be carried out and authorized directly by EFFKTA®. EFFKTA® will not be held responsible for the consequences arising from the use of non-original spare parts. EFFKTA® reserves the right to make technical modifications to the present manual and to the equipment without prior warning. Whenever typographical or other errors are found, the corrections will be included in new versions of the manual. EFFKTA® assumes responsibility for the information given in the original version of the manual in Italian language. Rev.A 05/16/2012 9 Installation and start-up of UPS PEGASUS II 10-40 kVA INSTALLATION AND START-UP OF UPS PEGASUS II 10-40KVA Index 1 SCOPE .............................................................................................. 13 2 SAFETY RULES AND WARNINGS .................................................. 14 2.1 UPS USE.................................................................................................................. 14 2.2 PEGASUS II RATING .............................................................................................. 15 2.3 SPECIAL SAFETY WARNINGS .............................................................................. 16 2.3.1 General warnings ............................................................................................ 16 2.3.2 Personnel ........................................................................................................ 16 2.3.3 Transport and handling .................................................................................. 16 2.3.4 Installation ....................................................................................................... 17 2.3.5 Electrical connection ...................................................................................... 18 2.3.6 Operation......................................................................................................... 19 2.3.7 Maintenance .................................................................................................... 20 2.3.8 Storage ............................................................................................................ 21 2.4 3 ENVIRONMENTAL PROTECTION .......................................................................... 21 2.4.1 Recycling of packing materials...................................................................... 21 2.4.2 Device disposal............................................................................................... 21 INSTALLATION ................................................................................ 22 3.1 RECEIPT OF THE UPS............................................................................................ 22 3.1.1 4 10 Storage ............................................................................................................ 22 3.2 HANDLING OF THE UPS ........................................................................................ 23 3.3 POSITIONING AND INSTALLATION ...................................................................... 24 3.3.1 Base plan, static load and weights ................................................................ 25 3.3.2 Overall dimensions, minimum distances from the walls and ventilation ... 26 3.3.3 Environmental installation conditions .......................................................... 28 ELECTRICAL CONNECTION ........................................................... 30 4.1 TERMINAL BOARDS............................................................................................... 33 4.2 CONNECTION OF POWER CABLES ...................................................................... 34 4.3 BATTERY ................................................................................................................ 35 Rev.A 15/05/2012 Installation and start-up of UPS PEGASUS II 10-40 kVA 4.3.1 5 Battery connection and positioning............................................................... 36 4.3.1.1 3,3Ah 12V battery connection and positioning – PEGASUS II 10kVA ..... 37 4.3.1.2 20kVA 7Ah / 9Ah 12V battery connection and positioning– PEGASUS II 10-1540 4.4 FUSES POSITIONING BCB – PEGASUS II 10-15-20KVA ...................................... 43 4.5 AS553 EXTERNAL BATTERY ................................................................................. 44 4.5.1 Dimensions and weights ................................................................................ 45 4.5.2 7Ah/9Ah/12Ah 12V battery connection and positioning 120 elements. ....... 47 4.5.3 Connections .................................................................................................... 49 4.6 SERIAL INTERFACES ............................................................................................. 50 4.7 RELAY CARD CONNECTION (OPTIONAL) ............................................................ 52 STARTUP AND SHUTDOWN .......................................................... 54 5.1 PRELIMINARY CHECKS ......................................................................................... 54 5.2 START-UP PROCEDURE ........................................................................................ 55 5.3 BASIC TROUBLESHOOTING.................................................................................. 57 5.4 SHUT-DOWN PROCEDURE .................................................................................... 57 5.5 SWITCHING PROCEDURE TO MANUAL BYPASS ................................................ 58 5.6 RESTART FROM MANUAL BYPASS ...................................................................... 59 Rev.A 15/05/2012 11 Installation and start-up of UPS PEGASUS II 10-40 kVA Index of pictures / Indice delle figure Picture 1 – Rating plate of PEGASUS II ..................................................................................................... 15 Picture 2 – Handling of UPS PEGASUS II ................................................................................................. 23 Picture 3 – Base plan.................................................................................................................................. 25 Picture 4 – Minimum distances from the walls ........................................................................................... 26 Picture 5 – Terminal board PEGASUS II 3/1 10-15-20kVA........................................................................ 33 Picture 6 – Terminal board PEGASUS II 3/3 10-15-20kVA........................................................................ 33 Picture 7 – Terminal board PEGASUS II 3/3 30-40kVA ............................................................................. 33 Picture 8 –Cabling of BCB fuse holder ....................................................................................................... 36 Picture 9 – Cardboard 3,3Ah battery protection ......................................................................................... 37 Picture 10 – 3,3Ah battery connection ........................................................................................................ 38 Picture 11 – 3,3Ah battery connected ........................................................................................................ 39 Picture 12 – Cardboard 7Ah/9Ah battery protection ................................................................................... 40 Picture 13 – 7Ah/9Ah battery connection ................................................................................................... 41 Picture 14 – 7Ah/9Ah battery connected .................................................................................................... 42 Picture 15 – Fuses positioning on the fuseholder BCB .............................................................................. 43 Picture 16 – Base plan of the external battery cabinet ............................................................................... 45 Picture 17 – Dimensions of the external battery cabinet ............................................................................ 45 Pictrue 18 – Cardboard 7Ah/9Ah/12Ah battery protection ......................................................................... 47 Picture 19 – 7Ah/9Ah/12Ah battery connection .......................................................................................... 47 Picture 20 – 7Ah/9Ah/12Ah battery connected .......................................................................................... 48 Picture 21 – Battery circuit breaker and fuses ............................................................................................ 48 Picture 22 – Battery cabinet and UPS connections .................................................................................... 49 Picture 23 – Interfaces of UPS PEGASUS II .............................................................................................. 51 Picture 24 – Relay card .............................................................................................................................. 52 12 Rev.A 15/05/2012 Installation and start-up of UPS PEGASUS II 10-40 kVA 1 SCOPE The instructions contained in the operating manual are applicable to the whole production range of PEGASUS II UPS systems, as indicated below. PEGASUS II 10kVA 3/1 PEGASUS II 15kVA 3/1 PEGASUS II 20kVA 3/1 PEGASUS II 10kVA 3/3 PEGASUS II 15kVA 3/3 PEGASUS II 20kVA 3/3 PEGASUS II 30kVA 3/3 PEGASUS II 40kVA 3/3 Storing documentation This manual and any other supporting technical documentation relating to the product must be stored and made accessible to personnel in the immediate vicinity of the UPS. Further information In the event that the information provided in this manual is not sufficiently exhaustive, please contact the manufacturer of the device, whose details are available in the “Contacts” section. Rev.A 15/05/2012 13 Installation and start-up of UPS PEGASUS II 10-40 kVA 2 SAFETY RULES AND WARNINGS 2.1 UPS USE Congratulations on choosing a product from EFFEKTA® for the safety of your equipment. To obtain the best performance from your PEGASUS II UPS system (Uninterruptible Power Supply), we suggest that you take your time to read the following manual. The purpose of this manual is to give a short description of the parts composing the UPS and to guide the installer or the user through the installation of the unit in its using environment. The installer or the user must read and correctly perform the instructions included in the present manual, with particular reference to the requirements regarding safety, in compliance with the current regulations. Read the technical documentation Before installing and using the device, make sure you have read and understood all the instructions contained in the present manual and in the technical supporting documentation. 14 Rev.A 15/05/2012 Installation and start-up of UPS PEGASUS II 10-40 kVA 2.2 PEGASUS II RATING UPS PEGASUS II is provided with an identification plate containing the operation ratings. The plate is fixed outside, on the rear of UPS. Picture 1 – Rating plate of PEGASUS II Check the technical characteristics Before carrying out any installation or start-up operation on the UPS, make sure its technical characteristics are compatible with the AC supply line and with the output loads. Rev.A 15/05/2012 15 Installation and start-up of UPS PEGASUS II 10-40 kVA 2.3 SPECIAL SAFETY WARNINGS 2.3.1 General warnings UPS PEGASUS II is provided with various stickers with indications regarding specific dangers. These stickers must be always well visible and replaced in case they are damaged. The present documentation must be always available in proximity to the device. In case of loss we recommend to request a copy to the manufacturer, whose details are available in the “Contacts” section. 2.3.2 Personnel Any operation on UPS PEGASUS II must be carried out by qualified personnel. By qualified and trained person we mean someone skilled in assembling, installing, starting up and checking the correct operation of the product, who is qualified to perform his/her job and has entirely read and understood this manual, especially the part regarding safety. Such training and qualification shall be considered as such, only when certified by the manufacturer. 2.3.3 Transport and handling Avoid bending or deforming the components and altering the insulation distances while transporting and handling the product. Undistributed weight The weight of the UPS is not uniformly distributed. Pay attention when lifting. Please inspect the device before installing it. In case any damage is noticed from the conditions of the package and/or from the outside appearance of the equipment, contact the shipping company or your dealer immediately. The damage statement must be made within 6 days from receipt of the product and must be notified to the shipping carrier directly. Should the product need to be returned to the manufacturer, please use the original package. Injury hazard due to mechanical damage Mechanical damage to the electrical components constitutes a serious danger to persons and property. In case of doubt regarding the non-integrity of the package or of the product contained therein, contact the manufacturer before carrying out the installation and/or the start-up. 16 Rev.A 15/05/2012 Installation and start-up of UPS PEGASUS II 10-40 kVA 2.3.4 Installation The product must be installed in strict compliance with the instructions contained in the technical back-up documentation, including the present safety instructions. In particular, the following points must be taken into account: The product must be placed on a base suitable to carry its weight and to ensure its vertical position; The UPS must be installed in a room with restricted access, according to standard IEC EN62040-1-2; Never install the equipment near liquids or in an excessively damp environment; Never let a liquid or foreign body penetrate inside the device; Never block the ventilation grates; Never expose the device to direct sunlight or place it near a source of heat. Special environmental conditions UPS PEGASUS II is designed for normal climatic and environmental operating conditions as defined in the technical specification: altitude, ambient operating temperature, relative humidity and environmental transport and storage conditions. It is necessary to implement specific protective measures in case of unusual conditions: harmful smoke, dust, abrasive dust; humidity, vapour, salt air, bad weather or dripping; explosive dust and gas mixture; extreme temperature variations; bad ventilation; conductive or radiant heat from other sources; strong electromagnetic fields; radioactive levels higher than those of the natural environment; fungus, insects, vermin. Use authorized personnel only All transport, installation and start-up operations must be carried out by qualified and trained personnel. The installation of UPS PEGASUS II must be carried out by authorized personnel, in compliance with national and local regulations. Rev.A 15/05/2012 17 Installation and start-up of UPS PEGASUS II 10-40 kVA Do not modify the device Do not modify the device in any way: this may result in damage to the equipment itself as well as to objects and persons. Maintenance and repair must be carried out by authorized personnel only. Contact the manufacturer for details of the nearest service centre. 2.3.5 Electrical connection The UPS connection to the AC power must be carried out in compliance with the current regulations. Make sure the indications specified on the identification plate correspond to the AC power system and to the actual electrical consumption of all of the equipment connected. Check the conformity of the documentation The UPS must be installed according to the requirements of HD 384.4.42 S1/A2 and in compliance with standard IEC 60364-4-482 – Chapter 482: protection against fire. Before connecting the unit to the distribution network, make sure you have received the approval of the electrical power distribution Authority, so as provided for by the current national regulations. All the electrical connections must be carried out by authorized personnel. Before connecting the device make sure that: the connection cable to the AC line is properly protected; the nominal voltages, the frequency and the phase rotation of the AC supply are respected; the polarities of the DC cables coming from the battery have been checked; no leakage current to earth is present. The device is connected to the following voltage supplies: DC battery voltage; AC mains voltage; AC bypass voltage. 18 Rev.A 15/05/2012 Installation and start-up of UPS PEGASUS II 10-40 kVA Injury hazard due to electric shock! The device is subject to high voltages, thus all safety instructions must be scrupulously adhered to before performing any operation on UPS PEGASUS II: Isolate the battery via DC circuit breakers before connecting it to the UPS; Connect the ground cable to the relevant bar before carrying out any other connection inside the device. Injury hazard due to electric shock! If primary power isolators are installed in an area other than the UPS one, you must stick the following warning label on the UPS. “ISOLATE THE UNINTERRUPTIBLE POWER SUPPLY (UPS) BEFORE WORKING ON THIS CIRCUIT” 2.3.6 Operation The installations to which the UPS systems belong must comply with all the current safety standards (technical equipment and accident-prevention regulations). The device can be started, operated and disconnected only by authorized personnel. The settings can only be changed using the original interface software. Injury hazard due to electric shock! During operation, UPS PEGASUS II converts power characterized by high voltages and currents. All the doors and the covers must remain closed. Injury hazard due to contact with toxic substances The battery supplied with the UPS contains small amounts of toxic materials. To avoid accidents, the directives listed below must be observed: Never operate the UPS if the ambient temperature and relative humidity are higher than the levels specified in the technical documentation. Never burn the battery (risk of explosion). Do not attempt to open the battery (the electrolyte is dangerous for the eyes and skin). Comply with all applicable regulations for the disposal of the battery. Rev.A 15/05/2012 19 Installation and start-up of UPS PEGASUS II 10-40 kVA 2.3.7 Maintenance Service and repairs must be carried out by skilled and authorized personnel. Before carrying out any maintenance operation, UPS PEGASUS II must be disconnected from AC and DC supply sources. The device is provided with internal isolators which allow to isolate the internal power circuits. However the voltages of the supply sources are present on the terminals. To isolate the device completely, provide external circuit breakers on the lines. The device contains dangerous voltages even after shutdown and disconnection from the supply sources, due to the internal capacitors which discharge slowly. Thus we recommend to wait at least 5 minutes before opening the device doors. Injury hazard due to electric shock! Any operation must be carried out only when voltage is absent and in compliance with safety directives. Make sure the battery circuit breaker that may be placed near the battery has been opened. Isolate the device completely by operating the external circuit breakers. Wait at least 5 minutes in order to allow the capacitors to discharge. After switching off and disconnecting the device there still might be very hot components (magnetic parts, heat sinks); therefore we recommend to use protective gloves. High temperature of components It is strongly recommended to use protective gloves due to the high temperatures that may be reached during the operation. 20 Rev.A 15/05/2012 Installation and start-up of UPS PEGASUS II 10-40 kVA 2.3.8 Storage If the product is stored prior to installation, it should remain stored in its original package in a dry place with a temperature ranging from -10°C to +45°C. Special environmental conditions It is necessary to implement specific protective measures in case of unusual environmental conditions: harmful smoke, dust, abrasive dust; humidity, vapour, salt air, bad weather or dripping; explosive dust and gas mixture; extreme temperature variations; bad ventilation; conductive or radiant heat from other sources; fungus, insects, vermin. 2.4 ENVIRONMENTAL PROTECTION 2.4.1 Recycling of packing materials Packing materials must be recycled or disposed of in compliance with applicable local and national laws and regulations. 2.4.2 Device disposal At the end of their product life, the materials composing the device must be recycled or disposed of in compliance with the current local and national laws and regulations. Rev.A 15/05/2012 21 Installation and start-up of UPS PEGASUS II 10-40 kVA 3 INSTALLATION 3.1 RECEIPT OF THE UPS Please inspect the device before installing it. In case any damage is noticed from the conditions of the package and/or from the outside appearance of the equipment, contact the shipping company or your dealer immediately. The damage statement must be made within 6 days from receipt of the product and must be notified to the shipping carrier directly. Should the product need to be returned to the manufacturer, please use the original package. Danger to persons due to transport damages Mechanical damage to the electrical components constitutes a serious danger to persons and property. In case of doubt regarding the non-integrity of the package or of the product contained therein, contact the manufacturer before carrying out the installation and/or the start-up. 3.1.1 Storage The package normally ensures protection from humidity and possible damages during transport. Do not store the UPS outdoor. Risk of damage due to inappropriate storage For the environmental storage conditions, refer to the indications given for the installation of the device. The device must only be stored in rooms protected from dust and humidity. The device cannot be stored outdoor. 22 Rev.A 15/05/2012 Installation and start-up of UPS PEGASUS II 10-40 kVA 3.2 HANDLING OF THE UPS The UPS is packed on a pallet. It is handled from the transport vehicle to the installation (or storage) place via a fork lift. The device has a heavy weight Avoid turnover during the transport of the UPS. Cabinets must always be handled in upright position. During loading and unloading operations, always respect the indications regarding the device barycentre marked on the package. Before positioning the UPS, in order to avoid risks of turnover, it’s recommended to move the system on the wood pallet on which the UPS is fixed. Before the positioning in the final location, remove the UPS from the pallet. Handling of the UPS The UPS PEGASUS II can be handled by means of the four wheels fixed on the bottom. Picture 2 – Handling of UPS PEGASUS II Rev.A 15/05/2012 23 Installation and start-up of UPS PEGASUS II 10-40 kVA 3.3 POSITIONING AND INSTALLATION UPS PEGASUS II must be installed indoor, in a clean and dry room, preferably without dust or humidity infiltrations. For the environmental conditions in the place of installation, in compliance with the current legislation, please refer to the “Overall dimensions, minimum distances from the walls and ventilation” section. Special environmental conditions It is necessary to implement specific protective measures in case of unusual environmental conditions: harmful smoke, dust, abrasive dust; humidity, vapour, salt air, bad weather or dripping; explosive dust and gas mixture; extreme temperature variations; bad ventilation; conductive or radiant heat from other sources; fungus, insects, vermin. 24 Rev.A 15/05/2012 Installation and start-up of UPS PEGASUS II 10-40 kVA 3.3.1 Base plan, static load and weights Picture 3 – Base plan Power (kVA) 10 15 20 30 40 3/1 / 3/3 L1 (mm) 450 P1 (mm) 640 L2(mm) - The supporting base of the UPS must be designed to carry the UPS weight and to ensure its steady and safe support. Its carrying capacity must be adequate to the static loads indicated in the table below. Power (kVA) 10 15 20 3/1 / 3/3 30 40 3/3 Weight without battery (kg) 100 110 140 Weight with battery (Max) (kg) 285 275 - Static load without battery (kg/m2) 347 381 486 Static load with battery (Max) (kg/m2) 989 954 - Rev.A 15/05/2012 25 Installation and start-up of UPS PEGASUS II 10-40 kVA 3.3.2 Overall dimensions, minimum distances from the walls and ventilation The UPS must be so installed as to ensure its serviceability and to allow a correct air flow as much as possible. With regard to the minimum distances from the walls, for all of the UPS sizes the same installation conditions apply as indicated in the table below. Picture 4 – Minimum distances from the walls 26 Rev.A 15/05/2012 Installation and start-up of UPS PEGASUS II 10-40 kVA Power (kVA) 10 15 20 30 3/1 / 3/3 3/3 L - mm 450 P - mm 670 H - mm 1200 X (min.) - mm 40 50 100 Y (min.) - mm 500 ADD. CABINET COD. AS553 L1 - mm 503 P1 - mm 647 H1 - mm 1200 The table below shows the air volume required for an optimal ventilation and cooling of the UPS. Power (kVA) Air volume (m3/h) Rev.A 15/05/2012 10 15 20 30 3/1 / 3/3 500 40 3/3 600 800 900 27 Installation and start-up of UPS PEGASUS II 10-40 kVA 3.3.3 Environmental installation conditions The air is classified by the EN 60721-3-3 standard (Classification of environmental parameters and their severities – Stationary use at weather-protected locations) based on climatic and biological conditions as well as on mechanically and chemically active substances. Therefore the place of installation must meet specific requirements to ensure compliance with the conditions for which the UPS was designed. Climatic conditions according to the technical specification of PEGASUS II Environmental parameter Minimum operating temperature (°C) – 10 Maximum operating temperature (°C) + 40 Minimum relative humidity (%) 5 Maximum relative humidity (%) 95 Condensation NO Rainfall with wind (rain, snow, hail, etc.) NO Water with an origin other than rain NO Ice formation NO Classification of biological conditions (EN 60721-3-3) Class Environmental parameter 3B1 3B2 3B3 a) Flora NO Presence of mildew, fungus, etc. Presence of mildew, fungus, etc. NO Presence of rodents and other animals that are harmful to products, excluding termites Presence of rodents and other animals that are harmful to products, including termites b) Fauna Classification of mechanically active substances (EN 60721-3-3) Environmental parameter 3S1 3S2 3S3 3S4 No 30 300 3000 b) Dust (suspension) [mg/m ] 0,01 0,2 0,4 4,0 c) Dust (sedimentation) [mg/(m2∙h) 0,4 1,5 15 40 a) Sand [mg/m3] 3 Places where precautions have been taken to minimize the presence of dust. Places away from dust sources Places without any special precaution to minimize the presence of sand or dust, however not in proximity to sand or dust sources Places in proximity to sand or dust sources Places in proximity to working processes that generate sand or dust, or in geographic areas having a high proportion of sand brought by the wind or of dust suspended in the air 28 Class X X X X Rev.A 15/05/2012 Installation and start-up of UPS PEGASUS II 10-40 kVA Classification of chemically active substances (EN 60721-3-3) Environmental parameter Class 3C1R 3C1L 3C1 3C2 3C3 3C4 No No No Salt fog Salt fog Salt fog 0,01 0,1 0,1 1,0 10 40 c) Hydrogen sulphide [mg/m3] 0,0015 0,01 0,01 0,5 10 70 d) Chlorine [mg/m3] 0,001 0,01 0,1 0,3 1,0 3,0 e) Hydrochloric acid [mg/m3] 0,001 0,01 0,1 0,5 5,0 5,0 f) Hydrofluoric acid [mg/m3] 0,001 0,003 0,003 0,03 2,0 2,0 g) Ammonia [mg/m3] 0,03 0,3 0,3 3,0 35 175 h) Ozone [mg/m3] 0,004 0,01 0,01 0,1 0,3 2,0 0,01 0,1 0,1 1,0 9,0 20 a) Sea salt b) Sulphur dioxide [mg/m3] i) Nitric oxide (expressed in equivalent values of 3 nitrogen dioxide) [mg/m ] Places where atmosphere is strictly monitored and regulated (“clean spaces” category) Places where atmosphere is permanently monitored X X Places located in rural and urban regions where industrial activities are few and where traffic is moderate X Places located in urban regions with industrial activities and/or considerable traffic X Places in proximity to industrial sources with chemical emissions X Places located in industrial installations. Emissions of highly concentrated chemical pollutants X UPS PEGASUS II is designed to be installed in an environment that meets the following classifications. K Climatic conditions In accordance with the technical specification B Biological conditions 3B1 (EN 60721-3-3) C Chemically active substances 3C2 (EN 60721-3-3) S Mechanically active substances 3S2 (EN 60721-3-3) In the event that the environmental conditions of the installation room do not comply with the specified requirements, additional precautions must be taken to reduce excessive values to the specified limits. Rev.A 15/05/2012 29 Installation and start-up of UPS PEGASUS II 10-40 kVA 4 ELECTRICAL CONNECTION The electrical connection is part of the work which is normally provided by the company that carries out the product installation. For this reason, the UPS manufacturer shall not be held responsible for any damages due to wrong connections. Use qualified personnel only All the operations related to the electric connection must be carried out by qualified and trained personnel. Work in compliance with the local standards The installation of UPS PEGASUS II must be carried out in compliance with national and local regulations. Connection of ground cable The grounding of the UPS via the relevant terminal is mandatory. It is strongly recommended to connect the ground terminal as first terminal. 30 Rev.A 15/05/2012 Installation and start-up of UPS PEGASUS II 10-40 kVA The electrical connection is part of the work which is normally provided by the company that carries out the electrical installation and not by the UPS manufacturer. For this reason, the following recommendations are only an indication, as the UPS manufacturer is not responsible for the electrical installation. In any case we recommend to carry out the installation and the electrical input and output connections in compliance with the local standards. Cables must be selected bearing in mind technical, financial and safety aspects. The selection and the sizing of cables from a technical viewpoint depend on the voltage, on the current absorbed by the UPS, on the bypass line and on the batteries, on the ambient temperature and on the voltage drop. Finally, the kind of cable laying must be taken into particular consideration. For more explanations regarding the selection and the sizing of cables, please refer to the relevant IEC standards, in particular to IEC 64-8 standard. “Short-circuit currents” (very high currents with a short duration) and “overload currents” (relatively high currents with a long duration) are among the main causes of cable damage. The protection systems normally used to protect the cables are: thermal magnetic circuit breakers or fuses. Protection circuit breakers must be selected according to the maximum short-circuit current (max Isc) that is needed to determine the breaking power of automatic circuit breakers, and to the minimum current (min Isc) that is needed to determine the maximum length of the line protected. The protection against short-circuit must operate on the line before any thermal and electrothermal effects of the overcurrents may damage the cable and relevant connections. During the electrical installation take particular care to respect the phase rotation. - UPS up to 20 kVA The terminal boards are placed on the rear of the UPS, under the breakers. To access the terminals remove the protection, removing the fixing bolts. - UPS 30-40 kVA The terminal boards are placed on the front of the UPS. To access the terminals remove the front panel, removing the fixing bolts. Mains connection The connection to the mains must be carried out with protection fuses between the mains and the UPS. The use of differential protection devices in the line supplying the UPS is unadvisable. The leakage current to ground due to the RFI filters is rather high and it can cause spurious tripping of the protection device. According to IEC EN62040-1 standard, in order to take into account the UPS’ leakage current, residual current devices having adjustable threshold can be used. Rev.A 15/05/2012 31 Installation and start-up of UPS PEGASUS II 10-40 kVA Mains connection Include an appropriate and readly accessible disconnect device in the fixing wire connecting the UPS to the mains. To protect the output against electrical shock, use the following residual current devices: PEGASUS II 3/3: DEVICE AS TYPE B (IEC/TR 60755/A2) PEGASUS II 3/1: DEVICE AS TYPE A (IEC 61081-1 or IEC 61091-1) Electrical connection data 10 Power (kVA) Input Fuses (A) Input cables (mm2) 15 20 3/1 Rectifier 3x25 3x32 3x32 Bypass 1x80 1x110 1x150 Rectifier 3x6 3x10 3x10 Bypass 2x16 2x25 2x35 Output cables (mm2) 2x16 2x25 2x35 Battery cables (mm2) 3x6 3x6 3x6 Electrical connection data 10 Potenza (kVA) Input Fuses (A) Input cables (mm2) Output cables Battery cables 32 2 (mm ) 2 (mm ) 15 20 30 40 3/3 Rectifier 3x25 3x32 3x32 3x70 3x70 Bypass - - - - - Rectifier 4x6 4x6 4x10 4x25 4x25 Bypass - - - - - 4x6 4x6 4x10 4x25 4x25 3x6 3x6 3x6 3x16 3x16 Rev.A 15/05/2012 Installation and start-up of UPS PEGASUS II 10-40 kVA 4.1 TERMINAL BOARDS UPS PEGASUS II is provided with terminal boards for the connection of power cables and of auxiliary connections. Picture 5 – Terminal board PEGASUS II 3/1 10-15-20kVA Picture 6 – Terminal board PEGASUS II 3/3 10-15-20kVA Picture 7 – Terminal board PEGASUS II 3/3 30-40kVA Rev.A 15/05/2012 33 Installation and start-up of UPS PEGASUS II 10-40 kVA 4.2 CONNECTION OF POWER CABLES For the electric connection of UPS PEGASUS II, connect the following cables: DC supply from the battery; AC supply from the rectifier and bypass supply mains; AC output to the loads. Injury hazard due to electric shock! Very high voltages are present at the ends of the cables coming from the battery: Isolate the battery via DC circuit breakers before connecting it to the UPS; Connect the ground cable to the relevant bar before carrying out any other connection inside the device. Risk of damages to the device due to insufficient insulation The cables must be protected from short-circuits and leakage currents to earth; The connection points must be hermetically sealed to prevent the air from being sucked through the cable passage. Risk of damages to the device due to incorrect wiring To connect the device, follow the electrical drawing scrupulously and respect the polarity of cables. 34 Rev.A 15/05/2012 Installation and start-up of UPS PEGASUS II 10-40 kVA 4.3 BATTERY Batteries installation For battery installation please respect the prescriptions of the EN62040-1 standard, paragraph 4.5. To obtain the battery life indicated by the battery manufacturer, the operating temperature must remain between 0 and 25 °C. However, although the battery can operate up to 40 °C , there will be a significant reduction of the battery life. To avoid the formation of any kind of potentially explosive hydrogen and oxygen mixture, suitable ventilation must be provided where the battery are installed (see EN62040-1 annex N). The batteries can be internal or external, however, it is recommended to install them when the UPS is capable of charging them. Please remember that, if the battery is not charged for periods over 2-3 months they can be subject to irreparable damage. Internal batteries The PEGASUS II 3/1 and 3/3 from 10 kVA to 20 kVA, have internal batteries. Servicing of batteries should performed by qualified personnel only. Replace the batteries with the same number of block and capacity. Replace only with original type. CAUTION: do not dispose of batteries in fire. The battery may explode. CAUTION: do not open or mutilate batteries. Released electrolyte is harmful to the skin and eyes.It may be toxic. CAUTION: do not dump the exausted batteries in the environment. Rev.A 15/05/2012 35 Installation and start-up of UPS PEGASUS II 10-40 kVA 4.3.1 Battery connection and positioning Battery voltage After the battery installation, before closing BCB, check the battery voltage on the BCB circuit breaker. In case of not directly supplied cabling, please connect the cables to the battery breaker (BCB) as shown in the below picture. Picture 8 –Cabling of BCB fuse holder 36 Rev.A 15/05/2012 Installation and start-up of UPS PEGASUS II 10-40 kVA 4.3.1.1 3,3Ah 12V battery connection and positioning – PEGASUS II 10kVA 1) Remove the four screws to open the front cover and access the battery trays. 2) Remove the cardboard cover protection from the batteries, see picture 9. Picture 9 – Cardboard 3,3Ah battery protection Rev.A 15/05/2012 37 Installation and start-up of UPS PEGASUS II 10-40 kVA 3) Connect the wires as shown on the picture 10. Picture 10 – 3,3Ah battery connection Colour cables The cable terminations, for the connection to the battery trays, are marked with BLACK PVC-sleeve for the connection to the negative pole and with RED PVCsleeve for the connection to the positive pole. The termination of the cable 13- will be marked with BLACK PVC-sleeve and that of the cable 13A+ with RED pvc-sleeve. The termination of the cable 15- will be marked with BLACK PVC-sleeve and that of the cable 12+ with RED pvc-sleeve. 38 Rev.A 15/05/2012 Installation and start-up of UPS PEGASUS II 10-40 kVA After the connection re-insert the battery trays as shown in pictures 11. Picture 11 – 3,3Ah battery connected Put back and fix the front cover with the four screws. Rev.A 15/05/2012 39 Installation and start-up of UPS PEGASUS II 10-40 kVA 4.3.1.2 7Ah / 9Ah 12V battery connection and positioning– PEGASUS II 10-15-20kVA 1) Remove the four screws to open the front cover and access the battery trays. 2) Remove the cardboard cover protection from the batteries, see picture 12. Picture 12 – Cardboard 7Ah/9Ah battery protection 40 Rev.A 15/05/2012 Installation and start-up of UPS PEGASUS II 10-40 kVA 3) Connect the wires as shown on the picture 13. Picture 13 – 7Ah/9Ah battery connection Colour cables The cable terminations, for the connection to the battery trays, are marked with BLACK PVC-sleeve for the connection to the negative pole and with RED PVCsleeve for the connection to the positive pole. The termination of the cable 13- will be marked with BLACK PVC-sleeve and that of the cable 13A+ with RED pvc-sleeve. The termination of the cable 15- will be marked with BLACK PVC-sleeve and that of the cable 12+ with RED pvc-sleeve. Rev.A 15/05/2012 41 Installation and start-up of UPS PEGASUS II 10-40 kVA After the connection re-insert the battery trays as shown in picture 14. Picture 14 – 7Ah/9Ah battery connected Put back and fix the front cover with the four screws. 42 Rev.A 15/05/2012 Installation and start-up of UPS PEGASUS II 10-40 kVA 4.4 FUSES POSITIONING BCB – PEGASUS II 10-15-20KVA After that the battery is correctly connected, insert the fuses and the auxiliary contact on the fuseholder (BCB), as shown in the picture 15. Picture 15 – Fuses positioning on the fuseholder BCB Battery voltage After the battery installation, before closing BCB, check the battery voltage on the BCB circuit breaker. In case of not directly supplied cabling, please connect the cables to the battery breaker (BCB) as shown in the below picture. Rev.A 15/05/2012 43 Installation and start-up of UPS PEGASUS II 10-40 kVA 4.5 AS553 EXTERNAL BATTERY The battery cabinet can be used to increase the autonomy of the UPS “PEGASUS II 10-1520kVA” line for which the battery is installed internally on the standard configuration. Internal battery With the external battery the internal battery is never present. The battery cabinet is necessary for the UPS 30-40kVA. The battery cabinet is composed of one string of 60 monoblocks 30+30 or is composed of two strings in parallel, each composed of 60 monoblocks 30+30. Each monoblock is composed of 6 cells. The size of the monoblocks can be 7Ah, 9Ah or 12Ah. - AS553 for 7Ah, 9Ah and 12Ah battery blocks. The battery circuit breaker and the battery fuses are installed inside the external battery cabinet, see picture 21. Concerning the installation of the external battery cabinet, refer to the details given in paragraph 4.3. Cabinet balanced In order to maintain the cabinet balanced, extract only one tray at a time. Before accessing the fuses, removing the protection, make sure that no voltage is present. 44 Rev.A 15/05/2012 Installation and start-up of UPS PEGASUS II 10-40 kVA 4.5.1 Dimensions and weights The dimensions and weights of the external battery cabinet are indicates here under. Picture 16 – Base plan of the external battery cabinet Picture 17 – Dimensions of the external battery cabinet Rev.A 15/05/2012 45 Installation and start-up of UPS PEGASUS II 10-40 kVA Cabinet AS553 L (mm) 503 P (mm) 647 H (mm) 1200 L1 (mm) 500 P1 (mm) 625 L2 (mm) 50 Cabinet AS553 Weight without battery (kg) Weight with battery (kg) 2 Static load with battery (kg/m ) 46 120 x 7Ah 120 x 9Ah 120 x 12Ah 60 x 12Ah 120 120 120 120 408 459 645 385 1255 1412 1984 1184 Rev.A 15/05/2012 Installation and start-up of UPS PEGASUS II 10-40 kVA 4.5.2 7Ah/9Ah/12Ah 12V battery connection and positioning 120 elements. 1) Remove the six screws to open the front cover and access the battery trays. 2) Remove the cardboard cover protection from the batteries, see picture 18. Pictrue 18 – Cardboard 7Ah/9Ah/12Ah battery protection 3) Connect the wires as shown on the picture 19. Picture 19 – 7Ah/9Ah/12Ah battery connection Rev.A 15/05/2012 47 Installation and start-up of UPS PEGASUS II 10-40 kVA 4) After the connection re-insert the battery trays as shown in picture 20. Picture 20 – 7Ah/9Ah/12Ah battery connected Put back and fix the front cover with the six screws. Battery voltage After the battery installation, before closing BCB, check the battery voltage on the BCB circuit breaker and connect battery cabinet to the UPS as indicated on 4.5.3 paragraph. Picture 21 – Battery circuit breaker and fuses 48 Rev.A 15/05/2012 Installation and start-up of UPS PEGASUS II 10-40 kVA 4.5.3 Connections The following picture shows the electrical connection between the UPS and the external battery cabinet. Picture 22 – Battery cabinet and UPS connections For the connection above mentioned you can use the cables supplied in the battery cabinet. Rev.A 15/05/2012 49 Installation and start-up of UPS PEGASUS II 10-40 kVA 4.6 SERIAL INTERFACES The UPS is provided with serial interfaces for the external communication of the operating status and parameters. RS232/USB: is used for connection to the proprietary programming and control software. MODBUS (OPTIONAL): is used for the transmission of data to the outside via MODBUS protocol (RS485) with terminals. PARALLEL (OPTIONAL): is used for communication between paralleled UPS units. SNMP (OPTIONAL): is used for the external transmission of data via LAN. NORMAL/BYPASS SELECTOR: switch the load on bypass. INPUT SERVICE: is used only for maintenance 50 Rev.A 15/05/2012 Installation and start-up of UPS PEGASUS II 10-40 kVA Picture 23 – Interfaces of UPS PEGASUS II Rev.A 15/05/2012 51 Installation and start-up of UPS PEGASUS II 10-40 kVA 4.7 RELAY CARD CONNECTION (OPTIONAL) UPS PEGASUS II, in its full configuration, is provided with a relay card for repeating alarms and operating statuses remotely. Its electric connection is carried out directly on the terminals located on the card. Picture 24 – Relay card 52 Rev.A 15/05/2012 Installation and start-up of UPS PEGASUS II 10-40 kVA M1 Status in normal operation Relay Alarms/Status Status RL1 Alarm = A30 COMMON ALARM Not energized if alarm is present 2-3 Closed 1-2 Open Not energized if alarm is present 5-6 Closed 4-5 Open Not energized if alarm is present 8-9 Closed 7-8 Open Not energized if alarm is present 11-12 Closed 10-11 Open NORMAL MODE Not energized if Alarm = A16 BYPASS LOAD alarm is present -------------------------- ------------ECO MODE Energized if Status = S7 BYPASS LOAD status is present 14-15 Closed RL2 RL3 RL4 RL5 RL6 RL7 RL8 Alarm = A1 MAINS FAULT Alarm = A9 BATTERY AUT END Alarm = A13 INV OUT OF TOL BATTERY NOT DISCHARGING Not Energized If battery discharge NORMAL MODE Energized if Status = S4 INVERTER LOAD status is present -------------------------- ------------ECO MODE Not energized if Alarm = A38 INV LOAD alarm is present Status = S6 BYPASS OK Energized if status is present Pins 13-14 Open 17-18 Closed 16-17 Open 20-21 Closed 19-20 Open 23-24 Closed 22-23 Open Led Status in Name normal operation DL1 On DL2 On DL3 On DL4 On DL5 On DL6 On DL7 On DL8 On Relay output characteristics: 120 VAC voltage 1A current 50 VDC voltage 1A current resistive load Rev.A 15/05/2012 53 Installation and start-up of UPS PEGASUS II 10-40 kVA 5 STARTUP AND SHUTDOWN Read the technical documentation Before installing and using the device, make sure you have read and understood all the instructions contained in the present manual and in the technical supporting documentation. Further information In the event that the information provided in this manual is not sufficiently exhaustive, please contact the manufacturer of the device, whose details are available in the “Contacts” section. 5.1 PRELIMINARY CHECKS Before starting up the unit, make sure that: all installation and electric connection works have been performed professionally; all power and control cables have been properly and tightly connected to the relevant terminal boards; the ground cable is properly connected; the battery polarity is correct and the voltage is within the operating values; the phase rotation of the line is correct and the voltage is within tolerance with the operating values. the emergency power off “EPO” push-button, if installed, is not pressed (if not, press it back to the rest position). 54 Rev.A 15/05/2012 Installation and start-up of UPS PEGASUS II 10-40 kVA 5.2 START-UP PROCEDURE EPO push-button and phase rotation Before switching the UPS on, make sure that: 1) the emergency power off “EPO” push-button, if installed, is not pressed. If not, press it back to the rest position; 2) the input and output phase rotation is correct. Circuit breaker BCB Do not close the battery breaker BCB before it’s required by the front panel. Serious damages to the UPS internal parts and/or to the battery may occur. No. LCD DISPLAY 1 BLANK ACTION Close RCB 2 BOOT LOADER 3 EEPROM READING 4 EEPROM PARAM. SENDING 5 6 PLEASE WAIT UPS START UP PLEASE WAIT RECTIFIER START UP PLEASE WAIT 7 8 INVERTER START UP PLEASE WAIT 9 BYPASS START UP CLOSE SBCB Rev.A 15/05/2012 OPERATING CHECKS A few seconds after the closing of input circuit breaker RCB the pre-charging phase of the capacitive bank will start. The control logic will be started and the front panel will be activated. “BOOT” phase where the UPS firmware can be updated following the appropriate procedure. All the LED’s on the front panel are on. Reading of the configuration parameters stored in the EEPROM. All the LED’s on the front panel are off. Sending of the configuration parameters stored in the EEPROM. All the LED’s on the front panel are off. UPS start-up. LED #1 is on - input voltage present. The IGBT rectifier bridge starts to modulate; VDC voltage reaches the nominal value. LED #3 is lit green: DC voltage present. The modulation of the inverter bridge is started. The AC output voltage reaches the nominal value. After a few seconds the static inverter switch is closed. LED #5 is lit green: static switch SSI closed. Close SBCB 55 Installation and start-up of UPS PEGASUS II 10-40 kVA 10 BYPASS START UP PLEASE WAIT 11 BATTERY START UP CLOSE BCB BATTERY START UP PLEASE WAIT 12 13 14 End 56 UPS START UP CLOSE OCB START UP END PLEASE WAIT UPS NAME NOMINAL POWER The control logic checks that all the bypass parameters (voltage, phase rotation, frequency) are correct. LED #2 is lit green: bypass voltage present Close BCB The control logic checks the closing of the circuit breaker to go to the following step. Led #4 lit green. Close OCB The control logic checks that all the output parameters (voltage, current, frequency) are correct. LED #7 is lit green: output voltage present. The default screen is displayed after a short time with the UPS name and the nominal power. Rev.A 15/05/2012 Installation and start-up of UPS PEGASUS II 10-40 kVA 5.3 BASIC TROUBLESHOOTING This paragraph provides the basic information if any problems occur during the start-up procedure. In case the problem cannot be solved, contact the service department. 1) After closing RCB the LCD display is still blank Check the phase rotation of supply voltage. Make sure the input voltage and frequency are within tolerance. Check the rectifier protection fuses F1-F2-F3; they are inside the unit. 2) After step #1 the UPS stops the starting sequence and shows one or more alarm messages Check the alarms indicated on the display and remove their causes. Close RCB and try to restart the UPS. 3) After step #2 the unit shows the alarm A15 – Byp fault Make sure you have closed circuit breaker SBCB. Check the protection fuses of the static bypass switch; they are inside the unit. Check the phase rotation of the bypass voltage. Make sure voltage and frequency are within tolerance. 4) After step #3 the unit shows the alarm A7 – BCB open Make sure you have closed the battery circuit breaker; the circuit breaker or the fuse carrier is external to the UPS system. Check the battery fuses. Check the interconnection between the auxiliary contact of the battery circuit breaker (in the external cabinet) and the terminals Bac1-Bac2 of the UPS. 5.4 SHUT-DOWN PROCEDURE No. ACTION LCD DISPLAY OPERATING CHECKS 1 Open OCB A30 GENERAL ALARM The supply to the load is interrupted. LED #7 off. 2 Open BCB A30 GENERAL ALARM The battery is disconnected from the rectifier. Led #4 red flashing. 3 Open SBCB A30 GENERAL ALARM The bypass supply is disconnected. LED #2 off. 4 Open RCB A30 GENERAL ALARM Rectifier and inverter shutdown. 5 Rev.A 15/05/2012 BLANK End of shutdown procedure. 57 Installation and start-up of UPS PEGASUS II 10-40 kVA 5.5 SWITCHING PROCEDURE TO MANUAL BYPASS The load is transferred to Manual Bypass with no interruption of supply to the loads. In this configuration, the system can be restarted via the return procedure from load on manual bypass, without the need to de-energize the loads. Manual bypass To perform the switching procedure correctly, make sure no alarms are present on the system. During Manual Bypass the load is supplied directly by the input mains, therefore continuous supply cannot be guaranteed to the loads. ACTION No. 1 Move the bypass selector SW to BYPASS OPERATING CHECKS A30 GENERAL ALARM The load is transferred to the bypass line. LED #5 off, LED #6 lit orange. 2 Close MBCB A30 GENERAL ALARM The inverter is switched off. The load is supplied by the input mains through the manual bypass switch. The static bypass switch is still closed. Led #8 lit orange. 3 Open BCB A30 GENERAL ALARM The battery is disconnected from the DC bus bar. Led #4 red flashing. 4 Open RCB A30 GENERAL ALARM The supply input is opened; the rectifier shuts down. LED #1 off. 5 Open OCB A30 GENERAL ALARM The load remains fed by the manual bypass switch. LED #8 off. 6 Open SBCB A30 GENERAL ALARM The bypass line is disconnected. The display goes out. BLANK The load is supplied directly by the mains through the manual bypass switch. The UPS is isolated. 7 58 LCD DISPLAY Rev.A 15/05/2012 Installation and start-up of UPS PEGASUS II 10-40 kVA 5.6 RESTART FROM MANUAL BYPASS Before restarting the UPS from manual by-pass, make sure the “Bypass_Sw" selector is in BYPASS position and the MBCB isolator is closed. No. LCD DISPLAY 1 2 BLANK BOOT LOADING 3 EEPROM READING 2 UPS START UP WAIT PLEASE 5 RECTIFIER START UP WAIT PLEASE 6 START UP FROM MBCB CLOSE SBCB BYPASS START UP WAIT PLEASE 7 8 9 10 START UP FROM MBCB CLOSE BCB START UP FROM MBCB CLOSE OCB START UP FROM MBCB OPEN MBCB Rev.A 15/05/2012 ACTION OPERATING CHECKS Close RCB “BOOT” phase where the UPS firmware can be updated following the appropriate procedure. All the LED’s on the front panel are on. Reading of the configuration parameters stored in the EEPROM. All the LED’s on the front panel are off. The rectifier is supplied and the DC voltage reaches the nominal value. All the LED’s on the front panel are on. The microprocessor checks that all the start-up conditions are good for restart. Led #1 lit green. Led #8 lit orange. The IGBT rectifier bridge starts to modulate; VDC voltage reaches the nominal value. LED #3 is lit green: DC voltage present. Close SBCB Close BCB The microprocessor checks that all the bypass parameters (voltage, phase rotation, frequency) are within tolerance. Led #2 lit green. The static bypass switch is closed. LED #6 lit orange. Closing of the battery circuit breaker. Led #4 lit green. Close OCB The load is fed by the static bypass switch. Circuit breaker MBCB is still closed. Led #7 lit green. Open MBCB The load is fed by the static bypass switch and the inverter can be started. LED #8 off. 59 Installation and start-up of UPS PEGASUS II 10-40 kVA 11 INVERTER START WAIT PLEASE 12 START UP FROM MBCB MOVE BYP - SWITCH START UP END WAIT PLEASE 13 14 60 The modulation of the inverter bridge is started. The AC voltage reaches the nominal value. The microprocessor checks the synchronization with the bypass line. The load is transferred to the inverter. Move the selector “NORMAL-BYPASS” Led #5 lit green. to NORMAL The microprocessor checks that all the output parameters (voltage, current, frequency) are within the tolerance limits. UPS MODEL OUTPUT VOLTAGE Rev.A 15/05/2012 UPS user manual UPS USER MANUAL Index 1 SCOPE ............................................................................................. 64 2 SAFETY RULES AND WARNINGS ................................................. 65 3 GENERAL UPS DESCRIPTION ....................................................... 66 3.1 TYPOLOGY .............................................................................................................. 66 3.2 SYSTEM DESCRIPTION .......................................................................................... 66 3.2.1 Rectifier............................................................................................................ 66 3.2.2 Inverter ............................................................................................................. 67 3.2.3 Battery and battery charger ............................................................................ 67 3.2.4 Static bypass ................................................................................................... 67 3.2.5 Manual bypass ................................................................................................ 67 3.3 3.3.1 Normal operation............................................................................................. 68 3.3.2 Bypass operation ............................................................................................ 68 3.3.3 Battery operation............................................................................................. 69 3.3.4 Manual bypass ................................................................................................ 70 3.4 4 5 OPERATING STATUS ............................................................................................. 68 CONTROL AND OPERATION DEVICES ................................................................. 71 3.4.1 Isolators (DC input and AC output) ................................................................ 71 3.4.2 Emergency power off command (EPO) ......................................................... 72 3.4.3 Normal/Bypass selector.................................................................................. 72 3.4.4 LCD control panel ........................................................................................... 72 FRONT PANEL ................................................................................ 73 4.1 FUNCTION BUTTONS ............................................................................................. 73 4.2 FUNCTION OF MIMIC PANEL LED’S ...................................................................... 73 HANDLING THE LCD PANEL.......................................................... 75 5.1 MAIN MENUS ........................................................................................................... 75 5.2 MEASURE DISPLAY................................................................................................ 76 5.3 BASIC DIAGNOSTICS ............................................................................................. 78 5.3.1 Display of alarms history ................................................................................ 79 5.3.2 Alarms and operating status .......................................................................... 80 UPS user manual 6 7 SETTINGS AND ADVANCED OPERATIONS .................................. 82 6.1 SETTING DATE AND TIME ..................................................................................... 84 6.2 DISPLAY LANGUAGE SETTING ............................................................................ 84 6.3 NEW BATTERY INSTALLATION ............................................................................ 84 6.4 BATTERY CONFIGURATION.................................................................................. 84 6.5 SETTING THE MODBUS PARAMETERS ............................................................... 86 6.6 UPS TEST ................................................................................................................ 86 6.7 BATTERY TEST ...................................................................................................... 87 6.8 SYSTEM RESET ...................................................................................................... 87 6.9 ALARMS HISTORY RESET..................................................................................... 88 SYSTEM INFORMATION .................................................................. 89 7.1 7.1.1 UPS position ................................................................................................... 90 7.1.2 Master / Slave priority..................................................................................... 90 7.1.3 Communication bus monitoring .................................................................... 91 7.1.4 Parallel type..................................................................................................... 91 7.1.5 Message statistics .......................................................................................... 92 7.2 8 62 PARALLEL OPERATION INFORMATION .............................................................. 90 SERVICE INFORMATION ........................................................................................ 92 FAULTS AND ALARMS ................................................................... 93 8.1 OPERATING STATUS DEFINITION ........................................................................ 94 8.2 TROUBLESHOOTING ............................................................................................. 96 Rev.A 05/15/2012 UPS user manual Index of pictures / Indice delle figure Picture 1 – Block diagram........................................................................................................................... 66 Picture 2 – Normal operation ...................................................................................................................... 68 Picture 3 – Load supplied by bypass .......................................................................................................... 68 Picture 4 – Battery operation ...................................................................................................................... 69 Picture 5 – Manual bypass ......................................................................................................................... 70 Picture 6 – UPS front panel ........................................................................................................................ 73 Picture 7 – UPS mimic panel ...................................................................................................................... 73 Picture 8 – Structure of MEASURES menu (1 of 2) ................................................................................... 76 Picture 9 – Structure of MEASURES menu (2 of 2) ................................................................................... 77 Picture 10 – Structure of ALARMS menu ................................................................................................... 78 Picture 11 – Structure of SPECIAL menu .................................................................................................. 82 Picture 12 – Structure of INFO menu ......................................................................................................... 89 Rev.A 05/15/2012 63 UPS user manual 1 SCOPE The instructions contained in this section of the manual apply to the UPS systems indicated below. PEGASUS II 10kVA 3/1 PEGASUS II 15kVA 3/1 PEGASUS II 20kVA 3/1 PEGASUS II 10kVA 3/3 PEGASUS II 15kVA 3/3 PEGASUS II 20kVA 3/3 PEGASUS II 30kVA 3/3 PEGASUS II 40kVA 3/3 Storing documentation This manual and any other supporting technical documentation relating to the product must be stored and made accessible to personnel in the immediate vicinity of the UPS. Further information In the event that the information provided in this manual is not sufficiently exhaustive, please contact the manufacturer of the device, whose details are available in the “Contacts” section. 64 Rev.A 05/15/2012 UPS user manual 2 SAFETY RULES AND WARNINGS Injury hazard due to electric shock! Always respect all the safety instructions and, in particular: any work on the unit must be carried out by qualified personnel; internal components can only be accessed after disconnecting the device from supply sources; always use protective devices designed for each type of activity; the instructions contained in the manuals must be strictly followed. Injury hazard due to device failure Potentially hazardous situations may arise in case of UPS failure. Do not use the device if visibly damaged. Maintain the device regularly to identify possible failure. Possible device damage Whenever work is carried out on the device, make sure all actions are taken in order to avoid electrostatic discharges which might damage the electronic components of the system. Read the technical documentation Before installing and using the device, make sure you have read and understood all the instructions contained in the present manual and in the technical supporting documentation. Rev.A 05/15/2012 65 UPS user manual 3 GENERAL UPS DESCRIPTION The UPS systems of the FXS line use IGBT technology with a high changeover frequency in order to allow a low distortion of the current re-injected into the supply line, as well as high quality and stability of output voltage. The components used assure high reliability, very high efficiency and maintenance easiness. 3.1 TYPOLOGY The UPS systems of the FXS line are on-line, double conversion; the inverter included in the UPS always supplies energy to the load, whether mains is available or not (according to the battery autonomy time). This configuration guarantees the best service to the User, as it supplies clean power uninterruptedly, ensuring voltage and frequency stabilization at nominal value. Thanks to the double conversion, it makes the load completely immune from micro-interruptions and from excessive mains variations, and prevents damage to critical loads (Computer - Instrumentation Scientific equipment etc.). Output voltage present The line connected to the UPS output is energized even during mains failure, therefore in compliance with the prescriptions of IEC EN62040-1-2, the installer will have to identify the line or the plugs supplied by the UPS making the User aware of this fact. Picture 1 – Block diagram 3.2 SYSTEM DESCRIPTION 3.2.1 Rectifier It converts the three-phase voltage of the AC mains into continuous DC voltage. It uses a three-phase fully-controlled IGBT bridge with a low harmonic absorption. The control electronics uses a 32 bit P of latest generation that allows to reduce the distortion of the current absorbed by mains (THDi) to less than 5%. This ensures that the rectifier does not distort the supply mains, with regard to the other loads. It also avoids cable overheating due to the harmonics circulation. The rectifier is so sized as to supply the inverter at full load and the battery at the maximum charging current. 66 Rev.A 05/15/2012 UPS user manual 3.2.2 Inverter It converts the direct voltage coming from the rectifier or from the DC battery into alternating AC voltage stabilized in amplitude and frequency. The inverter uses IGBT technology with a high changeover frequency of approximately 15 kHz. The control electronics uses a 32 Bit P of latest generation that, thanks to its processing capability, generates an excellent output sine-wave. Moreover, the fully digital control of the output sine-wave allows to achieve high performances, among which a very low voltage distortion even in presence of high-distorting loads. 3.2.3 Battery and battery charger The battery can be installed inside (only 10-20 kVA) or outside (10-40 kVA) the UPS. The battery charger logic is completely integrated in the rectifier’s control electronics. The battery is charged, according to the DIN 41773 Standard, every time it has been partially or completely discharged. When its full capacity is restored, it is kept floating so as to compensate for any autodischarge. 3.2.4 Static bypass The Static Bypass allows to transfer the load between Inverter and Emergency Mains, and vice-versa, in a very short time, and uses SCR’s as power commutation elements. 3.2.5 Manual bypass The Manual Bypass is used to cut off the UPS completely, supplying the load directly from the input mains in case of maintenance or serious failure. Follow the procedures contained in the manual The sequence of manual bypass switching and return must be carried out with respect to the procedure indicated in the installation and start-up section. The manufacturer cannot accept responsibility for damages arising from incorrect operation. Rev.A 05/15/2012 67 UPS user manual 3.3 OPERATING STATUS The UPS has four different operating modes, as described below: Normal operation Bypass operation Battery operation Manual bypass 3.3.1 Normal operation During normal operation all the circuit breakers/isolators are closed, except for MBCB (maintenance bypass). The rectifier is supplied by the AC three-phase input voltage which, on its turn, feeds the inverter and compensates mains voltage as well as load variations, keeping the DC voltage constant. At the same time, it keeps the battery charged (floating or boost charge depending on the battery type). The inverter converts the DC voltage into an AC sine-wave with stabilized voltage and frequency, and also supplies the load via its static switch SSI. Picture 2 – Normal operation 3.3.2 Bypass operation The load can be switched to bypass either automatically or manually. The manual changeover is due to the BYPASS SWITCH which forces the load to bypass. In case of failure of the bypass line, the load is switched back to inverter without interruption. Picture 3 – Load supplied by bypass 68 Rev.A 05/15/2012 UPS user manual 3.3.3 Battery operation In case of power failure or rectifier fault, the battery feeds the inverter without interruption. The battery voltage drops based on the amplitude of the discharging current. The voltage drop has no effect on the output voltage, which is kept constant by changing the PWM modulation. An alarm is activated when the battery is near the minimum discharge value. In case the supply is restored before the battery is completely discharged, the system will be switched back to normal operation automatically. In the opposite case, the inverter shuts down and the load is switched to the bypass line (bypass operation). If the bypass line is not available or is out of tolerance, the loads supply is interrupted as soon as the battery reaches the discharge limit threshold (black-out). As soon as the supply is restored, the rectifier will recharge the battery. In the standard configuration, the loads are supplied again via static switch SSB when mains is available again. The inverter is restarted when the battery has partially restored its capacity. The system restart from the black-out condition can be customized based on the requirements of the plant, in three different modes: Bypass loads are supplied as soon as the bypass line is available (factory configuration). Inverter loads are supplied by the inverter (even if the bypass line is available) when the battery voltage has reached a programmed threshold, after the rectifier restart. Man. Inverter the output supply is NOT restored automatically. The system requires a confirmation to restart which can only be done manually by the user via the front panel. Picture 4 – Battery operation Rev.A 05/15/2012 69 UPS user manual 3.3.4 Manual bypass The manual bypass operation is necessary whenever the UPS functionality is tested, or during maintenance or repair work. During the manual bypass due to repair or maintenance, the UPS is completely shut down and the load is directly supplied by the bypass line. Follow the procedures contained in the manual The sequence of manual bypass switching and return must be carried out with respect to the procedure indicated in the installation and start-up section. The manufacturer cannot accept responsibility for damages arising from incorrect operation. Picture 5 – Manual bypass 70 Rev.A 05/15/2012 UPS user manual 3.4 CONTROL AND OPERATION DEVICES The control and operation devices of the UPS are indicated below: AC isolator on rectifier input (RCB) AC isolator on bypass line input (SBCB) Isolator on UPS output (OCB) Manual bypass isolator (MBCB) Battery Isolator / Circuit breaker (BCB) Emergency power off button (EPO) Normal/Bypass selector LCD control panel Check the personnel training The use of the operation and control devices of the UPS is intended for authorized personnel only. We recommend to check the training of the personnel responsible for the use and maintenance of the system. 3.4.1 Isolators (DC input and AC output) The isolators provided on the UPS are used to isolate the power components of the device from the AC supply line, from the storage battery and from the loads. Voltage present on terminals The isolators do not isolate the UPS completely, where the AC line and battery voltages are still present on the terminals. Before carrying out any maintenance on the unit: Isolate the device completely by operating the external circuit breakers; Wait at least 5 minutes in order to allow the capacitors to discharge. Rev.A 05/15/2012 71 UPS user manual 3.4.2 Emergency power off command (EPO) The emergency power off command is used to disconnect the UPS output immediately, interrupting the loads supply. It also shuts down the inverter. Operate the command only in case of real emergency The components of the system are subject to a high stress when the emergency power off command is operated under load presence. Use the emergency power off button only in case of real emergency. Supply reset Reset the output supply only when the causes which led to the emergency shutdown have been eliminated and you are sure that there is no hazard to persons and things. 3.4.3 Normal/Bypass selector The Normal/Bypass selector is installed externally, on the rear of UPS. It is generally used during the manual bypass procedure, when it is necessary to isolate the UPS for maintenance or repair. Follow the procedures contained in the manual The Normal/Bypass selector shall only be operated in accordance with the procedures specified in the installation and start-up section. The manufacturer cannot accept responsibility for damages arising from incorrect operation. 3.4.4 LCD control panel The control panel of the UPS is used in order to: Check the operating parameters of the device Check the alarms present Access the event log Display the information on the device Modify the operating parameters The menu which allows to change the parameters is password-protected in order to prevent access to unauthorized personnel. 72 Rev.A 05/15/2012 UPS user manual 4 FRONT PANEL The front panel of the UPS, consisting of four rows alphanumeric display plus 5 function keys, allows the complete monitoring of the UPS status. The mimic flow helps to understand the operating status of the UPS. Picture 6 – UPS front panel 4.1 FUNCTION BUTTONS The front panel of the UPS is provided with 5 buttons whose functions are indicated in the following table: Button Assigned functions Scrolls up the menus Increases the values by one unit Selects a value Scrolls down the menus Decreases the values by one unit Selects a value Selects a menu Confirms changes Silences the buzzer (activated due to an alarm or a failure) Returns to the previous menu 4.2 FUNCTION OF MIMIC PANEL LED’S Picture 7 – UPS mimic panel Rev.A 05/15/2012 73 UPS user manual LED 1 LED 2 LED 3 LED 4 LED 5 LED 6 LED 7 LED 8 LED 9 LED 10 74 GREEN AC line on rectifier input within tolerance GREEN Wrong phase rotation OFF AC mains failure on rectifier input GREEN AC bypass line within tolerance GREEN Wrong phase rotation OFF AC bypass line out of tolerance AC bypass line failure GREEN Rectifier off or faulty RED DC voltage out of tolerance GREEN Rectifier on and DC voltage within tolerance GREEN circuit breaker BCB closed and battery charging GREEN Battery discharging or under TEST ORANGE Circuit breaker BCB open RED Battery fault (following a battery test) OFF Battery not available GREEN Inverter voltage within tolerance and static switch closed GREEN Inverter overload or short-circuit OFF Inverter off or voltage out of tolerance ORANGE Re-transfer blocked ORANGE Static bypass switch closed OFF Static bypass switch open GREEN Output circuit breaker OCB closed OFF Output circuit breaker OCB open ORANGE Manual bypass switch MBCB closed OFF Manual bypass switch MBCB open RED Emergency power off (EPO) activated OFF Normal operation ORANGE Maintenance request (slow flashing) ORANGE Critical alarm (fast flashing) OFF Normal operation Rev.A 05/15/2012 UPS user manual 5 HANDLING THE LCD PANEL 5.1 MAIN MENUS UPS NAME xxx kVA Main screen (nominal power of the UPS) UPS NAME MEASURES UPS measures regarding basic parameters (voltage, current, etc.) UPS NAME ALARMS UPS operating status, possible alarms present and alarms history UPS NAME SPECIAL Setting of parameters and special functions UPS NAME INFO General information regarding the UPS Rev.A 05/15/2012 75 UPS user manual 5.2 MEASURE DISPLAY The MEASURES menu is structured as follows: Picture 8 – Structure of MEASURES menu (1 of 2) 76 Rev.A 05/15/2012 UPS user manual Picture 9 – Structure of MEASURES menu (2 of 2) Sub-menu Displayed data Accuracy Rectifier input voltage (1) (2) INPUT OUTPUT BYPASS Rectifier input current (3) 0.1 Hz Input power 1 kVA Voltage (1) (2) 1V Current (3) 1A Frequency 0.1 Hz Active power 1 kW Apparent power 1 kVA Load percentage 1% Voltage (1) (2) 1V Voltage (1) (2) Frequency AC/DC Rectifier output voltage Voltage and current BATTERY Nominal capacity Residual autonomy (1) 1A Frequency Frequency INVERTER 1V 0.1 Hz 1V 0.1 Hz 1V 1V/1A 1 Ah 1 min / 1 % The voltage measures are always referred to the phase-to-neutral value (2) The three voltages are displayed in one screen as “xxx yyy zzz V” (3) The three line currents are displayed in one screen as “xxx yyy zzz A” Rev.A 05/15/2012 77 UPS user manual 5.3 BASIC DIAGNOSTICS The ALARMS menu allows to display the current operating status of the device and to access the event log, based on the following structure. Picture 10 – Structure of ALARMS menu Sub-menu Displayed data UPS STATUS Alarms present and operating statuses HISTORY Event log The LCD panel displays the ALARMS menu automatically whenever an alarm occurs. The audible indicator, if enabled, is activated to show the occurred failure. The audible alarm is silenced pressing the key (BUZZER). UPS STATUS alarm/status no. 1 Display of the first alarm present (if no alarm is present, the operating status is displayed) UPS STATUS Last alarm/status Press the key to browse the menu and to go to the next alarm/status (in alphabetical order) Automatic erasure of alarms Should an alarm occur and then the conditions that originated it no longer exist, the alarm will be automatically cancelled and the system restarted. 78 Rev.A 05/15/2012 UPS user manual 5.3.1 Display of alarms history All the events are recorded in the alarms history. UPS STATUS HISTORY HISTORY: Alarm code xxx/yyy Date/time The first event shown is the latest one in order of time; a new event makes all the other events automatically shift one position, clearing the oldest event. The quantity of stored events is displayed on the first line (xxx/yyy), which contains the data currently displayed (position in the list) and the total number of stored data (maximum number equal to 250) respectively. An asterisk indicates the automatic reset of the alarm. HISTORY: 001/015 A3 * 26-10-10 20:05 Latest event stored (in order of time) E.g.: automatic reset of alarm “A3 – BOOSTER STOPPED” HISTORY: 002/015 A3 26-10-10 19:45 Immediately prior event E.g.: alarm “A3 – BOOSTER STOPPED” HISTORY: 015/015 A18 15-10-10 12:49 First event stored (in order of time) Rev.A 05/15/2012 79 UPS user manual 5.3.2 Alarms and operating status ALARMS A1 MAINS FAULT A2 INPUT WRONG SEQ A3 BOOSTER STOPPED A4 BOOSTER FAULT A5 DC VOLTAGE FAULT A6 BATTERY IN TEST A7 BCB OPEN A8 BATTERY DISCHARGE A9 BATTERY AUT END A10 BATTERY FAULT A11 SHORT CIRCUIT A12 STOP TIMEOUT SC A13 INV OUT OF TOL A14 BYPASS WR SEQ A15 BYPASS FAULT A16 BYPASS --> LOAD A17 RETRANSFER BLOCK A18 MBCB CLOSED A19 OCB OPEN A20 OVERLOAD A21 THERMAL IMAGE A22 BYPASS SWITCH A23 EPO PRESSED A24 HIGH TEMPERATURE A25 INVERTER OFF A26 COMMUNIC ERROR A27 EEPROM ERROR 80 A28 A29 A30 A31 A32 A33 A34 A35 A36 A38 A39 A40 A41 A43 A44 A45 A46 A47 A48 A49 A50 A51 A52 A53 A54 A55 A63 CRITICAL FAULT MAINTENANCE REQ COMMON ALARM MBCB BUS CLOSED EPO BUS CLOSED ASYMMETRIC LOAD SERVICE REQUIRED DIESEL MODE DC FASTSHUTDOWN INV --> LOAD INV ERROR LOOP SSI FAULT RECT ERROR LOOP CURR ERROR LOOP DESAT IGBT INV HIGH TEMP SSW PAR LOST REDUND SEND PARAM ERROR RCV PARAM ERROR TEST MODE ERROR SSW BLOCKED BATT TEMPERATURE DC COMP ERROR FIRMWARE ERROR CAN ERROR PAR CABLE DISC START SEQ BLOCK Rev.A 05/15/2012 UPS user manual STATUSES S1 S2 S3 S4 S5 S6 S7 S8 S9 BOOSTER OK BATTERY OK INVERTER OK INVERTER --> LOAD INV BYPASS SYNC BYPASS OK BYPASS --> LOAD BOOST CHARGE INV MASTER SYNC Display and recording mode of alarms The statuses are always displayed in ascending order when the ALARMS – STATUSES menu is entered. The alarms are shown when they are present and must be silenced with the buzzer. The alarms remain displayed whilst they are present and they are automatically stored in the event log with date and time. Description of alarms and statuses For a more detailed description of the alarms and statuses, see the “Faults and alarms” section of the present manual. Rev.A 05/15/2012 81 UPS user manual 6 SETTINGS AND ADVANCED OPERATIONS Some operating parameters of the UPS can be set via the SPECIAL menu, which is structured as follows: Picture 11 – Structure of SPECIAL menu 82 Rev.A 05/15/2012 UPS user manual Sub-menu Programmable data RESET Reset of failure conditions CLOCK SETTINGS System date and time SELECT LANGUAGE Display language setting UPS TEST Performs a commutation test BATTERY SETTING Battery parameter setting BATTERY TEST Performs a battery test NEW BATTERY INSTALL Sets autonomy to 100% RESET HISTORY Event log reset MODBUS MODBUS address of device RESET RUNNING HOURS Reset the hour counter related to the UPS running time Password-protected access The SETTINGS menu is protected by a password set by the factory in order to prevent access to unauthorized personnel. We recommend minimum disclosure of the access password. Changes to the operating parameters and starting operations on the UPS may be potentially dangerous for the device and for persons. Rev.A 05/15/2012 83 UPS user manual 6.1 SETTING DATE AND TIME Date and time may be set via the CLOCK menu. CLOCK SETTINGS DD-MM-YY hh : mm The single digits can be modified via the arrow keys ( / ) and confirmed by pressing (ENTER). Setting the current date and time correctly The correct setting of the date and time is essential for the recording of the event log. 6.2 DISPLAY LANGUAGE SETTING The table below shows the languages which can be set for the display. Parameter LANGUAGE Standard Range ITALIAN ITALIAN GERMAN FRENCH ENGLISH PORTUGUESE SPANISH POLISH TURKISH The parameters are changed via the arrow buttons ( button is used to confirm the entry. 6.3 / ) to increase the digits, and the NEW BATTERY INSTALLATION The NEW BATTERY INSTALLATION menu is used in case battery circuit breaker BCB is not closed, when requested, in the start-up phase. In this case the system will start considering the battery completely discharged and activating the alarm “A10 – BATTERY FAULT”. To set the battery autonomy to 100% it is necessary to access the menu and press the button to confirm. 6.4 BATTERY CONFIGURATION In case the UPS has been tested without knowing the characteristic data of the storage battery, the BATTERY CONFIGURATION menu allows to set such data. In particular, the following data can be set: Battery capacity in Ampere-hours (Ah) Recharging current in Amperes (A) Nominal autonomy in minutes 84 Rev.A 05/15/2012 UPS user manual Access the menu by pressing the BAT CAPACITY SETTING 0120 CONFIRM BATT CAP.? YES button (ENTER). The single digits can be modified via the arrow keys ( / ) and confirmed by pressing (ENTER). Confirmation screen of the parameter set BAT RECHAR CURR SET 18 The single digits can be modified via the arrow keys ( / ) and confirmed by pressing (ENTER). CONFIRM RECHAR CURR? YES Confirmation screen of the parameter set AUTONOMY BAT SETTING 0020 The single digits can be modified via the arrow keys ( / ) and confirmed by pressing (ENTER). CONFIRM AUTON BATT? YES Confirmation screen of the parameter set SAVE BATT SETTINGS? YES Confirmation screen for the configuration BATT SETTINGS SAVED PRESS “ENTER” Rev.A 05/15/2012 85 UPS user manual Setting all the parameters To save all the parameters it is necessary to reach the end of the guided procedure until the last screen previously shown. If the procedure is interrupted earlier, none of the parameters previously set will be saved. 6.5 SETTING THE MODBUS PARAMETERS The parameters regarding the communication via RS485 interface can be set in the MODBUS menu. Modbus address The single digits can be modified via the arrow keys ( / ) and confirmed by pressing (ENTER). MODBUS ADDRESS 202 6.6 Parameter Standard Range MODBUS ADDRESS 1 1 …. 247 UPS TEST The UPS TEST menu allows to carry out a switching test of the inverter. The inverter is switched off and the load is transferred to the bypass supply. The inverter supply is automatically restored after a few seconds. The value on the second line is ready to be changed UPS TEST? NO (1x) UPS TEST? YES SPECIAL UPS TEST The parameter is changed. The change is confirmed by pressing (ENTER) The system performs a test and returns to the previous screen Possible loss of supply In case of power failure while the test is being performed, the immediate operation of the inverter is not guaranteed. 86 Rev.A 05/15/2012 UPS user manual 6.7 BATTERY TEST The BATTERY TEST menu allows to carry out a short discharge test of the battery. In case the battery is not efficient, the alarm “A10 – Battery fault” is generated at the end of the test. BATTERY TEST? NO The value on the second line is ready to be changed (1x) BATTERY TEST? YES SPECIAL BATTERY TEST The parameter is changed. The change is confirmed by pressing (ENTER) The system performs a reset and returns to the previous screen Possible loss of supply This test can affect the continuity of supply to the loads if the battery is not fully charged. 6.8 SYSTEM RESET The UPS is equipped with internal protections which block the system or some of its sections. The alarm can be cleared and normal operation can be resumed via the RESET menu. In case the failure persists, the UPS will return to the previous failure condition. In some cases the RESET is necessary to simply reset a failure signal, then the UPS will resume operation. RESET DEVICE? NO The value on the second line is ready to be changed (1x) RESET DEVICE? YES SPECIAL RESET Rev.A 05/15/2012 The parameter is changed. The change is confirmed by pressing (ENTER) The system performs a reset and returns to the previous screen 87 UPS user manual The failure conditions which impose a manual reset are: Static switch re-transfer block (alarm A17) Inverter shutdown due to the operation of the IGBT desaturation sensor (alarm A44) Inverter shutdown due to short-circuit timeout (alarm 12) Inverter shutdown due to thermal image protection (alarm 21) Inverter shutdown due to the operation of the quick disconnect sensor (alarm A36) Inverter shutdown due to voltage control loop error (alarm A39) Booster shutdown due to voltage control loop error (alarm A41) Booster shutdown due to current control loop error (alarm A43) Static switch blocked (alarm A50) Booster shutdown due to the operation of the load symmetry sensor (alarm A33) Activation of the battery fault alarm (alarm A10) Scheduled maintenance request (alarm A29). For a description of the UPS status in each of the failure conditions listed above, please refer to the “Faults and alarms” section. 6.9 ALARMS HISTORY RESET Access the RESET HISTORY menu. RESET HISTORY? NO The value on the second line is ready to be changed (1x) RESET HISTORY? YES The parameter is changed. The change is confirmed by pressing (ENTER) SPECIAL RESET HISTORY The system performs a reset of the alarms history and returns to the previous screen Loss of data The alarms history contains very important data to monitor the device behaviour over time. We recommend to save the data before deleting it. 88 Rev.A 05/15/2012 UPS user manual 7 SYSTEM INFORMATION The INFO menu provides general information regarding the UPS based on the structure indicated below. Picture 12 – Structure of INFO menu All data shown in the various sections are set by the factory via a special interface software and cannot be altered, except by personnel authorized by the manufacturer. The only adjustable parameters are the MODBUS settings (see SPECIAL menu). Rev.A 05/15/2012 89 UPS user manual Sub-menu Displayed data SERIAL NUMBER Device serial number given by the manufacturer and by an OEM distributor, if any DEVICE TYPE The device type can be: ON LINE - UPS FREQUENCY CONVERTER ECO MODE - UPS SINGLE UPS PARALLEL PARALLEL (1) 7.1 (1) Data regarding the parallel configuration MODBUS MODBUS address of device FIRMWARE RELEASE Firmware versions installed on the system SERVICE Scrolling text string with information regarding technical service RUNNING HOURS Dates related to hours number of UPS running time the menu is only active if the UPS belongs to a Parallel or Load Sync system PARALLEL OPERATION INFORMATION The PARALLEL menu is only active if the UPS belongs to a parallel or load-sync system. 7.1.1 UPS position PARALLEL 2 / 6 The first number on the second line identifies the position of that specific UPS within the parallel system. The second number represents the total number of UPS units. 7.1.2 Master / Slave priority PARALLEL MASTER The string on the second line may have two values, “MASTER” or “SLAVE”. Only one MASTER UPS can be present in the system; if not there will be a conflict on the data communication bus. 90 Rev.A 05/15/2012 UPS user manual 7.1.3 Communication bus monitoring 1-[ M ] PARALLEL 23- S S 4- S The second line of this menu gives a general indication regarding the communication between the UPS units composing the system. The numbers represent the single UPS units. The letters M and S stand for MASTER and SLAVE respectively. The brackets [ unit. ] around a letter indicate that we are working on that specific UPS A question mark next to a number indicates that that UPS unit is not communicating on the data bus. Let us assume to have the following situation: system composed of 4 UPS units; UPS2 is currently the MASTER UPS; we are checking the data communication on UPS3; UPS4 is not communicating. The menu will be as shown below. 1- S PARALLEL 23- [ M S ] 4- ? In case there are more than four paralleled devices, the menu will be as follows. 1- S PARALLEL 23- [ M S ] .... The dots indicate the presence of a further menu which shows the status of the other UPS units in the system. 7.1.4 Parallel type PARALLEL REDUNDANT+x The string on the second line may have two values, “POWER” or “REDUNDANT+x”. POWER means that the parallel system is so set as to require the presence of all the UPS units to feed the load. REDUNDANT+x means that the system is redundant and the redundancy index is indicated by number “X”. For example, in a system composed of 3 UPS units, “REDUNDANT+2” means that only one of the UPS units is sufficient to feed the load. Rev.A 05/15/2012 91 UPS user manual 7.1.5 Message statistics The statistics section regarding the messages exchanged on the communication buses consists of three different menus. CAN STATISTICS SSW MSG RX: 32564 100.0% Number of messages received and percentage of reception accuracy regarding the status of the static switches. The messages are exchanged between all the UPS units, therefore the number will increase on all of them. CAN STATISTICS INV SYNC RX: 15849 100.0% Number of messages received and percentage of reception accuracy regarding the synchronism signals. The messages are sent by the MASTER UPS, therefore the number will only increase on the SLAVE UPS units. CAN STATISTICS INV MSG RX: 9277 99.9% Number of messages received and percentage of reception accuracy regarding the status of the system. The messages are exchanged between all the UPS units, therefore the number will increase on all of them. 7.2 SERVICE INFORMATION The SERVICE menu provides important information regarding the technical service on the UPS. The information is displayed via a text string of max. 60 characters which scrolls on the second display line. However, please also see the addresses and contact numbers indicated in the present manual. 92 Rev.A 05/15/2012 UPS user manual 8 FAULTS AND ALARMS As indicated in the previous chapters, the system is provided with basic diagnostics which allow immediate visualization of the operating conditions. The LCD panel displays the alarms screen immediately, and an audible indicator is activated (if enabled). Each screen displays the alphanumeric alarm code and a short description of the alarm. A15 UPS STATUS BYPASS FAULT The display shows the first alarm in chronological order (1x) A30 S1 UPS STATUS COMMON ALARM UPS STATUS BOOSTER OK The other alarms present are displayed by scrolling the menu After the last alarm present, the operating statuses are displayed Injury hazard due to electric shock! Before carrying out any operation on the UPS, make sure that all the safety precautions are adhered to: Any work on the unit must be carried out by qualified personnel; Internal components can only be accessed after disconnecting the device from supply sources; Always use protective devices designed for each type of activity; The instructions contained in the manuals must be strictly followed; In case of doubt or impossibility of solving the problem, please contact EFFEKTA® immediately. Rev.A 05/15/2012 93 UPS user manual 8.1 94 OPERATING STATUS DEFINITION Status S1 BOOSTER OK Description The rectifier section is working properly. Operating condition The rectifier supplies the inverter and keeps the battery charged. Status S2 Description The battery is connected to the UPS. Operating condition The battery is kept charged by the rectifier and is ready to feed the inverter. Status S3 Description The inverter voltage and frequency are within the allowed range. Operating condition The inverter is ready to feed the load. Status S4 Description The inverter feeds the load. Operating condition The load is fed via the static inverter switch. Status S5 Description The inverter is synchronized with the bypass. Operating condition The synchronization between the inverter and the bypass is locked, and the static switch can change over from one source to the other. Status S6 Description The bypass voltage and frequency are within the allowed range. Operating condition The bypass line is ready for changeover in case of inverter failure. Status S7 Description Load fed by the bypass line. Operating condition The load is fed by the bypass via the static switch, waiting for the inverter to restart. BATTERY OK INVERTER OK INVERTER --> LOAD INV BYPASS SYNC BYPASS OK BYPASS --> LOAD Rev.A 05/15/2012 UPS user manual Status S8 Description The battery is in BOOST charge. Operating condition The rectifier is charging the battery with a higher voltage. The return to FLOATING charge mode is automatic. Status S9 Description The inverter is synchronized with the MASTER UPS. Operating condition This status is only present on the SLAVE UPS units, and shows that the inverter is synchronized with the signal sent by the MASTER UPS. Rev.A 05/15/2012 BOOST CHARGE INV MASTER SYNC 95 UPS user manual 8.2 96 TROUBLESHOOTING Alarm A1 MAINS FAULT Description The voltage or frequency of the input line are out of tolerance. Possible causes Mains instability or failure. Wrong phase rotation. Solutions 1. Check the connections to the mains. 2. Check the stability of mains voltage. 3. If the alarm persists, contact our Technical Support Service. Alarm A2 INPUT WRONG SEQ Description The phase rotation on the rectifier input line is wrong. Possible causes Wrong connection of power cables. Solutions 1. Check the phase rotation. 2. If the alarm persists, contact our Technical Support Service. Alarm A3 BOOSTER STOPPED Description The rectifier has been temporarily disconnected and the inverter is fed by the battery. Possible causes Instability of the AC line voltage or frequency. Possible fault in the rectifier control circuit. Solutions 1. Check the parameters of the AC line voltage. 2. Restart the device. 3. If the alarm persists, contact our Technical Support Service. Alarm A4 BOOSTER FAULT Description The rectifier has been disconnected due to an internal fault. Possible causes Possible fault in the rectifier control circuit. Solutions 1. Check which alarms are present and carry out the indicated procedures. 2. Restart the device. 3. If the alarm persists, contact our Technical Support Service. Rev.A 05/15/2012 UPS user manual Alarm A5 DC VOLTAGE FAULT Description The measured DC voltage is out of tolerance. Possible causes The battery has reached the discharge voltage due to a power failure. Measuring circuit failure. Solutions 1. Check the actual value of the measured DC voltage. 2. In case of mains failure, wait for the AC voltage to be restored. 3. Check which alarms are present and carry out the indicated procedures. 4. Restart the device. 5. If the alarm persists, contact our Technical Support Service. Alarm A6 BATTERY IN TEST Description The rectifier voltage is reduced to start a short controlled discharge of the battery. Possible causes A battery test has been started automatically (if set), or manually by the user. Solutions 1. Wait for the test to end, and check possible battery faults. Alarm A7 BCB OPEN Description The battery isolator is open. Possible causes Battery isolator open. Solutions 1. Check the status of the battery isolator. 2. Check the functionality of the auxiliary contact of the isolator. 3. Check the connection between the auxiliary contact of the isolator and the auxiliary terminals of the UPS (if provided). 4. If the alarm persists, contact our Technical Support Service. Alarm A8 BATTERY DISCHARGE Description The battery is discharging. Possible causes The battery is discharging due to a mains failure. Rectifier failure. Solutions 1. Check which alarms are present and carry out the indicated procedures. 2. If the alarm persists, contact our Technical Support Service. Rev.A 05/15/2012 97 UPS user manual 98 Alarm A9 BATTERY AUT END Description The battery has reached the pre-alarm discharge level. Possible causes The battery is discharging due to a mains failure. Rectifier failure. Solutions 1. Check which alarms are present and carry out the indicated procedures. 2. If the alarm persists, contact our Technical Support Service. Alarm A10 BATTERY FAULT Description Fault following a battery test. Possible causes Battery fault. Solutions 1. Check the battery. 2. Reset the system. 3. If the alarm persists, contact our Technical Support Service. Alarm A11 SHORT CIRCUIT Description The current sensor has detected a short-circuit at the output. Possible causes Load problem. Measuring circuit failure. Solutions 1. Check the loads connected to the UPS output. 2. If the alarm persists, contact our Technical Support Service. Alarm A12 STOP TIMEOUT SC Description Inverter shutdown due to an extended short-circuit during a power failure, or due to an overcurrent on the inverter bridge input. Possible causes Short-circuit on the loads during a power failure. Inverter bridge fault. Temporary current peak. Solutions 1. Reset the system. 2. If the alarm persists, contact our Technical Support Service. Alarm A13 INV OUT OF TOL Description The inverter voltage or frequency are out of tolerance. Possible causes Inverter shutdown due to an alarm. Inverter failure. Solutions 1. Check which alarms are present and carry out the indicated procedures. 2. If the alarm persists, contact our Technical Support Service. Rev.A 05/15/2012 UPS user manual Alarm A14 BYPASS WR SEQ Description The phase rotation of the bypass line is wrong. Possible causes Wrong connection of power cables. Solutions 1. Check the phase rotation. 2. If the alarm persists, contact our Technical Support Service. Alarm A15 BYPASS FAULT Description The voltage or frequency of the bypass line are out of tolerance. Possible causes Bypass line instability or failure. Wrong phase rotation. Solutions 1. Check the connections to the mains. 2. Check the stability of mains voltage. 3. If the alarm persists, contact our Technical Support Service. Alarm A16 BYPASS --> LOAD Description The load is fed by the bypass line. Possible causes Temporary changeover due to inverter failure. Solutions 1. Verify the inverter status and check whether other alarms are present. 2. If the alarm persists, contact our Technical Support Service. Alarm A17 RETRANSFER BLOCK Description The load is blocked on the bypass line. Possible causes Very frequent changeovers due to load in-rush currents. Static switch problems. Solutions 1. Reset the system. 2. Check the in-rush currents of the loads. 3. If the alarm persists, contact our Technical Support Service. Alarm A18 MBCB CLOSED Description The manual bypass isolator is closed. Possible causes Manual bypass isolator closed. Solutions 1. Check the status of the manual bypass isolator. 2. Check the functionality of the auxiliary contact of the isolator. 3. If the alarm persists, contact our Technical Support Service. Rev.A 05/15/2012 99 UPS user manual 100 Alarm A19 OCB OPEN Description The output isolator is open. Possible causes Output isolator open. Solutions 1. Check the status of the output isolator. 2. Check the functionality of the auxiliary contact of the isolator. 3. If the alarm persists, contact our Technical Support Service. Alarm A20 OVERLOAD Description The current sensor has detected an overload at the output. If the alarm persists, the thermal image protection will be activated (alarm A21). Possible causes Output overload. Measuring circuit failure. Solutions 1. Check the loads connected to the UPS output. 2. Contact our Technical Support Service. Alarm A21 THERMAL IMAGE Description The thermal image protection has been activated after an extended inverter overload. The inverter is shut down for 30 minutes and then restarted. Possible causes Output overload. Measuring circuit failure. Solutions 1. Check the loads connected to the UPS output. 2. Should you need to restore the inverter supply immediately, reset the system. 3. If the alarm persists, contact our Technical Support Service. Alarm A22 BYPASS SWITCH Description The “Normal/Bypass” selector has been operated. Possible causes Maintenance operation. Solutions 1. Check the selector position. 2. If the alarm persists, contact our Technical Support Service. Rev.A 05/15/2012 UPS user manual Alarm A23 EPO PRESSED Description The system is blocked due to the activation of the emergency power off button. Possible causes Activation of the (local or remote) emergency power off button. Solutions 1. Release the emergency power off button and reset the alarm. 2. If the alarm persists, contact our Technical Support Service. Alarm A24 HIGH TEMPERATURE Description High temperature of the heat sink on the inverter bridge or tripping of the DC fuses which protect the inverter bridge. Possible causes Fault of the heat sink cooling fans. The room temperature or cooling air temperature is too high. Tripping of the DC protection fuses. Solutions 1. 2. 3. 4. 5. Check the fans operation. Clean the ventilation grids and the air filters, if any. Check the air conditioning system (if present). Check the status of the DC fuses on the inverter bridge input. If the alarm persists, contact our Technical Support Service. Alarm A25 INVERTER OFF Description The inverter is blocked due an operation failure. Possible causes Various. Solutions 1. Reset the system. 2. If the alarm persists, contact our Technical Support Service. Alarm A26 COMMUNIC ERROR Description Internal error. Possible causes Microcontroller communication problems. Solutions 1. If the alarm persists, contact our Technical Support Service. Alarm A27 EEPROM ERROR Description The controller has detected an error in the parameters stored in EEPROM. Possible causes Wrong parameters entered during programming. Solutions 1. Contact our Technical Support Service. Rev.A 05/15/2012 101 UPS user manual 102 Alarm A28 CRITICAL FAULT Description An alarm has been activated which causes the shutdown of part of the UPS (rectifier, inverter, static switch). Possible causes System failure. Solutions 1. Check which alarms are present and carry out the indicated procedures. 2. If the alarm persists, contact our Technical Support Service. Alarm A29 MAINTENANCE REQ Description It is necessary to carry out maintenance work. Possible causes The time limit since the last maintenance work has elapsed. Solutions 1. Contact our Technical Support Service. Alarm A30 COMMON ALARM Description Common alarm. Possible causes At least one alarm is present. Solutions 1. Check which alarms are present and carry out the indicated procedures. Alarm A31 MBCB BUS CLOSED Description The manual bypass isolator is closed. Possible causes Manual bypass isolator closed. Solutions 1. Check the status of the manual bypass isolator. 2. Check the functionality of the auxiliary contact of the isolator. 3. If the alarm persists, contact our Technical Support Service. Alarm A32 EPO BUS CLOSED Description The system is blocked due to the activation of the emergency power off button. Possible causes Activation of the (local or remote) emergency power off button. Solutions 1. Release the emergency power off button and reset the alarm. 2. If the alarm persists, contact our Technical Support Service. Rev.A 05/15/2012 UPS user manual Alarm A33 ASYMMETRIC LOAD Description The positive and negative voltages measured on the DC capacitors towards the middle point are different. Possible causes Possible failure on the measuring circuit. Possible fault of DC capacitors. Solutions 1. Reset the system. 2. If the alarm persists, contact our Technical Support Service. Alarm A34 SERVICE REQUIRED Description A UPS check is necessary. Possible causes Possible UPS fault. Solutions 1. If the alarm persists, contact our Technical Support Service. Alarm A35 DIESEL MODE Description The UPS is supplied by the diesel generator. Possible causes The auxiliary contact which activates the diesel generator connected to the UPS is closed, and imposes this operating mode. Solutions 1. Wait for the diesel generator to stop as soon as the mains voltage is restored. 2. Check the connection of the auxiliary contact which signals the diesel generator start, to terminals XD1/XD2. 3. If the alarm persists, contact our Technical Support Service. Alarm A36 DC FASTSHUTDOWN Description Inverter shutdown due to the operation of the protection sensor as a result of sudden DC voltage variations. Possible causes Battery fault. Solutions 1. Check the battery. 2. Reset the system. 3. If the alarm persists, contact our Technical Support Service. Rev.A 05/15/2012 103 UPS user manual 104 Alarm A38 INV --> LOAD Description The load is fed by the inverter. This alarm is active for UPS systems in “ECO” mode, where the preferential supply is from the bypass line. Possible causes Temporary changeover due to bypass line failure. Solutions 1. Verify the status of the bypass line and check whether other alarms are present. 2. If the alarm persists, contact our Technical Support Service. Alarm A39 INV ERROR LOOP Description The control is not able to regulate the inverter voltage precisely. Possible causes Regulation system failure. Solutions 1. Reset the system. 2. If the alarm persists, contact our Technical Support Service. Alarm A40 SSI FAULT Description The system has detected a failure in the static inverter switch. Possible causes Possible problems on the loads. Static switch fault. Solutions 1. Check the absorption of the loads and the presence of DC components, if any, on AC current. 2. If the alarm persists, contact our Technical Support Service. Alarm A41 RECT ERROR LOOP Description The control is not able to regulate the rectifier output voltage precisely. Possible causes Regulation system failure. Solutions 1. Reset the system. 2. If the alarm persists, contact our Technical Support Service. Alarm A43 CURR ERROR LOOP Description The control is not able to regulate the rectifier output current precisely. Possible causes Regulation system failure. Solutions 1. Reset the system. 2. If the alarm persists, contact our Technical Support Service. Rev.A 05/15/2012 UPS user manual Alarm A44 DESAT IGBT INV Description The inverter is blocked due to the operation of the desaturation sensor of the IGBT drivers. Possible causes Inverter bridge fault. Solutions 1. Reset the system. 2. If the alarm persists, contact our Technical Support Service. Alarm A45 HIGH TEMP SSW Description High temperature of the static switch heat sink. Possible causes Fault of the heat sink cooling fans. The room temperature or cooling air temperature is too high. Solutions 1. 2. 3. 4. Check the fans operation. Clean the ventilation grids and the air filters, if any. Check the air conditioning system (if present). If the alarm persists, contact our Technical Support Service. Alarm A46 PAR LOST REDUND Description This alarm is only active on PARALLEL systems. Continuity is not ensured in the event of a fault on one of the UPS units. Possible causes The total load is higher than the maximum expected value. Possible failure on the measuring circuit. Solutions 1. Check the load fed by the system. 2. If the alarm persists, contact our Technical Support Service. Alarm A47 SEND PARAM ERROR Description Internal error. Possible causes Microcontroller communication problems. Solutions 1. Contact our Technical Support Service. Alarm A48 RCV PARAM ERROR Description Internal error. Possible causes Microcontroller communication problems. Solutions 1. Contact our Technical Support Service. Rev.A 05/15/2012 105 UPS user manual 106 Alarm A49 TEST MODE ERROR Description Internal error. Possible causes Microcontroller communication problems. Solutions 1. Contact our Technical Support Service. Alarm A50 SSW BLOCKED Description The static switch is blocked. The load is no longer supplied. Possible causes Loads failure. Possible UPS fault. Solutions 1. Check the loads for possible failures. 2. Reset the system. 3. If the alarm persists, contact our Technical Support Service. Alarm A51 BATT TEMPERATURE Description The battery temperature is out of tolerance. This alarm is only active when the temperature probe is installed and enabled on the battery. Possible causes Anomalous temperature in the battery cabinet. Possible failure on the measuring circuit. Solutions 1. Check the temperature on the batteries and remove the cause of the alarm, if any. 2. If the alarm persists, contact our Technical Support Service. Alarm A52 DC COMP ERROR Description Internal error. Possible causes Microcontroller communication problems. Solutions 1. Contact our Technical Support Service. Alarm A53 FIRMWARE ERROR Description The controller has detected an incompatibility in the control software. Possible causes The software update was not performed properly. Solutions 1. Contact our Technical Support Service. Rev.A 05/15/2012 UPS user manual Alarm A54 CAN ERROR Description Internal error. Possible causes Microcontroller communication problems. Solutions 1. Contact our Technical Support Service. Alarm A55 PAR CABLE DISC Description Parallel cable doesn't communicate. Possible causes Parallel cable disconnected or damaged. Solutions 1. Check the connection of cable 2. Contact our Technical Support Service. Alarm A63 START SEQ BLOCK Description During the UPS start-up a failure prevented the proper execution of the sequence. Possible causes Control devices in wrong position or operated improperly. Possible internal fault. Solutions 1. Make sure the position of the control devices (isolators, selectors) is as specified in the procedures (see “Installation and start-up” section). 2. If the alarm persists, contact our Technical Support Service. Rev.A 05/15/2012 107 TECHNICAL DATA SHEET “PEGASUS II” 10 – 15 – 20 kVA 3Ph(In) – 1Ph(Out) GENERAL INFORMATION POWER kVA UPS Type Nominal output power (Cos 0,8) Nominal output power (Cos 1,0) kVA kW Efficiency (AC AC) (ON LINE - Double Conversion) Efficiency (AC @25% load @50% load @75% load @100% load AC) (Eco Mode) Heat dissipation at nominal load and voltage UPS ambient temperature BATTERY ambient temperature UPS storage temperature BATTERY storage temperature Relative humidity (non condensing) Altitude % % kW kcal/h °C °C °C °C % m Standard battery type lead acid Protection degree Electromagnetic compatibility EMI Safety Test and performance Paint Accessibility Installation Dimensions 3 m /h dB n° cells mm Weight (with battery) kg Weight (without battery) kg Static load (with battery) kg/m 2 Static load (without battery) Input/Output cable connection Transport Transport mechanical stress kg/m 2 Design standards Free contact interface Serial communication interface Parallel configuration (optional) 108 15 20 ON LINE – Double Conversion 15 20 12 16 > 88 > 90 > 91 > 92 > 98 695 1040 1390 598 894 1195 0 40 0 +25 -10 +70 -10 +60 < 95 < 1000 (above sea level) 10 8 According to “IEC62040-3” 1% power derating every 100m above 1000m up to max 2000m Power derating for altitude > 1000 m Ventilation Requested cooling air volume Audible noise level (according to IEC EN 62040-3) 10 Forced 500 600 < 52 db 2 x 180 2 X 186 IP 20 According to “IEC EN 62040-2” (CE marking) IEC EN 62040-1 IEC EN 62040-3 RAL 7016 Front and top 10 cm from the wall L = 450 P = 650 H = 1200 Min.175 Min. 260 Min. 260 Max. 285 Max. 275 Max. 275 100 110 110 Min. 583 Min. 859 Min. 859 Max. 878 Max- 912 Max. 912 321 364 381 Bottom side By wheels According to “IEC EN 62040-3” “IEC EN 62040” “ISO 9001:2008” On request Standard: RS232 - USB Optional: RS485 (ModBus protocol) Up to 5+1 (Redundant parallel) Up to 6 (Power parallel) 500 Rev.A 06/01/2012 BLOCK DIAGRAM 1. 2. 3. 4. 5. 6. 7. Input mains (separate for by-pass and rectifier) Rectifier and battery charger Maximum internal battery: 3,3Ah, 7,2Ah and 9Ah – 60 or 62 batteries Optional external battery Inverter Emergency line (by-pass with backfeed contactor) Inverter (SSI) and by-pass (SSB) static switch Rev.A 06/01/2012 109 UPS INPUT: RECTIFIER AND BATTERY CHARGER POWER kVA 10 Input Vac % Hz % Nominal input voltage range Input frequency range Input power factor Input current THD at nominal voltage and THDV <0,5% @25% load @50% load @75% load @100% load DC output voltage accuracy DC output voltage ripple Battery recharging characteristic Maximum recharging current - at nominal load Bridge rectifier type Input protection Inrush input current Earth leakage current Nominal current absorbed from mains (at nominal load and battery charged) Maximum current absorbed from mains (at nom. Load, max. recharging current and min. input voltage) Settable walk-in Settable hold-off % % % rms A 15 20 Three-phase + Neutral 400 -20/+15 50 – 60 ±5 > 0.99 20 < 8< 6< 4< +/- 1% 2% rms IU (DIN 41773) 6 10 6 IGBT PFC Fuses < maximum nominal current < 22 A mA A 12 19 23 A 24 36 36 Sectable from 5’’ to 30’’ Sectable from 1’’ to 300’’ sec sec BATTERY POWER Maximum internal battery Standard type Cells number (settable) Floating voltage at 25°C (settable) Minimum battery discharge voltage Inverter input power (at nominal load) Inverter input current (at nominal load and minimum Vdc) Battery Protection (external to the UPS) Battery Test 110 kVA Vdc Vdc kW A 10 15 20 60 or 62 batteries 3,3AH - 7,2AH - 9AH Maintenance free 2x180 or 2x186 2x406 or 2x418 Settable 8,5 12,7 17 12 18 24 Fuses Included as standard Rev.A 06/01/2012 UPS OUTPUT: INVERTER POWER Inverter Bridge Nominal output power (Cos 0,8) Nominal output power (Cos 1,0) Efficiency (DC AC) Output Nominal output voltage (selectable) Output voltage stability - Static (balanced Load) - Static (unbalanced Load) - Dynamic (step load 20% 100% 20%) - Output voltage recovery time (after step load) - IEC EN 62040-3 Output frequency (selectable) Output frequency stability - Free running quartz oscillator - Inverter sync. with mains - Slew rate Nominal output current (@ 230 Vac output) - Cos 0,8 - Cos 1 kVA kVA kW % Vac 10 % % % ms Hz ±1 ±2 ±5 < 20 Class 1 50 - 60 Hz Hz Hz/s ± 0,001 ± 2 (other on request) ±1 A A 65 87 35 52 125% for 10 min 125%/150% for 30 sec >150% for 10 sec 104 70 Rev.A 06/01/2012 70 140 Elect. short circuit protection, current limited at 2 times nominal current. Automatic stop after 5 seconds Short circuit characteristic Selectivity Output waveform Output harmonic distortion - Linear Load - Non Linear Load - IEC EN 62040-3 Max crest factor without derating 20 43 Overload capability Short circuit current 15 Modular IGBT (transformerless) 10 15 20 8 12 16 > 95 Single phase 220-230-240 Within ½ cycle (Fuse GL 20% In) Sinusoidal % <2 <5 Fully compliant 3:1 111 UPS OUTPUT: BY PASS Automatic static by-pass Protection Bypass Nominal Voltage (selectable) Range Nominal Frequency (selectable) Range Transfer mode Vac Vac % Hz % Transfer inverter automatic bypass Retransfer automatic bypass inverter Overload Capability Manual By-Pass Back feed protection 112 % Electronic thyristor switch Fuses Single phase 220 – 230 – 240 ±10 50-60 ± (1 5) adjustable Without break In case of : - Short circuit - Battery end of discharge - Inverter test - Inverter not operating - Automatic - Block on bypass after 6 transfers within 2 minutes, reset by front panel 150 continuously 1000 for 1 Cycle Standard: - Electronically controlled - No break Standard Rev.A 06/01/2012 OPTIONS 1. 2. 3. 4. 5. 6. 7. 8. 9. 10. 11. 12. 13. 14. 15. BATTERY TEMPERATURE VOLTAGE COMPENSATION INSULATION TRANSFORMER ON BY-PASS VOLTAGE ADAPTATION AUTO-TRANSFORMERS RELAY CARD (Eight signals Alarms/Statuses), Free relay contact SERIAL INTERFACE RS-485 (MOD-BUS protocol) SNMP ADAPTER REMOTE MONITORING PANEL PARALLEL CARD INTERFACE KIT EXTERNAL BATTERY CABINET WALL MOUNTED FUSED SWITCH BOX SPECIAL PAINT LOAD-SYNC BUS CARD INTERFACE KIT DIESEL GENERATOR EXTERNAL EPO AUXILIARY CONTACT EXTERNAL MBCB AUXILIARY CONTACT OTHER SOFTWARE SELECTABLE FEATURES 1. 2. 3. 4. OFF-LINE RECTIFIER WALK-IN TIME RECTIFIER DELAY ON STARTUP (HOLD-OFF TIME) FREQUENCY CONVERTER MODE Rev.A 06/01/2012 113 TECHNICAL DATA SHEET “PEGASUS II” 10 – 15 – 20 kVA 3Ph(In) – 3Ph(Out) GENERAL INFORMATION POWER kVA UPS Type Nominal output power (Cos 0,8) Nominal output power (Cos 1,0) kVA kW Efficiency (AC AC) (ON LINE - Double Conversion) Efficiency (AC @25% load @50% load @75% load @100% load AC) (Eco Mode) Heat dissipation at nominal load and voltage UPS ambient temperature BATTERY ambient temperature UPS storage temperature BATTERY storage temperature Relative humidity (non condensing) Altitude % % kW kcal/h °C °C °C °C % m Standard battery type lead acid Protection degree Electromagnetic compatibility EMI Safety Test and performance Paint Accessibility Installation Dimensions 3 m /h dB n° cells mm Weight (with battery) kg Weight (without battery) kg Static load (with battery) kg/m 2 Static load (without battery) Input/Output cable connection Transport Transport mechanical stress kg/m 2 Design standards Free contact interface Serial communication interface Parallel configuration (optional) 114 15 20 ON LINE – Double Conversion 15 20 12 16 > 88 > 90 > 91 > 92 > 98 695 1040 1390 598 894 1195 0 40 0 +25 -10 +70 -10 +60 < 95 < 1000 (above sea level) 10 8 According to “IEC62040-3” 1% power derating every 100m above 1000m up to max 2000m Power derating for altitude > 1000 m Ventilation Requested cooling air volume Audible noise level (according to IEC EN 62040-3) 10 Forced 500 600 < 52 db 2 x 180 2 X 186 IP 20 According to “IEC EN 62040-2” (CE marking) IEC EN 62040-1 IEC EN 62040-3 RAL 7016 Front and top 10 cm from the wall L = 450 P = 650 H = 1200 Min.175 Min. 260 Min. 260 Max. 285 Max. 275 Max. 275 100 110 110 Min. 570 Min. 829 Min. 829 Max. 945 Max. 895 Max. 895 315 348 348 Bottom side By wheels According to “IEC EN 62040-3” “IEC EN 62040” “ISO 9001:2008” On request Standard: RS232 - USB Optional: RS485 (ModBus protocol) Up to 5+1 (Redundant parallel) Up to 6 (Power parallel) 500 Rev.A 06/01/2012 BLOCK DIAGRAM 1. 2. 3. 4. 5. 6. 7. Input mains (separate for by-pass and rectifier) Rectifier and battery charger Maximum internal battery: 3,3Ah, 7,2Ah and 9Ah – 60 or 62 batteries Optional external battery Inverter Emergency line (by-pass with backfeed contactor) Inverter (SSI) and by-pass (SSB) static switch Rev.A 06/01/2012 115 UPS INPUT: RECTIFIER AND BATTERY CHARGER POWER kVA 10 Input Vac % Hz % Nominal input voltage range Input frequency range Input power factor Input current THD at nominal voltage and THDV <0,5% @25% load @50% load @75% load @100% load DC output voltage accuracy DC output voltage ripple Battery recharging characteristic Maximum recharging current - at nominal load Bridge rectifier type Input protection Inrush input current Earth leakage current Nominal current absorbed from mains (at nominal load and battery charged) Maximum current absorbed from mains (at nom. Load, max. recharging current and min. input voltage) Settable walk-in Settable hold-off % % % rms A 15 20 Three-phase + Neutral 400 -20/+15 50 – 60 ±5 > 0.99 13 < 7< 5< 3< +/- 1% 2% rms IU (DIN 41773) 6 10 6 IGBT PFC Fuses < maximum nominal current < 22 A mA A 12 19 23 A 24 36 36 Sectable from 5’’ to 30’’ Sectable from 1’’ to 300’’ sec sec BATTERY POWER Maximum internal battery Standard type Cells number (settable) Floating voltage at 25°C (settable) Minimum battery discharge voltage Inverter input power (at nominal load) Inverter input current (at nominal load and minimum Vdc) Battery Protection (external to the UPS) Battery Test 116 kVA Vdc Vdc kW A 10 15 20 60 or 62 batteries 3,3AH - 7,2AH - 9AH Maintenance free 2x180 or 2x186 2x406 or 2x418 Settable 8,5 12,7 17 12 18 24 Fuses Included as standard Rev.A 06/01/2012 UPS OUTPUT: INVERTER POWER Inverter Bridge Nominal output power (Cos 0,8) Nominal output power (Cos 1,0) Efficiency (DC AC) Output Nominal output voltage (selectable) Output voltage stability - Static (balanced Load) - Static (unbalanced Load) - Dynamic (step load 20% 100% 20%) - Output voltage recovery time (after step load) - IEC EN 62040-3 Output frequency (selectable) Output frequency stability - Free running quartz oscillator - Inverter sync. with mains - Slew rate Nominal output current (@ 400Vac output) - Cos 0,8 - Cos 1 kVA kVA kW % Vac 10 % % % ms Hz ±1 ±2 ±5 < 20 Class 1 50 - 60 Hz Hz Hz/s ± 0,001 ± 2 (other on request) ±1 A A 22 29 12 18 125% for 10 min 125%/150% for 30 sec >150% for 10 sec 36 23 Rev.A 06/01/2012 24 46 Elect. short circuit protection, current limited at 2 times nominal current. Automatic stop after 5 seconds Short circuit characteristic Selectivity Output waveform Output harmonic distortion - Linear Load - Non Linear Load - IEC EN 62040-3 Max crest factor without derating 20 15 Overload capability Short circuit current 15 Modular IGBT (transformerless) 10 15 20 8 12 16 > 95 Three-phase + Neutral 380-400-415 Within ½ cycle (Fuse GL 20% In) Sinusoidal % <1 <5 Fully compliant 3:1 117 UPS OUTPUT: BY PASS Automatic static by-pass Protection Bypass Nominal Voltage (selectable) Range Nominal Frequency (selectable) Range Transfer mode Vac Vac % Hz % Transfer inverter automatic bypass Retransfer automatic bypass inverter Overload Capability Manual By-Pass Back feed protection 118 % Electronic thyristor switch Fuses Three-phase + Neutral 380 – 400 – 415 ±10 50-60 ± (1 5) adjustable Without break In case of : - Short circuit - Battery end of discharge - Inverter test - Inverter not operating - Automatic - Block on bypass after 6 transfers within 2 minutes, reset by front panel 150 continuously 1000 for 1 cycle Standard: - Electronically controlled - No break Standard Rev.A 06/01/2012 OPTIONS 1. 2. 3. 4. 5. 6. 7. 8. 9. 10. 11. 12. 13. 14. 15. BATTERY TEMPERATURE VOLTAGE COMPENSATION INSULATION TRANSFORMER ON BY-PASS VOLTAGE ADAPTATION AUTO-TRANSFORMERS RELAY CARD (Eight signals Alarms/Statuses), Free relay contact SERIAL INTERFACE RS-485 (MOD-BUS protocol) SNMP ADAPTER REMOTE MONITORING PANEL PARALLEL CARD INTERFACE KIT EXTERNAL BATTERY CABINET WALL MOUNTED FUSED SWITCH BOX SPECIAL PAINT LOAD-SYNC BUS CARD INTERFACE KIT DIESEL GENERATOR EXTERNAL EPO AUXILIARY CONTACT EXTERNAL MBCB AUXILIARY CONTACT OTHER SOFTWARE SELECTABLE FEATURES 1. 2. 3. 4. OFF-LINE RECTIFIER WALK-IN TIME RECTIFIER DELAY ON STARTUP (HOLD-OFF TIME) FREQUENCY CONVERTER MODE Rev.A 06/01/2012 119 TECHNICAL DATA SHEET “PEGASUS II” 30 – 40 kVA 3Ph(In) – 3Ph(Out) GENERAL INFORMATION POWER kVA UPS Type Nominal output power (Cos 0,8) Nominal output power (Cos 1,0) kVA kW Efficiency (AC AC) (ON LINE - Double Conversion) Efficiency (AC @25% load @50% load @75% load @100% load AC) (Eco Mode) Heat dissipation at nominal load and voltage UPS ambient temperature BATTERY ambient temperature UPS storage temperature BATTERY storage temperature Relative humidity (non condensing) Altitude % % kW kcal/h °C °C °C °C % m Standard battery type lead acid Protection degree Electromagnetic compatibility EMI Safety Test and performance Paint Accessibility Installation Dimensions Weight Static load Input/Output cable connection Transport Transport mechanical stress Design standards Free contact interface Serial communication interface Parallel configuration (optional) 120 40 ON LINE – Double Conversion 30 40 24 32 > 88 > 90 > 91 > 92 > 98 2080 2780 1788 2390 0 40 0 +25 -10 +70 -10 +60 < 95 < 1000 (above sea level) According to “IEC62040-3” 1% power derating every 100m above 1000m up to max 2000m Power derating for altitude > 1000 m Ventilation Requested cooling air volume Audible noise level (according to IEC EN 62040-3) 30 Forced 3 m /h dB n° cells mm kg 2 kg/m 800 900 < 52 db 2 x 180 2 x 186 IP 20 According to “IEC EN 62040-2” (CE marking) IEC EN 62040-1 IEC EN 62040-3 RAL 7016 Front and top 10 cm from the wall L = 450 P = 650 H = 1200 140 464 Bottom front side By wheels According to “IEC EN 62040-3” “IEC EN 62040” “ISO 9001:2008” On request Standard: RS232 - USB Optional: RS485 (ModBus protocol) Up to 5+1 (Redundant parallel) Up to 6 (Power parallel) Rev.A 06/01/2012 BLOCK DIAGRAM 1. 2. 3. 4. 5. 6. Common input rectifier and bypass Rectifier and battery charger External battery Inverter Emergency line (optional by-pass with backfeed contactor). Inverter (SSI) and by-pass (SSB) static switch Rev.A 06/01/2012 121 UPS INPUT: RECTIFIER AND BATTERY CHARGER POWER kVA 30 Input Vac % Hz % Nominal input voltage range Input frequency range Input power factor Input current THD at nominal voltage and THDV <0,5% @25% load @50% load @75% load @100% load DC output voltage accuracy DC output voltage ripple Battery recharging characteristic Maximum recharging current - at nominal load Bridge rectifier type Input protection Inrush input current Earth leakage current Nominal current absorbed from mains (at nominal load and battery charged) Maximum current absorbed from mains (at nom. Load, max. recharging current and min. input voltage) Settable walk-in Settable hold-off % % % rms A A mA 40 Three-phase + Neutral 400 -20/+15 50 – 60 ±5 > 0.99 < 14 <7 <5 <4 +/- 1% 1% rms IU (DIN 41773) 10 8 IGBT PFC Fuses < maximum nominal current < 22 A 38 50 A 58 72 sec sec Sectable from 5’’ to 30’’ Sectable from 1’’ to 300’’ BATTERY POWER External battery Standard type Cells number (settable) Floating voltage at 25°C (settable) Minimum battery discharge voltage Inverter input power (at nominal load) Inverter input current (at nominal load and minimum Vdc) Battery Protection (external to the UPS) Battery Test 122 kVA 30 40 Maintenance free 2x180 or 2x186 2x406 or 2x418 Settable Vdc Vdc kW 25,4 34 A 36 48 Fuses Included as standard Rev.A 06/01/2012 UPS OUTPUT: INVERTER POWER Inverter Bridge Nominal output power (Cos 0,8) Nominal output power (Cos 1,0) Efficiency (DC AC) Output Nominal output voltage (selectable) Output voltage stability - Static (balanced Load) - Static (unbalanced Load) - Dynamic (step load 20% 100% 20%) - Output voltage recovery time (after step load) - IEC EN 62040-3 Output frequency (selectable) Output frequency stability - Free running quartz oscillator - Inverter sync. with mains - Slew rate Nominal output current (@ 400Vac output) - Cos 0,8 - Cos 1 kVA kVA kW % Vac % % % ms Hz Hz Hz Hz/s ± 0,001 ± 2 (other on request) ±1 A Rev.A 06/01/2012 44 35 58 47 125% for 10 min 125%/150% for 30 sec >150% for 10 sec A Elect. short circuit protection, current limited at 2 times nominal current. Automatic stop after 5 seconds Short circuit characteristic Selectivity Output waveform Output harmonic distortion - Linear Load - Non Linear Load - IEC EN 62040-3 Max crest factor without derating 40 ±1 ±2 ±5 < 20 Class 1 50 - 60 Overload capability Short circuit current 30 Modular IGBT (transformerless) 30 40 24 32 > 95 Three-phase + Neutral 380-400-415 Within ½ cycle (Fuse GL 20% In) Sinusoidal % <1 <5 Fully compliant 3:1 123 UPS OUTPUT: BY PASS Automatic static by-pass Protection Bypass Nominal Voltage (selectable) Range Nominal Frequency (selectable) Range Transfer mode Vac Vac % Hz % Transfer inverter automatic bypass Retransfer automatic bypass inverter Overload Capability Manual By-Pass Back feed protection 124 % Electronic thyristor switch Fuses Three-phase + Neutral 380 – 400 – 415 ±10 50-60 ± (1 5) adjustable Without break In case of : - Short circuit - Battery end of discharge - Inverter test - Inverter not operating - Automatic - Block on bypass after 6 transfers within 2 minutes, reset by front panel 150 continuously 1000 for 1 cycle Standard: - Electronically controlled - No break Optional Rev.A 06/01/2012 OPTIONS 1. 2. 3. 4. 5. 6. 7. 8. 9. 10. 11. 12. 13. 14. 15. 16. 17. BATTERY TEMPERATURE VOLTAGE COMPENSATION INSULATION TRANSFORMER ON BY-PASS SEPARETED INPUT KIT VOLTAGE ADAPTATION AUTO-TRANSFORMERS BACK FEED PROTECTION RELAY CARD (Eight signals Alarms/Statuses), Free relay contact SERIAL INTERFACE RS-485 (MOD-BUS protocol) SNMP ADAPTER REMOTE MONITORING PANEL PARALLEL CARD INTERFACE KIT EXTERNAL BATTERY CABINET WALL MOUNTED FUSED SWITCH BOX SPECIAL PAINT LOAD-SYNC BUS CARD INTERFACE KIT DIESEL GENERATOR EXTERNAL EPO AUXILIARY CONTACT EXTERNAL MBCB AUXILIARY CONTACT OTHER SOFTWARE SELECTABLE FEATURES 1. 2. 3. 4. OFF-LINE RECTIFIER WALK-IN TIME RECTIFIER DELAY ON STARTUP (HOLD-OFF TIME) FREQUENCY CONVERTER MODE Rev.A 06/01/2012 125 126 Rev.A 06/01/2012 Rev.A 06/01/2012 127 128 Rev.A 06/01/2012