1
Digital Controller
E5@K-T
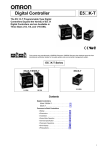
The E5@K-T Programmable Type Digital
Controllers Expand the Variety of E5@K
Digital Controllers and are Available in Three
Sizes (1/4, 1/8, and 1/16 DIN).
®
E5@K-T Series
E5AK-T/E5EK-T
1/16 DIN
1/8 DIN
Temperature
Controller
1/4 DIN
E5CK-T
Contents
Digital Controllers
E5AK-T/E5EK-T ...........................................
I-123
E5CK-T.........................................................
I-129
Common to Both Controllers
•
•
•
•
•
•
Dimensions...................................................
Installation ....................................................
Wiring ...........................................................
Operation......................................................
Peripheral Devices........................................
Precautions ..................................................
I-133
I-135
I-140
I-148
I-158
I-159
Digital Controller
E5@K-T
I-121
Compact and Easy-to-use Controllers
■ Programming is as easy as following the steps below.
Program can be set in pattern 0 according to the following procedure.
4. Set the target value to “50.”
SP
Step 1
Step 2
5p0
Step 3
100
0
50
50
Target value
Up key
0.20
0.40
0.20
Time: hours and minutes
Step No.
Target value
5. Press the Display Key to shift to the display for
the time of step 0.
Time
(hours.minutes)
0
50
0.00
1
100
0.20
2
100
0.40
3
50
0.20
ti0
0 000
1. Press the Display Key to shift to the display for
the number of steps.
5-no
0
8
Parameter for the number of
steps used
Number of steps
(Default setting: 8)
Pattern No.
Time parameter for step 0.
Step time
(Default setting: 0.00)
Pattern No.
Display key
6. Press the Display Key again with the step time
set at 0 minutes, and the target value parameter
for step 1 will be displayed.
5p1
0
0
Display key
2. Press the Down Key and set the number of steps.
Display key
5-no
0
4
7. Press the Up Key to increment to “100.”
Four steps in this case
5p1
0 100
Down key
3. Press the Display Key to shift to the display for
the target value of step 0.
5p0
0
0
Step 0
Parameter of the target value
Target value
(Default setting: 0)
Display key
I-122
Digital Controller E5@K-T
Up key
In the same manner, set the time for step 1, target
value for step 2, time for step 2, etc.
When the target value and time settings are
complete, press the Display Key.
Digital Controller
E5AK-T/E5EK-T
Advanced Programmable Digital Controllers
Ideal for Worldwide Use
• Offers up to eight patterns of simple programming control (16
steps per pattern).
• Modular structure, one-stock type
• High-accuracy: 100-ms sampling (for analog input)
• Conforms to international EMC and safety standards.
• IP66/NEMA4 (indoor use) front face
• Serial communications (RS-232C, RS-422 and RS-485) and
transfer output (4 to 20 mA)
• Position-proportional control model
• Heating/cooling control
• 24VAC/DC types are also available.
®
Model Number Structure
■ Model Number Legend
E5@K- T @@@ @ -500
1
2
3
4
1. Size
A:
96 x 96 mm
E:
96 x 48 mm
C:
58 x 58 mm
2. Programmable type
T:
Programmable type
3. Model
AA: Standard model
PRR: Position-proportional model
4. Number of alarms
2:
Two alarms
Temperature
Controller
Ordering Information
■ List of Models
Description
Base Unit
Model
Specification
E5AK-TAA2 AC100-240
Standard model
E5AK-TAA2-500 AC100-240
Standard model with terminal cover
E5AK-TAA2 AC/DC24
Standard model
E5AK-TAA2-500 AC/DC24
Standard model with terminal cover
E5AK-TPRR2 AC100-240
Position-proportional model
E5AK-TPRR2-500 AC100-240
Position-proportional model with terminal cover
E5AK-TPRR2 AC/DC24
Position-proportional model
E5AK-TPRR2-500 AC/DC24
Position-proportional model with terminal cover
E5EK-TAA2 AC100-240
Standard model
E5EK-TAA2-500 AC100-240
Standard model with terminal cover
E5EK-TAA2 AC/DC24
Standard model
E5EK-TAA2-500 AC/DC24
Standard model with terminal cover
E5EK-TPRR2 AC100-240
Position-proportional model
E5EK-TPRR2-500 AC100-240
Position-proportional model with terminal cover
E5EK-TPRR2 AC/DC24
Position-proportional model
E5EK-TPRR2-500 AC/DC24
Position-proportional model with terminal cover
Note: 1. When using the heater burnout alarm function with a standard model, the Linear Output Unit cannot be used for the control outputs (heat).
2. Be sure to specify the Current Transformer, Output Unit, and Option Unit when ordering.
Digital Controller
E5AK-T/E5EK-T
I-123
Description
Output Unit
Model
Specification
E53-R
Relay
E53-S
SSR
E53-Q
Pulse (NPN) 12 VDC at 40 mA max.
E53-Q3
Pulse (NPN) 24 VDC at 20 mA max.
E53-Q4
Pulse (PNP) 24 VDC at 20 mA max.
E53-C3
Linear (4 to 20 mA) under a load of 600 Ω max.
E53-C3D
Linear (0 to 20 mA) under a load of 600 Ω max.
E53-V34
Linear (0 to 10 V) under a load of 1 kΩ min.
E53-V35
Linear (0 to 5 V) under a load of 1 kΩ min.
Note: The Digital Controller uses a dedicated, high-resolution Output Unit. The E53-C Current Output Unit for the E5@X cannot be used with the
Digital Controller.
Description
Model
E53-AKB
Option Unit
Specification
Event input
E53-AK01
Communication (RS-232C)
E53-AK02
Communication (RS-422)
E53-AK03
Communication (RS-485)
E53-AKF
Transfer output
Note: 1. The Option Unit can be used either by the E5AK or E5EK.
2. The E5AK allows a maximum of three Option Units to be mounted. Refer to page 133 for mounting combinations.
The E5EK allows only one Option Unit to be mounted.
Inspection Report
The Digital Controller can be provided together with an inspection report.
Refer to the following legend with the suffix “K” when ordering a model provided together with an inspection report.
E5@K-TAA2-K, E5@K-TPRR2-K
■ Accessories (Order Separately)
Name
Current Transformer
Model
Hole diameter
E54-CT1
5.8 dia.
E54-CT3
12.0 dia.
Note: No CT is required unless the heater burnout alarm function is used.
Name
Terminal Cover
Model
E5AK
E53-COV08
E5EK
Unit Label
Model
I-124
Connectable models
E53-COV0809
Y92S-L1
Digital Controller E5AK-T/E5EK-T
Specifications
■ Ratings
Item
100- to 240-VAC type
24-VAC/VDC type
Supply voltage
100 to 240 VAC, 50/60 Hz
24 VAC/VDC, 50/60 Hz
Power consumption
E5AK: 16 VA
E5EK: 15 VA
12 VA, 8 W
Operating voltage range
85% to 110% of rated supply voltage
Sensor input
Thermocouple:
K, J, T, E, L, U, N, R, S, B, W, PLII
Platinum resistance thermometer: JPt100, Pt100
Current input:
4 to 20 mA, 0 to 20 mA (Input impedance: 150 Ω)
Voltage input:
1 to 5 V, 0 to 5 V, 0 to 10 V (Input impedance: 1 MΩ)
Control output
According to Output Unit (see Output Unit Ratings and Characteristics)
Auxiliary output
SPST-NO, 3 A at 250 VAC (resistive load)
Control method
ON/OFF or 2-PID control (with auto-tuning)
Setting method
Digital setting using front panel keys
Indication method
7-segment digital display and LEDs
Event input
Contact input:
ON: 1 kΩ max., OFF: 100 kΩ min.
No-contact input: ON: residual voltage: 1.5 V max., OFF: leakage current: 0.1 mA max.
Transfer output
4 to 20 mA, permissible load impedance: 600 Ω max., resolution: approx. 2,600
Current Transformer input
Connect an exclusive Current Transformer (E54-CT1 or E54-CT3)
Other functions
Standard
Manual output, heating/cooling control, SP limiter, loop burnout alarm, MV limiter, MV change rate limiter, input digital filter, input shift, run/reset, protect functions, scaling function
■ Input Ranges
Platinum Resistance Thermometer
Input (switch selectable)
JPt100
°C
Range
Pt100
–199.9 to 650.0
°F
Setting
–199.9 to 650.0
–199.9 to 999.9
–199.9 to 999.9
0
1
Input (switch
selectable)
(see note)
K1
K2
°C
–200
to
1,300
0.0 to
500.0
–100 0.0 to
to 850 400.0
–199.9 0 to
to 400.0 600
–100 0.0 to
to 850 400.0
–199.9 –200
to 400.0 to
1,300
0 to
1,700
0 to
1,700
100 to 0 to
1,800 2,300
0 to
1,300
°F
–300
to
2,300
0.0 to
900.0
–100
to
1,500
0.0 to
750.0
–199.9 0 to
to 700.0 1,100
–100
to
1,500
0.0 to
750.0
–199.9 –300
to 700.0 to
2,300
0 to
3,000
0 to
3,000
300 to 0 to
3,200 4,100
0 to
2,300
2
3
4
5
6
8
9
10
12
13
14
16
Range
Setting
J1
J2
T
E
7
L1
L2
U
N
11
R
S
B
W
15
PLII
Note: Setting number is factory-set to 2 (K1).
Current/Voltage
Input (switch selectable)
Current input
4 to 20 mA
Voltage input
0 to 20 mA
1 to 5 V
0 to 5 V
Range
One of following ranges depending on results of scaling
–1999 to 9999
–199.9 to 999.9
–19.99 to 99.99
–1.999 to 9.999
Setting
17
18
19
20
0 to 10 V
21
Digital Controller
E5AK-T/E5EK-T
I-125
Temperature
Controller
Thermocouple
■ Characteristics
Indication accuracy (see note)
Thermocouple:
(±0.3% of indication value or ±1°C, whichever greater) ±1 digit max.
Platinum resistance thermometer:
(±0.2% of indication value or ±0.8°C, whichever greater) ±1 digit max.
Analog input: ±0.2% FS ±1 digit max.
Hysteresis
0.01% to 99.99% FS (in units of 0.01% FS)
Proportional band (P)
0.1% to 999.9% FS (in units of 0.1% FS)
Integral (reset) time (I)
0 to 3,999 s (in units of 1 s)
Derivative (rate) time (D)
0 to 3,999 s (in units of 1 s)
Control period
1 to 99 s (in units of 1 s)
Manual reset value
0.0% to 100.0% (in units of 0.1%)
Alarm setting range
–1,999 to 9,999 or –199.9 or 999.9 (decimal point position dependent on input type or result of scaling)
Set time
0 to 99 hrs 59 min or 0 to 99 min 59 s
Program capacity
8 patterns (E5AK) or 4 patterns (E5EK), 16 steps
Programming method
Time or ramp setting method
Time accuracy
±0.2% (±500 ms) of the set value
Sampling period
Temperature input: 250 ms
Analog input:
100 ms
Insulation resistance
20 MΩ min. (at 500 VDC)
Dielectric strength
2,000 VAC, 50/60 Hz for 1 min between terminals of different polarities
Vibration resistance
Malfunction: 10 to 55 Hz, 10 m/s2 (approx. 1G) for 10 min each in X, Y, and Z directions
Destruction: 10 to 55 Hz, 20 m/s2 (approx. 2G) for 2 hrs each in X, Y, and Z directions
Shock resistance
Malfunction: 200 m/s2 min. (approx. 20G), 3 times each in 6 directions
(100 m/s2 (approx. 10G) applied to the relay)
Destruction: 300 m/s2 min. (approx. 30G), 3 times each in 6 directions
Ambient temperature
Operating: –10°C to 55°C (with no icing)/3-year warranty period: –10°C to 50°C
Storage: –25°C to 65°C (with no icing)
Ambient humidity
Operating: 35% to 85%
Degree of protection
Front panel: NEMA4 for indoor use (equivalent to IP66)
Rear case: IEC standard IP20
Terminals: IEC standard IP00
Memory protection
Non-volatile memory (number of writings: 100,000 operations)
Weight
E5AK:
approx. 450 g
E5EK:
approx. 320 g
Mounting bracket: approx. 65 g
EMC
Emission Enclosure:
Emission AC Mains:
Immunity ESD:
Approved standards
UL1092, CSA22.2 No. 142, CSA C22.2 No. 142
Conforms to EN50081-2, EN50082-2, EN61010-1 (IEC1010-1)
Conforms to VDE0106/part 100 (Finger Protection), when the separately-ordered terminal cover is
mounted.
EN55011 Group 1 class A
EN55011 Group 1 class A
EN61000-4-2: 4 kV contact discharge (level 2)
8 kV air discharge (level 3)
Immunity RF-interference:
ENV50140:
10 V/m (amplitude modulated, 80 MHz to 1 GHz)
(level 3)
10 V/m (pulse modulated, 900 MHz)
Immunity Conducted Disturbance: ENV50141:
3 V (47 to 68 MHz)
10 V (0.15 to 47 MHz, 68 to 80 MHz) (level 3)
Immunity Burst:
EN61000-4-4: 2 kV power-line (level 3)
2 kV I/O signal-line (level 4)
Note: The indication accuracy of the K1, T, and N thermocouples at a temperature of −100°C max. The indication accuracy of the U, L1, and L2
thermocouples at any temperature is ±2°C ±1 digit maximum.
The indication accuracy of the B thermocouple at a temperature of 400°C max. is unrestricted.
The indication accuracy of the R and S thermocouples at a temperature of 200°C max. is ±3°C ±1 digit maximum.
The indication accuracy of the W thermocouple at any temperature is (±0.3% of the indicated value or ±2°C, whichever is greater) ±1 digit
maximum.
The indication accuracy of the PLII thermocouple at any temperature is (±0.3% of the indicated value or ±2°C, whichever is greater) ±1 digit
maximum.
I-126
Digital Controller E5AK-T/E5EK-T
■ Output Unit Ratings and Characteristics
Model
Specifications
E53-R
Relay output
5 A at 250 VAC (resistive load)
E53-S
SSR output
1 A at 75 to 250 VAC (resistive load)
E53-Q
Voltage output
NPN: 40 mA at 12 VDC
(with short-circuit protection)
E53-Q3
NPN: 20 mA at 24 VDC
(with short-circuit protection)
E53-Q4
PNP: 20 mA at 24 VDC
(with short-circuit protection)
E53-C3
4 to 20 mA, permissible load impedance: 600 Ω max., resolution: approx. 2,600
Linear current output
0 to 20 mA, permissible load impedance: 600 Ω max., resolution: approx. 2,600
E53-C3D
E53-V34
0 to 10 VDC, permissible load impedance: 1 kΩ min., resolution: approx. 2,600
Linear voltage output
0 to 5 VDC, permissible load impedance: 1 kΩ min., resolution: approx. 2,600
E53-V35
Note: An output relay (1 A at 250 VAC) is mounted on the position-proportional model. (When replacing, use the E53-R.)
■ Option Unit Ratings and Characteristics
Model
E53-AKB
Event input
E53-AK01
Communications
Specifications
Contact input:
ON: 1 kΩ max., OFF: 100 kΩ min.
No-contact input:
ON: residual voltage 1.5 V max., OFF: leakage current 0.1 mA max.
RS-232C
E53-AK02
RS-422
E53-AK03
RS-485
E53-AKF
Transmission method:
Synchronization method:
Baud rate:
Transmission code:
Half-duplex
Start-stop synchronization (asynchronous method)
1.2/2.4/4.8/9.6/19.2 kbps
ASCII
4 to 20 mA:
Permissible load impedance: 600 Ω max.
Resolution: approx. 2,600
Transfer output
Note: Event input is used for switching the target value, run or stop command, or automatic and manual mode with an external signal input.
■ Current Transformer Ratings
Dielectric strength
1,000 VAC (for 1 min)
Vibration resistance
50 Hz, 98 m/s2 (10G)
Weight
E54-CT1: approx. 11.5 g; E54-CT3: approx. 50 g
Accessories (E54-CT3 only)
Armature: 2; Plug: 2
Max. heater current
Temperature
Controller
■ Heater Burnout Alarm
Single-phase 50 A VAC (see note 1)
Heater current value display accuracy
±5% FS±1 digit max.
Heater burnout alarm setting range
0.1 to 49.9 A (in units of 0.1 A) (see note 2)
Min. detection ON time
190 ms (see note 3)
Note: 1. Use the K2CU-F@@A-@GS (with gate input terminals) for the detection of three-phase heater burnout.
2. The heater burnout alarm is always OFF if the alarm is set to 0.0 A and always ON if the alarm is set to 50.0 A.
3. No heater burnout detection or heater current value measurement is possible if the control output (heat) is ON for less than 190 ms.
Digital Controller
E5AK-T/E5EK-T
I-127
Nomenclature
E5AK
Pattern Number
Indicates the pattern number.
Display 1
Displays the process value or
parameter code.
Program Status Indicators
The top indicator indicates the rising
step, the middle indicator indicates the
constant step, and the bottom indicator
indicates the falling step.
Display 2
Displays the present SP, manipulated variable, or parameter
settings.
Bar Graph
Indicates the rate of pattern elapsing time at the rate of 20% (5 levels) per one segment.
Operation Indicators
• OUT1
Lights when the pulse output function
assigned to control output 1 turns ON.
• OUT2
Lights when the pulse output function
assigned to control output 2 turns ON.
Up Key/Down Key
Press to increase or decrease
the value on the No.2 display.
• SUB1
Lights when the output function assigned
to auxiliary output 1 turns ON.
• SUB2
Lights when the output function assigned
to auxiliary output 2 turns ON.
• MANU
Lights when the manual operation mode.
Display Key
Press to shift the display to the
next parameter.
• RST
Lights when the operation is reset.
• RMT
Lights during remote operation.
• AT
Flashes during auto-tuning.
RUN/RST Key
Switches between RUN and RESET mode.
• HOLD
Lights when the program is on hold.
• WAIT
Lights when the program is waiting.
E5EK
Display 1
Pattern Number
Display 2
Operation indicators
Up Key/Down Key
Display Key
RUN/RST Key
I-128
Digital Controller E5AK-T/E5EK-T
Digital Controller
E5CK-T
Advanced, Compact Programmable Digital
Controllers Ideal for Worldwide Use
• Offers up to four patterns of simple programming control (16
steps per pattern).
• IP66/NEMA4 (indoor use) front face.
• Modular structure, one-stock type.
• Heating/cooling control.
• Serial communications (RS-232C and RS-485).
• Temperature and analog inputs.
• High-accuracy: 100-ms sampling (for analog input).
• Conforms to international EMC and safety standards.
• 24 VAC/DC types are also available.
®
Ordering Information
■ List of Models
Description
Model
E5CK-TAA1 AC100-240
Base Unit
Specification
Standard model
E5CK-TAA1-500 AC100-240
Standard model with terminal cover
E5CK-TAA1 AC/DC24
Standard model
E5CK-TAA1-500 AC/DC24
Standard model with terminal cover
Note: A single Output Unit and Option Unit can be mounted to each Base Unit.
Description
Model
E53-Q4R4
Pulse (NPN)/Relay
E53-Q4HR4
Pulse (PNP)/Relay
E53-C4R4
Linear (4 to 20 mA)/Relay
E53-C4DR4
Linear (0 to 20 mA)/Relay
E53-V44R4
Linear (0 to 10 V)/Relay
E53-Q4Q4
Pulse (NPN)/Pulse (NPN)
E53-Q4HQ4H
Pulse (PNP)/Pulse (PNP)
Description
Model
E53-CK01
Option Unit
Specification
Relay/Relay
Temperature
Controller
E53-R4R4
Output Unit
Specification
RS-232C
E53-CK03
RS-485
E53-CKB
Event input: 1 point
E53-CKF
Transfer output (4 to 20 mA)
Inspection Report
The Digital Controller can be provided together with an inspection report.
Refer to the following legend with the suffix “K” when ordering a model provided together with an inspection report.
E5CK-TAA1-K
■ Accessories (Order Separately)
Name
Terminal Cover
Model
E53-COV07
Digital Controller
E5CK-T
I-129
Specifications
■ Ratings
Item
100- to 240-VAC type
24-VAC/VDC type
Supply voltage
100 to 240 VAC, 50/60 Hz
24 VAC/VDC, 50/60 Hz
Power consumption
15 VA
6 VA, 3.5 W
Operating voltage range
85% to 110% of rated supply voltage
Sensor input
Thermocouple:
Platinum resistance thermometer:
Current input:
Voltage input:
Input impedance
Current input: 150 Ω
Voltage input: 1 MΩ min.
Control output
According to Output Unit (see Output Unit Ratings and Characteristics)
Auxiliary output
SPST-NO, 3 A at 250 VAC (resistive load)
Control method
ON/OFF or 2-PID control (with auto-tuning)
Setting method
Digital setting using front panel keys
Indication method
7-segment digital display and LEDs
Other functions
Standard
Manual output, heating/cooling control, SP limiter, loop burnout alarm, MV limiter, MV change rate limiter, input digital filter, input shift, run/reset, protect functions, scaling function
K, J, T, E, L, U, N, R, S, B, W, PLII
JPt100, Pt100
4 to 20 mA, 0 to 20 mA
1 to 5 V, 0 to 5 V, 1 to 10 V
■ Input Ranges
Platinum Resistance Thermometer
Input (switch selectable)
Range
JPt100
Pt100
°C
–199.9 to 650.0
–199.9 to 650.0
°F
–199.9 to 999.9
–199.9 to 999.9
0
1
Resolution (°C/°F)
(main setting and alarm)
Thermocouple
Input (switch
selectable)
(see note)
K1
K2
°C
–200
to
1,300
0.0 to
500.0
–100 0.0 to
to 850 400.0
–199.9 0 to
to 400.0 600
–100 0.0 to
to 850 400.0
–199.9 –200
to 400.0 to
1,300
0 to
1,700
0 to
1,700
100 to 0 to
1,800 2,300
0 to
1,300
°F
–300
to
2,300
0.0 to
900.0
–100
to
1,500
0.0 to
750.0
–199.9 0 to
to 700.0 1,100
–100
to
1,500
0.0 to
750.0
–199.9 –300
to 700.0 to
2,300
0 to
3,000
0 to
3,000
300 to 0 to
3,200 4,100
0 to
2,300
3
4
5
6
8
9
10
12
13
14
16
Range
Resolution (°C/ 2
°F) (main setting
and alarm)
J1
J2
T
E
7
L1
L2
U
N
11
R
Note: Setting number is factory-set to 2 (K1).
Current/Voltage
Input (switch selectable)
Current input
4 to 20 mA
Voltage input
0 to 20 mA
1 to 5 V
0 to 5 V
Range
One of following ranges depending on results of scaling
–1999 to 9999
–199.9 to 999.9
–19.99 to 99.99
–1.999 to 9.999
Resolution (°C/°F)
(main setting and alarm)
17
I-130
18
Digital Controller E5CK-T
19
20
0 to 10 V
21
S
B
W
15
PLII
Indication accuracy (see note 1)
Thermocouple:
(±0.3% of indication value or ±1°C, whichever greater) ±1 digit max.
Platinum resistance thermometer:
(±0.2% of indication value or ±0.8°C, whichever greater) ±1 digit max.
Analog input: ±0.2% FS ±1 digit max.
Hysteresis
0.01% to 99.99% FS (in units of 0.01% FS)
Proportional band (P)
0.1% to 999.9% FS (in units of 0.1% FS)
Integral (reset) time (I)
0 to 3,999 s (in units of 1 s)
Derivative (rate) time (D)
0 to 3,999 s (in units of 1 s)
Control period
1 to 99 s (in units of 1 s)
Manual reset value
0.0% to 100.0% (in units of 0.1%)
Alarm setting range
–1,999 to 9,999 or –199.9 or 999.9 (decimal point position dependent on input type)
Program capacity
4 patterns, 16 steps (possible to use up to 4 patterns with the communications function.)
Programming method
Time or ramp setting method
Time accuracy
±0.2% (±500 ms) of the set value
Sampling period (see note 2)
Temperature input: 250 ms
Analog input:
100 ms
Insulation resistance
20 MΩ min. (at 500 VDC)
Dielectric strength
2,000 VAC, 50/60 Hz for 1 min between terminals of different polarities
Vibration resistance
Malfunction: 10 to 55 Hz, 10 m/s2 (approx. 1G) for 10 min each in X, Y, and Z directions
Destruction: 10 to 55 Hz, 20 m/s2 (approx. 2G) for 2 hrs each in X, Y, and Z directions
Shock resistance
Malfunction: 200 m/s2 min. (approx. 20G), 3 times each in 6 directions
(100 m/s2 (approx. 10G) applied to the relay)
Destruction: 300 m/s2 min. (30G), 3 times each in 6 directions
Ambient temperature
Operating: –10°C to 55°C (with no icing)/3-year warranty period: –10°C to 50°C
Storage: –25°C to 65°C (with no icing)
Ambient humidity
Operating: 35% to 85%
Degree of protection
Front panel: NEMA4 for indoor use (equivalent to IP66)
Rear case: IEC standard IP20
Terminals: IEC standard IP00
Memory protection
Non-volatile memory (number of writings: 100,000 operations)
Weight
Approx. 170 g;
Adapter: approx. 10 g
EMC
Emission Enclosure:
Emission AC Mains:
Immunity ESD:
Approved standards
UL1092, CSA22.2 No. 142, CSA C22.2 No. 142
Conforms to EN50081-2, EN50082-2, EN61010-1 (IEC1010-1)
Conforms to VDE0106/ part 100 (Finger Protection), when the separately-ordered terminal cover is
mounted.
EN55011 Group 1 class A
EN55011 Group 1 class A
EN61000-4-2: 4kV contact discharge (level 2)
8kV air discharge (level 3)
Immunity RF-interference:
ENV50140:
10V/m (amplitude modulated, 80 MHz to 1 GHz)
(level 3)
10 V/m (pulse modulated, 900 MHz)
Immunity Conducted Disturbance: ENV50141:
3 V (47 to 68 MHz)
10 V (0.15 to 47 MHz, 68 to 80 MHz) (level 3)
Immunity Burst:
EN61000-4-4: 2kV power-line (level 3)
2kV I/O signal-line (level 4)
Note: The indication accuracy of the K1, T, and N thermocouples at a temperature of −100°C max. The indication accuracy of the U, L1, and L2
thermocouples at any temperature is ±2°C ±1 digit maximum.
The indication accuracy of the B thermocouple at a temperature of 400°C max. is unrestricted.
The indication accuracy of the R and S thermocouples at a temperature of 200°C max. is ±3°C ±1 digit maximum.
The indication accuracy of the W thermocouple at any temperature is (±0.3% of the indicated value or ±3°C, whichever is greater) ±1 digit
maximum.
The indication accuracy of the PLII thermocouple at any temperature is (±0.3% or ±2°C, whichever is greater) ±1 digit maximum.
Digital Controller
E5CK-T
I-131
Temperature
Controller
■ Characteristics
■ Output Unit Ratings and Characteristics
Model
Control output 1/Control output 2
E53-R4R4
Relay / Relay
E53-Q4R4
Voltage (NPN) / Relay
E53-Q4HR4
Voltage (PNP) / Relay
E53-C4R4
4 to 20 mA / Relay
E53-C4DR4
0 to 20 mA / Relay
E53-V44R4
0 to 10 mA / Relay
E53-Q4Q4
Voltage (NPN) / Voltage (NPN)
E53-Q4HQ4H
Voltage (PNP) / Voltage (PNP)
Output Type
Specifications
Relay
Voltage (NPN)
Voltage (PNP)
250 VAC. 3 A
12 VDC, 20 mA (with short-circuit protection)
12 VDC, 20 mA (with short-circuit protection)
0 to 10 V
0 to 10 VDC, Permissible load impedance:
1 kΩ min., Resolution: Approx. 2600
4 to 20 mA, Permissible load impedance:
500 Ω max., Resolution: Approx. 2600
4 to 20 mA
■ Option Unit Ratings and Characteristics
Model
E53-CKB
Event input
E53-CK01
Communications
E53-CK03
E53-CKF
Specifications
Contact input:
ON: 1 kΩ max., OFF: 100 kΩ min.
No-contact input:
ON: residual voltage 1.5 V max., OFF: leakage current 0.1 mA max.
RS-232C
RS-485
Transfer output
Transmission method:
Half-duplex
Synchronization method: Start-stop synchronization (asynchronous method)
Baud rate:
1.2/2.4/4.8/9.6/19.2 kbps
4 to 20 mA DC:
Permissible load impedance: 600 Ω max.
Resolution: approx. 2,600
Note: Event input is used for switching the target value, run or stop command, or automatic and manual mode with an external signal input.
Nomenclature
Display 1
Display 2
Operation Indicators
Up Key/Down Key
Display Key
RUN/RST Key
I-132
Digital Controller E5CK-T
Dimensions
Note: All units are in millimeters unless otherwise indicated.
E5AK
Panel Cutouts
96 x 96
91 x 91
110 min.
120 min.
Note: 1. Recommended panel thickness is 1 to 8 mm.
2. Maintain the specified vertical and horizontal
mounting space between each Unit. Units must
not be closely mounted vertically or horizontally.
Panel Cutouts
E5EK
60 min.
120 min.
E5CK
Temperature
Controller
Note: 1. Recommended panel thickness is 1 to 8 mm.
2. Maintain the specified vertical and horizontal
mounting space between each Unit. Units must
not be closely mounted vertically or horizontally.
Panel Cutouts
53 x 53
44.8 x 44.8
65 min.
60 min.
Note: 1. Recommended panel thickness is 1 to 5 mm.
2. Maintain the specified vertical and horizontal
mounting space between each Unit. Units must
not be closely mounted vertically or horizontally.
Digital Controller
E5@K-T
I-133
Accessories (Order Separately)
Terminal Cover
E53-COV0809 (E5AK)
E53-COV08 (E5EK)
(With rivet)
(With rivet)
E53-COV07
(With rivet)
Current Transformer
E54-CT1
E54-CT3
2.36 dia.
5.8 dia.
12 dia.
40x40
Two, M3 (depth: 4)
Unit Label (Order Separately)
Y92S-L1
I-134
Digital Controller E5@K-T
Installation
Note: Always turn OFF the power supply to the Digital Controller before changing any switch settings.
■ Settings (E5AK/E5EK)
On a standard model, set up the Output Units for control outputs 1
and 2 before mounting the Controller.
Setting Up the Option Unit
On a position-proportional model, the Relay Output Unit is already
set. Therefore, this setup operation is unnecessary. (Do not replace
with other Output Units.)
Check the type of the Option Unit you are about to set up.
When setting up the Output Units, draw out the internal mechanism
from the housing and insert the Output Units into the sockets for control outputs 1 and 2.
• Before Setup
• Procedure
1. Remove the power board and option boards in the order shown in
the following diagram.
E5AK
Draw-out
When drawing out the internal mechanism from the housing, prepare
a Phillips screwdriver matched to the size of the screw on the lower
part of the front panel.
1. Press down on the hook on the top of the front panel, and turn the
Phillips screwdriver to the left to loosen the screw on the lower
part of the front panel.
Hook
2. Insert the Option Units into the sockets for options 1 to 3. The following diagram shows the relationship between the Option Units
and mounting positions.
2. Draw out the internal mechanism towards you holding both sides
of the front panel.
Setting Up the Output Unit
Temperature
Controller
• Before Setup
Check the type of the Output Unit you are about to set up.
• Procedure
1. Check the positions of the sockets you are about to insert the
Output Units into as shown in the following diagram.
3. Mount the Option Boards and the power board in the order
shown.
OUT1
OUT2
Bracket
2. Insert the Output Unit for control output 1 into the socket “OUT1”
and the Output Unit for control output 2 into the socket “OUT2.”
3. Fasten the Output Units with the bracket (accessory).
Digital Controller
E5@K-T
I-135
Mounting
Setting Up the Terminal Cover
1. Insert the E5AK-T Controller into the mounting hole in the panel.
2. Fit the mounting bracket (accessory) into the fixing slots on the
top and bottom of the rear case.
Fasten the Terminal Covers (E53-COV0809) to protect terminals.
E5AK-VV2-500 Controller is provided with Terminal Covers.
Use E53-COV09 for terminals 1 to 10, and E53-COV08 for terminals
11 to 33.
Fasten the Terminal Covers as follows by using the snap pins.
E5AK-T
3. Tighten the mounting bracket screws alternately a little at a time
until the ratchet starts to slide.
I-136
Digital Controller E5@K-T
E53-COV0809
E5EK
5. Mount the power board at its original position.
Setting Up the Option Unit
Draw-out
• Before Setup
When drawing out the internal mechanism from the housing, prepare
a Phillips screwdriver matched to the size of the screw on the lower
part of the front panel.
1. Press down on the hook on the top of the front panel, and turn the
Phillips screwdriver to the left to loosen the screw on the lower
part of the front panel.
Check the type of the Option Unit you are about to set up.
• Procedure
1. Remove the power board and Option Boards in the order shown
in the following diagram.
PV
SV
RM
T
OU
R
S
OU
P
MA
S
N
U
S UB
1
S UB
2
AT
P
TO
T2
T1
E5
E
K
2. Draw out the internal mechanism towards you holding both sides
of the front panel.
Setting Up the Output Unit
• Before Setup
Check the type of the Option Unit you are about to set up.
• Procedure
2. Insert the Option Unit into the socket for option 1. The following
diagram shows the relationship between Option Unit and mounting position.
1. Check the positions of the sockets you are about to insert the
Output Units into as shown in the following diagram.
Option 1
E53-AKB: Event inputs 1/2
E53-AK01: RS-232C
E53-AK02: RS-422
E53-AK03: RS-485
E53-AKF: Transfer output
OUT1
Bracket
3. Mount the Option Board and the power board in the order shown.
Mounting
2. Remove the power board in the direction of the arrow in the figure
below. The power board is connected to the control board by a
connector at the center of the board.
1. Insert the E5EK-T Controller into the mounting hole in the panel.
2. Fit the mounting bracket (accessory) into the fixing slots on the
top and bottom of the rear case.
Control
board
Power
board
3. Insert the Output Unit for control output 1 into the socket “OUT1”
and the Output Unit for control output 2 into the socket “OUT2.”
4. Fasten the Output Units with the bracket (accessory).
Digital Controller
E5@K-T
I-137
Temperature
Controller
OUT2
3. Tighten the mounting bracket screws alternately a little at a time
until the ratchet starts to slide.
E5CK
Draw-out
Draw out the internal mechanism from the housing.
1. Press in both of the hooks on the left and right sides of the front
panel to unlock the internal mechanism from the housing.
2. Draw out the internal mechanism towards you holding both sides
of the front panel.
Setting Up the Terminal Cover
Fasten the Terminal Covers (E53-COV0809) to protect terminals.
E5AK-VV2-500 Controller is provided with Terminal Covers.
Use E53-COV09 for terminals 1 to 10, and E53-COV08 for terminals
11 to 33.
Fasten the Terminal Covers as follows by using the snap pins.
Setting Up the Output Unit
• Procedure
1. Two rectangular holes for slotting are provided on the power
board (on right side of Controller). Fit the two protrusions on the
Output Unit into these two holes.
2. With the Output Unit fitted into the power board, fit the Output Unit
into the connector on the control board (on left side of Controller).
E5AK-T
E53-COV08
To remove the Terminal Covers, pull the edges of the snap pins.
Setting Up the Option Unit
• Procedure
1. Place the Controller with its bottom facing up, and fit the board
horizontally into the connector on the power board (on right side
of Controller).
2. With the power board connected, fit the board vertically into the
connector on the control board (on left side of Controller).
I-138
Digital Controller E5@K-T
Mounting
1. Insert the E5EK-T Controller into the mounting hole in the panel.
2. Push the adapter along the Controller body from the terminals up
to the panel, and fasten temporarily.
3. Tighten the two fixing screws on the adapter. When tightening
screws, tighten the two screws alternately keeping the torque to
approximately 0.29 to 0.39 N·m, or 3 to 4 kgf·cm.
Adapter
Panel
Waterproof packing
Setting the Input Type Jumper
Set the jumper to one of temperature input, voltage input or current
input matched to the type of sensor connected to the input terminal.
I : Current input
V : Voltage input
TC/PT : Temperature input
The input type jumper is factory-set to “TC/PT (temperature input).”
Temperature
Controller
When you disconnect or insert the input type jumper, do not hold it
directly by its pins.
When you have finished setting the input type jumper, insert the
internal mechanism back into the housing.
To do this, push in the internal mechanism until you hear the hooks
on the front panel snap into place.
Digital Controller
E5@K-T
I-139
Wiring
■ Wiring Terminals
Terminal Arrangement
E5AK-T
E5EK-T
100-240 VAC
24 VDC/AC
100-240 VAC
24 VDC/AC
SOURCE
SOURCE
TRSF:
Transfer output
EV1 to 4: Event input
PTMR: Potentiometer
TRSF: Transfer output
EV1/2: Event input
PTMR: Potentiometer
E5CK-T
OUT1
100-240 VAC
24 VDC/AC
SOURCE
5
11
12
10
OUT2
4
9
3
8
SUB1
7
2
1
13
EV1
RS232C
RS485
TRSF
I-140
14
IN
6
TRSF: Transfer output
EV1: Event input
Digital Controller E5@K-T
■ Precautions when Wiring
Use ducts to separate input leads and power lines in order to protect the Controller and its lines from external noise.
Solderless terminals are recommended when wiring the Controller.
Tighten the terminal screws using a torque no greater than 0.78 N·m, or 8 kgf·cm max. Take care not to tighten the terminal screws too tightly.
Power Blocks
The E5AK/E5EK has independent power supplies for each of the terminal blocks shown below.
A
B
E
B
10
9
8
7
6
5
4
3
2
1
E5CK
E5EK
E5AK
C
A
C
30 31 32
29
28
27
26
25
24
23
22
21 33
20
19
18
17
16
15
14
13
12
11
F
D
B/C
10 21 22
9
8
7
6
5
4
3
2
1 23
B
E
F
C
20
19
18
17
16
15
14
13
12
11
The E5CK has independent power supplies for each
of the terminal blocks shown below. However, note
that the power supplies for blocks C (exclude relay
output) and D are shared for the following Option
Unit.
• Option Unit: E53-CKB or E53-CKF
A
C
D
C
5 11 12 10
4
9
3
8
2
7
1 13 14 6
D
B
■ E5AK Wiring
In the following wiring diagrams, the left side of the terminal numbers indicate the inside of the Controller.
Power Supply
Temperature
Controller
Input 100 to 240 VAC or 24 VAC/DC to terminal numbers 9 and 10 according to the specifications.
Sensor Input
Connect the sensor input to terminal numbers 11 to 14 and 33 as follows according to the input type.
Digital Controller
E5@K-T
I-141
Control Output
Terminal numbers 7 and 8 are for control output 1 (OUT1), and terminal numbers 5 and 6 are for control output 2 (OUT2). The following diagrams
show the available Output Units and their internal equalizing circuits.
With E53-V@@ Output Units, approx. 2 V is output for one second after the power is interrupted.
With E5AK-TPRR2 Controllers, the relay output (1 A at 250 VAC) is fixed.
When replacing the Output Unit, use the E53-R. The following diagrams show the relationship between terminals and open/close relay settings.
8
6
7
5
Open
Close
Auxiliary Output
Terminal numbers 3 and 4 are for auxiliary output 1 (SUB1) and terminal numbers 1 and 2 are for auxiliary output 2 (SUB2). The following diagrams
show the internal equalizing circuits for the auxiliary outputs:
10
9
8
7
6
5
4
3
2
1
30 31 32
29
28
27
26
25
24
23
22
21 33
20
19
18
17
16
15
14
13
12
11
Output specifications are as follows:
SPST-NO, 3 A at 250 VAC
I-142
Digital Controller E5@K-T
4
3
Auxiliary
output 1
2
1
Auxiliary
output 2
CT Input/Potentiometer
When using the HBA function on the E5AK-AA2 Controller, connect CT input (CT) to terminal numbers 15 to 17. When monitoring the valve opening
on the E5AK-PRR2 Controller, connect the potentiometer (PTMR) to terminal numbers 15 to 17. Connect each of these inputs as follows:
10
9
8
7
6
5
4
3
2
1
30 31 32
29
28
27
26
25
24
23
22
21 33
20
19
18
17
16
15
14
13
12
11
17
16
O
17
W
16
C
15
CT
15
CT input
Potentiometer
Event Input
Connect event inputs 1 and 2 (EV1/2) to terminal numbers 18 to 20, and event events 3 and 4 (EV3/4) to terminal numbers 24 to 26. However, note
that terminal numbers 18 to 20 cannot be used on Controllers with a communications function. Connect the event inputs as follows:
10
9
8
7
6
5
4
3
2
1
30 31 32
29
28
27
26
25
24
23
22
21 33
20
19
18
17
16
15
14
13
12
11
EV1 20
EV2 19
COM 18
+
+
−
Event input 1 and 2
EV3
26
EV4
25
COM 24
+
+
−
Event input 3 and 4
Terminals 18 and 24 (COM) are connected internally.
Use event inputs under the following conditions:
Contact input
ON: 1 kΩ max.
OFF: 100 kΩ min.
No-contact input
ON: Residual voltage 1.5 V max.,
OFF: Leakage current 0.1 mA max.
EV1
20
EV2
19
COM 18
+
+
EV3
26
EV4
25
COM 24
−
Event input 1 and 2
Temperature
Controller
Polarities during no-contact input are as follows:
+
+
−
Event input 3 and 4
Transfer Output
Connect transfer output (TRSF) to terminal numbers 29 and 30. The internal equalizing circuit for transfer output is as follows:
30
+
L
4 to 20mA
29
−
Transfer output specifications are as follows: 4 to 20 mA DC,
Permissible load impedance: 600 Ω max.,
Resolution: Approx. 2,600
Communications
Terminal numbers 18 to 20, 31 and 32 can be used only on Controllers with Communications Units (E53-AK01/02/03). For details on wiring, refer
to Chapter 6, Using the Communications Function in the E5AK-T/E5EK-T/E5CK-T User’s Manual (H88/H89/H90).
Digital Controller
E5@K-T
I-143
■ E5EK Wiring
In the following wiring diagrams, the left side of the terminal numbers indicate the inside of the Controller.
Power Supply
Input 100 to 240 VAC or 24 VAC/DC to terminal numbers 9 and 10 according to the specifications.
Sensor Input
Connect the sensor input to terminal numbers 11 to 14 and 23 as follows according to the input type.
Control Output
Terminal numbers 7 and 8 are for control output 1 (OUT1), and terminal numbers 5 and 6 are for control output 2 (OUT2). The following diagrams
show the available Output Units and their internal equalizing circuits.
With E53-V@@ Output Units, approx. 2 V is output for one second after the power is interrupted.
With E5EK-TPRR2 Controllers, the relay output (1 A at 250 VAC) is fixed.
When replacing the Output Unit, use the E53-R. The following diagrams show the relationship between terminals and open/close relay settings.
I-144
Digital Controller E5@K-T
8
6
7
5
Open
Close
Auxiliary Output
Terminal numbers 3 and 4 are for auxiliary output 1 (SUB1) and terminal numbers 1 and 2 are for auxiliary output 2 (SUB2). The following diagrams
show the internal equalizing circuits for the auxiliary outputs:
10 21 22
9
8
7
6
5
4
3
2
1 23
20
19
18
17
16
15
14
13
12
11
4
2
3
1
Auxiliary
output 1
Auxiliary
output 2
Output specifications are as follows:
SPST-NO, 3A at 250 VAC
CT Input/Potentiometer
10 21 22
9
8
7
6
5
4
3
2
1 23
20
19
18
17
16
15
14
13
12
11
15
O
17
W
16
C
15
CT input
Potentiometer
17
16
For details on CT inputs, refer to Appendix, About Current Transformer in the E5AK-T/E5EK-T/E5CK-T User’s Manual (H88/H89/H90). For details
on the potentiometer, refer to the Instruction Manual for the valve connected to the Controller. The variable resistance range is 100 Ω to 2.5 kΩ.
Event Input
Connect event inputs 1 and 2 (EV1/2) to terminal numbers 18 to 20. However, note that terminal numbers 18 to 20 cannot be used on Controllers
with a communications function. Connect the event inputs as follows:
10 21 22
9
8
7
6
5
4
3
2
1 23
20
19
18
17
16
15
14
13
12
11
EV1
20
EV2
19
COM 18
+
+
−
Event input 1 and 2
Use event inputs under the following conditions:
Contact input
ON:
No-contact input
ON: Residual voltage 1.5 V max.,
OFF: Leakage current 0.1 mA max.
1 kΩ max., OFF: 100 kΩ min.
Digital Controller
E5@K-T
I-145
Temperature
Controller
When using the HBA function on the E5EK-AA2 Controller, connect CT input (CT) to terminal numbers 15 to 17. When monitoring the valve opening
on the E5EK-TPRR2 Controller, connect the potentiometer (PTMR) to terminal numbers 15 to 17. Connect each of these inputs as follows:
Polarities during no-contact input are as follows:
EV1
20
EV2
19
COM 18
+
+
−
Event input 1 and 2
Transfer Output
Connect transfer output (TRSF) to terminal numbers 21 and 22. The internal equalizing circuit for transfer output is as follows:
21
4 to 20mA
+
L
22
−
Transfer output specifications are as follows:4 to 20 mA DC,
Permissible load impedance: 600 Ω max.,
Resolution: Approx. 2,600
Communications
Terminal numbers 18 to 22 can be used only on Controllers with Communications Units (E53-AK01/02/03). For details on wiring, refer to Chapter
6, Using the Communications Function in the E5AK-T/E5EK-T/E5CK-T User’s Manual (H88/H89/H90).
■ E5CK Wiring
Power Supply
Input 100 to 240 VAC or 24 VAC/DC to terminal numbers 4 and 5 according to the specification.
5
11
12
10
4
9
3
8
2
1
7
13
14
6
Sensor Input
Connect the input to terminal numbers 6 to 8 as follows according to the input type.
5
11
12
10
4
9
3
8
2
7
1
13
14
−
8
8
7
7
−
8
7
V
6
6
Thermocouple
Platinum resistance
thermometer
+
+
6
TC ⋅ PT
8
−
7
mA
6
Voltage input
V
6
+
Current input
I
Match the inputs with the internal jumper settings for each input type. For thermocouple or platinum resistance thermometer inputs, set the inputs
to a common position (TC/PT) as the temperature input.
I-146
Digital Controller E5@K-T
Control Output
Terminal numbers 11 and 12 are for control output 1 (OUT1). The five output types and internal equalizing circuits are available according to the
Output Unit.
5
11
12
4
11
+v
11
12
GND
12
+
Relay
7
13
14
6
+
11
NPN
E53-R4R4
−
12
PNP
E53-Q4R4
E53-Q4Q4
12
−
E53-Q4HR4
E53-Q4HQ4H
mA
L
V
L
GND
+
11
11
L
8
2
+
+v
9
3
1
10
L
12
−
−
0 to 10 V
4 to 20mA
E53-V44R4
E53-C4R4
E53-C4DR4
Terminal numbers 9 and 10 are for control output 2 (OUT2). The three output types and internal equalizing circuits are available according to the
Output Unit.
+
+V
10
+
+V
10
GND
9
10
L
L
GND
9
9
Relay
−
NPN
E53-R4R4 /E53-V44R4
E53-Q4R4 /E53-C4R4
E53-Q4HR4/E53-C4DR4
−
PNP
E53-Q4Q4
E53-Q4HQ4H
Auxiliary Output 1
Terminal numbers 2 and 3 are for auxiliary output 1 (SUB1).
The internal equalizing circuit for auxiliary output 1 is as follows:
5
11
12
10
4
9
3
8
2
1
3
2
7
13
14
6
Relay specifications are as follows:
SPST-NO, 250 VAC, 1 A
Temperature
Controller
Option
Terminal numbers 1, 13, and 14 are valid only when the Option Unit is set in the Controller.
The following four connections are possible depending on the model of the Option Unit.
5
11
12
10
13
9
4
3
8
2
7
1
13
14
6
14
1
SD
RD
SG
+
A
13
14
B
1
13
13
14
14
1
1
4 to 20mA
RS-232C
RS-485
Event input
E53-CK01
E53-CK03
E53-CKB
−
Transfer output
E53-CKF
Use event inputs under the following conditions:
Contact input
ON: 1 kΩ max., OFF: 100 kΩ min.
No-contact input
ON: residual voltage 1.5 V max., OFF: leakage current 0.1 mA max.
The polarity for no-contact input is as follows:
13
14
+
−
1
Transfer output specifications are as follows:
4 to 20 mA DC, load: 500 Ω max., resolution approx. 2,600
Digital Controller
E5@K-T
I-147
Operation
■ After Turning ON Power
To previous column
From previous column
Determine the I/O specifications of the Digital Controller in setup
mode.
Control output 1
assignment (Not
displayed by the
E5@K-TPRR2)
Setup Mode
Control output 2
assignment (Not
displayed by the
E5@K-TPRR2)
Power ON
Auxiliary output 1
assignment
Process value
1 s min.
Output
assignment
Auxiliary output 2
assignment (Not
displayed by the
E5CK)
Alarm 1 type
prgn
Alarm 1
open in
alarm
Alarm
1, 2, or
3 is not
set.
Alarm 2 type
Alarm type
Alarm 2
open in
alarm
Alarm 3 type
1 s min.
Alarm 3
open in
alarm
Input type
Temperature input
Current/Voltage input
Direct/Reverse
operation
°C/°F
selection
Scaling
upper limit
Scaling
lower limit
Decimal point
Parameter initialize
From next column
I-148
To next column
Digital Controller E5@K-T
Note: Parameter Initialize
Parameter initialization sets all parameters to default values except for the input type, scaling upper limit, scaling lower limit,
decimal point, and °C/°F selection parameters.
■ Input Type
Standard Models
Assignment
Destination
Set the code according to the following table. Default is “2: K1 thermocouple.”
Platinum Resistance Thermometer
2
Output Function
No
No
Control output (cool)
(see note 1)
Yes
Yes
No
No
Alarm 1
Yes
Yes
Yes
Yes
Alarm 2
Yes
Yes
Yes
Yes
Alarm 3
Yes
Yes
Yes
Yes
HBA (see notes 1, 2)
Yes
Yes
Yes
Yes
0.0 to 500.0 (°C)
/0.0 to 900.0 (°F)
LBA (see note 1)
Yes
Yes
Yes
Yes
Time signal 1
Yes
Yes
Yes
Yes
–100 to 850 (°C)
/–100 to 1,500 (°F)
Time signal 2
Yes
Yes
Yes
Yes
Program end
Yes
Yes
Yes
Yes
Stage output
(see note 1)
Yes
Yes
Yes
Yes
Error 1 : Input error
No
No
Yes
Yes
Error 2 : A/D convertor No
error
No
Yes
Yes
JPt100
–199.9 to 650.0 (°C) Platinum resistance ther/–199.9 to 999.9 (°F) mometer
1
Pt100
–199.9 to 650.0 (°C)
/–199.9 to 999.9 (°F)
2
K1
–200 to 1,300 (°C)
/–300 to 2,300 (°F)
J1
1
Yes
0
4
Auxiliary Output
2
Yes
Input type
K2
1
Control output (heat)
(see note 1)
Set
value
3
Control Output
Thermocouple
5
J2
0.0 to 400.0 (°C)
/0.0 to 750.0 (°F)
6
T
–199.9 to 400.0 (°C)
/–199.9 to 700.0 (°F)
7
E
0 to 600 (°C)
/0 to 1,100 (°F)
8
L1
–100 to 850 (°C)
/–100 to 1,500 (°F)
9
L2
0.0 to 400.0 (°C)
/0.0 to 750.0 (°F)
10
U
–199.9 to 400.0 (°C)
/–199.9 to 700.0 (°F)
Position-proportional Models
11
N
–200 to 1,300 (°C)
/–300 to 2,300 (°F)
Position-proportional-type Controllers support nine output functions.
These are assigned to auxiliary outputs 1 and 2.
12
R
0 to 1,700 (°C)
/0 to 3,000 (°F)
13
S
0 to 1,700 (°C)
/0 to 3,000 (°F)
Restrictions on assignment destinations are placed on some of the
outputs. The following table shows where outputs may be assigned
to.
14
B
100 to 1,800 (°C)
/300 to 3,200 (°F)
15
W
0 to 2,300 (°C)
/0 to 4,100 (°F)
16
PLII
0 to 1,300 (°C)
/0 to 2,300 (°F)
4 to 20 mA
18
0 to 20 mA
Assignment
Destination
Control Output
1
Auxiliary Output
2
1
2
Output Function
Current input
Alarm 1
No
No
Yes
Yes
Alarm 2
No
No
Yes
Yes
Alarm 3
No
No
Yes
Yes
Time signal 1
No
No
Yes
Yes
Yes
19
1 to 5 V
Time signal 2
No
No
Yes
20
0 to 5 V
Stage output
No
No
Yes
Yes
21
0 to 10 V
Program end output
No
No
Yes
Yes
Error 1 : Input error
No
No
Yes
Yes
Error 2 : A/D converter No
error
No
Yes
Yes
Voltage input
■ Output Assignments
Thirteen output functions are available. Allocate these functions to
the control outputs 1 and 2 and auxiliary outputs 1 and 2.
There are some limitations on some output function allocations.
Output function types and allocation limitations are as described in
the following.
Identical output functions cannot be allocated doubly to the control
output 1 or 2 and auxiliary output 1 or 2.
Temperature
Controller
17
Note: 1. Assignment is not possible with the control valve control
type.
2. Heater burnout alarm is not available for the E5CK.
With control output (cool), the conditions for switching from standard
control to heating and cooling control are reached when the output
function is assigned at the cooling side during heating and cooling
control.
In other words, heating and cooling control is carried out when control output (cool) is assigned, and standard control is carried out
when output is not assigned.
Digital Controller
E5@K-T
I-149
LBA
The LBA (loop break alarm) function is available when it is assigned
as an output. The LBA function is not available when a memory or A/
D converter error results.
LBA is a function for determining that an error has occurred somewhere on the control loop and outputting an alarm when the process
value does not change with the manipulated variable at a maximum
or minimum state. Accordingly, the LBA function can be used as a
means for detecting a malfunctioning control loop.
■ Alarm Mode Selectors
Alarm outputs are available if they are allocated as outputs. Factory setting is “2: Upper-limit alarm (deviation).”
Switch
setting
1
Alarm operation
Alarm output
When X is positive
Upper- and lower-limit alarm (deviation)
X
X
When X is negative
Always ON
ON
OFF
2
SP
Upper-limit alarm (deviation)
X
ON
ON
OFF
OFF
SP
3
Lower-limit alarm (deviation)
X
ON
X
SP
X
ON
OFF
OFF
SP
4
Upper- and lower-limit range alarm (deviation)
X
ON
OFF
5
Upper- and lower-limit alarm with standby sequence (deviation)
Upper-limit alarm with standby sequence (deviation)
Always OFF
X
Always OFF
SP
X
ON
OFF
6
SP
X
SP
X
ON
ON
OFF
OFF
SP
7
Lower-limit alarm with standby sequence (deviation)
X
ON
X
ON
X
OFF
SP
Absolute-value upper-limit alarm
SP
ON
OFF
8
X
ON
SP
X
OFF
OFF
0
9
Absolute-value lower-limit alarm
0
X
ON
ON
OFF
0
10
Absolute-value upper-limit alarm with standby sequence
X
ON
X
OFF
ON
0
X
OFF
OFF
0
11
Absolute-value lower-limit alarm with standby sequence
0
X
ON
ON
OFF
OFF
0
X
0
Deviation Alarm
Absolute Alarm
If the alarm mode selector is set to a number between 1 to 7, alarm
values are set to the width deviated from the set point as shown in
the following illustration.
If the alarm mode selector is set to 8 or 9, alarm values are set to the
absolute value based on 0°C/°F as shown in the following illustration.
Alarm value
Alarm value
10°C/°F
110°C/°F
0°C/°F
110°C/°F
Set point (SP)
100°C/°F
I-150
Digital Controller E5@K-T
110°C/°F
■ Close in Alarm/Open in Alarm
When the Controller is set to “close in alarm,” the status of the alarm
output function is output as it is. When set to “open in alarm,” the status of the alarm output function is output inverted.
Condition
Close in alarm
Open in alarm
Alarm
Output
Output LED
ON
ON
Lit
OFF
OFF
Not lit
ON
OFF
Lit
OFF
ON
Not lit
Alarm type and close in alarm (normally open)/open in alarm (normally close) can be set independently from each alarm.
Close in alarm/Open in alarm is set in the “alarm 1 to 3 open in
alarm” parameters (setup mode). Factory setting is “close in alarm”
[ n-o ].
■ Parameter Operation List
Switching to modes other than manual or protect mode is carried out using the mode selection in the menu display.
The figure below shows all parameters in the order that they are displayed. Some parameters are not displayed depending on the protect mode
setting and conditions of use.
Power ON
1 second min.
1 second min.
Level 0 mode
Manual mode
1 second min.
Program mode
1 second min.
1 second min.
Level 1 mode
1 second min.
1 second min.
1 second min.
Level 2 mode
Protect mode
1 second min.
Temperature
Controller
Setup mode
1 second min.
1 second min.
Expansion mode
1 second min.
Option mode
1 second min.
Calibration mode
■ Parameters and Menus
Note: For more details on the functions of each part and display contents, refer to the E5AK-T/E5EK-T/E5CK-T User’s Manual (H88/H89/H90).
Protect Mode
The protect function is for preventing unwanted modification of parameters and switching between run and reset operation
or auto and manual operation.
Manual Mode
In this mode, the Controller can be switched to manual operation. The manipulated variable can be manipulated manually
only in this mode.
Level 0 Mode
Set the Controller to this mode during normal operation. In this mode, you can change the set point and pattern during
operation, and execute step operation (e.g. advance). You can only monitor (not change) the process value, step No.,
standby time, pattern elapsing time, pattern execution count, and manipulated variable.
Program Mode
This is the programming mode. In this mode, you can set the number of steps used in each pattern, pattern execution
count, alarm values, set points for each step, step time, and time signals for two steps.
Digital Controller
E5@K-T
I-151
Level 1 Mode
This is the main mode for adjusting control. In this mode, you can execute AT (auto-tuning), and set up the control period,
PID parameters and heater burnout alarm (HDA) conditions.
Level 2 Mode
This is the auxiliary mode for adjusting control. In this mode, you can set the parameters for limiting the manipulated variable, switch between the remote and local modes, and set the loop break alarm (LBA), alarm hysteresis, and the digital
filter value of inputs.
Setup Mode
This is the mode for setting the basic specifications. In this mode, you can set parameters that must be checked or set
before an operation such as the input type, scaling, output assignments, and direct/reverse operation.
Expansion Mode
This is the mode for setting expanded functions. In this mode, you can set SP setting limiter, switching between 2-PID control or ON/OFF control, program time unit, selection of step time/rate of rise, time unit of ramp rise rate, and the time for
automatic return to the monitoring display.
Option Mode
This is the mode for setting optional functions. You can select this mode only when an Option Unit is mounted in the Controller. In this mode, you can set the communications conditions, transfer output and event input parameters to match the
type of Option Unit mounted in the Controller. Heater burnout alarm function and position-proportional travel time are also
found in this mode.
Calibration Mode
This mode is provided so that the user can calibrate inputs and output. When calibrating input, the selected input type is
calibrated. Whereas, transfer output can be calibrated only when the Communications Unit (E53-AKF) is set in the Controller.
I-152
Digital Controller E5@K-T
■ Parameter Operation
Refer to the E5AK-T/E5EK-T/E5CK-T User’s Manual (H88/H89/H90) for each parameter and the calibration mode in detail.
Refer to page 135 for the setting in detail.
Level 0 Mode
Protect Mode
Under this mode, key operations are invalidated for the Auto/Manual
and Run/Reset.
Measured
value
RUN/RST
Process Value
Set Point
Press 1 s min.
simultaneously.
Security
Pattern Number
(With E5CK, this display appears when more than
two patterns are used.)
0
Key protect
Step Number Monitor
RUN/RST
To level 0
Press 1 s min.
simultaneously.
Hold
Security
Before starting operation, apply key protection to the parameters that
will not be changed during operation in order to prevent any accidental parameter changes.
Advance
Standby Time (displays remaining time) Monitor
Depending on the set values for the Security parameter (protect
mode), ranges of parameter application will be restricted. The following table shows relationship between the set values and the scope of
protection.
Time
Pattern Elapsing Time Monitor
Time
Pattern Execution Count Monitor
Number of times
(Control Valve Control)
MV
MV Monitor (heating)
Valve Opening
Set value
0
1
2
3
4
5
6
Calibration
Yes
No
No
No
No
No
No
Option
Yes
Yes
No
No
No
No
No
Expansion
Yes
Yes
No
No
No
No
No
Setup
Yes
Yes
No
No
No
No
No
Level 2
Yes
Yes
Yes
No
No
No
No
Level 1, 0
Yes
Yes
Yes
Yes
No
No
No
Program
Yes
Yes
Yes
Yes
Yes
No
No
Level 0
Yes
Yes
Yes
Yes
Yes
Yes
*
Note: *Only the “Process Value/Set Point” parameter display is possible.
When the set value is “0,” protection will not be applied.
(Heating/Cooling Control)
MV
MV Monitor
(Cooling)
When the set value is “5,” only the parameter in the level 0 mode can
be used and not possible to change to the menu screen.
When the set value is “6,” only the “Process Value/Set Point” can be
monitored.
The default setting is “1.”
Manual Mode
+
Press simultaneously 1 s
min.
Process value
Manipulated variable/
Valve opening monitor
MANU indicator
+
Press simultaneously
1 s min.
Digital Controller
E5@K-T
I-153
Temperature
Controller
Mode
Program Mode
Pattern number
Synchronized with with the pattern
number of level 0 mode.
Step number
Changed to the ramp setting method. Refer to the
Operation Manual for the ramp setting method.
Time Setting Method
Set the number of steps to be used beginning with step 0 (e.g., step
0 SP, step 0 time, step 1 SP, and step 1 time).
The step target value can be set within a range between the
lower and upper target value limits. The default value is zero.
The step time can be set within a range between 0.00 and 99.59
(in hr and min or min and s). The default value is 0.00.
Time setting method
Target SP 0
Step 0
Step 1
Step 2
Step 0 time
Step 1 time
Step 2 time
Step 3
Step 0 SP
Ramp Rate 0
Step 0 time
Soak time 0
Target SP 7
Step 7 SP
Step 7 time
(see note)
Ramp rate 7
Soak time 7 (max.)
Pattern execution count
Alarm value 1 (displayed only if the alarm is allocated.)
Step 3 time
Time
A: Step 0 and step 3 SP
B: Step 1 and step 2 SP
Step 0 is flat as shown in the above graph. Set step 0 to 0.00 so that
step 1 will be the actual first step when writing ramp-start programs.
Note: Up to step 15 (i.e., a total of 16 steps) can
be set in the time setting method.
Time Signal
Two types of time signal patterns can be set in each pattern.
Alarm value 2 (displayed only if the alarm is allocated.)
Alarm value 3 (displayed only if the alarm is allocated.)
Time signal 1 enabled step
ON time
Time
Time signal 1 ON time
Time signal output
OFF time
Time signal 1 OFF time
Two types of time signal timers are available (i.e., ON-time and OFF-time use), each
of which starts with the edge of the step.
Time signal 2 enabled step
The output is ON from the moment the ON time elapses until the OFF time elapses.
Time signal 2 ON time
Time signal 2 OFF time
Set the step so that the time signal is triggered by the time signal 1/2 enabled step
parameters. The default is step 0.
Set the ON/OFF timing with the timing signal 1/2 ON-time and time signal 1/2
OFF-time parameters in Program mode.
ON Conditions
If the ON time is shorter than the OFF time, the signal will be reset or ON after the ON
time elapses until the next pattern starts.
The signal is not ON if there is no difference in period between the ON time and OFF time.
If ADVANCE is executed while the time signal setting step is executed, the time equivalent to the setting step will be deemed to have elapsed. In the above graph, for example, the signal is ON from the edge of the next step until the OFF time elapses.
I-154
Digital Controller E5@K-T
Level 1 Mode
Level 2 Mode
Remote/Local
Used for the
communications function.
AT Execute/Cancel
Proportional Band
Available if the Controller is in 2-PID control.
Standby Time
Integral Time
Available if the Controller is in 2-PID control.
LBA Detection Time
Available when the LBA (loop break
alarm) is assigned as an output.
Unavailable to the E5@K-PRR2.
Derivative Time
Available if the Controller is in 2-PID control.
MV at Reset
For E5@K-PRR2
Dead Band
Used with the Controller is in
heating and cooling control.
MV at PV Error
Positionproportional
dead band
MV Upper Limit
Unavailable to the
E5@K-PRR2.
MV Lower Limit
Unavailable to the
E5@K-PRR2.
Manual Reset Value
Available when the integral time parameter
of the Controller in standard control is "0."
Hysteresis (Heat)
Available when the Controller is in
ON/OFF control.
MV Change Rate Limit
For heating/cooling control
Hysteresis (Cool)
Available when the Controller is in
ON/OFF control
Input Digital Filter
For E5@K-PRR2
Control Period (Heat)
Available when the Controller has a relay
or voltage output, or is in 2-PID control.
Open/Close Hysteresis
For heating/cooling control
Control Period (Cool)
Available when the Controller has a relay
or voltage output, or is in 2- PID control.
Current value
Alarm 1 Hysteresis
Available only when the alarm
output 1 is assigned.
Alarm 2 Hysteresis
Available only when the alarm
output 2 is assigned.
Heater Current Monitor
Available when the heater
burnout alarm is assigned.
Alarm 3 Hysteresis
Available only when the alarm
output 3 is assigned.
Heater Burnout Detection
Available when the heater
burnout alarm is assigned.
Input Shift Upper Limit
Available if the input type is a
thermocouple or platinum resistance
thermometer.
Input Shift Lower Limit
Available if the input type is a
thermocouple or platinum resistance
thermometer.
(See Input Shift)
Input Shift
When temperature input is selected, scaling is not required. This is
because input is treated as the “temperature” as it is matched to the
input type. However, note that the upper- and lower-limit values of the
sensor can be shifted. For example, if both the upper- and lower-limit
values are shifted by 1.2°C, the process value (before shift) is
regarded as 201.2°C after shift when input is 200°C before shift.
To set the input shift, set shift values in the “input shift upper limit”
and “input shift lower limit” parameters (level 2 mode).
Temperature
Upper-limit compensation value
Upper limit
Lower limit
After
compensation
Before compensation
Lower-limit
compensation value
Input (% of full scale)
Digital Controller
E5@K-T
I-155
Temperature
Controller
For heating/cooling control
Cooling Coefficient
Used with the Controller is in
heating and cooling control.
Expansion Mode
Set Point Upper
Limit
Set Point
Lower Limit
PID/ON/OFF
(not displayed for control valve control)
Operation at Power ON
Option Mode
Event Input Assignment 1
Available for the event input function.
Event Input Assignment 2
Available for the event input function.
Event Input Assignment 3
Available for the event input function.
Event Input Assignment 4
Available for the event input function.
End condition
Communication Stop Bit
Used when the communications function is being used.
Number of Patterns (Displayed for E5CK.)
Communication Data Length
Used when the communications function is being used.
Program Time Unit
Stop Time/Rate of Rise Programming
Time Unit of Ramp Rate (used for Rate of Rise Setting)
Communication Parity
Set when the communications function is being used.
Communication Baud Rate
Set when the communications function is being used.
Communication Unit No.
Set when the communications function is being used.
PV Start (used for setting time)
Transfer Output Type
Set when the transfer output function is being used.
Wait Width (available for E5AK or E5EK.)
Transfer Output Upper Limit
Set when the transfer output function is being used.
Alarm During Ramp Step Enable
Transfer Output Lower Limit
Set when the transfer output function is being used.
Run All Enable (with E5CK, this display appears
when more than two patterns are used.)
α
Available if the Controller is in 2-PID
control.
AT Calculated Gain
Available if the Controller is in 2-PID
control.
For E5@K-PRR2
HBA latch
Motor
calibration
Travel time
PV dead
band
Automatic Return of Display Mode
AT Hysteresis
Available if the Controller is in 2-PID
control.
LBA Detection Width
Available only when the LBA (loop break
alarm) function is assigned.
Unavailable to the E5@K-PRR2.
I-156
Digital Controller E5@K-T
■ How to Use the Error Display
When an error has occurred, the No.1 display alternately indicates error codes together with the current display item.
This section describes how to check error codes on the display, and the actions that must be taken to remedy the problem.
Input Error
Meaning
Input is in error.
Action
Check the wiring of inputs, disconnections, and shorts, and check the input type and the input type jumper connector.
Operation at Error
For control output functions, output the manipulated variable matched to the setting of the “MV at PV error” parameter (level
2 mode). Alarm output functions are activated when the upper limit is exceeded.
Memory Error
Meaning
Internal memory operation is in error
Action
First, turn the power OFF then back ON again. If the display remains the same, the E5@K-T Controller must be repaired.
If the display is restored to normal, the probable cause may be external noise affecting the control system. Check for external noise.
Operation at Error
Control output functions turn OFF (2 mA max. at 4 to 20 mA output, and output equivalent to 0% in case of other outputs).
Alarm output functions turn OFF.
A/D Converter Error
Meaning
Internal circuits are in error.
Action
First, turn the power OFF then back ON again. If the display remains the same, the E5@K-T Controller must be repaired.
If the display is restored to normal, the probable cause may be external noise affecting the control system. Check for external noise.
Operation at Error
Control output functions turn OFF (2 mA max. at 4 to 20 mA output, and output equivalent to 0% in case of other outputs).
Alarm output functions turn OFF.
Calibration Data Error
This error is output only during temperature input and is displayed for two seconds when the power is turned ON.
Meaning
Calibration data is in error.
Action
Must repair.
Operation at Error
Both control output functions and alarm output functions are active. However, note that the readout accuracy is not assured.
Meaning
Though not an error, this is displayed when the process value exceeds the display range when the control range (setting
range ±10%) is larger than the display range (–1999 to 9999).
• When less than “–1999”
Operation
• When greater than “9999”
Control continues, allowing normal operation.
Digital Controller
E5@K-T
I-157
Temperature
Controller
Display Range Over
Peripheral Devices
■ SSR
Connection Example of Digital Controller and SSR
SSR
Digital Controller
Load
+
+
Voltage output
terminal (for driving SSR)
Heater
INPUT
−
LOAD
Power supply
for load
−
Connectable
Power SSR
E5AK-T, E5EK-T
Digital Controller with
Voltage Output
(12 VDC, 40 mA max.)
E5CK
Digital Controller with
Voltage Output
(12 VDC, 20 mA max.)
See the following table.
Model
G3PA
G3NH
G3NA
G3NE
G3B
Appearance
SSRs connected in E5AK/E5EK: 5 pcs.
E5CK:
3 pcs.
parallel
E5AK/E5EK: 8 pcs.
E5CK:
4 pcs.
E5AK/E5EK: 5 pcs.
E5CK:
2 pcs.
E5AK/E5EK: 2 pcs.
E5CK:
1 piece
E5AK/E5EK: 5 pcs.
E5CK:
2 pcs.
5 to 24 VDC
5 to 24 VDC
12 VDC
5 to 24 VDC
Standard model with
screw terminals
Compact, low-cost
model with tab terminals
Socket, model with 5-A
switching capacity
Rated input voltage
5 to 24 VDC
Features
Thin, monoblock con- For high-power heater
struction with heat sink control
I-158
Digital Controller E5@K-T
Precautions
!WARNING
Use within the following temperature and humidity ranges:
■ General Precautions
• Temperature: –10°C to 55°C (with no icing or condensation)
Humidity: 35% to 85% (with no icing or condensation)
If the Controller is installed inside a control board, the ambient temperature must be kept to under 55°C, including the temperature
around the Controller.
If the Controller is subjected to heat radiation, use a fan to cool the
surface of the Controller to under 55°C.
Be sure to observe these precautions to ensure safe use.
Store within the following temperature and humidity ranges:
• Do not use the product in places where explosive or flammable
gases may be present.
• Never disassemble, repair or modify the product.
• Tighten the terminal screws properly.
• Use the specified size of solderless terminals for wiring.
• Use the product within the rated supply voltage.
• Use the product within the rated load.
• The life expectancy of the output relay varies considerably according to its switching capacity and operating conditions. Be sure to
use the output relay within its rated load and electrical life expectancy. If the output relay is used beyond its life expectancy, its contacts may become fused or burned.
• Temperature: –25°C to 65°C (with no icing or condensation)
Humidity: 35% to 85% (with no icing or condensation)
Do not touch any of the terminals while the power is being supplied.
Doing so may result in electric shock.
■ Correct Use
If you remove the Controller from its case, never touch nor apply
shock to the electronic parts inside.
Do not cover the E5@K-T. (Ensure sufficient space around the Controller to allow heat radiation.)
Do not use the Controller in the following places:
• Places subject to icing, condensation, dust, corrosive gas (especially sulfide gas or ammonia gas).
• Places subject vibration and large shocks.
• Places subject to splashing liquid or oil atmosphere.
• Places subject to intense temperature changes.
• Places subject to heat radiation from a furnace.
Never place heavy objects on, or apply pressure to the Controller
that may cause it to deform and deteriorate during use or storage.
Avoid using the Controller in places near a radio, television set, or
wireless installing. These devices can cause radio disturbances
which adversely affect the performance of the Controller.
Mounting
The dimensions of the Digital Controller conform to DIN 43700.
Recommended panel thickness is 1 to 8 mm (1 to 5 mm for E5CK).
Mount the Unit horizontally.
Connection
To reduce inductive noise influence, the lead wires connecting the
input type to the Digital Controller must be separated from the power
lines and load lines.
Use the specified compensating conductors for thermocouples. Use
lead wires having a small resistance for platinum resistance thermometers.
Connection Example
Wire the terminals of the Unit using solderless terminals.
The tightening torque applied to the terminal screws of the Unit must
be approximately 0.78 N·m or 8 kgf·cm.
When wiring input or output lines to the Controller, keep the following
points in mind to reduce the influence from inductive noise:
Use the following type of solderless terminals for M3.5 screws.
• Allow adequate space between the high voltage/current power
lines and the input/output lines.
• Avoid parallel or common wiring with high voltage sources and
power lines carrying large currents.
• Using separating pipes, ducts, and shielded line is also useful in
protecting the Controller, and its lines from inductive noise.
Temperature
Controller
Be sure to wire properly with correct polarity of terminals.
7.2 mm max.
7.2 mm max.
Cleaning: Do not use paint thinner or organic solvents. Use standard
grade alcohol to clean the product.
Use a voltage (100 to 240 VAC at 50/60 Hz, or 24 VDC). At power
ON, the prescribed voltage level must be attained within two seconds.
Allow as much space as possible between the Controller and devices
that generate a powerful high frequency (high-frequency welders,
high-frequency sewing machines, etc.) or surge. These devices may
cause malfunctions.
If there is a large power-generating peripheral device and any of its
lines near the Controller, attach a surge suppressor or noise filter to
the device to stop the noise affecting the Controller system. In particular, motors, transformers, solenoids and magnetic coils have an
inductance component, and therefore can generate very strong
noise.
When mounting a noise filter on the power supply to the Controller,
be sure to first check the filter’s voltage and current capacity, and
then mount the filter as close as possible to the Controller.
Digital Controller
E5@K-T
I-159
ALL DIMENSIONS SHOWN ARE IN MILLIMETERS.
To convert millimeters into inches, multiply by 0.03937. To convert grams into ounces, multiply by 0.03527.
Cat. No. H087-E1-03
I-160
In the interest of product improvement, specifications are subject to change without notice.
Digital Controller E5@K-T