1
A7
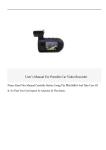
User’s Manual for Dash Camera
Please Read This Manual Carefully before Using the
That You Can Inspect at Anytime In The future.
Camera and Take Care of It, So
Preface
Precautions
General precautions
· Do not expose this product to dusty, dirty or sandy areas to reduce the risk of damaging components.
· Do not expose the camera to high temperature. High temperature may shorten the life span of electronic device, damage
the battery and wind or melt specific plastic parts.
· Do not situate the camera under cold environment. When the product is preheated to its correct temperature, there will be
moisture inside and damage the circuit.
· Do not try to disassemble or repair by yourself. Doing so may lead to electric shock from the internal high-pressure
components.
· Do not drop or punch the camera. Otherwise the internal components will be damaged.
· Do not clean the camera with chemicals, cleaning solution or high concentration detergent. Please wipe it with slightly
damp soft cloth.
·
Send the camera or any other accessories to the professional service center for maintenance when they do not work
well.
Operational condition
· According to the design, the camcorder should be operated within the temperature range from 0 degree to 40 degree
(32℉to 104℉)
· Do not operate or expose the camcorder under following condition:
—Direct sunlight area
—High temperature or dusty area
—Near air conditioner or heaters or any other extreme temperature area
—In a closure car, especially parking in direct sunlight
—Violent vibration area
1 Brief Introduction of the Dash Camera
The features and functions are introduced in this chapter. In addition, PC system requirement, list of items and description of
the hardware components are included.
1.1 PC System Requirements
The PC system needs to meet the following requirements:
· Windows Vista/XP operating system
· Intel Pentium 4 2.8GHz CPU or above(recommended 3GHz)
· At least 512 MB RAM or above(recommended 1GB)
· Standard USB2.0 port or above
· At least 64MB video card or above
2
1.2 Camera appearance and feature icons
1. GPS tracker box also GPU (bracket), 3M sticker put here and then stick to car front window.
If no GPS, it is as a bracket only
2. USB port
3. AV port
4.Up button / Menu / Mute hot button
5. OK button
6. Down /SOS button
7. Light indicator
8. Lens
9. USB port (working only when with GPS tracker box)
10. Power on/off / Reset (Long press it as reset button)
11. HDMI port
12.TF card slot
Light indicator: Red, charging / Blue, stand by / Blue flashing, recording
3
Operation
Read this chapter to know how to operate the camera.
2.1 Inserting a TF card
Inserting a TF card into the camera provides more space to store videos, images or other files.
Please use high-speed TF card meeting the specification of TFHC. (Class6 is perfect .Class10 may cause some problem
because the speed of card is too fast, it is better not use Class10 card)
Copy function for backup video (8GB memory card built-in)
Video clip can be copied between external and internal storage, then you will have backup after you hand over card to police
or the court. (Optional)
First you should choose the card (see 2.1 how to choose card), then
1. Long press "DOWN" button and into Movie reviewing
2. Then long press "UP" button you can copy video to another card
2.2 Turning on your camera
Press Power button to turn ON / OFF the power. Or connect to the car charger directly; it will turn on automatic when car
start.
2.3 Take a picture
Taking a still picture
1. On recording, long press "OK" button and take a picture
2. On stand by, long press "OK" button and take a picture
2.4 Reviewing the pictures
1. Long press "Down" button and into Movie reviewing, then long press "Down" button again that you can review the
pictures.
2. Then long press "UP" button you can do something setting about the pictures: delete file/ protect file/auto play/copy to
another card / choose card
3. Press "OK" button to confirm.
4. Long press "Down" button to back to other mode
2.5 Before using
Before using the camera, it is necessary to do some basic settings such as Date and Time, Language and Beep Tone etc.
2.5.1 Setting Date and Time
Power on the camcorder, Press Menu (Long press UP button), then press UP and DOWN button to choose Date and
Time, press OK button to confirm.
4
2.5.2
Setting Language
Power on the camcorder, Press Menu (Long press UP button), then press UP and DOWN button to choose language,
press OK button to confirm.
2.5.3 Loop recording setting
Off/1minutes/3minutes/5minutes
1. off mode
a. The device can not record automatically and can not record by recycled
b. Maximum length of each recorded video file is 3.66G. When it reaches the maximum, the recording is
automatically split and saved as another file
c. if the space is full, the previous files will not be deleted; when card is full , will show "card full " and can not
continue record
2.When the loop setting mode is "1 min", "3min", "5min", "off"
a. Power on , the device will record automatically
b. if the space is full, the previous saved file will be automatically cover and overwrite
3. loop recording between external card and internal card.
2.5.4 Setting other features
Read this chapter to know how to configure the setup and fine-tune the functions
Power on the camera, Press Menu (Long press UP button), press UP and DOWN button to choose the icons and press OK
button to confirm.
1. Video resolution: 2560*1080 30P 21:9 / 2304*1296 30P 16:9 / 1920*1080 45P 16:9 / 1920*1080 30P 16:9
HDR 1920*1080 30P 16:9 / 1280*720 60P 16:9 / 1280*720 30P 16:9
1296*1080 60P (only A7LA70 have, optional)
2. EV:0/-0.3/-0.7/-1.0/-1.3/-1.7/-2.0/+2.0/+1.7/+1.3/+1.0+0.7/+0.3
3. Flicker: 50/60Hz
Use this function to set the flicker frequency in your area.
4. Lens: wide angle 135 degree+6G
5. White Balance
This item is for correction in different colors under different light conditions. When the white balance is set as Auto, the
camcorder compensates different light conditions automatically.
AUTO/Sunny/Incandescent/ flvorescent /cloudy
6. ADAS: LDWS (Land Departure Warning System)
FCW (Forward Collision Warning)
FCMD (Forward Car Motion Detection)
7. TV type: NTSC/PAL
8. AUTO power off
9. Date time display: Date time/off/date/time
10. Motion detect: off/on
11. Power off screen: off/1minutes/3 minutes/5minutes
12Video camera mode: Video + audio / video
13. G-sensor precision: 2G/2.5G/3G/3.5G/4G/4.5G/CLOSE
14. WDR/HDR
5
15. USB Mode: Mass storage
16. Choose card: external card / internal card (this function is optional )
17. Language: English/Russian/Chinese
18. Default setting : Yes/No
This function will restore all the settings to the factory defaults.
19.Format: Yes/No (Please format micro SD card at first use, and format micro SD card regularly to avoid storage
problems. )
Use this function to Format the storage medium. Note that all the data stored in the medium will be gone.
20. Speed Unit: OFF ; Km/h ; Mph (please choose speed unit before using GPS function).
21. Firmware version
2.5.5 Stamp: Date time/time /date/car/driver number/off
a.When you choose date time and car, then driver number can not show, it is not enough space.
Under car mode, it will display the location latitude and longitude after connect to GPS
b.When you choose date time and driver number, then GPS information can not show, it is not enough space.
C. Driver number is 9 character driver numbers, license plate
2.5.6 GPS: Open/close (Some model without GPS Function)
GPS tracking (effective with GPS-IN function) for the model with GPS. If NO GPS, NO this function
1. Plug in the GPS module to the DVR, satellite searching will be start automatically.
2.
When GPS signal is located,
will be showed on the display.
3.
When taking picture in Camera mode, location will be recorded automatically.
2.6 Review/playing your video files
1. Long press "Down" button and into Movie reviewing to display the latest video files on the LCD screen.
2. Then long press "UP" button you can do something setting about the video: delete file/ protect file/auto play/copy to
another card/ choose card
3. Press "OK" button to confirm.
4. Long press "DOWN" button twice to get back to other mode
2.7 Connecting PC
Connect the camera to computer with USB cable included. (Effective under recording settings off)
2.8 Connecting the DVR to Standard TV. (Effective with AV-OUT function)
Connect your camera and Standard TV via Accessory AV cables (customized).
2.9 Connecting the DVR to HDTV
When connecting to HDTV, you can use high resolution to display video files or pictures.
Use HDMI cable to connect the camcorder video or audio signal to HDTV.
Attention:
When connected to HDTV, shuttering, recording and taping are not available!
6
3.0 Recording Mode
This mode is for recording a video or tacking picture file. The files are saved into TF card.
3.1 Some icons meaning
Record Mode:
About the indication of each icon and symbol, see the table below.
Video Mode
Battery
Motion Detection
TF Card
V:-------
Super HD
Car speed monitor after
GPS searched satellite.
Resolution
White Balance Auto, Tungsten,
Fluorescent, Daylight, Claudy indictor.
2008/01/01
01:07AM
Segmented loop recording
time
Date and Time
GPS
3.2 Playback mode
Using Play back mode to display all the video files saved in the DVR.
About the indication of each icon and symbol, see the table below
000:00:15
Playback time
Play
Battery
Pause
3.3 USB mode
You can use USB mode to connect with the host PC. ((Effective under recording settings off))
When the camera is connected with the host PC, it appears as a removable disk in the Windows explorer.
4. Protection
4.1 When reviewing the video,
1. Long press "DOWN" button and into Movie reviewing to display the latest video files on the LCD screen.
2. Then long press "UP" button you can move to protect file button then setup protect one file or all, etc .The file with
are protected.
3. Press "OK" button to confirm.
4. Long press "DOWN" button twice to get back to other mode
7
Attention:To unlock the files, repeat the steps above. After being unlocked, no files are with
setting, the previous file is not protected ,protects only the last cycle recorded file.
.; under Loop record
4.2 When recording (SOS)
Press “DOWN” button and the current file will be save and lock and can not be deleted.
When you copy the video to another TF card, the copied files will be locked.
Appendix
Specification
Image Sensor
3.2M CMOS
Chip
Ambarella A7 1296 P 30FPS (Ambarella A7LA70 is optional)
Lens
135 Wide angle
External memory
Internal memory
TF card (up to 64 GB)
Built-in 8GB (loop recording between external card and internal card)
WDR/HDR
Support
Display
1.5″TFT
Still images
Format:JPEG
Quality:Auto
Videos
Format:H.264 (MOV)
Resolution:2560*1080 30P 21:9 / 2304*1296 30P 16:9 / 1920*1080 45P
16:9 / 1920*1080 30P 16:9 / HDR 1920*1080 30P 16:9 / 1280*720 60P
16:9 / 1280*720 30P 16:9 /
1296*1080 60P (only A7LA70 have, optional)
Quality:Auto
Audio
Built-in microphone/ speaker
Tape
Yes
White Balance
Auto
Tungsten
Daylight
Cloudy
Fill light
Fluorescent
Exposure
compensation
-2.0EV~+2.0EV
Time ,date
On/off , date and time watermarking function
Output
HDMI HD Audio-Video output
PC Interface
USB2.0(High-speed)
AV Output Format
NTSC/PAL
Battery
Built-in Lithium Ion battery
8
Troubleshooting
Question
Possible reasons
Solutions
The camcorder is suddenly
turned off
Auto Off Function is On.
Low battery
·Turn on again the camera
Charge battery
Captured images are not
saved into memory
Power is off before the
images are saved.
Memory card can not be used
Memory card is protected.
Memory card contains
non-DCF images from
other cameras.
·Unlock the memory card.
·Format the memory card. Before formatting, make
sure to backup files first.
All the buttons are invalid.
Short-circuit
when
connecting camcorder with
other equipments.
Long press the power button
Charge battery
Accessories:
Name
Quantity
Name
Quantity
Camera
1 piece
Car Adapter
1 piece
USB cable
1 piece
3M sticker
4 pieces
Cable Clip
1 bag
User Manual
1 piece
Film
1 piece
Lens Cleaning Cloth
1 piece
CPL
optional
GPS
optional
CPU (mount)
optional
Hardwire Kits
optional
Remarks:
Methods of pasting the FILM:
1. Spray some water on the place that the FILM will be pasted on, and then use a dry towel to clean it;
2. Tear off the FILM, then paste it to the right place.
3. After you have adjusted the location well, you can use a scratch board or something else flat to slick the film and
squeeze the water inside out until there is no bubble or water in it.
4. Then put 3M sticker onto the film, then if you want to remove bracket, it is easy, just remove the FILM.
NOTE: Alterations reserved.
About the Manual
We have tried our best to make sure that what in this manual is right and updated. However, we can not guarantee that all
the content is correct without any errors. If there is a difference between the manual and camera, please take the camera as
standard. We keep the right to change content or technical regulations without informing you beforehand. In addition, the
manufacturer keeps the right to change technical specification without informing you beforehand.
If the accessories are different from the ones inside the actual product, please take the actual product as standard.
9