1
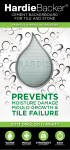
Reverso en Espanol
C
No ont
Gy ain
ps s
um
with MoldBlock® Technology
INSTALLATION GUIDE
Cement Backerboard for Walls,
Floors and Countertops
90% Premium Portland Cement and Sand
Backed by a Limited Lifetime Warranty
© 2012 James Hardie Technology Limited. All rights reserved.TM, SM, and ® denote trademarks or registered
trademarks of James Hardie Technology Limited. is a registered trademark of James Hardie Technology Limited.
HB1131 1/12
Cutting
HardieBacker® Board
• Use a straight edge as a guide to score
the board’s face and snap upward
along the score line. We recommend
using a carbide-tipped scoring knife,
but a utility knife may also be used.
The use of shears (manual, electric or
pneumatic) is also acceptable.
•For cutouts and small holes, score
around perimeter and break out from
the face side with hammer.
• NEVER use high-speed power tools (e.g. saws, grinders, etc.) to cut James Hardie®
products indoors as they may generate excessive silica dust.
•NEVER dry sweep – Use wet suppression methods or HEPA vacuum for clean-up.
• To further limit respirable silica exposures, wear a properly-fitted, NIOSH-approved dust mask or respirator (e.g. N-95) in accordance with applicable government
regulations and manufacturer instructions.
Countertop Installation
1 | Ensure cabinets are level and
secure
• Use minimum 1/2” exterior grade
plywood or equivalent, positioned
across the wood cabinet. Space
between plywood supports is not to exceed 16” on center.
2 | Determine layout of HardieBacker® cement board
• Do not align HardieBacker cement board with plywood joints.
• Score and snap boards to required sizes and make necessary cutouts.
• We recommend an 1/8” gap from board edges.
3 | Attach HardieBacker cement board to countertop
•Apply a supporting bed of dry-set mortar or modified thinset to plywood with a 1/4”
square-notched trowel. Mastic can also be used with a 5/32” V-notched trowel.
• Use the fastener pattern as a guide. Fasten HardieBacker cement board with
specified nails or screws (as listed in “Materials Required”) every 8” over the entire
surface. Keep fasteners between 3/8" and 3/4" from board edges and 2" from
board corners.
4 | Tape joints prior to tiling • Prior to setting the tile, fill all joints with the same mortar used to set the tiles.
• Embed 2” wide high-strength alkali-resistant glass fiber tape in the mortar and level.
5 | Exterior application (HardieBacker 500 only)‡ Additional details on page 4
• Follow Countertop installation steps 1 thru 4
• Mastic (organic adhesives) shall not be used in exterior applications
1 | English
Floor Installation
(Interior Application Only)
We recommend 1/4” HardieBacker®
board for floor applications, unless 1/2”
thickness is needed for transition.
1 | Ensure subfloor is structurally
sound
On existing structures:
• Ensure subfloor is not damaged.
Replace any loose, warped, uneven or
damaged sections of floor.
• Make certain subfloor is a clean and flat surface.
For all floors:
•Use minimum 5/8 exterior grade plywood or 23/32 OSB with Exposure 1
classification or better, complying with local building codes and ANSI A108.11.
• Joist spacing not to exceed 24” on center.
• The floor must be engineered not to exceed the L/360 deflection criteria (L/720 for natural stone), including live and dead design loads, for the specific joist spacing used.
2 | Determine layout of HardieBacker® cement board
•Stagger all HardieBacker® cement board joints. Do not align with subfloor joints.
•Never allow all four corners of boards to meet at one point.
•We recommend an 1/8” gap
between board edges.
•Keep sheet edges 1/8” back from
walls and cabinet bases.
• Score and snap boards to required
sizes and make necessary cutouts.
3 | Attach HardieBacker cement board to subfloor
• Apply a supporting bed of mortar or modified thinset to subfloor using a 1/4”
square-notched trowel.
• Embed HardieBacker cement board firmly and evenly in the wet mortar.
• Use the fastener pattern as a guide. Fasten HardieBacker cement board with
specified nails or screws (as listed in “Materials Required”) every 8” over the entire
surface. Keep fasteners between 3/8" and 3/4" from board edges and 2" from
board corners.
• Set fastener heads flush with the surface without overdriving.
4 | Tape joints prior to tiling •Prior to setting the tile, fill all joints with
the same mortar used to set the tiles.
•Embed 2” wide high-strength alkaliresistant glass fiber tape in the mortar
and level.
English | 2
Wall Installation
1 | Ensure framing is structurally
sound
•Must comply with local building codes
and ANSI A108.11.
•Use a minimum of 2” x 4” wood studs
or 20-gauge metal studs, which must
be straight, properly aligned and
spaced a maximum of 16” on center.
•In tub and shower enclosures,
ensure that the framing is adequately
reinforced at the corners.
2 | Determine layout of HardieBacker cement board
•Boards may be installed vertically or horizontally.
•Edges of the board parallel to framing must be supported by a structural framing member.
•Score and snap boards to required sizes and make necessary cutouts.
3 | Attach HardieBacker cement board to framing
•See applicable building codes regarding vapor barrier requirements.
•Install boards 1/4” above floor, tub or shower pan and caulk accordingly.
•Fasten cement board with specified nails or screws (as listed in “Materials
Required”) a maximum of 8” on center at all supports.
•Keep fasteners 3/8” from board edges and 2” in from sheet corners.
•Set fastener heads flush with the surface, without overdriving.
4 | Tape joints prior to tiling
•Fill all joints with mortar (see “Materials Required”).
•Embed 2” wide high-strength alkali-resistant glass fiber tape in the mortar and level.
5 | Exterior application (HardieBacker 500 only)‡ Additional details on page 4
• Install HardieBacker 500 over sub-sheathing with a code approved water-resistive
barrier, or in accordance with applicable code.
• May be used up to a height not exceeding the lesser of: through the second-story
above grade or 30 feet above grade.
• Follow wall installation steps 1 thru 4
Finishing with Tile
1.Refer to ANSI A108 and the mortar
and tile manufacturers’ published
application guidelines for complete
tiling instructions.
2.Wipe the surface of HardieBacker®
cement board clean with a damp sponge
just prior to adding mastic or mortar.
3.Spread the mastic or mortar with
a notched trowel (Note: Please see
“Materials Required” to see which setting
material is required for your application.)
3 | English
4.Twist or press and beat in tiles
complying with ANSI A137.1.
5.Allow a minimum of 24 hours curing
set time before grouting.
Finishing with
Natural Stone
Natural stone often has hidden
weaknesses which can result in surface
cracks in finished floors. To reduce the
risk of job failures, always consult The
Marble Institute of America Handbook.
In addition to the steps outlined under
“Floor Installation,” the following is required:
•Always follow the recommendations of the flooring material manufacturer.
•Marble and natural stones must have sufficient flexural strength for use in flooring
systems.* Where the quality and strength of the stone is unknown, the floor must
be engineered not to exceed the L/720 deflection criteria, including live and dead
design loads, for the specific joist spacing used. The strength of your natural stone
will have an impact on the ultimate performance of your flooring system.
* Testing has shown that a minimum 2900 psi is preferable for flooring application.
Finishing with Paint, Wallpaper or Texture
(Interior Application Only)
1 | Painting or Wallpapering
Apply a drywall primer suitable for high-moisture areas, as recommended by the
paint manufacturer. Paint HardieBacker board as you would drywall. If wallpapering,
prime surface of HardieBacker board with a primer suitable for high-moisture areas
as recommended by the wallpaper manufacturer.
2 | Texturing
Texture can be applied to HardieBacker board in the same way as drywall.
Steam Room Application
HardieBacker® board is recognized for use in residential steam rooms when installed
over conventional framing and in accordance with HardieBacker board printed
installation instructions, TCNA guidelines (Tile Council of North America Handbook,
www.tileusa.com), and local building codes. Questions and concerns regarding
design and construction should be directed to a knowledgeable professional.
Exterior Application
(This application has limited warranty coverage. Refer to Exterior Warranty for
coverage information on page 8)
HardieBacker 500 may be used up to a height not exceeding the lesser of: through
the second-story above grade or 30 feet above grade. The HardieBacker 500 must
be installed over sub-sheathing with a code approved water-resistive barrier, or in
accordance with the applicable code. Install flashings, clearances, and other building
practices per local code. James Hardie will assume no responsibility for water
infiltration. Use a minimum No. 11 ga. 1¾” long roofing nails or No. 8-1¾” long
(0.375” HD) or ribbed wafer head corrosion resistant screws spaced a maximum of
8" OC. The maximum weight of the overlayment (tiles, stones and veneers) is not to
exceed the code limit of 15 lbs/sq ft. Application is limited to HZ10® areas only.
Follow installation procedure in accordance with the stone and mortar manufacturer’s
recommendations. ¹ Stones must be free of any substance that may impede proper
adhesion.
English | 4
Skim coat is recommended to be 1/8"
- 1/4" thick and the tile/stone is to be
installed while the skim coat is wet.
CAUTIONS: This product shall not be
used in the following applications:
• As a backer board in balcony railings
and balcony parapet walls
• HardieBacker 500 may not be used
to a height exceeding through the
second-story above grade or greater
than 30 feet above grade.
¹ See IRC Table R703.4, IBC §2101.2 and
§1405.10
Vinyl and Resilient Flooring (Interior Application Only)
Materials Required
1 | Fasteners
• Minimum 7/8” long galvanized or polymer-coated 18-gauge chisel point staples
with 1/4”crown.
•Minimum 7/8” long galvanized ring shanked underlayment flooring nails.
• Fasteners should be long enough to reach the bottom of the subfloor, but not
penetrate it.
• Avoid using resin, rosin or cement-coated fasteners that can discolor vinyl flooring.
2 | Patch
•Use the cement-based, rapid-setting patching compound recommended by the
floor covering manufacturer.
• Do not use a gypsum-based patch. Follow the patch manufacturer’s instructions.
Preparation for Underlayment
1 | Ensure subfloor is structurally sound and properly installed
On existing floors:
• HardieBacker® cement board may be installed under or over Vinyl Composition Tile
(VCT) and other resilient flooring. For best results, remove existing floor covering,
especially if it is in poor condition.
• If installing HardieBacker cement board over existing floor, ensure the floor is flat
and floor covering is thoroughly adhered to the subfloor.
On all floors:
• Ensure subfloor is not damaged. Replace any loose, warped, uneven or damaged
sections of floor.
• Make sure subfloor is dry, level and fastened correctly. All fasteners must be
countersunk or flush with the subfloor. All seams or other areas that are not level
must be sanded flat.
• Subfloor must be free of all debris, oil, grease, paint or other foreign substances.
2 | Basements and crawl spaces
• Crawl spaces must be well ventilated with a minimum of 18” between the ground
and joists. A vapor barrier over the ground is required.
5 | English
Underlayment Installation
1 | Determine layout of
HardieBacker® cement board
• Install smooth side up.
• Install HardieBacker boards
perpendicular to subfloor panels.
• Stagger all HardieBacker board joints. Do not align HardieBacker board joints with
subfloor joints
• Never allow all four corners of boards to meet at one point.
• Lightly butt the board joints. Do not leave a gap or force edges together.
• Join factory-cut edges together in the body of the floor.
• Keep board edges 1/8” back from walls and cabinet bases.
2 | Attach HardieBacker boards to subfloor
• Fasten one board at a time. HardieBacker boards must be flush with subfloor
during installation.
• Begin the fastening pattern in a corner of the board, then fasten the two adjacent
edges. Return to the corner and fasten in a diagonal pattern from that corner until
the board is completely fastened.
• Place fasteners in a random, staggered pattern across HardieBacker board. Avoid fastening in a straight line.
• Fasten HardieBacker boards with proper fasteners (as listed in “Materials Required”)
a maximum of 3” on center around the perimeter and 6” on center in the field.
• Keep fasteners between 3/8” and 3/4” from board edges and 2” in from board corners.
• Fastener heads/crowns must be flush with or slightly countersunk a maximum of
1/16” below the surface.
3 | Finishing surface and joints (not necessary for carpet or wood flooring)
• If necessary, lightly hand-sandseams to achieve a smooth transition between
boards. Avoid over-sanding. Sanding will generate significant respirable silica dust
and those in the immediate area must wear NIOSH-approved respiratory protection
(e.g. N95) in accordance with applicable government regulations.
• Thoroughly clean HardieBacker board surface to remove all debris prior to patching.
• Using a wide flat trowel, apply a skim coat of patch (as listed in “Materials
Required”) to all seams, sanded areas, hammer indentations, holes, gaps, gouges,
chips and voids to achieve a smooth surface. Avoid building a ridge over the seams
by feathering the patch out several inches on both sides of the seams.
• Obtaining a perfectly smooth surface may require more than one coat of patch.
• After the patch has thoroughly dried, lightly sand or scrape off any surface
imperfections caused by the patch to achieve a smooth surface.
• Wait until patch is thoroughly dry before installing the floor covering.
4 | Flooring installation
• Prepared HardieBacker cement board surface must be free of all debris, oil, paint, caulk, joint compound and other foreign substances.
• Do not install floor covering seams directly over the HardieBacker board seams.
• Install floor covering according to the adhesive and floor covering manufacturers’
instructions.
English | 6
Basic Composition
90% Portland cement and sand with
selected additives. Contains no asbestos,
formaldehyde, gypsum, paper facing, or
abrasive aggregate.
1/4” HardieBacker® cement board:
Sheet size:3’ x 5’ (EZ Grid® board) and 4’ x 8’
Thickness: 1/4”
Weight: 1.9 lbs. psf (9.3 kg/m2) Complies
with ASTM C1288 & ANSI A118.9
HardieBacker 500 cement board:
Sheet sizes:3’ x 5’ and 4’ x 8’
Thickness: 0.42”
Weight: 2.6 lbs. psf (12.7 kg/m2)
Complies with ASTM C1288 & ANSI A118.9
®
Materials Required
• If applying HardieBacker 500 cement
board over gypsum, use minimum 1-3/4”
long corrosion-resistant roofing nails.
For countertops:
• Minimum 3/4” long corrosion-resistant
roofing nails.
• Minimum 3/4” long ribbed counter
sinking corrosion-resistant screws.
• 18-gauge corrosion-resistant polymer
coated 3/4” staples with a 1/4” crown.
••For HardieBacker 500 cement board,
use minimum 1-1/4” long corrosionresistant roofing nails or ribbed
countersinking screws.
For vinyl and resilient flooring: (Interior Only)
•Minimum 7/8” long galvanized or polymercoated 18-gauge chisel point staples with
1/4” crown.
1| Mortar
•Minimum 7/8” long galvanized ring
shanked nails.
For floors:
• Latex or acrylic modified thinset
(complying with ANSI A118.4).
•Fasteners should be long enough to
reach the bottom of the subfloor, but not
penetrate it.
• Dry-set mortar for use between
subfloor and cement board only
(complying with ANSI A118.1).
For walls and countertops:
• Latex or acrylic modified thinset
(complying with ANSI A118.4).
• Type 1 mastic (complying with ANSI
A136.1). (Not to be used in exterior
applications)
• For Exterior applications follow
stone and mortar manufacturers
recommendations.
2 | Tape
• 2” wide high-strength alkali-resistant
glass fiber tape.
3 | Fasteners
For floors and walls:
• Minimum 1-1/4” (for interior)
& 1-3/4" (exterior walls) long
corrosion-resistant roofing nails.
• Minimum 1-1/4” (for Interior) &
1-3/4" (exterior walls) long No. 8
x 0.375” HD self-drilling corrosionresistant ribbed waferhead screws.
• If compliance with ANSI A108.11 is
not required, minimum 1” long No. 8
x 0.323” HD self-drilling corrosionresistant ribbed buglehead screws
may be used for floors.
7 | English
•Avoid using resin, rosin or cement-coated
fasteners that can discolor vinyl flooring.
HardieBacker® board
delivers more compressive
and flexural strength than
any board on the market.
WARNING AVOID BREATHING SILICA DUST:
James Hardie® products contain respirable
crystalline silica, which is known to the State of
California to cause cancer and is considered by
IARC and NIOSH to be a cause of cancer from
some occupational sources. Breathing excessive
amounts of respirable silica dust can also cause a
disabling and potentially fatal lung disease called
silicosis, and has been linked with other diseases.
Some studies suggest smoking may increase
these risks. During installation, use fiber cement
shears for cutting or, use score & snap technique.
During clean-up, use HEPA vacuums or wet
cleanup methods—never dry sweep. For further
information, refer to our installation instructions
and Material Safety Data Sheet available at www.
jameshardie.com or by calling 1-800-9HARDIE
(1-800-942-7343). FAILURE TO ADHERE TO
OUR WARNINGS, MSDS, AND INSTALLATION
INSTRUCTIONS MAY LEAD TO SERIOUS
PERSONAL INJURY OR DEATH.
BK050905
Environmental Considerations
HardieBacker® board’s proprietary cement formulation and MoldBlock® Technology
provide a moisture and mold-resistant wallboard and tile backer substrate that
stands tough over time, reducing the need for product replacement. James Hardie
has demonstrated a commitment to reducing energy consumption, while improving
process efficiencies and waste management. It avoids the use of environmentally
damaging materials and uses renewable resources that are abundant in the
manufacture of HardieBacker® cement board. HardieBacker cement board does
not contain any glass fibers, gypsum, asbestos or formaldehyde. The company also
focuses on water conservation and attempts to recycle water and waste product as
much as possible during the manufacturing process.
Recognitions
HardieBacker cement board is recognized as an interior substrate by the following:
•International Code Council Evaluation Service ESR-2280
• City of Los Angeles Research Report No. 24862
•HUD Materials Release Nos. 1263 and 1268
• City of New York MEA No. 223-93M
• IBC 2509.2
• IRC R702.4.2
Consult these documents for additional information concerning conditions for use in
applicable jurisdictions.
*Cementitious Backer Unit/Fiber-Cement Underlayment
Compressive Strength Compressive Strength at Equilibrium Moisture Content (ASTM
D2394)
1/4” HardieBacker® EZ Grid® cement board: 7000 psi (48 MPa)
HardieBacker® 500 cement board: 6500 psi (45 MPa)
Non-Combustibility HardieBacker cement board is recognized as non-combustible in
accordance with ASTM E136.
Surface Burning Characteristics When tested in accordance with ASTM method E-84:
Flame Spread – 0, Fuel Contributed – 0, Smoke Developed – 5.
Fire Rated Assemblies HardieBacker cement board may be used as a component
in one-hour fire-resistive wall construction; consult ESR-2280 website listings
for recognized assemblies, or contact James Hardie’s Technical Services at
1-800-9HARDIE (1-800-942-7343).
Interior Warranty
Warranty copies are available from James Hardie Building Products or wherever
James Hardie® products are sold. Limited lifetime warranty includes material and
labor. Please visit HardieBacker.com for more details.
Exterior Warranty
Warranty coverage for this application is limited to HZ10 areas only. To find out
your zone go to HardieZone.com or see HardieBacker® cement board’s exterior
application warranty for applicable zip codes. The HardieBacker® 500 cement
board warranty is extended to cover external use, meaning areas under direct and
indirect exposure to weather.
English | 8
Contractors and do-it-yourselfers trust HardieBacker® cement
board with MoldBlock® technology to deliver superior moisture
and mold protection. HardieBacker board doesn’t contain any
glass mesh or gypsum and its proprietary cement formulation
delivers the ultimate in durability. HardieBacker board’s
dimensional stability, exceptional bonding surface, and moisture
resistance make it the Total Wet Area Solution™.
Exclusive MoldBlock Technology
Mold protection is integrated
throughout HardieBacker cement
board. It passes both ASTM mold
tests with a perfect score.
Ultimate in Durability
Proprietary 90% cement and sand
formulation protects against water
damage.
Exceptional Workability
Just score one side and snap
upward. Cuts cleanly and fastens
with common tools. Lightest cement
board available.
Superior Tile Bond Strength
Exceeds industry specifications in
ASTM tests for tile adhesion.
No Special Handling Required
Unlike fiber gypsum board,
HardieBacker board does not have
to acclimate to job site temperature
and humidity prior to installation.
9 | English