1
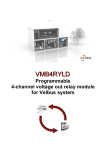
VMB4RY
4-channel Relay
Module
for VELBUS system
Velbus manual VMB4RY– edition 1 – rev.2.0
1
INDEX
Features ........................................................................................................................................................................... 3
Velbus data...................................................................................................................................................................... 4
Connection ...................................................................................................................................................................... 5
Direct control with several push buttons ................................................................................................................. 6
Control via VELBUS system ................................................................................................................................... 7
Combination of direct push button control and VELBUS control ............................................................................ 7
Use ................................................................................................................................................................................... 8
Termination ............................................................................................................................................................. 9
Addressing ............................................................................................................................................................ 10
Timer setting ......................................................................................................................................................... 10
Operation mode/ timer2 ........................................................................................................................................ 10
Operation .............................................................................................................................................................. 12
Led-indication........................................................................................................................................................ 12
Learning mode ...................................................................................................................................................... 12
Velbus manual VMB4RY– edition 1 – rev.2.0
2
Features:
◊
◊
◊
◊
◊
◊
◊
◊
◊
◊
◊
◊
◊
◊
◊
◊
◊
◊
◊
◊
◊
◊
◊
◊
◊
◊
Relay outputs: 4 independent N.O. contacts
Switching capacity with a resistive load: 16A/230VAC max.
Switching capacity with an inductive load: 8A/230VAC max.
Suppressed relay contacts.
Manual control on the module.
LED indications for:
• The relay outputs
• The operation modes (slow, fast, very fast or 2 x blinking and continuously ON)
• The power voltage
• Data reception and forwarding through VELBUS
10 different operation modes independently adjustable (through the ‘mode’ rotary switch) per channel:
• Moment control
• On/off control
• Start/stop timer
• Staircase lighting timer
• Non-restartable timer
• Switch-off delay
• Switch-on delay
• Starting the timer by push button release
• Timer with blinking effect
• 2-way timer (short press will start timer 1/ long press will start timer 2)
16 different time settings (adjustable through ‘time1’ rotary switch): moment - 5s - 10s - 15s - 30s - 1min - 2 min 5min - 10min - 15min - 30min – 1h – 2h – 5h - 1day – on/off
9 different time settings for timer 2 (adjustable through ‘time2’ rotary switch): 5min - 10min - 15min - 30min – 1h
– 2h – 5h - 1day – on/off
Controllable by connecting several push buttons in parallel.
Push button input debounce: 65ms.
Control through VELBUS.
Programmable without PC.
Easy learning process by operating the desired push buttons in the learning mode.
8 different operation possibilities:
• Using push buttons turning on the relay.
• Using push buttons turning off the relay.
• Using push buttons turning the relay on or off.
• Using push buttons activating the set mode on the module.
• Using push buttons starting or stopping the timer.
• Using push buttons starting or stopping the 2nd timer.
• Using push buttons starting or restarting the timer.
• Using push buttons starting or restarting the 2nd timer.
Memory for 15 different push buttons per command.
Learned push buttons are saved in case of a power failure.
Report to control modules for LED status modification.
223 different addresses (adjustable through ‘ADDR’ rotary switches)
Required power voltage: 12 to 18VDC
Consumption in standby: 70mA at 18V (50mA at 16V)
Consumption all relays activated: 270mA at 18V (225mA at 16VDC)
Max. consumption (activated relay and push button inputs): 330mA at 18V (285mA at 16VDC)
Standard DIN-rail housing (4 modules)
Dimensions (L x W x H): 90 x 71 x 58mm.
Weight: 210g
Velbus manual VMB4RY– edition 1 – rev.2.0
3
VELBUS:
2-wire communication for VELBUS data and 2 wires for power.
Data transfer: 16,6Kbit/s.
Serial data protocol: CAN (Controller Area Network)
Short-circuit proof (towards negative or positive of power)
Bus error indication: 2 x short flash of the operation mode LED.
Self restoring after 25 seconds in case of a bus error.
Possibility to assign a name (max. 16 characters) which can be saved in the non-volatile memory.
The module can react to push button messages sent over the VELBUS.
A modification of the relay status will be reported on the VELBUS.
When modifying the relay status, the module will send instructions to adjust the status of the LEDs on the control
modules.
Instructions will be accepted when calling up the module type, module name, module status, reading from or
writing to the non-volatile memory, switching on or off the relay and when starting or stopping the timer.
The module can respond with the module type, module name, module status or the contents from the memory.
Velbus manual VMB4RY– edition 1 – rev.2.0
4
CONNECTION
To control a load, you can use the relay module’s normal open, normal closed or relay contact.
CH4
N
AC POWER
L
CH3
N
AC POWER
L
CH2
N
AC POWER
L
CH1
N
AC POWER
L
OUT1
OUT2
OUT3
OUT4
ADDR
MODE
TIME2
TIME1
VMB4RY
12V
- +
BUS
L H
-
PB1
-
PB2
-
PB3
-
PB4
If the consumer needs a 2-pole interruption (e.g. outdoor lighting, pump) or the consumption exceeds 1000W (e.g.
wall outlets, electric heating, water heater), you need to use an additional 2-pole relay. A 3-phase consumer (e.g.
accumulation heater) has to be controlled through a 4-pole relay.
AC POWER
L
OUT1
OUT2
OUT3
OUT4
1
- +
BUS
L H
-
PB1
-
PB2
OUT1
OUT2
OUT4
1
3
A1
L2 L3
5
MODE
TIME2
A1 1 3 5 7
TIME1
A2 2 4
TIME1
A2 2 4 6 8
PB3
-
PB4
VMB4RY
12V
2
4
7
ADDR
A1 1 3
A2
-
OUT3
L1
MODE
TIME2
VMB4RY
12V
3
A1
ADDR
AC POWER
N
N
- +
BUS
L H
-
PB1
-
PB2
LOAD
-
PB3
-
PB4
2
4
A2 6
N
L1
L2 L3
LOAD
8
Connect the 12 … 18VCC (mind the polarity) to the module. Make sure to use a heavier wire gauge (1mm2) with
long connections. You can use the relay output’s normal open, normal closed or relay contact. The relay module
can be controlled via push buttons which are directly connected to the push button input by using the VELBUS or
a combination of both possibilities.
Velbus manual VMB4RY– edition 1 – rev.2.0
5
Direct control with several push buttons:
CH4
N
AC POWER
L
CH3
N
AC POWER
L
CH2
N
AC POWER
L
CH1
N
AC POWER
L
OUT1
OUT2
OUT3
OUT4
ADDR
MODE
TIME2
TIME1
VMB4RY
12V
- +
BUS
L H
-
PB1
-
PB2
-
PB3
-
PB4
PUSH BUTTONS FOR CHANNEL 4
PUSH BUTTONS FOR CHANNEL 3
PUSH BUTTONS FOR CHANNEL 2
PUSH BUTTONS FOR CHANNEL 1
+
12V SUPPLY
-
Remark: To break off communication with the VELBUS system, set the address on ‘00’ so no status
modifications will be reported. All learned push buttons must be deleted (see learning mode) so no instructions
will be sent over the VELBUS to control the push button indication LEDs.
In the other case, de relay module will cause a bus error with every status modification.
Velbus manual VMB4RY– edition 1 – rev.2.0
6
Control through the VELBUS system:
CH4
N
AC POWER
L
CH3
N
AC POWER
L
CH2
N
AC POWER
L
CH1
N
AC POWER
L
OUT1
OUT2
OUT3
OUT4
ADDR
MODE
TIME2
TIME1
VMB4RY
12V
- +
BUS
L H
-
H
L
PB1
-
PB2
-
PB3
-
PB4
BUS
TWISTED
PAIR (0.5mm 2 )
+
12V SUPPLY
-
Remark: For connection between the modules, use twisted pair cable (ex. EIB 2x2x0.8mm2, UTP 8x0.51mm CAT5 or other). Use minimum 0.5mm² cable. For long wiring (>50m) or if a lot of modules ( > 10) are
connected to one wire, use 1mm² cable.
Connect the bus (mind the polarity) to the module.
Velbus manual VMB4RY– edition 1 – rev.2.0
7
Combination of direct push button control and VELBUS control:
CH4
N
AC POWER
L
CH3
N
AC POWER
L
CH2
N
AC POWER
L
CH1
N
AC POWER
L
OUT1
OUT2
OUT3
OUT4
ADDR
MODE
TIME2
TIME1
VMB4RY
12V
- +
BUS
L H
- PB1 - PB2 - PB3 - PB4
PUSH BUTTONS FOR CHANNEL 4
PUSH BUTTONS FOR CHANNEL 3
PUSH BUTTONS FOR CHANNEL 2
PUSH BUTTONS FOR CHANNEL 1
H
L
BUS
TWISTED
PAIR (0.5mm2 )
+
12V SUPPLY
-
Remark: For connection between the modules, use twisted pair cable (ex. EIB 2x2x0.8mm2, UTP 8x0.51mm CAT5 or other). Use minimum 0.5mm² cable. For long wiring (>50m) or if a lot of modules ( > 10) are
connected to one wire, use 1mm² cable.
Connect the bus (mind the polarity) to the module.
Velbus manual VMB4RY– edition 1 – rev.2.0
8
USE
Remove the lid from the dimmer module using a small screwdriver and modify the configuration.
Normal open contact channel 1
Normal open contact channel 2
Normal open contact channel 3
Normal open contact channel 4
Relay-ON indication LED channel 2
Relay-ON indication LED channel 1
Operation mode setting channel
2
Operation mode setting channel
1
OUT1
OUT2
OUT3
OUT4
Relay-ON indication LED channel 3
Relay-ON indication LED channel 4
ADDR
Operation mode setting channel 3
Operation mode setting channel 4
MODE
TIME2
Address setting
Time setting channel 4
TIME1
Time setting channel 1
Time setting channel 2
Time setting channel 3
Power LED
Reception LED
Forwarding LED
Termination
TERM
BUS
- 12V + L
- PB1 - PB2 - PB3 -
H
12V supply
PB4
Manual control channel 2
Manual control channel 3
Manual control channel 4
Operation mode LED channel 4
Operation mode LED channel 3
Operation mode LED channel 2
Manual control channel 1
Operation mode LED channel 1
Direct push button control for channel 4
VELBUS
Direct push button control for channel 3
Direct push button control for channel 2
Direct push button control for channel 1
Replace the lid.
Termination:
If the module is connected at the start or end of a cable on the VELBUS, place the ‘TERM’ jumper.
Remove the jumper in all other cases.
Remark: If different cable wiring topologies (tree, star, loop, ...) are used, place a jumper on the end module of
the longest cable only, NOT on each end point.
Velbus manual VMB4RY– edition 1 – rev.2.0
9
Addressing:
Enter a unique address (from ‘00’ to ‘FE’ except for ‘81’…‘84’, ‘91’…’94’, ‘A1’…’A4’, ‘B1’...’B4’, ‘C1’...’C4’,
‘D1’...’D4’, ‘E1’...’E4’, ‘F1’ … ‘F4’ and ‘FF’) for each module through the ‘ADDR’ rotating switches. These
addresses can be used to learn the push buttons.
In case of a modification of the addresses, the lamp will be switched off and all LEDs of the corresponding control
push buttons will be turned off.
Timer time setting:
A timer time will be chosen depending of the setting of the ‘TIME1’ rotary switch:
TIME1
0
1
2
3
4
5
6
7
8
9
A
B
C
D
E
F
Description
Moment control (the relay is switched on as long as the push button is pressed)
5s timer
10s timer
15 timer
30s timer
1min timer
2min timer
5min timer
10min timer
15min timer
30min timer
1h timer
2h timer
5h timer
1day timer
On/off control (the relay is switched on while pressed and switched off with a next press)
Operation mode/time2:
The relay module will operate as follows, depending on the setting of the ‘MODE/TIME2’ rotary switch:
MODE/
TIME2
0
Operation mode
Description
Start/stop timer
Operating the push button will switch on the relay. After the set time
has elapsed (see ‘TIME1’ rotating switch), the relay turns off.
Operating the push button when the relay is switched on will
immediately switch off the relay.
Operating the push button will switch on the relay. After the set time
has elapsed (see ‘TIME1’ rotating switch), the relay will turns off.
Operating the push button when the relay is switched on will restart
the timer.
Operating the push button will switch on the relay. After the set time
has elapsed (see ‘TIME1’ rotating switch), the relay turns off.
Operating the push button when the relay is switched on has no effect.
The relay will be switched on as long as the push button is operated.
Releasing the push button will start the timer. After the set time has
elapsed, the relay turns off (see ‘TIME1’ rotating switch).
Operating the push button will start the switch-on delay. The relay will
only be switched on after this switch-on delay has elapsed (see
‘TIME1’ rotating switch). Operating the push button when the switchon delay is running will immediately switch off the switch-on delay.
Operating the push button when the relay is on will immediately switch
off the relay.
The relay switches on during the set time (see ‘TIME1’ rotating switch)
by releasing the push button.
Operating the push button will make the relay blink. After the set time
has elapsed (see ‘TIME1’ rotating switch), the relay turns off.
Operating the push button while the relay is blinking will immediately
switch off the relay.
1
Staircase lighting timer
2
Non-restartable timer
3
Switch-off delay
4
Switch-on delay
5
Start timer with push button
release
Blink timer
6
Velbus manual VMB4RY– edition 1 – rev.2.0
10
7
2-way timer (time 2 = 5min)
8
2-way timer (time 2 = 10min)
9
2-way timer (time 2 = 15min)
A
2-way timer (time 2 = 30min)
B
2-way timer (time 2 = 1h)
C
2-way timer (time 2 = 2h)
D
2-way timer (time 2 = 5h)
E
2-way timer (time 2 = 1day)
F
2-way timer (time 2 = on/off)
A short press will switch on the relay during the set time (see ‘TIME1’
rotating switch).
A long press will switch on the relay for 5 minutes.
Operating the push button when the relay is on will immediately switch
off the relay.
A short press will switch on the relay during the set time (see ‘TIME1’
rotating switch).
A long press will switch on the relay for 10 minutes.
Operating the push button when the relay is on will immediately switch
off the relay.
A short press will switch on the relay during the set time (see ‘TIME1’
rotating switch).
A long press will switch on the relay for 15 minutes.
Operating the push button when the relay is on will immediately switch
off the relay.
A short press will switch on the relay during the set time (see ‘TIME1’
rotating switch).
A long press will switch on the relay for 30 minutes.
Operating the push button when the relay is on will immediately switch
off the delay.
A short press will switch on the relay during the set time (see ‘TIME1’
rotating switch).
A long press will switch on the relay for 1 hour.
Operating the push button when the relay is on will immediately switch
off the delay.
A short press will switch on the relay during the set time.
A long press will switch on the relay for 2 hours.
Operating the push button when the relay is on will immediately switch
off the delay.
A short press will switch on the relay during the set time.
A long press will switch on the relay for 5 hours.
Operating the push button when the relay is on will immediately switch
off the delay.
A short press will switch on the relay during the set time (see ‘TIME1’
rotating switch).
A long press will switch on the relay for 24 hours.
Operating the push button when the relay is on will immediately switch
off the delay.
A short press will switch on the relay during the set time (see ‘TIME1’
rotating switch).
A long press will switch off the relay for an undetermined time.
Operating the push button when the relay is on will immediately switch
off the relay.
Remarks:
The set mode is only applicable on push buttons connected to the direct push button input and to push buttons
connected via the Velbus® which were attributed the mode function in the learning mode (see learning mode).
If the TIME rotary switch is set on 0, the operating mode will always operate in moment control, regardless of
the position of the MODE rotary switch.
If the TIME rotary switch is set on F, the relay module will operate in on/off mode.
Velbus manual VMB4RY– edition 1 – rev.2.0
11
Operation:
The relay module can be operated in different ways:
• Using push buttons connected to the direct push button input:
o activating the set mode on the module.
• Using push buttons connected to the Velbus® through a push button interface or control module:
o switching on the relay.
o switching off the relay.
o switching the relay on or off.
o activating the set mode on the module.
o starting or stopping the timer.
o starting or stopping the 2nd timer.
o starting or restarting the timer.
o starting or restarting the 2nd timer.
LED indication:
The control module LEDs and the mode LED on the relay module indicate the status of the relay:
•
•
•
•
The LED will not light if the relay is switched off.
The LED lights if the relay is switched on and the timer is not activated.
The LED blinks rapidly if the timer is activated.
The LED blinks slowly if the 2nd timer is activated.
A short press will only be distinguished from a long press in the 2-way timer mode. A short press will activate the
1st timer (TIME1) while a long press will activate the 2nd (TIME2) timer.
Learning mode:
Only push buttons connected to the Velbus® via a push button interface or a control panel are appropriate for the
procedure below. Each command can accept up to 7 different push buttons.
Memorize he unique address of the module.
Set the module address on:
Address
F1
E1
D1
C1
B1
A1
91
81
Command Channel 1
OFF: Learning push buttons switching off the relay of channel 1
ON: Learning push buttons switching on the relay of channel 1
TGL: Learning push buttons switching the relay of channel 1 on or off
PBM: Learning push buttons activating the set mode of channel 1 on the module
TG1: Learning push buttons starting or stopping the timer of channel 1
TG2: Learning push buttons starting or stopping the 2nd timer of channel 1
ST1: Learning push buttons starting or restarting the timer of channel 1
ST2: Learning push buttons starting or restarting the 2nd timer of channel 1
Address
F2
E2
D2
C2
B2
A2
92
82
Command Channel 2
OFF: Learning push buttons switching off the relay of channel 2
ON: Learning push buttons switching on the relay of channel 2
TGL: Learning push buttons switching the relay of channel 2 on or off
PBM: Learning push buttons activating the set mode of channel 2 on the module
TG1: Learning push buttons starting or stopping the timer of channel 2
TG2: Learning push buttons starting or stopping the 2nd timer of channel 2
ST1: Learning push buttons starting or restarting the timer of channel 2
ST2: Learning push buttons starting or restarting the 2nd timer of channel 2
Address
F3
E3
D3
C2
B3
A3
92
82
Command Channel 3
OFF: Learning push buttons switching off the relay of channel 3
ON: Learning push buttons switching on the relay of channel 3
TGL: Learning push buttons switching the relay of channel 3 on or off
PBM: Learning push buttons activating the set mode of channel 3 on the module
TG1: Learning push buttons starting or stopping the timer of channel 3
TG2: Learning push buttons starting or stopping the 2nd timer of channel 3
ST1: Learning push buttons starting or restarting the timer of channel 3
ST2: Learning push buttons starting or restarting the 2nd timer of channel 3
Velbus manual VMB4RY– edition 1 – rev.2.0
12
Address
F4
E4
D4
C4
B4
A4
94
84
Command Channel 4
OFF: Learning push buttons switching off the relay of channel 4
ON: Learning push buttons switching on the relay of channel 4
TGL: Learning push buttons switching the relay of channel 4 on or off
PBM: Learning push buttons activating the set mode of channel 4 on the module
TG1: Learning push buttons starting or stopping the timer of channel 4
TG2: Learning push buttons starting or stopping the 2nd timer of channel 4
ST1: Learning push buttons starting or restarting the timer of channel 4
ST2: Learning push buttons starting or restarting the 2nd timer of channel 4
The relays will be switched off and the operation mode LED of the corresponding channel will blink very rapidly to
indicate the learning mode. The indication LEDs of the learned push buttons will also blink very rapidly. In this way
it is possible to see which push buttons for the corresponding group have already been learned.
You can add a specific push button by maintaining it pressed until the relay switches on. When releasing the push
button the relay will switch off and the push button indication LED will blink very rapidly as a confirmation. If this
does not work then the maximum amount of push buttons has been reached.
To delete a learned push button, maintain it pressed. When releasing the push button the indication LED will be
turned off.
You can delete all learned push buttons for a specific control group by maintaining the manual control on the relay
module pressed until the relay switches on. When releasing the manual control push button the relay and the
indication LEDs of all corresponding push buttons will turn off.
Repeat the procedure above to learn other commands to the push buttons.
Quit the learning mode by resetting the relay module’s original address.
When using firmware version 0735 you will be able to delete all push buttons saved into the memory of the relay
module at once. Set the address to one of the learning addresses. Maintain the manual control on the relay
module pressed for 10 seconds. The relay will activate and deactivate again after 7 seconds to confirm the push
buttons have been erased. Set the address back to its original value.
Velbus manual VMB4RY– edition 1 – rev.2.0
13
Velbus manual VMB4RY– edition 1 – rev.2.0
14