Transcript
v2.0 (EN/E)
PLEASE READ AND SAVE THIS FOR FUTURE REFERENCE
user manual
manual de usuario
RP5605
EN/E
It is important to read this instruction prior to using your new product for the first time.
Es importante leer este manual antes de usar por vez primera su equipo.
FCC information
This device complies with Part
15 of the FCC Rules. Operation
is subject to the following two
conditions: (1) This device may not
cause harmful interference, and
(2) this device must accept any
interference received, including
interference that may cause
undesired operation.
This equipment has been tested
and found to comply with the
limits for a Class B digital device,
pursuant to Part 15 of FCC Rules.
These limits are designed to
provide reasonable protection
against harmful interference in
a residential installation. This
equipment generates, uses, and
can radiate radio frequency
energy and, if not installed
and used in accordance with
the instructions, may cause
harmful interference to radio
communications.
IMPORTANT SAFETY INSTRUCTIONS
Some of the following
information may not apply to
your particular product; however,
as with any electronic product,
precautions should be observed
during handling and use.
• Read these instructions.
• Keep these instructions.
• Heed all warnings.
• Follow all instructions.
• Do not use this apparatus near
water.
• Clean only with dry cloth.
• Do not block any ventilation
openings. Install in accordance
with the manufacturer’s
instructions.
• Do not install near any heat
sources such as radiators, heat
registers, stoves, or other
apparatus (including amplifiers)
that produce heat.
• Do not defeat the safety
purpose of the polarized
or grounding-type plug. A
polarized plug has two blades
with one wider than the
other. A grounding type plug
has two blades and a third
grounding prong. The wide
blade or the third prong is
provided for your safety. If
the provided plug does not
fit into your outlet, consult an
electrician for replacement of
the obsolete outlet.
• Protect the power cord
from being walked on or
pinched particularly at plugs,
convenience receptacles, and
the point where they exit from
the apparatus.
• Only use attachments/
accessories specified by the
manufacturer.
• Use only with the cart, stand,
tripod, bracket, or table
specified by the manufacturer,
or sold with the apparatus.
When a cart is used, use
caution when moving the cart/
apparatus combination to
avoid injury from tip-over.
Changes or modifications not
expressly approved by the party
responsible for compliance could
void the user’s authority to
operate the equipment.
However, there is no guarantee
that interference will not occur
in a particular installation. If
this equipment does cause
harmful interference to radio or
television reception, which can
be determined by turning the
equipment off and on, the user is
encouraged to try to correct the
•
•
• Unplug this apparatus during
lightning storms or when
unused for long periods of
time.
• Refer all servicing to qualified
service personnel. Servicing is
required when the apparatus
•
•
Plugging in for power
Battery back-up operation
Power failure indicator
AC OUTLET POWER SUPPLY:
120V~60Hz
The power failure protection
circuit will not operate unless
battery is installed.
When AC power is interrupted
(disconnected) for a short period
of time, both time and alarm
settings will change (unless
battery is installed). After AC
power is restored (reconnected),
the Digital Display will blink
to indicate that power was
interrupted and you should
readjust the time and alarm
settings.
The AC power plug is
polarized (one blade is
wider than the other)
and only fits into AC
power outlets one way.
If the plug will not go into the
outlet completely, turn the plug
over and try to insert it the other
way. If it still does not fit, contact
a qualified electrician to change
the outlet, or use a different one.
Do not attempt to bypass this
safety feature.
SEE MARKING ON BOTTOM OF PRODUCT
WARNING:
TO PREVENT FIRE OR ELECTRICAL
SHOCK HAZARD, DO NOT EXPOSE THIS PRODUCT TO
RAIN OR MOISTURE.
Technical information
Product: CD/Clock Radio
Brand: RCA
Model: RP5605-A
Power Supply: 120V ~ 60Hz
Power Consumption: 13 Watts
Power is fed to the unit even
when it is not functioning. To cut
the power supply off, the power
cable must be unplugged.
The descriptions and characteristics in this owner’s manual are for the purpose of
general reference only and not as a guarantee. In order to provide you with the
highest quality product, we may make changes or modifications without prior notice.
The English version serves as the final reference on all product and operational details
should any discrepancies arise in other languages.
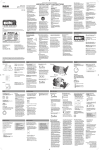
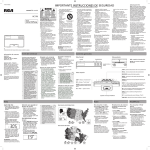
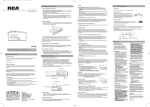
RADIO ON – turns on the radio;
selects the radio from other
modes
• Do not attempt to disassemble
the cabinet. This product
does not contain customer
serviceable components.
• IF YOUR PRODUCT OPERATES
ON BATTERIES, adhere to the
following precautions:
A. Any battery may leak
electrolyte if mixed with
a different battery type, if
inserted incorrectly, or if all
batteries are not replaced at
the same time.
B. Any battery may leak
electrolyte or explode if
disposed of in fire or an
attempt is made to charge a
battery not intended to be
recharged.
C. Discard leaky batteries
immediately. Leaking batteries
can cause skin burns or
other personal injury. When
discarding batteries, be sure
to dispose of them in the
proper manner, according to
your state/provincial and local
regulations.
Right view
No worry battery backup
When the battery backup
functions, the digital display will
not light, however, the wake
function still occurs during the
power interruption if remaining
battery power is adequate.
Install battery as follow:
1. Remove battery compartment
door (located at the bottom of
the radio) by applying thumb
pressure to the tab on battery
door and then lift the door
out and off the cabinet.
2. Connect a 9-volt battery (not
supplied) to the connector
plug.
3. Replace the compartment door.
Clock
Radio
TUNING – selects radio frequency
Setting clock
Switching on
BAND AM/FM – selects radio
band
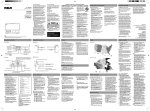
1. Press CLOCK SET once. The
current clock time flashes on
the display.
Press RADIO ON to turn on the
radio.
Switching band
/
– sets clock or wake time;
skips to previous or next CD track
during CD playback
Left view
+ VOLUME – – adjusts volume
– turns on the unit from CD
mode; pauses or resumes CD
playback
Slide the BAND/AM•FM switch on
the right of the unit to select AM
or FM band.
2. Press
or
to set the clock
time. The time decrements or
increments will follow by a
faster rate when you press and
hold the buttons. AM or PM
indicator also lights beside the
time on the display.
Rotate the TUNING dial on the
right of the unit to select radio
frequency.
3. When finished, wait for about
5 seconds or press CLOCK SET
to exit clock setting mode.
CLOCK SET – activates clock time
setting mode
WAKE TIME – activates wake
time setting mode; checks current
wake time
AM Antenna – A built-in ferrite
rod antenna eliminates the need
for an outside antenna for AM
reception. Rotating the unit
slightly may improve reception of
distant AM stations.
SNOOZE – turns off the wake
function temporarily; cancels the
sleep function
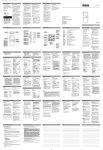
1. Lift open the CD compartment
door.
2. Insert a disc and close the
door.
to select CD mode and
3. Press
start CD playback.
• Press
to pause playback and
press again to resume.
4. Adjust volume to your desired
level.
5. Press
or
to skip backward
or forward a track. Press and
hold to search through a track.
6. Press to stop playback.
7. Press RADIO ON to listen to
the radio or OFF to turn off
the unit.
Setting wake time
Selecting wake source
Checking wake time
1. Press WAKE TIME once. The
current wake time flashes on
the display.
1. If your desired wake source is
radio or CD:
• Wake to Radio – select an
AM or FM station (refer to
“Radio”).
• Wake to CD – insert a CD in
the CD compartment.
2. Set a wake time (refer to
“Setting wake time”).
3. Press WAKE MODE repeatedly
to select a wake source. The
indicator lights against the
wake source icons on the right
of the display to indicate the
currently selected wake source:
Press WAKE TIME to show the
current wake time which flashes
briefly on the display.
2. Press
or
to set the wake
time. The time decrements or
increments will follow by a
faster rate when you press and
hold the buttons. AM or PM
indicator also lights beside the
time on the display.
3. When finished, wait for about
5 seconds or press WAKE
TIME to exit wake time setting
mode.
• The Wake to Alarm mode
(read below) will be
automatically activated
whenever the wake time has
been set.
FM Antenna – The power cord
acts as your FM antenna. The
power cord picks up moderate
to strong stations and eliminates
the need for an external antenna
in most strong signal areas. Be
sure the power cord is stretched
out to its full length. Do not
coil or bunch the cord together.
Changing position of the power
cord may improve reception.
Sleep function
Wake function
• If disc is paused for
more than 5 minutes,
the CD player will
resume to stop mode
automatically.
• If disc is stopped in the CD
mode for more than 30
minutes without further
operations, the unit will
turn off automatically.
This product should be serviced
only by those specially trained in
appropriate servicing techniques.
For instructions on how to obtain
service, refer to the warranty
included in this user manual.
When tuning in FM stations, you
may notice that the station you
are tuning can be well-tuned on
two or three nearby points on the
dial. Always tune carefully at the
loudest and clearest point.
Antennas
WAKE MODE – activates wake
function and changes wake mode
Listening to CD
Service information
Built-In AFC – The Built In
Automatic Frequency Control
(AFC) works only on FM. It helps
reducing drift on FM reception
and keeping the radio locked in
on the FM station to which it is
tuned.
Tuning radio
SLEEP – activates the Sleep
function
CD player
In the event that service should be
required, you may need the model
number and the serial number. In
the space below, record the date
and place of purchase and the
serial number:
Model No.:
Date of Purchase:
Place of Purchase:
Serial No.:
Alkaline (NEDA 1604A/
IEC 6LR61) battery is
recommended. Carbonzinc battery may be used but
memory holding time will
be substantially reduced.
Memory holding time for
a fresh alkaline battery is
approximately 8 hours (if radio
or alarm are not operated)
which should take care of
short, nuisance-type AC power
failures. To preserve battery
life, the unit should remain
plugged into an AC outlet.
As the battery gets older, its
voltage drops and memory may
be lost. Be sure to replace the
battery periodically. Battery
should be removed if the unit
will be stored for more than
one month. Leaky battery can
badly damage the clock radio.
Normal operation will resume
after AC power is restored so you
will not have to reset the time or
wake.
OFF – turns off the unit; turns off
the wake function and sleep mode
– stops CD playback
For your records
Before you begin
General controls
Top view
•
]
interference by one or more of
the following measures:
• Reorient or relocate the
receiving antenna.
• Increase the separation
between the equipment and
receiver.
• Connect the equipment into
an outlet on a circuit different
from that to which the
receiver is connected.
• Consult the dealer or
an experienced radio/TV
technician for help.
•
has been damaged in any way,
such as power-supply cord or
plug is damaged, liquid has
been spilled or objects have
fallen into the apparatus, the
apparatus has been exposed
to rain or moisture, does not
operate normally, or has been
dropped.
ADDITIONAL SAFETY
INFORMATION
Apparatus shall not be exposed
to dripping or splashing and
no objects filled with liquids,
such as vases, shall be placed
on the apparatus.
Always leave sufficient space
around the product for
ventilation. Do not place
product in or on a bed, rug,
in a bookcase or cabinet that
may prevent air flow through
vent openings.
Do not place lighted candles,
cigarettes, cigars, etc. on the
product.
Connect power cord only to
AC power source as marked on
the product.
Care should be taken so that
objects do not fall into the
product.
Important Battery Precautions
• Any battery may present a risk
of fire, explosion, or chemical
burn if abused. Do not try to
charge a battery that is not
intended to be recharged, do
not incinerate, and do not
puncture.
• Non-rechargeable batteries,
such as alkaline batteries, may
leak if left in your product for
a long period of time. Remove
the batteries from the product
if you are not going to use it
for a month or more.
• If your product uses more
than one battery, do not mix
types and make sure they are
inserted correctly. Mixing types
or inserting incorrectly may
cause them to leak.
• Discard any leaky or deformed
battery immediately. They
may cause skin burns or other
personal injury.
• Please help to protect the
environment by recycling
or disposing of batteries
according to federal, state, and
local regulations.
Turning off the wake
function
Silence the wake function
momentarily:
• With SmartSnooze™, press
SNOOZE,
,
, or
to
turn off the wake function
temporarily for extra sleep
time.
Stop the wake function:
Press OFF. The wake
function will activate
again on the following
day at the same time.
Cancel the wake function
completely:
Press WAKE MODE
repeatedly until no
indicator lights against
the wake source icons.
The set wake time will
not be erased and can be used
the next time when you switch on
wake function again.
wake by alarm
wake by radio
wake by CD
• Once the wake source is
selected, the wake function
will be activated at the set
wake time.
• The wake function will activate
again when the snooze period
(9 minutes) is over.
• The snooze period is fixed and
cannot be changed.
You can set the duration (up to 90
min) before the radio or CD player
turns off automatically.
1. Press SLEEP repeatedly to
select a duration (90, 80, 70,
60, 50, 40, 30, 20, 10min or
OFF) before the radio or CD
player turns off automatically.
• The default sleep time is 60
minutes.
• By default, the radio will be
switched on once SLEEP is
pressed. You may change to
listen to the CD player by
pressing
if a disc is loaded.
2. To check the remaining
duration before the unit turns
off, press SLEEP once.
3. To cancel the sleep function,
press SNOOZE or OFF.
If you set Sleep function
with low volume level
before going to bed, we
advise using Wake to Alarm
mode.
Limited warranty
Limited Warranty (US)
What your warranty covers:
• Defects in materials or
workmanship.
For how long after your purchase:
• One year from date of
purchase.
• The warranty period for rental
units begins with the first
rental or 45 days from date of
shipment to the rental firm,
whichever comes first.
What we will do:
• Provide you with a new, or at
our option, a refurbished unit.
The exchange unit is under
warranty for the remainder of
the original product’s warranty
period.
• Proof of purchase in the form
of a bill of sale or receipted
invoice which is evidence
that the product is within
the warranty period must be
presented to obtain warranty
service. For rental firms, proof
of first rental is also required.
How to make a warranty claim:
• Properly pack your unit.
Include any cables, etc., which
were originally provided with
the product. We recommend
using the original carton and
packing materials.
• Include evidence of purchase
date such as the bill of sale.
Also print your name and
address and a description of
the defect. Send via standard
UPS or its equivalent to:
Thomson Inc.
Product Exchange Center
11721 B Alameda Avenue
Socorro, Texas 79927
• Insure your shipment for loss
or damage. Thomson accepts
no liability in case of damage
or loss en route to Thomson.
• Pay any charges billed to you
by the Exchange Center for
service not covered by the
warranty.
• A new or refurbished unit
will be shipped to you freight
prepaid.
What your warranty does not
cover:
• Customer instruction. (Your
Owner’s Manual provides
information regarding
operating Instructions and
user controls. For additional
information, ask your dealer.)
• Installation and set-up service
adjustments.
• Batteries.
• Damage from misuse or
neglect.
• Products which have been
modified or incorporated into
other products.
• Products purchased or serviced
outside the USA.
• Acts of nature, such as but not
limited to lightning damage.
Product Registration:
• Please complete and mail
the Product registration Card
packed with your unit. It will
make it easier to contact you
should it ever be necessary.
The return of the card is
not required for warranty
coverage.
Limitation of Warranty:
• THE WARRANTY STATED
ABOVE IS THE ONLY
WARRANTY APPLICABLE TO
THIS PRODUCT. ALL OTHER
WARRANTIES, EXPRESS OR
IMPLIED (INCLUDING ALL
IMPLIED WARRANTIES OF
MERCHANTABILITY OR FITNESS
FOR A PARTICULAR PURPOSE)
ARE HEREBY DISCLAIMED.
NO VERBAL OR WRITTEN
INFORMATION GIVEN BY
THOMSON INC., ITS AGENTS
OR EMPLOYEES SHALL CREATE
A GUARANTY OR IN ANY WAY
INCREASE THE SCOPE OF THIS
WARRANTY.
• REPAIR OR REPLACEMENT
AS PROVIDED UNDER THIS
WARRANTY IS THE EXCLUSIVE
REMEDY OF THE CONSUMER.
THOMSON INC. SHALL NOT
BE LIABLE FOR INCIDENTAL
OR CONSEQUENTIAL
DAMAGES RESULTING FROM
THE USE OF THIS PRODUCT
OR ARISING OUT OF ANY
BREACH OF ANY EXPRESS OR
IMPLIED WARRANTY ON THIS
PRODUCT. THIS DISCLAIMER
OF WARRANTIES AND LIMITED
WARRANTY ARE GOVERNED
BY THE LAWS OF THE STATE
OF INDIANA. EXCEPT TO
THE EXTENT PROHIBITED
BY APPLICABLE LAW, ANY
IMPLIED WARRANTY OF
MERCHANTABILITY OR
FITNESS FOR A PARTICULAR
PURPOSE ON THIS PRODUCT IS
LIMITED TO THE APPLICABLE
WARRANTY PERIOD SET FORTH
ABOVE.
How state law relates to this
warranty:
• Some states do not allow the
exclusion nor limitation of
incidental or consequential
damages, or limitations on
how long an implied warranty
lasts, so the above limitations
or exclusions may not apply to
you.
• This warranty gives you specific
legal rights, and you also may
have other rights that vary
from state to state.
If you purchased your product
outside the USA:
• This warranty does not apply.
Contact your dealer for
warranty information.
Audiovox Electronics Corp
150 Marcus Blvd, Hauppauge, NY 11788
1-877-833-3491
©2008
Trademark(s) ® Registered
Marque(s) ® Deposée(s)
Marca(s) ® Registrada(s)
www.rcaaudiovideo.com