1
Nikon
AC-1ME
Photo Secretary
for F5
(for Macintosh®)
Instruction Manual
Contents
FOREWORD
Configuration
System Requirements for Installing Nikon Photo Secretary
Minimum Computer System Requirements
To control camera operations and
transfer shooting data directly from the camera
4
4
5
5
5
WELCOME TO NIKON PHOTO SECRETARY
Before Installing Photo Secretary on Your Personal Computer
Installing Nikon Photo Secretary
To Set Up Photo Secretary for Macintosh®
Online Mode
Offline Mode
Starting Nikon Photo Secretary
Contents of Photo Secretary
Selecting a Serial Port
Photo Secretary Functions
Tool Bar Icons
Using "Help" Functions
Connecting to Camera
6-15
6
7
7
7
7
8-9
8
10-11
12-14
13
14
15
CAMERA OPERATION
Configuration
Custom Functions
Setting Custom Functions
Custom Reset
Remote Operation
Combining Functions
Program Shooting
Editing Program
Setting Shooting Order Options
Performing Program Shooting
Viewing Status Data
Displaying Metering Status
Checking the Camera's Location
16-39
16
17-19
17-19
20-21
22-27
27
28-33
29-30
31
32-33
34-35
34
35
2
Loading Shooting Data from Camera
Selecting Data to Be Stored
Loading Shooting Data from Camera to Photo Secretary
36-39
36-37
38-39
FILM MANAGER
Configuration
Loading Shooting Data from the Camera
Viewing Shooting Data Files
Editing Data Files
Editing Film Data
Editing Frame Data
Linking Images to Shooting Data
Finding Shooting Data
Converting Data Files
Printing from Photo Secretary
40-51
40
41-42
43
44-45
44
45
46-47
48
49
50-51
PHOTO FINDER
52
TROUBLESHOOTING
53
3
FOREWORD
Thank you for purchasing Nikon Photo Secretary for F5 (AC-1 ME).
This software is easy to use, but requires familiarity with basic Macintosh®
operations and functions, including: handling of documents, folders,
windows, menus, dialog boxes, the clipboard, and general mouse and
keyboard techniques.
If you are not familiar with these operations, please refer to your
"Macintosh® User's Manual."
Nikon Photo Secretary for F5 is programmed to allow you to:
• Control F5 camera connected to your personal computer
• Design Customized Settings
•Transfer shooting data directly from the F5 camera to your computer
• Edit shooting data transferred from F5 to computer, and link it to image
data loaded from photo CD
•Take advantage of an extensive online help system
• Macintosh® is a U.S. registered trademark of APPLE COMPUTER Inc.
Configuration
• Eight Floppy Disks with Installer
• Instruction Manual
• License Agreement
• Registration Card
• Nikon Personal Computer Connecting Cord MC-34 (for Macintosh®)
4
System Requirements for Installing Nikon Photo
Secretary
Minimum Computer System Requirements
To use Photo Secretary, your computer system must be equipped with the following
peripheral equipment and software:
Mac™ OS 7.0-7.6, and the minimum hardware requirements for operating Mac™ OS
7.0-7.6
680x0 Macintosh®
• 16 Megabytes of memory (32MB or more recommended for optimum
performance)
Power Macintosh
• 24 Megabytes of memory (40MB or more recommended for optimum
performance)
Floppy disk drive (for installation)
Available external serial port (Printer Port/Modem Port)
Approximately 16MB free disk space for program files
Macintosh® supported printer
CD-ROM drive
* Not supported with TWAIN device.
To control camera operations and transfer shooting data directly from the
camera
Nikon F5 Camera
Nikon Personal Computer Connecting Cord MC-34 (for Macintosh®)
f\.
—^
.
.
| \ C 3. U 1 1 0 n !
* \
"
Never disassemble or modify the MC-34.
~ 3 4 a w a y f r o m w a t e r ( do n o t wash),
and do not touch with wet hands.
K e e p the MC
5
WELCOME TO NIKON PHOTO SECRETARY
Before Installing Photo Secretary on Your Personal
Computer
We strongly advise that you make a backup copy of the enclosed
distribution diskette and store the original master diskette in a safe
place. Use the backup copy to continue with the installation.
Check the distribution diskette for any late breaking news or
additions to this instruction manual. If it contains updated
information or corrections, the information will appear in a file named
README.
Information in this file, if it exists, will supersede or correct
information contained in this instruction manual.
6
Installing Nikon P h o t o S e c r e t a r y
To Set Up Photo Secretary for Macintosh®
1. Insert Setup Disk 1 in the floppy disk drive.
2. Double-click on "Disk 1" icon
3. Double-click on "Installer" icon on the "Disk 1" window.
4. Click on "Install" in the "Installer" window, then follow the instructions on your
screen.
Nikon Photo Secretary for F5 can be operated in either of two modes, Online or
Offline.
Online Mode
In Online mode, you can control or operate a connected F5 camera through Photo
Secretary.
With an F5 camera connected to your computer using the MC-34, sending any signal
from the computer to the F5 automatically switches your F5 to Online mode, causing
the computer mark to appear in the rear LCD panel of the camera. With the F5 in
Online mode, you will be able to operate the shutter release button, film rewind
function, focus mode selector, AE-L/AF-L button and AF start button only. Other
camera modes and functions can be operated through the Photo Secretary software.
To cancel Online mode, quit Photo Secretary or turn off the camera power.
Offline Mode
You can also use Photo Secretary in Offline mode without connecting the camera to
your computer. In Offline mode, you can select Custom Setting options, create
programs for programmed shootings, edit shooting data, image data and files, and
use the "Help" function. You cannot, however, control or operate a connected F5
camera in Offline mode.
Switching the camera from Online mode to Offline mode automatically resets all
settings except Custom Setting and multiple exposure.
7
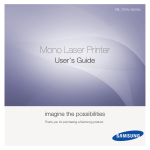
Starting Nikon Photo Secretary
Contents of Photo Secretary
Nikon Photo Secretary for F5 contains the following modules:
• Camera Operation
• Nikon Photo Secretary for F5 Help
• Camera ID Setup
• Photo Finder
• Film Manager
• Readme File
All software is installed in a single location on your computer, but each individual
module can be started and used individually.
To launch Photo Secretary, open the "Nikon Photo Secretary for F5" folder, then click
on the icon for the module you want to open. Opening a Photo Secretary module will
reveal the main window for that module. When opening the Camera Operation or Film
Manager module, you will see the Opening window first.) To quit Nikon Photo
Secretary, click on "File" - "Quit" in the main window (see Figures 1 and 2).
Camera Operation
| r y ]^CT|RST
Hm
Camera-ID ( 255 ) Online
For Help, press F1
(Figure 1. Camera Operation)
8
File
Edit
View
Tool
Window
QMJJ a DD n m m
im
i sn
(Figure 2. Film Manager)
9
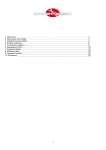
Selecting a Serial Port
Select the serial port to which you will connect the MC-34.
The serial port can be set when installing Photo Secretary on your computer.
1. Open Photo Secretary's "Camera Operation" or "Film Manager" module.
2. Open the "Tool" menu and select the "Configuration"
3. Select the port to which you intend to connect the MC-34.
Photo Secretary supports Printer and Modem ports. Select a free serial port
supported by your computer. Figures 3 and 4 show the "Configuration" dialog boxes
for "Camera Operation" and "Film Manager".
-p
Configuration
Communication Port
| Modem
Minimum Number for ID Sear h
l'
Maximum Number for ID Sear ch
l'°
•
Shooting Data Folder
{Macintosh HD:Nikon Photo Secretary for
[
Drowse...
J
Custom Setting Folder
[Macintosh HO:Nikon Photo Secretary for
f
Drowse...
]
Program Shooting Folder
(Macintosh HD:Nikon Photo Secretary for
[
Drowse...
[
« J
(Figure 3. Camera Operation)
10
Cancel
Configuration
Communication Port
Modem
• I
Minimum Number for ID search
Maximum Number for ID search
Shooting Data Folder
Macintosh HD:Nikon Photo Secretarg for F5
Display Item in Text Uieuj
Frame Count fr Date
Shutter Speed & Rperture
Metering System
EU Difference in Manual Exposure Mode
•
Data Imprinting
Horizontal Frames
3
First Frame
GD
I Cancel
(Figure 4. Film Manager)
11
Photo Secretary Functions
All functions can be accessed via pull-down menus. Most functions can also be
accessed via the Tool Bar.
The Menu Bar and menu options will change to match the active operation.
Unavailable functions will appear "dimmed" or not at all. Most menu commands,
options and functions can be found with the "Help" function. (Figure 5)
Holding the cursor over an icon
causes a "Tool Tip" to appear.
Click on the |W) tool bar icon, then
click on the icon for which you would
like help.
P
•ameta Operation H H
CEM RST
1 /-'-• H m
Camera-ID ( 255 I Online
For Help., p r e s s F1
(Figure 5)
12
Tool Bar Icons
Help (appears in the main window of all Photo Secretary modules)
Tool Bar Icons in "Camera Operation" main window
Online
Remote
RST
Custom Reset
Program
V<
Location Check
Custom
/h
Metering Status
Tool Bar Icons in "Film Manager" main window
ID]
0
New
Open
Save
Find
Print
L Q . I Print Preview
Copy
Paste Data
Paste Picture
Text
List
Edit Film
Edit Frame
Thumbnail & Text
Photo Finder
I I
Load Shooting
Tool Bar Icons in "Photo Finder" main window
\y V
Open
Save
Print
Copyright
Copy
13
Using "Help" Functions
For information on the currently active function/mode, you can click on the "Help"
menu, as described below.
Nikon Photo Secretary for F5 Help
Open "Help" for basic operations.
Help Topics
• Contents: Refer to the menu contents relevant to your desired information.
• Search: Enables you to search the "Help" topics for specific words and phrases.
About...
Display information, version number and copyright.
\4
Connecting to Camera
— Personal Computer Connecting Cord MC-34 for F5
When connecting the Nikon F5 camera to your computer, use only Nikon Personal
Computer Connecting Cord MC-34. A data link cannot be established with other
connecting cords.
Connecting
1. Switch off both the camera and computer.
2. Connect the MC-34 to the camera's 10-pin remote terminal.
Insert the MC-34's plug into the terminal with the "A"
symbol pointing up, then turn the lock ring as far as it goes.
(See illus. A)
3. Connect the MC-34 to the computer's external serial port.
Match the shape of the MC-34 connector with the
computer terminal, then push it in.
4. After starting the computer, turn on the camera power.
Illus. A
Disconnecting
1. Turn off the camera power.
2. Remove the MC-34 connector from the computer.
3. Remove the MC-34's plug from the camera body.
Unscrew the lock ring, then unplug the MC-34. (See illus. B)
Illus. B
Setting Camera ID
Designate camera ID so that shooting data of several cameras can be distinguished.
With two or more cameras connected to one computer, be sure to create a new
folder for each camera to store shooting data or set the camera ID for each camera to
avoid replacing old data with new data.
To set the camera ID, click on "Program"-"Nikon Photo Secretary" from the Start
Menu, then select "Setting Camera ID".
• With only one camera body connected to your computer, you do not need to set
the camera ID.
15
CAMERA OPERATION
Nikon Photo Secretary allows you to operate F5 camera functions, change the
camera's settings, perform program shootings, and more.
To open the Camera Operation module, open the "Nikon Photo Secretary for F5"
folder, then double-click on the icon for the "Camera Operation" module.
Configuration
Configuration settings for Camera Operation can be set in the "Configuration" dialog
box.
This dialog box allows you to set the communication port, minimum and maximum
numbers for an ID search, and data saving folders — without turning the camera on.
1. Open Photo Secretary's Camera Operation module.
Open the "Tool" menu and select the "Configuration" (The "Configuration" dialog
box is shown in Figure 6.)
2. After selecting your desired settings, click on "OK" to save the setting.
I !
rnmmiiniratinn Pnrt
Configuration
IJ * ° d e m
"*
|Macintosh Hu:Nikon Photo Secretary fo
m s t o m S i t i n g Fohlrr
|M 0 ciotosh HD:Nikon Photo Secretary fo [J
(
Browse...
Program shooting FnMor
|Mocintosh HO:Nikon Photo Secretary fo M
I
Browse...
l( « ]
(Figure 6)
16
3 ( _Browse...
Shnntiog not* Fnirt.r
(
Cancel
Custom Functions
The "Custom Functions" dialog box allows you to set camera function settings,
complementing the F5's Custom Setting features.
The F5 camera offers EEPROM memo storage in two areas to memorize custom
settings — one in Custom Set Memory A, one in Custom Set Memory B.
Using the computer, you can select from the area (A or B) to which you will load
camera settings or store the new custom settings. Photo Secretary automatically
selects the Custom Set Memory designated in camera's Custom Setting feature #0.
The "Custom Functions" dialog box allows you to:
Set custom functions.
Select the operating memory (select memory where data has been uploaded or
data changes stored).
Select custom set memory (select memory for storing setting changes made
with camera's Custom Setting feature #0).
Setting Custom Functions
1. Using the MC-34, connect the camera body and computer.
2. Turn on the camera power. (When setting custom functions only, you do not need
to turn on the camera power.)
3. From Camera Operation open the "Tool"menu and select "Custom Functions" to
access the "Custom Functions" dialog box shown in Figure 7.
4. Select the Custom Set Memory you wish to confirm or modify.
Check "A" or "B" at the right of "Set" to indicate the memory from which you wish
to load data.
5. Click on "Load" to load and confirm the settings of your selected Custom Set
Memory.
6. Select the Custom Set Memory to which you will send the new custom settings.
Check "A" or "B" at the right of "Set" to select the memory where you wish to store
data.
7. After selecting your desired custom functions/modes, click on "Set" to set the new
custom functions for the camera. (Default settings are indicated with asterisk.)
To change the settings in camera's Custom Setting feature #0, check "A" or "B" at
the right of "Selecting Custom Setting".
1/
The "Custom Functions" dialog box offers menu plates for "Dial/Buttons", "Release",
"Film Operation", "AF", "Exposure/SB", "Shooting Data" and "Function Settings". For
details on each of these functions/modes, see "Help" menu.
(i.e. Self-Timer LED On When Shutter Release)
At the default setting, self-timer LED does not light up when the shutter is released.
You can change this so that it lights up during exposure.
Note:
• When you have set the custom option(s) on your camera, BB3HBH appears in camera's
rear LCD panel.
• To confirm, change or memorize the camera's custom settings on the computer, you
must turn the camera on.
• "Release Timing for Second Camera" enables you to set the custom function for
synchronized shutter release on two cameras — when used with Nikon Connecting Cord
MC-23. Set the same shutter speed/film advance mode for both cameras. When
selecting "Alternative", set the shutter speed faster than 1/250 sec. (Connecting F90X and
F5 cameras via the MC-23 will limit the F5 functions available.)
• "Time delay for auto meter-switch-off" in Photo Secretary's "Custom Functions"
dialog box is set at "8 sec." as the default setting, although the meter on some F5
models remains on approximately 16 sec. at the default setting. With these F5
models, selecting the "Time delay for auto meter-switch-off" default setting (8 sec.)
in Photo Secretary's "Custom Functions" dialog box causes 8 M B to appear in
the camera's LCD panel.
• After changing the custom setting, turn the camera power off, then on again.
18
Custom - Untitled I Load Camera-10 255 I
XHeleaseShooting DataI ilm Itpeiation
IE
Dial/Buttons
Direction of Command Dial Rotation
I""* Default
Hi Hi Lock Button
|
fiperture Setting uia Sub-Command Dial
| * Enabled
Lock Button
|
* RF/RE Lock
* Lock
Stops at both ends of the scale
Command Dial Rotation
[
Load
)
[
Set
|
®A
Function Settings
QB
Selecting Custom Setting
€>A
•
QE
(Figure 7)
19
Custom Reset
The "Custom Reset" dialog box lets you change the initial setting of the camera's
Two-Button Reset function.
Exposure Mode, Flash Sync Mode, Focus Area and AF Area Mode settings can be
stored in the camera as Custom Reset data. This data can be retrieved by keeping
the camera's <HB and CUD buttons pressed for longer than two seconds.
1. Using the MC-34, connect the camera body and computer.
2. Turn on the camera power.
3. From Camera Operation, open the "Tool" menu and select the "Custom Reset".
The "Custom Reset" dialog box appears as in Figure 8. (Current setting appears in
the display.)
4. Select your desired Custom Reset settings, then click on "Set" or "Set & Reset" to
save the settings.
* Click on "Set" to send the new settings to the F5 camera and change the TwoButton Reset setting on the camera.
* Click on "Set & Reset" to send new settings to the F5 camera, change old settings
and perform Two-Button Reset on the camera.
* For details on specific functions, see "Help" menu.
P
Custom Reset
EKposure Mode
Flash Sync Mode
f s ] [fl] [ M ]
Focus Rrea
M
[+]
I
"
1 " "
|
Set
]
a Reset ]
|[
Cancel
]|
s
(« et
(Figure 8)
20
[Rear]
HI Rtea Mode
M
S
[Norm] |
Note:
• Functions restricted in the "Custom Functions" dialog box cannot be selected.
• Functions selected in the "Custom Reset" dialog box can be restricted, but such
restricted functions cannot be reset using the Two-Button Reset function.
• The selected focus area will be reset in any case.
• Photo Secretary's Custom Reset function allows you to reset all settings made on
the F5 camera. (Custom settings, which can be selected only with Photo Secretary,
cannot be reset with this function.)
21
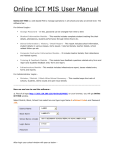
Remote Operation
Camera functions can be set and controlled using the Photo Secretary "Remote"
dialog box. The "Remote" dialog box offers menu plates named "Basic Settings" for
normal shooting, and "AE SB BKT" and "Release" for Photo Technique Selection.
* Photo Secretary's Remote Operation function cannot be used with Nikon MultiControl Back MF-28's "Photo Technique Selection". Cancel "Photo Technique
Selection" before using the Remote Operation function.
1. Connect the camera body and computer using the MC-34.
2. Turn on the camera power. The camera icon and ID number appear in the display,
indicating that the camera is in Online mode. (If the icon and ID number do not
appear in the display, open the "File" menu and select the "Online".)
3. From Camera Operation, open the "Tool" menu and select the "Remote" to access
the "Remote" dialog box shown in Figure 9.
The first display shows the settings of the previous remote operation.
4. After selecting your desired functions and mode, click on "Release" on the dialog
box or the shutter release button on the camera to perform remote operation. (You
cannot select functions indicated as restricted in the "Custom Functions" dialog
box.)
To start the Interval Timer, click on "Start" on the dialog box.
To stop operation, click on "Cancel".
With the "Remote" dialog box appearing, the camera's current settings and status are
displayed on the Camera Operation main window.
When all shots have been taken, all selected functions except Multiple Exposure
remain on the computer until a new selection is made.
* For details on specific functions, see "Help" menu.
22
Remote - Camera ID : 255
BasicSettings | HE SB BKT | Release
S h u t t e r Speed
M e t e r i n g System
Rperture
Focus Rrea
Exposure M o d e
O000
a is
Flash Sync Mode
Slow
*B [5
Film Rduance Mode
CL
CH
gj
Rear
CS
ISD
RE Mode
Q
M
I Interval Shooting
(Figure 9)
23
Notes for Basic Remote Operation
• With "Remote" function active, the computer communicates with the camera to
display current camera settings, and the shutter release button is held in the "lightly
pressed" position. (Camera remains in Online mode as long as remote function is
active.)
• The camera does not respond when you double-click on "Release" on the
computer.
About Shutter Speed:
• The shutter speed "Time" can only be selected when the "Bulb or Time selection" is
set at "Time". To expose at shutter speed "Time", click on "Release" to open the
"Time Release" dialog box (Figure 10), then click on "End" to close the shutter. (Bulb
or Time cannot be set when using the self-timer. Self-timer cannot be set when Bulb
or Time is already selected.)
Time Release
TIME
Press End to stop release
I
End
]
(Figure 10)
About Aperture
The aperture value in use depends on the attached lens. The lens aperture setting
takes priority over settings made on Photo Secretary software. The "Remote" dialog
box displays lens settings and status.
About Film Advance Mode
• To stop self-timer operation, change the film advance mode.
• Depending on your computer's processing speed, CH and CL film advance speeds
may slow and the intervals between shots may be uneven.
About AF Mode
With the focus mode selector set at M, neither AF-C or AF-S mode can be selected.
About Flash Sync Mode
With an SB-24, SB-25 or SB-26 attached to the camera, the Flash Sync Mode
selected on the Speedlight has priority over the Photo Secretary setting.
24
About AE-L/AF-L
Click on "AE-L/AF-L" to lock auto exposure and autofocus. To cancel AE and AF
lock, click on "AE-L/AF-L" or "Release" on the computer.
About AF-ON/Release
• With film advance mode set at Continuous Shooting, autofocus function remains
active until you take the first exposure by clicking on "AF-ON". (AF function is also
activated after you take the first exposure.)
Notes for Photo Technique Selection
About Auto Exposure Bracketing/Flash Exposure Bracketing
• When the bracketing direction is set at"+/-" after setting an even number of shots,
one shot is automatically added to the selected number of shots.
• You cannot set the number of shots at an even number when the bracketing
direction is set at"+/-".
• During remote operation, the shooting order does not follow the sequence set in the
"Custom Functions" dialog box. When the shooting direction "0 - +" is selected, the
center value is shot first, followed by a negative compensation value shot, then a
positive compensation value shot.
• Settings for these functions remain active until the box for Auto Exposure Bracketing/
Flash Exposure Bracketing is deselected.
About Multiple Exposure
• Multiple Exposure can only be selected when Multiple Exposure is set at "Still on
after release". (See the Film Operation menu plate in the "Custom Functions" dialog
box, page 19.)
• To cancel Multiple Exposure, deselect the Multiple Exposure box after making
desired number of exposures. The film then advances a frame.
• Settings for this function remain active until you deselect the Multiple Exposure box.
About Interval Timer
• If the date and time for the start of interval shooting have not been set, Photo
Secretary triggers the camera to take the first shot immediately after clicking on
"Start". Once the Interval Timer has started, the start date and time cannot be set.
• Interval Timer cannot be set with the shutter speed at "Bulb", but when set at Long
Time Exposure function, the Interval Timer function can be used for an interval time
> Long Time Exposure duration + 2 sec.
• If the camera back opens or the film reaches the end of the roll during operation,
Interval Timer operation is cancelled.
25
About Long Time Exposure
• Usable only in "Manual" exposure mode at the "Time" shutter speed setting. First
open "Custom Functions" dialog box and select "Time" for "Bulb or Time selection".
• If the MC-34 is disconnected from the camera or computer during Long Time
Exposure, the camera shutter remains open as long as shutter speed is set at
"Time". To close the shutter, depress shutter release button or turn off the camera
power.
• Long Time Exposure is deactivated with the press of the shutter release button
during operation. Depressing the shutter release button before shooting the
exposure activates shutter speed "Time".
• The settings for this function remain active until you deselect the "Long Time
Exposure" box.
About Focus-Priority
• Settings for this function remain active until you deselect the Focus-Priority box.
26
Combining Functions
Functions can be combined under the following conditions.
Interval Timer
• Combined with Long Time Exposure function
If a Long Time Exposure is set and the interval time is shorter than the Long Time
Exposure duration + 2 seconds, Interval Timer will not be set.
• Combined with Auto Exposure Bracketing or Flash Exposure Bracketing
The number of shots set for bracketed shooting have priority over those for Interval
Timer shooting.
When Multi-Control Back MF-28 is attached to the camera body, Photo
Technique Selection is set by the Photo Secretary prior to the selection set by the
MF-28.
When prolonged shutter speed is selected using Auto Exposure Bracketing, the
shutter speed in Bracketing does not vary.
When flash sync speed is selected in Manual exposure mode at "X", the shutter
speed in Bracketing does not vary.
27
Program Shooting
You can select one of the following program modes and functions when you wish to
control the camera under special shooting conditions (e.g. for medical or scientific
research).
Photo Secretary for the F5 lets you set programs containing up to 100 steps. To
create a new program, first open the "Tool" menu and select the "Program" from
Camera Operation to open the dialog box (see Figure 11). Then click on "OK" to make
the Program window appear (as in Figure 12).
' SB
A
Camera Operation
Vou need to set ISO ualue and RF Mode in Remote operation
([
OK
|
(Figure 11)
• Program - untitled NJM
DitfiHiai
MM
E>$osure
Flash Sync
For H*1p, press Fl
(Figure 12)
28
Shutter
Ensure
Flwh Output
Com pens alien
Compensator
Editing Program
1. To edit program file, click on "Open" from the Program window, then open the
desired program file. (To edit or create program files only, you do not need to
connect the camera and computer.)
* Film speed and AF mode cannot be set in Program window. To change these
settings, first select the film speed and AF mode in "Remote" dialog box.
(See page 23.)
2. Select the programmed sequence you want to edit, then open the "Tool" menu and
select the "Edit Program" in the Program window or double-click on the desired
line. The "Edit Program" dialog box appears (as in Figure 13).
Edit Program - 1
Time
Delay Time
• • • • •
Month Day
Hour
Min.
• • •
Sec.
Metering System
Hour
Di
Min. Sec.
Shutter Speed
g^g
Number of Shots
[=^
Rperture
czza
Exposure Mode
O000
VA i«—IB
Flash Sync Mode
< _ ,
,
w
Slouj
Multiple Enposure
li—i I
,
, *B KZ\9
Rear
,
1/
„
Q„
fl
Cancel
rED
(Figure 13)
The following items will be displayed in the "Edit Program" dialog box:
• Camera ID
• Time (Start time)
• Delay Time (interval between shooting
operations)
• Number of Shots
• Metering System
• Shutter Speed
•
•
•
•
•
•
Aperture
Exposure Mode
Exposure Compensation
Flash Sync mode
Flash Output Level Compensation
Multiple Exposure
?9
3. Select the desired settings, then click on "OK". Updated programmed sequence
appears in the Program window.
To save a new program as a file, click on "Save" or "Save As" in the Program
window.
• For details on specific functions, see "Help" menu.
Note:
• The number of shooting orders will be set automatically. You cannot change this
number.
• "Time" can be set only for the starting programmed sequence (the first programmed
sequence or the programmed sequence marked "S"). The date and time set on the
computer will be used. To start program shooting immediately after selecting the
"Run" in the "Tool" menu, input a just-elapsed time (i.e., two minutes earlier than
current time).
• Delay time commences from the start of the previous programmed sequence
(previous shot). Delay time cannot be set for the starting programmed sequence
(first shot).
• When you set the number of shots to 1 for multiple exposure shooting in one
programmed sequence, the film will advance after the shooting of the next
programmed sequence is complete.
• Shutter speeds X, bulb and Time cannot be selected.
• With the SB-24, SB-25 or SB-26 attached to the camera, the flash sync mode
selected on the Speedlight takes priority over the setting on Photo Secretary.
• When a different Flash Output Level Compensation value is set on the Speedlight,
the Flash Output Level Compensation is adjusted to accommodate the total
Speedlight and Photo Secretary setting values.
30
Setting Shooting Order Options
Shooting Order Options enables you to perform shootings using only your desired
programmed sequences, or repeat shooting operations of desired programmed
sequences.
Select your desired shooting order options in the "Control" dialog box.
1. Select your desired shooting programmed sequence. Open the "Tool" menu and
select the "Control" in the Program window to open the "Control" dialog box in
Figure 14.
Control - 1 m
Mark
Times
Clear
|J
|
f Cancel
(Figure 14)
The following shooting order options can be set in the "Control" dialog box:
Mark: Clear Deletes the inputed "Control" code.
S Start shooting operation from the programmed sequence with "S".
R Repeat shooting operations to the programmed sequence with "R".
B Repeat shooting operations from the programmed sequence with
"B".
E Stop shooting operation with the programmed sequence with "E".
Times: Set the number of times the selected programmed sequences are to be
repeated.
2. After selecting the desired order, click on "OK".
31
Performing Program Shooting
Photo Secretary offers two program shooting modes:
Program shooting using "Run" function. (Activates all programmed sequences.)
Program shooting using "Step" function. (Activates only the selected
programmed sequence.)
Perform program shooting using "Run"
Open the "Tool" menu and select "Run" in the Program window. Start control, and
shoot according to order.
To shoot, depress the shutter release button, or select "AF Start/Release" in the
"Tool" menu. (Shootings will be performed at the dates and times set in the program.)
After starting operation, an indication appears in the window during exposures.
Shooting follows the programmed date and time or the delay time. If the date and
time for shooting or delay time are not programmed, shooting occurs by selecting
"Release" in the "Tool" menu or pressing the shutter release button. ("Release"
command and shutter release button have priority over programmed shooting date
and time.)
Note:
• If the camera does not start shooting within 7.5 sec. after the release command is
sent from the computer, Photo Secretary cancels the programmed sequence and
starts shooting in accordance with the next programmed sequence.
• If the time for the next programmed sequence comes during the shooting operation,
Photo Secretary cancels the coming programmed sequence and continues the
current operation.
3?
Execute program shooting using "Step".
Execute only the selected programmed sequence.
Select a desired programmed sequence and select "Step" in the "Tool" menu in the
Program window.
To shoot, depress the shutter release button, or select "AF Start/Release" in the
"Tool" menu. (Shootings will be performed at the dates and times set in the program.)
After starting operation, an indication appears in the window during exposures.
Shooting occurs following the programmed date and time or the delay time. If the
shooting date and time or delay time are not programmed, shooting is triggered by
selecting "Release" in the "Tool" menu or pressing the shutter release button.
("Release" command and the shutter release button have priority over programmed
shooting date and time.)
Note:
• If the camera does not start shooting operation within 7.5 sec. after the release
command is sent from the computer, all program operations are cancelled.
To interrupt program shooting
•To interrupt program shooting, Select "Step" in the "Tool" menu in the Program
window.
• To resume an interrupted operation from the interrupted programmed sequence,
select "Continue" in the "Tool" menu in the Prpgram window.
• If you perform an operation other than "Continue" in the Program window after
interrupting program shooting, Photo Secretary terminates program shooting.
Note:
• 3D Color Matrix Metering system can be used only with AF-D lenses. If you select
Matrix Metering with a non-CPU lens, Photo Secretary automatically switches to
Center-Weighted Metering.
• With a non-CPU lens, Programmed Auto and Shutter-Priority Auto exposure modes
cannot be used. In such cases, Photo Secretary selects Aperture-Priority Auto
exposure mode.
• If the camera is unable to control the aperture (because a non-CPU lens is attached
to the camera or the lens' aperture is not set to its minimum position), Photo
Secretary will use the aperture set on the lens.
• If your selected aperture is beyond the controlled range, the F5 automatically adjusts
to the nearest proper value.
• In the "Edit Program" dialog box, although you can select functions and modes
restricted in the "Custom Functions" dialog box, the actual program shooting will be
executed according to restrictions set in the "Custom Functions" dialog box.
• Interrupting (via the computer) a programmed Multiple Exposure shooting set with
Photo Secretary will not affect the camera's Multiple Exposure setting.
33
Viewing Status Data
Displaying camera status in the Photo Secretary window.
Displaying Metering Status
1. Connect camera body to computer using the MC-34 cable.
2. Turn on the camera power.
3. In Camera Operation, select "Metering Status" in the "Tool" menu and confirm the
Color/Brightness Pattern display, as shown in Figure 15. Metering status is
indicated using more than 256 colors, in 12 x 20 cells, utilizing information from the
camera. After changing the subject, click on "More" to update the display.
4. To change the displayed metering status contrast, use the slider below the display.
Note:
• This function can be used only with the Multi-Meter Finder DP-30.
• The displayed color data and number of cells are processed to match the
computer's CRT.
Li
Color
Brightness P a t t e r n
••••••••••••••••••DO
••••••••••••••••••DO
••••••••••••••••••DO
•••••••••••••••••••n
• • • • • D U G L I DnnDnnnnnnn
••••••••••^•••••••nE
nnnnnnnnnnnnnnnnncnn
••••••••••••••••••••
•••••••••••••••••mn
nnnnnnnnnnnnnnnnnnnn
••••••••••••••••••••
••••••••••••••••••••
3
(Figure 15)
34
[
More H
li
Cl0 e
*
~J
Checking the Camera's Location
The alert LED of the selected camera blinks, to check communicating status, or
camera's location.
1. Connect camera body to computer using the MC-34 cable.
2. Turn on the camera power.
3. In Camera Operation, open the "Tool" menu and select "Location Check". You will
see the dialog box shown in Figure 16.
The ID number of the selected camera will appear. Clicking on "Check" causes the
alert LED on the selected camera to blink for one second.
* For details about a specific function, see "Help" menu.
•
Location Check
fllert
LED on t h e Selected Camera blinks f o r 1 sec.
ID o f t h e s e l e c t e d camera
[
Check ~~]
255
Cancel
(Figure 16)
35
Loading Shooting Data from Camera
Photo Secretary for the F5 allows you to select shooting data to be stored in the
camera, load shooting data from camera to computer, and display and edit shooting
data. In Camera Operation, you can select data items to be stored and load shooting
data from the camera. To edit this data, see page 44.
Selecting Data to Be Stored
The F5 offers two types of shooting data — frame data and film data. Frame data is
information about each frame. Film data is about each film roll. Select data to be
stored by Photo Secretary using the "Custom Functions" dialog box. The selection
appears after a new film roll is loaded and before it advances to frame #1.
1. Connect camera body to computer using the MC-34 cable.
2. Turn on the camera power.
3. In Camera Operation, open the "Tool" menu and select "Custom Functions". You
will see the "Custom Functions" dialog box shown in Figure 7 in page 19.
4. Select the shooting data you wish to store (from types A to D) in the "Shooting
Data" sheet shown in Figure 17 (type A is the default setting).
• For details about storing data, see "Help" menu.
Note:
• Only data selected in the "Custom Functions" dialog box will be stored in the
camera.
• Shooting data cannot be stored unless a film roll is loaded.
• You cannot store data for "Year/Month/Day/Hour/Minute/Second" or data
containing characters, unless the MF-28 is attached to the camera.
• For Multiple Exposure shooting, all selected data will be stored at the first exposure,
and after that only data of type A will be stored.
• Shooting data will be always stored when film is loaded; your F5 camera will store
data even during test shooting.
• Shooting data stored in the camera is deleted only when it is downloaded to the
computer or replaced with new data. When the camera's memory is full, you can
select the action to take using the "Shooting Data" menu plate in the "Custom
Functions" dialog box.
• The "Custom Functions" dialog box enables you to activate full-memory alert
(blinking computer symbol).
• Selecting "From old data" replaces old data with new data, which then activates the
blinking full-memory alert. Frequent downloading of shooting data is recommended.
• If you change the ISO film speed after advancing the film to frame #1, the new data
will not be stored.
36
Custom - Untitled ( Load Camera-ID 255 )
Dial/Buttons
Release
Exposure/SB
I
j
Film Operation
Shooting Data
j
AF
Function Settings
Shooting data to be stored
|
Deleting Shooting Data
j * From old data
-1
Shooting Data Indication
| * Not Displayed
'1
Data Imprinting on Frame * 0
|
'1
Load
|
[
Set
|
®A
OB
*A
"Disabled
Selecting Custom Setting
-1
OB
(Figure 17)
Contents of data to be stored and data storing capacity
Type of data to
be stored
Contents
Data storing
capacity
A
Shutter speed, aperture, lens' focal length, maximum
aperture, frame count
Approx. 78 rolls
B
Year/month/day/hour/minute/second + A
Approx. 36 rolls
C
Imprint data between frames + B
Approx. 12 rolls
D
Approx. 10 rolls
Metering system, exposure mode, sync mode, EV difference
(39 rolls, without
in Manual exposure mode, exposure compensation value + C
MF-28)
* When using 36-exposure film. Data storage capacity varies according to number of shootings
and/or multiple exposure shooting.
Data for B and C can be stored only when the Multi Control Back MF-28 is attached.
Storage capacity for the F5 can be increased. To add data storage memory, ask your Nikon
dealer.
37
Loading Shooting Data from Camera to Photo Secretary
Downloaded shooting data will be stored in the selected folder as a file, with a file
name consisting of camera ID number, film number.
Selecting "Enable" for "Data Imprinting on Frame #0" in the "Custom Functions"
dialog box enables you to automatically imprint the same film number used for the
stored shooting data on frame #0.
Shooting Data Folder
icEnnsijmyL^jMEHESannnznsB i [
Load HLL
|
[
Cancel
BIOUM^...
*]
]
(Figure 18)
1. Connect camera body to computer using the MC-34 cable.
2. Turn on the camera power.
3. In Camera Operation, open the "Tool" menu and select "Load Shooting Data". You
will see the "Load Shooting Data" dialog box shown in Figure 18. (You can also
download shooting data from Film Manager module.)
4. Click on "Load ALL" on the dialog box.
Note:
• After increasing the memory on your F5 camera, to prevent the camera's meter
from automatically turning off while downloading data from the camera to your
computer, continue pressing any Exposure compensation, Exposure mode or AF
area mode button on the camera.
38
5. Each item of shooting data will be transferred to your computer as a file. After
downloading, the "Delete Shooting Data" dialog box in Figure 19 will request
confirmation that you intend to delete shooting data stored in the camera. To do
so, click on "Delete."
Delete Shooting Data
20 shooting data I except data of the film in use ) is
downloaded successfully.
Rre you sure you want to delete the shootiny data
from the camera's memory ?
[[
Delete - ^))
f
Cancel
]
(Figure 19)
Note:
• You cannot display or edit shooting data in the Camera Operation module.
To display and edit shooting data, open the Film Manager module by doubleclicking on the icon for the "Film Manager" module in the "Nikon Photo Secretary for
F5" folder. (See page 40.)
• Pressing the shutter release button on the camera while downloading shooting data
to the computer, terminates the download and deletes any data downloaded to the
computer. To access deleted data, select "Load Shooting" in the "Tool" menu once
again.
39
FILM MANAGER
The Film Manager module allows you to load shooting data from camera to computer
and display and edit shooting data.
To open the Film Manager module, open the "Nikon Photo Secretary for F5" folder
and double-click on the icon for the "Film Manager" module.
* In Film Manager, you cannot select the data to be stored by Photo Secretary. Select
your desired data using the "Custom Functions" dialog box. (For details about data
selection, see page 34.)
Configuration
The "Configuration" dialog box enables you to choose Photo Secretary's configuration
settings without turning on the camera.
1. Open Photo Secretary's Film Manager module.
Select "Configuration" in the "Tool" menu to access the "Configuration" dialog box
shown in Figure 20.
2. After choosing your settings, click on "OK" to save the configuration.
* For details about specific items, see "Help" menu.
Configuration
Communication Port
Modem
^|
Minimum Number for ID search
Maximum Number for ID search
Shooting Data Folder
Macintosh HD:Nikon Photo Secretary for F5
Broujse... ]
Display Item in Text Uieui
Frame Count & Date
| Shutter Speed & Rperture
Metering System
III Difference in Manual Exposure Mode
•
Data Imprinting
Horizontal Frames
6 frames
•
First Frame
oo
(Figure 20)
40
Cancel
Loading Shooting Data from the Camera
Loading Shooting Data from the Camera to Photo Secretary.
1. Connect camera body to computer using the MC-34 cable.
2. Turn on the camera power.
3. In Film Manager, select "Load Shooting Data" in the "Tool" menu to access the
"Load Shooting Data" dialog box in Figure 21.
load Shooting Data
Shooting Data Folder
}fm
[Macintosh HD:Nikon Photo Secretary for F5
| f Brquise...)
nil shooting datatexcept data of the film in use) is
downloaded, then deleted from camera's memory.
I Camera's Found
I
LoadBLL^I
(
Cancel ~)
(Figure 21)
4. Click on "Load ALL" on the dialog box.
If you see "0 Camera's found" on the dialog box in Figure 21, you have not
established a link with your camera. Check your cable link connections and serial port
settings (see "Configuration", page 40).
41
5. Each item of shooting data will be transferred and stored to your computer as a file,
with a file name consisting of the camera ID number and film number. To display
shooting data, open the "File" menu and select "Open" (see page 43).
After downloading shooting data from the camera to the computer, the dialog box
in Figure 22 will appear, allowing you to confirm your intention to delete shooting
data stored in the camera. To do so, click on "Delete."
i l Delete Shooting Data I I
20 shooting data I except data of the film in use ) is
downloaded successfully.
Are you sure you want to delete the shooting data
from the cameras memory ?
Delete
[
(Figure 22)
* For details on specific items, see "Help" menu.
42
Cancel
|
Viewing Shooting Data Files
In Film Manager, select "Open" in the "File" menu to access the "Open" dialog box
shown in Figure 23. Select your desired file and click on "Open," or double-click on
the icon, to display the data. (Only files in Film Manager file format can be read by
Photo Secretary.)
(Figure 23)
Photo Secretary allows you to select the display format of shooting data: Thumbnail &
Text, Text, or List. To change the format, open the "View" menu followed by
"Thumbnail & Text," "Text," or "List." Each format displays the film title, with ISO
rating, comments about film and frames appearing in the top of the downloaded data.
* For details on the different display format, see "Help" menu
43
Editing Data Files
Photo Secretary enables you to edit data files and link data to image data.
Editing Film Data
1. Display data files you intend to edit by selecting "Open" in the "File" menu in Film
Manager. Then select "Edit File" in the "Tool" menu and you will see the "Edit Film
Data" dialog box in Figure 24.
Choose your desired display format for shooting data (see page 43).
Edit Film Data
Film Title
I
I
Comment
I
i
Film Speed
i
First Frame
I
Horizontal Frames
I
fi
OK
H^l
j|
f
Cancel
|
(Figure 24)
2. Input or correct the film title, comments, or film speed in the dialog box. You can
also change the display position of the first frame and the number of frames in the
horizontal line.
3. After making your changes, click on "OK" on the dialog box.
* For details on specific functions, see "Help" menu.
44
Editing Frame Data
1. Display data files by selecting "Open" in the "File" menu in Film Manager. Select the
frame you wish to edit and select "Edit Frame" in the "Tool" menu, or double-click
on the frame you wish to edit. You will see the "Edit Frame Data" dialog box in
Figure 25.
Edit Frame Data
Frame Count
Shutter Speed
Aperture
is
I S ELL
Focal Length
Maximum Aperture
[
F2.8
Dfl
Day
Flash Sync Mode
[Program Exposure
Month - Day
• /•/I
J
]S LL
Color Matrix
Exposure Mode
r-^
Cancel
EU Difference in
Manual Exposure Mode
Exposure
Compensation
Metering System
C
L* J
- Vear
Time
[Normal
Hour - Min - Sec.
I
Data Imprinting
c
zi
(Figure 25)
2. Edit the frame data, then click on "OK" on the dialog box. (Deleting any item causes
frame data to revert to the original data.)
For details on specific functions, see "Help" menu.
45
Linking Images to Shooting Data
1. Display desired data files by selecting "Open" in the "File" menu in Film Manager,
then select "Thumbnail & Text" from "View" to display the data in Thumbnail & Text
format.
2. Select the frame to which you want to link an image.
3. Select "Photo Finder" in the "Tool" menu to display the PhotoFinder window shown
in Figure 26.
PhotoFinder - untitled
L^ 3 ?
|3
• * •
For Help, press F1
(Figure 26)
m
4. By selecting "Open" in the "File" menu in the PhotoFinder window, you can
download image data from a scanner (not supported with TWAIN device), which
you want to link with your desired shooting data, or select a PICT file or image data
that is on photo CD.
46
PhotoFinder
A
Saue changes to the document
|
No
J
|
Cancel
J|L
Ves
J)
(Figure 27)
5. Select "Exit & Return..." in the "File" menu in PhotoFinder. The dialog box in Figure
27 will appear. Click on "Yes" to link the image data to the selected frame of
shooting data.
Images linked to frame data can be moved to other frames in the same shooting data
by dragging.
To view the source of a linked image, open the "Tool" menu and select "Photo Finder".
* For details on specific functions, see "Help" menu.
47
Finding Shooting Data
Search through shooting data by inputting keywords, without having to open files.
1. Select "Find" in the "File" menu in Film Manager to display the "Find Data" dialog
box in Figure 28.
2. Input characters you are searching for in the boxes for Film Number, Film Keyword,
Day, Time or Frame Keyword.
3. Click on "Find" on the dialog box to start searching for items located in the folder
indicated in the Folder box.
4. To open a found file, double-click on the name of the found file (shown as a result
of the search).
• For details on specific functions, see "Help" menu.
Note:
• Search operations are normally performed with a character string. To search files by
word, check the "type in the word" box on the dialog box.
• Searches are case sensitive, distinguishing between capital and lower case letters
unless you check "ignore case" on the dialog box.
: • : : : . : : : • •
•
•
r.:::::::
Find Data
•..
Folder
•
M a c i n t o s h HD:PCDL TEST:TEST2:ltvi5:liiorlc5
Browse.
|(
Film N u m b e r
Z
Z
Find
Stop
j
I
Jump
I
oay
[
I -
•! |
|
Time
| =
•
t y p e in t h e w o r d
V
Close
I
|
Frame K e y w o r d
c
Find Result :
(Figure 28)
48
i
D iynore
case
: . : : . :
Converting Data Files
To convert files or frames to text format, use the "Tool" - "Convert Data" function.
When saving data as delimited text, the first line of text will always be film data, and
the data will be separated with commas.
1. Display data files by selecting "Open" in the "File" menu in Film Manager. Select the
frames you wish to convert to text format. In Film Manager, open the "Tool" menu
and select "Convert Data" to open the "Convert Data" dialog box in Figure 29.
2. Input a file name, and then click on "Save" on the dialog box.
ConuertData
S i Data
a
•
3>
||0030639
Macintosh HD
|
Eject
j
|
Desktop
||0030640
§p 0030641
§ | 0030642
( New
§ | 0030643
D
)
<>
Cancel
Sane as:
|0030653.tnt
II
Sane File as Type;
Sa.e
II
'W l
(Figure 29)
For details on specific functions, see "Help" menu.
49
Printing from Photo Secretary
Photo Secretary allows you to printout one shooting data file in List View mode.
Photo Secretary uses the standard Macintosh® printing system. As a Macintosh®
user, you should be familiar with the use of "Print" dialog boxes you will see in Photo
Secretary. Photo Secretary supports very basic printing.
Shooting data files will be printed according to the display format:
• Thumbnail & Text—prints out thumbnail images as displayed in Figure 30.
OmralD - 255 FftBNS.*1W Comitate! at 11&1/IB6
FME:
Rlm^te
Tset shooting
Rlm£peed
Omrerl
Mihon oniuinial
1
100
image
OOOOlOOOOOOOOsOOOOOOOOjOOOOOOOOiOOOOOOOOsOOOOOOOOeOOOO
Aji^
0 0 0 0
0 0 0 Ofl
0 0 0 0 0 0 0>0
0 0 0 0 0 0 0 0 0
-i
00
30
0 0 0 0 0 0 DO
00
00
00
O O C I O O O O O O O O O O O O O O O O O O O D O U
0 0 00
0 0 OuO 0 0 0 0 0 0 OuO O 0 O 0 0 0 CIL>0 0 0 0
n
7i IIHBL^. I
0 0 0 0 O0 0 0 0 0 0 0 0 0 0 0 0 0 0 0 0 0 0 0 0 0 0 0 0 0 0 0 0 O 0 O 0 O0 U 0 O 0 O0 O 0 0
nraraH
0 0 0 0 0 0 0 0 0 0 0 D 0 0 0 0 0 U 0 0 0 0 0 0 0 0 0 0 0 0 0 O 0 0 0 0 0 O 0 0 0 O 0 0 0 0 0 0
0 0 0
QuO 0 0 0 0 0
Q 0io0 0 0 O O 0 0
DaO 0 0 0 O O O
L^l—L1*^ L
00000000
0 00000
O O O O O O O O O O O O O O a O O O D O O O O O O
(Figure 30)
50
OuO 0 0 0 0 0 0 DwQ 0 0 0 0 0 0 OsCl 0 0 0
• Text—prints out shooting data as displayed in Figure 31.
QireralD = 255 R n No. = 101 Ctwtafcd at 11S13*
R\GE;
RlmnUe
RlmSpad
0 0 0 OiD 0 0 0 0 Q O Q i O O O O a O O Q j O O O O O
[1]
01
125. rs.6
025, rs.6
70 . T4. 5
Progrjn E>pojur?
Progr»i Expo-mre
Color MiWix
Color Htfii*
Cola Maxix
0 0 0(0 0 0 0 0 0 0 P C
[4]
U t . n>.i
lit, F4 5
[51
U t , IT.3
?i), F4.5
l
loo
OOOOOOOiOOOO
1ft,
n.i
Program D^pojun
FT.I-IK iri E*po."jrr
Color MffiriH
Color M r in
Q 0 Q 0 0 0 0 0 0 0 0 0 0 o a 0 0 0 Q 0 0 0 0 0 0 0 0 D 0 0 0 0 0 0 I] 0 [I 0 0 0 0 0 0 0 0 0 0 0
O O Q O T O O D D
Q Q O O C I O 0 O 0 0
0 0»0 0 0 0 0 0 0 Qu)0 0 0 0 0 0 0 OuO 0 0 0 0 0 0 QuQ 0 0 0
25,F3.3
0 0 0 0 0 0 0 0 0 0 0 0 0 0 0 O 0 0 0 0 0 0 0 0 0 0 0 0 0 0 0 0 0 0 0 0 0 O 0 G 0 O 0 O 0 O 0 0
(Figure 31)
• List—prints out shooting data as a list (see Figure 32).
CSrrsralD = 255 Rill No. = 101 DONlkKtad at 113/1996
RAGE:
Rim Title
Rlwfoeed
i
loo
(Figure 32)
To view the page as it will be printed, select "Print Preview" in the "File" menu in Film
Manager.
To printout a shooting data file, orient the paper horizontally in the "Print Setup" dialog
box.
For details on specific functions, see "Help" menu.
51
PHOTO FINDER
Photo Finder allows you to rotate images and link them to shooting data. To open the
Photo Finder module, open the "Nikon Photo Secretary for F5" folder and doubleclick on the icon of the "Photo Finder" module.
D
L..' ~':"
PhotoFinder - untitled
DD13D
For Help, press F1
(Figure 33)
The Photo Finder module:
• Opens and displays PICT files.
• Downloads images from a photo CD to the computer.
• Rotates displayed images 90 degrees to the right or left.
• Stores original image data in the computer in PICT image format.
• Prints out displayed images.
* For details on specific functions, see "Help" menu.
52
Hi
TROUBLESHOOTING
Trouble
Cause and remedy
Camera will not communicate with computer.
If your computer uses a single serial port for
both modem and printer, set it to the modem
port setting. Open the "Tool" menu, select
"Configuration", then set "Communication Port"
at "Modem".
Frequent communication errors.
Communication through networks may require
substantial memory and could cause frequent
errors. Deactivating AppleTalk may reduce
errors. Select "Chooser" from the Apple Menu,
then set "AppleTalk" to "Inactive".
Error message appears when opening a
shooting data file or image file from a DOSformatted floppy disk.
Opening a file from a DOS-formatted floppy
disk, formatted on a WindowsO-based
computer, may cause errors. If such an error
occurs, initialize the disk in DOS-format on a
Macintosh® computer.
"Not enough memory" message appears
during operation.
Insufficient virtual memory may result in a lack
of operating memory. Open "Memory" in the
"Control Panel", then set virtual memory to
"On" to increase the available memory.
System error occurs while using "Balloon Help"
with this software.
This software does not offer "Balloon Help"
support. Do not attempt to activate "Balloon
Help" displays while using this software.
System error occurs while dragging and
dropping a data file over the Printer icon.
This software does not support the printout
function that allows you to drag and drop data
into the "Printer" icon. Do not attempt to drag
and drop data into the "Printer" icon.
S3
54
55
No reproduction in any form of this manual, in
whole or in part {except for brief quotation in critical
articles or reviews), may be made without written
authorization from NIKON CORPORATION.
Nikon
NIKON CORPORATION
FUJI BLDG., 2-3, MARUNOUCHI 3-CHOME,
CHIYODA-KU, TOKYO 100, JAPAN
PHONE: 81-3-3214-5311
TELEX: NIKON J22601
FAX: 81 -3-3201 -5856
Printed in Japan 9&017-B08 <