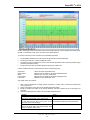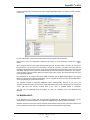
1
SuperSPC ® v.2012 SuperSPC 2012 USER’S MANUAL U s e r M a n u a l 1 SuperSPC ® v.2012 CONTENTS: 1. PRESENTATION 3 2. STATISTICAL PROCESS CONTROL 6 3. INSTALLATION AND START UP 33 4. DATA ENTRY 43 5. CONFIGURATION 53 6. STATISTICAL CHARTS 78 7. REPORTS 94 8. OTHER OPTIONS 101 9. DATA ACQUSITION MODULES (MAD) 104 A. CERTIFICATES DESIGN 110 B. DATA BASE LAYOUT 117 C. TABLES AND FORMULAS 122 D. BIBLIOGRAPHY 132 Note: The contents of SuperCEP are being constantly improved; therefore, this printed handbook will remain from time to time slightly outdated. The online help and the SCLOG.TXT file contain the most updated information. U s e r M a n u a l 2 SuperSPC ® v.2012 1. PRESENTATION Statistical Process Control is a collection of tools of great usefulness for the analysis of data obtained through measurements or specific observations on the characteristics of raw materials, manufacturing processes, finished goods, services and administrative processes. The workers' participation in this quality functions is important. The benefits obtained from the implantation of this type of control are necessarily reflected in an increase of productivity, costs reduction, constant improvement of product quality and greater client satisfaction. The Statistical Process Control System SuperCEP 2008 was created considering the importance of Statistical Process Control in modern organizations and the need for the people responsible to anticipate and speed the response time to quality problems. The integral utilization of this kind of techniques demands registering, storing, processing and analyzing great amounts of data. With this idea in mind and the need to rapidly obtain well presented and reliable results, we designed this Statistical Process Control System SuperCEP 2008 for stand alone PC's and local networks. The system has a Sample Data Record Sheet that allows users to enter, edit, delete, select, filter, transform, consult and report the information obtained from inspections or quality tests. SuperCEP offers the following statistical quality analysis techniques: Descriptive Statistics Frequencies Histograms Normality Studies. Process Capability Analysis Net Weight or Volume Audits Whisker Box Charts Pareto Charts Variables Control Charts Attributes Control Charts Exponentially Moving Average Chart Highs and Lows Charts Rainbow Charts Group Charts Lot Variables Acceptance Samplings Lot Attributes Acceptance Samplings Scatter Diagrams Quality Certificates Data Reports Non-Conformities Report Process Log Report SuperCEP 2008 presents a series of competitive advantages for the user, since it elaborates the statistical analysis of the information obtained in productive processes, services or quality improvement programs, as well as in other industrial activities, in order to have quantitative elements for decisionmaking and to verify the veracity of the processes capacity. When the operator uses SuperCEP he finds that the implementation of SPC does not burden his daily work, since the verification sheet or inspection format is presented to him on the screen much in the same way it would on paper. He inputs variables or attributes data from his process or product inspection and SuperCEP does the rest. The user does not have to learn complicated instructions or key combinations, only to capture the data that is being solicited to him, just like using paper and pencil, but more quickly and with the possibility of making Reports, Certificates, present a log record, to have process information when he wishes, print any type of available chart, carry out data filtering and stratification, etc., all of this right after the information is generated. U s e r M a n u a l 3 SuperSPC ® v.2012 SuperCEP 2008 is a tool of great help in any operational or transactional area whose processes need to be verified inside a quality management system. Some examples of the needs that can be covered are: Management Responsibility Customer focus. Determination of customer requirements; enhance customer satisfaction. Management review. Review the QMS at planned intervals; suitability, adequacy, effectiveness; opportunities for improvement; input; output. Resource Management Human resources. Evaluate competent personnel; training and effectiveness of training. Work environment. Monitor work environment. Product Realization Customer related processes. Evaluation of the ability of the organization to meet customer’s requirements. Design and development. Verification that the design outputs meet the requirements of the input elements. Validation that the product or service meet the intended use and established needs. Evaluation, verification and validation of the effects of design changes. Purchasing. Assure conformance of purchased product; type and extent of control; evaluate and select suppliers; re-evaluation; records; purchasing information (approval of product, procedures, processes, equipment, qualification of personnel, QMS requirements); verification of purchased product. Production and service provision. Plan and carry out production and service provision; controlled conditions; information; work instructions; equipment; gages; inspection; release, delivery, postdelivery; special processes; identification and traceability; customer property; preservation of product. Control of monitoring and measuring devices. Assure that process monitoring and measurement is consistent with requirements. Evaluate previous results in case of non-conformance. Measurement, analysis and improvement Monitoring and measurement. Monitor customers’ perception regarding organization’s ability to consistently meet requirements; methods; conduct internal audits; monitor and measure processes; monitor and measure products. Control of nonconforming product. Nonconforming product is identified and controlled; defined controls and related responsibilities and authorities; documented procedure; action to eliminate detected nonconformities; authorized concession; actions to preclude use (if nonconformities are not corrected); records. Analysis of data. Determine, collect, analyze data; demonstrate suitability and effectiveness; evaluate where continual improvement can be made; including: customer satisfaction, product conformity, characteristics and trends of processes and products; opportunities for prevention; suppliers. Improvement. Continually improve effectiveness; by use of policy, objectives, audits, data analysis, corrective and preventive actions, management review; corrective actions; preventive actions. This system is aimed to any company or industry that wishes to assure and to control the quality of its products, services and processes. U s e r M a n u a l 4 SuperSPC ® v.2012 It is also very useful for those companies interested in exporting national products, which will have to show statistical evidence of the fact that they comply with the specifications and standards required by the international market including the requisites for electronic records security imposed by FDA CFR-21. Also SuperCEP 2008 is an excellent support for the activities related to the obtainment and maintenance of the ISO-9000 procedures. The system is completely in English (Spanish and Portuguese versions available) and very simple to operate. The recommended procedure to obtain the best results with the system is to consult the information in this manual in the order that is shown below: Installation and start up Enter data in the tutorial examples. Charts and Reports on the tutorial examples. Configuration of your own real example. Enter real data. Charts and Reports on real data. If you have any doubts about how the system is administered it will be necessary to consult chapters 4 Data Entry and 5 Configuration. The only way to exploit SuperCEP 2008 to its 100 % is to consult this handbook in its entirety. Finally, if after consulting the content of this handbook, the information is not sufficient for obtaining a wished chart or report, or if you have some suggestion to improve or enrich the handbook or the system, please call your distributor or the manufacturer: Free Technical Support. Telephone: (0155) 5445-5390 al 92 Web site: www.supercep.com.mx E-mail: [email protected] [email protected] U s e r M a n u a l 5 SuperSPC ® v.2012 2. STATISTICAL PROCESS CONTROL. Below we intend to give a short explanation about Statistical Process Control and each one of the tools available in the system, as well as their application to the productive processes and Quality Management. 1. 2. 3. 4. 5. 6. 7. Concepts. Control Charts. Other Sequential Charts. Process Capability Studies. Pareto Charts. Acceptance Sampling. Linear Regression. 2.1 Concepts Quality improvement is essential to increase client satisfaction, increase sales, preserve employment and to raise the living standards of society. One of the main obstacles for improving quality is the constant presence of variations in processes and its consequences on out coming products or services. But, what is variation? In the same way that no two persons are never exactly alike, two manufactured parts or two services delivered are never exactly the same, There will always be a variation in size, weight, conformance or delivery time of the material, part, assembly or service. The difference can be very small or difficult to measure but it will always exist. This is called Variability. Excessive variation is the cause of a great deal of quality problems. We must possess tools that allow us to show, react, control and prevent excessive variations. Statistical Process Control methods are very important to quality improvement since it has been demonstrated that is a very simple and inexpensive way to detect, analyze and control excessive variation. For most people, statistics seem very difficult or complicated, but for us it is no more than a clever way of using numbers to our advantage for helping us make objective decisions based on facts to reduce the number of problems in the operation of any process and in the realization of any product or service. The use of statistics is necessary because it is a mathematical tool designed to deal with large amounts of numbers of incomplete and imperfect nature just as the ones obtained from industrial and commercial scale processes. Before approaching the statistical tools that SuperCEP has, we should understand what it means to be in "Statistical Control". It is said that a process is in Statistical Control when the variations or deviations from its average value cannot be linked to special causes and when the magnitude of these variations remains constant in the short and long-term. If the variations that arise are caused only by common and chance causes, the process is said to be under Statistical Control. A process is said to be "out of statistical control" if special causes of variation arise. Stating that a process is in Statistical Control is equivalent to saying that it is in a natural stability state. In practice, how can one distinguish between a special cause and a natural or common cause? A special cause will not necessarily indicate a defective product. On the other hand, the exclusive existence of a system of common causes does not necessarily leads to a process conforming to specifications. What fundamentally matters at this moment is to verify the consistency and stability of the process independently of the way the product or service meets or not the stated specification. For the purpose of analysis and improvement of the process we can think of common or natural causes as the sum or system of all those forces that act upon our process and have relatively small and random effects. Even the most perfect and stable process, natural or artificial, shows certain routine variations of random nature that we must acknowledge as an inseparable part of it and that we call natural variability or noise. On the other hand, a process might present extraordinary variations known as signals that might indicate the presence of special or non-random causes that have appeared and are acting upon our process. U s e r M a n u a l 6 SuperSPC ® v.2012 To make a decision on the stability of a process it will be useful to be able to delimit between natural variability or noise and special variability or signals. Control Charts are built using these limits. In terms of the control charts we can say that for a process to be in control, all the points should fall within the Control Limits and they should be scattered at random with respect to the Central Line with no runs, cycles or adhesion to limits. After recording data in our inspection format and having obtained a chart, the first question that we should answer is: Is the process in statistical control? We could ask the same question in different terms: Is the process free of special causes of variation? Or, the realization of the product or service has been under a stable and consistent set of circumstances? For answering this question, we should seek evidence of extreme variations, deviations and trends. The presence of any indication of a special cause must guarantee an investigation of the process. The absence of these signs gives us the security that our data correctly represent the current maximum possibilities of the process. Only when our data come from of a system of common causes, we can think that it is justified to compare the results of the process with the conditions imposed by the specifications. 2.2 Control Charts Some people are surprised when they know that two apparently identical parts, made under carefully controlled conditions, of the same source of raw material and manufactured only with a difference in seconds by the same machine, could be different in many aspects. In reality, any manufacturing process, even the most reliable, is characterized by certain degree of variability that it is of random nature and cannot be eliminated completely. Services and administrative processes are no exception. When the variability present in a production or service process is limited to natural or random variation, it is said that the process is Under Statistic Control. This condition is reached investigating and eliminating all the causes that originate variations of other kinds, as are those which can be due to poorly trained workers, low quality raw materials, improper machine adjustments, lack of control of ambient conditions, overused parts, tools wear, unclear instructions, etc. As any manufacturing or service processes rarely are free of this type of influences, it is important to have some systematical method for detecting the notable deviations from the state of statistical control, when these factors appear or earlier if it is possible. It is mainly for this purpose for which control charts are employed. A control chart consists of a central line that corresponds to the average in which the process is operating and two lines corresponding to the upper and lower control limits. These limits are chosen in such a way that the values that fall outside them should be interpreted as indications of a control fault, which means excessive variation or process instability. These limits should not be confused with specification limits, which were chosen, by the customer or designer to fulfill an arbitrary purpose. U s e r M a n u a l 7 SuperSPC ® v.2012 Marking the results obtained from samples taken periodically in frequent intervals, it is possible to verify, by means of this chart, if the process is under control or if in the process has appeared some special cause of problems as those previously indicated. When an obtained point falls outside of the control limits, we seek a possible fault, but still if the points remain within limits, the appearance of a trend or systematic irregularity can serve as notice of the fact that some action should be taken to avoid more serious problems. The ability to "read" or "interpret" a control chart and to determine justly what corrective action must be taken, is a matter of objectivity, experience and good judgment of the process owners. There are several types of control charts that can be built. If you obtain data for a quality characteristic that can be measured and expressed in numbers, generally you use control charts for central trend and variability, since the quality of a product frequently can be summarized in terms of these two quantities. The sequence of decisions and necessary activities regarding the use of a control chart for any quality characteristic will typically include many of the following steps: 1. Decisions preparatory to the control charts. Purpose of the Charts. The objective is to complement and improve the ability of operators and supervisors of analyzing the process for the purpose of: o o o o Establishing or changing specifications or in determining whether a given process can meet specifications. Establishing or changing production procedures either by elimination of assignable causes of variation or fundamental changes in production methods. Establishing or changing inspection and acceptance procedures. Provide a basis for current decisions during production as to when to hunt for causes of variation and take action intended to correct them and when to leave a process alone. Provide a basis for current decisions on acceptance or rejections of manufactured or purchased product. Disclose opportunities for continuous improvement and cost savings. Choice of the Variable. An easy to sample and measure variable not always justifies the use of a control chart. Specially at the beginning is important to select variables that offer the greatest prospects of reducing or preventing costs that supervision and management will readily accept as being real. U s e r M a n u a l 8 SuperSPC ® v.2012 Decision on the Basis of Subgrouping. The key idea behind the success of control charts is the division of observations into rational subgroups. This requires the use of the right discrimination suited to the type of process and the purpose of the control chart. Generally speaking subgroups should be selected in a way that makes each subgroup as homogeneous as possible and that gives the maximum opportunity for variation from one subgroup to another. Decision on the Size and Frequency of Subgroups. Because the essential idea of the control chart is to select subgroups in a way that gives minimum opportunity for variation within a subgroup, it is desirable that subgroups be as small as possible. On statistical grounds, a size of four is sufficient for the distribution of means to be nearly normal. The larger the subgroup size, the narrower the control limits on charts for means and the easier it is to detect small variations. No general rules may be laid down for frequency of subgroups but in the initial use of a control chart for analyzing a process, it may be desirable to take more frequent samples and, later on, the frequency can be reduced as the process becomes more stable. If the cost of measurements is high, the sampling frequency must be balanced with the expected benefits. Setting up the Forms for Recording the Data. For learning and sensitizing purposes it can be interesting to have operators work their first charts with paper and pencil, although the routine use of computers is more efficient because human errors are reduced and there is more time left for analysis. Any form used needs plenty space for remarks and annotations regarding the context that might give clues to the causes of any out-of-control points. Determining the Method of Measurement. The quality of the data obtained from the measurement system (instruments, operators, methods) must be formally assured before any attempt is made to extract valid conclusions from the control charts elaborated with this data. 2. Starting the Control Charts. Making and Recording the Measurements. It should always be remembered that the information given by the control chart is influenced by variations in the measurement process as well as by variations in the quality characteristic. Measurement and recording errors should be avoided to the maximum extent possible. Data must be time-stamped to preserve its sequence. Annotations should be made of any occurrences that might help find special causes in case necessary. Calculation of subgroup statistics. Depending on the type of chart it will be necessary to calculate the mean, range, standard deviation or some other statistic for each subgroup. The relevant formulas will be presented later on. Plotting the charts. Although not compulsory, the general practice is to present the means and ranges (X-R) chart before the variability chart (R or S). Vertical scales are used for statistical measures and the horizontal scale is used for subgroup numbers, lot numbers or dates. Each point represents the statistic for the subgroup. Points may be connected but some authors do not recommend it to avoid resemblance with a trend chart. Points on the chart should be kept plotted up to date preferably by the process operators because the potential benefit of using the chart depends to a great extent on the agility of the decision-making it enables. 3. Determining the trial control limits. Decision on required number of subgroups before control limits are calculated. On statistical grounds it is desirable that control limits be based on at least 25 subgroups. Preliminary calculations of control limits can be made from the first 8 or 10 subgroups, with subsequent modification of limits as more subgroups are obtained. It must be understood that the fewer the subgroups used, the less assurance that this basis for action is sound.. Calculation of trial limits. In all cases control limits extend 3 standard deviations on each side of the average values of the location and variability statistics. This space represents a good balance between the two types of errors one can make using the charts to determine the stability of a process: the error of searching for a problem when there is none and the error of letting the U s e r M a n u a l 9 SuperSPC ® v.2012 process run when a problem really exists. We wil list later on the methods that statistical theory gives us to estimate the standard deviation for each chart. Plotting the central lines and limits on the charts. Conventionally a solid horizontal line is drawn to represent the central limit at the aveage of the means, ranges or standard deviations charts. On both sides of this line the upper and lower control limits are drawn with a dashed horizontal line. On the ranges and standard deviations charts the lower control limit are not drawn if the computed value is zaro or less. It will be useful to draw lighter iines to horizontally divide de 1, 2 and 3 standard deviations zones between the central line and each limit. 4. Drawing preliminary conclusions from the charts. Indication of control or lack of control. Lack of control is indicated by points falling outside the control limits. The computational design of the control limits offers great confidence that a common cause system will seldom be responsible for points falling outside control limits. In contrast to this; when all points fall inside the control limits we can only say that it pays to act as if no assignable causes of variation are present. Still it is necessary to search for runs or patterns that might point to assignable causes of variation. For this purpose there are a series of rules or tests based on the number of points that can be expected on each zone of the chart if the process were subjected exclusively to a common cause system. The following situations suggest the need to searh for assignable causes of a possible process shift: o o o o o o o o o o o 2 out of 3 succesive points are on the zone between 2 and 3 standard deviations. 7 succesive points going up or down. 8 succesive points outside the 1 standard deviation zone on both sides of the central line. 4 out of 5 succesive points outside the 1 standard deviation zone on the same side of the central line. 15 succesive points inside the 1 standard deviation zone on both sides of the central line. 14 alternating successive points. 7 succesive points are on the same side of the centra line.. 10 out of 11 succesive points are on the same side of the central line. 12 out of 14 succesive points are on the same side of the central line. 14 out of 17 succesive points are on the same side of the central line. 16 out of 20 succesive points are on the same side of the central line. Interpretation of process in control. With evidence from the control chart that a process is in control, we are in a position to judge what is necessary to permit the manufacture of product that meets the specifications for the quality characteristic charted. If specifications are met then it will suffice to maintain the state of the process to assure the quality of the product or service. If specifications are not met then it will be necessary to profoundly modify the process itself to reduce common variation or to better the centering of it with respect to the target specification. Interpretation of process lacking statistical control. When the control chart indicates lack of statistical control the obvious step is to hunt for the assignable causes of variation and try to correct them. The process centering and dispersion cannot be used to compare with specification limits because the process is not stable nor predictable. It is possible though to recalculate limits eliminating out-of-control points on the charts to predict where ought the process average and limits to be if a controlled state could be achieved. This way it can be known in advance whether or not profound process changes are necessary anyway to meet specification limits. 5. Continuing to use the charts. Revision of Central Lines and Control Limits. The trial control limits served the purpose of determining whether past operations were in control. The continuing use of the control chart, with each out-of-control point used as a possible basis for hunting for an assignable cause of variation and taking action to eliminate that cause, may require revised limits. Eventually, as more data accumulate, the limits will need to be reviewed to make them more precise or simply U s e r M a n u a l 10 SuperSPC ® v.2012 because there have been fundamental changes in the process that have modified the commoncause system of variation. Use of the Control Charts for Action on the Process. In continuing the use of the control charts, there may be three different kinds of action on the process as follows: 1) action to remove assignable causes of variation that are brought to attention by out-of-control points, 2) action to establish the process average and 3) action to establish the process dispersion. Once a process is brought into control with a satisfactory average and dispersion, a purpose of the control chart is to help continue this state of affairs. Control Charts for Variables in relation to Acceptance Inspection. There are useful techniques for acceptance sampling and inspection, but it is well established that an overall decision with respect to the acceptance or rejection of a manufacturing process often is superior to a series of unrelated decisions regarding acceptance or rejection of separate lots of products. Control charts may give evidence that a process is in statistical control with satisfactory centering and dispersion which means the product is being made right the first time. Use of the charts for action on the specification. The basis of all specification limits should be the prospective use of the part or product for which the limits are specified. Ideally, all specification limits should be exactly right from the standpoint of what is really needed. Many specification limits are made tighter than really necessary, often because no time or effort has been given to finding out what is necessary. In most cases there is no one right value of specification limits which can be settled independently of cost factors involved; these cost factors cannot be properly judged without information regarding the capabilities of the manufacturing process such as is given by the control chart. Sometimes the appropriate conclusion from the control chart is to change the specification. 2.2.1 Control Charts for variables SuperCEP offers the following charts for Variables: X - R Chart (Means and Ranges) X - S Chart (Means and Standard Deviations) I - mR (Individuals and Moving Ranges) X – mR – R (Means, Moving Ranges and Ranges) EWMA - R (Exponential Moving Averages and Ranges) 2.2.1.1 Means and Ranges Chart ( X R) The X-R chart, which is the traditional and fundamental tool of statistical process control, consists of two graphs, one for the means (X) that will help us control process centering and the other for ranges (R) that will help us control its variability. U s e r M a n u a l 11 SuperSPC ® v.2012 Means and Ranges are obtained from subgroups of samples of constant size taken from the process at regular intervals of time or production units. Usually subgroup sizes are chosen between 4 and 5. Each data point on the Means graph is the average of the samples in one subgroup. Each point on the Ranges chart is the difference between the highest and lowest value in the subgroup. Control limits are calculated from the average Range and they delimit a 3 standard deviations zone around the process average. Necessary formulas for the central line and control limits are: Graph Limit Means Ranges Definition Estimate Upper X 3 X X A2 R Central X X Lower X 3 X X A2 R Upper R 3R D4 R Central R R Lower R 3R D3R Estimators vary with subgroup size n: n 2 3 4 5 6 7 8 9 A2 1.8806 1.0231 0.7285 0.5768 0.4833 0.4193 0.3726 0.3367 D3 0.0000 0.0000 0.0000 0.0000 0.0000 0.0760 0.1360 0.1840 D4 3.2670 2.5740 2.2820 2.1140 2.0040 1.9240 1.8640 1.8160 U s e r n 21 22 23 24 25 30 35 40 A2 0.1733 0.1675 0.1621 0.1572 0.1526 0.1341 0.1204 0.1098 M a n u a l 12 D3 0.4254 0.4347 0.4438 0.4530 0.4602 0.4830 0.5016 0.5162 D4 1.5746 1.5653 1.5562 1.5470 1.5398 1.5170 1.4984 1.4838 SuperSPC ® v.2012 10 11 12 13 14 15 16 17 18 19 20 0.3082 0.2851 0.2658 0.2494 0.2353 0.2231 0.2123 0.2028 0.1943 0.1866 0.1796 0.2230 0.2560 0.2830 0.3070 0.3280 0.3470 0.3630 0.3780 0.3910 0.4030 0.4150 1.7770 1.7440 1.7170 1.6930 1.6720 1.6530 1.6370 1.6220 1.6080 1.5970 1.5850 45 50 55 60 65 70 75 80 85 90 95 100 0.1013 0.0943 0.0885 0.0838 0.0796 0.0759 0.0726 0.0696 0.0668 0.0642 0.0619 0.0597 0.5277 0.5372 0.5453 0.5512 0.5582 0.5670 0.5787 0.5943 0.6152 0.6426 0.6781 0.7231 1.4723 1.4628 1.4547 1.4488 1.4418 1.4330 1.4213 1.4057 1.3848 1.3574 1.3219 1.2769 2.2.1.2 Means and Standard Deviations Chart ( X S ) Each point of the Means chart is the average of the samples of a subgroup. Each point of the Deviations chart is the internal standard deviation of each subgroup. The control limits are calculated from the average standard Deviation and delimit a zone of 3 standard deviations on each side of the average. U s e r M a n u a l 13 SuperSPC ® v.2012 Necessary formulas for the central line and control limits are: Graph Limit Means Deviations Definition Estimator Upper X 3 X X A1S Central X X Lower X 3 X X A1S Upper S 3S B 4S Central S S Lower S 3S B 3S Estimators vary with subgroup size n: n 2 3 4 5 6 7 8 9 10 11 12 13 14 15 16 17 18 19 20 A1 3.7599 2.3937 1.8799 1.5959 1.4100 1.2766 1.1750 1.0942 1.0282 0.9726 0.9253 0.8842 0.8482 0.8162 0.7876 0.7618 0.7384 0.7170 0.6974 B3 0.0000 0.0000 0.0000 0.0000 0.0300 0.1176 0.1850 0.2395 0.2830 0.3219 0.3529 0.3818 0.4064 0.4281 0.4487 0.4655 0.4810 0.4964 0.5094 B4 3.2664 2.5682 2.2659 2.0895 1.9700 1.8824 1.8150 1.7605 1.7170 1.6781 1.6471 1.6182 1.5936 1.5719 1.5513 1.5345 1.5190 1.5036 1.4906 n 21 22 23 24 25 30 35 40 45 50 55 60 65 70 75 80 85 90 95 100 2.2.1.3 Individuals and Moving Ranges Chart ( A1 0.6792 0.6625 0.6469 0.6324 0.6188 0.5619 0.5183 0.4835 0.4549 0.4308 0.4086 0.3912 0.3759 0.3622 0.3499 0.3388 0.3287 0.3194 0.3109 0.3030 B3 0.5231 0.5354 0.5458 0.5561 0.5638 0.6039 0.6342 0.6604 0.6767 0.6953 0.8744 0.8277 0.7964 0.7729 0.7544 0.7393 0.7267 0.7159 0.7066 0.6985 B4 1.4769 1.4646 1.4542 1.4439 1.4362 1.3961 1.3658 1.3396 1.3233 1.3047 1.1256 1.1723 1.2036 1.2271 1.2456 1.2607 1.2733 1.2841 1.2934 1.3015 PI Rm) The control chart of individual points and mobile ranges can be used for characteristics whose individual samples are normally distributed. On the I chart each point represents an individual value. In the mR chart each point is the difference between the current sample and the previous sample. U s e r M a n u a l 14 SuperSPC ® v.2012 Necessary formulas for the central line and control limits are: Graph Individuals Moving Range Limit Definition Estimator Upper PI 3PI PI 2.6596 Rm Central PI PI Lower PI 3PI PI 2.6596 Rm Upper Rm 3Rm 3.267 Rm Central Rm Rm Lower Rm 3Rm 0.0 2.2.1.4 Means, Moving Ranges and Ranges ( X Rm R or 3D) Statistical independence between samples in each subgroup is one the most important requisites for a control chart to work properly, but also one of the most frequently ignored. Many times several measures of the same characteristic on the same sample are taken and these repetitions are integrated into subgroups charting its mean and range values. The lack of independence of these repetitions usually generates out-of-control charts. The 3D chart was designed to avoid this problem. The same means, moving ranges and ranges charts that we already know are presented with one difference: subgroups averages are taken as individuals on the moving range chart and for the calculation of limits on the means chart. This adaptation renders more realistic natural limits. U s e r M a n u a l 15 SuperSPC ® v.2012 Necessary formulas for the central line and control limits are: Graph Means Moving Range Ranges Limit Definition Estimator Upper X 3 X X 2.6596Rm Central X X Lower X 3 X X 2.6596Rm Upper Rm 3Rm 3.267 Rm Central Rm Rm Lower Rm 3Rm 0.0 Upper R 3R D4 R Central R R Lower R 3R D3R 2.2.1.5 Exponentially Weighted Moving Averages and Ranges Chart (EWMA – R or mR) The Exponential Moving Averages chart is an alternative to the Means or Individuals chart that can be used in processes where we want to investigate constant and small shifts in the process mean in the order of 0.5 to 2.0 sigma. Each point on the graph is geometrically weighted with all older data in a way that better represents small constant shifts sacrifying the sensibility for large sudden shifts. A weighting factor (lambda) is chosen between 0.05 and 1.0 to inversely affect how much “smoothing” is obtained. Common chosen values fall between 0.2 and 0.4. Raw individual or grouped data can be used. The Ranges chart does not change. U s e r M a n u a l 16 SuperSPC ® v.2012 Necessary formulas for the central line and control limits are: Graph Limit Means Definition Upper X Central X Lower X R d2 n 2 R d2 n 2 Estimator d2 varies with subgroup size n: n d2 2 3 4 5 6 7 8 9 10 1.1280 1.6930 2.0590 2.3260 2.5340 2.7040 2.8470 2.9700 3.0780 n 11 12 13 14 15 16 17 18 19 20 d2 3.1730 3.2580 3.3360 3.4070 3.4720 3.5320 3.5880 3.6400 3.6890 3.7350 U s e r n 21 22 23 24 25 30 35 40 45 50 d2 3.7780 3.8190 3.8580 3.8950 3.9310 4.0855 4.2134 4.3220 4.4151 4.4982 M a n u a l 17 n 55 60 65 70 75 80 85 90 95 100 d2 4.5720 4.6220 4.6720 4.7220 4.7720 4.8220 4.8720 4.9220 4.9720 5.0220 SuperSPC ® v.2012 Kappa factor varies with lambda: lambda 0.05 0.10 0.20 0.30 0.40 0.50 0.75 1.00 kappa 2.49 2.70 2.86 2.93 2.96 2.98 3.00 3.00 2.2.2 Control Charts for Attributes When a quality characteristic can only be evaluated as accepted or rejected or qualified with a subjective scale then an analysis by attributes is necessary. The defective fraction chart or number of defects chart are used in this situations. The system handles the following Control Charts by Attributes: C Chart (Number of defects) U Chart (Number of defects per unit) P Chart (Defective fraction) NP Chart (Number of defectives) 2.2.2.1 Non-conformities chart ( c ). Each point on the graph is the number of defects found in a sample, a lot, a period’s production or any other constant-size opportunity area. Control limits border a 3 standard deviations probability zone around the mean so the interpretation of out-of-limits points is similar to the variables charts. U s e r M a n u a l 18 SuperSPC ® v.2012 Necessary formulas for the central line and control limits are: Limit Definition Estimator Upper c 3c c 3 c Central c c Lowerr c 3c c 3 c 2.2.2.2 Non-conformities per Unit Chart ( u ). Each point on the graph represents the quotient between the number of defects found in a sample, lot, period’s production or any other opportunity area and its size, which might not be constant. Control limits are interpreted as usual except that they will vary from point to point according to the inverse of the opportunity area size. Necessary formulas for the central line and control limits are: Limit Definition Estimator Upper u 3u u 3 u/n Central u u Lower u 3u u 3 u/n U s e r M a n u a l 19 SuperSPC ® v.2012 2.2.2.3 Non-Conforming Fraction Chart ( p ). Each point on the graph represents the percentage of the number of non-conforming units (with each rejected unit having one or more defects) in the sample, lot, period’s production or any other opportunity area, which might not be of constant size. Control limits are interpreted as usual except that they will vary from point to point according to the inverse of the opportunity area size. Necessary formulas for the central line and control limits are: Limit Definition Estimator Upper p 3p p 3 p1 p/ n Central p p Lower p 3p p 3 p1 p/ n 2.2.2.4 Non-Conforming units Chart ( np ). Each point on the graph is the number of non-conforming elements (each rejected unit may have one or more non-conformities) found in a sample, lot, period’s production or any other opportunity area of constant size. Control limits border a 3 standard deviations probability zone around the mean so the interpretation of out-of-limits points is similar to the variables charts. U s e r M a n u a l 20 SuperSPC ® v.2012 Necessary formulas for the central line and control limits are: Limit Definition Estimator Upper np 3np np 3 np1 p Central np np Lower np 3np np 3 np1 p 2.3 Other Sequential Charts 2.3.1 Rainbow Chart It is a practical tool for in-line process control. It is recommended because it is especially effective controlling processes with frequent set-ups, adjustments and tooling changes. Comparing it with the X-R chart it has some attractive characteristicss like the small subgroup sizes allowed (usually 2 samples every 30 minutes) and the fact that no calculations are needed. This allows operators and tooling personnel to use them in an effective manner with little training. U s e r M a n u a l 21 SuperSPC ® v.2012 Another advantage is that the Rainbow chart shows samples directly charted against specification limits instead of control limits, which is the case with control charts like X-R. To use this chart the process must show some statistical properties: The probability distribution of the process must approximate a normal distribution. The process must be in a state of statistical control. The process must be centered very close to the nominal specification value (half-way between upper and lower specification limits). The process must have a potential capacity index (Cp) of at least 1.33. If these conditions are met, 5 color areas are drawn in the following way: Upper Red. Upper Yellow. Green. Lower Yellow. Lower Red. Above the upper specification limit. Between 75% of tolerance and upper specification limit. Between 25% and 75% of tolerance. Between 25% of tolerance and lower specification limit. Below the lower specification limit. The usage routine is as follows: 1. 2. 3. 4. After a set-up, adjustment or tooling change, inspection is a 100% until 5 consecutive measures fall on the green zone. Having 5 measures on the green zone sampling inspection begins. Initially 2 samples are taken at 30 minutes intervals and both measures from the subgroup are recorded. Actions are taken based on which color zones both measures fall on: Situation Both points on the green zone. One point on the green zone and the other on any yellow zone. Both points on the same yellow zone. One point on the red zone and the other on any zone of the same side of the nominal target. One point on the red zone and the other on any zone on the other side of the nominal target. Both points on opposite yellow zones. U s e r Action Continue without change. Adjust and enter 100% inspection until finding 5 consecutive measures on the green zone. Stop the operation and ask for supervision. M a n u a l 22 SuperSPC ® v.2012 5. 6. Samples with values on the red zone are to be handled according to non-conforming product procedures. Based on process control needs, reduction of inspection frequency can be justified after having 25 subgroups with all its measures on the green zone. 2.3.2 Maximum and Minimum Chart Similar to the Means control chart this graph show the average of each subgroup and also the lowest and highest value with an I bar. Subgroups are not necessarily made up of constant size samples but instead they encompass a constant period’s samples. The central line is the average of the means of all subgroups, while control limits are calculated for each period from the range. This chart is useful for comparing extreme values with specification limits. 2.3.3 Group Chart When forming the subgroups for a control chart, mixing samples from different currents of a process is a common mistake. This frequently happens when the same machine has distinct positions, cavities, injectors, molds, dies, etc. In fact, each one of these elements usually behaves as a relatively independent process with its own average and standard deviation and therefore collecting product samples from all of them into one subgroup will mask the signals of instability losing the ability to detect them. If one wants to avoid this mistake, the practical problem arises of how the control chart of each element can be analyzed without having to spend too much time and effort. The Group chart can be used to detect which elements or positions deserve a closer analysis with a control chart. On a Group chart, extreme upper and lower samples from a fixed period of time are shown with a label identifying its origin. This permits saying, for example, that mold number 5 is delivering the most deviated samples most of the time. The highest and lowest moving ranges between successive periods are labeled on a second chart. U s e r M a n u a l 23 SuperSPC ® v.2012 Due to its nature this graph does not lend itself to the calculation of control limits but it is useful as a guide to initiate other analysis. 2.4 Process Capability Study. The tabulation or gathering of the number of times in which a certain measurement of the quality characteristic or variable to analyze appears, for any product that is being examined is known as a Frequencies Histogram. The tabulation or data ranking is represented putting on the vertical axis the frequency in which the data occur, and on the horizontal axis the values of the characteristic that is being measured; these values are represented in small numerical intervals almost always defined by the user, called class intervals. Commonly, in the referred Histogram, the corresponding values of the target mean of all the population are also shown, as well as the values for the upper and lower specification limits. The process capacity or Cp is defined as the relationship between the specification limits or tolerance and the total variability of the process given by the calculation of the standard deviation. Mathematically it is expressed in the following form: Cp = Upper Specification - Lower Specification __________________________________ 6 times the standard deviation Example: Upper Specification Limit: Lower Specification Limit: Process Standard Deviation: 5.00 % humidity 3.00 % humidity 0.40 % U s e r M a n u a l 24 SuperSPC ® v.2012 (Calculated with data obtained from last month) Substituting these values in the formula gives the following result: 5.0 - 3.0 Cp = -------------- = 0.83 6 x 0.40 The denominator is greater than the numerator and gives a smaller value than 1.0. This means that the process has greater variability than what the specification allows. Now, corrective action is taken on one of the common causes to reduce the variability and then the new standard deviation of the process is equal to 0.25%, therefore we have a new value for Cp: 5-3 Cp = ------------ = 1.333 6 x 0.25 This indicates that the variability of the humidity that the process gives is less than that of the established tolerance; therefore the process has the potential capacity of fulfilling the specification. As it’s seen, the Cp index permits to qualify the variability of products and processes, being greater the capacity of complying with the specification, when the Cp value is greater. You must realize that for calculating the value of Cp it has been assumed that the average value of the distribution always coincides with the center of the specification, but in reality there will be situations, as those of the cases "B" or "C" of the following figure, where the average of the distribution does not coincide with the center of the specification. U s e r M a n u a l 25 SuperSPC ® v.2012 It is evident that in the "B" case there are more values outside of specification and in the "C" case, though in smaller quantity, the distribution shows that the values also tend to be outside the upper limit of the specification; however, according to the Cp formula, in the three "A", "B" and "C" cases, the numerical value would be 1.33. To consider this situation, we use a more meaningful index that takes into account the position of the center of the distribution with respect to that of the specification, that we call Process Capability (Cpk). Mathematically it is expressed as: Cpk usl = Cpk lsl = Upper Specification – Mean ------- ----------------------------------------3 times the standard deviation LSE - X = ---------------3·s Mean – Lower Specification X - LIE ----------------------------------------------- = ---------------3 times the standard deviation 3·s From the obtained values, we take into account the one, which is smaller. Cpk = Min (Cpk lsl, Cpk usl) Applying the formula to the "A" case in which the distribution average = 4.0 we have: 5-4 Cpk usl = ---------- = 1.333 3 x 0.25 4-3 Cpk lsl = ------------ = 1.333 3 x 0.25 In this case, the distribution mean coincides with the center of the specified limits, therefore the values of Cpk usl, Cpk lsl and Cp are equal and therefore Cpk is equal also. In the"B" case, where the average distribution = 3.2, we have: 5 - 3.2 Cpk usl = ------------- = 2.4 3 x 0.25 3.2 - 3 Cpk lsl = ------------- = 0.267 3 x 0.25 In this case, to use only the value of Cpk usl would make the process look perfect, but the value of Cpk lsl = 0.267, which is the value that will be taken as Cpk, is very low, which indicates that most of the data is outside the lower limit, something which can be noticed in the previous figure. In the "C" case the average of the distribution = 4.25 and therefore: 5 - 4.25 Cpk usl = ------------- = 1.0 3 x 0.25 4.25 - 3 Cpk lsl = ------------- = 1.666 3 x 0.25 U s e r M a n u a l 26 SuperSPC ® v.2012 In this case, there are no problems with the lower limit, but on the other hand, the value of Cpk usl indicates that it is on the exact frontier of the specified upper limit. The foregoing permits to conclude that higher Cpk values mean smaller variability and closer distribution mean and target value, yielding higher probability of complying with the conditions specified for a given process or product, that is, greater Cpk means greater quality. 2. 5 Pareto Chart. In productive processes there are many factors that should be improved and these, at the same time, consist of several small problems, therefore on some occasions it is difficult to know which ones should be attacked first and what road to follow to solve them. The Pareto chart is a tool that sorts by order of importance, the negative impact of the non conforming characteristics that are measured on a given process or product, either by frequencies of defects or found contingencies or by its cost or value that they impinge on the process. Systematic elaboration of these charts permits us to observe the evolution of the improvements accomplished on the productive processes. U s e r M a n u a l 27 SuperSPC ® v.2012 2.6 Acceptance Sampling of Lots. Manufactured goods are sent to customers in batches that vary in size from a few up to many thousands of individual objects. Ideally, each batch would not contain any defective object, but in practice it is quite rare to find this case. Recognizing the fact that some defective objects have been sent, even supposing that the batch may have been a hundred percent surveyed, many consumers demand evidence based on careful inspection, of the fact that the portion of defective items in each batch will not be excessive. A frequently employed method and a very effective one to give this kind of evidence is that of samples inspection, in which the samples are selected from each batch before shipment (or before consumer acceptance) and a decision is made based on this sample to accept or reject the whole batch. A batch can be accepted even though it contains some defective units. The agreement between producer and consumer will establish some form of compensation to the consumer for these rejections. The rejection of a batch does not mean that it has to be destroyed, but simply that it should be subdued to a strict inspection to eliminate all the defective parts. As this cost is not negligible at all (some times is as high as the production cost and sometimes greater) it will not always be convenient to check all the pieces of a batch. Consequently, the inspection for acceptance implies as a rule the use of samples; more specifically, a random sample is selected from each batch and the batch will be accepted if the number of defective items found in the sample does not exceed a given acceptance number. For lot acceptance sampling SuperCEP uses the inspection standards by attributes MIL-STD-105E / ANSI-Z1.4 and MIL-STD-1916 and the inspection standards by variables MIL-STD-414, ANSI-Z1.9 y MILSTD-1916. 2.6.1 MIL-STD-105E / ANSI-Z1.4 ACCEPTABLE QUALITY LEVEL (AQL). The level of acceptable quality (AQL) is defined as the maximum defective percentage (or the maximum number of defects per hundred units) that, for inspection sampling purposes, can be considered satisfactory as an average of the process. In MIL -STD-105 E / ANSI-Z1.4, the values of AQL of 10 or less are expressed as defective percentage or as defects per hundred units; those above 10, are expressed only per hundred units. U s e r M a n u a l 28 SuperSPC ® v.2012 INSPECTION LEVELS AND STAGES. These concepts determine the size of the sample to inspect. The system allows choosing between the 4 special levels and the 3 general levels under single sampling in normal sampling stage. Special levels of inspection are applied to very reliable suppliers that only need small samples to decide acceptance of the lot. General levels 1 and 2 are recommended at the beginning of a system of lot sampling. Finally, inspection level 3 is suggested for less reliable suppliers which have had difficulties meeting required specifications in the near past and need to submit bigger samples form the lots to decide acceptance. Finally, the Sampling Plan, that is the combination of lot size, inspection level, inspection stage and AQL determine the acceptance Number c which limits the maximum number of non-conforming items that can be found in the sample to accept the whole lot. 2.6.2 MIL-STD-414 The standard by variables has similarities with the standard by attributes. Like the standard by attributes, the sampling plans are catalogued by AQL, inspection level and lot size. The definition of AQL is different from that found in the MIL-STD-105D. In MIL-STD-414, the level of acceptable quality, AQL, is defined as a nominal value expressed in terms of defective percentage specified for only one quality characteristic. There are five inspection levels that go from 1 to 5. Level 1 is the less rigorous and level 5 the most rigorous. The system employs the table for normal inspection stage. When this type of sampling is applied for the first time we begin with inspection level 4 unless other one is specified. Level 1 is applied to unreliable suppliers, therefore we would have to inspect the largest possible sample to decide if the lot is accepted or rejected. U s e r M a n u a l 29 SuperSPC ® v.2012 Example: Lot size Inspection Level Code Letter Aceptable Quality Level (AQL) Sample size % Non-conformance allowed 5000 1 G 1.0 15 3.05 Mean Lower specification limit Upper specification limit Standard deviation (s) 18.00 17.50 18.22 0.21 Estimate % above USL Estimate % below LSL Estimate % Total non-conforming The lot must be 2.31 0.42 2.73 ACCEPTED 2.6.3 ANSI Z1.9 The 2003 version is similar to MIL-STD-414 with some adjustments in lot sizes and M critical values. U s e r M a n u a l 30 SuperSPC ® v.2012 2.6.4 MIL-STD-1916 Replaces previous military standards radically eliminating the concept of AQL. There are 7 verification levels with its corresponding tightened and reduced inspection stages. For attributes inspection all acceptance numbers are c = 0. For variables inspection, the k and F tables give similar error risks to the equivalent attributes levels but with smaller sample sizes. The new standard emphasizes prevention thru SPC as a better way to quality assurance and proposes the use of acceptance sampling as a last resort. U s e r M a n u a l 31 SuperSPC ® v.2012 2.7 LINEAR REGRESSION Through this technique it is possible to determine if a variable is correlated with some other or if they vary independently. This is of importance when investigating the reaction or behavior of a variable upon modifying another. When two or more variables are related it is possible to design indirect inspection systems that could be more economic and practical than the direct measurement of the variable of interest. The minimum squares adjustment technique is used over sample data pairs obtained from processes under statistical control. Results are reported in the form: y = f(x) = mx + b where the function is that of a straight line with slope “m” and intercept “b”. It is possible to calculate the correlation coefficient “r” that is a measure of how well the “y” values can be predicted from the “x” values using the discovered function. In practice this coefficient should be greater than 0.9 to expect close predictions. If “x” and “y” are cause and effect related, then it could be necessary to unsync the formation of value pairs to account for the time it takes the cause to produce its effect. This technique can be useful also in the research of cycles within a data series pairing with data points from previous periods (autocorrelation). If periodicity exists then the values of the r coefficient will reach a maximum for certain values of the delay which are multiples of the cycle amplitude. The system can look for non-linear correlation of 2 variables transforming one or both of them with a formula. For example to obtain a correlation of the type y = f(x2) the x characteristic is transformed raising it to the square and using this result instead of the original values. U s e r M a n u a l 32 SuperSPC ® v.2012 3. INSTALLATION AND START-UP. 3.1 Hardware and Operating System Requirements The following are the minimum hardware and software requirements to adequately run the system: Pentium Proccesor @ 1.0 Ghz. 32 or 64 bits Windows Operating System (2000, XP, 2003, Vista, 7 or 8) 512 Megabytes of RAM. XVGA color monitor (1024x768) or better. 250 Megabytes of Hard Disk storage available. Mouse and Keyboard or Touchscreen Graphics Printer 3.2 Local installation on a PC. To install the system on a PC follow the next instructions: 1. Close all Windows applications. 2. Put the original CD in the drive. If the computer does not have a CD drive you can access a shared drive in your local network or copy the contents of the CD to a shared folder or flash memory or download the installation files from the Internet (read on). 3. Click on the Start button in the Windows Task bar and then click on My PC. Navigate to the \SuperCEP 2012 folder on the CD or shared resource that contain the installation files and double click on the SCEP2012.msi file. Note: The software will automatically install for all current and future users of the PC (ALLUSERS=1). If you wish to install only for the current user then you should open the Run dialog in the windows Start button and write the command MSIEXEC /i e:\scep2012\scep2012.msi ALLUSERS=””. 4. The Windows Installer will start. This program is a component of your Windows Operating System. Important: If you are installing on Windows 98 or if you get some error message related to MDAC (Microsoft Data Access Components), please run the file MDAC_TYP.EXE, which is found on the original CD. This executable will install version 2.5 SP3 of these components. Retry from step 3. 5. After a few seconds the following dialog will show: U s e r M a n u a l 33 SuperSPC ® v.2012 6. Click on the Next button. 7. You can confirm the installation to the folder C:\Program Files\SuperCEP2012. If you wish to install to a different disk or folder, click on Examine... and select the new target path. Anytime after installation the database location can be changed with the menu option Configure Database Location. Important: The program should not be installed to the root folder. Important: If you are using any older version of SuperSPC do not select the same folder for the new installation or they will stop working. Although the 2012 version can coexist with older versions in the same PC (as long as they are installed on different folders), databases are neither forward nor backward compatible, therefore each version should keep their own databases. Important: It is always recommended to install on a new or empty folder. If you had previously installed version 2012 on the computer, the installer program will prompt you to uninstall and then install again. If U s e r M a n u a l 34 SuperSPC ® v.2012 there is a useful configuration database in your system, make a backup copy of the SCEP2012.MDB file before uninstalling, even though this file will not be deleted nor the data folders created by the system. Please write down any other configuration settings like color or printer preferences to re-establish them manually after reinstallation because the installer will reset them. After reinstalling, restore the SCEP2012.MDB file, run REPAIR.EXE and click the Repair MDB button. 8. Confirm the installation of SuperSPC v. 2012. 9. The installer will do what is necessary to copy and register the system in Windows. 10. Finally a shortcut icon will be created on the desktop and a message announcing the success of the installation will appear. U s e r M a n u a l 35 SuperSPC ® v.2012 11. On Windows Vista, 7 or 8 some additional steps are necessary. When running the program you will see Status: EXPIRED and no Installation # number. 1. 2. 3. 4. 5. 6. 7. Close SuperSPC Find the application Computer\Disk C\Program Files\SuperSPC2012\Scep2012.exe Right click and select Properties Select the Compatibility tab In the Privileges frame check Run as an Administrator Click OK SuperSPC will now run normally showing Status: EVALUATION and the Installation # number (if already personalized). This procedure needs to be performed only once and can be reverted after the software license is registered. 12. If your computer does not have a Crystal Reports 9 or higher viewer you must install it from the original CD with the CR9RT.MSI file. The process is very similar to the one just described. If the installer reports an error please verify if your system meets the following requirements: a) Administrative permission to install software. b) Minimum hardware requirements, specially enough RAM and hard disk space. c) No other application, screen saver, toolbar or antivirus open. 3.3 Downloading the program from the Internet SuperSPC is being constantly improved. If your user license is at the free update period, then you can download the most recent revision from, http://www.supercep.com.mx/SuperCEP/download2012.htm There you will find the installer package SCEP2012.msi. Save it to your PC and run it. Then follow the directions as explained before. U s e r M a n u a l 36 SuperSPC ® v.2012 3.4 Personalization. When you purchase SuperSPC you receive a personalization CD that contains necessary information to validate your user license: Organization Name Serial Number License quantity Purchase date After installing the software you must copy the contents of this CD to the installation folder on your PC to be able to use the system without limitations. If the message "This demonstration only accepts 100 samples” appears when capturing data then you have not personalized your system. 3.5 Installation on a Network. Important: To use the system beyond the evaluation period on more than one computer of the same organization it is necessary to have additional user licenses or an open user license. For more information please contact your authorized distributor. 3.5.1 Placing the executable files. There are three possibilities to access the main program (SCEP2012.exe): a) Run from a local folder. It is the default method and the shortcuts to the program are configured this way after installation. Each PC has its own copy of the program, auxiliary files, library components and dependencies. The advantages of this method are faster program loading and the independence of separate PC based settings like colors, fonts and graphics preferences. Local loading does not limit the possibility to connect to a shared database or data server (read ahead). The main drawback is that when it is necessary or desirable to update the software it will have to be reinstalled on every PC. b) Run from a network location. It has the main advantage that it simplifies the installation of revisions because only the installation at the network location has to be updated. Important: At first, the system needs to be installed locally on every computer where it is intended to run even though later it will be redirected to run from a server in the network. After the default installation the shortcuts should be manually redirected to the network location. To help users avoid running U s e r M a n u a l 37 SuperSPC ® v.2012 a possibly outdated local copy of the program it is recommended to hide the local installation from them. c) Run from an application server. The system runs effectively inside application server environments like Terminal Server and Citrix. The implementation details and performance warranties should be obtained from the servers suppliers. 3.5.2 Placing the MS Access (Jet) compatible Database. The system includes all necessary components of the Jet 4.0 database engine which makes it compatible with Microsoft Access 2000 MDB files (MS Office or Access not required). There is a main Configuration database (SCEP2012.MDB file) that gives access to a set of mdb files that the system creates one by one when there is a demand for a data sheet with a new combination of inspection format, machine and product. There are two options for the location of these databases: a) Each user has its own database. It is the default option because, after installation, the system points to a local database with example configurations and files. Warning: Since Windows Vista it is not a good practice to keep database files under the \Program Files system folder because the operating system usually will try to block writing operations. b) All users will share the same database. In this case a shared location in the network should be selected and every copy of the program should point to this location. This setting is done on the main menu bar in Configuration Database Location (read section 8.1). Windows users should have read, write, create and delete permissions over the network shared folder that hosts the database files. Commonly, the location of the main configuration database (SCEP2008.MDB) and the location of inspection data files will be the same, but it is possible to declare separate locations which can be useful in certain situations like saving data to removable mean. 3.5.3 Connection to a SQL Database Server. If the PC has access to SQL Server you can place your databases there enabling the option at the main menu Configuration Database Location (read section 8.1). Initially it will be necessary to create in SQL Server the main configuration database SCEP2012 and the samples database SCEP2012DATA. To do this we recommend using the migration tool Convert from previous versions that comes with your program. Select de MDB -> SQL tab and enter the connection information of your server. The user must have database creation privileges and the date format must match the locale of the SQL Server. For more details read the Database Appendix later on. As you open new data sheets, the system will create new data tables inside SCEP2012DATA database. There are up to three tables for each combination of inspection Format_Machine_Process. The table (Datos_) is for inspection data, the table (Log_) keeps a log of records modifications and deletions and the table Audit keeps a copy of deleted records. If you have datasheets from previous versions, first convert them to the current version in MDB Jet format (read section 3.6) before running the migration tool to SQL Server. If you want to have separate databases for different business areas, you can create them with distinct names inside SQL Server, for example SPCSite2 and SPCSite2DATA would be valid names for the main configuration and inspection data databases respectively. Remember to configure the new name (in this case SPCSite2) in the field Initial Catalog in the main menu Configuration Database Location. 3.6 Data migration from previous versions. U s e r M a n u a l 38 SuperSPC ® v.2012 If you are a user of previous versions of SuperSPC and wish to continue to use your main configuration and inspection data, it is necessary to run once the Previous Versions Converter program (CONV2012.exe) found in the SuperSPC 2012 program group. If you are going to use SQL Server to store your data you must first convert it from the previous to the current version in Jet format and then migrate it to the server. Read section 3.5.3. Your previous software version number is found on the main window’s title bar of your older system. The location of the previous databases will vary according to the version number and whether it was placed locally or shared on the network. This converter only updates the main configuration database (SCEP2012.MDB). The other databases corresponding to inspection data are recognized as older and converted automatically at the moment they are opened for the first time with the new version. It is recommended to copy all inspection data subfolders from the previous location to the new location instead of converting them directly from the old location, this is to maintain the possibility to open these older databases with the original version they were created. Important: In case you are migrating from version 2000 or Millennium it is necessary that all database folders be copied to a folder named MILLENIUM before opening them for the first time. 3.7 Entry to the system. To enter, double-click on the SuperSPC icon or use Windows Explorer to locate the executable file SCEP2012.EXE and run it. U s e r M a n u a l 39 SuperSPC ® v.2012 Wait for 5 seconds, press any key or click on the front page to make it disappear. If the message “A copy is already running” shows, press Cancel if you do not want a second copy of the program to load. If you press OK, the system will attempt to use an additional license, which might provoke the message “The maximum number of licenses has been reached” on limited licenses installations. You can easily switch from one copy to the other clicking on the windows task bar or pressing the <Alt><Tab> keyboard combination. After the front page disappears you will see the registration dialog window. 3.8 Registration Form and Copyright Protection. SuperSPC employs a registration system to protect your investment by guaranteeing that only the lawful licensees are able to use it after the evaluation period. U s e r M a n u a l 40 SuperSPC ® v.2012 On every computer the software is installed you will get a different installation number that you must register. If you do not see the installation number it means you have not copied the license personalization file. Please fill out and sign the registration form at the back of the User License that came with your User’s Manual and fax it to Ms. Selene Amador at telephone number (55)-5445-5390 to 92 in Mexico City. You can also e-mail an image of the filled format to [email protected] . A registration code will be given to you so you can operate the system without any limitation. Enter the 8-character registration code, press Register and then Continue. Important: If you own an older limited licenses version protected with hardware Sentinel locks, please return them to us so we can exchange them for the newer software registration protection. If you manage a larger network installation, it will make sense to automate the entry of registration codes on each PC. Use the windows Notepad to create the file SCEPCLAREG.TXT in the same shared folder where the main configuration database is found (SCEP2012.MDB). In this file create one row for each license you want to register. Each row should have the installation number and its corresponding registration code with the following format: “12345678”, ”A1B2C3D4” Upon entering the system at each unregistered PC it will look up its number in this file and register automatically. It is also possible to move a registered license from one PC to another. Contact our technical support if you want to do this. While the installation is not registered, the system will operate during 50 sessions clicking on the Continue button. After that, the label EXPIRED is shown. If your PC has Windows Vista and SuperSPC expires without showing the installation number, use the Program Compatibility Wizard to set the option Run with Administrator privileges for SCEP2012.EXE (read section 3.2). 3.9 Keyboard usage The program design uses the keyboard for introducing data in the input or configuration fields and to move through the data sheet with the arrows and pagers. To give commands and select options the mouse left button is used preferably, though the keyboard can also be used. The mouse and the keyboard should be used in a combination that is the most efficient for you. Most system windows can be closed clicking on the Control button located in their upper right corner. To end the application the combination <Alt-F4> can also be used. The <Alt-Tab> combination switches to another open application without closing the current application. Keyboard guide: Choose in List box Select in List box Delete in List box Click Button Change focus of Button or Field in Dialogue Change of Column Change of Row Access to Log notes Return to data sheet from log notes Shortcut to a Menu Option Indirect access to a Menu Option Exit a Menu Access to a window control Access to chart buttons Return to previous window Close window U s e r < Initial letters> <Enter> <Shift - Horizontal Arrows> <Backspace> or <Del> <Enter> <Tab> or <Shift-Tab> <Enter> or <Horizontal Arrows> < Vertical Arrows> or <PgUp> or <PgDn> <Tab> <Shift-Tab> <Alt - underlined Letter> <Alt> <Horizontal Arrows> <Enter> <Esc> <Alt - Space> <Tab> or <Shift-Tab> <Alt-F6> <Alt-F4> M a n u a l 41 SuperSPC ® v.2012 Though it is not mandatory, it is recommended to operate the system entering the information in CAPITAL LETTERS to avoid confusion with element codes. See the Configuration chapter. 3.10 The Main Menu The Main menu is located at the first row of the system’s main window just below the title bar. Some menu options will be disabled depending on the rights of the logged user or the part of the system that is being used. The menu consists of the following options: Configuration ALT-C: Access to general configuration options and to the database that will store all definitions of the elements of statistical process control. Consult chapter 5. Graphs ALT-G: Permits the elaboration of the charts authorized for the current user and pertinent to the current characteristic. Consult chapter 6. Reports ALT-R: Permits the elaboration of the reports authorized for the current user. Consult chapter 7. Miscellaneous ALT-V: Access to communication utilities, data entry options and external programs. Information ALT-I: Direct access to documents associated with a column of the inspection format. Consult Chapter 5 in the Product Characteristics section. Data ALT-D: Permits to import, export and backup sample data. Consult Chapter 4. Rows ALT-O: Maintenance options for the sample data of the inspection format. Consult Chapter 4. Windows ALT-W: Permits to organize different active chart windows on the screen. Help ALT-H or F1: On line help screen of this handbook. Additionally you can configure links to other programs by editing the MENU.IAU file. You can put these links on the Main menu or on the Graphs, Reports or Miscellaneous menus. Write the link title, the name and complete path of the external program under the corresponding section and the word PATH or NOPATH if you wish or not to send a command line containing the identification codes of the data sheet and current characteristic to the linked program. U s e r M a n u a l 42 SuperSPC ® v.2012 4. DATA INPUT. Important: If the system reports a 3709 error “Invalid operation.... closed connection” it means that the database was not found at the location defined in the system. This location is set when the program is installed but can be modified at menu option Configuration Database Location. This problem can also be solved by reinstalling the system or by editing with Notepad the text file SCDIREC.IAU which contains either the access paths to the folders where the main configuration and inspection data databases reside o the access parameters to the database server. The system can handle different databases at different locations. 4.1 Selecting the User Each person that requires using the system must have a registered code. The users configuration defines the rights and capacities of each person within the system. Use the mouse to select a user on the list box or type the user code (for example SUPER password “……”) and press Enter. Important: If at this point the Users list box is empty you will not be able to enter the system. Still you can run the Database Configuration module typing SCEP2012.EXE PASSWORD at the Windows Start Run dialog. Type the database general password, create a new user and assign him to at least one station. All users have the possibility to change their password as many times as they require. New passwords must be at least 6 characters long. If your system has the electronic records security option enabled, the user will have to modify his password at least every 3 months. Additionally his account will be blocked after 3 failed consecutive access attempts. System administrators will be notified of these events by e-mail. The image shown can be replaced with any other in BMP, JPG or GIF format replacing the file Image\RECEPCION.JPG. Another way of replacing the image is by enabling the Configuration Map Edit option, opening any folder where your images are found, selecting one and dragging and dropping it over the previous image. SuperSPC will copy the image to the folder indicated in the SCDIREC.IAU file. 4.2 Selecting the Station The Station term is used as synonymous of Area or Department. Depending on the user, the system will display a window with the different stations to which he is assigned. Also, a map is shown that can be configured to show the layout of the different stations in the organization (see section 4.17). To change this image you must replace the PLANT.JPG file by any other file in BMP or JPG format. The location of the Stations within the plant map can be modified dragging and dropping the labels with the mouse. For this it is necessary that the User has the Config. Map right and the Configuration Edit Map menu option activated. U s e r M a n u a l 43 SuperSPC ® v.2012 To enter a Station use the mouse in the list box, type the code and press Enter or click on the label on the map. If the user is not related to any station, the stations list box will appear empty. In this case select a user with rights to configure, enter the configuration module and connect a station to the user. Leave the configuration module and select the user again to display its new stations list. 4.3 Selecting the Machine The Machine term is used as synonymous of Production Line, Equipment, Work Place or Department. The system displays in the list box and on the map the different machines that are found inside a station. The disposition of each machine is shown with a color code (read section 4.17). The image that appears as a map is configured in the Map field of the Stations catalogue. The location of the Machines within the Station map can be modified dragging and dropping the labels with the mouse. For this it is necessary that the User has the Config. Map right and the Configuration Edit Map menu option activated. U s e r M a n u a l 44 SuperSPC ® v.2012 Select it or type the machine code on the list box or click on the map over the desired machine. If the list box is blank, configure at least one machine for the current station. 4.4 Selecting the Product The system displays on the list box and in the map the different products or processes for the machine. The image that appears as a map is configured in the Map field of the Machines catalogue. The disposition of each product is shown with a color code (read section 4.17). The location of the Products within the Machine map can be modified dragging and dropping the labels with the mouse. For this it is necessary that the User has the Config. Map right and the Configuration Edit Map menu option activated. If the list box is blank, configure at least one product for the current machine. Select it or type the product code on the list box or click on the map over the desired product. 4.5 Selecting the Format A format holds the different measured or surveyed characteristics of a process or product. Different formats can be configured for the same product according to the type of test accomplished. The system displays on the list box the different applicable formats for the product. In the map the characteristics of each format are shown. The disposition of each characteristic is labeled with a color code. The image that appears as a map is configured in the Products catalogue Map field. The location of the Characteristics within the map of the Product or Process can be modified dragging and dropping the labels with the mouse. For this it is necessary that the User has activated the Config. Map right and the Configuration Map Edit menu option. If the list box is blank, configure at least one format for the current product. Type the format code or select it with the mouse on the list box or on the map. U s e r M a n u a l 45 SuperSPC ® v.2012 4.6 Opening the Data Sheet Once the User, Station, Machine, Product and Format are selected, the program locates the Inspection Data file and presents it on the screen. Important. If you receive the message Repair MDB, it is because the database is not updated with respect to your program. Exit the program and execute REPAIR.EXE. Press the Repair MDB button. Try to open the data sheet again. In this point you can have the following situations: 1. The data sheet has never been used and will be created for the first time. 2. The data sheet has been used in a previous version that requires automatic conversion. 3. The data sheet has been used, but it has suffered structure changes, that is to say that a characteristic has been incorporated, eliminated or relocated. The existing file will proceed to a reconfiguration. The process takes a time proportional to the amount of existing data. 4. The file has been used before and has not suffered structure changes since then. The activated file will be displayed in the form of matrix in the central part of the screen. 4.7 Data Sheet Description Each Machine/Product/Format combination has a corresponding data sheet that is created physically the first time the combination is selected. The columns that conform each sheet are determined by the existing definition of each particular format in the Characteristics table of the Configuration module. A sheet can contain a maximum of 250 columns and 999,999 rows. The quantity of data sheets is not limited. In the tabular data sheet, each row will represent a sample (identified with progressive number, date, hour, shift and operator) and each column will represent a characteristic of that sample. The first four columns are fixed at the beginning; that is to say, they cannot be modified and normally are filled automatically: U s e r M a n u a l 46 SuperSPC ® v.2012 1. 2. 3. 4. Sample consecutive number. Sample acquisition date and time (d/m/yyyy hh:mm:ss format). Corresponding shift. Code of the user that inspects the sample. The date and time are obtained from the calendar-clock of the computer. The shift is displayed according to the scheduled configuration for each shift. Cursor movement within the sheet is achieved using the arrows and pagers of the keyboard (do not use the tabulator) or putting the pointer of the mouse on a cell and clicking. When the number of columns and/or rows exceeds the capacity of the screen, scroll bars appear with an interior button which permits the positioning on any zone of the sheet. It is not possible to put the cursor beyond the last row. The header of each column shows the characteristic code to control and upon changing columns its configuration parameters are shown in the lower part of the screen. To edit or add any of these parameters, go to the Product Characteristics table of the Configuration module. The data shown at the bottom is: Configuration shortcut button. Column number. Column position, characteristic description, target value and measurement unit. Input type (Keyboard, Connection or Formula). Calculation formula or automatic input connection. Specification Limits. Type of statistical analysis (Variable, Attribute, Disposition or Not to Analyze). Critical Category (Minor, Major or Critical). Size of the statistical subgroup. 4.8 Data input Data can be introduced directly or received automatically from a measurement instrument and will be registered in the cell that has the cursor. Also indirect measurements can be obtained through calculation columns. U s e r M a n u a l 47 SuperSPC ® v.2012 Important: The functions that are explained in this section require that the user have the Input, Erase and Vertical Movement rights activated. In the columns with Variable or Attribute analysis type the sheet accepts numerical values of up to 9 characters including the decimal point (use the point or the comma according to the regional configuration for Windows). Do not use exponential notation. In columns with Disposition analysis type you can type up to 7 characters beginning with an A for accepting or with an R to reject. In the columns Not to Analyze you can type any character. If the column is of type Disposition or Not to Analyze, and was configured with Width = 2, up to 14 characters can be accepted. The cursor movement after introducing a datum is obtained pressing <Enter>. The cursor will be displaced to the right or downward depending on the Down checkbox in the Product Characteristic configuration. When the captured number provokes a sound and disappears is because it is not accepted by the system due to the fact that the input limits hinder the introduction of absurd data far from the specification. These limits can be consulted and modified in the Product Characteristic table of the Configuration module. The identification data (date/time, shift and operator) as well as the columns with free input type appear in black foreground color. Upon capturing the first datum of a row, it becomes automatically identified with Date, Time, Shift and Operator. The shift is obtained using the time of day. The schedule can be edited using the Configuration Shift Edit option from the main menu. The automatic identification of each sample (row) can be modified manually using the Misc Edit Date Time menu option. The only limitation for changing the date and time is that the chronological order of the samples must be observed. If for any reason the samples are not ordered by date and time, leave the data sheet, re-enter again and then use the Row Renumber option. If the sheet does not accept or alters data with decimal point, it is because in some versions of Windows the decimal separator is a comma instead of a point (.), such as it is used in Europe and some countries of South America. To amend this situation select Misc Control Panel from the menu and choose the International or Regional icon. DATA INPUT FROM A MEASUREMENT INSTRUMENT CONNECTION (SC VERSION ONLY). To receive data on a column directly from a measurement instrument it is necessary to configure it as Connection Input Type. To input the data, place the cursor on the appropriate cell and press de data send button of your instrument. The correct reception of data depends on the connection being well configured according to the hardware communication parameters and data format of your instrument or measurement equipment. For more information read chapter 5 about the configuration of Product Characteristics. If you plan to massively collect data from one or more measurement instruments or even other monitoring software applications it can be more convenient to use some of the included data acquisition accessories available explained on the chapter about Data Acquisition Modules. 4.9 Color Codes Sample data is shown in green when it is within the specification or in red otherwise. Sample data in black color are labels that do not need to be analyzed statistically. If the quality characteristic is at the control stage (read section 5.3.12), cells are shown with a gray background if the value falls within the statistical control limits of the means or individuals control chart or with a yellow background otherwise. In case the column is declared for grouped data (subgroup size greater than 1), if a subgroup average is out of control limits, only the individuals falling outside the limits are shown with a yellow background. Therefore an individual value on a gray background does not necessarily indicate that the subgroup it belongs to is within control limits. The sample or row numbers are color coded according to the following situations of the current record: U s e r M a n u a l 48 SuperSPC ® v.2012 Green Foreground Red Foreground Gray Background Yellow Background All characteristics are within specifications. One or more characteristics are out of specifications. All characteristics at control stage are within statistical limits of the means, individuals and ranges chart. One or more characteristics at control stage fall beyond statistical limits of the means, individuals or ranges chart. The sample or row number color code updates every 20 minutes or when the user re-enters the data sheet. All other color updates are instantaneous. If you have been configured as a Supervisor of the product or process in question, you will see these colors also in the Date/Time, Shift and Operator columns indicating that you have not supervised these samples. To supervise the samples click on any of these fields. 4.10. Log Notes Each sample or row accepts a log note, commentary or observation. Place the mouse pointer and click on the field that is located immediately below the columns. It is possible to show these log notes on control charts enclosing a text fragment between parenthesis (). If the commentary is only applicable to some of the characteristics, type @ and the characteristic code before the commentary. The available space to type log notes is of 1000 characters per row. To save the note and return to the data sheet click on any cell. 4.11. Saving data In this system it is not necessary to save the sample data captured in the sheet, since each one is recorded automatically. However it is always advisable to close the program before turning the computer power off or not using the computer for a long time. Important: For efficiency reasons, SuperSPC only updates the database when the cursor changes rows or when the data sheet is properly closed. If you input or modify a value at any row but do not move the cursor to another one, then the changes will not be committed to the database, charts or reports. This is why, it is recommended to always advance the cursor to the next row immediately after entering one sample. 4.12. Recalculating formula columns SuperSPC recalculates the cells from formula columns each time that one its factors changes or when the cursor travels vertically through the column. Nonetheless, if there has been a change of the formula definition and there are a lot of samples that need to be recalculated it will be better to use the Rows Recalculate menu option to update the results automatically. 4.13. Delete and Insert To erase an individual cell, type a space and then press <Enter>. To erase one or more rows, select Rows Delete and indicate the range to be deleted. Note: For Audit Trail purposes, the system stores a copy of all previous values and deletions with a log record of the user and the time stamp when these changes occurred. To delete a column you should eliminate it from the format structure at the Format Characteristics table in the Configuration module. It is important to note that upon modifying the structure of a Format, all the products that use that Format will be modified. The columns will not be eliminated physically but will be kept hidden from the users. You can selectively delete rows using a SQL Filter. For more information consult the Charts chapter. If you have deleted a great amount of data you can compact and optimize the database with the REPAIR.EXE utility. U s e r M a n u a l 49 SuperSPC ® v.2012 Important: Any deletions are executed immediately therefore they can't be undone. To insert one or more rows, first place the cursor on the insertion point and then select Row Insert to indicate the number of lines to be inserted. To insert a column add it to the structure at Format Characteristics in the Configuration module. This will affect all the data sheets of the products that use that Format. 4.14. Ordering Data SuperCEP charts and reports only operate correctly with samples ordered by date and time, therefore each time you enter a Data Sheet the system orders it automatically. In exceptional cases this can cause disordered sample numbers. Use Row Renumber to amend this situation. This option is disabled if your system enforces the electronic records security directives to maintain the traceability of the Audit Records. 4.15. Data Search In the Data menu, the Search in this column and Search in the database options allow to locate numeric or alphabetic data in one column of the current data sheet or in the whole database respectively. 4.16. Data Export and Import It is possible to capture data transporting it from other applications (import). The import procedure using the Windows Clipboard follows: Enter the application of the original data. Select the data that you wish to transport. Copy your selection to the Clipboard with Edit Copy. Enter SuperSPC. Place the cursor on the insertion cell. U s e r M a n u a l 50 SuperSPC ® v.2012 Select the Data Paste from the Clipboard menu. Check that correct information to be pasted appears in the textbox. Click Paste. The insertion point can be placed at the end of the sheet or on any intermediate row. In this last case the imported data will be overwritten on the previous one. SuperSPC data can also be annexed from files located in other folders or disks provided that they share the same format. For this use the Data File Import menu. The data export process from SuperCEP can use the Windows Clipboard or a disk file. Select the Data Copy to Clipboard or External File menu options, indicate the type of separator (most Windows applications can read data tables separated by TAB and those of MS–DOS separated with COMMA), the rows range, the columns selection and the name of the output file in disk with its extension according to the application that is going to receive the data (.xls for Excel, .doc for Word, etc.) You can copy the content of a column to other column of a different data sheet. To do this, use the Data Copy and Data Paste options in the main menu. If the file that receives the information is empty, the necessary rows are created. When the file already contains information, then the new data is inserted in its position corresponding to the date and time of each sample. 4.17. Data backup To make a backup of the data sheet use the Data Backup option. The backup can be made on any removable media (diskette, memory card, etc.) or on a local or network hard disk. The backup is limited to the current data sheet and to the available space in the backup media. This type of backup has the advantage that it can be read directly without the need of restoring it to the original disk changing only the path to the inspection data access in Configure Database Location. The configuration database is stored in the SCEP2008.MDB file. This file must be manually backed up regularly. If you need a massive backup of your data, use some backup tool and include the programs, configuration and inspection data folders. 4.18. Supervision SuperSPC implements a supervision mechanism to allow the medium and higher ranks of the organization fast navigation from the more general to the more specific information about those quality characteristics that might be giving trouble at a particular moment. U s e r M a n u a l 51 SuperSPC ® v.2012 The mechanism works in the following way: The supervisor enters the system and he sees a map with the different stations he has access to. Each label is color-coded in a similar way to that explained in section 4.9: Green Foreground Red Foreground Gray Background Yellow Background All characteristics of all products accessible from this station are within specifications. One or more characteristics of one or more products or processes accessible from the station are out of specification. All characteristics on the control stage of all products and processes accessible from this station are within statistical limits on their means, individuals and ranges charts. One or more characteristics of one or more products and processes accessible from the station are out of statistical limits on their means, individuals and ranges chart. When the supervisor chooses a station, the map changes to show the machines or departments associated with it. The color of each label indicate if there are products or processes realized in those machines with quality characteristics with recent problems on specifications or statistical control. In the same manner when the supervisor selects a machine or department the color labels of its products and processes are displayed. Finally, when the product is selected, the labels of all the quality characteristics defined for the product or process are shown and from the color code it can be known which of them are having recent trouble. The criteria to consider recent data is 7 days by default but it can be modified for each process at the characteristic configuration (read section 5.3.12). Label colors are updated when users modify and close the data sheets, therefore some labels could remain “on” if its data sheet has not been modified recently. If the user is a supervisor, he can see next to the label a number indicating the amount of products or processes with recent data out of specification or out of statistical control that he has not yet checked out. With this indication the supervisor can follow those labels with numbers to reach the specific sample characteristic that caused the message. To check out the problem sample it suffices to click on its identification columns (n, date/time, shift or operator). For a user to be considered a process supervisor he has to be declared as such at the product characteristics configuration (see section 5.3.12). U s e r M a n u a l 52 SuperSPC ® v.2012 5. CONFIGURATION Grouped in this menu are the options to personalize the system operation. 5.1 Database. Why is the need to Configure? Configuration consists of the definition of a logical structure that will enable SuperSPC to identify and label each data point it receives. The system will be able to decide if the datum is accepted or not, who is the operator that inputs it, to which process and machine it belongs, if it is in or out of specification limits, etc. Configuration is one of the most important activities within the system. It will have to be accomplished by all the personnel that is directly involved with the Process Control carried out in any company; as for example: the quality control supervisors, productivity, manufacturing, warehouse, materials control, quality assurance, etc. This activity encompasses all the areas, processes, stations, machines, products, characteristics, measurement instruments, etc.; that intervene in the statistical analysis that is intended to be carried out with SuperSPC. To use the system, it is first necessary to configure it to later be able to incorporate the sample data of all those characteristics that require control. To configure means to plan and to define the precise location and identification that each sample datum that arrives to the system will have. The effort invested in this initial configuration is fully compensated by the timesavings, ease of use and secure routine operation. All those elements as products, materials, processes, etc, should be registered with their characteristics or variables that are going to be measured and inspected. Also, you will have to register those users that will operate the system with their access levels, and incorporate the technical data of the variables to be measured, such as: definition of the type of statistical analysis to be made by attributes or by variables, the batch size or subgroup size, the specification limits, etc. Finally, it is important to mention that in order to trace the origin of data more accurately, you have the option to tell the system what production line, machine, work area and suppliers the data comes from. Before starting to configure, you should gather all the necessary information that match as closely as possible the configuration of your workplace. Once all the information is gathered, we proceed to input it into the Configuration tables. We must emphasize that on the care and order that we apply on the configuration depends the ease that the operators will perceive using the system, and though it is hard work, it has to be carried out only once and the rest will be only operation. U s e r M a n u a l 53 SuperSPC ® v.2012 U s e r M a n u a l 54 SuperSPC ® v.2012 CATALOGUES USERS. They are the people that require access to the system. They will need a registered code and password in this catalogue to work in the system. The access level to the system facilities (querying, editing, printing, etc.) for each user is given here. At least one of the users will be responsible for controlling the access of the others. STATIONS. A station is a physical work area where the product, material, component, etc., is manufactured and inspected. Each station receives a unique code (For example: PLant, incoming MAterials, INyection, PResses, ASsembly, etc.). MACHINES. All the production lines, machines or departments, responsible for the production or the supply of any part, product, material, etc., are registered in this catalogue with a unique code. PRODUCTS. Each product, raw material, part, subassembly, component, process, etc., that you wish to measure or inspect will have a unique code in this catalogue. FORMATS. One or more quality characteristics of the same part, product or process, will be included or grouped into a sheet, template or inspection screen designated as Format. Every format should have a unique code. CHARACTERISTICS. Characteristic is the variable, inspection attribute or identifier that is going to be measured, inspected or established for any sample of product or process. All characteristics are registered in this catalogue with a unique code. CONNECTIONS. In this option the equipment and/or instruments that can be connected to the system through serial ports (RS-232) or Ethernet adapter (TCP/IP) appear. The connection will allow immediate transfer of the readings provided by the equipment or instrument to SuperSPC for its automatic processing and storage. INFORMATION. The use of this catalogue is optional. It is employed to fill the content of texts that can be shown automatically when the sample data indicate situations or trends out of specification or statistical control. These notices will be directed to operators to help them take corrective actions and to activate alarms and control procedures. General information or instructions about process settings can also be registered here to be viewed at the Information menu. RELATIONS USER STATIONS. In this option the system receives indication of each user location according to the workstation where he works, in order to have access and analyze the information of his area or department. The same user can access several stations. STATION MACHINES. Every machine, production line or department should be assigned to a station. MACHINE PRODUCTS. In this option you should relate every product to the machine that manufactures it and every process to the department that carries it out. The system will display only the appropriate products or processes when a user accesses a particular machine or department. PRODUCT FORMATS. These are the data sheets or templates that are suited for the inspection of a particular product or process. FORMAT CHARACTERISTICS. A format is made up of quality characteristics. Every characteristic generates a column (a field in a database table) where data is entered. The position and width of each column on the screen is defined here. PRODUCT CHARACTERISTICS. This table keeps record of all measured or inspected characteristics of a product, material, etc. The system requests technical data of these characteristics, such as specification limits, batch or subgroup size, decimals, input mode (keyboard, connection to an instrument or formula), among others. U s e r M a n u a l 55 SuperSPC ® v.2012 When the system is installed, a set of example tables are copied which are useful in the initial system explorations. When the example is no longer needed, it can be erased table by table as is explained below. 5.1.2 Entering the Configuration Module Enter the program and select user SUPER. Click on the Configure Database menu option. If this option is not enabled try with another user. If no user enables this option you will have to exit the program and run it directly with the command SCEP2008.EXE PASSWORD. Add at least one user with configuration rights. The configuration screen displays: At the upper part you will find the fields that indicate the selection of User, Station, Machine, Process, Format and Characteristic. At the lower part there is a table showing the user catalogue with a blue foreground. If your screen looks different click on the user field over the word SUPER. 5.1.3 USERS Catalog. Important: This section is not accessible to users with the User Conf. option disabled. To find a user press key F5 and next the first letters of his code. When it is shown in the table press the tab key to place the cursor on it. To add a new user place the cursor on the blank row at the end of the table (marked with an asterisk *) at the first column titled Code (8). Type a user code employing only capital letters or numbers without spaces. The code can have up to 8 characters. Take note that, when editing, the asterisk moves downward and a pencil appears in its place indicating the edition in progress. To cancel the edition press <Esc>. Press <Enter> to advance to the next column titled Name (30). Type the name of the User with up to 30 characters. To finish editing place the cursor on the next row (now marked with the asterisk *). The pencil will disappear indicating that a new User has been registered with default options. Important: If the message "[ ] invalid Character in code …" appears, verify that all the characters of the user code are letters, numbers or #$% - . The spaces in any position are interpreted as characters. Important: If the message "Value duplicated …" appears, verify that the code of the element is not already registered in this catalogue. U s e r M a n u a l 56 SuperSPC ® v.2012 If you wish to delete a record from the catalogue, click in the corresponding line and then click on the button on its left side. The line will be marked in a black background. Press the <Del> key. It is not possible to delete a user or edit his name if the system has the electronic records security option enabled. To modify the content of a field from a previous record without retyping it completely, place the cursor over the field, select it (blue background) and press F2. You can also modify the user options putting the cursor on the table on the user row. The User field at the top left will change to indicate the current user. Press the button on the left titled User to enter the User Configuration window. Fill this form according to the following explanation: PASSWORD. Up to 12 hidden characters. It is very important to memorize the password since it is necessary to access the system. The default password for a new User is .. (dot dot). Any password with less than 6 characters can be used only once, forcing the user to change it secretly. If the system has the electronic records security option enabled, the password will expire 3 months after the date shown in the From field. STATUS. Only Active users can gain access to the system. Blocked users can be reactivated by an administrator. Disabled users can be reactivated except when the system has the electronic records security option enabled. PROFILE. Optional. Enter the code of a virtual user that will serve as a model to assign the necessary rights to the current user. When adding a new user you can link him to a profile bypassing the need to declare his rights because those properties will be taken from the profile. E-MAIL. Type the user’s e-mail address. GRAPHS AND REPORTS. Check the boxes corresponding to the graphs and reports that the user is authorized to obtain from the system: Graph Description X-R Control Chart Means and Ranges Chart or Individuals and Moving Ranges Chart Means and Ranges Charts or Individuals and Moving Ranges Charts of several characteristics in one window Means and Ranges Chart or Individuals and Moving Ranges Chart for one characteristic stratified based on the content of another Means, Moving Ranges and Ranges Chart Means and Standard Deviations Chart Exponentially Weighted Moving Averages Chart (EWMA) Individuals Maximum and Minimum and Moving Ranges Chart Means Control Chart with subgroup maximum and minimum amplitude lines. Grouped by period Process Control Chart by direct comparison with specification limits Attributes Chart of Non-Conforming Fractions (variable sample size) Attributes Chart of Non-Conforming (constant sample size) Attributes Chart of the number of Non-Conformities Attributes Chart of the number of Non-Conformities per Unit Frequencies Distribution Histogram and Process Capability Study (Cp y Cpk). Normal or Non-Normal Distributions. Frequencies Distribution Histogram and Cpk of several characteristics in one window Frequencies Distribution Histogram and Cpk for one characteristic stratified based on the content of another Whisker Box diagrams representing the probability distribution of several characteristics in one window Whisker Box diagrams representing the probability distribution for one characteristic stratified based on the content of another Stacked Bar Graph showing the Cp and Cpk level of several characteristics X-R Control Multiple X-R Control Strata X-Rm-R (3D) Chart X-S Control Chart EWMA Control Chart Group Chart Maximum Minimum Rainbow Chart Attributes P Chart Attributes nP Chart Attributes C Chart Attributes U Chart Capacity Study Collective Histogram Stratified Histogram Collective Whisker Box Stratified Whisker Box Capability Summary U s e r M a n u a l 57 SuperSPC ® v.2012 Linear Regression at different periods Evaluation Report of inspection approval of weight or volume content under government regulations Accumulated Frequencies chart on a Normal Probability scale, Whisker Box, Median and Quartiles and Frequencies Histogram Lot Acceptance Sampling by Variables according to Military Standard 414. Lot Acceptance Sampling by Variables according to ANSI ASQ Z1.9 2003. Lot Acceptance Sampling by Attributes according to Military Standard 105E or ANSI ASQ Z1.4. Lot Acceptance Sampling by Attributes according to Military Standard 1916. Diagram, curve and tabulation of the number of non-conformities for a group of characteristics in decreasing frequency or cost-impact magnitude Diagram, curve and tabulation of the number of non-conformities for a group of free-coded characteristics in decreasing frequency or cost-impact magnitude Fit and linear correlation between two original or transformed variables Report Description Data Sheet Report of sample data points and its descriptive statistics Report of the Mean, Standard Deviation and Range of grouped sample data points. Printing of Quality Certificates from sample data Report of the number of non-conformities conformities for a group of freecoded characteristics in decreasing frequency or cost-impact magnitude Consolidated report of out of specification data points and process log notes Consolidated cross tabulation of non-conformities by Process and Machine Consolidated report of Process Capability Indexes Content Regulation Normality Study Variables Sampling 414 Variables Sampling Z1.9 Attrib. Sampling 105E/Z1.4 Accept. Sampling 1916 Pareto Chart Free Pareto Chart Subgroups Certificates Easy Pareto Log Notes Non Conformities Capability RIGHTS. Check the boxes corresponding to the capacities or rights that the user has in the system: Right Description Configure Right to add or edit any configuration element except Users and Users Stations. Access to the definition of the type and location of the database, printer setup, U s e r M a n u a l 58 SuperSPC ® v.2012 User Configure Maps Configure Chart Configure Erase Capture Print Vertical Movement Real Time Process Change Miscellaneous Menu Reports Menu Alarm OK Select shifts schedule and operation language. Permission to register or edit new Users and their access to Stations. Permission to change images and modify the position of labels on the Plant, Station, Machine and Product maps. Permission to define parameters and options for graphs. Permission to delete or modify sample data. Time window for modifying in minutes. Permission to enter new sample data and row insertions. Permission to print graphs and reports. Permission to move to other rows on the datasheet apart from the addition row. Enabled charts will be automatically presented to the user immediately after the sample is captured or as he moves across the datasheet. Not recommended if the user has more than 3 active graphs. Only available on SC version. Permission to switch to another datasheet different from the current one. Access to the Miscellaneous menu where sample date or time can be edited, datasheet columns scroll fixed, serial connections disabled, etc. Access to the Reports menu. Authorization to unblock an alarm message from a control chart. This is an additional right to the one granted to the 4 supervisors declared at each machine process. Access to the dialog window to select and filter data to include in charts and reports. INITIAL AND FINAL POSITIONS. Allows user access to a limited section of the datasheet between these two positions. Introduce numeric values from 0 to 9999. To finalize press OK to record and go back to the previous screen. You can preview and print a Users Report pressing the Listing button and then Prepare. 5.1.4 STATIONS CATALOG. Once the new User is added, go on to add a new Station. Click on the Station field located on the top left under the User field. Two tables show at the lower part of the window. The left table with blue foreground is the Stations catalog. To find a station press F5 and then the first few letters of the code. When the table scrolls to the appropriate code press Tab to put the cursor on it. U s e r M a n u a l 59 SuperSPC ® v.2012 To add a new Station place the cursor on the blank row at the end of the table (marked with an asterisk *) at the first column titled Code (4). Type a station code employing only capital letters or numbers without spaces. The code can have up to 4 characters. Take note that, when editing, the asterisk moves downward and a pencil appears in its place indicating the edition in progress. To cancel the edition press <Esc>. Press <Enter> to advance to the next column titled Station (30). Type the name of the Station with up to 30 characters. Press <Enter> to advance through the next columns. At the column titled Map you can optionally type the name of an image of the station. The image file should be in the BMP or JPG format at the Image folder. To finish editing, place the cursor on the next row (now marked with the asterisk *). The pencil will disappear indicating that a new Station has been registered. Important: Most catalogs have fields for writing alternate descriptions in Spanish and Portuguese. This information is optional and will be used in case you wish to obtain graphs and reports with titles and legends in these languages. If you wish to delete a record from the catalogue, click in the corresponding line and then click on the button on its left side. The line will be marked in a black background. Press the <Del> key. Important: When a station is deleted, all its connections to users are only disabled not deleted. To modify the content of a field from a previous record without retyping it completely, place the cursor over the field, select it (blue background) and press F2. You can preview and print a Stations Report pressing the Listing button and then Prepare. 5.1.5 USER STATIONS Relation. Important: This section is unavailable to users with the Users Config. option disabled. Once a new station is registered you should add it to the User Stations list that is shown at the right bottom corner of the window. If the user is also new the table will be empty. To add a Station finish any edition in progress (no visible pencil), click on the corresponding catalog row and press the F4 key. In the table at right a new row will appear with the station code and description. Double click can be used instead of the F4 key. Repeat this procedure for each station you want the user to have access to. Each user should have access to at least one station, except for those users that will only serve as profiles. One station can be assigned to several users. If you wish to delete a station from the User Stations list, click in the corresponding line and then click on the button on its left side. The line will be marked in a black background. Press the <Del> key. You can preview and print a User Stations Report pressing the Listing button and then Prepare. 5.1.6 MACHINES Catalog. When the user has a station assigned proceed to register a new Machine. Make sure the station field shows the code of the new station. Click on the Machine field located on the top left under the Station field. Two tables show at the lower part of the window. The left table with blue foreground is the Machines catalog. To find a machine press F5 and then the first few letters of its code. When the table scrolls to the appropriate code press Tab to put the cursor on it. To add a new Machine place the cursor on the blank row at the end of the table (marked with an asterisk *) at the first column titled Code (8). Type a machine code employing only capital letters or numbers without spaces. The code can have up to 8 characters. Take note that, when editing, the asterisk moves downward and a pencil appears in its place indicating the edition in progress. To cancel the edition press <Esc>. Press <Enter> to advance to the next column titled Machine (30). Type the name of the Machine with up to 30 characters. Press <Enter> to advance through the next columns. At the column titled Map you can optionally type the name of an image of the machine. The image file should be in the BMP or JPG format at the Image U s e r M a n u a l 60 SuperSPC ® v.2012 folder. To finish editing, place the cursor on the next row (now marked with the asterisk *). The pencil will disappear indicating that a new Machine has been registered. If you wish to delete a record from the catalogue, click on the corresponding line and then click on the button on its left side. The line will be marked in a black background. Press the <Del> key. Important: When a Machine is deleted, all its connections to Stations and Processes are only disabled not deleted. To modify the content of a field from a previous record without retyping it completely, place the cursor over the field, select it (blue background) and press F2. You can preview and print a Machines Report pressing the Listing button and then Prepare. 5.1.7 STATION MACHINES Relation. Once the new machine is registered you should add it to the Station Machines list that is shown at the right bottom corner of the window. If you are at a new Station then the table will be empty. To add a Machine finish any edition in progress (no visible pencil), click on the corresponding catalog row and press the F4 key. In the table at right the machine code and description will appear in a new row. Double click can be used instead of the F4 key. Repeat this procedure for each Machine pertaining to this station. Each station should have at least one assigned machine. One machine can be assigned to several stations. If you wish to delete a machine from the Station Machines list, click on the left side button of the corresponding row. The line will be marked in a black background. Press the <Del> key. You can preview and print a Station Machines Report pressing the Listing button at right and then Prepare. 5.1.8 PRODUCTS Catalogue. After the machine is assigned to a station proceed to register a new Product / Process. Make sure the machine field shows the code of the new machine. Click on the Process field located on the top right corner of the window. U s e r M a n u a l 61 SuperSPC ® v.2012 Two tables show at the lower part of the window. The left table with blue foreground is the Products catalog. To find a product press F5 and then the first few letters of its code. When the table scrolls to the appropriate code press Tab to put the cursor on it. To add a new Product place the cursor on the blank row at the end of the table (marked with an asterisk *) at the first column titled Code (16). Type a product or process code employing only capital letters or numbers without spaces. The code can have up to 16 characters. Take note that, when editing, the asterisk moves downward and a pencil appears in its place indicating the edition in progress. To cancel the edition press <Esc>. Press <Enter> to advance to the next column titled Product (40). Type the name of the Product with up to 40 characters. Press <Enter> to advance through the next columns. At the column titled Map you can optionally type the name of an image of the product. The image file should be in the BMP or JPG format at the Image folder. To finish editing, place the cursor on the next row (now marked with the asterisk *). The pencil will disappear indicating that a new Product / Process has been registered. If you wish to delete a Product from the catalogue, click on the corresponding row and then click on the button on its left side. The line will be marked in a black background. Press the <Del> key. Important: When a Product is deleted, all its connections to Machines, Formats and Characteristics are only disabled not deleted. To modify the content of a field from a previous record without retyping it completely, place the cursor over the field, select it (blue background) and press F2. You can preview and print a Products Report pressing the Listing button and then Prepare. 5.1.9 MACHINE PRODUCTS Relation. Once the new product is registered you should add it to the Machine Products list that is shown at the right bottom corner of the window. If you are at a new Machine then the table will be empty. To add a Product finish any edition in progress (no visible pencil), click on the corresponding catalog row and press the F4 key. In the table at right the product code and description will appear in a new row. Double click can be used instead of the F4 key. Repeat this procedure for each Product / Process realized in this machine. Each machine should have at least one assigned product. One product can be the outcome of several machines. If you wish to delete a product from the Machine Products list, click on the left side button of the corresponding row. The line will be marked in a black background. Press the <Del> key. U s e r M a n u a l 62 SuperSPC ® v.2012 You can preview and print a Machine Products Report pressing the Listing button at right and then Prepare. 5.1.10 FORMATS Catalog. After the Product is assigned to its Machine proceed to register a new Format. Make sure the product field shows the code of the new product. Click on the Format field located on the top right corner of the window. Two tables show at the lower part of the window. The left table with blue foreground is the Formats catalog. To find a format press F5 and then the first few letters of its code. When the table scrolls to the appropriate code press Tab to put the cursor on it. To add a new Format place the cursor on the blank row at the end of the table (marked with an asterisk *) at the first column titled Code (8). Type a format code employing only capital letters or numbers without spaces. The code can have up to 8 characters. Take note that, when editing, the asterisk moves downward and a pencil appears in its place indicating the edition in progress. To cancel the edition press <Esc>. Press <Enter> to advance to the next column titled Format (30). Type the name of the Format with up to 30 characters. Press <Enter> to advance through the next columns. To finish editing, place the cursor on the next row (now marked with the asterisk *). The pencil will disappear indicating that a new Format has been registered. If you wish to drop a Format from the catalogue, click on the corresponding row and then click on the button on its left side. The line will be marked in a black background. Press the <Del> key. Important: When a Format is deleted, all its connections to Products and Characteristics are only disabled not deleted. To modify the content of a field from a previous record without retyping it completely, place the cursor over the field, select it (blue background) and press F2. You can preview and print a Formats Report pressing the left Listing button and then Prepare. 5.1.11 PRODUCT FORMATS Relation. Once the new format is registered you should add it to the Product Formats list that is shown at the right bottom corner of the window. If you are at a new Product then the table will be empty. To add a Format finish any edition in progress (no visible pencil), click on the corresponding catalog row and press the F4 key. In the table at right the format code and description will appear in a new row. Double click can be used instead of the F4 key. Repeat the operation for each Format applicable to this Product / Process. Each product should have at least one format assigned. The same Format can be used with several products. If you wish to delete a format from the Product Formats list, click on the left side button of the corresponding row. The line will be selected with a black background. Press the <Del> key. You can preview and print a Product Formats Report pressing the Listing button at right and then Prepare. 5.1.12 CHARACTERISTICS Catalogue. Once a Format is assigned to the Process/Product proceed to register a new quality Characteristic. Make sure the Format field shows the code of the new Format. Click on the Charact field located at the right of the window under the Format field (click inside the field not on the button). Two tables show at the lower part of the window. The left table with blue foreground is the Characteristics catalog. To find a characteristic press F5 and then the first few letters of its code. When the table scrolls to the appropriate code press Tab to place the cursor on it. U s e r M a n u a l 63 SuperSPC ® v.2012 To add a new Characteristic place the cursor on the blank row at the end of the table (marked with an asterisk *) at the first column titled Code (8). Type a quality characteristic code employing only capital letters or numbers without spaces. The code can have up to 8 characters. Take note that, when editing, the asterisk moves downward and a pencil appears in its place indicating the edition in progress. To cancel the edition press <Esc>. Press <Enter> to advance to the next column titled Characteristic (30). Type the name of the Characteristic with up to 30 characters. Press <Enter> to advance through the next columns. To finish editing, place the cursor on the next row (now marked with the asterisk *). The pencil will disappear indicating that a new Characteristic has been registered. Important: Do not add characteristics with codes N, FECHA, TURNO, OPERADOR, BITACORA or FLAGS because they are reserved for the system internal operation. If you wish to delete a Characteristic from the catalogue, click on the corresponding row and then click on the button on its left side. The line will be marked in a black background. Press the <Del> key. Important: When a Characteristic is dropped, all its connections to Formats and Products are disabled but not deleted. When opening a data sheet having any of those Formats the corresponding column will be hidden. Sample data will show again if the characteristic is re-enabled with the same code and data type. To modify the content of a field from a previous record without retyping it completely, place the cursor over the field, select it (blue background) and press F2. You can preview and print a Characteristics Report pressing the left Listing button and then Prepare. 5.1.13 FORMAT CHARACTERISTICS Relation. When the new characteristic is registered you should add it to the Format Characteristics list that is shown at the right bottom section of the window. If you are at a new Format then the table will be empty. To add a characteristic finish any edition in progress (no visible pencil), click on the corresponding catalog row and then double-click or press the F4 key. In the table at right the characteristic code, position, width and description will appear in a new row. Repeat this procedure for each Characteristic that you wish to include in the Format. Each Format should have at least one Characteristic assigned and a maximum of 250. The same characteristic can be declared for several Formats. U s e r M a n u a l 64 SuperSPC ® v.2012 If you wish to delete a characteristic from the Format Characteristics list, click on the left side button of the corresponding row. The line will be selected with a black background. Press the <Del> key. Important: When a Format Characteristic is deleted, the corresponding column will be hidden when opening the data sheet but its data contents are not lost. You can preview and print a Format Characteristics Report pressing the Listing button at right and then Prepare. 5.1.14 PRODUCT/PROCESS CHARACTERÍSTICS Relation. The same Format Characteristics table serves the purpose of configuring the Product/Process quality Characteristics. Place the cursor at the corresponding row in the right-side table. The Character. field will show the Characteristic code and description. Press the Character button to show the Product Characteristic configuration window. Notice that the product characteristic is independent for each different machine. If specifications and process control parameters are the same for all machines, you can configure one and then conveniently copy and paste to the rest. Fill this form according to the following indications: POSITION. A number that determines the location of the column relative to the rest of the format columns. Defines accessible sections for users. WIDTH. Choose 1 to accept up to 8 characters in the column cells. Choose 2 for up to 14 characters and 3 for up to 30. DECIMALS. Number of decimals that the database will store. Determines the results precision on graphs and reports. U s e r M a n u a l 65 SuperSPC ® v.2012 ANALYSIS TYPE. Variables to analyze data obtained from precision instruments. Attributes to analyze data obtained from imprecise numeric scales or counts of defectives or defects. Disposition to analyze data obtained from Pass / Fail inspections. Don’t Analyze for label data not requiring statistical analysis. Important: If you modify the analysis type from Variables or Attributes to Disposition or Don’t Analyze, of a product characteristic that already has a column on the data sheet, you will see the message ”Change Type …” when you re-enter that sheet. If the modification is the other way around from Disposition or Don’t Analyze to Variables or Attributes, you will see the “Change Type …” message and you will lose all nonnumeric data on that column. LIMITS. Upper, Target and Lower Specification. Nominal value and tolerance range established by product/process engineering or client requirement. If the characteristic has only one limit, check the corresponding box. If the characteristic has bilateral limits check both boxes. Do not leave both boxes unchecked. Upper, Central and Lower Control. Mean Value and natural 6-sigma variation range of individual or grouped samples of a process under statistical control. If these values are not yet known they can be left blank to be later evaluated by the system. Stage. Initial Study means that the statistical control limits have not been established as representative of the process or that they are being revised due to profound changes in the process. Control means that the statistical limits have been previously fixed and represent the stability of the current process. Upper and Lower Input. Range of allowed values according to the physics and logics of the process. Intended to avoid input mistakes. These limits should fall outside the specification limits. Minimum Cpk: Used to activate an alarm message when, on the Control Chart, the Capability Index of the process falls below this acceptable value. Subgroup Size. Number of samples that are averaged to form a statistical subgroup. The value 1 means individual data (useful with normally distributed populations). Values 4 and 5 are preferred for discrete productions where samples have great variability, for non-Normal distributions or where a more rigorous analysis is required. Each specification or control limits modification is kept recorded. This modifiable history can be accessed clicking on the fields blue labels. On the data sheet these limits are enforced strictly according to their starting date-time. Limits at control charts will reflect these variations if the data timestamps span more than one period. . DATA INPUT. Keyboard. Manual input with the keyboard. To facilitate manual input you can pre-establish Concept Lists associated with Disposition or Don’t analyze columns up to a maximum of 16 columns on any single Data Sheet Format. U s e r M a n u a l 66 SuperSPC ® v.2012 To create a new Table enter the Code in the field next to the asterisk (*) and move the cursor to the next line. After a few seconds you can start recording the various concepts of the new table. To edit an existing Table select it in the list on the left. The Value column is a useful scale for assessing cost in the Pareto Chart. Samples per day. According to the sampling frequency recommended by the control plan. Connection. Automatic data acquisition through a RS-232 serial port or Ethernet TCP/IP. Enter the connection code according to the connections catalog, the serial port number (1 to 8), the channel number if there is an automatic multiplexer, check Find box if multiplexed data should find its column and check Down box if the cursor should advance a row after automatic data reception or manual data input. If you wish to view the connections catalog press the Catalog button. New connections can be added if the communication parameters and data format are known from the inspection equipment manuals. Formula. Data is calculated from data in other columns. Write down an algebraic formula to obtain the variable’s value. Each column reference used in the formula should be preceded with the @ sign. U s e r M a n u a l 67 SuperSPC ® v.2012 FORMULA. Available functions and operators are: Symbol Operation () + * / ˆ LOG( ) EXP( ) SIN( ) COS( ) TAN( ) ATN( ) ABS( ) SQR( ) AVG( ) MAX( ) MIN( ) RNG( ) DIS( ) INC( ) IIF( ) CDATE() WRD() Group terms Addition Substraction Multiplication Division Exponentiation Natural Logarithm Natural Inverse Logarithm Sine Cosine Tangent Arc Tangent Absolute Value Square Root Average Maximum Minimum Range Disposition Increment Function Conditional IF Date to day count conversion Working days between 2 dates The following rules apply: 1. Operations are allowed only between columns of the same data sheet. 2. References to any column (characteristic) should come preceded by the character @ (at). Examples: @DIAM or @WEIGHT or @PH or @L76_X5 3. Constants with decimals are always separated with a dot instead of a comma. 4. Formulas should not contain other signs different from those enlisted. You will not be able to include characteristic codes that contain an operator symbol for example DI-01 or PH/009 because the formula would not evaluate correctly. 5. The formula should not include its own code, that is if you are defining a formula for column ABCD, you cannot include the code @ABCD. 6. Arguments of trigonometric functions are expressed in radians (180 degrees = PI radians). 7. Functions AVG( ), MAX( ), MIN( ), RNG( ) and DIS( ) take as argument a list of characteristics separated with commas. Formulas with these functions cannot include other functions or operators. 8. The increment function INC( ) defines a formula that increments an alphanumeric value by the parameter value. For example if the initial value is A50 and the formula is INC(2), the values of the following rows will be: A52, A54, A56, etc. If you wish to repeat the initial value simply write INC(0). To set the initial value append it with an * (asterisk). One column can have as many initial values as is necessary. The column must be of type Don’t analyze. 9. The IIF conditional requires 3 arguments separated by comma. 1) the expression to evaluate, 2) the result in case the expression is true and 3) the result in case the expression is false. 10. To calculate with date-time values enter them on a Don’t analyze column using a Windows acceptable format and in the formula use the CDATE( ) conversion function. Formula Examples: a) b) c) d) Density Total Average Area @WEIGHT / @VOLUME @C1 + @C2 + @C3 AVG(@C1,@C2,@C3) 3.141593 * ( @DIAMETER / 2 ) ˆ2 U s e r M a n u a l 68 SuperSPC ® v.2012 e) Hour Interval (CDATE(@T1) – CDATE(@T0)) * 24.0 SUPERVISION. Optionally enter the codes of up to 4 users that will supervise this product/process. Supervisors will see a parenthesis on their maps beside the codes of the elements that require supervision. On entering the data sheet they will see colors at the labels of samples that are in exception. This configuration affects all characteristics of the product/process on this machine. CRITICAL LEVEL. Indicates the severity of the impact of having one sample out of specification limits and its relative cost to quantify on a Pareto Chart. Characteristics can be filtered by this concept to be output by the Log, Defects and Capability consolidated graphs and reports. MESSAGES. Enter the codes of text messages pre-established in the messages catalog. These messages are shown to the operator at different situations. Process. At operator discretion when he presses Alt-Information being at this characteristic on the data sheet. Out of limits. When on a Control Chart the operator clicks on an alarm symbol indicating a point out of statistical or specification limits. Run. When on a Control Chart the operator clicks on an alarm symbol indicating a run or tendency out of statistical control. Adhesion. When on a Control Chart the operator clicks on an alarm symbol indicating an adhesion to limits out of statistical control. To view or edit the messages catalog press the Catalog button. As an alternative, messages can be links to any document for which there is a viewer, explorer or the original application. Edit the text file SCVIEWER.IAU to associate the file extensions of the documents (.xls, .doc, .ppt, .pdf, .htm, etc.) with the access path of their location. There is no need to register the name of this documents on the messages catalog just enter the file name and extension in the fields of the Messages frame. You can preview and print a listing of the Product Characteristics pressing the right bottom Listing button and then Prepare. COPY AND PASTE. It is possible to copy and then paste one or more characteristic properties from one product to another or from one product to the same in another machine. Go to the configuration window of the characteristic you wish to copy and press the Copy button. Leave the window and select the machine and/or product that will receive the information, open the configuration window of the target characteristic and press the Paste button. Check the box on the dialog window if you wish to copy all characteristics from the source machine/product to the target. 5.1.15 CONNECTIONS Catalog (SC version only). U s e r M a n u a l 69 SuperSPC ® v.2012 Data can be input directly from measuring instruments if they provide a RS-232 or TCP/IP Ethernet output. To enable the connection check the Connection option at the Data Input frame in the Product Characteristics configuration window. In the next field type the connection code of the measuring instrument according to the Connections catalog. To view or edit this catalog press the Catalog button. There you will see a table with the pre-defined connections. Look for the one most similar to the maker and model of your instrument. Verify that the default communication parameters match the settings on your instrument. If this is not the case modify them at the catalog or at the instrument whichever is easier. To modify the content in a field of an existing record without retyping it completely, place the cursor on the field, select it (blue background) and press the F2 key. New connections can be added filling the information on a new record at the last row marked with an asterisk. CODE. Enter a code for the Connection using only capital letters and numbers without spaces. The code can have no more than 8 characters. Notice that the asterisk drops one row and a pencil appears indicating the edition in progress. Press <Esc> to cancel the edition or <Enter> to advance to the next cell titled Connection (40). CONNECTION. Free format description of the instrument or communication interface. TYPE. Either RS-232 or TCP/IP. Note: The data sheet is not capable of connecting directly to Ethernet TCP/IP. The data acquisition must be done through the MAD2008 module. BAUD (RS-232). Baud rate or transmission speed in bits per second. From 300 up to 115200. PARITY (RS-232). Parity type. N = no, E = even, O = odd, M = mark, S = space. DATA BITS (RS-232). Number of bits that represent data. 7 or 8. STOP BITS (RS-232). Number of stop bits. 1 or 2. HANDSHAKE. Communication protocol. 0 = None, 1 = XOn/XOff, 2 = RTS/CTS and 3 = Both. ACTIVE DTR (RS-232). Activate Data Terminal Ready Line. ACTIVE RTS (RS-232). Activate Request to Send Line. BUFFER (RS-232). Memory space for data transfer. Default 1024 characters. RECEIVE THRESHOLD (RS-232). Windows response threshold. Normally 1 character. HOST IP (TCP/IP). IP address of the instrument or remote host. TCP PORT (TCP/IP). TCP port number of the instrument. START COMMAND. Initial command to activate communication with the equipment. If there is a variable channel number in the command use the placeholder %CH. If special characters are required type their ASCII code after a slash. For example the instruction S1%CH1000/013 will send characters S151000 followed by a Car Return (ASCII character 013) when the channel configured for the column is 5. DATA COMMAND. Command to request one reading from the equipment. Follows the same syntax of the start command, for example #%CHPS/013 will send #5PS followed by a CR when the channel number is 5. START. Position of the first data character. Useful when the result message includes information preceding that of interest. TERMINATOR. ASCII code of the character marking the end of the result message. 10=LineFeed, 13=CarReturn. TID TABLE. If the result message from the measuring equipment has a complex format it might be necessary to build a Data Interpretation Table. For more details read ahead. U s e r M a n u a l 70 SuperSPC ® v.2012 Before registering a new connection we recommend testing if communication is functional on the serial port with the RS-232 test tool located in the Miscellaneous Menu or with the PING command of your computer’s operating system when communicating through an Ethernet port. TID TABLES CONSTRUCTION. SuperCEP can capture data from instruments having complex output formats. Data items can be extracted locating fixed positions or constant tags or labels. A TID table must contain exactly: One header row of free text enclosed in double quotes. One row for each data item with four comma-separated fields: Tag or empty string in double quotes. Data reading start position counted from the end of the located tag. Number of characters to be read from the start position. Code of the characteristic in double quotes where the data item is to be written. One row with the text FIN. TID Table example: When the tag is null (“”) the reading start position is taken from the beginning of the data message row. The same tag can be used to position more than one data item. If the code of the characteristic does not match any column in the data sheet format the data item is dropped. If the code of the characteristic is left blank the data item is written to the current column where the cursor is found. 5.1.16 MESSAGES Catalog. Important: There is no obligation to register any code in this catalog if you already have documented information files of any kind for which there is a viewer, explorer or application installed on your PC. Just type the names and extensions of the files in the corresponding fields of the Product Characteristic configuration window. This catalog is useful for compiling commentaries about preventive and corrective actions or reaction plans that operations personnel should undertake. These texts have the main objective of instructing users about recommended paths of action triggered by out of limits, runs and adhesion to limits conditions present on a control chart. Specific instructions to control each quality characteristic of each different product could be necessary. Nonetheless the content of this catalog is optional. Text messages will display when clicking on the red warning points at the control chart each time the following conditions are present: U s e r M a n u a l 71 SuperSPC ® v.2012 Case 1. Out of Limits. When 1 point falls outside control or specification limits. On the Rainbow chart this corresponds to the Stop action. Case 2. Adhesion to Limits. When 2 out of 3 consecutive points fall between 2 and 3 standard deviations from the central limit on either side or n out of m consecutive points fall within 1 standard deviation of the central limit on either side. On the Rainbow chart this is equivalent to the Adjust action following 2 yellow points. Case 3. Runs and Tendencies. When there are n out of m consecutive points over or under the central line or n out of m consecutive points with an upward or downward tendency. Also when there are n out of m consecutive points beyond 1 standard deviation or n out of m consecutive alternating points. On the Rainbow chart this corresponds to the Adjust action from 1 red point and another point on the same side. These stated rules can be modified at the Control Chart configuration window. Regardless of the condition of the control chart the operator can view the messages directly from the data sheet by clicking on the Information menu. Enter the configuration window for the Product Characteristic to be attached with information messages. Press the Catalog button in the Messages frame. At the last row type a Message code using only capital letters or numbers without spaces. The code can have 20 characters at most. Notice that the asterisk goes down one row and a pencil icon replaces it indicating the edition in progress. Press <Esc> to cancel the edition. Press <Down arrow> to save the code. Press <Up arrow> to go back to the newly added row. Click on the text box at right and type up to 1400 characters. Press the Save button to save the updated text. If you wish to delete a message from the catalog, click on the button at the left of the corresponding row. The row’s background will turn black. Press the <Del> key. Important: References to a message are not automatically deleted from the Product Characteristics table when a message is eliminated, therefore there will be a warning when the system tries to show it. Double-clicking on a row of the messages catalog will copy the corresponding code to the first empty field of the Messages frame at the Product Characteristics configuration window. 5.2 Database Repair, Cleanse and Update All the information registered in the Configuration modules is stored in an Access 2000 compatible database (SCEP2008.MDB). It is highly advisable to maintain this database in a periodic manner or when it is suspected that the configuration information is not being correctly stored because of equipment or network connection failures. These utilities are not available for SQL Server. Make sure nobody is using the database. Run the Database Repair program (REPAIR2008.EXE) located at the SuperCEP program group or directly from the installation folder. Press Repair MDB. The operation will take only a few moments. Sometimes it will be necessary to repair twice. Besides database repairing there is a cleansing process available, which will cascade delete records that have lost their parent relations. These lost relations are generated when for example you delete the WEIGHT characteristic without first deleting the existing definitions of that characteristic for products A, B and C. Physical records for the Product Characteristic still exist but are invisible to the system because there is no definition of the WEIGHT characteristic that allows access to them. If you enter the WEIGHT characteristic again, then you would see those records re-linked. When you run the cleansing process all records in this situation will be permanently deleted. Press the Clean Database button to execute this option. Repairing after Cleaning will compact your database file size. U s e r M a n u a l 72 SuperSPC ® v.2012 When you install a software revision within the same 2008 version it might be necessary to use the Update button to have your database structure up to date (tables, fields, indexes and views). It is also possible to repair a particular selection of Data Sheets indicated using the Formats, Machines and Processes buttons. Every time a database is repaired, cleaned or updated the system creates a backup copy identified with a timestamp. 5.3 Database location. SuperCEP can store its databases on two quite different systems of database management. The first is called Jet 4, which is compatible with Microsoft Access 2000 although this software is not required on the PC or on a server, and the second called SQL Server or Informix for which your organization should have a valid license installed at some corporate server. The decision of which system to use depends on the resources and the information technologies policies of your organization. From the point of view of SuperCEP’s functionality there is not a thing that can be done with Jet that can’t be done with SQL Server or Informix and vice versa. Jet database engine can have a bit faster response speed on small files with few users, while SQL Server tends to be faster with large files and many users. From the standpoint of security and robustness, SQL Server or Informix are clearly better options although it is always necessary to have the supervision of a competent technical administrator. U s e r M a n u a l 73 SuperSPC ® v.2012 5.3.1 Jet 4 To select the Jet engine compatible with Access 2000 click the upper radio-button and then enter the complete path to the configuration database SCEP2008.MDB and the complete path to the folder where data sheet files will reside. Typically both paths are the same. The edition of these folders or paths enables you to operate the system on a network and share data. You could also create distinct sets of files or store sample data on removable drives instead of hard fixed disks. Very Important: Since Windows Vista, it is not recommended to keep database files under any \Program Files folder because the operating system assumes these files to be Read Only. For information backup purposes please be aware that Windows will sometimes mantain the up to date version of some SuperCEP files located at folder \Users\user name\AppData\Local\VirtualStore\Program Files(x86). If the system is installed on a local network and it is desired to share data, enter here the full paths to the folders that contain data sheet files and the configuration database. Important: On a network it is recommended to use the full locator of the shared storage resource instead of drive letters, for example: \\QUALITY\DISK_C\SCEP2008 instead of C:\SCEP2008. Prior to the edition of the access paths to configuration and sample data files the referred folders must already exist. For the configuration database path the system checks if the SCEP2008.MDB file exists before permitting the modification. To create the folders and relocate the SCEP2008.MDB file use Windows Explorer. Users must have read and write privileges over the shared folders. Additionally, the sample data folder must admit the creation and deletion of subfolders and files. Important: If the access folders or the configuration file (SCEP2008.MDB) at a later time cease to exist or are not available on the network you will not be able to enter the program. If this happens, use Notepad to fix directly the access path in the SCDIREC.IAU file under the [JET4] tag. The first tag in this file determines the type of the current connection. Do not point the access paths of samples or configuration data to folders of previous versions of SuperCEP because they are not compatible. If you wish to store samples data on diskettes or other kind of removable media instead of a hard disk, change the samples data folder to the corresponding drive letter (e.g. A:\, E:\, etc.). U s e r M a n u a l 74 SuperSPC ® v.2012 5.3.2 SQL Server To employ a connection to SQL Server click on the lower button. In the Data Source field type the name of your server. In the Initial Catalog field type the name of the database (initially SCEP2008). In the User ID field type a user code that can be authenticated by the server with the same password used for SuperCEP. This password corresponds to the one encrypted in the SCEPPASS.IAU file and therefore it is not necessary to enter it again. For the connection to be successful the SCEP2008 (or the name given in the Initial Catalog field) database must already exist on the server. For more details read the Database appendix. Important: If at this point the connection cannot be done because of a parameter mistake, you will need to close the system and edit with Notepad the SCDIREC.IAU file under the [SQLSERVER] tag. The first tag in this file determines the type of the current connection. 5.3.3 Informix In a similar manner SuperCEP can be connected to a database on an Informix server. 5.4 Printer Settings. The program is capable of printing from 1 up to 4 charts per page. The number, size and location of the charts on the page can be configured. Use the Configure button to load the printer driver, which will let you change other properties such as orientation, paper size and number of copies. The Form Feed option should be unchecked only when you wish to continue printing on the same page after all charts are done printing. In the Graphs per Page field select a value from 1 to 4. The program will subdivide the page accordingly. In the Graph Size frame select any region with the option buttons found at the upper left. Adjust the size and position of the region changing the percent Height, Width and Margins. On high resolution printers the graphs will look better using wider Line Widths. In the Color frame the option Black & White prints black foregrounds, the option Foreground Colors prints foregrounds with a gray scale on monochrome printers or with color on color printers. The option All Colors prints background and foreground colors with a gray scale on monochrome printers or full color on color printers. U s e r M a n u a l 75 SuperSPC ® v.2012 Pressing the OK button will save this configuration as default for subsequent SuperCEP print jobs. 5.5 Map Edit. Authorized users can check this option to change (by dragging and dropping) the background images or move the tags on the Plant, Station, Machine and Process maps. Don’t forget to uncheck so the tags can continue to be used to select and load the Data Sheet. 5.6 Edit Shifts. Type the start time of each shift using the HHMM (HourMinute) format. According to this schedule the Shift column will be generated when entering each sample at the data sheet. 5.7 Operation Language. U s e r M a n u a l 76 SuperSPC ® v.2012 The operation language will change sequentially to English, Portuguese or Spanish if you accept this dialog. U s e r M a n u a l 77 SuperSPC ® v.2012 6. STATISTICAL CHARTS 6.1 How to obtain a Chart. To obtain the charts that the system offers, go into a data sheet selecting the user, the station, the machine, the process and the format. Enter some data. Verify that the data is displayed in green or red, which indicates that they are analyzable, by variables or attributes. Place the cursor on the column (characteristic) you wish to analyze. Use the icons on the right side of the screen or the Graphs menu to request the graph. Each user on the system might have access to different sets of charts. If an icon is missing, verify that the current user has the corresponding option checked in the Users catalog in the Database Configuration module. Modify as necessary and re-select the user. If the current user has the Real Time mode activated, the graph icons are not visible because charts are automatically displayed with column or row changes or new data input. The charts shown in Real Time mode display more condensed information than those obtained manually. Important: Not all graphs can be requested for each column. At the right bottom part of the data sheet you will see the type of analysis and other properties of the current characteristic that determine the applicable graphs: Graph Variables X-R chart or Individuals and mR chart. X-mR-R (requires subgroup size greater than 1) X-S chart. EWMA-R chart Group Chart (requires subgroup size greater than 1) Maximum and Minimum Rainbow Chart (requires bilateral specification) P Chart (requires lot size column) NP chart C chart U chart (requires lot size column) Process Capability Study Whisker Box Diagram Capability Summary. Content Acceptance Normality Study. Lot Acceptance Sampling 414. Lot Acceptance Sampling Z1.9. Lot Acceptance Sampling 105E / Z1.4. Lot Acceptance Sampling 1916 Pareto chart Free Pareto chart (requires defect codes column) Linear Regression Attributes Disposition X X X X X X X X X X X X X X X X X X X X X X X X X X X X X X X X X X X X X X X X X Each chart is presented in an independent window that can be moved or size adjusted just as any other window of the system. The following buttons give access to the options for modifying, copying or printing graphs: U s e r M a n u a l 78 SuperSPC ® v.2012 Select and filter samples Configure graph parameters Change colors Change font Print Copy to clipboard Filter a Subgroup (drag and drop) Divide the data (drag and drop) Set new control limits You can add options to the Graph menu to execute other applications without leaving SuperCEP. To do this, edit the MENU.IAU file. 6.2 Control Charts. X-R CHART. To obtain the Means and Ranges chart it is necessary to have the product characteristic declared with Variables analysis type and subgroup size greater than 1. Each point of the Means chart is the average of the samples of a subgroup. Each point of the Ranges chart is the difference between the maximum value and the minimum value of each subgroup. The control limits are calculated from the average Range and delimit a zone of 3 standard deviations on each side of the average. The process capacity indexes are calculated from Average Range (Cp and Cpk) or from the Mean Square Root (Pp and Ppk) depending on how the Capability Study was configured. The OOC initials emphasize that these indexes were calculated from data lacking statistical control I-mR CHART. In the Individuals chart each point represents an individual value. In the Moving Range chart each point is the difference between the current sample and the previous sample. This chart is obtained for any characteristic with Variables analysis type and subgroup size equal to 1 selecting the X-R chart icon. Control limits are calculated from the average moving range and delimit a 3 standard deviations zone on each side of the average. The process capacity indexes are calculated from Average Range (Cp and Cpk) or from the Mean Square Root (Pp and Ppk) depending on how the Capability Study was configured. The OOC initials emphasize that these indexes were calculated from data lacking statistical control COLLECTIVE X-R CHART. One X-R or I-mR chart will be drawn for each characteristic in the data sheet with Variables analysis type. The characteristics can be selected in the Columns field STRATAFIED X-R CHART. One or more charts are drawn from subsets of the data of the same characteristic cut by some classification. The classification criteria is the content of any other column of the data sheet, for example the lot number, the shift id, the operator, etc X-mR-R (3D) CHART. To obtain the Means, Moving Ranges and Ranges chart it is necessary to define the process characteristic with Variables analysis type and subgroup size greater than 1. Each point of the Means chart is the average of the samples of a subgroup. Each point on the Moving Ranges chart is the difference between the mean of the current subgroup and the previous one. Each point of the Ranges chart is the difference between the maximum value and the minimum value of each subgroup. Control limits are calculated from the average moving range and delimit a 3 standard deviations zone on each side of the average. The process capacity indexes are calculated from Average Range (Cp and Cpk) or from the Mean Square Root (Pp and Ppk) depending on how the Capability Study was configured. Please note that the indexes will differ from those obtained from the Capability Study. The OOC initials emphasize that these indexes were calculated from data lacking statistical control. U s e r M a n u a l 79 SuperSPC ® v.2012 X-S CHART. To obtain the Means and Standard Deviations chart it is necessary to have the product characteristic declared with Variables analysis type and subgroup size greater than 1. Each point of the Means chart is the average of the samples of a subgroup. Each point of the Standard Deviations chart is the internal standard deviation of each subgroup. Control limits are calculated from the average standard deviation and delimit a 3 standard deviations zone on each side of the mean. The process capacity indexes are calculated from Average Range (Cp and Cpk) or from the Mean Square Root (Pp and Ppk) depending on how the Capability Study was configured. The OOC initials emphasize that these indexes were calculated from data lacking statistical control. EWMA-R CHART. Each point on the graph is an exponentially weighted value from all previous data. A weighing factor must be selected between 0.05 and 1.0 which is an inverse function of the “smoothing“ to be done. The graph can be obtained from individuals or grouped data. The Ranges chart is standard. GROUP CHART. To obtain the Group chart it is necessary that the product characteristic be declared with Variables analysis type and subgroup size greater than 1. In the upper graph, the average, minimum and maximum values for each subgroup are shown, together with the corresponding sample number within the subgroup. In the lower graph, the minimum and maximum moving range of each subgroup are identified with their sample number. The overall maximum and minimum values and the positions or elements with greater minimum or maximum occurrences are shown. MAXIMUM AND MINIMUM CHART. To obtain this graph it is necessary that the characteristic is of Analysis Type Variable or Attribute. Each point on the graph represents the average value in each period (month, week, day, shift or hour). Vertical lines join the maximum and minimum values of each period. Means statistical control limits calculated from the average range are also shown. Initial studies will show variable control limits from period to period if the sample size is not constant for each period. RAINBOW CHART. This graph can be requested for characteristics of Variable Analysis type only. Each vertical line on the chart represents the range between individual values drawn as X’s. The subgroup is always of size 2 with no regard to the subgroup size predefined for this characteristic. Target and Specification limits are shown delimiting Red, Yellow and Green zones. The X-axis has a scale for relative Subgroup number, Date-Time, Upper and Lower values and recommended Action. c CHART. To obtain the number of Non-Conformities or Defects chart it is necessary that the product characteristic is defined with analysis type Attributes or Disposition. Each point on the graph is the number of defects found in the sample if the characteristic is of type Attribute. For the Disposition type characteristic, each point on the graph is the number of Defects (Rejections) found in a specific period (month, week, day, shift or hour). Control limits embrace a 3-sigma probability zone above and under the mean, thus the interpretation of points outside the limits is similar to that of variables control charts. p CHART. The Non-Conforming (or defective) Fraction chart requires a characteristic of analysis type Attribute or Disposition. When the characteristic is of type Attribute there must exist a second column where the lot or sample size is entered. Each point on the graph is the percentage fraction defective with respect to lot size. If the characteristic is of type Disposition there is no need for additional columns because each point on the graph is the fraction of rejected product with respect to the number of samples taken in each period (month, week, day, shift or hour). Control limits are interpreted as usual but vary from point to point as an inverse function of sample size. u CHART. To obtain the Non-Conformities (or defects) per Unit chart it is necessary that the product characteristic has the Attribute or Disposition analysis type. If the type is Attribute there must be a second column with the lot size. Each point of the u chart then represents the quotient between the number of defects in the lot and its size (defects per unit). For the Disposition characteristic type there is no need for additional columns because each point on the graph plots the fraction of defects with respect to the number of samples taken in the corresponding period (month, week, day, shift or hour). Control limits are interpreted as usual but vary from point to point as an inverse function of sample size. U s e r M a n u a l 80 SuperSPC ® v.2012 . np CHART. The Non-Conforming (or defective) chart can be obtained for product characteristics of type Attribute or Disposition. Enter the number of Rejects for each lot if the characteristic is of type Attribute. Each point on the graph represents the number of defectives of each lot. If the characteristic is of type Disposition, each point on the graph is the number of defectives in each period (month, week, day, shift or hour). Control limits are constant and interpreted in the usual manner Subgroup Information. Click directly on any point of the graph to list the samples that make up the subgroup and any log notes or statistical alarms. In most of the graphs so far described you can click on any plotted point to obtain information about the corresponding individual or subgroup. When the selected point is in a situation out of statistical control there will be an alarm displayed for each of the diagnostic rules being met. Optionally, a text or document will display in line with the configuration of the Out of limits, Run or Tendency fields in the Information section of the Product Characteristic configuration. These functions are not available in the graphs obtained from Disposition type characteristics. 6.3 Control Charts Configuration. 6.3.1 Subgroup Selection. When a graph is requested the system includes data according to the most recent data selection. The left bottom button that appears on all graphs permits the modification of this selection. Click this button to define the way the program determines which samples to include in the graph calculations. The “From” box option determines the way to locate the initial sample, the “Up To” box option determines the way to locate the last sample. Any option of the “From” box can be combined with any option of the “Up To” box. Sample number. Input the starting and ending sample numbers to be processed for the chart or report. Date & Time. Write dates in a standard Windows format. The system will include on the chart or report all samples in the period. 1st and last sample in column. The system will include all samples of the current column. Cursor. The samples under the cursor will be used as the initial and/or final sample. Cursor subgroup Start. The initial sample of the subgroup under the cursor will be used as the starting sample. Not useful if the column has blank cells in the range. Cursor subgroup End. The final sample of the subgroup under the cursor will be used as the ending sample. Not useful if the column has blank cells in the range. n Subgroups Backward. Includes the n subgroups preceding the final sample determined by the Up To option. n Subgroups Forward. Includes the n subgroups trailing the sample determined by the From option. U s e r M a n u a l 81 SuperSPC ® v.2012 1st and last sample from. Allows the selection of a time interval forward or backward from the cursor position in minutes, hours, days, weeks, months or years. The amount of time units can be set from 0 to 99. Filter. You can select a data subset to be processed for your chart or report. The filter expression indicates the logical conditions that a data point must meet to be included on a chart. For example the expression DIAM > 0.65 indicates that only those samples with diameter (characteristic code DIAM) greater than 0.65 will be accounted for to construct the graph. Comparators that can be used are: > < <> >= <= = Between ... and ... like '...' Greater than Lesser than Different from Greater than or equal to Lesser than or equal to Equal to interval similar to (only for Dispositión and Don’t Analyze columns) Two or more conditions can be joined or connected by means of the operators "and" & "or". The “and” connector indicates that both conditions must be met. The “or” connector indicates that one condition met will suffice. If you know the syntax of SQL languages you will notice that the filter syntax is that of the Where clause. Enclose the characteristic name in brackets [ ] if it starts with a digit character or contains characters different from letters and numbers. To clarify the usefulness of the Filter option some examples follow: Imagine you a want a graph of the “DATUM” characteristic measurement results for the second shift that are beyond the upper specification, which is 9.3. In such case the filter expression will be: TURNO = 2 and DATUM > 9.3 U s e r M a n u a l 82 SuperSPC ® v.2012 Please observe that the two conditions were joined with the "and" connector, which means that qualifying samples must meet both criteria to be on the graph (“TURNO” is a system reserved word meaning SHIFT). Besides product characteristics, the additional reserved words N, [DateTime], [Shift], [Operator] and [Log] will filter by sample number, date-time, shift, operator and log notes respectively. Date/time values must be enclosed in sharp symbols (#) and formatted with yyyy-m-d h:nn:ss. The next example will filter samples older than March 23rd 2008 at 6 p.m.: [DATETIME] > #2008-3-23 18:00# Now consider a graph where samples to be charted have values between 0.3 y 0.7 of relative humidity on the characteristic coded HUM. The instruction for the filter would be the following expression: HUM >= 0.3 and HUM <= 0.7 Or its equivalent form: HUM between 0.3 and 0.7 An additional free text column can be used to mark or label sample data on other columns to be able to select or filter them. Consider for example a packaging line where out of spec data is always generated at start-ups. The operator needs to record every sample but does not wishes to show these periods on the control charts. The solution is to create an additional column of type Don’t Analyze to type a code marking those periods and then use a filter based on that column: MARK <> 'STARTUP' When interpreting this filter, the program will select those samples that do not have the STARTUP label in the MARK column to process the control chart. Note that the text to be matched is enclosed between single quotes. When using filters based on Don’t Analyze columns the percent sign (%) can be used to indicate that you wish to include all samples whose label starts with the stated text. For example, to show all lots with labels starting with the letter C: LOT like 'C%' Important. The filter expression remains in memory and will be applied to any subsequent chart or report until it is modified, deleted or another data sheet with different format is opened. Columns. Some charts and reports can show data from multiple columns of the data sheet. You can select the columns to include in the graph or report listing the column numbers separated with commas. If columns are consecutive type the first and last one separated with a hyphen (-). For example if you want to show columns 2, 5, 7, 8, 9 and 10 you would type: 2,5,7-10. If this field is left blank then all columns will be included. Chart parameters. Allows changing various parameters that affect the way charts are presented. 6.3.2 Limits. Select Initial Study if you wish to have a new set of statistical limits calculated from the sample data included in the chart. Read more ahead about the use of the 2L button to store sets of historical statistical limits. Select Standard Given to display the statistical control limits already known from previous data. These previously calculated limits are taken from the Control Limits fields at the Process & Machine Characteristic configuration window. They can also be set from an Initial Study chart with the Set New Limits button. To compare client Specification limits with Statistical limits check the Specification box. The Best-Fit Limits box should be checked if you want the initial study statistical limits to accommodate the general tendency of the data. The central limit slope is calculated with the least squares method. U s e r M a n u a l 83 SuperSPC ® v.2012 Subgroup size. Each point on the chart represents a subgroup. A subgroup initially contains as many data points as is indicated in the Subgroup Size field at the Process & Machine Characteristic configuration window. You can modify this value temporarily at the subgroup size box. The process standard deviation estimation will vary for different subgroup sizes. These differences will affect the statistical limits and process capability calculations. 6.3.3 X-axis scale. Subgroups identification on the horizontal scale of the chart has the following options: Dates. Labels subgroups with date, shift and time of their first data point. At the text box type a formatting mask using the following codes: Y = year, M = month, W = week, D = day, S = shift, H = hour, m = minute and s = second. Column. Uses the content of another characteristic of the same sample to label the subgroup. Type the column number of the characteristic that carries the desired identification. Relative. Labels subgroups starting from 1. Absolute. Labels subgroups with the row number from the data sheet of their first data point. Points. Horizontal spacing between subgroups is determined by this value. Its value adjusts automatically when it is less than the number of subgroups to be displayed. Type 0 (zero) if you wish that points fill the available width of the chart. Put every. Indicates how many subgroups are skipped for each label. Vertical Grid. Draws a vertical dotted line to align the subgroup with its label. 6.3.4 Options. Alarms. Check this box to display arrows over subgroups out of statistical control. The next figure shows different types of arrows and their meaning. On the Ranges, Standard Deviations and Attributes charts the U s e r M a n u a l 84 SuperSPC ® v.2012 criteria related to the zone under the mean are not evaluated because this area is frequently not a 3-sigma zone. Rules. Press this button to modify or deactivate the evaluation criteria mentioned in the previous paragraph. Criteria are set individually for the different kinds of charts a) individuals centering, b) subgroups centering, c) individuals variability and d) subgroups variability. If you wish these criteria to be evaluated restarting from the last alarm check the Reset calculation box. If you wish to have a text notice (or any other kind of document) shown when the last subgroup on the graph meets an alarm criterion check the On last point show automatically option. This box should be checked for the next two options to be enabled. If a Mandatory Log must be input before closing the alarm notice window check the corresponding box. You can force a supervision approval after an automatic alarm. Check the appropiate box. The authorization consists of the User code and password of any of the supervisors defined in the characteristic configuration. Also any user with the Alarm OK privilege can unblock the alarm. The authorization will be saved into the subgroup log identified by a $ sign. Log Notes. This option will show, next to the subgroup points on the chart, the corresponding log annotations made on the data sheet. Only the portions of text enclosed in braquets () will display. If the log contains a section for the characteristic then only this section is considered. If more than one sample has log annotations then several rows of text will be displayed. 6.3.5 Attributes. Lot Size Column. Initial Study Attributes Control Charts of type p and u require the lot size of each sample to calculate statistical limits. Indicate the name of the column that holds this information. Grouping criterion. Control Charts for characteristics of type Attribute or Disposition (Accepted / Rejected) and the Maximum Minimum chart form their subgroups in accordance to this field: M = Month, W = Week, D = Day, T = Shift, H = Hour and I = Individuals. U s e r M a n u a l 85 SuperSPC ® v.2012 Data can be grouped by Month, Week, Day, Shift, Time, or Individual. Applies for characteristics of type Attributes and Disposition. It is no longer necessary to calculate the Fraction Defective to obtain the p Chart. The constituent data of each subgroup can be queried clicking directly on any subgroup. 6.3.6 Language. Spanish, English, Portuguese or Chinese. Descriptions of each language will be used to develop the corresponding graph. 6.3.7 Stratify. Some graphs allow stratification, this means that instead of one graph several graphs are obtained each one made from data belonging to certain classification. The classification criteria are always taken based on the contents of other columns in the same sheet, typically a lot or machine key. In the Use Column field select the column containing the sort key. In the Group chars. field type the character range of those keys to be taken to form classes (eg, 1-5 indicates to take the first 5 letters or numbers). Save. Check this box to store the selected parameters and use defaults in coming sessions. OK. Press this button to re-draw the graph with the new parameters 6.3.8 Filter a subgroup. Drag and drop this button on the item to be deleted from the calculation of historical limits. Immediately notice that the graph is updated with the new filter. You can filter multiple points in sequence. If you wish to cancel or modify this filter you must enter Selection Set Filter and do this manually. This option is not available for charts of characteristics by Disposition. The user’s permit Select enables this button 6.3.9 Divide the Data. Lets you calculate a new set of historical statistical limits on the same dataset. Show the graph and then divide the data by dragging and dropping the button on any subgroup (except start and end points). You will get statistical limits before and after this subgroup. On the right appears the last set of statistical values. To delete a set of limits, drag and release the button again precisely on the first point of the set to remove. The beginning of each new set of limits is recorded in the log of the sample with an asterisk (*) followed by the characteristic name. The multiple limits function is only available in control charts for variables. The user’s permit Conf Charts enable this button 6.3.10 Set new control limits. This button is enabled on control charts with historical limits and allows for new control limits for future control charts. The user’s permit Conf Charts enable this button 6.4 Process Capability Studies HISTOGRAM. To obtain the histogram it is necessary that the product characteristic type is defined with Variable or attribute analysis. The height of each bar represents the frequency histogram of the data in that interval. The theoretical curve represents a normal distribution with The same mean and standard deviation of the data analyzed. On the curve, the average and standard deviations are indicated. Also shown are the specification limits. At the bottom are the results of the process capability study, the normality analysis and forecasts of product in and out of specification. The Pearson option draws a skewed curve from LP to UP. COLLECTIVE HISTOGRAM. Shown are histograms of each characteristic with analysis type by variables or attributes. The capability index of each one is reported. The characteristics can be selected in the Columns field. STRATAFIED HISTOGRAM. One or more graphs are made from subsets of data from the same characteristic obtained by some classification. The classification criterion is the content of a column of the data sheet such as lot number, shift number, the operator or machine. NORMALITY STUDY. For the study is necessary that the product characteristic type is defined with variable or attribute analysis. There are 3 graphics: U s e r M a n u a l 86 SuperSPC ® v.2012 1. Cumulative frequencies. Each point on the graph represents the cumulative frequency up to the interval indicated on the horizontal scale. The diagonal line represents the cumulative frequencies expected for a normal distribution. The left vertical scale indicates the distance to the middle of each interval in standard deviation units. The right vertical scale is the fraction of accumulated area under the curve of each interval. The cumulative total is not represented because it would require an infinite vertical axis. The horizontal scale is adjusted to 6 standard deviations. The diagnosis of normality is made by comparing the correlation coefficient with a minimum value given according to the size of the sample. See Annex C.3.f. 2. Box and whisker. Represents the minimum, first quartile, median, third quartile and maximum of the sample. 3. Frequency histogram. Represents the distribution of frequencies compared to a theoretical curve with the same mean average and deviation. Normality is diagnosed using the Anderson-Darling test. HISTOGRAM OF CONTENTS. It makes the verification of the net weight or volume of packaged contents according to the Mexican Official Standard NOM-002-SCFI-1993. Necessary for the study is that the product characteristic type is defined with variable or attribute analysis and there is only one specification limit defined (usually the lower limit). The graph shows the frequency distribution of the sample and diagnoses the three acceptance criteria: declared content, declared content minus 1 tolerance and declared content minus 2 tolerances. COLLECTIVE BOX AND WHISKER. This diagram shows the data distribution of each characteristic showing the minimum, first quartile, median, third quartile and maximum. Thus the "box" represents the middle 50% of the sample and the left and right "whiskers" represent the upper and lower 25% of the sample respectively. STRATAFIED BOX AND WHISKER. This diagram shows the distribution of subsets of data from the same characteristic classified or segmented according to the contents of another column. CAPABILITY SUMMARY. It is a graph representing the number of quality characteristics whose process capacity (Cp) and capabilty (Cpk) indexes are in certain predefined levels identified by color codes: Green above 3 sigma, Yellow between 2 and 3 sigma and Red below 2 sigma. The height of each section of the stacked bar represents the number of characteristics whose capability indexes are in the range corresponding to its color. Clicking on any section gives the details of the characteristics that comprise it. You can define up to three periods of tabulation for comparison. 6.5 Setting Process Capability studies 6.5.1 Subgroups. Selecting Subgroups. Press this button to define how the program determines the samples included in the graph. See explanation in section 6.3.1. Parameters of the graph. When a graph is requested the system produces it taking the most recently saved parameters. The Configure button allows you to modify these parameters. 6.5.2 Subgroup size. You can temporarily change this value in the Size box. The standard deviation calculation is different for size 1 (Root Mean Square) than larger sizes (Average Range / d2). This affects the process capability calculations. The histogram of the frequency distribution and the observed percentages in and out of specification are always calculated based on individual samples. 6.5.3 Capability. The number of times the standard deviation is taken towards each side of the mean for calculating the variability. 6.5.4 Capacity. The process capacity index can be reported in a traditional format or as its inverse (sometimes called Cr). You can also calculate with grouped (Cp / Cpk) or individual data (Pp / Ppk). U s e r M a n u a l 87 SuperSPC ® v.2012 6.5.5 Language. Spanish, English, Portuguese or Chinese. Descriptions of each language will be used to develop the corresponding graph. 6.5.6 Scale. The automatic scaling works taking the greater between tolerance (upper limit minus lower specification limit) and variability (6 standard deviations) as the range for the scale. If only one limit is specified, this limit is taken and a range of 6 standard deviations to calculate tolerance. The scale can be set manually where you want it filling the Upper and Lower fields. Although not relevant for statistical results, avoid creating artificial intervals combining the scale range and the number of intervals to coincide with the graduations of the measuring equipment. 6.5.7 Intervals. The frequency distribution is performed on the resulting intervals from dividing this many times the scale range. It is recommended to choose this value so that the center of each interval coincides with the graduation of the measuring equipment used. This will allow for a better visual appreciation of the shape of the distribution. 6.5.8 Distribution. The calculation of process capability indexes can be done using the values set for the normal distribution or can be more precise using Pearson fittings for clearly non-normal distributions. 6.5.9 Stratify. Some graphs allow stratification, this means that instead of one graph several graphs are obtained each one made from data belonging to certain classification. The classification criteria are always taken based on the contents of other columns in the same data sheet, typically a lot or machine code. In the Use Column select the column containing the sort key. In the Group chars. field type the character range of those keys to be taken to form classes (eg, 2-4 indicates that the second to fourth characters are to be taken). Save. Check this box to store the selected parameters and use them in future sessions by default. OK. Press this button to re-draw the graph with the new parameters. 6.6 Configuring the Capability Summary U s e r M a n u a l 88 SuperSPC ® v.2012 The modifiable parameters and buttons are explained below: Scope. The Capability Summary can consolidate information from other data sheets besides the one currently open at the time of request. Formats. Use this button to mark the formats that will be included in the graph. In the format list Ctrl-click on the desired format codes. Click OK to finish. Machines. Similarly select the machines to include in the graph. Processes. Similarly select the processes to include in the graph. Periods. You can define up to three periods to compare the evolution of Cp and Cpk indexes. The end of the first date is determined by the date of the row from which the chart was requested and the starting date is determined by going back the number of predefined subgroups. If you change format the predefined date range changes. If the number of subgroups can not be completed the starting date shall be the first row of the datasheet. To change these intervals enter new dates in a format compatible with windows (e.g. d-myyyy). Subgroups. Select the rows and columns to include in the graph. For more details see the discussion in Section 6.3.1. Minimum Data. This is the minimum number of samples needed to evaluate the indexes of each characteristic. The characteristics that do not cover the minimum sample data are reported missing with a blue code. Out of Control. If you check this box, the characteristiccss containing some point outside the control limits of Means or Ranges are accumulated in a separate level (white) instead of their share according to its process capacity. Language. Spanish, English, Portuguese or Chinese. Descriptions of each language will be used to draw the graph. U s e r M a n u a l 89 SuperSPC ® v.2012 6.7 Acceptance Sampling MIL-STD-414 by Variables. You can obtain this report from any characteristic of Variables analysis type. Configure the sampling paln and capture the number of samples required. You will get the acceptance criteria, the operating curve and the verdict. ANSI ASQ Z1.9 by Variables. You can obtain this report from any characteristic of Variables analysis type. Configure the sampling plan and capture the number of samples required. You will get the acceptance criteria, the operating curve and the verdict. MIL-STD-105E / ANSI Z1.4 by Attributes. You can obtain this report from any characteristic of Attributes or Disposition analysis type. Configure the sampling plan and capture the number of samples required. If of type Attributes all values are added to obtain the total rejections. If of type Disposition only rejections are added to get the total. You will get the acceptance criteria, the operating curve and the verdict. MIL-STD-1916 by Variables. You can obtain this report from any characteristic of Variables analysis type. Configure the sampling plan and capture the number of samples required. You will get the acceptance criteria, the operating curve and the verdict. . MIL-STD-1916 by Attributes. You can obtain this report from any characteristic of Attributes or Disposition analysis type. Configure the sampling plan and capture the number of samples required. If of type Attributes all values are added to obtain the total rejections. If of type Disposition only rejections are added to get the total. You will get the acceptance criteria, the operating curve and the verdict In all cases the operating curve represents the risk for the customer (of accepting a bad lot) and the risk for the supplier (of rejecting a good lot) of the chosen inspection plan and is useful in selecting the best sampling plan. 6.8 Acceptance Sampling Settings. Selecting Subgroups. Press this button to define how the program determines the samples to include in the graph. See explanation in section 6.3.1. Parameters of the graph. When a graph is requested the system produces it taking the most recently saved parameters. The Configure button allows you to modify these parameters. Sampling Plan. Set the Lot Size, Inspection Level and Acceptable Quality Level according to simple sampling plans of MIL-STD-414 or 105E. For the MIL-STD-1916 instead of the AQL the inspection stage A = Adjusted, N = Normal and R = Reduced must be specified. Language. Spanish, English, Portuguese or Chinese. Descriptions of each language will be used to draw the corresponding graph. Save. Check this box to store the selected parameters and use them as default in future sessions. OK. Press this button to re-draw the graph with the new parameters. 6.9 Pareto Diagrams PARETO. The Pareto chart can be requested from any column. The diagram on the left represents the number of non-conformities of each characteristic ranked from highest to lowest frequency. The curve represents the cumulative frequency of these defects. The diagram on the right represents the impact (frequency x unit cost) of non-conformities. The curve represents the cumulative impact. At the bottom the characteristics are listed in descending order of frequency and impact. U s e r M a n u a l 90 SuperSPC ® v.2012 FREE PARETO. To obtain it you only need a defect code column and a number of defects column. It is not required to capture the different defects in separate columns. The plot is called from the number of defects column. Defect codes should be at most 10 characters long. We recommend entering the codes and descriptions of defects in a Concept Table. If you wish to obtain total costs enter the cost weights in the Value column of the table. Clusters of defects can be made using sections of the defect codes. For example if you specify a grouping level 1-2, then all the defects sharing the same first two characters in their codes will be grouped under one heading. 6.10 Pareto Settings Selecting Subgroups. Press this button to define how the program determines the samples included in the graph. See explanation in section 6.3.1. Parameters of the graph. When a graph is requested the system produces it taking the most recently saved parameters. The Configure button allows you to modify these parameters. Accumulate. When you select Reds, one nonconformity or defect will be counted for each datum found out of specification in each column. This option is most useful for variables analyzable characteristics. When you select Total, defects will be accumulated according to the value recorded in each cell in the data sheet no matter whether they are in or out of specification. This option applies best to characteristics analyzed by attributes. Free Pareto. This applies to the construction of free Pareto charts. Indicate the column where to find defect codes. If defect codes can be grouped, indicate a Grouping Level which is the section of characters shared by the same group of codes. If codes will not be grouped then type 1-10. Language. Spanish, English, Portuguese or Chinese. Descriptions of each language will be used to draw the corresponding graph. Save. Check this box to store the selected parameters and use them as default in future sessions. OK. Press this button to re-draw the graph with the new parameters. 6.11 Linear Regression It takes two columns with variables or attributes type of analysis to form XY data pairs. The column from which the chart is requested provides the X values. Set the location of the Y values. For regressions with transformed values create new columns with Formula input type and the desired transformation equation. You can apply a Delay to relate one cause variable values with subsequent values of the effect variable. 6.12 Linear Regression Settings Selecting Subgroups. Press this button to define how the program determines the samples included in the graph. See explanation in section 6.3.1. Parameters of the graph. When a graph is requested the system produces it taking the most recently saved parameters. The Configure button allows you to modify these parameters. Y's Column. Select the column that contains the values to be tested as results of the values from the column on which the regression was requested. U s e r M a n u a l 91 SuperSPC ® v.2012 Language. Spanish, English, Portuguese or Chinese. Descriptions of each language will be used to draw the corresponding graph. Save. Check this box to store the selected parameters and use them as default in future sessions. OK. Press this button to re-draw the graph with the new parameters. 6.13 Colors Allows you to change the color of any element of the graphs. When you select this option the cursor is converted to a sensor of each color in the graph. Place the cursor over the color that you want to change verifying that the box located in the lower left corner shows this color pixel amplified. Click to display the color palette and select the new color in the usual way. In the bottom center of the chart you will see a box with the solid color corresponding to the point just beneath the mouse pointer. Legend contains RGB color components red, green and blue. The graph shows the change immediately. When you have finished modifying the necessary colors do not forget to press the Color button again. The system will ask for a color gradient parameter which has the effect of "illuminating" the chart. The zero value does not degrade. Negative values go from light to dark. Positive values go from dark to lighter shades. U s e r M a n u a l 92 SuperSPC ® v.2012 Note: Some video adapters degrade the colors of the edges of text fonts to improve readability. If so, be sure not to select these degraded tones. 6.14 Fonts The Fonts button gives you access to the font settings of the chart. A font consists of a fontface plus a style plus a size. The program does not include special fonts so that the options available depend on the font types that have been previously installed on your Windows system. Your font selection is stored for future graphs of the same kind drawn on the same computer. The automatic scaling of font size done to adjust to the actual size of the view window or printer does not affect the original value selected by you. The font and the content of the graph headers can be configured entirely (except for the name of the organization). Right click anywhere on the header to enter edit mode. Important: Edit mode requires the use of an RTF (Rich Text Format) file editor. By default \Windows \System32 \ Wordpad.exe is used. To use another editor modify the contents of the [RichText] tag on the Iau\MENU.IAU file. Modify the Rich Text Format file ScepHead.RTF RichText to suit your needs. The variable fields you can keep, modify or delete are: Concept Graph Title Station Name Machine Name Format Name Product Name Characteristic Name Selection Filter Date - Time of first selected sample Date - Time of last selected sample Location of the characteristic 6.15 Field @Titul @Estac @Maqui @Forma @Produ @Carac @Filtr @Feini @Fefin @Ruta Print the Graph The Print button will send a copy of the graph on the screen to the system’s print manager. If you set up more than one chart per page in the Printer Setup module, the Print button will show the sequence number of the following chart to print. When the clock pointer disappears from the screen, the graph has been sent to the print manager. The print job is sent to the printer physically until the print manager has received the total number of graphs per page. 6.16 Copy the Graph The Copy button will send a copy of the graphic display to the system clipboard. This way you can use the Edit Paste command in any Windows application that accepts imported bitmap images. U s e r M a n u a l 93 SuperSPC ® v.2012 7. STATISTICAL REPORTS 7.1 How to Obtain. To get the reports provided by the system first open a data sheet by selecting a user, station, machine, product and format. Verify that the Reports menu is activated. Otherwise you must enable the User right to access the Reports menu in the Configuration module. Capture some data. Verify that the data appears green or red indicating that the characteristic was configured as type Variables or Attributes. Place the cursor in the column corresponding to the characteristic you wish to analyze. Select the desired report in the Reports menu. Each system user has access to different reports. If an option is grayed out, check that the current user has the option marked in the catalog within the User Settings module. If necessary modify and then re-select the user. Important: Not all reports can be obtained in each column: The Type of Analysis of the current column is shown at the bottom right of the screen, which determines the possible reports: Variables and Attributes: Data Sheet Report. Subgroups Report. Quality Certificate. Free Pareto Report. Audit Trail Report. Disposition and Don’t Analyze: Data Sheet Report. Quality Certificate. Audit Trail Report. The following consolidated reports can be requested from any column in any format: Log Notes Report. Defects Report. Capability Report. Reports are produced in HTML format and opened in the default web browser of your computer. You can add options to the Reports menu to run other applications from here. This requires editing the file MENU.IAU. 7.2 Data Sheet Report. Sample data are listed followed by a statistical The modifiable parameters and buttons are explained below: summary of each characteristic. Subgroups selection. Press this button to define how the program determines which samples to include in the report. See explanation in section 6.3.1. U s e r M a n u a l 94 SuperSPC ® v.2012 Options. Data. Check this box to include the details of the sample data of each characteristic. Log Notes. Check this box to list the comments captured in the logs of the sample data. Requires Data box checked. Summary. Check this box to include a summary of descriptive statistics. Total Sum. Report the total addition of each characteristic. Requires Summary box checked. Capacity. Reports the short and / or long term process capability indexes. Language. Spanish, English, Portuguese, Phonetic Chinese and Simplified Chinese. Descriptions of each language will be used to prepare the report. Font. Press the button with the font name to change the font, style or size. Prepare. Press to prepare the report with the new parameters. The report is displayed as a Web page in your web explorer. Print. To preview the printout click the right mouse button and then Preview. Copy to Excel. Select the data you want to copy and right-click on the selection to copy to the Windows clipboard. U s e r M a n u a l 95 SuperSPC ® v.2012 Save a Copy. Right click on the link at the end of the report and select Save Target to save a copy of the report to a file. E-mail. Close the browser window so that the system will prepare an email message with an attached copy of the report. The default values of the following dialog window are taken from the Iau\SCMAIL.XML file. 7.3 Subgroups Report (Means, Standard Deviations and Ranges). Lists the means, standard deviations and ranges of each subgroup. The identification of each subgroup corresponds to the last datum of each subgroup. For characteristicss with subgroup size equal to 1, the standard deviation is not defined. The modifiable parameters and buttons are explained below: U s e r M a n u a l 96 SuperSPC ® v.2012 Subgroups selection. Press this button to define how the program determines which samples to include in the report. See explanation in section 6.3.1. Language. Spanish, English, Portuguese, Phonetic Chinese and Simplified Chinese. Descriptions of each language will be used to prepare the report. Font. Press the button with the font name to change the font, style or size. Prepare. Press to prepare the report with the new parameters. The report is displayed as a Web page in your web explorer. Find the explanation of the functions of the preview in Section 7.2 7.4 Quality Certificate (SC version only) In the data sheet, place the cursor in any of the characteristics of the sample you want to include in the certificate. If the certificate lists or calculates on a range of samples click into any row that belongs to the range. Go to the Reports Certificates menu. In the list that appears at the top left click on a TXT or XLS model file. The installation disks provide 3 model files that only work correctly with the tutorial example ABC format. To create new model files use Notepad or Microsoft Excel. If the model file was created in Excel you need to have this application running (but not necessarily with the model file opened). For more information see the chapter dedicated to Certificates design. Once the model file is selected, a table is shown with fields containing the certificate´s user variables. Fill each one in the right column of the table. Subgroups selection. Press this button to define how the program determines which samples to include in the report. See explanation in section 6.3.1. Press Prepare. If the certificate model was developed in Excel press the flashing button on the Windows taskbar to go to the preview in that application. After printing or revising in Excel you must close the Excel preview to continue operating SuperCEP. If you want to save a copy of the newly filled certificate please accept or change the name of the file that the system suggests. If the certificate model was designed with Notebook a special preview window will automatically display. See the explanation of the functions of the preview in Section 7.2. . U s e r M a n u a l 97 SuperSPC ® v.2012 7.5 Easy Pareto Report. It lists the causes of nonconformities ordered by frequency. It also reports percentages and parts per million of each type of defect with respect to the total lot size. To obtain this report your data sheet must contain at least three columns: one for the code name of the cause or defect, another for the lot size and the third for the number of defects. The cursor should be placed on this last column before requesting the report. The modifiable parameters and buttons are explained below: Subgroups selection. Press this button to define how the program determines which samples to include in the report. See explanation in section 6.3.1. Language. Spanish, English, Portuguese, Phonetic Chinese and Simplified Chinese. Descriptions of each language will be used to prepare the report. Free Pareto. Defect code column indicates which column holds the code names of defects. Sample Size column indicates the column where the lot size is written. If the codes for defects can be grouped, Grouping Level indicates the position of characters that share the same group code. If they will not be grouped type positions 1-10. Font. Press the button with the font name to change the font, style or size. Prepare. Press to prepare the report with the new parameters. The report is displayed as a Web page in your web explorer. Find the explanation of the functions of the preview in Section 7.2 7.6 Audit Trail Report. In this report you will get the list of actions taken by users when they remove or modify data samples. The complete deleted records are also available. The query can be filtered by example in the first cell of each column with or without a wildcard character (*). The filtered query can be printed or exported. U s e r M a n u a l 98 SuperSPC ® v.2012 7.7 Log Notes Report. In this report you will get a listing of data samples falling outside control and / or specification limits and their log comments from one or more sheets. It can also report only samples with missing data cells or all-good data. Scope. The report can consolidate information from other sheets in addition to the one currently open. Format. Use this button to select the formats to be included in the report. In the format list select multiple rows by clicking while pressing the Control key. Press OK to finish. Machines. Select the machines that will be included in the report. In the machine list select multiple rows by clicking while pressing the Control key. Press OK to finish. Processes. Select products / processes that will be included in the report. Subgroups Selection. Select the criteria for rows and columns (characteristics) to be included in the report. For more details see the discussion in Section 6.3.1. Include samples. Check the boxes for the condition of the samples you want to appear in the report: Logged Bad Good Missing Samples with comments regardless of their disposition. Samples with one or more values out of bounds. The asterisk (*) will indicate statiscally out of control and exclamation (!) indicates out of spec. Samples with all values within limits. Samples with empty cells. Language. Spanish, English, Portuguese, Phonetic Chinese and Simplified Chinese. Descriptions of each language will be used to prepare the report. Font. Press the button with the name of the font to change its type, style or size. Prepare. Press this button to preview the report based on the new parameters. See the explanation of the preview functions in Section 7.2. Important: When processing this report with several data sheets an 'outdated data sheet' message may appear and a button to update. This is because the system has found a sheet with the same format but U s e r M a n u a l 99 SuperSPC ® v.2012 different content columns making it necessary to update all the characteristics to the current format definition. If you choose not to update, then the content of that sheet will be omitted from the report. This report can be scheduled to be run automatically by Windows and the result sent attached to an email by typing the following command line: C:\Program Files\SuperSPC2012\Scep2012.exe RBITACO, <recipient>, <period> Replace <recipient> with the recipient's email address Replace <period> by a word that starts with the character key to the period: A M S D T H To include data from To include data from To include data from To include data from To include data from To include data from the start of the year to the current date and time. the start of the month to the current date and time. the start of the week to the current date and time. the start of the day to the current time. the start of the shift to the current time. the beginning of the hour to the current time This command can be placed either at the Start > Run command line, in a BAT command batch file or programmed inside Programs > Accessories > Tools > Windows Scheduled Tasks. The email will be sent by the method indicated in the editable file SCMAIL.XML. Choices are Lotus Notes, MS Outlook, Outlook Express and SMTP. 7.8 Defects Report. In this report you'll get 3 cross tabulations: Defective product by machine. Defects by type and product. Defects by type and machine. Before preparing click the buttons to select the formats, machines and processes to include in the report. Then enter the date range. Finally press the button Prepare to get the preview of the report. The modifiable parameters are the same buttons on Log Notes Report. This report can be scheduled to be run automatically by Windows and the result sent attached to an email by typing the following command line: C: \ Program Files \ SuperCEP 2012 \ scep2012.exe RDEFECT, <recipient>, <period> See details in section 7.7 7.9 Capability Report. It is a summary list of process capabilities in three presentations: Summary of capability indexes and process capability (Cp's & Cpk's) per machine, product and characteristic. Summary of the observed percentage of product within specification per machine, product and characteristic. Weekly average value, standard deviation and percentage observed within specification per machine, product, characteristic and weekday. Before preparing click the buttons to select which Formats, Machines and Processes to include in the report. Then enter the date range. Finally press the button Prepare to get the preview of the report. U s e r M a n u a l 100 SuperSPC ® v.2012 The modifiable parameters are the same buttons as in the Log Notes Report except: Minimum Data. This is the minimum number of samples required for each characteristic to appear in the report. This report can be scheduled to be run automatically by Windows and the result sent attached to an email by typing the following command line: C: \ Program Files \ SuperCEP 2012 \ Scep2012.exe RHABILID, <recipient>, <period> See details in section 7.7 REVISED JLO APRIL 24 2014 U s e r M a n u a l 101 SuperSPC ® v.2012 8. MISCELLANEOUS MENU Contains various options for data capture and access to third-party tools. 8.1 RS-232 Utility. Before setting a column type format with automatic capture serial port Connection, you should use this tool to check for data communication with the measuring equipment. Select the COM port, or baudaje speed (bits per second), the parameters (parity, data bits and stop bits), protocol, activating RTS and DTR lines, the reception level (number of bytes in activating the reading buffer), the capacity or size of the receive buffer and terminator character ASCII code used by the instrument to separate each row of data (13 = 10 = CR and LF). If you are not sure how to set any of the parameters mentioned consult your instrument or call our support for free advise. Click the Open button and to work on your instrument to send data. The right side counters indicate the number of bytes received by the port and the number of bytes present in the read buffer and pending the implementation. Press Read to bring a line of data from the buffer to the text box. The bytes received can be saved to a file by pressing the Save button. This file is useful if the particular format of the data required to Fábrica Digital advise you to set or reprogram SuperCEP for the interpretation of the information. You can send a command to the writing instrument in the field and pressing the Send button. If the command contains control characters set the symbol / followed by the ASCII character code with 3 digits. For example PRINT/013 send the word PRINT followed by 013 or CR character. If the connection is interrupted or not coincide with the parameters of the equipment will display ads for how to log into the text box from the middle of the window. 8.2 Lock Columns. In formats of inspection with many columns, it is useful to keep sample identification columns on the screen. Use this option to set the ones you need always to the left. U s e r M a n u a l 102 SuperSPC ® v.2012 8.3 Edit Date and Time. Upon entering the inspection form and begin capturing data, the columns of sample number, date, time, shift and operator are automatically filled. If you want to feed or change them check this option. In the case of changes to the date / time remember that if you alter the chronological order of the submitted samples reordered system the next time you enter the Data Sheet shows regardless of how many they have. 8.4 Serial Port. If you need to work in an inspection form that contains a column type set to automatic capture serial port Connection, but the computer is not working or not connected to the local computer, you must temporarily disable access to ports communication to avoid the error messages. 8.5 Timer. Used to start or finish the update automatically, without user intervention, data sheet and deployed viewports. The refresh interval can be set between 5 and 65 seconds. Whenever the system meets the period reread the database and re-draw the graphics. This is useful in network installations where synchronization is desired query to feed data from other devices or from external applications for data collection. Enabling or disabling the timer is saved for the next session SuperCEP. You can always be a manual update timer status independently by pressing the F5 key in the Data Sheet. 8.6 Calculator, Control Panel, MS Paint. These choices will lead to different programs according to the provisions under the label file MENU.IAU [TOOL]. This file can be edited to remove these shortcuts or include others. U s e r M a n u a l 103 SuperSPC ® v.2012 9. MAD. DATA ACQUISITION MODULES (SC version only). The routers programs MAD2012, MADExcel2012, MADSQL2012 and MADDDE2012 are auxiliary SuperCEP modules which aim to minimize the data collection effort. 9.1 MAD2012. Allows you to receive up to 16 RS-232 serial connection or Ethernet TCP / IP, identifying, labeling and recording them in one or more predefined data sheets. Each connection can handle a single instrument or instruments multiplexer with several distinguishable by channel numbers. Even for a single channel connection and can separate different quality characteristics in the order of arrival at the port (sequences). Once configured, the program works independently keeping constantly updated database of SuperCEP. The connections must be configured so that the program knows how to interpret the data coming and how should record them at data sheets. Select the connection by clicking the numbered tab and press the Configure button. Appearing configuration window, select an instrument from the list shown at the bottom. If the instrument has RS-232 output then the connection number (1 through 16) corresponds to the serial communication ports COM1 to COM16. If the instrument is outputted TCP / IP can use any of the 16 connections as they all use the same Ethernet adapter.. Enter the number 1 in the Channel field if your connection is to a multiplexer. If you have a multiplexer connected should create a separate configuration for each channel of your team. Then type the number 1 in the Sequence field if your instrument sends data via this connection / channel correspond to a single characteristic. If the data are for different characteristicss and they come in order, enter the sequence number. If the data are for different characteristicss but do not always arrive in the same order, then they should come up with some identifier, which is set on a table as TID explains Product Characteristics. In the latter case the sequence is 1. In the Operator, Station, Machine, Process, Format and Characteristic fields, keys must be selected from the lists that appear at the bottom of the window. These lists can not be changed here, only in the Configuration module SuperCEP. The additional characteristic and value fields are optional and can record additional data with the value provided by each data arrives for this Connection / Channel / Sequence. In the U s e r M a n u a l 104 SuperSPC ® v.2012 following example, each measuring total column height LON additionally be recorded lot number "654JKL" column LOT. In case of be using a connection TID table, selection of the characteristic is irrelevant. Press Save to save the configuration. Repeat this procedure for each combination Connection / Canal / Stream need. Once configured the connection starts receiving data open with the Open button. The TCP / IP connections have a timeout to 10 seconds for the instrument to accept the connection. The green color along with the selection indicates tab is open. Clicking on the tab will show the last 25 data received by this connection and what blade and spine were recorded. To terminate the communication press the Close button. The program saves the state of the connections before you leave so that, upon re-entry, the connections that were open are restored automatically. All configuration of all modules connections MAD is stored in the file MadConf2012.MDB. If you require different configurations for different applications, you can copy this file, select the copy with the large button at the top right and you need to add or modify. The operation requires no SuperCEP MAD2012 running simultaneously. However, if you want to be watching the data received in the leaves can open SuperCEP interest in the road and hit F5 to refresh the screen with the most recently received data. If the timer is enabled refresh is automatic. The user can not accidentally close the program. To close it is necessary to go to the Windows Task Manager. 9.2 MADExcel2012. Is an alternative way to collect data from MS Excel spreadsheets. By MADExcel connections you can automatically record this information in the SuperCEP database for storage and statistical analysis. All that is required is to know the name of the Book, Sheet and Excel Cell for each of the data of interest and it will be used to bind them to the corresponding Products and Characteristics in SuperCEP. U s e r M a n u a l 105 SuperSPC ® v.2012 The update of the data can be done manually or automatically in predefined time intervals using a configurable set of 10 clocks. To illustrate the operation of this utility we will connect an Excel worksheet to the sample datasheet that comes with the system. The steps are: In Excel set: Create a workbook called C:\CEP.XLS containing a sheet named Sheet1. Choose any 4 cells and put data for the following concepts: Identification of Lot, Contents, Diameter and Length. Save and close the Excel workbook. In MADExcel set: 1. On the Excel Book column of the first 4 rows of the table type C:\CEP.XLS. 2. On the Excel Sheet column of the first 4 rows of the table type SHEET1. 3. On the Excel Cell column of the first 4 rows of the table enter the coordinates of the cells used in step 2. Note: If you plan to change the coordinates of the data in the future it is convenient to assign names to their cells and use the names instead of coordinates. 4. On the Operator, Station, Machine, Product and Format columns of the first 4 rows of the table type SUPER, PROD, LIN1, ABC21 and ABC respectively 5. On the Characteristic Column of the first 4 rows of the table type the codes LOTE, TAMLOT, DI and LON. 6. On the Clock column of the first 4 rows of the table enter the number 1. 7. On the Minutes column enter the number 0. Changing the value in a row changes the minutes of all rows that have the same clock, although this is not immediately reflected in the table. U s e r M a n u a l 106 SuperSPC ® v.2012 Get Data: Press the Open button at the bottom center of the MADExcel window. Press button number 1. Click the tab that says Data and observe the 4 lines that indicate the four data read from Excel cells and the locations where they were recorded in SuperCEP. In the example above, data were obtained manually by pressing button number 1. You can automate the data collection setting an interval in the Minutes column. Each time the established interval for a clock is met, the program reads data from the Excel spreadsheet (of those characteristics assigned to the clock) and records it in SuperCEP. You can use up to 10 clocks with independent intervals. U s e r M a n u a l 107 SuperSPC ® v.2012 An advanced option to dynamically identify the destination of read data in SuperCEP is to use Excel named cells. For example, if an Excel spreadsheet can contain data of different products in the same cells depending on when you read it, you must have a named cell (eg. "ITEM") indicating the product code and then at the product column in MADExcel you will type @ITEM indicating that the product code is variable and should be taken from that cell.. MADExcel has an option that can identify which data have already been read and do not repeat their capture. This can be useful if you have an Excel spreadsheet that fills slowly with sample data that must be copied to SuperCEP only once but you want to capture them as they are available. To achieve this in the example above, the additional steps are: In Excel set: 1. In the same workbook make a copy of Sheet1 to Sheet1_C. 2. Delete any content from cells B7, C8, D9 and E10 in Sheet1 and Sheet1_C. In MADExcel set: 3. In the Input Control column of the first 4 rows enter –1 (minus 1). Get data: 4. Open the Excel workbook and input data in cells B7 and D9. Close the workbook. 5. Press the Open button situated at the bottom center of the MADExcel window. 6. Press button number 1. 7. Clic on the Data tab and notice that there are only 2 rows containing data read from characteristics LOTE and DI. 8. Open the Excel workbook and notice in Sheet1_C cells B7 and D9 now holding a letter ‘C’. 9. On Sheet1 input data into cells C8 and E10. Close the workbook. 10. In MADExcel press button number 1 again. 11. Clic on the Data tab and notice 2 new rows containing the data read from the corresponfing new contents in cells TAMLOT y LON. Since all four configured data ports are already read, MADExcel will not read them again until in the corresponding cells in Sheet1_C the letters ‘C’ are eliminated. All the described configurations are stored in the MadConf2012.MDB file. Should you require working with different configurations you can copy this file and select the copy with the large button located at the bottom left of the window. 9.3 MADDDE2012. It is an alternative to capture that collects data from other applications or programs with the ability to establish communication DDE (Dynamic Data Exchange). There are applications that allow connections to objects that publish their data in real time. Using DDE connections can automatically record the data in the database SuperCEP for storage and statistical analysis. All that is required is that you is know the DDE (LinkTopic) name of the application that originated the data and cells or fields of the application also have a DDE (LinkItem) name to be used to bind them to the Products and corresponding characteristics in SuperCEP. U s e r M a n u a l 108 SuperSPC ® v.2012 The DDE update can be done manually or automatically in predefined time intervals using a configurable set of 5 clocks. The configuration and operation of this module equals MADExcel syntax except for the connections to be consulted with the application vendor and Windows documentation. Note: The DDE functionality was discontinued from Windows Vista. 9.4 MADSQL2012. It is an alternative to capture that collects data from database that accepts SQLconnections. Their use requires a basic knowledge of SQL query language. U s e r M a n u a l 109 SuperSPC ® v.2012 A. CERTIFICATE DESIGN (SC version only). The aim of this module is to provide the tools that allow you to get special reports of the sample data, including any text you want, free variables in each print, statistical calculations (average, maximum, minimum, standard deviations and process capability indexes), free accommodation columns inspection format, complete control over the size and font and insert image files. The main use of these tools is to issue Quality Certificates, which are widely used in industries that deliver lots and wish accompany the product to a report where clearly specified measurements and verifications were performed at the same. Para diseñar un nuevo Certificado de Calidad puede emplear el Bloc de Notas o Microsoft Excel. A.1 With Notepad. The following certificate was obtained SuperCEP: Aceros del Norte, SA de CV Atención: Ing. Francisco Martínez P R E S E N T E CERTIFICADO DE CALIDAD. PRODUCTO: ABC_21 01 LIN_1 ABC TORNILLO MODELO ABC-21 PLANTA Línea de Producción 1 FORMATO PARA MODELOS ABC No. de Envases: 2,500 RESULTADO DEL ANALISIS DEL LOTE: AA-01 -----------------------------------------TAMLOT DI LON APARIE FDAPAR TAMAÑO DE LOTE DIAMETRO DE CABEZA ALTURA TOTAL MALA APARIENCIA Fracción Mala Apariencia : : : : : -E.INF.100.0 0.6500 1.670 -E.SUP.110.0 0.6900 1.710 9 0.050 --VALOR105.0 0.6640 1.660 1 0.020 ATENTAMENTE --------------Aseg. Calidad To analyze the construction of the proforma for this certificate, select the menu Reports the option Notepad or any text editor loaded with capacity for ASCII files. Open the file Example1.txt located in the folder IAU within the installation folder: Rem Sample Certificate. Rem ----------------------Rem Rem & = Variable field Rem @AA = Identification data U s e r M a n u a l 110 SuperSPC ® v.2012 Rem @nn = Value of data Rem ! = Tabulator Rem Rem 3 Variable Fields (&) Rem ---------------------3 1 Company 2 Attention from 3 Containers Num. Rem Rem Starting Form Rem --------------! &01 Attention: &02 P R E S E N T E QUALITY CERTIFICATE. !..!...........!...........! PRODUCT: @CP @NP @CE @NE @CM @NM @CF @NF ! Containers Num.: &03 !.......! LOT TEST RESULT: @01 !* -----------------------------------------!..!........!................................!......!............!............! -E.INF.-E.SUP.--VALOR@CC02 @NC02 : @EI02 @ES02 @02 @CC03 @NC03 : @EI03 @ES03 @03 @CC04 @NC04 : @EI04 @ES04 @04 @CC05 @NC05 : @EI05 @ES05 @05 @CC06 @NC06 : @EI06 @ES06 @06 ! ATENTAMENTE !* --------------! @NU Quality Assurance Rem End of Form The lines starting with REM are comments and are not interpreted in print. The following lines define three free fields: 3 1 Company 2 Attention from 3 No. Containers You can feed the values of these fields in the table that appears whenever you print the certificate. These values will be printed on positions & located in the body of the text. For example: &01 Atención: &02 Print the name of the company and below the name of the person for whom the Certificate. Later following appears: U s e r M a n u a l 111 SuperSPC ® v.2012 PRODUCT: @CP @CE @CM @CF @NP @NE @NM @NF Here data identifications will be printed at positions @ according to the following table: Key Notepad @CU @CE @CM @CP @CF @CC @UN @NE @NM @NP @NC @NF @UC @SN @MN @PN @CN @FN @0 @-1 @-2 @-3 @01,@02... 99 @EI01,@EI02... 99 @ES01,@ES02... 99 @MA01,@MA02... 99 @MI01,@MI02... 99 @AV01,@AV02... 99 @SD01,@SD02... 99 @SS01,@SS02... 99 @SR01,@SR02... 99 @PP01,@PP02... 99 @PK01,@PK02... 99 @CP01,@CP02... 99 @CK01,@CK02... 99 Displays User’s Key Key Station Machine key Product Key Format Key Characterístic Key User’s Name Station Description Machine Description Product Description Characteristic Description Format Description Unit of measure of the Characteristic Station Name Machine Name Product Name Characteristic Name Format Name Key operator that data captured Turn that was captured Time it was captured data Date the data was captured Captured value in the indicated column in the Data Sheet Lower Specification characteristic column indicated Lower Specification characteristic column indicated Maximum value of a data range of the indicated column Minimum value of a data range of the indicated column Average data range of the indicated column Standar Deviation (RMC) of a data range of the indicated column Sample Standar Deviation of a data range of the indicated column Standard Deviation (R/d2) of a data range of the indicated column Index Preliminary Process Capability of the indicated column Ability Index Preliminary Processing of the indicated column Process Capability Index of the indicated column Process Capability Index of the indicated column The following table of results is also constructed using the keys' in the table above. Note that the numeric key corresponding to the column number in the Data Sheet. Lot test result: @02 !* -----------------------------------------!..!........!................................!......!............!............! -E.INF.-E.SUP.--VALOR@CC01 @NC01 : @EI01 @ES01 @01 @CC03 @NC03 : @EI03 @ES03 @03 @CC04 @NC04 : @EI04 @ES04 @04 @CC05 @NC05 : @EI05 @ES05 @05 @CC06 @NC06 : @EI06 @ES06 @06 It is very important that all the @ is sufficient space on the right to fit the substitutions of the actual values. U s e r M a n u a l 112 SuperSPC ® v.2012 Finally the characters ! indicate spaced tabs. For example, the following three lines indicate 1) fixed space, 2) fixed proportional spacing with tabs and 3) proportional spacing: !* !..!........!................................!......!............!............! ! The remaining items that do not contain special symbols (&, @,!) Are printed as found in the text. Example1.txt file can use as a starting point to develop proformas for certificates that only require a specimen. The following certificate is obtained from the proforma Example2.txt using more advanced instructions to display multiple samples, do calculations on them and improve appearance with changes to the font type and size, inserts images and tables. You can also print the certificate condition defining alarms for out of specification data. Certificado de Calidad Pruebas Físicas Dirigido a: Aceros Internacionales At'n.: Ing. Mendoza PRESENTE En relación a su amable solicitud, le estamos enviando el siguiente Certificado de Calidad con el objeto de que puedan constatar la excelente calidad con la que están fabricados nuestros productos. Así mismo reiteramos nuestra confianza en que el material que le estamos entregando con la remisión No.A1034. será de gran utilidad para la fabricación de su nuevo producto. ---------------------------------------------------------------Fecha de Operador Contiene Altura Diametro Manchas Elaborac. Turno (Pza) (in) (cm) (Pza) ---------------------------------------------------------------01/02/1997 2 SUPER 101.0 1.650 0.6700 1 01/02/1997 2 SUPER 102.0 1.738 0.6700 2 01/02/1997 1 SUPER 103.0 1.734 0.6700 3 01/02/1997 1 SUPER 104.0 1.732 0.6720 4 01/02/1997 1 SUPER 105.0 1.726 0.6700 5 01/02/1997 1 SUPER 106.0 1.722 0.6700 3 01/02/1997 1 SUPER 107.0 1.723 0.6600 0 01/02/1997 2 SUPER 108.0 1.718 0.6700 4 ---------------------------------------------------------------Media : 104.5 1.718 0.6690 3 Mínimo: 101.0 1.650 0.6600 0 Máximo: 108.0 1.738 0.6720 5 Valores nominales de su proceso: -------------------------------------------Contiene Altura Diametro Manchas (Pza) (in) (cm) (Pza) -------------------------------------------105+/-5 1.7+/-.1 .66+/-.02 3 max -------------------------------------------- Sin más por el momento, quedamos a sus apreciables órdenes. ATENTAMENTE Ing. Leopoldo García Rodríguez Gerente de Planta The changes in the type and font size are obtained with the following commands: U s e r M a n u a l 113 SuperSPC ® v.2012 Change Font: [FontName = type] Change font size: [FontSize = size] Change to bold: [FontBold = -1] Change to normal: [FontBold = 0] Change to italics: [FontItal = -1] Change to normal: [FontItal = 0] To insert an image type: [Picture = Name, X, Y, W, H] To insert a table type: [Box = X, Y, W, H, 1.1, LW] To insert a table type: [Box = X, Y, W, H, HC, VC, LW] Where Name is the path and filename BMP or JPG, X and Y are the coordinates (in%) of the top left corner and W and H are the width and height (in%) of the image, chart or table. LW is the line width of the chart or table. HC and VC are the number of the horizontal and vertical cells in the table. The table of results is obtained with the following instructions: ---------------------------------------------------------------Fecha de Operador Contiene Altura Diametro Manchas Elaborac. Turno (Pza) (in) (cm) (Pza) ---------------------------------------------------------------[Repeat] @-3 @-1 @00 @02 @04 @03 @05 -------------------------------------------------------------Media : @AV02 @AV04 @AV03 @AV05 Mínimo: @MI02 @MI04 @MI03 @MI05 Máximo: @MA02 @MA04 @MA03 @MA05 Besides @ fields already explained above, instruction is used [Repeat] which repeats the print line for each of the selected samples. Results Average, Minimum and Maximum can be printed at any time without showing the detail of the samples. You can filter only some items within the selection range by typing the filter condition in the field. To include an alarm condition to print the certificate type the logical expression that must be met to trigger the alarm using the keys described above. In the following example alarm if the average of column 2 least 3 times more sample standard deviation exceeds the specification: [Alarm=@AV02 + 3 * @SS02 > @ES02] [Alarm=@AV02 - 3 * @SS02 < @EI02] To print any Certificate follow the instructions on the Reports chapter. A.2 With Microsoft Excel. If you have this application on your computer you can design the report using all the facilities thereof. You can use one or more sheets in any position within the Excel Workbook. To include SuperCEP data in the Excel worksheet cells must be labeled with names that are listed in the following table: U s e r M a n u a l 114 SuperSPC ® v.2012 Microsoft Excel Name CU CE CM CP CF CC_code UN NE NM NP NF NC_code UC_code SN MN PN FN CN_code BE BM BP BF BC_code VU_code VA_N VA_FECHA VA_HORA VA_TURNO VA_OPERADOR VA_BITACORA VA_code VR_N VR_FECHA VR_HORA VR_TURNO VR_OPERADOR VR_BITACORA VR_code EI_code EC_code ES_code ND_code MA_code MI_code AV_code SD_code SS_code SR_code PP_code PK_code CP_code CK_code FA_code FI_code FB_code ZU_code ZT_code ZL_code Displays User Code Station Code Machine Code Product Code Format Code Characteristic Code User Name Descripcion de la Estación Descripción de la Máquina Descripción del Producto Descripción del Formato Descripción de la Característica Characteristic Unit of Measure Station Name Machine Name Product Name Format Name Characteristic Name Portuguese Station Description Portuguese Machine Description Portuguese Product Description Portuguese Format Description Portuguese Characteristic Description Free field. Content assignable at print time Number of the first sample selected Date of the first sample selected Time of the first sample selected Shift of the first sample selected Code of Operator that entered the first sample selected Log of the first sample selected Value entered at the code cell of the first sample selected Numbers of selected samples Dates of selected samples Times of selected samples Shifts of selected samples Operator codes of selected samples Logs of selected samples Values of the code Characteristic of the selected samples Lower Specification of the characteristic in the code column Target Value of the characteristic in the code column Upper Specification of the characteristic in the code column Number of samples selected of code characteristic Maximum value of the range of code column data Minimum value of the range of code column data Average of the range of code column data Standard Deviation (RMC) of the range of code column data Sample Standard Deviation of the range of code column data Standard Deviation (R/d2) of the range of code column data Performance Potential Capacity Index of code column Performance Capability Index of code column Process Potential Capacity Index of code column Process Capability Index of code column Estimated fraction of population above specification Estimated fraction of population in specification Estimated fraction of population below specification Standard distance z from the Mean to the Upper Specification Limit Standard distance z from the Mean to the Target Standard distance z from the Mean to the Lower Specification Limit U s e r M a n u a l 115 SuperSPC ® v.2012 To label the cell use the Define Name procedure. To include VU_ free fields use prefix and a word that describes the data type. For example VU_CLIENT will allow you to write the name of the customer before printing each certificate. Save the Excel workbook in the CCC folder within the same folder where SuperCEP is. The capability of showing alarms before printing is not available on certificates designed with Excel. U s e r M a n u a l 116 SuperSPC ® v.2012 B. DATABASE B.1 Configuration Tables. If you use the connection to database with Jet engine, the configuration data are stored in the SCEP2012 file.Mdb file that is compatible with Microsoft Access 2000 format. Copy this file to work in any program that can read this format. If you are using the connection to SQL Server database, see your computer administrator for information about how you can get a copy of the SCEP2012 database. Very Important: Since Windows Vista, it is not recommended to keep database files under any \Program Files folder because the operating system assumes these files to be Read Only. For information backup purposes please be aware that Windows will sometimes mantain the up to date version of some SuperCEP files located at folder \Users\user name\AppData\Local\VirtualStore\Program Files(x86). The tables you'll find in this database are: Table Description USU EST EXU MAQ MXE PRO PXM CAR CXP ESP FRM CXF AXC INS TEX USERS catalog STATIONS catalog STATIONS per USER relations MACHINES catalog MACHINES per STATION relations PRODUCTS catalog PRODUCTS per MACHINE relations CHARACTERISTICS catalog CHARACTERISTICS per PRODUCT relations History of LIMITS FORMATS catalog CHARACTERISTICS per FORMAT relations LISTS OF CONCEPTS catalog INSTRUMENTS connections catalog TEXT information catalog Description of fields content follows: Table USU USU USU USU USU USU USU USU USU USU USU USU USU USU EST EST EST EST EST EXU EXU Field USUCLAVE USUDESCR USUSSTAT USUCONTR USUGRAFI USUREPOR USUPODER USURCOLI USURCOLF USUESTAC USUEMAIL USUPROFI USUBEGIN USUTWMOD ESTCLAVE ESTDESC1 ESTDESC2-7 ESTMAPA ESTMAQUI EXUUSUAR EXUESTAC Description User Code User Name User Status User Password User Charts User Reports User Rights Column Initial Position Column Final Position Recent Station User E-Mail User Profile Password Date Minutes to edit Station Code Station Name main language Station Name alternative languages Image for Machines menu Recent Machine User Station U s e r M a n u a l 117 Default Value “..” 0 “..” 10000000000001 1 00010100000000000000 0 9999 0 Code Code “BLANK.JPG” SuperSPC ® v.2012 EXU EXU MAQ MAQ MAQ MAQ MAQ MAQ MAQ MXE MXE MXE MXE PRO PRO PRO PRO PXM PXM PXM PXM PXM PXM PXM FRM FRM FRM FXP FXP CAR CAR CAR CAR CXP CXP CXP CXP CXP CXP CXP CXP CXP CXP CXP CXP CXP CXP CXP CXP CXP CXP CXP CXP CXP CXP CXP CXP CXP CXP CXP EXUCOORX-Y EXUDISPO MAQCLAVE MAQDESC1 MAQDESC2-7 MAQPRODU MAQFORMA MAQOPER1-3 MAQMAPA MXEESTAC MXEMAQUI MXECOORX-Y MXEDISPO PROCLAVE PRODESC1 PRODESC2-7 PROMAPA PXMMAQUI PXMPRODU PXMCOORX-Y PXMFIMON PXMMONID PXMSUPV1-4 PXMREVI1-4 FRMCLAVE FRMDESC1 FRMDESC2-7 FXPPRODU FXPFORMA CARCLAVE CARDESC1 CARDESC2-7 CARUNIDM CXPMAQUI CXPPRODU CXPCARAC CXPANALI CXPLIMIT CXPDECIM CXPLINFE CXPLMEDE CXPLSUPE CXPLINFN CXPMEDIA CXPLSUPN CXPLINFC CXPLSUPC CXPTSUBG CXPETAPA CXPCPMIN CXPNMUES CXPCAPTU CXPCATAL CXPEQUIP CXPPUERT CXPCANAL CXPEQOP2 CXPEQOP4 CXPFORMU CXPCRITI X-Y coordinates of label Station quality disposition Machine Code Machine Name main language Machine name alternative languages Recent Product Recent Format Not used Image for Products menu Station Machine X-Y coordinates of label Machine quality disposition Product Code Product Name main language Product Names alternative languages Image for Formats menu Machine Product X-Y coordinates of label Not used Not used Supervisors Supervision done Format Code Format Name main language Format Name alternative languages Product Format Characteristic Code Characteristic Name main language Characteristic Name alternative languages Measure unit Machine Product Characteristic Analysis Type Limits Type Decimals Lower Specification Limit Target value Upper Specification Limit Lower Control Limit Mean value Upper Control Limit Lower Input Limit Upper Input Limit Subgroup size Control Stage Minimum Cpk Samples per day Input Type Input catalog Instrument connection Serial COM port Multiplexor channel Column search Cursor Movement Formula Critical level U s e r M a n u a l 118 Random Code Code “BLANK.JPG” Random Code Code “BLANK.JPG” Random #01/Jan/2011# 7 0 Code Code Code Code “..” “V” “B” 2 -1 0 1 0 0 0 -999999 999999 1 “H” -1 3 “M” 0 0 3 SuperSPC ® v.2012 CXP CXP CXP CXP CXP CXP ESP ESP ESP ESP ESP ESP ESP ESP ESP ESP CXF CXF CXF CXF INS INS INS INS INS INS INS INS INS INS INS INS INS INS INS INS INS INS INS AXC AXC AXC AXC AXC CXPCOSTO CXPINFOP CXPAVI01-03 CXPCOORX-Y CXPDISPO CXPANCHO ESPMAQUI ESPPRODU ESPCARAC ESPFECHA ESPLINFE ESPLMEDE ESPLSUPE ESPLINFN ESPLMEDN ESPLSUPN CXFFORMA CXFCARAC CXFPOSIC CXFANCHO INSCLAVE INSDESCR INSTIPOC INSBAUDI INSPARID INSBDATO INSBPARO INSHNDSH INSDTRA INSRTSA INSBUFFE INSRCVTH INSRMTIP INSTCPPR INSCINIC INSCDATO INSINICI INSTERMI INSTABLA AXCTABLA AXCCLAVE AXCDESC1 AXCDESC2-7 AXCVALOR Cost of non-conformity Process Information Alarm messages X-Y coordinates of label Characteristic quality disposition Not used Machine Product Characterístic Start Date Lower Specification Limit Target Value Upper Specification Limit Lower Contro Limit Mean Value Upper Control Limit Format Characteristic Column relative position Column width Instrument code Instrument name Type of connection Baud rate Parity Data bits Stop bits RS232 Handshake DTR active RTS active Data buffer size Receive threshold Remote IP TCP port Initial ommand Data request command Initial position of data Message termination character Data interpretation table Concept Table Code Concept Code Description in main language Description in alternative languages Specific weight 1 Random 0 1 0 0.5 1 0 0.5 1 1 1 “..” “RS232” 9600 “N” 8 1 1 -1 -1 1024 1 “127.0.0.1” 1007 1 10 No 1 B.2 SAMPLING DATA TABLES. If you use the Jet engine database connection, there is a data file in a format compatible with Microsoft Access 2000 for each data sheet created. The data files are located within the sample data folder in the subfolder <Format>\<Machine> named <Product>.MDB. If you are using the connection to SQL Server database, there is a single database called SCEP2012DATA containing all data sheets. Consult your computer administrator about how to obtain a copy of this database. In Jet format, the data file contains a table named Datos with the following structure (in SQL Server the table is called Datos_<Format>_<Machine>_<Product>): U s e r M a n u a l 119 SuperSPC ® v.2012 Field N Date Turn Operator Log Flags <Carac1> <Carac2> <CaracN> Jet Data Type Longint Date / Time Integer Text(10) Memo Integer Double or Text (14) Double or Text (14) Double or Text (14) SQL Data Type int datetime smallint nvarchar (10) ntext smallint float o nvarchar(14) float o nvarchar(14) float o nvarchar(14) Contains Sample number (primary key) Date and time of sample Corresponding shift Operator code Sample Log Supervision Bits Value of Characteristic 1 Value of Characteristic 2 Value of Characteristic n The Log table (or Log_<Format>_<Machine>_<Product> in SQL Server) records modifications, deletion operations or columns eliminations: Field Jet Data Type SQL Data Type Date Date / Time datetime Usuario Action Reason Text (10) Text (250) Text (250) nvarchar(10) nvarchar(250) nvarchar(250) Contains Date and time performed. User Code Action performed. Reason the action was The Audit table (or Audit_<Format>_<Machine>_<Product> in SQL Server) keeps a copy of deleted records with the same structure as the Datos table. B.3 Work Files. SuperCEP 2012 requires the following files for proper operation: Name Type Description SCEP.HLP SCEP2012.CHM SCLog.TXT IAU\ColoresV.IAU IAU\GrafParm.IAU IAU\SeleData.IAU IAU\Menu.IAU IAU\SCDirec.IAU IAU\SCImpre.IAU IAU\ScTurn.IAU IAU\SCViewer.IAU MADConf2012.MDB IAU\MADDirec.IAU SCEP2012.MDB SCEPWork.MDB IAU\ScepHead.RTF IAU\SCMail.XML IAU\Caratula1.jpg Image\Planta.jpg Image\Recepcion.jpg Image\Blank.jpg Image\ABC21.jpg Image\ABC22.jpg Image\Esta01.jpg Image\Esta02.jpg Image\Gerencial.jpg Image\LIN1.jpg Image\LIN2.jpg Image\Economia.jpg Image\Estandar.jpg Help Help Log Configuration Configuration Configuration Configuration Configuration Configuration Configuration Configuration Configuration Configuration Configuration Configuration Configuration Configuration Configuration Configuration Configuration Configuration Example Example Example Example Example Example Example Example Example Context-sensitive help HTML format Help Development Log Color of graphics Graphics parameters Data Selection User Menus and RTF editor Data Paths Printing graphics Turns Viewers of information MAD module parameters Paths MAD data modules System Database Reporting parameters Custom header graphic Email Definitions System Image Home Layout of the organization Entry to the organization Empty image Image of the product or process Image of the product or process Area or station Image Area or station Image Area or station Image Machine or department Image Machine or department Image Machine or department Image Machine or department Image nto U s e r M a n u a l 120 SuperSPC ® v.2012 Image\TORNILLO.BMP Tornillo.txt CCC\EJEMPLO1.TXT CCC\EJEMPLO2.TXT CCC\EJEMPLO3.XLS ABC\LIN1\ABC21.mdb ABC\LIN1\ABC22.mdb CPK\VALIDA\ABC22.mdb EDORES\CONTABIL\OPERACIÓN.MDB ISO\VALIDA\ABC22.MDB OPERA\CONTABIL\OPERACIÓN.MDB PL\VALIDA\ABC22.MDB QTIPS\VALIDA\AEROCAN.MDB TIEMPO\VALIDA\ABC22.MDB CEP.XLS IAU\SC105A2N.IAU IAU\SC1916.IAU IAU\SC414.IAU IAU\SC414B3.IAU IAU\SCACNT.IAU IAU\SCTAB1A.IAU IAU\SCTAB1B.IAU IAU\SCTAB2.IAU IAU\SCZ19B3.IAU IAU\SCZ19B5.IAU IAU\RSLang.IAU IAU\SCLang.IAU IAU\SCCOMPA.IAU MDBBasica.mdb MDBVacia.mdb ScepVacia2012.mdb Conv2012.exe MAD2012.exe MADDDE2012.exe MADExcel2012.exe MADSQL2012.exe Repair2012.exe RS232.exe Scep2012.exe CrystalRPT\SCCAR.Rpt CrystalRPT\SCCXF.Rpt CrystalRPT\SCCXP.Rpt CrystalRPT\SCEST.Rpt CrystalRPT\SCEXU.Rpt CrystalRPT\SCFRM.Rpt CrystalRPT\SCFXP.Rpt CrystalRPT\SCINS.Rpt CrystalRPT\SCMAQ.Rpt CrystalRPT\SCMXE.Rpt CrystalRPT\SCPRO.Rpt CrystalRPT\SCPXM.Rpt CrystalRPT\SCTEX.Rpt CrystalRPT\SCUSU.Rpt Example Example Example Example Example Example Example Example Example Example Example Example Example Example Example Statistics Statistics Statistics Statistics Statistics Statistics Statistics Statistics Statistics Statistics Dictionary Dictionary License Template Template Template Program Program Program Program Program Program Program Program Report Report Report Report Report Report Report Report Report Report Report Report Report Report U s e r Graphic Information Text Information Certificate of Quality Certificate of Quality Excel Certificate of Quality Sample Data Sample Data Sample Data Sample Data Sample Data Sample Data Sample Data Sample Data Sample Data DDE communication with Excel Acceptance sampling Acceptance sampling Acceptance sampling Acceptance sampling Normal distribution Acceptance sampling Acceptance sampling Acceptance sampling Acceptance sampling Acceptance sampling Utility RS-232 System System Sample data Sample data Configuration Data Converter previous databases Multiport router Dynamic Data Exchange router MS Excel router Data base SQL router Repairer files Serial communication Utilities RS-232 Main system Characteristics Format characteristics Product characteristics Stations User Stations Formats Product Formats Instruments Machines Station Machines Products Machines Products Texts of information Users M a n u a l 121 SuperSPC ® v.2012 C. TABLES AND FORMULAS 1. Control Charts for Variables: a. Historical control limits, provisional or initial study. Definition. X R X S a1 LC X X 3 X a3 LC X X 3 X a2 LCR R 3R a4 LCS S 3S b. Historical control limits, provisional or initial study. Calculating with estimators . b1 b2 PI Rm X S X R LC X X A 2 R LSC R D4 R LICR D3R b3 LC X X A1S b5 LCPI PI E 2 Rm b4 LSCS B4S LICS B3S b6 LSCRm D4 Rm LICRm D3Rm EWMA R b7 b8 LCEWMA X EWMA Rm R d2 n 2 LSC R D4 R LICR D3R U s e r Rm d2 2 b9 LCEWMA PI b10 LSCRm D4 Rm LICRm D3Rm M a n u a l 122 SuperSPC ® v.2012 c. Control limits given, known or standards. Definition. X R X S c1 LCX dados c3 LCX dados c2 LCR d 2 n LSC LIC / 6 3 R c4 LCS c2 n LSC LIC / 6 3 S d. Control limits given, known or standards. Calculating with estimators. X R y PI Rm d1 d3 X S LCX dados d2 LSCR D4 d 2 n LSC LIC / 6 LICR D3 d 2 n LSC LIC / 6 d4 EWMA R d5 d6 LCEWMA dada LCX dados LSCS B 4 c2 n LSC LIC / 6 LICS B 3 c2 n LSC LIC / 6 EWMA Rm R dado d2 n 2 LSCR D4 d 2 n LSC LIC / 6 LICR D3 d 2 n LSC LIC / 6 U s e r d7 d8 Rmdado d2 2 LCEWMA PI dada LSCR D4 d 2 n LSC LIC / 6 LICR D3 d 2 n LSC LIC / 6 M a n u a l 123 SuperSPC ® v.2012 e. Development of estimators calculations. To go from a.1 to b.1 & b.5 To go from a.3 to b.3 X ' / n X ' / n ' R / d2 ' S / c2 A2 3 / d 2 n A1 3 / c2 n E2 3 / d 2 To go from a.2 to b.2 & b.6 To go from a.4 to b.4 R d 3 ' S B ' ' R / d2 d3 D3 1 3 d2 d3 D4 1 3 d2 S / c2 To go from a.2 to c.2 & from b.2 to d.2 To go from a.4 to c.4 & from b.4 to d.4 R d2 ' S c2 ' ' x n x LSC LIC / 6 X n X LSC LIC / 6 B c2 B B4 1 3 c2 B3 1 3 U s e r M a n u a l 124 SuperSPC ® v.2012 f. Glossary. X R X S PI Rm EWMA R EWMA Rm LC LSC LIC Mean and Range Graph n Subgroup Size X Subgroup Mean X Graph of Means and standard deviations Individual and moving order 2 ranges Graph Exponentially Weighted Moving Averages and Ranges Graph Graph of Exponentially Weighted Moving Average and Moving Range of order 2 Control Limits Upper control limit Lower control limit Media of the means subgroups R R S S PI Rm ' EWMA Subgroup range c2 Estimator universe standard deviation to the mean standard deviation of the subgroups d2 d3 Estimator of universe standard deviation to the mean ranges of the subgroups B A1 A2 B3 B4 D3 D4 E2 Mean ranges of the subgroups Subgroup standard deviation Mean standard deviations of the subgroups Individual data Moving range of order 2 Standard deviation Standard deviation of the universe EWMAt Yt 1 EWMAt 1 Given control Mean Estimator universe standard deviation to the standard deviation of the ranges of the subgroups Estimator universe standard deviation to the standard deviation of the standard deviations of the subgroups Facilitator for calculation of means and standard deviations graphic Facilitator for calculation of means or individual points and ranges graphs Facilitator for calculation of means and standard deviations graphs Facilitator for calculation of means and standard deviations graphs Facilitator for calculation of means or individual points and ranges graphs Facilitator for calculation of means or individual points and ranges graphs Facilitator for calculation of individual points and moving ranges graphs Weighting factor for calculating EWMA Correction factor 3 sigma (ARL = 370) to calculate EWMA U s e r M a n u a l 125 SuperSPC ® v.2012 g. Table of estimators and facilitators. n c2 d2 d3 A1 A2 B B3 B4 D3 D4 E2 2 0.5642 1.1280 0.8533 3.7599 1.8806 0.4262 0.0000 3.2664 0.0000 3.2670 2.6596 3 0.7236 1.6930 0.8869 2.3937 1.0231 0.3782 0.0000 2.5682 0.0000 2.5740 4 0.7979 2.0590 0.8813 1.8799 0.7285 0.3367 0.0000 2.2659 0.0000 2.2820 5 0.8407 2.3260 0.8644 1.5959 0.5768 0.3053 0.0000 2.0895 0.0000 2.1140 6 0.8686 2.5340 0.8472 1.4100 0.4833 0.2808 0.0300 1.9700 0.0000 2.0040 7 0.8882 2.7040 0.8325 1.2766 0.4193 0.2612 0.1176 1.8824 0.0760 1.9240 8 0.9027 2.8470 0.8199 1.1750 0.3726 0.2452 0.1850 1.8150 0.1360 1.8640 9 0.9139 2.9700 0.8084 1.0942 0.3367 0.2317 0.2395 1.7605 0.1840 1.8160 10 0.9227 3.0780 0.7976 1.0282 0.3082 0.2205 0.2830 1.7170 0.2230 1.7770 11 0.9300 3.1730 0.7872 0.9726 0.2851 0.2102 0.3219 1.6781 0.2560 1.7440 12 0.9359 3.2580 0.7777 0.9253 0.2658 0.2019 0.3529 1.6471 0.2830 1.7170 13 0.9410 3.3360 0.7692 0.8842 0.2494 0.1939 0.3818 1.6182 0.3070 1.6930 14 0.9453 3.4070 0.7617 0.8482 0.2353 0.1870 0.4064 1.5936 0.3280 1.6720 15 0.9490 3.4720 0.7552 0.8162 0.2231 0.1809 0.4281 1.5719 0.3470 1.6530 16 0.9523 3.5320 0.7491 0.7876 0.2123 0.1750 0.4487 1.5513 0.3630 1.6370 17 0.9551 3.5880 0.7434 0.7618 0.2028 0.1702 0.4655 1.5345 0.3780 1.6220 18 0.9576 3.6400 0.7378 0.7384 0.1943 0.1657 0.4810 1.5190 0.3910 1.6080 19 0.9599 3.6890 0.7325 0.7170 0.1866 0.1611 0.4964 1.5036 0.4030 1.5970 20 0.9619 3.7350 0.7278 0.6974 0.1796 0.1573 0.5094 1.4906 0.4150 1.5850 21 0.9638 3.7780 0.7236 0.6792 0.1733 0.1532 0.5231 1.4769 0.4254 1.5746 22 0.9655 3.8190 0.7196 0.6625 0.1675 0.1495 0.5354 1.4646 0.4347 1.5653 23 0.9670 3.8580 0.7152 0.6469 0.1621 0.1464 0.5458 1.4542 0.4438 1.5562 24 0.9684 3.8950 0.7102 0.6324 0.1572 0.1433 0.5561 1.4439 0.4530 1.5470 25 0.9696 3.9310 0.7074 0.6188 0.1526 0.1410 0.5638 1.4362 0.4602 1.5398 30 0.9747 4.0855 0.7040 0.5619 0.1341 0.1287 0.6039 1.3961 0.4830 1.5170 35 0.9784 4.2134 0.7000 0.5183 0.1204 0.1193 0.6342 1.3658 0.5016 1.4984 40 0.9812 4.3220 0.6970 0.4835 0.1098 0.1111 0.6604 1.3396 0.5162 1.4838 45 0.9831 4.4151 0.6951 0.4549 0.1013 0.1059 0.6767 1.3233 0.5277 1.4723 50 0.9849 4.4982 0.6939 0.4308 0.0943 0.1000 0.6953 1.3047 0.5372 1.4628 55 0.9900 4.5720 0.6930 0.4086 0.0885 0.0415 0.8744 1.1256 0.5453 1.4547 60 0.9900 4.6220 0.6914 0.3912 0.0838 0.0569 0.8277 1.1723 0.5512 1.4488 65 0.9900 4.6720 0.6881 0.3759 0.0796 0.0672 0.7964 1.2036 0.5582 1.4418 70 0.9900 4.7220 0.6815 0.3622 0.0759 0.0749 0.7729 1.2271 0.5670 1.4330 75 0.9900 4.7720 0.6702 0.3499 0.0726 0.0810 0.7544 1.2456 0.5787 1.4213 80 0.9900 4.8220 0.6521 0.3388 0.0696 0.0860 0.7393 1.2607 0.5943 1.4057 85 0.9900 4.8720 0.6249 0.3287 0.0668 0.0902 0.7267 1.2733 0.6152 1.3848 90 0.9900 4.9220 0.5864 0.3194 0.0642 0.0937 0.7159 1.2841 0.6426 1.3574 95 0.9900 4.9720 0.5335 0.3109 0.0619 0.0968 0.7066 1.2934 0.6781 1.3219 100 0.9900 5.0220 0.4635 0.3030 0.0597 0.0995 0.6985 1.3015 0.7231 1.2769 U s e r M a n u a l 126 SuperSPC ® v.2012 2. Control Charts for Attributes: a. Historical control limits, provisional or initial study. Definition. c a1 p LCc c 3c a2 LCp p 3p np a3 u LCnp np 3np a4 LCu u 3u b. Historical control limits, provisional or initial study. Estimators calculation. c b1 p LCc c 3 c b2 LCp p 3 p1 p / n np b3 u LCnp np 3 np1 p b4 LCu u 3 u / n c. Control limits given, known or standards. c c1 LCc given p c2 LCp given U s e r np c3 LCnp given M a n u a l 127 u c4 LCu given SuperSPC ® v.2012 d. Development of estimators calculations. To get from a.1 to b.1 To get from a.2 to b.2 c c p p1 p / n To get from a.3 to b.3 To get from a.4 to b.4 np np1 p u u / n e. Glossary. n c Sample Size c p Defects Average p np Average fraction defective np Average defective u Nonconformities or defects per unit u LC Average defects per unit Number of nonconformities or defects Fraction nonconforming or defective Number of non-conforming or defective Control Limits Standard Deviation U s e r M a n u a l 128 SuperSPC ® v.2012 3. Frequency distribution and Process Capability: a. Ungrouped data. X x / n s Pp LSE LIE 2ns 2 X x / n 1 zINF X LIE / s zSUP LSE X / s Ppk min zINF , zSUP n b. Grouped data. X x / n s R / d2 Cp LSE LIE 2ns zINF X LIE / s zSUP LSE X / s Cpk min zINF , zSUP n U s e r M a n u a l 129 SuperSPC ® v.2012 c. Percentages outside specification of a normal distribution. Z -6.0 -5.0 -4.0 -3.0 -2.0 -1.0 0.0 1.0 2.0 3.0 4.0 5.0 6.0 +0.0 100.00000 99.99997 99.99680 99.86500 97.72000 84.13000 50.00000 15.87000 2.28000 0.13500 0.00320 0.00003 0.00000 +0.2 100.00000 99.99992 99.99280 99.74400 96.41000 78.81000 42.07000 11.51000 1.39000 0.06900 0.00133 0.00001 +0.4 100.00000 99.99979 99.98410 99.53000 94.52000 72.58000 34.46000 8.08000 0.82000 0.03400 0.00054 0.00000 +0.6 100.00000 99.99946 99.96600 99.18000 91.92000 65.54000 27.42000 5.48000 0.47000 0.01590 0.00021 0.00000 +0.8 99.99999 99.99867 99.93100 98.61000 88.49000 57.93000 21.19000 3.59000 0.25600 0.00720 0.00008 0.00000 This table was extracted from the inner table of the system which has a resolution 20 times higher and a linear interpolation mechanism. d. Bias and kurtosis. X x / n X2 x / n X3 x / n X4 x / n 2 3 4 Mo2 X 2 X 2 Mo3 X 3 3 X X 2 2 X 3 2 Mo4 X 4 4 X X 3 6 X X 2 3 X Sk Ku 3 4 Mo 3 Mo 2 2 Mo4 3 Mo2 2 U s e r M a n u a l 130 SuperSPC ® v.2012 e. Normality Test Anderson-Darling. Result Certainty A2 mod 1.035 The data are from a normal distribution No 99% de probabilidad de acertar A mod 0.752 No 95% de probabilidad de acertar A2 mod 0.631 No 90%de probabilidad de acertar A mod 0.631 Sí 2 2 f. Minimum correlation coefficients for cumulative frequency linear fit. Number of data Less than 20 21 a 25 26 a 30 31 a 40 41 a 50 51 a 60 61 or more Minimum coefficient 0.9600 0.9662 0.9707 0.9767 0.9807 0.9835 0.9865 g. Glossary. x n X Individual sample Sample Size Sample media s Sample standard deviation LSE LIE Upper specification limit zINF z SUP Standardized distance from the media to the lower specification limit n Pp Standardized units of each side of the media used as a reference for the calculation of the indexes of capacity and ability. Potential process capacity index for ungrouped data Ppk Process capability index for ungrouped data R d2 Average range of subgroups Cp Potential process index for grouped data Cpk Mo2 Mo3 Mo4 Sk Ku Process capability index for grouped data Lower specification limit Standardized distance from the middle to the upper specification limit Estimator of universe standard deviation to the media ranges subgroups Second-order momento Third order momento Fourth-order momento Bias Kurtosis U s e r M a n u a l 131 SuperSPC ® v.2012 D. BIBLIOGRAPHIC REFERENCES 1. ANSI/ASQC A1-1978. American National Standard. Definiciones, Símbolos y Tablas para Gráficas de Control. 2. ANSI/ASQC A1-1978. American National Standard. Formas, Símbolos y Definiciones para el Muestreo de Aceptación. 3. Bowker, A. H. y Lieberman, G.J. Engineering Statistics. Prentice – Hall, Inc., Englewood Cliffs, N.J. 1972 4. Clements, John Process Capability Calculations for Non-Normal Distributions. Quality Progress, Sept. 1989, Págs. 95-102 5. Department of Defense, United States of America. MIL-STD-1916 Test Method Standard. MIL-HDBK-1916. Companion Handbook. 1996-1999. 6. Douglas C. Montgomery Control Estadístico de la Calidad. Editorial Iberoamericana, S.A.México, D.F. 7. Duncan, Acheson Control de Calidad y Estadística Industrial. Ediciones AlfaOmega. México 1989. 8. Food and Drug Administration, United States of America. Code of Federal Regulations Title 21 Chapter 1 Part 11. Electronic records; Electronic signatures. Marzo 1997. 9. Ford Motor Co., Statistical Methods Office. Dearborn, Mich. 1985 Continuing Process Control and Process Capability Improvement. 10. Grant, L.E. y Leavenworth, R.S. Control Estadístico de Calidad 2ª edición. CECSA. México 1996. 11. Hayes, Glenn E. y Romig, Harry G. Modern Quality Control Bruce U.S.A., 1977. Págs, 307-313 12. International Organization for Standarization International Standard ISO8258 First Edition 1993 Shewhart Control Charts 13. International Organization for Standarization Informe Técnico ISO/TR 10017:2003 Orientación sobre las Técnicas Estadísticas para la Norma ISO 9001:2000 14. Lieberman, G.J. y Resnikoff, G.J. Sampling Plans For Inspection By Variables Journal of the American Statistical Association, Junio 1955, Vol. 50, págs. 457-516 15. Lockhart, R.A., O’Reilly, F.J. y Stephens, M.A. Tests of Fit based on Normalized Spacings. The Journal of the Royal Statistical Society Series B ( Methodological ) Vol. 48, No. 3, 1986 Págs. 344-352 16. Miller, I. y Freund, J.E. Probability and Statistics for Engineers. Prentice – Hall, Inc., Englewood Cliffs, N.J., 1968 U s e r M a n u a l 132 SuperSPC ® v.2012 17. Secretaría de Comercio y Fomento Industrial NOM-002-SCFI-1993. Productos preenvasados contenido neto tolerancias y métodos de verificación. Octubre 1993. 18. Walpole y Myers Probabilidad y Estadística McGraw-Hill. México 1992. 19. Wheeler, Donald J. Understanding Variation:the key to managing chaos SPC Press 1993. 20. Wieringa, Jakob Edo Statistical process control for serially correlated data. Chapter 4. [Online Resource]. University Library Groningen. 1999. U s e r M a n u a l 133