Transcript
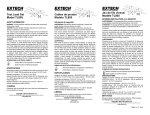
P/N:110401103945
II. Working voltage and working condition
Working voltage: 90V-1000V AC
Working condition:
1) Working Temperature: 0°
C~40°
C
Storage Temperature : - 10°
C~50°
C
Humidity: İ95%
2) Altitude: İ2000m
V. Battery replacement
Battery: 2×1.5V AAA
(1). with one hand holding detector body, and thumb
of other hand pressing the control position of detector
head and extending it backward.
III. Operation instructions
Warning:
Thank you for purchasing the UT12C probe and for the
full use of the product, please:
----------Read the user manual carefully.
----------strictly observe the safety rules and notes listed
in the manual
Please note the following items to guard against electric
shocking or personal injury:
If any damage about the detector or failure to operate,
please do not use it. If any doubt, please deliver the probe
for repair.
Please do not impose voltage exceeding the rating
voltage on probe.
There may be a danger of electric shocking for voltage
higher than 30V (AC), please pay attention to that in
operation and observe local and national safety code of the
country you are in.
Activate
probe
AC
voltage
test
Be careful! Electric shocking
Dangerous! Important information, reference manual
CAT IV equipment is intended for protecting from transient
voltage injury resulted by first level power source such as
meter or overhead wires or ground wires infrastructure.
The product meets:
EMC: EN55022:2006+A1:2007
EN61326-1:2006
LVD: EN61010-1:2010
EN61010-031:2002+A1:2008
UL: UL61010-1, 2nd Edition, 2005-07-22
CAN/CSA-C22.2 No.61010-1,2nd Edition,2004-07
Notes:
no contact with the white part of front end of detector body
for your finger!
1) Under non-vibration mode, put tip of
detector close to the object being tested with
AC voltage, LED will flick and buzz.
2) Under vibration mode, put tip of detector
close to the object being tested with AC
voltage, LED will flick and buzz and motor
vibrate.
Battery will power off automatically for energy
Power
saving if do not use detector about 3 minutes.
off
automatically Buzzer and LED will work concurrently 1
second, indicating power off successfully.
I. Electric symbol
Double insulation
Press once gently the button labeled with
power symbol, buzzer, LED and motor will work
concurrently for 0.5 second, indicating detector
is activated successfully. While entering
the test standby status, LED will flicker two
times continuously with the interval of 1.5
seconds.
Stop
using
motor
Press button gently after power on, LED flickers,
buzzer works, but motor fails to vibrate, a mode
called non-vibration (shifting between vibration
and non-vibration mode with button after power
on).
Stop
Press button about 2 second to power off the
using probe detector with 1 second of buzzer and LED
alight 1 second.
IV. Indication for low electricity of battery
Indication for low electricity of battery When battery voltage is
lower than 1.75V, LED will flicker 5 times slowly after power
on, and buzzer, if any signal, may sound faintly, and motor
vibrates weakly. Please replace battery immediately for the
test accuracy.
(2). Please take out the upper cover of detector according
to the direction as shown in the picture, replace the battery.
(See the following picture)
Cleaning
Periodically wipe the case with a dry cloth do not use
abrasives or solvents.
*END*
This operating manual is subject to change without notice.