1
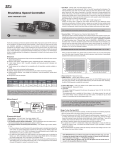
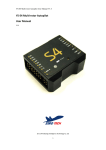
Hero Flight Controller User Manual No.8036 thundertiger.com Manufactured by : Thunder Tiger Corp.(Ningbo) 28 Jin-Feng Road, Liang Hui Industrial Park, Yuyao, Zhejiang 315400 China JK6254 More information can view the tutorial videos on our TTR official website (www.ttrobotix.com) or YouTube channel (https://www.youtube.com/user/ThunderTigerVideo) Hero Flight Controller User Manual I ND E X WARNING AND WARRANTY P.02 CONTENTS INCLUDED P.03 FUNCTIONS P.04 INSTALLATION INSTRUCTIONS P.04 Controller Installation P.04 GPS & Compass Installation P.04 P.05 WIRING Wiring Diagram P.05 Connection P.06 P.07 CONFIGURATION BEFORE FLYING Install Assistant Software P.07 Transmitter Settings P.08 Parameter Settings P.09 Transmitter Calibration P.11 P.14 OUTDOORS TESTING Magnetic Compass Calibration P.14 Unlocking the Motors P.16 Motor Mix Control Checking P.17 FIRMWARE UPGRADE P.19 APPENDIX P.21 Appendix 1 Flight Status Indicators / LED Light of GHOST+ P.21 Appendix 2 Flight Mode Description P.22 Mobile Control Mode P.22 Manual Altitude Hold Mode P.23 Automatic Hovering Mode P.23 Return Home Mode P.23 P.24 CUSTOMER SERVICE -01- Hero Flight Controller User Manual Thank you for purchasing the TTR product. This product is a high-precision quadcopter. Any misuse may result in damage to property, injury, or even death. The user must conform to the law and use the equipment responsibly. This product is not suitable for people under the age of 18. Please read the instruction manual and tutorial videos before using the product, or visit the TTR web page at www.ttrobotix.com refer to relevant updates or information. WARNING Please keep this product out of reach of children under 3 years old. Always fly this product away from people and dangers such as buildings, roads and property. We suggest you fly your quadcopter at specially designated areas. Please do not fly this product when affected by drunkenness, tiredness, drugs, dizziness fatigue, nausea or any other condition that might impair your ability to control the quadcopter. Please make sure all components of the device are connected well and working properly, otherwise, this product may be damaged, destroyed or even burnt. Please do not fly this product in unfavorable conditions. Remote Controlled (RC) Aircraft Model is Intended used for leisure activities. WARRANTY TTR warrants to the original purchaser that the Product purchased will be free from defects in materials and workmanship at the date of purchase. (Removal or tampering of the WARRANTY VOID stickers from the Product voids this warranty.) This warranty is not transferable and does not cover cosmetic damage, or damage due to acts of God, accident, misuse, abuse, negligence, commercial use, or due to improper use, installation, operation, maintenance, or modification of or to any part of the Product, or attempted service by anyone other than a TTR authorized customer service center. After reading and following all steps in the owner’s manual please attach a tether line to this product and check that all functions are working properly. This is your first flight check, and may be covered under warranty at the discretion of TTR and/or its authorized customer service centers. If you have any problems land the Product immediately and contact an authorized customer service center. EXTENDED ELECTRONICS WARRANTY The Electrical Components of this product are covered under an extended electronics warranty program. Please contact a customer service center for additional information. If you feel you are experiencing an issue with the flight controller we require a data log and/ or the flight controller for warranty claims. PLEASE NOTE: Any additional components attached to this item are not covered under any portion of this warranty, and are done so at your own risk. Opening this product, removal of void stickers, or damage from misuse or negligence VOIDS ANY AND ALL WARRANTIES EXPRESSED OR IMPLIED! -02- Hero Flight Controller User Manual CONTENTS INCLUDED Hardware Software (need to download) Controller X1 Support WIFI transmission and PC firmware upgrading, and the flight status can be recorded in real time by the Smart Phone ground station. GPS & COMPASS Module X1 For GPS positioning and course identification. LED Indicator Module X1 Indicate the real-time flight status by LED light color and use as the extending USB interface function. Power Module X1 Power supply module for the controller. WIFI Module X1 Connected with the establishment of AP (Access Point), and support “Point to Point” and “Router” two kinds of work modes through. USB Cable X1 For connecting the PC and the WIFI module, and exclusive for WIFI parameters configuration. Android APP Software PC Firmware Upgrade Software -03- PC Software WIFI Software Hero Flight Controller User Manual FUNCTIONS Dynamic Layout: 4-axis X-type, 4-axis cross type, 6-axis X-type, 6-axis cross type Operation Mode: Manual Stabilization, Automatic Hovering, Automatic Landing, Return Home, No Head Mode Security Measures: Standard safety features when the aircraft loses control (Return Home). Status Indication: LED. Control Mode: Transmitter Control / Mobile Phone Control (Part Functions) Configuration methods: PC Software / Mobile Phone Software Firmware Upgrade: PC upgrade (Micro USB cable) Receiver: Support standard receiver, and PPM receiver Gimbals: Support servo gimbals INSTALLATION INSTRUCTIONS Controller Installation Install and directly stick the controller on the central deck of the aircraft horizontally, with the “Front” arrow on the label pointing towards the head of the aircraft, and the controller’s appearance is shown as below: GPS & Compass Installation Connect the GPS and Compass modules to the controller respectively through the connecting board. Note: This product is a separated GPS, which is used with TTR Ghost+. If the users want to use it with other open airframes, please purchase the integrated GPS. -04- Hero Flight Controller User Manual WIRING Wiring Diagram The wiring diagram of the HERO controller is as follows: WIFI Module The “COM”port can be used to connect WIFI. The WIFI module must have a 3S﹣6S Lithium battery. LED Indicator Module Install LED in the proper position and far away from GPS. Make sure that the LED indicator is always visible during the flight. LED Indicator Module WIFI Module Battery (3S﹣6S) Power Module Make sure to use the original power module. If you use other power module, it may burn the controller. The range of power supply for the power module is 3S-6S. Controller The controller should be directly stick on aircraft and should be placed level on the main body of the aircraft. (The “Front” arrow must point towards the head of the aircraft.) Please make sure all the ports of the controller are not blocked. It is suggested to connect cables and setup software before fixing the controller. GPS & Compass Module The GPS & Compass is sensitive to magnetic interference and should be far away from the other electronic devices. The controller only work when the GPS module is connected. Power Module GPS & Compass Module Servo Gimbal 8 7 6 Receiver 5 4 Speed Controller 3 (M1﹣M6) 2 1 PPM Receiver Parameter Setup/Firmware Upgrade Servo Gimbals Parameter Setup/Firmware Upgrade Receiver Please setup the channel of aileron, elevator, throttle and rudder first. Select 2 3-way switches as the control witch, and connect the receiver to corresponding channel of the controller in order. The receiver (PPM receiver supported) is powered directly from the controller. DO NOT connect any external power, otherwise the device may be burnt. Micro USB cable is used for parameter setup/firmware upgrade. Servo gimbals must be powered separately. DO NOT power servo gimbals from the controller. Caution: a. Ensure the original factory supplied power module is used. Otherwise, the controller may be burnt out by using any other power module. b. The Power module and the WIFI module must connect to a 3S~6S (10.8V~25.5V) lithium battery. c. The receiver (PPM receiver supported) is powered directly from the controller. DO NOT connect any external power, otherwise the device may be burnt. d. The speed controller and the motor can cause serious magnetic interference when working, the GPS & Compass module must stay away from all the electronic devices as far as possible. e. Servo gimbal, must powered separately. f. The WHITE wire is the signal wire, the RED wire is positive, the BLACK wire is ground. g. Only the USB port can be used for Parameter Setting and Firmware Upgrade. The COM port is used for connecting the WIFI module. h. The calibration function for speed controller is not supported. You have to calibrate manually. (Please refer to the manual of the speed controller) -05- Hero Flight Controller User Manual Connection The connection steps are as follows: 1. Connect the Power Module: The 3-color cable is used to connect the POW port. The WHITE wire is on the top, the RED is in the middle and the BLACK wire is at the bottom. The RED and BLACK bare wires should be welded to the Positive and Negative poles of the main power (3S-6S Lithium battery). 2. Connect the LED Indicator Module: The LED module should be connected to the LED port and USB port of the controller respectively. 3. Connect the GPS & Compass Module: Use the connecting board to connect the GPS and Compass respectively. Note: This product use a separated GPS, which is used with TTR Ghost+. Please purchase the integrated version of GPS for other open airframes. -06- Hero Flight Controller User Manual 4. Connect the Receiver: The signal wire shall be connected to the controller in sequence. (The WHITE wire is on the top, the RED is in the middle and the BLACK wire is at the bottom.) 5. Connect the Speed Controller: The signal wire shall be connected to the controller in sequence. (The WHITE wire is on the top, the RED is in the middle and the BLACK wire at the bottom.) 6. Connect the WIFI Module: The signal wire shall be connected to the controller. (The WHITE wire is on the top, the RED is in the middle and the BLACK wire is at the bottom.) Description: The WIFI signal wire is a 3-core cable, connecting to the WIFI module and the COM port of the controller respectively (The WHITE wire is on the top, the RED is in the middle and the BLACK wire is at the bottom.) When the WIFI module is connected with the controller, the WHITE wire of the WIFI signal wire should be close to the POWER port of the WIFI module. CONFIGURATION BEFORE FLYING Install Assistant Software The Installation are as follows: 1. Download the PC Assistant Software on the SUPPORT page from our official website (www.ttrobotix.com). 2. After unzip, double-click the “TTR HERO ASSISTANT.exe” to start the program. Install smart phone Assistant APP: 1. Download and install the Assistant APP (Android) on the SUPPORT page from our official website (www.ttrobotix.com), or download the TTR HERO App from the Google Play Store or Apple App Store. 2. After executing the APP, it can automatically complete the installation. -07- Hero Flight Controller User Manual 3. Open the APP (need to connect to the WIFI module), the screen is displayed as below. The APP version and the firmware version of the controller are displayed on the Flight Information page. Transmitter Settings Use the TTR Commander Transmitter Please refer to the Instruction Manual of TTR Commander Use a Commercially Available Transmitter Select fixed wing mode on your transmitter and remove all channel mixed control. FUTABA Radio: All channels should be Normal (not reversed). JR, JTm, Spektrum and WFLY Radios: Reverse all channels. The Transmitter setting steps are as follows: 1. Set CH5 to a 2-way switch and CH6 to a 3-way switch. If there are not enough 2-way switches, the channels can be set on the 2 positions of a 3-way switch. CH5 Position 1: Head Mode CH6 Position 1: Takeoff Mode CH5 Position 2: No Head Mode CH6 Position 2: Landing Assistant CH6 Position 3: Return Home Description: The Return Home mode always takes priority. In any mode, as long as the CH6 is switched to position 3, the Return Home will be executed. -08- Hero Flight Controller User Manual 2. Fail-Safe Setting (F/S) F/S Setting 1) Set CH6 to position 3 of the 3-way switch. 2) Set the throttle to mid-position (50%). Description: The F/S of HERO is: Return Home mode which means that the controller can automatically control the aircraft to return home after the Transmitter signal is lost. For the specific settings of the transmitter, please refer to the manual of the transmitter. Note: This only applies to FUTABA transmitters. Parameter Settings Parameter settings are divided into two types: PC Parameter Settings and smart phone Parameter Settings (smart phone Parameter Adjustment must connect WIFI). Note: When testing on the ground, please first turn on the transmitter, and then power on the controller. Please make sure that the propellers are removed before power on to prevent injuries. Parameter Settings from PC The PC parameter adjustment steps are as follows: 1. Power on the controller first and make sure the throttle stick is at the bottom. Use the Micro USB cable to connect PC and the controller respectively. The Micro USB cable should be prepared by the users. 2. Please download the exclusive PC Assistant Software from the official website and start it. 3. Click “Read” button (can click several times to avoid failure) to obtain the current parameters of the controller. 4. After set the parameters of the controller, click “Save” button (can click several times to avoid failure) to upload the modified parameters to the controller. Description: To restore the default parameters, push the throttle stick to the bottom and click “Default” button. -09- Hero Flight Controller User Manual The default parameters are shown as below: “Roll Sensitivity” and “Pitch Sensitivity” would affect the users’ touch sensitivity (Default: 40, Range: 0-255), “Sway Compensation” can increase stability but decrease the sensitivity (Default: 60, Range: 0-255) The relevant descriptions of the main parameters are shown in the following table: Parameter Name and Default Value Setting Description Roll/Pitch sensitivity is used to adjust the compensation angle of the PTZ data for your Gimbals. You can compensate high or low for aircraft movement within a range from -127 to 127 (You can enter a negative value to reverse the direction of compensation). Set up the maximum flight speed. Set up the maximum speed of climbing and descending. Battery cell number: according to the actual number of cells used by the user. The controller can calculate the low voltage alert according to the number of cells entered. Enter the voltage per cell required to activate a low voltage alert, for a Lithium battery, normally this would be 3.65V. The maximum height and distance of the aircraft can be specified. The range of the height setting is 10-1500 (Unit: Meter). The range of the distance setting is 0-1500 (Unit: Meter). Enter your aircraft type. -10- Hero Flight Controller User Manual parameter settings from smart phone The steps of parameter settings from smart phone are as follows: 1. Connect WIFI. 2. Open the “Settings” or “Advanced Setting” page of the APP, click “Get” button to get the current parameters of the controller (can click several time to avoid failure). 3. After adjusting the parameter of the controller, click “Save” button to upload the modified parameters to the controller. The default parameters are shown as below. The description of the relevant parameters, please refer to “ PC Parameter Setting”. Transmitter Calibration The transmitter calibration steps are as follows: Transmitter Calibration by PC 1. The Transmitter Calibration steps by PC are as follows: 1) Open the PC Transmitter Calibration software. 2) Click "Hand Mode" and select the Mode in the drop-down menu according to your preference. -11- Hero Flight Controller User Manual 2. Joysticks Calibrate 1) Click the "Calibration Transmitter" button to pop up a confirmation dialog box. 2) After click the “OK” button, turn the left and right joysticks of the transmitter to the maximum radius for a few laps within 5 seconds as shown in the diagram. During the rotation, the controller will automatically collect the maximum and minimum values of the sticks’ position, and calculate the median value. 3. Check whether the movement direction of the joystick is in accordance with the change of the corresponding rudder position of the GCS: Check the display status of the special position after calibrating the transmitter. 1) Below the "Hand Mode" there is the sketch map of the position of the stick. On the left of the sketch map, “ELE” means “Elevator”, “RUD” means “Rudder”, on the right, “AIL” means “Aileron”, “THR” means “Throttle”. 2) When both joysticks are in the middle position, it shows GREEN, any other position, it shows RED. 3) When the throttle stick is at the bottom, it shows YELLOW. When the throttle is in hover position (normally close to the middle position) it shows GREEN, other status, it shows RED. -12- Hero Flight Controller User Manual Transmitter Calibration by smart phone The Transmitter Calibration steps by smart phone are as follows: 1. Select the Correct Stick Layout 1) Click on the "Advanced Setting" page of the APP. 2) Click the "Hand Mode" button to pop up the “Hand Mode” options, and select the Mode in the drop-down menu according to your preference. -13- Hero Flight Controller User Manual 2. Calibrate the Joysticks 1) Click the "Calibration Transmitter" button to pop up the “Adjust Transmitter” confirmation dialog box. 2) After click the “OK” button, turn the left and right sticks of the transmitter to the maximum radius for a few laps within 5 seconds. During the rotation, the controller will automatically collect the maximum and minimum values of the sticks’ position, and calculate the median value. OUTDOORS TESTING Magnetic Compass Calibration Note: When you first install the controller, the GPS/COMPASS must be calibrated before the official flight. Other occasions that need to calibrate the GPS/COMPASS: The positions of the electronic components are moved, or the aircraft flies in circle etc. ALWAYS carry out this calibration outdoors. DO NOT calibrate in a building or near a car or in a strong magnetic environment. 1. Click the "Magnetic Compass" button on TTR HERO App "Advanced Settings" page. 2. Select "Horizontal Alignment" in the dialog box, and click the "OK" button to start the horizontal calibration program. -14- Hero Flight Controller User Manual 3. Carefully rotate aircraft horizontally two times. Ensure that the Green LED light remains ON during this procedure. 4. Click the "Magnetic Compass" button again then select "Vertical Alignment" and click the "OK" button to start Vertical calibration. 5. Carefully rotate aircraft horizontally two times. Ensure that the Red LED light remains ON during this procedure. Front Front Step 3 Step 5 6. Click "Magnetic Compass" button again then select "Save Alignment" and click "OK" button to finish the procedure. 7. Now it will automatically display two circles (a BLUE one and a RED one). If the circles match well as shown, it means the calibration has been done successfully. If not, please perform calibration again. NG OK Description: Once the controller installation and the compass calibration are finished, there is no need to do the compass calibration every time you fly or upgrade the firmware. But it should be done if the components are removed or the installation positions are changed. -15- Hero Flight Controller User Manual Unlocking the Motors Based on safety considerations, the controller locks the motor at ordinary times, and the motor can only rotate after carrying out the “Unlocking the Motors” operation. The Specific Operation of the “Unlocking the Motors” 1. Turn the rudder to the far left, pull the elevator back to the end, turn the aileron rudder to the far right, and push the throttle stick back to the end. 2. Execute the“Combined-Stick-Command” (CSC). For left hand direction (Japanese and American convention which are Mode 1 and Mode 2), adopts the /\ type. For right hand direction (Chinese and European convention which are Mode 3 and Mode 4), adopts the \/ type. Description: “Unlocking the Motor” cannot work without connecting the GPS. -16- Hero Flight Controller User Manual Motor Mix Control Checking Check the motor mix control before take-off. First change to the manual mode, and check the F/S settings, then check after “Unlocking the Motor”. Take the 4-axis cross type as an example to simply describe how to check motor mix control. Other conditions please refer to the illustration. The checking steps are as follows: 1. Check Motor Balance When you push the throttle stick, the four motors rotate at the same speed which means the motor balance is good. 2. Check the Aileron Channel Slightly push the aileron stick to the left, motor M4 rotates immediately (see Figure 1), the other three motors keep still. Slightly push the aileron stick to the right, motor M2 rotates immediately (see Figure 2), the other three motors keep still. Figure 1 Figure 2 3. Check the Elevator Channel According to the symmetry of the aircraft, it’s similar to checking the aileron channel. Push up the elevator stick, motor M3 rotates (see Figure 3), pull down the elevator stick, motor M1 rotates (see Figure 4). Figure 3 Figure 4 -17- Hero Flight Controller User Manual 1) 4-axis X-type Left push the aileron stick Right push the aileron stick Push up the elevator stick Pull down the elevator stick 2) 6-axis cross type Left push the aileron stick Right push the aileron stick Push up the elevator stick Pull down the elevator stick Right push the aileron stick Push up the elevator stick Pull down the elevator stick 3) 6-axis X-type Left push the aileron stick -18- Hero Flight Controller User Manual FIRMWARE UPGRADE Note: For safety, please remove all the propellers before upgrading firmware. The steps of upgrading firmware are as follows: 1. Download the upgrade software and firmware from the official website. 2. Use USB to connect the controller and PC. 3. Make sure the throttle stick is at the bottom before you power the controller. 4. Open “TTR HERO Firmware Upgrade Program.exe” program, and then click “Open USB”. 5. Click “OK” button in the pop-up dialog box. 6. Click “Select Firmware” button. -19- Hero Flight Controller User Manual 7. Click the firmware program “*.bin”, the software will automatically execute the upgrade program 8. After completion, it will show “Download Successfully!” Then quit the software and power off. -20- Hero Flight Controller User Manual APPENDIX * Appendix 1 Flight Status Indicators / LED Light of GHOST+ The indicators are defined below: LED is GREEN LED is RED 1. First stage : indicate the battery is low. Please keep your Ghost+ near landing area. 2. Final stage : the Ghost+ will decrease altitude automatically. User could select landing area but CAN NOT push the throttle stick to gain altitude. Flight Status LED Situation Description Manual altitude (Satellite ≦ 4) -- LED blinks GREEN once & RED 3 times one loop Manual altitude (Satellite = 5) -- LED blinks GREEN once & RED 2 times one loop Auto hovering (Satellite ≧ 6) -- -- LED blinks GREEN 2 times one loop First stage low voltage alert -- -- LED blinks RED 2 times one loop Final stage urgent low voltage alert -- LED blinks RED 3 times one loop Return Home LED solid in RED Horizontal Alignment LED solid in GREEN Magnetic compass calibration Vertical Alignment -21- LED solid in RED Hero Flight Controller User Manual * Appendix 2 Flight Mode Description The flight mode mainly includes four modes: Mobile Control Mode, Manual Altitude Hold Mode, Automatic Hovering Mode and Return Home Mode. The detailed description is as follows. Note: DO NOT push the throttle stick to the bottom during the flight. Mobile Control Mode During the flight, when the aircraft is in the Automatic Hovering mode, click “MOBILE CONTROL” of the APP to enter or quit the Mobile Control mode. In the Mobile Control mode, the transmitter control will not work. The Mobile Control operation methods are as follows: After Starting Mobile Control Mode Operation Methods of the Remote Control Interface Aircraft Status Circle Status Red: GPS is not located. Green: GPS is located - Position Hold No Operation Position hold Level Flight Climb/ Descend/ Rotate 1) Press the center circle and drag it up/down on the screen 2) Press the center circle and drag it left/right on the screen 3) Press the center circle and drag it upper left/right, lower left/right on the screen 1) Click the area just above the circle (inside the cross range) 2) Click the area just below the circle (inside the cross range) 3) Click the left side of the circle (inside the cross range) 4) Click the right side of the circle (inside the cross range) 1) Move forward/backward 2) Move left/right 3) Move left/right front, left/right rear 1) Climb 2) Descend 3) Rotate to left Description: The distance between the click point and the circle is proportional to the flying speed. That is to say the further the distance, the faster the flying speed. The pressing time is proportional to the moving time of aircraft. 4) Rotate to right Note: If GPS is not located (e.g. indoors), the Mobile Control function is not available. -22- Hero Flight Controller User Manual Manual Altitude Hold Mode After the aircraft takes off, the aircraft will enter the Manual Altitude Hold Mode when the GPS is not located (less than 5 stars). At this point, the controller will lock the height, but not lock the position. In this mode, users can perform the following operations: Automatic Hovering When the throttle stick is in the middle position, the aircraft will hover in the current height, but not stay in the current position. (The aircraft will drift if the GPS is not located.) Manual Intervention By controlling the throttle stick, the aircraft can hover at any height, by controlling other sticks, the aircraft can move to any position. Left/right moving is controlled by the AILERON stick, forward/backward moving is controlled by the ELEVATOR stick, direction is controlled by the RUDDER stick, and height is controlled by the THROTTLE stick. If the throttle stick is above the middle position, the aircraft will fly upward. If the throttle stick is below the middle position, the aircraft will descend. Automatic Hovering Mode After the aircraft takes off, the aircraft will enter the Automatic Hovering mode when the GPS is located (more than 5 stars). In this mode, the controller will lock the position and height. Automatic Hovering When the throttle lever is in the middle position, the aircraft will hover in the current height. (The aircraft will not drift because the GPS locked it’s position.) Manual Intervention By controlling the throttle stick, the aircraft can hover at any height; by controlling other sticks, the aircraft can move to any position. Left/right moving is controlled by the AILERON stick, forward/backward moving is controlled by the ELEVATOR stick, direction is controlled by the RUDDER stick, and height is controlled by the THROTTLE stick. If the throttle stick is above the middle position, the aircraft will fly upward. If the throttle stick is below the middle position, the aircraft will descend. Return Home Mode Successfully unlock the motors and GPS is located (more than 5 stars), the aircraft will automatically record the return point. The process of the Return Home is as follows: 1. Push the transmitter stick to “Return Home”. If you want to quit the “Return Home”, please push the stick to the takeoff position. 2. The controller will control the aircraft to Return Home automatically. During the returning, the aircraft will not accept the manual intervention from the stick channel. 3. When the aircraft returns, it will descend slowly. At this point, users can interfere in the flight state of the aircraft through the stick channel to find a more suitable landing point (The controller automatically controls the throttle). 4. After landing, the motors will stop. At this time, push the throttle stick to the bottom, and users need to unlock the motors to restart. -23- Hero Flight Controller User Manual Note: Since the time is too short for the aircraft to adjust the flight status, to avoid accident, it is recommended that users DO NOT change into the Return Home mode when the distance is too close between people and the aircraft. Description: If the aircraft is beyond 25 meters away from the home position and below 20 meters height to executes the Return Home mode, the aircraft will first ascend to 20 meters before returning. If the height of the aircraft is higher than 20 meters or the distance between the aircraft and the home point is within 25 meters to executes the Return Home mode, the aircraft will maintain its original height. CUSTOMER SERVICE ■ North America Distributed by : HRP Distributing HRP Distributing 2034 South 3850 West Salt Lake City, UT 84104 USA For customer service please contact [email protected] [email protected] Tel : 1-844-887-6268 Attn : TT Support ■ Germany, Netherlands, Belgium, Luxembourg, Austria, Italy Distributed by / Vertrieb : THUNDER TIGER EUROPE GmbH, Rudolf-Diesel-Str. 1, 86453 Dasing, Germany For customer service please contact [email protected] -24- ■ For Other Countries Distributed by : Thunder Tiger Corporation No.7 6th Road, Industry Park, Taichung, Taiwan 40755 For customer service please contact [email protected] Tel : 886-4-23591632