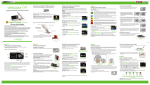
1
V.A.C.® Therapy™
Clinical Guidelines
A Reference Source for Clinicians
January 2005
R
Index
Patient Selection Criteria . . . . . . . . . . . . . . . . . . . . . . . . . . . . . . . . . . . . . . . . . . .4
Indications . . . . . . . . . . . . . . . . . . . . . . . . . . . . . . . . . . . . . . . . . . . . . . . . . . . . . . . . . . . . . . . . . .4
Contraindications . . . . . . . . . . . . . . . . . . . . . . . . . . . . . . . . . . . . . . . . . . . . . . . . . . . . . . . . . . . . .4
Precautions . . . . . . . . . . . . . . . . . . . . . . . . . . . . . . . . . . . . . . . . . . . . . . . . . . . . . . . . . . . . . . . . .4
Care and Safety Tips . . . . . . . . . . . . . . . . . . . . . . . . . . . . . . . . . . . . . . . . . . . . . . . . . . . . . . . . . . .4
Optimizing Therapy . . . . . . . . . . . . . . . . . . . . . . . . . . . . . . . . . . . . . . . . . . . . . . . . . . . . . . . . . . .5
Wound Healing Progression with Effective V.A.C.® Therapy. . . . . . . . . . . . . . . . . . . . . . . . . . . . . .6
V.A.C.® Therapy Unit and Dressing Application Recommended Guidelines . . . . . . .7
Choosing the Foam . . . . . . . . . . . . . . . . . . . . . . . . . . . . . . . . . . . . . . . . . . . . . . . . . . . . . . . . . . .7
Recommended Guidelines for Foam Use . . . . . . . . . . . . . . . . . . . . . . . . . . . . . . . . . . . . . . . . . . .7
Applying the Dressings . . . . . . . . . . . . . . . . . . . . . . . . . . . . . . . . . . . . . . . . . . . . . . . . . . . . . . . . .8
Applying the V.A.C.® Therapy Unit . . . . . . . . . . . . . . . . . . . . . . . . . . . . . . . . . . . . . . . . . . . . . . . .9
Dressing Removal . . . . . . . . . . . . . . . . . . . . . . . . . . . . . . . . . . . . . . . . . . . . . . . . . . . . . . . . . . . .10
Canister and Y-Connector Change . . . . . . . . . . . . . . . . . . . . . . . . . . . . . . . . . . . . . . . . . . . . . . . .10
Follow-up on Dressing Integrity . . . . . . . . . . . . . . . . . . . . . . . . . . . . . . . . . . . . . . . . . . . . . . . . . .11
Disconnecting from Unit . . . . . . . . . . . . . . . . . . . . . . . . . . . . . . . . . . . . . . . . . . . . . . . . . . . . . . .11
General Dressing Tips . . . . . . . . . . . . . . . . . . . . . . . . . . . . . . . . . . . . . . . . . . . . . .12
Maintaining a Seal . . . . . . . . . . . . . . . . . . . . . . . . . . . . . . . . . . . . . . . . . . . . . . . . . . . . . . . . . . . .12
Circumferential Drape Application . . . . . . . . . . . . . . . . . . . . . . . . . . . . . . . . . . . . . . . . . . . . . . . .12
Treating Multiple Wounds . . . . . . . . . . . . . . . . . . . . . . . . . . . . . . . . . . . . . . . . . . . . . . . . . . . . . .12
“Y” Connecting . . . . . . . . . . . . . . . . . . . . . . . . . . . . . . . . . . . . . . . . . . . . . . . . . . . . . . . . . . . . .12
Bridging . . . . . . . . . . . . . . . . . . . . . . . . . . . . . . . . . . . . . . . . . . . . . . . . . . . . . . . . . . . . . . . . . .13
Fecal Incontinence . . . . . . . . . . . . . . . . . . . . . . . . . . . . . . . . . . . . . . . . . . . . . . . . . . . . . . . . . . . .13
Tunneling . . . . . . . . . . . . . . . . . . . . . . . . . . . . . . . . . . . . . . . . . . . . . . . . . . . . . . . . . . . . . . . . . .13
Wound Undermining . . . . . . . . . . . . . . . . . . . . . . . . . . . . . . . . . . . . . . . . . . . . . . . . . . . . . . . . .14
Dressing Small Wounds . . . . . . . . . . . . . . . . . . . . . . . . . . . . . . . . . . . . . . . . . . . . . . . . . . . . . . . .14
Optimizing Wound Approximation . . . . . . . . . . . . . . . . . . . . . . . . . . . . . . . . . . . . . . . . . . . . . . . .15
Wound Observation Between Dressing Changes . . . . . . . . . . . . . . . . . . . . . . . . . . . . . . . . . . . . .16
Adjunct Dressing Recommendations . . . . . . . . . . . . . . . . . . . . . . . . . . . . . . . . . . . . . . . . . . . . . .16
V.A.C.® Instill™ Therapy Unit Recommended Guidelines . . . . . . . . . . . . . . . . . . . . .17
V.A.C.® Instill™ Patient Selection Criteria . . . . . . . . . . . . . . . . . . . . . . . . . . . . . . . . . .17
Indications . . . . . . . . . . . . . . . . . . . . . . . . . . . . . . . . . . . . . . . . . . . . . . . . . . . . . . . . . . . . . . . . . .17
Contraindications . . . . . . . . . . . . . . . . . . . . . . . . . . . . . . . . . . . . . . . . . . . . . . . . . . . . . . . . . . . . .17
Precautions . . . . . . . . . . . . . . . . . . . . . . . . . . . . . . . . . . . . . . . . . . . . . . . . . . . . . . . . . . . . . . . . .17
Care and Safety Tips . . . . . . . . . . . . . . . . . . . . . . . . . . . . . . . . . . . . . . . . . . . . . . . . . . . . . . . . . . .17
Optimizing Therapy . . . . . . . . . . . . . . . . . . . . . . . . . . . . . . . . . . . . . . . . . . . . . . . . . . . . . . . . . . .17
V.A.C.® Instill™ General Therapy Unit and Dressing Instructions . . . . . . . . . . . . . . . .18
V.A.C.® Instill™ Pad Aplication . . . . . . . . . . . . . . . . . . . . . . . . . . . . . . . . . . . . . . . . . . . . . . . . . . . . .18
Applying the V.A.C.® Instill™ Therapy Unit . . . . . . . . . . . . . . . . . . . . . . . . . . . . . . . . . . . . . . . . . . .18
V.A.C.® Instill™ Therapy Settings Adjustment . . . . . . . . . . . . . . . . . . . . . . . . . . . . . . . . . . . . . . . . . .19
Recommended Guidelines for Treating Different Wound Types . . . . . . . . . . . . . . .20
Acute/Traumatic Wounds/Partial Thickness Burns . . . . . . . . . . . . . . . . . . . . . . . . . . . . . . . . . . . . .20
Surgical Wound Dehiscences . . . . . . . . . . . . . . . . . . . . . . . . . . . . . . . . . . . . . . . . . . . . . . . . . . . .21
Meshed Grafts and Bioengineered Tissues . . . . . . . . . . . . . . . . . . . . . . . . . . . . . . . . . . . . . . . . . .22
Pressure Ulcers . . . . . . . . . . . . . . . . . . . . . . . . . . . . . . . . . . . . . . . . . . . . . . . . . . . . . . . . . . . . . . .23
Chronic Ulcers . . . . . . . . . . . . . . . . . . . . . . . . . . . . . . . . . . . . . . . . . . . . . . . . . . . . . . . . . . . . . . .24
Flaps . . . . . . . . . . . . . . . . . . . . . . . . . . . . . . . . . . . . . . . . . . . . . . . . . . . . . . . . . . . . . . . . . . . . . .25
Venous Grafts . . . . . . . . . . . . . . . . . . . . . . . . . . . . . . . . . . . . . . . . . . . . . . . . . . . . . . . . . . . . . . .25
Recommended Guidelines for V.A.C.® Therapy with Enteric Fistula . . . . . . . . . . . .26
Acute and Chronic Candidate Selection . . . . . . . . . . . . . . . . . . . . . . . . . . . . . . . . . . . . . . . . . . . .26
Application Directions: Acute Enteric Fistula (Complex) . . . . . . . . . . . . . . . . . . . . . . . . . . . . . . . . .26
Application Directions: Acute Enteric Fistula (Simple) . . . . . . . . . . . . . . . . . . . . . . . . . . . . . . . . . . .27
Application Directions: Chronic Enteric Fistula . . . . . . . . . . . . . . . . . . . . . . . . . . . . . . . . . . . . . . .28
Pouching / Diverting Drainage of a Chronic Fistula . . . . . . . . . . . . . . . . . . . . . . . . . . . . . . . . . . .29
Troubleshooting Tips . . . . . . . . . . . . . . . . . . . . . . . . . . . . . . . . . . . . . . . . . . . . . . . . . . . . . . . . . .29
Additional Recommended Guidelines for Treating Various Wounds
with V.A.C.® Therapy™ . . . . . . . . . . . . . . . . . . . . . . . . . . . . . . . . . . . . . . . . . . . . . .30
Infected Wounds . . . . . . . . . . . . . . . . . . . . . . . . . . . . . . . . . . . . . . . . . . . . . . . . . . . . . . . . . . . . .30
Wound Odors . . . . . . . . . . . . . . . . . . . . . . . . . . . . . . . . . . . . . . . . . . . . . . . . . . . . . . . . . . . . . . .30
Adjusting V.A.C.® System™ Pressure Settings . . . . . . . . . . . . . . . . . . . . . . . . . . . . . . . . . . . . . . . . . .30
Continuous vs. Intermittent Therapy . . . . . . . . . . . . . . . . . . . . . . . . . . . . . . . . . . . . . . . . . . . . . . .31
Intensity Feature . . . . . . . . . . . . . . . . . . . . . . . . . . . . . . . . . . . . . . . . . . . . . . . . . . . . . . . . . . . . . .31
Additional Therapy Recommended Guidelines Chart . . . . . . . . . . . . . . . . . . . . . . . . . . . . . . . . . .31
V.A.C.® Therapy and Hyperbaric Oxygen Therapy . . . . . . . . . . . . . . . . . . . . . . . . . . . . . . . . . . . . .32
When to Discontinue V.A.C.® Therapy . . . . . . . . . . . . . . . . . . . . . . . . . . . . . . . . . . . . . . . . . . . . .32
Minimal Change in Wound Dimensions . . . . . . . . . . . . . . . . . . . . . . . . . . . . . . . . . . . . . . . . . . . .32
Deterioration of Wound . . . . . . . . . . . . . . . . . . . . . . . . . . . . . . . . . . . . . . . . . . . . . . . . . . . . . . . .33
Changes in the Wound . . . . . . . . . . . . . . . . . . . . . . . . . . . . . . . . . . . . . . . . . . . . . . . . . . . . . . . .33
Ordering The V.A.C.® System™ . . . . . . . . . . . . . . . . . . . . . . . . . . . . . . . . . . . . . . . .34
Physician Order . . . . . . . . . . . . . . . . . . . . . . . . . . . . . . . . . . . . . . . . . . . . . . . . . . . . . . . . . . . . . .34
Transitioning Patients Between Care Settings . . . . . . . . . . . . . . . . . . . . . . . . . . . . . . . . . . . . . . . .34
KCI Contact Information . . . . . . . . . . . . . . . . . . . . . . . . . . . . . . . . . . . . . . . . . . . . . . . . . . . . . . . .34
These V.A.C.® Therapy Clinical Guidelines are for use with the V.A.C.® Classic, V.A.C.® ATS™ and
V.A.C.Freedom® therapy systems. Not all systems have the same features nor require the same
guidelines. Please refer to the specific Quick Reference Guide, User Manual, On-Screen User
Guide and Disposable Instructions for Use (as appropriate) for specific product instructions.
Caution: Federal law restricts this device to sale or rental by or on the order of a physician.
Information is subject to change at any time without notice.
Notice to Users: As with any prescription medical device, failure to follow
product instructions or adjusting settings and performing therapy applications
without the express direction and/or supervision of your trained clinical
caregiver may lead to improper product performance and the potential for
serious or fatal injury.
NOTE: THESE GUIDELINES ARE NOT INTENDED AS A GUARANTEE AS TO RESULTS,
OUTCOME OR PERFORMANCE OF THE V.A.C.® SYSTEM™. THEY ARE RECOMMENDATIONS TO
ASSIST THE TREATING PHYSICIAN IN ESTABLISHING PATIENT-SPECIFIC TREATMENT PROTOCOLS.
AS WITH ANY APPLICATION, PLEASE CONSULT THE PATIENT’S TREATING PHYSICIAN AS TO
INDIVIDUAL CONDITIONS AND TREATMENT AND FOLLOW ALL APPLICABLE MANUALS AND
REFERENCE GUIDES AS TO PRODUCT USE AND OPERATION. ALWAYS CONSULT THE
INDICATIONS, CONTRAINDICATIONS, PRECAUTIONS AND CARE AND SAFETY TIPS
SECTION OF THIS BOOKLET AND ANY OTHER PRODUCT LABELING AND INSTRUCTIONS
BEFORE PLACING A V.A.C.® PRODUCT ON A PATIENT. CONTACT YOUR LOCAL KCI
REPRESENTATIVE WITH PRODUCT OPERATION USE QUESTIONS.
KCI Contact Information:
If you have questions, or for additional information, please contact your local KCI
representative or contact KCI directly at 1-800-275-4524. Visit our website at
www.woundvac.com. For a medical emergency, contact your local emergency number
(i.e. 911).
V.A.C.® System - PN M8259924
V.A.C.® Disposables
• Non-ambulatory
• Moderately to heavy exudating wounds (>15 cc s/day)
• Multiple wounds
V.A.C.® ATS™ System - PN M8259968
T.R.A.C.® Disposables
• Ambulatory or Non-ambulatory
• Moderately to heavy exudating wounds (>15 cc s/day)
• Multiple wounds
V.A.C. Freedom® System - PN 320000
T.R.A.C.® Disposables
• Ambulatory
• Moderately to heavy exudating wounds (>15 cc s/day)
• Multiple wounds
V.A.C.® Instill™ System - PN 320100
• Use only with T.R.A.C.® System disposables
• Benefit of controlled topical solution treatment
in conjunction with V.A.C.® Therapy
• Moderately to heavy exudating wounds (>15 cc s/day)
• Multiple wounds
• Less mobile patient
3
V.A.C.® Therapy™ Patient Selection Criteria
Indications:
The V.A.C.® family of devices* with woundsite feedback control are negative pressure devices
used to help promote wound healing, through means including removal of infectious material
or other fluids, under the influence of continuous and/or intermittent negative pressures,
particularly for patients with chronic, acute, traumatic, subacute and dehisced wounds,
partial-thickness burns, ulcers (such as diabetic or pressure), flaps and grafts. Feedback control
is achieved by measuring the level of negative pressure at the wound site.
Types of wounds for which V.A.C.® Therapy currently has been indicated include:
• chronic
• partial-thickness burns
• pressure ulcers
• acute
• dehisced wounds
• flaps
• traumatic
• diabetic ulcers
• grafts
*Certain unique indications, contraindications, precautions and safety tips may apply for
distinctive products within the V.A.C.® family of devices, such as for the V.A.C.® Instill™ System
and for V.A.C.® systems that do not utilize T.R.A.C.® woundsite feedback control. Please refer to
the product labeling for each specific product.
Contraindications:
Contraindicated for patients with:
• malignancy in the wound
• non-enteric and unexplored fistula
• untreated osteomyelitis
• necrotic tissue with eschar present
• Do not place V.A.C.® dressing over exposed blood vessels or organs.
Precautions:
Precautions should be taken for patients with:
• active bleeding
• difficult wound hemostasis
• anticoagulants
• when placing the V.A.C.® dressing in close proximity to blood vessels or organs,
take care to ensure that all vessels are adequately protected with overlying fascia, tissue or
other protective barriers
• greater care should be taken with respect to weakened, irradiated or sutured blood vessels
or organs
• bone fragments or sharp edges could puncture protective barriers, vessels or organs
• wounds with enteric fistula require special precautions to optimize V.A.C.® Therapy. Refer to
pages 27 - 28 of this guide for recommended guidelines.
Follow Universal Precautions.
Care and Safety Tips
Safety Tips:
• Keep therapy on: Never leave subatmospheric pressure off for more than 2 hours
per 24 hour period. Remove V.A.C.® dressing if subatmospheric pressure is terminated or
is off for more than 2 hours in a 24 hour period.
• Dressing changes: Perform aggressive wound cleaning per physician order prior to
dressing application. Routine dressing changes should occur every 48 hours. Dressing
changes for infected wounds should be accomplished every 12 - 24 hours. Always
replace with sterile V.A.C.® disposables from unopened packages. Follow established
institution protocols regarding clean versus sterile technique. During dressing applications
apply skin prep such as Mastisol®, No-Sting®, etc. to periwound tissue to assist with drape’s
adhesiveness. Note: All components of The V.A.C.® System™ are packaged sterile. The
decision to use clean versus sterile/aseptic technique is dependent upon wound
pathophysiology and physician/clinician preference. All components of V.A.C.® Therapy
including the foam, canister, tubing, and drape are latex free.
4
• Monitoring the wound: Inspect the dressing frequently to ensure foam is collapsed
and negative pressure is being delivered in a consistent manner. Monitor periwound
tissue and exudate for signs of infection or other complications. Signs of possible
infection may include fever, tenderness, redness, swelling, itching, rash, increased
warmth in the wound area, purulent discharge or a strong odor. Nausea, vomiting,
diarrhea, headache, dizziness, fainting, sore throat with swelling of the mucous membrane, disorientation, high fever (>102˚ F, 38.8˚ C), refractory hypotension, orthostatic
hypotension, or erythroderma (a sunburn-like rash) may be added signs of more serious
complications of infection. Extra care and attention should be given if there are any signs
of possible infection or related complications. Infection can be serious. With or without
V.A.C.® Therapy, infection can lead to many adverse complications including pain, discomfort, fever, gangrene, toxic shock, septic shock and various other complications. With signs
of more serious complications of infection, discontinue V.A.C.® Therapy until the serious
infection is diagnosed and properly treated.
• If dressing adheres to wound: Introduce sterile water or normal saline into the
dressing and let it set for 15 - 30 minutes; then gently remove from the wound. Consider
placing a single layer, wide meshed, non-adherent dressing (Adaptic or Mepitel) prior to
foam placement.
• Discomfort: If patient complains of discomfort throughout therapy, consider
changing to V.A.C.® Vers-foam (PVA) Dressing. If patient complains of discomfort
during the dressing change, consider pre-medication, use of a non-adherent prior to
foam placement or instillation of a topical anesthetic agent such as 1% lidocaine prior to
dressing removal.
• Unstable structures: Over unstable body structures such as unstable chest wall or
non-intact fascia, use continuous (not intermittent) therapy to minimize movement and
help stabilize the wound bed.
• Spinal cord injury: In the event a patient experiences autonomic hyperreflexia
(sudden elevation in blood pressure or heart rate in response to stimulation of the
sympathetic nervous system) discontinue V.A.C.® Therapy to help minimize sensory
stimulation.
• Body cavity wounds: Underlying structures must be covered by natural tissues or
synthetic materials that form a complete barrier between the underlying structures and
the V.A.C.® foam.
• V.A.C.® dressing use: All V.A.C.® dressings distributed by KCI are to be used
exclusively with V.A.C.® Therapy units, and vice versa.
WARNING: Do not pack the foam into any areas of the wound. Forcing foam
dressings in a compressed manner into any wound is contrary to approved KCI
guidelines, and KCI questions whether such practice may increase the risks of
serious adverse health consequences.
Optimizing Therapy
To help optimize the benefits of V.A.C.® Therapy, the patient must:
• maintain active negative pressure therapy for 22 of 24 hours per day. If therapy is
turned off for periods exceeding two hours, the dressing must be removed and
replaced with a traditional dressing. Patients with a strong history of non-compliance
with other therapies should be monitored throughout V.A.C.® Therapy.
• receive clinical evaluation and guidance on a regular basis. Overall outcomes are
improved when KCI trained wound care professionals actively participate in the care of
the wound.
• have a nutrition evaluation to ensure adequate nutritional status and appropriate
supplementation if required to optimize the healing process.
• be on a pressure relief surface if the wound is over a bony prominence or in areas
where weight bearing may exert additional pressure or stress to the underlying tissues.
5
To help receive maximum benefits from negative pressure therapy, the wound must be:
• debrided of all eschar and hardened slough. Devitalized tissue should be removed as
thoroughly as possible per physician instruction. Areas of soft or stringy slough
may remain in the wound at the onset of negative pressure therapy if the patient is not
a candidate for any debridement procedure. However, the presence of slough may
slow the healing process.
• free of osteomyelitis, or receiving concurrent antibiotic treatment therapy for the
active treatment of osteomyelitis.
• supplied by enough circulation to allow for healing.
Wound Healing Progression with Effective V.A.C.® Therapy:
• Observations during the first dressing change (approximately 48 hours or 12 hours if
infection is present) may include a slight increase in the size of the wound. This increase
is due to the active removal of fluids or extracellular debris and decompression of the
interstitial spaces. This decompression allows for increased perfusion as well as increased
oxygen and nutrient transport to the wound, which aids in the healing process.
• the wound appearance should begin to change color and become a deeper red as
perfusion to the wound increases.
• the exudate color may change from serous to serosanguineous and some sanguineous
or bloody drainage may also be noted during negative pressure therapy. This is due
to the increased blood perfusion and disruption of capillary buds as granulation tissue
formation increases. A sudden rapid increase in bright, red blood in the
tubing and/or canister requires immediate assessment.
• initial wound measurements should begin to decrease as the active state of healing
continues. Weekly wound measurements should be performed and documented per
institution protocol for subsequent comparison and to effectively assess the continuation
of the healing state. A steady decrease in wound dimensions should be noted every
week. If this does not occur, comprehensive assessment and troubleshooting
interventions should be implemented immediately.
• the exudate volume should experience a gradual decrease as the extracellular debris is
brought to equilibrium.
• as the wound continues to form granulation tissue, new epithelial growth should be
visualized at the wound edges.
• the length of treatment is dependent upon the treating physician’s goal of therapy,
wound pathology, size and management of patient co-morbidities. The average length
of treatment is 4 - 6 weeks, however many wounds may be ready for surgical closure in
as little as one week. If a patient is not a surgical candidate, V.A.C.® Therapy may be
utilized for an extended period of time as long as satisfactory progress continues.
Note: Refer to Troubleshooting Tips, page 29 for recommendations when progress
stalls.
6
V.A.C.® Therapy Unit and Dressing Application
Recommended Guidelines
Choosing the Foam:
KCI provides two types of foam for use with the V.A.C.® System™. Both are latex free and are
packaged sterile in order to optimize patient outcomes.
1. V.A.C.® GranuFoam® Dressing (Black, polyurethane (PU) foam)
The V.A.C.® GranuFoam® Dressing has reticulated or open pores and is considered to be
the most effective at stimulating granulation tissue while aiding in wound contraction. It
is hydrophobic (or moisture repelling) which enhances exudate removal.
2. V.A.C.® Vers-foam Dressing (White, PVA foam)
The V.A.C.® Vers-foam Dressing is a dense foam with a higher tensile strength. It is
hydrophilic (or moisture maintaining) and is pre-moistened with sterile water. It possesses
overall non-adherent properties and generally does not require the use of a
non-adherent layer for grafts or in wounds with excessive pain or rapid growth of
granulation tissue. It is generally recommended for situations where the growth of
granulation tissue into the foam needs to be more controlled or when the patient
cannot tolerate the V.A.C.® GranuFoam® Dressing due to pain. Due to the higher
density of the V.A.C.® Vers-foam Dressing, higher pressures must be utilized in order to
provide adequate negative pressure therapy distribution throughout the wound.
Minimum pressure setting when using the V.A.C.® Vers-foam Dressing should be
125 mmHg.
All foam dressing kits are packaged sterile. The chart on this page shows the recommended
guidelines for when to use each type of foam during V.A.C.® Therapy. Physician guidance
should always be followed as individual circumstances may vary.
Recommended Guidelines for Foam Use
V.A.C.®
GranuFoam® (black)
Deep, acute wounds with moderate
granulation tissue present
V.A.C.®
Vers-foam (white)
Either
✘
✘
✘
Deep pressure ulcers
Flaps
Extremely painful wounds
✘
✘
✘
Superficial wounds
Tunneling / sinus tracts / undermining
Deep trauma wounds
✘
Wounds which require controlled growth
of granulation tissue
✘
✘
✘
✘
Diabetic ulcers
Dry wounds
Post graft placement
(including bioengineered tissues)
✘
Shallow chronic ulcers
7
Applying the Dressings:
Note: The V.A.C.® dressing should be changed once every 48 hours, or every 12 hours in
cases of infection.
Note: Use gloves, gown and goggles if splashing or exposure to body fluids is likely. Treat all
body fluids as if they are infectious. All steps should be taken under the direction of a physician
and in accordance with institutional protocols.
1.
Gently remove the old V.A.C.® dressing (if applicable) and discard per institution protocol.
2.
Debride eschar or hardened slough if present.
3.
Achieve hemostasis (avoid use of bone wax).
4.
Aggressively clean wound according to institution protocol or physician order.
5.
Irrigate wound with normal saline or solution per physician order.
(Sterile water is recommended in the presence of silver-impregnated adjunct dressings.)
6.
Clean and dry periwound tissue: If skin is moist due to perspiration, oil or
body fluids, a degreasing agent may be required.
7.
Apply skin prep such as Mastisol®, No-Sting®, etc. to periwound tissue.
Note: For patients with fragile periwound tissue, a thin-layered dressing such as KCI
drape, Duoderm® or Tegaderm® may be applied to the periwound area.
8.
Note wound dimensions and pathology and select
appropriate foam. Cut the foam to the dimensions that
will allow the foam to be placed gently into the wound.
Note: Do not cut the foam over the wound. Gently
rub the freshly cut edges of the foam to remove any
loose pieces. Also, do not pack the foam into the wound.
9.
Gently place the foam into the wound cavity, covering
the entire wound base and sides, tunnels and undermined areas. Count the pieces of foam and annotate
the total number in patient chart. Also annotate on
drape with permanent marker.
Note: If the wound is larger than the largest dresssing,
more than one dressing may be required. Ensure edges
of multiple pieces of foam are in direct contact with
each other for even distribution of negative pressure.
10. Size and trim the drape to cover the foam dressing as
well as an additional 3 - 5 cm border of intact periwound tissue. Do not discard excess drape, you may
need it later to patch difficult areas.
TIP: If skin surrounding wound site is excessively moist
or oily, a medical grade liquid adhesive may improve
adhesion. Applying a medical grade liquid adhesive may also
assist with the integrity of the dressings’ seal with repetitive
Instillation Therapy™ cycles.
TIP: For fragile periwound skin, use a skin prep prior to
drape application, or frame the wound with a layer of
Duoderm®. Cut the drape to a size large enough
to cover the foam dressing and the Duoderm® layer only.
8
Wound illustration
V.A.C.® foam
V.A.C.® foam application
V.A.C.® Classic tubing application
V.A.C.® tubing
V.A.C. Drape
V.A.C.® Classic System: Apply the tubing to the dressing. Cut
a hole through drape and into the foam. Insert tubing into hole
and secure with additional drape. Tubing must be placed away
from bony prominences at all times.
V.A.C.® foam
V.A.C.® Classic tubing application
T.R.A.C. Pad®
T.R.A.C. Pad®: V.A.C.® Therapy systems with T.R.A.C.®
technology utilizes a T.R.A.C. Pad® for applying the tubing (i.e.:
V.A.C.® ATS and V.A.C.Freedom®). Use the following instructions when
applying the T.R.A.C. Pad®:
T.R.A.C. Pad® application
Once the wound is filled with the foam dressing, cover the entire wound with drape, including the foam dressing and about 3 - 5 cm of surrounding intact skin. Cut a 2 cm hole in the
drape, large enough to allow fluid to pass through the dressing. Lift the drape with your
thumb and forefinger and cut the drape. It is not necessary to cut into the foam. Apply the
T.R.A.C. Pad® opening directly over the hole in the drape. Apply gentle pressure around the
T.R.A.C. Pad® to ensure complete adhesion. Give particular attention to the position of the
tubing, avoiding placement over bony prominences, or in creases in the tissue. TIP: Always
cut a 2 cm hole in the drape. Do not cut a linear "slit" in the drape. When negative pressure is
applied a slit may collapse and close, preventing negative pressure from reaching the wound.
Note: DO NOT cut off the T.R.A.C. Pad® and insert the T.R.A.C.® tubing into the foam. This
will cause the therapy unit to alarm.
Applying the V.A.C.® Therapy Unit:
1.
Remove canister from the sterile packaging and push it into the V.A.C.® unit until it
clicks into place.
Note: If the canister is not engaged properly the V.A.C.® alarm will sound.
2.
Connect the dressing tubing to the canister tubing. Make sure both clamps are open.
3.
Place the V.A.C.® unit on a level surface. Hang from the foot board or IV pole (some
units may not have an IV pole clamp).
Note: The V.A.C.® Classic unit will alarm and will discontinue therapy if unit is tilted
beyond 45 degrees.
4.
Turn on power button. Adjust the V.A.C.® unit settings per the Recommended
Guidelines for Treating Various Wound Types, page 30. Press THERAPY
ON/OFF button to activate negative pressure therapy. In less than 1
minute of operation, the V.A.C.® dressing should collapse, unless leaks are present. If
you hear or suspect a leak (small leaks may create a whistling noise), you can often fix
it by gently pressing around the tubing and wrinkles to better seal the drape. You can
also use excess drape to patch over leaks.
9
Dressing Removal:
1.
Raise the tubing connectors above the level of the therapy unit.
2.
Tighten clamp on the dressing tubing.
3.
Separate canister tubing and dressing tubing by disconnecting the connector.
4.
Allow the therapy unit to pull the exudate in the canister tube into the canister then
tighten clamp on the canister tubing.
5.
Press THERAPY ON/OFF to deactivate pump.
6.
Gently stretch drape horizontally and slowly pull up from skin. Do not peel. Gently
remove foam from wound.
Note: If dressing adheres to the wound base, you may consider applying a single
layer of non-adherent, porous material (e.g. Mepitel®, Adaptic®, N-terface®, or widemeshed vaseline-impregnated gauze) between the dressing and the wound when
re-applying the dressing. The non-adherent material must have wide enough pores
to allow unrestricted passage of air and fluid. Because tissue growth into the V.A.C.®
dressing may cause adherence, also consider using the V.A.C.® Vers-foam or
consider more frequent dressing changes.
Note: If pain is experienced during dressing change, you may, upon physician order,
consider introducing 1% lidocaine solution down the tubing, or injected into the
foam with the pump turned on at a lower pressure (50 mmHg). After instilling the
lidocaine, clamp the tube and wait 15 - 20 minutes before gently removing the dressing.
Note: If previous dressings were difficult to remove, introduce 10 - 30 ccs of normal
saline into tubing to soak underneath foam (ensure dressing tube is unclamped). For
best results, let it set for 15 - 30 minutes. Saline can also be injected directly into the
foam while low vacuum (50 mmHg) is applied to the dressing. Clamp the tubing
once the saline starts to flow into the dressing tubing. Wait 15 - 30 minutes, then
gently remove dressing.
7.
Discard disposables in accordance with applicable regulations.
Canister and Y-Connector Change
The V.A.C.® canister should be changed when full (unit will alarm), which averages about once
every 3 - 5 days. At a minimum, the canister should be changed weekly to control odor. The
Y-connectors should also be changed weekly at a minimum, and more frequently as needed.
System may contain body fluids. Follow Universal Precautions.
1. Tighten clamps on canister tubing and dressing tubing.
2. Disconnect canister tubing from dressing tubing.
3. Remove the canister from the unit.
4. Dispose of canister according to specified protocol in setting.
Note: If the Y-connectors are due to be changed, disconnect with the canister tubing
and dispose of per protocol. If the Y-connector is not yet due to be changed,
disconnect canister tubing from Y-connector and leave the Y-connector connected to
dressing tubing.
10
Follow-up on Dressing Integrity
It is recommended that a clinician or patient (if home) visually check the dressing every 2 hours
to make sure that the foam is firm and collapsed in the wound bed while therapy is active. If
not, follow the tips below:
• Make sure the display screen reads THERAPY ON. If not, press the THERAPY ON/OFF
button.
• Make sure clamps are open and tubing is not kinked.
• Identify air leaks by listening with stethoscope or by moving your hand around the
edges of the dressing while applying light pressure.
• If you find that the seal is broken and the transparent dressing has come loose, patch
with strips of adhesive drape as needed.
Disconnecting from Unit
Patients should only be disconnected from the unit for short periods, and no more than a total
of two hours per day.
To disconnect for short periods of time:
1. Close both clamps on the tubing.
2. Turn the unit OFF.
3. Disconnect the dressing tubing from canister tubing.
4. Cover the ends of the tubing with gauze and secure or, if available, use a tubing cap.
To re-connect:
1. Remove the gauze from the ends of the tubing.
2. Connect the tubing.
3. Unclamp the clamps.
4. Turn therapy ON. Previous therapy settings will resume.
11
General Dressing Tips
Maintaining a Seal
Maintaining a seal in the dressing is an important key for successful use of V.A.C.® Therapy.
Following are some ways to best maintain the integrity of the seal:
• Dry periwound area thoroughly after cleansing. You may use a skin prep or degreasing
agent to better prepare the skin for the drape application (e.g. Mastisol®, No-Sting®).
• Frame wound with a skin barrier to enhance the seal for wounds with delicate
periwound tissue, or in convoluted areas.
• Reduce the height of the V.A.C.® GranuFoam® dressing by cutting or beveling it to treat
areas that are shallower or near the perineal area.
• Try to position the dressing tubing on flat surfaces and away from the perineal area,
bony prominences, or pressure areas.
• Secure or anchor tubing with an additional piece of drape or tape several centimeters
away from the dressing/wound. This prevents pull on the wound area which can cause
leaks.
• Another application option for the V.A.C.® Classic only, is:
Seal the drape over the foam with the tubing removed. Then, make a slit in the top of
the dressing through the occlusive drape and 1/2 to 1 cm into the foam. Lay tubing
inside the shallow slit in the foam so that the foam surrounds holes in tubing. Cut strips
of drape, and then patch over drape hole and tubing.
Circumferential Drape Application
In the presence of anasarca or excessively weeping extremities, a circumferential drape application may be necessary in order to establish and maintain a seal. Extreme care should be taken
not to stretch or pull the drape when securing it, but let it attach loosely and stabilize edges
with an elastic wrap such as Coban® or ACE®. After initiating therapy, it is crucial to palpate
distal pulses to ensure circulatory patency, and to question the patient for presence of numbness and/or tingling sensations. If present, stop therapy and loosen drape. Instruct patient to
discontinue therapy and contact their clinician if numbness, tingling or increased pain occurs
during therapy. Circumferential drape applications should not be placed on patients with
neuropathic etiologies or in the presence of previous numbness or tingling.
Treating Multiple Wounds
“Y” connecting
By applying a Y-connector to the canister tubing, one V.A.C.® Therapy unit may be used to
treat multiple wounds on the same patient simultaneously.
T.R.A.C. Pad® Y-connector
V.A.C.® Classic Y-connector
V.A.C.® Classic tubing +
Y-connector application
T.R.A.C. Pad® tubing +
Y-connector application
12
Bridging
Wounds that are in close proximity to one another and of
similar pathologies may also be treated with one V.A.C.®
unit using another technique known as “bridging.” The
advantage of bridging is that it requires only one tubing,
decreasing the possibility of leaks.
1. Protect intact skin between the two wounds with a
piece of V.A.C.® Drape or another skin barrier
(Tegaderm®).
Bridging
2. Fill both wounds with foam, then connect the two
wounds with an additional piece of foam, like a bridge.
All foam pieces must come into contact with each other.
3. It is important to apply the tubing or T.R.A.C. Pad® in a central location to ensure
exudate from one wound is not being drawn across the other wound.
Fecal Incontinence
Fecal incontinence is not a contraindication for V.A.C.® Therapy. Many incontinent patients with
sacral, coccyx, or perineal wounds can benefit from V.A.C.® Therapy. There are many ways to
combat or control potential leakage of stool into the wound dressing. Please review the
suggestions below:
1. Use a rectal collection system (such as a fecal bag).
2. Frame the wound with a V.A.C.® Drape or other skin barrier (Stomahesive®,
Tegaderm®, skin-prep) that will help prevent the dressing from coming off due to
contact with stool. The barrier layer helps create a dam between the anus and the
area likely to come into contact with stool.
3. Perform temporary or permanent ostomy (if stooling is so severe that further erosion
of healthy tissue is likely if stool is not contained).
Tunneling:
Do not place foam into blind or unexplored tunnels.
1. Determine length and width of the tunnel using a
measuring device of your choice. During the initial
dressing application, cut the V.A.C.® Vers-foam wider
at one end and narrow at the other. This specific type
of cut ensures the opening to the tunnel remains patent
until the distal portion of the tunnel closes. Cut the
foam 1 - 2 cm longer than the tunnel measures.
Gently place the foam into the tunnel all the way to the
Tunnel
distal portion. The additional 1 - 2 cm of foam should
Wound Tunnel Fig. 1
remain in the wound bed and must communicate with
the foam in the wound bed. Therapy pressure
settings should be increased by 25 mmHg with the
presence of a tunnel.
Continuous therapy should always be used until the
tunnel has completely closed.
2. As the drainage begins to diminish, subsequent
dressing changes for the tunnel also change. Determine
length and width of the tunnel as above. Cut the
V.A.C.® Vers-foam wider at one end and narrow at the
other. Cut the foam to the exact wound dimension.
Gently place the foam into the tunnel all the way to
V.A.C.® Vers-foam Application Fig. 2
the distal portion. Pull out 1 - 2 cm leaving some
tunnel foam in the wound to communicate with the
13
Tunneling (cont.):
3.
foam in the wound bed. This specific placement leaves the distal portion of the
tunnel clear (see V.A.C.® Vers-foam application diagram) of foam and allows the
distribution of higher pressures to collapse the edges together, allowing the wound
to granulate together from the distal portion forward. Initiate continuous therapy at
previous settings.
Repeat this procedure until the tunnel has closed.
Note: Be sure to annotate on the dressing and nursing notes the actual number of
pieces of foam that have been placed into all aspects of the wound, as well as the
placement of any adjunct dressings such as non-adherents or silver-impregnated
dressings.
Wound Undermining
Wound undermining should be handled as follows:
Wound Undermining
1.
2.
3.
4.
®
Gently fill all undermined areas with V.A.C. Vers-foam
beginning at the distal portion.
Monitor exudate amounts and presence of granulation
tissue at each dressing change.
Always utilize continuous therapy.
As exudate amounts decrease and the presence of
granulation tissue is noted, gently place the foam into
the undermined areas all the way to the distal portion.
Pull out 1 - 2 cm leaving some foam in the wound to
communicate with the foam in the wound bed. This
specific placement leaves the distal portion of the undermined area clear of foam. This allows the distribution of
higher pressures to collapse the free areas of undermining together, allowing the wound to granulate together
from the distal portion forward. Initiate continuous
therapy at previous settings.
Dressing Small Wounds
Foot wounds: For wounds on the plantar surface or heel of
the foot, it is beneficial to utilize a bridge technique for tubing
placement to ensure no additional pressure from tubing exists.
After placing the dressing into the wound, cut a piece of foam in
the shape of a letter "C". Place the drape or another occlusive
barrier from the wound site to the anterior aspect of the foot.
Place the "C" piece of foam around the lateral aspect of the foot,
ensuring the two pieces of foam are touching and apply the
drape to obtain a seal. Cut a hole in the drape on the anterior
aspect of the foot and either insert the tubing and seal with
drape or apply a T.R.A.C. Pad®.
“C” Cut
14
Foot Wound
Small wounds with T.R.A.C. Pad®: For wounds that are smaller in dimension than the
T.R.A.C. Pad®, a special dressing application is required to carefully protect the periwound tissue.
1. Prepare the wound per physician orders.
2. Cut the foam to fit into the wound cavity
V.A.C.® foam
drape
3. Cut the drape to fit over the wound cavity as well as 4 - 5
inches around the wound.
4. Cut a 2 cm hole in the center of the drape prior to placement
over the foam. Apply the drape with the hole directly over the
foam.
V.A.C.® foam
5. Cut another piece of foam large enough to extend 1 - 2 cm
beyond the T.R.A.C. Pad® and lay directly over the hole in the
drape.
Larger piece of
V.A.C.® foam
6. Apply the T.R.A.C. Pad® to the larger piece of foam. Initiate
therapy.
T.R.A.C. Pad®
Optimizing Wound Approximation
Acute or traumatic pathologies such as compartment syndromes often require tissue decompression through a fasciotomy procedure, which may ultimately allow for tertiary or delayed
primary closure. Initial dressing applications should include gently placing the foam into the
wound and utilizing higher pressure settings to encourage removal of excessive debris.
Subsequent dressing applications should include cutting the foam 1 - 2 cm smaller to
encourage wound contraction allowing controlled re-approximation of the wound edges.
15
Wound Observation Between Dressing Changes
If you wish to observe the wound between dressing changes, simply cut the foam into two
pieces prior to placing in the wound and place three strips of drape horizontally across the
top of the foam dressing. To observe the wound, simply remove the middle strip, which
should be placed directly over the break between the two pieces of foam, separate the foam
and observe the wound. After inspection, realign the two pieces of foam, always ensure they
are touching each other, and reseal with an additional strip of drape.
Adjunct Dressing Recommendations:
1.
2.
3.
4.
All adjunct dressings utilized with V.A.C.® Therapy must be meshed or pie-crusted
to allow for even distribution of negative pressure and effective exudate removal.
Silver-impregnated dressings can be used in conjunction with the V.A.C.®
Vers-foam and V.A.C.® GranuFoam®. V.A.C.® Vers-foam is pre-moistened with
sterile water; therefore, no special considerations should be required to ensure bene
fits of the silver ion dressing. Special considerations should still be taken to evenly fen
estrate across a potentially occlusive silver dressing. This will allow for proper exudate
removal and even distribution of negative pressure.
Small areas of the wound can be covered with absorptive dressings. The majority of
the wound surface must be in contact with the V.A.C.® foam dressing. The exudate
may pool, forming a viscous or gel-like consistency and block negative pressure
distribution to the underlying tissues. Maceration or other tissue damage may occur.
In the presence of sutures or staples: Superficial or retention sutures should be
covered with a single layer of non-adherent prior to foam placement. This protects
the suture from becoming lodged into the open-cell foam during the delivery of
negative pressure.
16
Indications:
The V.A.C.® Instill™ System is indicated for patients who would benefit from negative pressure
wound therapy, drainage and controlled delivery of topical wound treatment solutions over
the wound bed.
Types of wounds for which V.A.C.® Therapy has been indicated include:
• chronic
• dehisced wounds
• pressure ulcers
• flaps, grafts
• acute
• traumatic
• diabetic ulcers
• partial thickness burns
Solutions for use with the V.A.C.® Instill™ System: Possible topical wound treatment
solutions include: topical cleansers, anesthetics, antibiotics, antiseptics, and antifungals.
Contraindications:
The same Contraindications apply as for V.A.C.® Therapy (see page 4). In addition, the
following apply to the V.A.C.® Instill™ System:
V.A.C.® dressing systems are contraindicated for use with hydrogen peroxide due to effervesence of solution upon contact. Solutions that are alcohol based or contain alcohol are also
contraindicated due to their potential adverse effects on skin with extended tissue contact.
Fluids should not be delivered to the thoracic cavity due to the potential risk of changes to core
body temperature.
Precautions:
The same Contraindications apply as for V.A.C.® Therapy (see page 4). In addition, the
following apply to the V.A.C.® Instill™ System:
Additional Precautions:
• The V.A.C.® Instill™ System is intended for use with saline solutions in a physiologic
pH range* that are topical wound treatment solutions.
• Various topical agents such as hydrogen peroxide are not intended for extended
tissue contact. If in doubt about the appropriateness of using a solution for the V.A.C.®
Instill™ System, contact the solution’s manufacturer.
• Use solutions only in accordance with manufacturer’s instructions for use and prescribing
information.
• During the dwell period of the V.A.C.® Instill™ System, the V.A.C.® dressing system is a
closed system and is NOT vented to the atmosphere.
• Do not use where temperature of fluid could cause an adverse reaction, such as a
change in patient’s core body temperature.
• Application of the V.A.C.® Instill™ System will result in pauses of negative pressure to the
wound. Additional consideration and physician discretion is advised when using the V.A.C.®
Instill™ System on wounds requiring continuous V.A.C.® Therapy (as opposed to intermittent
V.A.C.® Therapy), such as enteric fistulas and fresh flaps and grafts.
*6.0 - 7.4 per Guyton, AC. “Textbook of Medical Physiology” 8th ed, 1991.
Care and Safety Tips for the V.A.C.® Instill System:
See page 4 for additional Care and Safety Tips for V.A.C.® Therapy.
• Canister changes: Monitor fluid level in canisters frequently during use of the V.A.C.®
Instill System to accommodate canister changes resulting from use of topical wound
treatment solutions and exudate removal. V.A.C.® canisters should be changed when full. At
a minimum, the canister should be changed weekly and disposed of properly, as it may
contain body fluids. Follow Universal Precautions.
Optimizing Therapy
The same Optimizing Therapy applies as for V.A.C.® Therapy (see page 5).
17
V.A.C.® Instill™ System Recommended Guidelines
V.A.C.® Instill™ System
Recommended Guidelines
®
V.A.C. Instill™ Patient Selection Criteria
V.A.C.® Instill™ System Recommended Guidelines
V.A.C.® Instill™ System Therapy Unit
and Dressing Instructions
V.A.C.® Instill Pad Application:
1.
Choose an appropriate location for the Instill Pad, on the
opposite side and above the location the T.R.A.C. Pad®. Cut
a 2 cm hole in the drape over the foam.
2.
Apply the Instill Pad directly over hole in drape. Apply
gentle pressure around the Instill Pad to ensure complete
adhesion.
Instill Pad® application
Setting up the V.A.C.® Instill System:
1.
2.
Route facility’s solution tubing under the V.A.C.® Instill™ unit’s
solution tubing clamp on left side of unit. (Fig. 1)
Note: Keep tubing thumb-wheel closed until ready to
begin initial manual instillation cycle and record time.
TIP: Place strip of surgical tape or drape on tubing against
face of unit to prevent slippage or dislodging of tubing from
unit’s clamp.
Attach V.A.C.® Instill™ Pad to solution bag tubing using luer
Fig. 1
connector to either press fit or thread into facility’s tubing for
™
Left
side
unit
solution
tubing
clamp
Instillation Therapy .
Note: Use a macro drip kit for quicker solution delivery to wound site.
3.
Ensure the canister is engaged properly in the canister port.
4.
Route the canister tubing under the V.A.C.® Instill™ unit
canister tube clamp on right side of unit and then connect
to the dressing tubing. (Fig. 2)
5.
Place the V.A.C.® Instill™ therapy unit on a level surface or an
IV pole using the IV pole clamp. Ensure the V.A.C.®
Instill™ unit is located in a position elevated higher
than patient’s wound. Always operate the V.A.C.®
Instill™ therapy unit in an upright position.
6.
7.
Fig. 2
Right side unit canister tubing clamp
Attach the power cord to the V.A.C.® Instill™ therapy unit and plug into electrical outlet.
Press the green Power ON Switch to reach the Home Screen.
18
1.
2.
3.
4.
5.
Press Therapy button to select Therapy Screen.
Select level of negative pressure, using arrow keys to choose levels between 50 and
200mmHg, as per physician order.
Select Intensity Level. Use the arrow keys to choose rate of pressure change at the wound
site (10 - 50 mmHg per second). The lower the setting, the slower the target pressure will
be reached. This should be adjusted in accordance with varying wound conditions,
patient’s pain tolerance and at the direction of a physician.
Press the Instillation button to select Instillation Therapy™ management menu.
Use arrow keys to set the V.A.C.® Instill™ unit’s target settings per physician orders:
a. V.A.C.® Therapy time range: 1 min. – 12 hrs.
b. Instillation Therapy™ time range: 1 sec. – 2 mins.
Note: Observe initial instillation cycle and note the amount of time it takes to fill wound
site; close thumb wheel to prevent excess solution delivery. Program observed time into
unit’s “instillation” setting. An indication that a wound may be adequately filled is the
observation that the solution reaches the bottom of the Instill Pad or T.R.A.C. Pad®.
TIP: It is recommended to begin with a collapsed dressing and deliver solutions manually
the first time in order to determine the appropriate instillation time setting.
c. Hold time range: 1 sec. – 1 hr.
Note: The combination of Instillation time and Hold time should not exceed 2 hours in a
24-hour period. While operating in Instillation Therapy™ mode, intermittent therapy mode
is not available.
V.A.C.® Instill™ Therapy Settings Range
Mode:
Available Setting:
V.A.C.® Therapy™ (continuous)
Instillation Therapy™
Hold
1 minute - 12 hours
1 second - 2 minutes
1 second - 1 hour
Turning V.A.C.® Instill™ Therapy On
1.
2.
3.
4.
Return to Home Screen. Ensure that the V.A.C.® Instill™ unit’s solution tube clamp and
canister tube clamp are closed. Release the solution tube’s thumb wheel to the open
position.
Press ON/OFF button to turn therapy on.
Select the desired start-up mode:
• V.A.C.®
• Instillation
• Hold
TIP: Before beginning Instillation Therapy™, be sure there is enough room in the
canister for fluids delivered.
Once V.A.C.® therapy is being delivered, the V.A.C.® System dressing should collapse in less
than one minute. If the dressing does not collapse, a leak may be present. If a leak (small
leaks may create a whistling noise) is suspected, fix it by gently pressing around the
T.R.A.C. Pad® or Instill Pad tubing and wrinkles to better seal the drape. Use excess drape
to patch over leaks.
Note: The Air Flow Meter may be used to help diagnose dressing integrity. The lower the
level of the Air Flow Meter, the better the condition of the dressing. If the level of the Air
Flow Meter stays above 2 L/min. for 2 minutes, the leak alarm will sound.
Note: Once the Instillation Therapy™ treatment is complete, if desired, continuous or
intermittent therapy can be chosen to complete the patient’s course of therapy if needed.
19
V.A.C.® Instill™ System Recommended Guidelines
Adjusting Settings on the V.A.C.® Instill™ System
Recommended Guidelines for
Treating Different Wound Types
Physician-specific orders should always be followed as individual circumstances may vary.
Acute / Traumatic Wounds / Partial-Thickeness Burns
Initial
Cycle
Subsequent
Cycle
Target Pressure
V.A.C.®
GranuFoam®
Continuous
Intermittent
first 48 hours (5 min. ON /
2 min. OFF)
for rest of
therapy
125 mmHg
Target Pressure
V.A.C.®
Vers-foam
Dressing Change
Interval
125-175 mmHg; Every 48 hours
(every 12 hours
Titrate up for
with infection)
more drainage
Clinical Considerations:
• If you are using the V.A.C.® GranuFoam® Dressings, healthy, exposed tendon should
be covered by a single layer of a non-adherent dressing to prevent dessication and
minimize trauma to the tendon. Subject to physician discretion, V.A.C.® Vers-foam
Dressings may sometimes be applied directly over the exposed tendon, without a
non-adherent dressing.
• You may apply the V.A.C.® foam directly over Vicryl mesh, Prolene mesh, Marlex mesh or
intact peritoneum. Do not place the V.A.C.® dressing over exposed blood vessels or
organs; cover these structures with natural tissue (membranes, muscle), mesh or
multiple layers of a non-adherent dressing.
• For wounds with large amounts of drainage/edema, you may need to increase target
pressures by 25 - 75 mmHg until the drainage amount tapers off.
(Refer to Adjusting V.A.C.® Pressure Settings, page 30)
• You may maintain settings on Continuous Therapy throughout entire therapy for
patients who are experiencing discomfort, using V.A.C.® Vers-foam, or where the
wound contains tunneling. (Refer to Continuous vs. Intermittent Therapy, page 31)
• Chronic wounds may benefit from aggressive debridement of the soft tissue to remove
any epithelial cells that may have migrated over the wound surface, sinus tract or tunnel.
• In the case of suspected osteomyelitis or wounds that have exposed bone,
osteomyelitis should be ruled out according to the local protocols or established
practice. Any necrotic bone must be removed to prevent future occurrence.
• Exposed tendon, nerves or blood vessels should be protected by moving available
muscle or fascia over them or by a layer of non-adherent dressing if the
V.A.C.® GranuFoam® Dressing is used.
• Orthopaedic hardware can be incorporated in the V.A.C.® dressing and may not have
to be removed in the presence of an infected wound. Serial quantitative cultures should
be taken to monitor the progress.
Note: Acute traumatic wounds may not require large quantities of granulation tissue
formation unless there has been significant loss of soft tissue or extensive debridement.
• In acute wounds with exposed bone or fractures, the V.A.C.® may be used to reduce
interstitial fluid and may aid in preventing bacterial contamination secondary to the
traumatic wounding. In this case, V.A.C.® Vers-foam can be used without producing
large quantities of granulation tissue. Pressures with the V.A.C.® Vers-foam should be
at least 125 mmHg and higher if tolerated by the patient. V.A.C.® GranuFoam® would
be indicated for traumatic wounds that need large amounts of granulation tissue formed.
Compromised Suture Lines
Patients with multiple co-morbidities such as diabetes, end stage renal disease or heart disease
have a high incidence of surgical wound dehiscence. Patients with excessive edema and fluid
accumulation are also at risk for wound dehiscence. V.A.C.® Therapy placed over potentially
compromised suture lines may assist with healing and maintenance of wound stability.
20
• Protect intact epithelium on both sides of the suture line with KCI Drape or Tegaderm®
leaving the suture line exposed.
• Lay a single layer of a wide meshed non-adherent over the exposed sutures.
• Cut a strip of V.A.C.® GranuFoam® and gently place on top of the non-adherent.
• Place drape and tubing.
• Initiate therapy at 75 mmHg - continuous.
• Dressing changes should occur every 48 hours (every 12 hours if infected) and
therapy is usually required for a short period of time.
Suture lines that are extremely edematous and weeping may require removal of one or two
sutures. V.A.C.® Vers-foam strips may be cut and gently placed into the suture line where the
sutures have been removed. The V.A.C.® GranuFoam® is still placed on top of the suture line as
directed above. Ensure the V.A.C.® Vers-foam and V.A.C.® GranuFoam® directly communicate
in order to provide adequate distribution of negative pressure and "wick" fluid from within the
suture line. Tertiary closure may be obtained after adequate tissue decompression has occured.
Surgical Wound Dehiscences
Cycle
Continuous
for duration
of therapy
Target Pressure
V.A.C.®
GranuFoam®
Target Pressure
V.A.C.®
Vers-foam
Dressing Change
Interval
125-175 mmHg; Every 48 hours
(every 12 hours
Titrate up for
with infection)
more drainage
125 mmHg
Non-adherent
V.A.C.® foam
Dehisced wound
Apply non-adherent layer
V.A.C.® foam application
Clinical Considerations:
• Select appropriate type of foam dressing based on wound characteristics. (See
Recommended Guidelines for Foam Use Chart, page 7) V.A.C.® GranuFoam® is
used more often to promote rapid granulation tissue growth. V.A.C.® Vers-foam may
be used to help protect more sensitive structures, (i.e., minimally covered vessels,
tendons or grafts.) You may want to use a combination of the two types of foams.
• May be used with retention sutures in place, but it is generally important to access and
dress all of the wound under and between the sutures. It may be easier to dress and
maintain the seal if all or most of the sutures are removed.
• Consider applying drape over adjacent drain (puncture) sites in the event that a
properly applied dressing is not collapsing.
• Monitor characteristics of wound drainage and report any significant changes to
the physician.
• Applying the V.A.C.® foam to the bowel which is covered by mesh may produce
granulation tissue on the bowel resulting in adhesions.
21
• If bowel is visible in the wound base, it is best when possible to pull the greater
omentum down over the visible bowel then proceed with V.A.C.® Therapy as usual. If
the greater omentum is not available then the surgeon may want to consider placing
mesh over the bowel.
• V.A.C.® foam can be placed directly over synthetic mesh (Vicryl® or Marlex®) in
abdominal wounds and can facilitate the growth of granulation tissue from the
structures beneath the mesh, extending up through the mesh into the wound base.
• For dehisced sternal wounds, V.A.C.® may be placed over an intact mediastinal
membrane. Should the heart and great vessel be exposed, consult with the physician.
• For dehisced abdominal wounds, continuous cycle can be used throughout the entire
V.A.C.® treatment period.
• For patients with sternotomies or sternectomies, continuous therapy is recommended
throughout the entire treatment period to help stabilize the chest wall. This helps to pull
the wound closed, aids in promoting wound contraction, and this “splinting” effect can
be more comfortable for the patient.
For other than sternal dehisced wounds, you may achieve better results with
Intermittent Therapy once exudate levels are stable and where the primary goal is to
create granulation tissue.
Meshed Grafts and Bioengineered Tissues
Initial
Cycle
Continuous for
duration of therapy
Target Pressure
V.A.C.®
GranuFoam®*
75-125 mmHg
Target Pressure
V.A.C.®
Vers-foam
Dressing Change
Interval
125 mmHg; Titrate Remove dressing after
up for more
4-5 days when using
drainage
either foam (Drainage
should taper prior to
removal)
*75 mmHg can be used if patient has persistent pain with higher pressures, in areas that will not be subjected to shear
forces. 125 mmHg can be used in highly contoured areas or areas where shear forces are present. The higher pressure
may help hold the graft more firmly in place. In general, the pressure that was used to prepare the recipient bed before
grafting should be continued after grafting.
Recommendations for applying V.A.C.® GranuFoam® Dressing post-graft:
• Apply V.A.C.® dressing immediately after graft placement. Begin therapy as soon as
possible.
• Select a single layer of non-adherent, open pore dressing [e.g. Mepitel® (Mölnlycke),
Adaptic® (Johnson & Johnson), N-terface® (Winfield Laboratories, Inc)]. Cut the nonadherent dressing to the size of the grafted area, plus a 1 cm border, then place it over
the graft. Cut the V.A.C.® GranuFoam® to the same size as the non-adherent dressing so
that it extends approximately 1 cm outside the staple line, and lay it on top of the nonadherent layer. Cover with V.A.C.® Drape and apply tubing or T.R.A.C. Pad®. Set negative
pressure to desired level as indicated above.
• Look for more drainage in the tubing and canister during the first 8 - 24 hours of V.A.C.®
application post graft. Then, the drainage will usually taper off significantly. This is
generally a good sign of graft take. In general, a lot of drainage in the tubing postgraft may indicate that there is a complication underneath the foam.
• If signs of infection are present, remove V.A.C.® dressing and evaluate wound.
22
Recommendations for applying V.A.C.® Vers-foam post-graft:
• Apply V.A.C.® dressing immediately after graft placement;
begin therapy immediately.
• Cut V.A.C.® Vers-foam to the size of the grafted area,
plus a 1 cm border. Place the V.A.C.® Vers-foam directly
over the graft, extending approximately 1 cm beyond the
staple line.
• When using V.A.C.® Classic, tubing can remain embedded
in the V.A.C.® Vers-foam, or it can be removed from
inside the foam and placed on top of the foam. Place the
V.A.C.® Drape over the foam and apply pressure at
Graft
125 mmHg.
®
• If tubing remains embedded into the V.A.C. Vers-foam,
be sure that the tubing doesn’t extend all the way to the
end of the foam. It is recommended to retract the foam
from the distal end of tubing, cut approximately 1 cm off
tubing, then replace the foam so that it extends at least
1 cm beyond the tubing.
• When using therapy units with T.R.A.C.® technology, place
the V.A.C.® Drape over the foam, cut a 2 cm hole in drape
and apply a T.R.A.C. Pad®.
• Upon removal of dressing, foam may be slightly dry
V.A.C.® Vers-foam application
around the edges. If this happens, simply apply saline
to the dry areas on the foam and gently remove when
moist. The foam should not adhere to graft.
• Look for more drainage in the tubing and canister during the first 8 - 24 hours of
V.A.C.® application post graft. Then, the drainage will usually taper off significantly. This
is generally a good sign of graft take. In general, a lot of drainage in the tubing postgraft may hint that there is a complication underneath the foam.
• If signs of infection are present, remove V.A.C.® dressing and evaluate wound.
Pressure Ulcers
Initial
Cycle
Subsequent
Cycle
Target Pressure
V.A.C.®
GranuFoam®
Continuous Intermittent
125 mmHg
(5 min. ON /
for first 48
2 min. OFF)
hours
for rest of
therapy
Target Pressure
V.A.C.®
Vers-foam
Dressing Change
Interval
Every 48 hours
125-175 mmHg;
Titrate up for more (every 12 hours
with infection)
drainage
Clinical Considerations:
• If patient’s skin cannot tolerate frequent dressing changes, cut the drape around the
foam, remove foam, clean wound as ordered, then replace foam and drape. Drape in
periwound area may be left for one additional dressing change. Never layer more than
two drapes at a time. More than two layers may impair the moisture vapor transmission
rates of the drape.
• If patient is complaining of pain, the V.A.C.® target setting may be decreased by
25 mmHg increments (minimum 75 mmHg) until pain is relieved.
• If patient is elderly, emaciated, or on anticoagulents, start with lower pressure (i.e., 75 or
100 mmHg) and slowly titrate to 125 mmHg.
• If pressure ulcer is in an area where moisture is an issue, consider using continuous
therapy for the duration of treatment.
23
Chronic Ulcers
Initial
Cycle
Subsequent
Cycle
Target Pressure
V.A.C.®
GranuFoam®
Target Pressure
V.A.C.®
Vers-foam
Dressing Change
Interval
50-125 mmHg* 125-175 mmHg;
Every 48 hours
Continuous Intermittent
(5 min. ON /
for first 48
Titrate up for more (every 12 hours
2 min. OFF)
with infection)
hours
drainage
for rest of
therapy
*The higher pressures within the stated target pressure range are preferred. In cases of intolerance, use lower pressure
as an option, but ensure that active fluid evacuation occurs.
Clinical Considerations:
• If patient’s skin cannot tolerate frequent dressing changes, cut the drape around the
foam, remove foam, clean wound as ordered, then replace foam and drape.
• If patient is experiencing pain, the V.A.C.® target setting may be decreased by 25 mmHg
increments (minimum 50 mmHg for V.A.C.® GranuFoam®; 125 for V.A.C.® Vers-foam)
until pain is relieved.
Flaps
Initial
Cycle
Continuous for
duration of therapy
Target Pressure
V.A.C.®
GranuFoam®
Target Pressure
V.A.C.®
Vers-foam
125-150 mmHg 125 - 175 mmHg;
Titrate up for more
drainage
Dressing Change
Interval
Fresh = every 72 hrs.
Complicated = every
48 hrs.
(every 12 hours with
infection)
Clinical Considerations:
1. Suture the flap in place using approximately 1/3 less sutures than would normally be used.
The greater spacing will allow the V.A.C.® to remove fluid through the suture lines.
2. Place a single layer of KCI drape, Tegaderm or another semiocclusive barrier over the intact epidermis on the top of the flap
and on the opposite side of the suture line (see diagram). Be
careful not to cover the suture line with the semi-occlusive barrier.
semi-occlusive barrier
3. Place a single layer of a wide-meshed non-adherent over the
exposed suture line.
non-adherent
24
Flaps
Clinical Considerations (cont.):
4. Placement of V.A.C.® Vers-foam wick is optional:
If the recipient bed was previously highly exudating, a thin strip
of V.A.C.® Vers-foam may be cut and placed under the flap,
between the sutures, to wick fluid from the interior of the flap.
Ensure V.A.C.® Vers-foam and V.A.C.® GranuFoam® directly
communicate in order to ensure even distribution of pressure.
V.A.C.® Vers-foam wick
5. Select the appropriate size of V.A.C.® GranuFoam® to cover
the entire flap, including the suture line and 2 - 3 cm beyond
the suture line.
V.A.C.® GranuFoam®
6. If viewing the flap during therapy is desired, cut the V.A.C.®
GranuFoam® in half prior to application and place the drape in
strips directly over the area where the foam is approximated.
Removal of the strip of drape over the approximated foam
allows the clinician to gently separate foam in order to inspect
the underlying tissue. After inspection of the flap, simply reapproximate the foam pieces and reseal with an additional strip
of drape and continue therapy.
7. Place drape over the foam and apply tubing or T.R.A.C. Pad®.
8. Higher pressures should be used, especially with large, bulky flaps in order to help bolster
the flap.
Venous Grafts
V.A.C.® Therapy can be used to treat dehisced wounds over venous grafts with small areas of
exposed graft. A flap of tissue should be used to cover the graft and act as a barrier between
the graft and foam dressing. If a small area of graft is exposed, a thick layer of non-adherent
dressing should be used between the V.A.C.® GranuFoam® and graft.
25
Recommended Guidelines for V.A.C.® Therapy
with Enteric Fistula
V.A.C.® Therapy may assist in promoting the healing of enteric fistulas. The recommended
guidelines provide basic technique protocols, this is not a guarantee of results. V.A.C.® Therapy
is not recommended or designed for effluent management and containment. It remains an aid
in wound healing therapy.
Two primary goals of therapy currently exist:
Acute: Obtaining complete pressure-directed closure of the fistula.
Chronic: Segregate the fistula from the abdominal wound in order to obtain sufficient
healing and stabilization of the patient’s overall health to allow for subsequent surgical repair.
Chronic Candidate Selection
Acute Candidate Selection
•
•
•
•
•
•
•
•
• Enteric fistula - non-surgical candidate
Enteric fistula
• Chronic formation
Acute formation
• Mouth of fistula must be easily visualized
Minimal to moderate amounts of effluent
and accessed
Effluent is thin to slightly viscous consistency
• NPO (Nothing by mouth)
NPO (Nothing by mouth)
• TPN (Total Parenteral Nutrition)
TPN (Total Parenteral Nutrition)
Fistula opening must be easily visualized and accessed
No evidence of epithelial cells/growth on opening of fistula
Application Directions: Acute Enteric Fistula (Complex)
1. Cover the mouth of the fistula with several layers of petroleumbased gauze.
2. Aggressively irrigate and clean the abdominal wound as
directed by the physician.
mouth
of fistula
3. Remove the layers of petroleum-based gauze from the mouth of
the fistula.
4. Cover the mouth of the fistula with a single-layer of widemeshed non-adherent dressing.
5. Cover all areas of exposed bowel or other organs with a
petroleum-based fine-meshed non-adherent dressing.
26
®
V.A.C.
Vers-foam
V.A.C.®
GranuFoam®
6. Cut and apply a strip of V.A.C.® Vers-foam directly over the widemeshed non-adherent dressing on the mouth of the fistula. The
foam should extend 1 - 2 cm beyond the mouth of the fistula.
7. Cut and gently place V.A.C.® GranuFoam® dressing into the
remaining wound. Ensure the V.A.C.® GranuFoam® is in direct
contact with the V.A.C.® Vers-foam. The V.A.C.® GranuFoam® can
also be placed directly over the V.A.C.® Vers-foam.
8. Apply the drape over the entire abdominal dressing.
T.R.A.C. Pad®
9. Apply the tubing or T.R.A.C. Pad® directly over the area that
houses the fistula.
V.A.C.® Drape
10. Initiate pressure at 150 – 175 mmHg.
11. Use continuous therapy throughout treatment.
Application Directions: Acute Enteric Fistula (Simple)
1. Cover the mouth of the fistula with several layers of petroleumbased gauze.
2. Aggressively irrigate and clean the abdominal wound as directed
by the physician.
mouth of
fistula
drape
T.R.A.C.
Pad®
3. Remove the layers of petroleum-based gauze from the mouth of
the fistula.
4. Cut and gently place V.A.C.® GranuFoam® dressing into the
wound. Apply drape.
5. Apply the tubing or T.R.A.C. Pad® directly over the area that
houses the fistula.
V.A.C.®
GranuFoam®
27
Application Directions: Chronic Enteric Fistula
Recommended Guidelines based on current practice. References available upon request.
1. Cover the mouth of the fistula with several layers of petroleumbased gauze.
2. Aggressively irrigate and clean the abdominal wound.
3. Remove the several layers of petroleum-based gauze from the
mouth of the fistula.
mouth of
fistula
petroleum
based gauze
drainage
device
non-adherent
V.A.C.®
GranuFoam®
4. Place a drainage device (soft, red rubber catheter, foley catheter,
etc.), over the mouth of the fistula. Do not enter the lumen of the
bowel.
5. Take a petroleum-based strip gauze and wrap it around the base
of the drainage device at the point of insertion into the mouth of
the fistula.
6. Cover all areas of exposed bowel or other organs with a
petroleum-based fine-meshed non-adherent dressing.
7. Cut a piece of V.A.C.® GranuFoam® in a circle and make a single
cut from the edge of the circle to the center of the circle. At the
base of the tube, slide the V.A.C.® GranuFoam® circle around the
tube.
8. Cut and gently place V.A.C.® GranuFoam® into the wound.
V.A.C.®
GranuFoam®
9. Apply the drape over the entire abdominal dressing, cutting a
hole for the tubing to come through.
10. Apply the tubing or T.R.A.C. Pad®.
T.R.A.C. Pad®
11. Stabilize drainage device on outside of dressing with an additional drape or foam and drape.
12. Connect drainage device to collection unit such as foley bag or suction system.
28
Pouching/Diverting Drainage of a Chronic Fistula
Take all precautionary steps per other fistula protocols (NPO, fistulagram, etc)
1.
2.
3.
4.
5.
6.
7.
8.
9.
10.
11.
12.
13.
14.
15.
16.
17.
18.
19.
20.
21.
22.
Cover the mouth of the fistula with 2-3 layers of petroleum based gauze.
Aggressively irrigate and clean the abdominal wound.
Remove the 2-3 layers of petroleum based gauze from the mouth of the fistula.
Wrap petroleum based gauze around the mouth of the fistula.
Cover all areas of exposed bowel or other organs with a petroleum based fine-meshed
non-adherent dressing.
Cut and gently place V.A.C.® GranuFoam® or V.A.C.® Vers-foam as appropriate into
remainder of the wound. DO NOT place foam over mouth of fistula. V.A.C.® foam and
“collar” should be in contact. Be careful not to have foam overlapping into the mouth of
the fistula. A hole may be cut in one piece of foam exposing the chronic fistula in question.
Note: Do not cut the foam over the wound. Gently rub the freshly cut edges of the foam
to remove any loose pieces. Also, do not pack the foam into the wound.
Note: Be sure to annotate on the dressing and nursing notes the actual number of pieces
of foam that have been placed into all aspects of the wound, as well as the placement of
any adjunct dressings such as non-adherents or silver-impregnated dressings.
Place 2 x 2 gauze over mouth of fistula.
Apply the drape over the entire abdominal dressing.
Apply the tubing or T.R.A.C. Pad® away from the 2 x 2 gauze. Initiate negative pressure.
Ensure seal is airtight.
Mark the area on the drape where the mouth of fistula is.
Turn off the negative pressure and allow for the foam to “fluff” back up.
Carefully cut away the drape that is directly over the 2 x 2 gauze and mouth of fistula.
Remove the 2 x 2 gauze exposing chronic fistula.
Apply Eakins Covalent seal, caulking strip or Ostomy paste in a circle around the chronic
fistula on the drape.
Apply the Ostomy appliance or fecal incontinence bag of your choice as directed over the
exposed chronic fistula and the previously placed caulk.
Make sure appliance is securely in place and the end of the appliance is adequately sealed.
Initiate NPWT at a pressure of 100 - 125 mmHg. Observe for dressing draw down.
As air is evacuated from the appliance, it may start to shrink down onto the mouth of the
exposed fistula. Pinch the bag with your fingers and hold away from fistula until desired
pressure is obtained.
For high output fistulas, consider using a higher output bag or following physician’s
instructions for drainage.
Use continuous therapy throughout treatment.
Encourage staff to monitor I & O of fistula.
Educate patient, when possible, to alert staff when emptying of the device is necessary.
Troubleshooting Tips
1. After pressure is initiated, effluent is noted in the tubing.
a. Increase pressure in increments of 25 mmHg for 20 to 30 minutes, check for effluent.
If present, continue to increase pressures and observe for a maximum of 200 mmHg
until there is no effluent being removed. If effluent continues to flow into the tubing
after all measures have been tried, discontinue therapy and reapply V.A.C.® dressing.
b. Initial approximation of the fistula is evidenced by loss of effluent coming from the
wound.
2. With the higher pressures required to approximate the fistula, won’t it exert too much
pressure on the rest of the wound bed?
a. No. Application directions include placement of single or multiple layers of a fine
mesh non-adherent dressing.
b. The fine-mesh non-adherent under the V.A.C.® GranuFoam® provides a protective
barrier to the higher pressures.
29
Additional Recommended Guidelines for Treating
Various Wounds with V.A.C.® Therapy
NOTE: THESE GUIDELINES ARE NOT INTENDED AS A GUARANTEE AS TO RESULTS,
OUTCOME OR PERFORMANCE OF THE V.A.C.® SYSTEM™. THEY ARE RECOMMENDATIONS TO
ASSIST THE TREATING PHYSICIAN IN ESTABLISHING PATIENT-SPECIFIC TREATMENT PROTOCOLS.
AS WITH ANY APPLICATION, PLEASE CONSULT THE PATIENT’S TREATING PHYSICIAN AS TO
INDIVIDUAL CONDITIONS AND TREATMENT AND FOLLOW ALL APPLICABLE MANUALS AND
REFERENCE GUIDES AS TO PRODUCT USE AND OPERATION. ALWAYS CONSULT THE
INDICATIONS, CONTRAINDICATIONS, PRECAUTIONS AND CARE AND SAFETY TIPS
SECTION OF THIS BOOKLET AND ANY OTHER PRODUCT LABELING AND INSTRUCTIONS
BEFORE PLACING A V.A.C.® PRODUCT ON A PATIENT. CONTACT YOUR LOCAL KCI
REPRESENTATIVE WITH PRODUCT OPERATION USE QUESTIONS.
Infected Wounds
If a wound is chosen for V.A.C.® Therapy and is infected (CFUs, colony forming units, greater
than 105), change the dressing every 12 - 24 hours. You may resume regular dressing change
intervals (48 hours) when CFUs are decreased to levels lower than 105, or clinical signs of
infection have abated. If the patient’s skin cannot tolerate frequent dressing changes, cut the
drape around the foam, remove foam, irrigate wound as ordered, then place new foam and
drape. It is extremely important during the entire course of V.A.C.® Therapy to keep the therapy
ON continuously and clean the wound thoroughly at each dressing change.
Wound Odors*
V.A.C.® treated wounds have a unique odor due to the interaction of the foam and wound fluids
which contain bacteria and proteins. The type of bacteria and proteins present may be responsible for the type and strength of the odors. It is imperative that aggressive wound cleaning be
done at each dressing change to decrease bacterial load, and help minimize the odor.
If you determine that the V.A.C.® unit is the source of the odor please contact your KCI
representative to replace the unit. Using a canister with Isolyser® can greatly reduce odors.
*Note: Strong odors may also be a sign of possible infection. (See Infected Wounds,
page 30 and Care and Safety Tips, page 4)
Adjusting V.A.C.® System™ pressure settings:
The Recommended Guidelines on therapy settings in this booklet are based on the average
wound. You may want to vary the pressure settings to optimize V.A.C.® Therapy based on
individual conditions and upon physician order.
The V.A.C.® pressure setting may be titrated up by 25 mmHg
increments in situations where there is:
• Excessive drainage
• Large wound volume
• V.A.C.® Vers-foam dressing(s) in the wound or in tunneled areas
• A tenuous seal (refer also to previous section Maintaining a Seal, page 12)
The V.A.C.® pressure setting may be titrated down by 25 mmHg
increments in situations where there is:
• Pain unrelieved by aggressive analgesia
• Bruising in the wound bed
• Elderly and nutritionally compromised patient
• Excessive bleeding (i.e.: anticoagulated patient)
• Compromised circulation (Peripheral Vascular Disease)
• Excessive granulation tissue growth
30
Continuous vs. Intermittent Therapy
V.A.C.® Therapy research in porcine models has shown that intermittent therapy (5 min active,
2 min inactive) can stimulate faster granulation tissue formation than continuous negative
pressure. This research has helped establish the guidelines for the recommended mode of
therapy (Continuous or Intermittent) as well as the amount of negative pressure that should be
used on various wounds.
While it is recommended to advance the patient from Continuous to Intermittent Therapy after
the first 48 hours on acute wounds and pressure ulcers, the conditions for switching to
intermittent therapy may not always be optimal. Patients may be better served on Continuous
Therapy for the duration of therapy when:
• They are experiencing significant discomfort during Intermittent therapy mode.
• There is difficulty maintaining an air tight seal during the first 48 hours of therapy in
Continuous mode (i.e. perianal or toe wounds.)
• There are tunnels or undermined areas. Continuous therapy helps to hold the wound
closed. (See Tunneling, page 13).
• There are high levels of drainage from the wound beyond the first 48 hours. It is
better to wait until the amount of drainage tapers off before switching to Intermittent.
Intensity Feature:
The Intensity feature is not available with all V.A.C.® systems. Please refer to the appropriate
User’s Manual or On-Screen User Guide. Intensity is the rate at which target pressure is reached
at the initiation of therapy. The lower the Intensity setting the slower target pressure will be
reached. It is recommended that new patients begin therapy at the lowest intensity setting as
this allows for slower, gentle increase of negative pressure once the foam is compressed in the
wound. The intensity can remain at the minimum setting throughout the entire length of
treatment to enhance patient comfort, especially when using Intermittent therapy.
Additional Therapy Recommended Guidelines Chart
Wound
Characteristics
Intermittent
Continuous
Either
Intensity
Setting
Difficult dressing application
✘
Higher
Flaps
Lower
Painful wounds
✘
✘
✘
✘
Tunnels or undermining
✘
Higher
Unstable structures
✘
Either
Highly exudating
Meshed grafts
Higher
Lower
Lower
Minimally exudating
✘
Lower
Large wound
✘
Higher
Small wound
✘
✘
Lower
Either
✘
Higher
Stalled progress
®
V.A.C. Vers-foam
31
Use of V.A.C.® Therapy and Hyperbaric Oxygen Therapy
There are two potential options to consider when patients treated with V.A.C.® Therapy
undergo hyperbaric oxygen therapy treatments (dives).
Option One:
Remove the V.A.C.® dressing before the dive and cover the wound with a moist (saline) gauze
or other dressing described in the facility’s Hyperbaric protocol. After dive is completed, clean
surface of wound and surrounding tissue. Replace V.A.C.® dressing and initiate V.A.C.® Therapy.
Option Two:
Since Hyperbaric treatments are usually daily, Monday - Friday and some are twice a day, the
removal of the dressing prior to each dive may become overly irritating to the surrounding
tissue or uncomfortable for the patient and cause added cost. In such cases, the Medical
Director of the Hyperbaric chamber can authorize the following procedure:
Prior to entering the chamber, disconnect the V.A.C.® Therapy unit and canister from the V.A.C.®
dressings by clamping the clamps on the dressing and canister tubing. Disconnect the tubing.
The V.A.C.® Therapy unit and canister do not enter the chamber. Once the patient is in the
chamber, the end of the connector should be covered by a 4 x 4 or other absorbent dressing
to contain any secretions in the tubing. Once the gauze is in place, unclamp the tubing to
allow pressure changes in the V.A.C.® tube and dressing. Cover the entire V.A.C.® dressing and
tubing with a moist towel.
After the dive, reconnect the V.A.C.® Therapy unit to the dressing and turn the therapy ON.
Check the dressing for air leaks and seal, if necessary.
When to discontinue V.A.C.® Therapy:
V.A.C.® Therapy should be discontinued when the goal of therapy has been met. In some cases
V.A.C.® Therapy will take the wound to full closure. In other cases, the surgeon may elect to
close the wound surgically. Generally, although individual circumstances will vary, therapy
should also be stopped if the wound shows no progress for 1 - 2 weeks and potential solutions
have failed.
Minimal change in wound dimensions
When there is minimal to no change in the wound dimensions for 1 - 2 consecutive weeks,
and patient compliance and technique are not the cause:
• For shallower wounds, cut foam slightly smaller (1/8 to 3/8 cm) than wound edges
to enhance inward epithelial migration.
• Provide a “Therapeutic Pause.” Interrupt V.A.C.® Therapy for 1 - 2 days, then resume.
This has been effective in reinitiating the healing progress.
• You may also change the therapy settings from Continuous to Intermittent or viceversa. This has also been effective in stimulating further healing.
• Evaluate nutritional status and supplement as needed.
• Make sure the patient is receiving adequate pressure relief. For example, the patient
with an ischial pressure ulcer may be sitting up too long.
• Assess wound surface for presence of epithelial cells. If present, removal of epithelial
cells may allow granulation to proceed in wound and undermined areas.
32
Deterioration of wound
When wound is progressing well from dressing change to dressing change, then suddenly
experiences rapid deterioration within 48 hours, use the following interventions:
• Check therapy hour meter for actual number of therapy hours received versus
number of recommended therapy hours (22 of 24 hours). If number of therapy
hours is lower than 22 of 24 hours each day, explore reason for therapy deficit and
remedy situation.
• Check for small leaks with stethoscope. If stethoscope is not available, identify air leaks
by listening for whistling noise or by moving your hand around the edges of the
dressing while applying light pressure. Patch as needed.
• Assess for osteomyelitis.
• Change dressing more frequently.
• Clean wound more aggressively during dressing changes.
• Assess for tissue infection.
• Obtain a culture or biopsy and treat accordingly.
• Examine and debride the wound or bone as needed.
• Debride wound edges if they appear non-viable or rolled under, thus inhibiting
granulation tissue formation and migration of epithelial cells over an acceptable
wound base.
• Make sure dressing changes are being done every 48 hours, if possible. Waiting
longer than 48 hours may allow exudate to seal off the foam pores next to the wound.
Changes in the wound
If the wound assessment reveals dark discolorations:
• Rule out mechanical trauma. Relieve wound of excessive pressure due to prolonged
sitting, excessive foam in the wound or pulling and stretching drape over the foam.
Roll drape over the foam; do not stretch drape over foam.
• Decrease pressure by 25 mmHg.
• Assess presence of anticoagulant therapy and evaluate recent clotting times of lab
values.
• Thin depth of foam prior to dressing application to prevent overpacking.
If the wound appears white, excessively moist or macerated:
• Check therapy hour meter for actual number of therapy hours received versus
number of recommended therapy hours (22 of 24 hours). If number of therapy
hours is lower than 22 of 24 hours each day, explore reason for therapy deficit and
remedy situation.
• Consider increasing target pressure in increments of 25 mmHg to encourage
excessive exudate removal.
33
Ordering The V.A.C.® System™
Physician Order:
All V.A.C.® Therapy systems require a physician’s order. The following information should be
included:
1. Product name
2. Exact location and type of wound to receive therapy
3. Wound dimensions
4. Pre-medication instructions
5. Wound cleansing instructions (cleanser, normal saline, etc)
6. Therapy settings (i.e.: Intermittent or Continuous)
7. Pressure settings in mmHg (50 - 200)
8. Dressing change intervals (12, 24 or 48 hours)
9. Dressings to be used (i.e.:V.A.C.® GranuFoam® or V.A.C.® Vers-foam Dressings)
10. Adjunct dressings to be used (non-adherents, silver-impregnated, etc.)
You may also include additional instructions about pre-medication, wound cleansing, etc.
For more information and required authorization forms, call 1-800-275-4524.
Example:
V.A.C.® Therapy to dehisced abdominal wound. Set therapy on Continuous Therapy at
125 mmHg. Change dressing every 48 hours.
Transitioning Patients Between Care Settings:
•
•
•
•
•
•
Contact your KCI representative and the QA/Discharge Planner/Case Manager as
soon as you know that you are planning to transfer a patient to a different care
setting with V.A.C.® Therapy. Ideally, allow at least 2 - 3 days prior to planned transfer
to allow KCI to contact and train Insurance/Medicare/Home Health/Facility and
obtain supplies.
Write a prescription for V.A.C.® Therapy to be continued, and include the
recommended length of treatment (usually 30- or 60- day increments).
Include wound measurements and condition of wound in the discharge record.
Special paperwork is required for Medicare/Medicaid patients. Contact your local KCI
representative or call 1-800-275-4524 for specific instructions.
Company policy requires delivery of a new therapy unit and pick-up of the used
therapy unit when a patient transitions from one care setting to another or to home.
The new unit cannot be delivered prior to Medicare, private insurance or facility
approval.
Remove V.A.C.® dressing before the patient is discharged. Apply appropriate
alternative dressing until the new V.A.C.® Therapy unit is approved and personnel
can be trained to commence therapy.
KCI Contact Information:
If you have questions, or for additional information, please contact your local KCI
representative or contact KCI directly at 1-800-275-4524. Visit our website at
www.woundvac.com. For a medical emergency, contact your local emergency number
(i.e. 911).
34
R
1-800-275-4524
www.woundvac.com
©2005 KCI Licensing, Inc., All rights reserved. GORE-TEX® is a registered trademark of W.L. Gore and Associates. Adaptic®,
Mepitel®, Mastisol®, No-Sting®, Duoderm®, Tegaderm®, N-terface®, Coban™, ACE®, Stomahesive®, Vicryl®, Prolene®, Marlex®,
Isolyser® and Dakins are not trademarks of KCI or its affiliates, but are trademarks of other entities. References to these non-KCI
products in this Guide are not intended as an endoresement of one particular brand over another. Other trademarks and service
marks designated herein are property of KCI, its affiliates and licensors. V.A.C.® Systems (including disposables) are subject to
patent and/or pending patent. Information in this Guide is subject to change at any time without notice. Rev. 1/2005 2-B-128