1
Model No. 831.15948.0
Serial No.
Write the serial number in the space
above for reference.
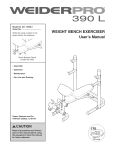
WEIGHT BENCH
User's Manual
Serial Number
Decal
• Assembly
• Operation
• Maintenance
• Part List and Drawing
Sears, Roebuck and Co.
Hoffman Estates, IL 60179
__wlw_F
_rl
REE
"_
/f_
/
HOW-TO
I_ k_)V,DEOS /
.iFit.com
_'
TABLE OF CONTENTS
WARNING DECAL PLACEMENT ...............................................................
IMPORTANT PRECAUTIONS ..................................................................
BEFORE YOU BEGIN ........................................................................
PART IDENTIFICATION CHART ................................................................
ASSEMBLY ................................................................................
ADJUSTMENT ............................................................................
EXERCISE GUIDELINES ....................................................................
PART LIST ................................................................................
EXPLODED DRAWING ......................................................................
HOW TO ORDER REPLACEMENT PARTS ..............................................
90 DAY FULL WARRANTY ...........................................................
2
3
4
5
6
11
13
14
15
Back Cover
Back Cover
WARNING DECAL PLACEMENT
This drawing shows the location(s) of the warning
decal(s). If a decal is missing or illegible, call
1-877-992-5999 and request a free replacement
decal. Apply the decal in the location shown.
Note: The decal(s) may not be shown at actual
size.
• Misuse
of this machine
may result
in serious
injury.
• Read user's
manual
prior to use and follow
all warnings
and instructions.
• Do not allow children
on or around
machine.
• Keep body,
all moving
clothing,
parts.
and
hair
free
and
clear
of
or removed.
User Weight:
Max 300 LBS
Weight Crutch:
Max 310 LBS
Leg Developer:
Weight Carriage:
Chest
Product
2
Max 150 LBS
Max 150 LBS
Fly Per Arm:
Max
50 LBS
may not offer all listed
exercises.
L-LN
IMPORTANT PRECAUTIONS
WARNING:
To reduce the risk of serious injury, read all important precautions and
instructions in this manual and all warnings on your weight bench before using your weight bench.
Sears assumes no responsibility for personal injury or property damage sustained by or through the
use of this product.
1.
.
.
.
.
.
.
.
It is the responsibility of the owner to ensure
that all users of the weight bench are adequately informed of all precautions.
9.
Always wear athletic shoes for foot protection while using the weight bench.
10. The weight bench is designed to support a
maximum user weight of 300 Ibs. (136 kg),
and a maximum total weight of 610 Ibs. (277
kg). Do not place more than 310 Ibs. (141
kg), including a barbell and weights, on the
weight rests or the squat weight rests. Note:
No barbell or weights are included.
Before beginning any exercise program,
consult your physician. This is especially
important for persons over age 35 or persons with pre-existing health problems.
Use the weight bench only as described in
this manual.
11. Always exercise with a partner. When you
are performing bench press exercises, your
partner should stand behind you to catch the
barbell if you cannot complete a repetition.
The weight bench is intended for home use
only. Do not use the weight bench in a commercial, rental, or institutional setting.
12. Always place the same amount of weight
on both ends of the barbell. While adding or
removing weights, always keep some weight
on both ends of the barbell to prevent the
barbell from tipping.
Keep the weight bench indoors, away from
moisture and dust. Do not put the weight
bench in a garage or covered patio, or near
water.
Place the weight bench on a level surface,
with enough clearance around the weight
bench to mount, dismount, and use the
weight bench.
13. Before using the weight bench, make sure
that the three knobs are fully engaged in
adjustment holes.
14. Over exercising may result in serious injury
or death. If you feel faint or if you experience
pain while exercising, stop immediately and
cool down.
Inspect and properly tighten all parts regularly. Replace any worn parts immediately.
Keep children under age 12 and pets away
from the weight bench at all times.
3
BEFORE YOU BEGIN
Thank you for selecting the WELDER PRO TM 450 L
weight bench. The versatile 450 L weight bench is
designed to develop every major muscle group of the
body. Whether your goal is to develop a shapely figure,
dramatic muscle size and strength, or a healthier cardiovascular system, the 450 L weight bench will help
you to achieve the specific results you want.
reading this manual, please see the back cover of this
manual. To help us assist you, note the product model
number and serial number before contacting us. The
model number and the location of the serial number
decal are shown on the front cover of this manual.
Before reading further, please review the drawing
below and familiarize yourself with the labeled parts.
For your benefit, read this manual carefully before
using the weight bench. If you have questions after
Length: 6 ft. (183 cm)
Width: 3ft. 11 in. (120cm)
Squat Weight Rest
Weight Rest
Backrest
Upright
Curl Pad
Backrest Bracket
Seat
Curl Post Knob
Bracket Knobs
4
PART IDENTIFICATION
Use the drawings below to
drawing is the key number
key number is the quantity
has been preassembled.
identify the
of the part,
needed for
Extra parts
M6 Washer
(33)-8
M8 Locknut
(36)-8
M6 x 20mm
Screw (31)-4
CHART
small parts needed for assembly. The number in parentheses below each
from the PART LIST near the end of this manual. The number following the
assembly. Note: If a part is not in the hardware kit, check to see if it
may be included. If a part is missing, please call 1-877-992-5999.
M8 Washer
(35)-8
M10 Locknut
(30)-1
M10 Washer
(28)-4
M12 kocknut
(26/-1
M6 x 65mm
Screw (32)-8
M10 x 20mm
Screw (29)-5
M10 x 80mm Screw (27)-4
M12 x 132mm Bolt (25)-1
5
M8 x 42mm Bolt
(34)-8
ASSEMBLY
To watch an assembly
video, go to
http://productvideo.co/
assembly/sears/weider
or use your mobile phone
or your smartphone to
read the QR code at the
right.
Left parts are marked "L" or "Left" and right parts
are marked "R" or "Right."
To identify small parts, see page 5.
In addition to the included tool(s), assembly
requires the following tool(s):
one adjustable wrench
Assembly requires two persons.
one Phillips screwdriver
Due to its weight and size, the weight bench
should be assembled in the location where it will
be used. Make sure that there is enough clearance to walk around the weight bench as you
assemble it.
Assembly may be easier if you have a set of
wrenches. To avoid damaging parts, do not use
power tools.
Place all parts in a cleared area and remove the
packing materials. Do not dispose of the packing
materials until you finish all assembly steps.
1. Orient the Crossbar (2) as shown.
Attach the Crossbar (2) to one of the Uprights
(3) with two M10 x 80mm Screws (27); do not
tighten the Screws yet.
--3
Attach the Crossbar (2) to the other Upright
(3) in the same way.
Warning
6
2.
Slide the end of the Frame (1) onto the Crossbar
(2). Attach the Frame with four M10 x 20mm
Screws (29) and four M10 Washers (28). Start
all four Screws, and then tighten them.
2
See step 1. Tighten the four M10 x 80mm
Screws (27).
.
Identify the Right Seat Frame (8), the Left Seat
Frame (9), and the Seat Bracket (10). Orient the
three parts as shown.
3
34
35
Attach the Left Seat Frame (9) to the Seat
Bracket (10) with two M8 x 42mm Bolts (34), two
M8 Washers (35), and two M8 Locknuts (36); do
not tighten the Bolts yet.
10
Attach the Right Seat Frame (8) to the Seat
Bracket (10) in the same way.
.
36
Identify the Right Backrest Frame (5), the Left
Backrest Frame (6), and the Backrest Bracket
(7). Orient the three parts as shown.
Attach the Left Backrest Frame (6) to the
Backrest Bracket (7) with two M8 x 42mm
Bolts (34), two M8 Washers (35), and two M8
Locknuts (36); do not tighten the Bolts yet.
5
34
Attach the Right Backrest Frame (5) to the
Backrest Bracket (7) in the same way.
36
7
35
5.
Insert the Seat Bracket (10) and the Backrest
Bracket (7) into the two slots in the Frame (1) as
shown.
5
Align the brackets on the Seat Frames (8, 9) and
the brackets on the Backrest Frames (5, 6) with
the welded tube on the Frame (1), as shown in
the inset drawing.
Attach the Seat Frames (8, 9) and the Backrest
Frames (5, 6) to the Frame (1) with an M12 x
132mm Bolt (25) and an M12 Locknut (26). Do
not overtighten the Locknut; the Seat Frames
and the Backrest Frames must be able to
26
pivot.
.
Tighten the Curl Post Knob (14) into the Frame
(1) in the indicated location.
Next, tighten one of the Bracket Knobs (13) into
the Frame (1) and into one of the adjustment
holes in the Seat Bracket (10).
Tighten the other Bracket Knob (13) into the
Frame (1) and into one of the adjustment holes
in the Backrest Bracket (7).
13
Then, attach an M10 x 20mm Screw (29) and
an M10 Locknut (30) to the lower end of the
Backrest Bracket (7).
10
8
29
30
.
Attach the Seat (18) to the Seat Frames (8, 9)
with four M6 x 65mm Screws (32) and four M6
Washers (33). Start all four Screws, and then
tighten them.
18
8\
33
32
9//
8
.
Attach the Backrest (19) to the Backrest
Brackets (5, 6) with four M6 x 65mm Screws
(32) and four M6 Washers (33). Start all four
Screws, and then tighten them.
5
32
19
See steps 3 and 4. Tighten the eight M8 x
42mm Bolts (34).
33
33
32
9
32
.
Attach the Right Squat Weight Rest (12) and the
Left Squat Weight Rest (11) to the Uprights (3)
as shown.
9
Make sure that both Squat Weight Rests (11,
12) are at the same height.
12
10. Attach the Curl Pad (17) to the Curl Post (4)
with four M6 x 20mm Screws (31). Start all four
Screws, and then tighten them.
3
\
10
11. Make sure that all parts are properly tightened before the weight bench is used. Note: Extra parts may
be included. The use of all remaining parts will be explained in ADJUSTMENT_ beginning on page 11.
10
ADJUSTMENT
The steps below explain how the weight bench can be adjusted. Make sure that all parts are properly tightened
each time the weight bench is used. Replace any worn parts immediately. The weight bench can be cleaned with
a damp cloth and a mild, non-abrasive detergent; do not use solvents to clean the weight bench.
ADJUSTING THE BACKREST AND THE SEAT
To adjust the angle of the Backrest (19), pull the
indicated Bracket Knob (13), raise or lower the
Backrest, and then release the Bracket Knob into
one of the adjustment holes in the Backrest Bracket
(7). Move the Backrest upward or downward to
make sure that the Backrest Knob is engaged in
one of the adjustment holes.
19
Adjust the angle of the Seat (18) in the same way.
18
13
USING THE CURL PAD
To use the Curl Pad (17), pull the Curl Post Knob
(14), insert the Curl Post (4) into the Frame (1),
and then release the Curl Post Knob into one of the
adjustment holes in the Curl Post. Move the Curl
Post upward or downward to make sure that the
Curl Post Knob is engaged in one of the adjustment holes.
17
11
USING THE SQUAT WEIGHT RESTS
To perform squat exercises, attach the Squat Weight
Rests (11, 12) to the Uprights (3) at the desired
height. Make sure that both Squat Weight Rests
(11, 12) are at the same height.
12
EXERCISE GUIDELINES
FOUR TYPES OF STRENGTH WORKOUTS
workout, and the numbers of repetitions and sets to
complete. Progress at your own pace and be sensitive
to your body's signals. Follow each workout with at
least one day of rest.
Note: A "repetition" is one complete cycle of an
exercise, such as one sit-up. A "set" is a series of
repetitions.
Warming Up--Start with 5 to 10 minutes of stretching and light exercise. A warm-up increases your body
temperature, heart rate, and circulation in preparation
for exercise.
Muscle Building--Work
your muscles near their maximum capacity and progressively increase the intensity
of your exercise. Adjust the intensity level of an individual exercise as follows:
• Change the amount of resistance used.
• Change the number of repetitions or sets performed.
Working Out--Include 6 to 10 different exercises in
each workout. Select exercises for every major muscle
group, emphasizing areas that you want to develop.
To give balance and variety to your workouts, vary the
exercises from workout to workout.
Use your own judgment to determine the amount of
resistance that is right for you. Begin with 3 sets of 8
repetitions for each exercise you perform. Rest for 3
minutes after each set. When you can complete 3 sets
of 12 repetitions without difficulty, increase the amount
of resistance.
Cooling Down--Finish with 5 to 10 minutes of stretching. Stretching increases the flexibility of your muscles
and helps to prevent post-exercise problems.
EXERCISE FORM
Toning--Tone
your muscles by working them to a
moderate percentage of their capacity. Select a moderate amount of resistance and increase the number of
Move through the full range of motion for each exercise and move only the appropriate parts of the body.
Perform the repetitions in each set smoothly and
without pausing. The exertion stage of each repetition should last about half as long as the return stage.
Exhale during the exertion stage of each repetition and
inhale during the return stroke. Never hold your breath.
repetitions in each set. Complete as many sets of 15 to
20 repetitions as possible without discomfort. Rest for
1 minute after each set. Work your muscles by completing more sets rather than by using high amounts of
resistance.
Weight Loss--To lose weight, use a low amount of
resistance and increase the number of repetitions in
each set. Exercise for 20 to 30 minutes, resting for a
maximum of 30 seconds between sets.
Rest for a short period of time after each set:
• Muscle Building-- Rest for three minutes after each
set.
• Toning--Rest for one minute after each set.
• Weight Loss-- Rest for 30 seconds after each set.
Cross Training--Combine
strength training and aerobic exercise by following this type of program:
• Strength training workouts on Monday, Wednesday,
and Friday.
• 20 to 30 minutes of aerobic exercise on Tuesday and
Thursday.
• One full day of rest each week to give your body time
to regenerate.
STAYING MOTIVATED
For motivation, keep a record of each workout. Write
the date, the exercises performed, the resistance used,
and the numbers of sets and repetitions completed.
Record your weight and key body measurements once
a month. To achieve good results, make exercise a
regular and enjoyable part of your life.
WORKOUT GUIDELINES
Familiarize yourself with the equipment and learn the
proper form for each exercise. Use your own judgment
to determine the appropriate length of time for each
13
PART LIST
Key No. Qty.
Model No. 831.15948.0 R0812A
Description
Key No.
Qty.
Description
1
2
3
4
1
1
2
1
Frame
Crossbar
Upright
Curl Post
21
22
23
24
4
8
1
5
Small Oval Cap
Rectangular Cap
Crossbar Cover
M4 x 19mm Screw
5
6
7
1
1
1
Right Backrest Frame
Left Backrest Frame
Backrest Bracket
25
26
27
1
1
4
M12 x 132mm Bolt
M12 Locknut
M10 x 80mm Screw
8
9
10
1
1
1
Right Seat Frame
Left Seat Frame
Seat Bracket
28
29
30
4
5
1
M10 Washer
M10 x 20mm Screw
M10 Locknut
11
12
13
14
1
1
2
1
Left Squat Weight Rest
Right Squat Weight Rest
Bracket Knob
Curl Post Knob
31
32
33
34
4
8
8
8
M6
M6
M6
M8
15
16
2
1
Frame Bushing
Frame Sleeve
35
36
8
8
M8 Washer
M8 Locknut
17
18
19
20
1
1
1
4
Curl Pad
Seat
Backrest
Foot
37
38
*
*
2
4
-
Large Oval Cap
Round Cap
Grease Packet
User's Manual
x 20mm Screw
x 65mm Screw
Washer
x 42mm Bolt
Note: Specifications are subject to change without notice. For information about ordering replacement parts, see
the back cover of this manual. If a part is missing, call 1-877-992-5999. *These parts are not illustrated.
14
EXPLODED DRAWING
Model No. 831.15948.0 R0812A
38
11
22
32
33
21
27
18
32
/
21
33
38
12
34
25
36
29
17
29
13
21
13
\
15
15
Your Home
For repair--in
or heating
iiiiiiiiiiiiiii
your home--of
all major brand appliances, lawn and garden equipment,
and cooling systems, no matter who made it, no matter who sold it!
For the replacement
parts, accessories,
and user's manuals that you need to do-it-yourself.
For Sears professional installation of home appliances
and items like garage door openers and water heaters.
1-800-4-MY-HOME
® (1-800-469-4663)
iiiii
iiiii
Call anytime, day or night (U.S.A. and Canada)
www.sears.com
www.sears.ca
Our Home
For repair of carry-in items like vacuums, lawn equipment,
and electronics, call or go on-line for the location of your nearest
Sears Parts & Repair Center.
1-800-488-1222
Call anytime, day or night (U.S.A. only)
www.sears.com
HHH
To purchase a protection agreement (U.S.A.)
or maintenance agreement (Canada) on a product serviced by Sears:
1-800-827-6655
(U.S.A.)
1-800-361-6665
(Canada)
Para pedir servicio de reparaci6n a domicilio, y para ordenar piezas:
1-888-SU-HOGAR
®(1-888-784-6427)
Sears
® Registered Trademark / TMTrademark / SMService Mark of Sears Brands, LLC
® Marca Registrada / TMMarca de F&brica / SMMarca de Servicio de Sears Brands, LLC
90 DAY FULL WARRANTY
If this Sears Weight Bench Exerciser fails due to a defect in material or workmanship within 90 days of
the date of purchase, call 1-800-4-MY-HOME® (1-800-469-4663) to arrange for free repair (or replacement if repair proves impossible).
This warranty does not apply when the Weight Bench Exerciser is used commercially or for rental purposes. This warranty gives you specific legal rights, and you may also have other rights which vary from
state to state.
Sears, Roebuck and Co., Hoffman Estates, IL 60179
J
J
Part 333781 R0812A
Printed in China © 2012 ICON IP, Inc.