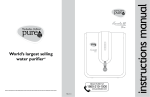
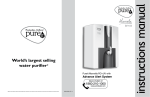
1
7,499/-
3,299/-
2,699/-
LCD interface that guides you through
controls of your purifier.
•
No need to depend on a technician, it
Auto-regulates the TDS & make TDS
selection at the touch of a button.
•
A unique technology that gives you,
your preferred TDS.
•
1.
PRODUCT CONCEPT:
RO + UV + UF water purifier which senses the TDS of incoming water and makes a recommendation for selecting the most
likeable TDS/Taste of the purified water. The user has the option of either selecting the product recommended TDS/Taste or
making a different selection from the other available TDS/ Taste options.
2.
THE TECHNOLOGY:
'Patented technology' ensures that irrespective of the source of water (borewell, municipal, tanker) the final TDS/Taste of
purified water is obtained as per the Taste preferences of the user by software driven 6 stage purification process of passing
water through various filtration combinations of RO, UF and UV stages.
3.
KEY FEATURES:
•
•
•
•
•
•
•
•
•
•
TDS sensing of incoming supply water and TDS regulation for Taste control of output water. Six different TDS/Taste Bands are
available for you to choose from as per your liking. Any of the TDS/Taste Band can be selected by LCD guided user
commands.
TDS change alert: The unit alerts the user immediately as and when the TDS level of incoming water changes to enable the
user to switch over to another TDS/Taste Band.
Auto TDS/Taste regulation : In case of change is input TDS the Xpert automatically selects the desired TDS/Taste Brand.
Low Wastage RO : By intelligent shifting between RO+UV & UF flow paths, Xpert ensures that water wastage is reduced
unlike other ROs.
Date & Time display on LCD (built-in real time clock).
Advance Alert for Filter Life & UV Life: The advance alert system flashes message on the LCD for informing the user well in
advance about the need for any replacement.
Self diagnostic Error code display The LCD would start flashing an error code of the probable cause along with the contact
phone number thus providing advance information to ensure speedy resolution.
Unique colored backlit LCD panel as user interphase.
Soft touch key pads for user commands: User friendly and easy prompts for user to scroll between commands for selection
of TDS/Taste Band.
Auto-Flush system: Reinvigorates and enhances the RO membrane life by periodic auto-flushing. It helps benefit you by
lowering the maintenance cost.
1
4. THE MULTI-STAGE PURIFICATION PROCESS
S.
No. Treatment Stage
Material
Benefits
Removes fine suspended particles such as
dirt and sand from water.
1
I-Cartridge
Polypropylene roving
wound cartridge
2
Chemi-Block
Bacteriostatic activated
Reduces excess chlorine and organic
carbon block filter cartridge impurities. It also adsorbs and removes foul
taste and foul odour from the water.
3
Reverse Osmosis Thin film composite RO
membrane
Membrane
4
Taste Enhancer
Cartridge
Bacteriostatic Taste
Enhancer Activated
Carbon
Removes residual organic impurities and
revives the original taste of water. The
activated carbon polishes the water, giving it
a sparkling look and making it great to taste.
5
UF cartridge
Ultra Filter Hollow Fibre
capillary tubes module
Remove and eliminates ultrafine impurities
thus ensuring crystal clear, tastier and
safe water.
6
UV Treatment
Germicidal UV rays
Eliminates water borne disease causing
bacteria, viruses, protozoa and cysts.
1
Reduces TDS, hardness, fluorides,
pesticides and heavy metals like arsenic,
lead and mercury. Eliminates microorganism
like bacteria, viruses, protozoa and cysts.
2
3
2
6
5
4
5.
FLOW DIAGRAM AQUASURE XPERT RO+UV
SOLENOID
VALVE
LPS
U.F. CARTRIDGE
FLOAT witH
MICRO SWITCH
FLOW REGULATOR
NRV
SOLENOID
VALVE
UV LAMP
QG TUBE
RO MEMBRANE FILTER
TASTE ENHANCER
CARTRIDGE
PURIFIED WATER
STORAGE TANK
BOOSTER
PUMP
WATER TAP
UV REFLECTOR HOUSING
NRV
CHEMI BLOCK
ONLINE
TDS PORBE
I - CARTRIDGE
DIVERTER
VALVE
REJECT WATER
CONTROL VALVE
REJECT WATER
OUTLET
6.
SOLENOID
VALVE
UNIQUE FEATURE
NOTE : THIS IS A SCHEMATIC ILLUSTRATION OF THE PRODUCT TO GIVE
A VISUAL SCHEME OF WOKING OF UNITS. THIS IS NOT AN ACTUAL
ENGINEERING DRAWING OF THE PRODUCT.
AUTO FLUSH
•
•
7.
Depending upon the input TDS of water, the "Xpert" recommends the most ideal TDS/Taste Band for the user to select.
After the user makes the selection, the water passe through a combination of filter modules and fills the tank with pure
water having the recommended/Desired TDS/Taste. In case the user does not make a selection their 'Xpert'
automatically selects the desired 'optimal' TDS/Taste Band.
In case the user wishes to have water with a different TDS, then the user can scroll and select any of the other available
TDS/Taste Band options (pls. refer TDS Band Selection Table).
HOW TO CHANGE AND SELECT A DIFFERENT TDS / TASTE BAND.
In order to have water lower in TDS than what was produced by the unit then the user needs to simply select the next upper
level of TDS/Taste Band. Similarly, in order to have water higher in TDS than what was produced by the 'Xpert' then the user
needs to simply select the previous lower of TDS/Taste Band
3
e.g. If the unit has recommended TDS Band C but the user wishes to reduce the TDS & hardness further then he/ she could select other
TDS/Taste Bands like D or E or F. As the user moves from C to other TDS/Taste Bands in increasing alphabetical order, TDS and hardness
would keep reducing and make the water softer.
If the user wishes to increase the TDS & hardness than what is produced by TDS Band C, then he / she could select TDS/Taste Band B
which would produce water of higher TDS / hardness and reduce the softness level.
8.
Low TDS, Low Hardness
High TDS, High Hardness
Softness High
Softness Low
'TDS/TASTE BAND' SELECTION TABLE : The incoming TDS of water is categorized in different ranges. Depending upon the incoming TDS, the unit
prompts the user to select the optimal TDS/Taste Band.
Unit recommended TDS/Taste Band
for optimal TDS*
Other options available for selection in
addition to the recommended TDS/Taste Band
B, C
A, C, D
B, D, E, F
B, C, E, F
C, D, F
D, E
Note: in case the incoming TDS is more than 1000 ppm then the Optimal TDS/Taste Band displayed would be F with only E available for selection.
* Optimal TDS has been arrived at after our extensive survey of people's choice of a particular level of TDS which is liked the most by the people surveyed.
4
9.
WHEN TO SELECT THE 'TDS/TASTE BAND':
•
•
•
10.
You should select the TDS/Taste Band whenever the unit prompts for it. The unit will prompt and alert the user
whenever there is a change in the TDS of incoming water supply.
The unit will also prompt whenever, the electricity to the unit is disrupted or in case the unit is switched off/on.
In case you wish to try out a different Taste to make is further closer to your liking then you should opt for setting the
other available TDS/Taste Band.
WORKING INSTRUCTION
When you switch-on the power supply (and given that water supply to the unit is available), the LCD would display the
following 'welcome message' along with a buzzer beep. Just below the LCD there are two soft touch switches 'mode' and
'scroll'
Screen 1
GOOD MORNING
BASED ON TAP WATER
TDS
FOR OPTIMAL TDS
PLEASE SELECT BAND _ _
GOOD MORNING
BASED ON TAP WATER
TDS
FOR OPTIMAL TDS
PLEASE SELECT BAND C
Note: '__' are indicative for any of the listed TDS Bands, which could be A, B, C, D, E & F.
Good-morning or Good-afternoon or Good-evening messages will be displayed with respect to the real time clock.
5
This display would continue for 20 sec. The user is supposed to press the 'scroll' button switch to make a selection. If the user
presses the scroll switch, then the welcome display would terminate and move into TDS/Taste Band selection mode.
In case the 'scroll' switch is not pressed within 20 sec. then the unit would register the previously running/ selected TDS/Taste
band or in case no prior selection has been made to the factory packed unit then your Xpert unit will go into auto selection
mode & select the optimal TDS/Taste band on it its own.
(i)
HOW TO SELECT THE DESIRED TDS/TASTE BAND
â
Whenever, the display prompts for making a selection or whenever you wish to change the TDS/Taste Band,
press and hold the scroll switch for 2 -3 sec. The unit will enter into the TDS/Taste Band selection mode with
one buzzer beep and the LCD will display following message:
Screen 2
DEAR USER
YOUR SELECTION IS _ _
FOR OPTIMAL TDS
PLEASE SLECT BAND _ _
You can move forward from one TDS/Taste Band to the other (only those bands will be displayed which are
supposed to be available as per the response of the intelligent sensing software. Please refer TDS/Taste band
Selection, Table.
â
At every press of the scroll button the TDS/Taste Band will move to the next TDS/Taste Band.
â
To save the selected TDS/Taste band, press and hold the scroll key for 2 sec. The selected band will be saved
and the LCD display will change to any of the following two messages with one buzzer beep:
(a)
In case your selection is the same as the recommended optimal TDS/Taste band, then the message would read:
6
Screen 3
DEAR USER
YOU HAVE SELECTED
OPTIMAL BAND
(b)
In case your selection is different to the recommended optimal TDS/Taste band, then the message would read:
Screen 4
DEAR USER
YOU HAVE SELECTED
BAND _ _
OPTIMAL BAND IS _ _
This display (screen 3 or 4) will continue for 5 sec. Therafter, the display would go to the home pages.
Note : If the unit is in TDS/Taste band setting mode and the scroll switch is not pressed for 10 sec. then the unit will select that
last displayed TDS/Taste band as set band.
•
After the TDS/Taste Band is set, the LCD would display the selected TDS/Taste band and clock alternately. The display
screen would move from one page to another in a cyclic manner as per the below pages.
Page 1
DEAR USER
BAND _ _ IS ON
TO INCREASE SOFTNESS
RESET TO UPPER BAND
Page 2
DD / MM / YYYY
HR: MM:SS: AM / PM
7
Page 3
DEAR USER
BAND _ _ IS ON
TO INCREASE HARDNESS
RESET TO LOWER BAND
IMPORTANT : Please note that to check the TDS of the water after making a selection or changing the selection, you should first empty
the storage tank of the unit and allow it to get completely filled after you have made the selection.
Alternately, in order to hurry up, first switch-off the power supply to the unit and then empty the top tank of the unit (Don't waste the
stored water but keep is separately for use). Leave the spout in open condition and keep a 1 litre container directly under the faucet of
the unit. Now, make a selection and let the container or 1 litre bottle fill upto the 1 litre mark. Taste this water, if you like it then let the unit
run in this TDS/Taste Band, otherwise for trying out other available taste option Repeat the procedure by selecting another TDS/Taste
Band.
(ii) TDS CHANGE ALERT :
In case the TDS of the incoming water changes then following message page 4 will flash on LCD followed by the clock display in a cyclic
manner.
Page 4
TAP WATER TDS
CHANGED
PLEASE SELECT BAND _ _
FOR OPTIMAL TDS
DD / MM / YYYY
HR: MM:SS AM/PM
This 'TDS CHANGED' message will continue to flash for 40 sec. for the user to make a selection. You should select the recommended
TDS/Taste Band or new TDS/Taste Band whenever TDS Change Alert comes to your notice. In case you do not make any selection
within 40 sec of the alert then your AquaSure Xpert will automatically select the recommended TDS/Taste Band.
(iii) ALERT MESSAGE IN CASE OF BREAK IN INCOMING WATER SUPPLY :
In the event of unavailability of incoming water or in case of below input water pressure the LCD would flash the following messages. In
case you find that water is available and with sufficient pressure (i.e. > 0.6kg./Cm2) but the unit the continues to flash the message
then kindly call service at the helpline number being displayed on LCD.
8
NO WATER SUPPLY
PLEASE CHECK.
EUREKA FORBES LTD.
YOUR FRIENDS FOR LIFE
(iv)
DD / MM / YYYY
IF WATER SUPPLY OK
CALL HELPLINE
1860-266-1177
HR: MM:SS: AM/PM
INDICATION IN CASE THE STORAGE TANK GETS FULL
Whenever the storage tank gets full, the LCD would display the following messages alternately:
DD / MM / YYYY
SAFE WATER
TANK IS FULL
HR: MM:SS: AM/PM
EUREKA FORBES LTD.
YOUR FRIEND FOR LIFE
This message will continue till the water level in tank falls whenever you draw some water.
(v)
DATE SETTING :
•
Press and hold the mode key for 2 sec, then select the date menu with the scroll key.
DATE AND TIME SETTING
> DATE: DD / MM / YYYY
TIME: HR: MM:SS: AM/PM
9
•
•
•
(vi)
The pointer > should be in front of date. The current date will be displayed and the date digits will start blinking. Set
the date by pressing the scroll key. Once the date is ok, press the mode key once again.
Next, the month digits will start blinking. Set the month by pressing scroll key. Once the month is ok, press the
mode key once again.
Next, the year digits will start blinking. Set the year by pressing the scroll key. Once the correct year gets
displayed, press the mode key once again. After completion of the setting, press the mode key once so that LCD
flashing stops and then press the mode key for 2 sec. for normal display.
TIME SETTING:
•
•
•
•
•
•
Press and hold the mode key for 2 sec, then select the time mode with the scroll key. The pointer > should be in
front of time. Current time will be displayed and HR digits will start blinking.
Set the Time by pressing the scroll key. Once the time is ok, press the mode key once again.
Next, the minutes digits will start blinking. Set the minutes by pressing scroll key. Once the minutes is ok, press the
mode key once again.
Next, the seconds digits will start blinking. Set the seconds by pressing the scroll key. Once the correct seconds
gets displayed, press the mode key once again.
Next, AM/PM will start blinking. Select, AM or PM by scroll key.
After completion of the setting, press the mode key once so that the flashing numeric / digit stops and then press
mode key for 2 sec. for normal display.
DATE AND TIME SETTING
DATE: DD / MM / YYYY
> TIME: HR: MM:SS: AM/PM
10
11. INSTALLATION INSTRUCTIONS
•
•
•
•
Install it in a dry, ventilated place, keeping it away from direct sunlight, heating devices or areas below freezing temperature.
Connect it to only cold tap water. Filters can be damaged if connected to hot tap water. Make sure that the tap water pressure and
temperature is between 0.6-2.0 kg/Cm2" and 5° - 45°C respectively. The desired proportion of purified and reject water for RO
Membrane is set at approx 1:3 ratio.
Make sure that reject water hose is placed lower than the top of the purifier; otherwise water might flow back into the purifier. Make sure
that the purifier is installed within the distance of 1.0 M from the tap water supply. The purifier is for 230V only, so make sure that it is
connected to 230 V power outlets. Do not install the purifier in a place where water or rain could leak into the unit (outdoors, etc.)
Your Aquasure XPERT can be kept on the kitchen counter or can be wall mounted using a stand (Provided with the unit).
SEQUENCE TO BE FOLLOWED FOR FLUSHING THE FILTERS AT THE TIME OF INSTALLATION
(This is to be done by an authorized service / installation engineer of Eureka Forbes Ltd.)
(i) Step 1: Flushing the I - Cartridge 1 & Chemi Block Cartridge 2 :
•
Remove the pipe from the outlet of 'I-Cartridge' 1 and connect another loose pipe to the outlet of this cartridge. Leave the other end of
the loose pipe into the wash basin / drain. Connect the water supply to the 'Xpert unit'. Turn on the diverter valve and let water flow. Keep
draining the water till it becomes clear. It will take about 4-5 litres water to flush clean the 'I cartridge'.
•
Remove the pipe from the outlet of the Chemi Block Cartridge 2 and connect another loose pipe to the outlet of this cartridge. Leave
the other end of the loose pipe into the wash basin / drain. Turn on the diverter valve and let water flow from the outlet of the carbon
block cartridge. Keep draining the water till water becomes clear. Initially some carbon fines or particles would come out from the
cartridge. It will take about 4-5 litres water to flush clean the carbon block cartridge.
•
CAUTION:
Please ensure that this flushing is done properly so that carbon fines get washed away thoroughly. If not done so, these fines might
enter other components like solenoid valves and pump etc and can cause damage.
Close the 'Diverter Valve'. Remove the loose pipe and reconnect the pipe connection as originally factory fitted.
11
ii) Step 2 : Flushing the 'Ultrafilter' Cartridge 5 .
•
Remove the pipe from the outlet of 'Ultra filter Cartridge' 5 and connect another loose pipe to the outlet of 'Ultra filter cartridge'. Leave
the other end of this pipe into the wash basin / drain.
Carefully disengage the TDS probe from its 'T' connector and block the open port of 'T' connector with the end plug (use the end plug
of Inlet & Reject ports of the 'Xpert unit'). · Leave the TDS probe as such on a dry cloth (Do not pull the cable of TDS probe). Disengage
the pipe from the Inlet of MF housing & connect an additional pipe and direct it into the drain.
Turn on the 'Diverter Valve' for water flow. Switch ON the power and wait for a min. The 'Xpert unit' will start working and water will first
flow from MF inlet pipe and then start flowing out from Ultra Filter.
Let atleast 4-5 litres of water to drain. This washing is important in order to wash away the preservative from the Ultrafilter. Switch Off the
power supply to the 'Xpert unit' and close the 'Diverter Valve'. Remove the loose pipe and reconnect the pipe connection of Ultra Filter
Cartridge as originally factory fitted.
iii) Step 3 : Flushing the 'Taste Enhancer Cartridge' (Post Carbon Cartridge) 4 :
•
•
•
•
Remove the pipe from the outlet of 'Post Carbon Cartridge' 4 and connect another loose pipe to the outlet of this cartridge. Leave the
other end of this pipe into the washbasin / drain. ·
Turn on the 'Diverter Valve'. Switch ON the power and wait for a min. The 'Xpert unit' will start working and water will flow out from the
Post Carbon Cartridge.
Initially some fines or fine particles would come out from the Post Carbon cartridge. It will take about 4-5 litres water to flush clean the
post carbon cartridge.
CAUTION:
Please ensure that this flushing is done properly so that carbon fines get thoroughly washed away and later do not enter the UV column
or storage tank.
Reconnect the inlet pipe of MF housing as it was before.
Switch Off the power supply to the 'Xpert unit' and close the 'Diverter Valve'. Remove the loose pipe and reconnect the pipe connection
as originally factory fitted.
12
iii) Step 4 : Flushing the 'Membrane Filter' cartridge 3 .
•
·
•
·
•
Remove the pipe from the Pure Water outlet of Membrane Filter Cartridge 3 and connect another loose pipe to the pure water outlet
(Permeate) of MF cartridge. Leave the other end of this pipe into the wash basin/drain. Also connect the reject water pipe to the reject
water port of the unit.
With the help of a thin electrical wire, short both the pins of the TDS sensor probe. Simply entwine a small pices of loose electrical
wire over the pins of TDS probe. Turn ON the 'Diverter Valve'. Switch ON Sensor the power and wait for a min. The 'Xpert unit' will start
working and water will start flowing out from the MF Cartridge.
Let the 'Xpert unit' run like this for 10 min. RO and Reject water will be produced which is supposed to be drained.
CAUTION:
Please ensure that the first flush water of MF does not enter into Post Carbon (Taste Enhancer Cartridge) or UV. This washing is
important in order to wash away the preservative from the MF.
Switch Off the power supply to the 'Xpert unit' and close the 'Diverter Valve'. Remove the loose pipe and reconnect the pipe
connection as originally factory fitted.
iv) Step 5: Restarting the 'Xpert unit' and flushing the storage tank.
IMPORTANT :
•
•
Remove the electrical wire tied over the pins of the TDS sensor probe.
SNUG FIT THE TDS PROBE BACK TO ITS ORIGINAL PLACE IN THE 'T' CONNECTOR.
IMPORTANT: It is a must to remove the wire which was used to short the pins of TDS sensor. Do remember to connect the TDS
probe back into it's originally place in the 'T' connector. If the TDS probe is not put back in it's originally place then the 'Xpert unit' will
malfunction.
•
Recheck that all connections are intact and are at the originally factory fitted positions.
•
Turn on the 'Diverter Valve' and ensure that the water supply is on. Switch On the power supply. The 'Xpert unit' will start working. Wait
for atleast five minutes to check that there is no leakage from any of the quick fit connections and tubing. If you notice any dripping or
leakage, then please refit the pipe into the connector and ensure that it sits properly and fully inside the quick fit connector.
13
CAUTION: In case you intend to refit the connection then first of all, please close the water supply from the diverter valve and switch off
the power to the unit, otherwise water jet from any of the connectors can splash inside the unit.
•
·
•
After ensuring that there is no leakage, please close the back cover and keep the 'Xpert unit' in its intended place and let it run
normally.
Once the display shows 'Tank Full', please empty the entire tank by lifting the faucet lever.
CAUTION: Do not drink this first fill water. This water can be used for watering plants and for mopping floor or for any household
chores.
Now, your 'Xpert unit' is ready for use. You can use the water for drinking and cooking purpose from second filling onwards.
Your 'Xpert unit' will automatically select the optimal TDS/Taste Band depending upon the TDS of input water. However, in case you
wish to try out any other available TDS/Taste Band as per your taste preference, then please do so as per the ref. no. 7,8 & 10 (i).
12. SERVICE INDICATIONS :
•
UV LAMP LIFE ALERT : When the UV life comes close to its specified end, the display will start flashing 'REPLACE UV TUBE' at normal
working mode. A buzzer will beep once whenever the page 5 message pops up on the LCD screen.
Page 5
DEAR USER
PLS. GET UV CHECKED
UV LIFE: _ _ _ %
â
Please call service in advance to book for UV lamp replacement.
â
When the UV lamp completes its usable life then at normal working, page 6 message will start getting displayed.
Page 6
DEAR USER
CALL HELPLINE FOR
UV REPLACEMENT
1860-266-1177
14
You can also view the UV lamp life status at any time during normal working by pressing the mode key once. The LCD
would flash the following display message :
DEAR USER
UV LIFE: _ _ _ %
(ii)
CARTRIDGE LIFE ALERT : When the cartridge life comes close to its specified end, the display with start flashing 'GET
CARTRIDGE CHECKED' at normal working mode. A buzzer will beep once whenever the page 7 message pops up on
the LCD screen.
Page 7
DEAR USER
PLS. GET CARTRIDGE
CHECKED
CALL HELPLINE
1860-266-1177
(iii)
ALERT FOR ERROR CODE : In case of any electrical/electronic check requirement, the error code will start flashing on
the LCD display alternately with date / time along with a beep.
CALL HELPLINE
1860-266-1177
ERROR NO. __
Error codes listed in the software are in numeric like 1,2,3,4 etc.
You need to simply call the helpline number and give your feedback mentioning the error code which would help speed
up the resolution.
15
13.
MAINTAINING YOUR AQUASURE XPERT
•
•
•
•
•
•
•
•
14.
After installation, let the tank get filled and discard the first filling from the storage tank.
Do not place heavy or sharp object over the top of the purifier.
Empty the storage tank of the water in case the unit has not been used for over 2 days. (Please do not discard this water. You can
use it for watering plants or for mopping floor or for flushing toilet / bathroom).
Make sure that the tank is cleaned with a special tank disinfection tablet & during every mandatory service.
Ensure replacement of consumables on time. Replacement should be done by company authorized service engineer.
Ensure that only genuine spare parts are used.
Do not use excessive force when operating the lever of the faucet.
Please keep the surrounding area of the unit, clean and free from ants / insects.
CLEANING & DISINFECTION OF STORAGE TANK OF XPERT :
•
•
•
•
•
•
•
•
•
•
•
Close the tap water value and unplug the power cord.
Empty the storage tank (do not discard the pure water)
Open the top cover and keep it aside on a clean surface.
Wipe the inside of the tank with a soft, clean & dry cloth.
Open the tap valve & Switch on the unit.
Allow water to till the storage tank.
Drop one tank disinfection tablet'*' and let it stand for 30 min.
After 30 min. discard this tank water completely. Caution : Do not drink this water
Let the tank get filled again. Discard this fill too.
Now four 'Aquasure Xpert' in ready for use.
Let it work as normal.
* Available with Eureka Forbes Service Technician & also supplied with the new product.
16
15.
TROUBLE SHOOTING
•
In case the LCD becomes blank or the text is garbled then please switch-off and switch-on the unit. This should resolve the
problem. If not, then please call service at helpline No. 1860-266-1177
•
In case the LCD displays 'Please Wait' then kindly allow the Xpert unit remain in this state for 2-3 min.
DD / MM / YYYY
HH:MM:SS AM/PM
PLEASE WAIT
The purifier is actually performing internal self check which is important for efficient working of the system.
The unit will revert to normal working. In case the unit does not revert and displays following message,
CALL HELPLINE
1860-266-1177
ERROR NO. ___
then before calling the service, kindly re-boot the system.
17
16.
PROCEDURE FOR RE-BOOTING THE SYSTEM
a.
b.
c.
Switch-off the power to the unit.
Press and hold the mode & scroll knobs. Switch-on the power while still holding both the knobs for atleast 3 sec., then
leave the knobs.
On completion of 3 sec., buzzer will beep once and LCD will display 'calibration under process' as shown below :
DD / MM / YYYY
HR: MM:SS: AM / PM
CALIBRATION
UNDER PROCESS
d.
After about 15 sec., a beep will sound once and LCD would display
DD / MM / YYYY
HR: MM:SS: AM / PM
CALIBRATION OVER
PLEASE RESTART SYSTEM
e.
Switch-off and switch-on the power supply. If the re-boot is successful then the unit will begin normal working.
NOTE: Please note that after re-booting. you would have to select your preferred TDS/Taste band again in case your TDS
/Taste band selection was not the same as your Xpert units/recommended auto selection.
•
In case the re-boot is not successful and the display reads 'calibration not completed' then please call service
for resolution of problem.
18
17.
FAQs
Water taste is not the same as was earlier even though the TDS/Taste Band selected is the optimal TDS/Taste Band
(recommended by the purifier).
If at anytime you feel that the taste of the water has changed and is not what it used to be then please shift to the next
level of TDS/Taste Band. Try out various TDS/Taste Band options available.
The taste of the water obtained as per the purifier recommended optimal TDS/Taste Band is not of your liking.
Taste is a very subjective and individualistic matter. The optimal TDS/Taste Bands have been set keeping in perspective
the preferred choice of most of the people. It is possible that some individuals have a different preference when it
comes to taste.
Precisely to address this issue, the purifier gives many options in addition to its recommendation. You can choose to ignore
the recommendation and opt for any other available option which is offered, as per your liking.
This flexibility in having the desired taste of water from the purifier is the uniqueness of your "AQUASURE XPERT".
19
18. TECHNICAL SPECIFICATIONS*
Input Power Supply
Power Rating
Operating Voltage
Overall dimensions (HxDxW), mm
RO Membrane
Net weight
Tank Capacity
Filtration system
*
**
230 V AC, 50 Hz
45 Watts (Max.)
150 - 270 V AC
405 x 390 x 330
TFC Spiral, Approx. 90% TDS reduction**
11.5 kg.
08 Ltrs.
Filtration / Purification Stage
1 : I-Cartridge
2 : Chemi-Block
3 : RO Membrane
4 : Post Carbon Cartridge
5 : Ultrafilter Cartridge
6 : UV Purification, 4 Watt
Rated Life
6000 Ltrs.
6000 Ltrs.
6000 Ltrs.
6000 Ltrs.
6000 Ltrs.
5000*** working hours
Specifications are subject to change without prior notice.
Final TDS of pure water of storage tank will depend upon the 'TDS/Taste Band' operating at the time of measurement and it is applicable for composite sample drawn from full tank without altering the
'TDS/Taste Band' during the total filling time of the storage tank of Xpert unit.
As per Lamp manufacturer's specifications.
***
GUIDELINES FOR INPUT WATER QUALITY
Allowable Hardness**** of input water
Allowable Turbidity of Input water
Suitable TDS range of input water*****
Allowable Iron content of input water
Input water pressure******
Input water temperature
Note:
****
*****
******
600 mg/ L (max.)
15 NTU (max.)
2000 mg/L (max.)
0.3 mg/L (max.)
0.6 Kg/Cm2 (Min.) - 2.0 Kg / Cm2 (Max.)
5oC (min.) to 45oC (Max.)
The performance data of the product presented in the table is applicable under standard laboratory conditions. Actual performance may vary depending upon the input water quality, input water pressure and condition of filters.
Not withstanding the max. level of Hardness; use of 'Antiscalant Cartridge' for protection of Membrane Filter is recommended wherever the hardness of water is high. This cartridge is available with the company at an extra cost.
Input water quality and TDS contents are important determinants of output water characteristics and percent recovery.
If the water pressure is more than specified, use of pressure reducing valve 'PRV' is strongly recommended. The accessory is available with the company at an extra cost. However, if the input water pressure is lower than
specified or the water is meant to be drawn from a bucket kept aside, then the use of a standard external pump attachment is recommended. The accessory is available with the company at an extra cost.
INPUT WATER QUALITY LIMITATIONS
1.
2.
3.
If the input water iron content is more than 0.3 mg/L, then use of iron remover as a pretreatment stage is highly recommended. It is available with the company at an extra cost.
In the input water turbidity is more than 15 NTU or comprises of colloidal particles, then use of special filter as a pretreatment stage is required. It is available with the company at an extra cost.
DO NOT install the water purifier if the TDS is more than specified.
20
21
22
23
24