Download Chlorine, Total
Transcript
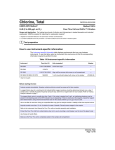
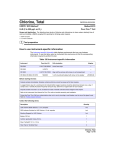
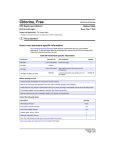
Chlorine, Total
(Method 10014
Pour-Thru Cell and OriFlo™ Filtration
DPD Method1
ULR (2 to 500 µg/L as Cl2)
Scope and Application: For detecting trace levels of chlorine and chloramines in clean waters relatively free of color and
turbidity; USEPA accepted for reporting for wastewater analysis2.
1 Adapted
2 U.S.
from Standard Methods for the Examination of Water and Wastewater.
Patent 5,362,650 covers the procedure. U.S. Patent 5,549,816 covers the OriFlo™ Filtration System.
.
Test Preparation
Before starting the test:
Analyze samples immediately. Samples containing chlorine cannot be preserved for later analysis.
A reagent blank value for a combined lot of indicator/buffer reagent solutions should be determined at least once a day. If
sample color or turbidity fluctuates frequently during the day, determine a reagent blank for each sample. Refer to Treating
Analysis Labware on page 7.
The reagent blank value is normally less than 5 µg/L. If the value is greater than 5 µg/L, an interfering substance may be
present in the blanking water or the DPD Indicator may be degrading. If there is doubt about the reagents, repeat the reagent
blank determination using chlorine-demand-free water for the sample. Blanks up to 5 µg/L may be used.
Use a new filter for each test. Using an unspecified filter may give low analysis results or inability to filter the required volume.
Ampules contain more than 1.0 mL of solution for ease of transfer. Discard excess reagent in the ampule.
Refer to the instrument User Manual for Pour-Thru cell and module assembly and installation.
Protect the Pour-Thru Cell from contamination when not in use by inverting a small beaker over the top of the glass funnel.
Collect the following items:
Quantity
ULR Chlorine Buffer Solution, 1.5-mL ampules
1 mL
DPD Indicator Solution for ULR Chlorine, 1.5-mL ampules
1 mL
Blanking Reagent for ULR Chlorine
1 mL
Membrane Filters, 3-micron, 25-mm
1
OriFlo Assembly
1
Beaker, 250 mL
1
Cylinder, graduated mixing, 50-mL.
1
Pipet,
TenSette®,
0.1 to 1.0 mL
1
Pipet Tips
2
Pour-Thru Module and cell
1
Note: Reorder information for consumables and replacement items is on page 9.
ChlorineTot_10014_ULR_RL_OriFlo.fm
Chlorine, Total
Page 1 of 10
Chlorine, Total ULR (2 to 500 µg/L as Cl2)
Pour-Thru Cell
1. Select the test.
Method 8370
2. Install the Pour-Thru
module and cell.
Flush the Pour-Thru cell
with 50 mL of deionized
water.
5. Break open one ULR
Chlorine Buffer Solution
Ampule.
6. Using a TenSette®
Pipet and a clean tip,
transfer 1.0 mL of buffer
from the ampule to a
clean, treated 50-mL
graduated mixing cylinder.
3. Unscrew the cap from
the OriFlo™ plunger
assembly. Be sure that the
O-ring is properly seated
in the cap.
4. Install a new, 3-micron
filter into the cap well. Wet
the filter with a few drops
of deionized water.
Reassemble and
hand-tighten the cap onto
the plunger.
7. Break open one
ampule of DPD Indicator
Solution for Ultra Low
Range Chlorine.
8. Using a TenSette
Pipet and a clean tip,
transfer 1.0 mL of indicator
from the ampule to the
graduated mixing cylinder.
Swirl to mix.
Proceed to step 9 within
one minute.
Chlorine, Total
Page 2 of 10
ChlorineTot_10014_ULR_RL_OriFlo.fm
Chlorine, Total ULR (2 to 500 µg/L as Cl2)
9. Prepared Sample:
Avoiding extra agitation,
carefully fill the cylinder to
the 50-mL mark with
sample. Stopper the
cylinder. Gently invert it
twice to mix.
13. Pour the filtered
sample from the plunger
reservoir into the
Pour-Thru Cell.
10. Press TIMER>OK.
A three-minute reaction
time will begin. Perform
steps 11–16 during this
period.
Measure the reacted
sample 3–6 minutes after
mixing the sample and
reagents. If less than three
minutes elapses, the
reaction with chloramines
may be incomplete. A
reading after six minutes
may result in higher
reagent blank values.
14. When the flow stops,
press ZERO.
The display will show:
0 µg/L Cl2.
11. Push the valve button
on the OriFlo™ barrel
assembly to the “closed”
position. Place the barrel
assembly into its stand.
Pour approximately 50 mL
of the original sample into
the barrel.
12. Insert the plunger into
the barrel and slowly push
the plunger down with
even pressure, until the
plunger is fully seated.
The lower ring on the barrel
assembly represents about
a 50-mL volume.
15. Pull the barrel valve
button out to the “open”
position. Pull the plunger
up to separate it from the
barrel assembly. Discard
the remaining unfiltered
sample.
16. Push the barrel valve
button to the “closed”
position. Place the barrel
assembly into its stand.
A new membrane may be
required for very turbid
samples. Alternatively, use
a second Quick Filter unit
with a new membrane filter
installed.
ChlorineTot_10014_ULR_RL_OriFlo.fm
Chlorine, Total
Page 3 of 10
EN
IL
LL
IF
Chlorine, Total ULR (2 to 500 µg/L as Cl2)
17. When the timer
expires, pour the contents
of the mixing cylinder into
the barrel.
18. Insert the plunger into
the barrel and slowly push
the plunger down with
even pressure, until the
plunger is fully seated.
19. Pour the filtered,
reacted sample from the
plunger reservoir into the
Pour-Thru Cell.
20. Flush the Pour-Thru
Cell with at least 50-mL of
deionized water
immediately after use.
Results are in µg/L
chlorine.
Subtract the reagent blank
value (Determining the
Reagent Blank Value) from
the sample value obtained
in step 19.
If a dechlorinating agent
(e.g., sulfite or sulfur
dioxide) is present, the
sample result, corrected for
the reagent blank, will read
“0” or a slightly negative
value.
EN
IL
LL
IF
EN
IL
LL
IF
Determining the Reagent Blank Value
Reagent Blank:
Off
1. Select the test.
2. Make sure that the
reagent blank setting is off.
3. Install the Pour-Thru
module and cell.
Press OPTIONS>MORE>
Flush the Pour-Thru cell
with 50 mL of deionized
water.
REAGENT BLANK>OFF.
See the user manual for
information.
Chlorine, Total
Page 4 of 10
4. Collect about 100 mL
of deionized or tap water
in a clean, 250-mL beaker.
ChlorineTot_10014_ULR_RL_OriFlo.fm
Chlorine, Total ULR (2 to 500 µg/L as Cl2)
GENERAL TIMER
5. Using a TenSette
Pipet, add 1.0 mL of
Blanking Reagent to the
beaker. Swirl several times
to mix.
The Blanking Reagent
removes chlorine and
chloramines from the
water.
9. Fill the cylinder to the
50-mL mark with
dechlorinated water from
step 5. Cap and invert
twice to mix. Save the
remaining water for
step 11.
ChlorineTot_10014_ULR_RL_OriFlo.fm
6. Press
OPTIONS>MORE>TIMER>
GENERAL TIMER.
Set a 5-minute timer and
press OK. A five-minute
dechlorination period will
begin.
10. Press TIMER>OK.
A three-minute reaction
time will begin.
7. After the timer expires,
break open one ampule of
ULR Chlorine Buffer
Solution. Using a TenSette
Pipet and clean tip,
transfer 1.0 mL of buffer
from the ampule to a clean
50-mL mixing graduated
cylinder.
8. Break open one
ampule of DPD Indicator
Solution for Ultra Low
Range Chlorine. Using a
TenSette Pipet and a clean
tip, transfer 1.0 mL of
indicator from the ampule
to the cylinder. Swirl to mix
the reagents. Proceed to
step 9 within one minute.
11. During the reaction
period, flush the Pour-Thru
Cell with the remainder of
original dechlorinated
water from step 9.
12. When the flow stops,
press ZERO.
The display will show:
0 µg/L Cl2.
Chlorine, Total
Page 5 of 10
EN
IL
LL
IF
Chlorine, Total ULR (2 to 500 µg/L as Cl2)
13. When the timer
expires, introduce the
contents of the cylinder
into the Pour-Thru Cell.
Results are in µg/L
chlorine.
14. Use this value to
correct the sample result
obtained in this procedure.
See the user manual for
details on saving the
reagent blank value.
15. Flush the Pour-Thru
Cell with at least 50-mL of
deionized water
immediately after use.
Interferences
Table 1 Interfering Substances and Levels
Interfering Substance
Interference Levels and Treatments
Bromine, Br2
Interferes at all levels.
Chlorine Dioxide, ClO2
Interferes at all levels
Chloramines, organic
May interfere
Copper,
Cu2+
Greater than 1000 µg/L
Interferes at all levels.
Iodine, I2
Manganese, oxidized (Mn4+,
Mn7+) or Chromium, oxidized
(Cr6+)
1.
Adjust sample pH to 6 –7 with 1.000 N Sulfuric Acid1.
2.
Add 9 drops Potassium Iodide (30 g/L)1 to an 80-mL sample.
3.
Mix and wait 1 minute.
4.
Add 9 drops Sodium Arsenite1, 2 (5 g/L) and mix.
5.
Analyze the treated sample as described in the procedure above.
6.
Subtract the result of this test from the original analysis to obtain the correct
concentration.
mg/L nitrite
–
Nitrite, NO2 (uncommon in
clean waters)
Chlorine, Total
Page 6 of 10
Apparent µg/L chlorine
2.0 mg/L
3 µg/L
5.0 mg/L
5 µg/L
10.0 mg/L
7 µg/L
15.0 mg/L
16 µg/L
20.0 mg/L
18 µg/L
ChlorineTot_10014_ULR_RL_OriFlo.fm
Chlorine, Total ULR (2 to 500 µg/L as Cl2)
Table 1 Interfering Substances and Levels (continued)
Interfering Substance
Interference Levels and Treatments
Ozone
Interferes at all levels.
Peroxides
May interfere
Extreme sample pH or highly
buffered samples
Adjust to pH 6 –7
1 See
Optional Reagents and Apparatus on page 9.
treated with sodium arsenite for interferences will be hazardous waste as regulated by the Federal RCRA for arsenic (D004). Refer to
the current MSDS for safe handling and disposal instructions.
2 Samples
Sample Collection, Storage, and Preservation
Analyze samples for chlorine immediately after collection. Chlorine is a strong oxidizing agent
and it is unstable in natural waters. It reacts rapidly with various inorganic compounds and
more slowly oxidizes organic compounds. Many factors, including reactant concentrations,
sunlight, pH, temperature and salinity influence decomposition of chlorine in water.
Avoid plastic containers since these may have a large chlorine demand. Pretreat glass sample
containers to remove any chlorine demand by soaking in a dilute bleach solution (1 mL
commercial bleach to l liter of deionized water) for at least 1 hour. Rinse thoroughly with
deionized or distilled water. If sample containers are rinsed thoroughly with deionized or
distilled water after use, only occasional pre-treatment is necessary.
A common error in testing for chlorine is not obtaining a representative sample. If sampling
from a tap, let the water flow for at least 5 minutes to ensure a representative sample. Let the
container overflow with the sample several times, then cap the sample containers so there is
no head space (air) above the sample. Perform the chlorine analysis immediately.
Treating Analysis Labware
Glassware used in this test must be chlorine demand-free. Fill the 100-mL mixing cylinder and
sample container with a dilute solution of chlorine bleach prepared by adding 1 mL of
commercial bleach to 1 liter of water. Soak in this solution at least one hour. After soaking,
rinse thoroughly with deionized water and allow to dry before use.
Treat the Pour-Thru Cell similarly with dilute bleach and let stand for several minutes. Rinse
several times with deionized water.
Cleaning the Pour-Thru Cell
The Pour-Thru Cell may accumulate a buildup of colored reaction products, especially if the
reacted solutions are allowed to remain in the cell for long periods after measurement.
Remove the buildup by rinsing the cell with 5.25 N Sulfuric Acid* followed by several rinsings
with deionized water.
* See Optional Reagents and Apparatus on page 9.
ChlorineTot_10014_ULR_RL_OriFlo.fm
Chlorine, Total
Page 7 of 10
Chlorine, Total ULR (2 to 500 µg/L as Cl2)
Accuracy Check
Standard Additions Method (Sample Spike)
1. After reading test results, leave the sample cell (unspiked sample) in the instrument.
2. Press OPTIONS>MORE. Press STANDARD ADDITIONS. A keypad will appear. Enter the
average chlorine concentration shown on the certificate enclosed with the chlorine
voluette ampules. Multiply the mg/L value from the label by 1000, to enter this as µg/L.
Press OK.
3. A summary of the Standard Additions procedure will appear. Press OK to accept the
values for standard concentration, sample volume, and spike volumes as shown. Press
Edit to change these values. After values are accepted, the unspiked sample reading will
appear in the top row. See the user manual for more information.
4. Snap the top off a Low Range Chlorine Voluette® Ampule Standard Solution, 25 to
30-mg/L (25,000 to 30,000 µg/L).
5. Prepare three sample spikes. Use the TenSette® Pipet to add 0.1, 0.2, and 0.3 mL of
standard to three 50-mL samples, respectively. Swirl gently to mix.
6. Analyze each sample spike as described in the procedure above, starting with the 0.1 mL
sample spike. Accept each standard additions reading by pressing READ. Each addition
should reflect approximately 100% recovery.
7. After completing the sequence, press GRAPH to view the best-fit line through the standard
additions data points, accounting for the matrix interferences. Press IDEAL LINE to view
the relationship between the sample spikes and the “Ideal Line” of 100% recovery.
Method Performance
Precision
Standard: 295 µg/L Cl2
Program
95% Confidence Limits of Distribution
86
290–300 µg/L Cl2
Sensitivity
Chlorine, Total
Page 8 of 10
Portion of Curve
∆Abs
∆Concentration
Entire range
0.010
17 µg/L Cl2
ChlorineTot_10014_ULR_RL_OriFlo.fm
Chlorine, Total ULR (2 to 500 µg/L as Cl2)
Summary of Method
It is essential that interfering sample turbidity is removed using a 3-micron membrane filter. To
avoid chlorine loss, the filtration is done after reacting the DPD with the chlorine in the sample.
The filter used has been specifically selected to avoid retention of the colored product. Sample
color is compensated by zeroing the spectrophotometer on a filtered sample.
Several modifications to the normal DPD chlorine method are necessary to measure trace
levels of chlorine. The Pour-Thru Cell must be used in the spectrophotometer. Liquid reagents
are also required. The reproducible optics of the Pour-Thru Cell give more stable readings
than is possible with movable sample cells, resulting in more stable measurements.
The reagents are packaged in ampules and sealed under argon gas to ensure stability. Use of
liquid reagents eliminates any slight turbidity that might be caused by using powdered
reagents. Due to the possible oxidation of the reagents (which could give a positive chlorine
reading in the blank), a reagent blank must be determined at least once a day for each lot of
reagent used. This reagent blank value is subtracted from the sample result and the corrected
value is the actual chlorine concentration. Test results are measured at 515 nm.
Consumables and Replacement Items
Required Reagents
Description
Quantity/Test
Unit
Cat. No.
—
—
25630-00
ULR Chlorine Buffer Solution, 1.5-mL ampules
1 mL
20/pkg
24931-20
DPD Indicator Solution for ULR Chlorine, 1.5-mL ampules
1 mL
20/pkg
24932-20
Blanking Reagent for ULR Chlorine
1 mL
29 mL
LZV479
Quantity/Test
Unit
Cat. No.
ULR Chlorine Reagent Set (approximately 20 tests), includes:
Required Apparatus
Description
ULR Chlorine Apparatus Set, includes:
—
—
25956-00
Membrane Filters, 3-micron, 25-mm
1
25/pkg
25940-25
OriFlo™ Assembly
1
each
49660-00
Beaker, 250-mL
1
each
500-46H
Cylinder, graduated mixing, 50-mL
1
each
1896-41
Pipet, TenSette®, 0.1 to 1.0 mL
1
each
19700-01
Pipet Tips, for TenSette Pipet 19700-01
2
50/pkg
21856-96
Pour-Thru Cell Module Kit
1
each
59122-00
Unit
Cat. No.
20/pkg
26300-20
Recommended Standards
Description
Chlorine Standard Solution,
Voluette®
Ampule, 25–30 mg/L, 2-mL
Optional Reagents and Apparatus
Description
Potassium Iodide, 30 g/L 100 mL
Cat. No.
343-32
Sodium Arsenite, 5 g/L 100 mL
1047-32
Sulfuric Acid, 1 N 100 mL
1270-32
Sulfuric Acid, 5.25 N 100 mL
2449-53
ChlorineTot_10014_ULR_RL_OriFlo.fm
Chlorine, Total
Page 9 of 10
FOR TECHNICAL ASSISTANCE, PRICE INFORMATION AND ORDERING:
In the U.S.A. – Call toll-free 800-227-4224
Outside the U.S.A. – Contact the HACH office or distributor serving you.
On the Worldwide Web – www.hach.com; E-mail – [email protected]
© Hach Company, 2005. All rights reserved. Printed in Germany.
HACH COMPANY
WORLD HEADQUARTERS
Telephone: (970) 669-3050
FAX: (970) 669-2932
Updated April 05 Edition 1


