1
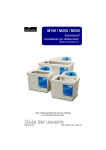
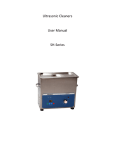
M150 / M250 / M550
Soniclean®
Ultrasonic Cleaners
(Ultrasonic Baths)
This unit is made for table top usage.
User’s Guide
CPN-214-158
003-1159-00 Rev. K (9/4/13)
Table of Contents
Ultrasonic Cleaners,
Warranty . . . . . . . . . . . . . . . . . . . . . . . . . . . . . . . ii
Consumables, and Accessories . . . . . . . . . . . .iii
Safety Precautions . . . . . . . . . . . . . . . . . . . . . . . 1
Introduction. . . . . . . . . . . . . . . . . . . . . . . . . . . . . 3
Ultrasonic Cleaners. . . . . . . . . . . . . . . . . . . . . . . . . . . .3
Accessories For Your Cleaner . . . . . . . . . . . . . . . . . . .3
Unpacking Your Cleaner . . . . . . . . . . . . . . . . . . . . . . . .4
Installing Your Cleaner . . . . . . . . . . . . . . . . . . . . . . . . .4
Specifications . . . . . . . . . . . . . . . . . . . . . . . . . . . . . . . .4
How Ultrasonics Cleaning Works . . . . . . . . . . . . . . . . .6
Operating Your Cleaner . . . . . . . . . . . . . . . . . . . 7
Operating Your Soniclean®
Series Cleaner . . . . . . . . . . . . . . . . . . . . . . . . . . . . . . .7
Before You Start Cleaning. . . . . . . . . . . . . . . . . . . .8
Degassing . . . . . . . . . . . . . . . . . . . . . . . . . . . . . . . .8
Cleaning Items . . . . . . . . . . . . . . . . . . . . . . . . . . . .9
Draining Your Cleaner. . . . . . . . . . . . . . . . . . . . . . . . . .9
Optimizing Your Cleaner . . . . . . . . . . . . . . . . . . . . . . . 11
Application Hints . . . . . . . . . . . . . . . . . . . . . . . . . . . . .12
Cleaning Methods . . . . . . . . . . . . . . . . . . . . . . . . . . . .13
Troubleshooting . . . . . . . . . . . . . . . . . . . . . . . . 15
Troubleshooting Guide . . . . . . . . . . . . . . . . . . . . .15
Service Center . . . . . . . . . . . . . . . . . . . . . . . . . 16
Repair Parts . . . . . . . . . . . . . . . . . . . . . . . . . . . . . . . .16
Cavitation Check . . . . . . . . . . . . . . . . . . . . . . . 17
“Foil” Test . . . . . . . . . . . . . . . . . . . . . . . . . . . . . . .17
“Glass Slide” Test . . . . . . . . . . . . . . . . . . . . . . . . .19
Page i
Warranty
Ultrasonic Cleaners, when used in accordance with manufacturer’s
instructions and under normal use, are guaranteed for two years after
date of shipment. Within the period guaranteed, the manufacturer will
repair or replace free of charge, at its sole discretion, all parts that are
defective because of material or workmanship including costs for removing or installing parts. Repairs are made on a Freight Out Bound repair
depot basis.
Manufacturer’s liability, whether based on warranty, negligence or other
cause, arising out of and/or incidental to sale, use or operation of the
transducer elements, or any part thereof, shall not in any case exceed the
cost of repair or replacement of the defective equipment, and such repair
or replacement shall be the exclusive remedy of the purchaser, and in no
case shall manufacturer be responsible for any and/or all consequential
or incidental damages including without limitation, and/or all consequential damages arising out of commercial losses.
CAUTION
• Do not place parts or containers directly on the bottom of the
cleaning tank; use a tray or wire to suspend items.
• Do not allow the solution to drop more than 3/8 inch below the
operating level line with the cleaner on.
• Do not ever use alcohol, gasoline or flammable solutions. Doing so
could cause a fire or explosion. Use only water-based solutions.
• Do not use mineral acids. These could damage the tank.
Page ii
Ultrasonic Cleaners, Consumables, and Accessories
Description
Part Number
Cleaners
M150 Ultrasonic Cleaner (120V)
M150 Ultrasonic Cleaner (220V)
M150-001
M150-002
M250 Ultrasonic Cleaner (120V)
M250 Ultrasonic Cleaner (220V)
M250-001
M250-002
M550 Ultrasonic Cleaner (120V)
M550 Ultrasonic Cleaner (220V)
M550-001
M550-002
Chemistry
Midmark General Purpose Cleaner (32 oz)
9A296001
Midmark Tartar and Stain Remover (32 oz) 9A297001
Midmark Enzymatic Cleaner (32 oz)
9A298001
Accessories
M150 Accessory Kit
9A285001
M150 Accessory Kit w/Half Basket
9A286001
M250 Accessory Kit
9A287001
M250 Accessory Kit w/Half Basket
9A288001
M550 Accessory Kit
9A289001
M150 Safety Basket
9A290001
M150 Half Safety Basket
9A291001
M250 Full / M550 Half
Safety Basket
9A292001
M250 Half Safety Basket
9A293001
M550 Safety Basket
9A294001
M250 Cassette Rack (holds 3 cassettes)
9A295001
M550 Cassette Rack (holds 6 cassettes)
9A407001
Page iii
Safety Precautions
Before using your Ultrasonic Cleaner, please read and thoroughly
understand these safety precautions. Failure to follow them may result
in serious personal injury or property damage.
To avoid electrical shock:
•
Do unplug from power source before filling or emptying the tank.
•
Do keep the control panel and the area around the cleaner clean
and dry -- wipe up solution which spills over the tank brim. Water
and high voltage can cause electrical shock.
•
Do not operate the cleaner without proper grounding.
•
Do not remove the grounding prong on the line cord plug.
•
Do not disassemble your cleaner -- high voltage inside the cleaner
is dangerous.
•
Do not immerse the cleaner in water.
To prevent personal and/or property damage:
•
Do operate the cleaner with a cover.
•
Do use water-based solutions.
•
Do not ever use alcohol, gasoline or flammable solutions. Doing so
could cause a fire or explosion and will void your warranty. Use only
water-based solutions.
•
Do not ever use mineral acids. These could damage the tank.
•
Do not touch the stainless steel tank or cleaning solution during
use -- they may be hot.
•
Do not allow fluid temperature to exceed 70ºC (160ºF).
•
Do not place your fingers or hands into the tank while the cleaner is
operating. Doing so may cause discomfort and possible skin
irritation. Avoid contact with solutions and provide adequate
ventilation.
•
Do not use solutions containing chlorine bleach.
Page 1
To prevent damage to the cleaner:
•
Do change your solution regularly.
•
Do not operate the cleaner dry.
•
Do not place parts or containers directly on the bottom of the
cleaning tank; use a tray or wire to suspend items. Failure to comply
may cause transducer damage and will void your warranty.
•
Do not allow the solution to drop more than 3/8 inch below the
operating level line with the ultrasonics on. Failure to comply may
cause transducer damage and will void your warranty.
Page 2
Introduction
Ultrasonic Cleaners
This line of ultrasonic cleaners includes three models with capacities of
1-1/2 gallons, 2-1/2 gallons and 5-1/2 gallons. Each model is constructed
using durable, industrial style 40kHz transducers. These provide
increased cleaning power along with built in sweep frequency to ensure
uniform cleaning activity throughout the bath. For safety and operator
convenience, all three sizes have built in drains and are supplied with
tank drain kits. Each model is supplied with a mechanical timer which can
be set from 1 to 60 minutes. The timer also includes a “HOLD” position
that will permit continuous operation.
When you first fill your unit, or refill it with fresh solution, use warm water
with your chemistry. Turn on the ultrasonics by rotating the timer knob.
If you place the cover on the unit, the solution will continue to heat and
will stabilize near 60 degrees centigrade (140 degrees F).
Accessories For Your Cleaner
All units are supplied with a cover. In addition, a perforated insert tray
(basket) is available to be used for immersing instruments or parts during
cleaning.
Page 3
Unpacking Your Cleaner
Please check your cleaner and its carton carefully for any external or
internal damage. If you find damage, contact your shipping carrier
immediately, before contacting your distributor. Please retain your
packaging for future use.
Installing Your Cleaner
Check the plate on the back of the cleaner for correct power
requirements. Position your cleaner within easy reach of a standard
grounded electrical outlet. Do not place the cleaner on a circuit which
could become overloaded.
If your cleaner does not operate correctly, first refer to the troubleshooting
section for possible causes. If you are unable to resolve the problem,
contact your distributor or an authorized service center for additional
information.
Specifications
Equipment Specifications: North American Models (120V)
Model
Tank
Capacity
Tank
Size
(in.)
Overall
Size
(in.)
Weight
Max.
Sonics
Power
Max. Draw
Power Req.
M150
(120V)
1-1/2 gal.
(5.7 L)
W: 11.5”
D: 6”
H: 6”
W: 15.6”
D: 12.5”
H: 14.8”
14 lbs.
(6.4 KG)
110W
130W
M250
(120V)
2-1/2 gal.
(9.5 L)
W: 11.5”
D: 9.5”
H: 6”
W: 15.6”
D: 15.8”
H: 14.9”
16 lbs.
(7.3 KG)
160W
180W
M550
(120V)
5-1/2 gal.
(20.8 L)
W: 19.5”
D:11.5”
H: 6”
W: 23.5”
D: 18.3”
H: 15.4”
28 lbs.
(12.7 KG)
280W
320W
Fuse Table: North American Models (120V)
Model
Fuse 1
Fuse 2
Fuse 3
M150
(120V)
250V, 2.5A
250V, 1.6A
250V, 1A
M250
(120V)
250V, 5A
250V, 2A
250V, 1A
M550
(120V)
250V, 10A
250V, 3.15A
250V, 1A
Page 4
Equipment Specifications: European Models (230V)
Model
Tank
Capacity
Tank
Size
(mm)
M150
(230V)
5.71 L
(1-1/2 gal.)
W: 290
D: 150
H: 150
M250
(230V)
9.51 L
(2-1/2 gal.)
M550
(230V)
20.81 L
(5-1/2 gal.)
Overall
Size
(mm)
Weight
Max.
Sonics
Power
Max. Draw
Power Req.
W: 396
D: 318
H: 376
8.2 kg
(18 lbs.)
110W
130W
W: 290
D: 240
H: 150
W: 396
D: 401
H: 378
9.5 kg
(21 lbs)
160W
180W
W: 495
D: 290
H: 150
W: 597
D: 465
H: 391
16.3 kg
(36 lbs)
280W
320W
Fuse Table: European Models (230V)
Model
M150
(230V)
M250
(230V)
M550
(230V)
Fuse 1
Fuse 2
Fuse 3
250V, 2.5A
250V, 1.6A
250V, 1A
250V, 5A
250V, 2A
250V, 1A
250V, 5A
250V, 2A
250V, 1A
NOTE
• All models operate at a frequency of 40kHz.
• 120V ± 10%, 60Hz is optimum voltage for 120V units
• 220V ± 10%, 50Hz is optimum voltage for 220V units.
• All cleaners have CSA approval and comply with FCC regulations.
• Due to FCC filtering requirements units may trip GFI circuits.
• All units have a ground leakage current less than 0.50mA.
Page 5
How Ultrasonics Cleaning Works
Ultrasonic sound is sound transmitted at frequencies generally beyond
the range of human hearing. In your ultrasonic cleaner, ultrasonic sound
(sonics) is used for cleaning materials and parts. This is how it works:
•
As the sound waves from the
transducer radiate through the
solution in the tank, they cause
alternating high and low pressures in the solution.
•
During the low pressure stage,
millions of microscopic bubbles
form and grow. This process is
called CAVITATION, meaning
“formation of cavities”.
•
During the high pressure
stage, the bubbles collapse,
or “implode” releasing enormous amounts of energy.
These implosions act like an
army of tiny scrub brushes.
They work in all directions,
attacking every surface and
invading all recesses and
openings.
Page 6
Operating Your Cleaner
If this is the first time you are using the cleaner, please read this whole
section before operating your cleaner.
Operating Your Midmark Soniclean® Series Cleaner
Explanation of Controls
Control
TIMER
Function
Turn clockwise for variable times of 0-60 minutes to
activate ultrasonic.
Turn counter clockwise to “SONICS” position to turn
OFF ultrasonic.
Turn counter clockwise to the “HOLD” position to permit
continuous operation.
Page 7
Before You Start Cleaning
CAUTION
• Do not place parts or containers directly on the bottom of the
cleaning tanks; use a tray or wire to suspend items.
• Do not allow the solution to drop more than 3/8 inch below the
operating level line with the cleaner on.
• Do not ever use alcohol, gasoline or flammable solutions. Doing so
could cause a fire or explosion. Use only water-based solutions.
• Do not ever use mineral acids. These could damage the tank.
• Failure to comply with these cautions will void your warranty.
Step
Action
1
Select a cleaning solution suitable for your application.
2
Allowing for the volume of the parts you will be cleaning and
cleaning solution, fill the tank with warm tap water to the
operating level line.
3
Add cleaning solution to the tank water.
4
Plug the cleaner into a grounded outlet.
5
For maximum efficiency, refer to page 11, “Optimizing Your
Cleaner” before proceeding.
NOTE
If this is the first time you are running the cleaner, or if you have
changed cleaning solution, you must degas the solution. If not, skip to
"Cleaning Items”.
Degassing
Step
Action
1
Turn the TIMER to 5-10 minutes and let the cleaner run to allow
the solution to “degas”. The ultrasonics will drive out excess dissolved gas greatly improving the cleaner’s effectiveness.
Page 8
Cleaning Items
NOTE
To stop ultrasonics at any time, turn the TIMER to zero.
Step
Action
1
Set the TIMER for the amount of time you wish the items to be
cleaned.
2
Place the items into a basket, perforated tray, or other device for
suspending instruments or parts above the bottom.
3
If using beakers or a solid tray, add cleaning solution to beakers
or tray to cover the items.
4
Slowly lower the tray or beakers into the tank. Do not allow
items to contact the tank bottom. Do not aerate the solution.
5
When items are clean, slowly remove them from the cleaner.
6
Rinse the clean items with clean water and dry.
Draining Your Cleaner
WARNING
Do not immerse the cleaner in water. Unplug cleaner from
power source.
NOTE
Models M150, M250, and M550 include a drain and valve kit.
Step
Action
1
Place the cleaner to allow easy reach of the drain tube into a
waste disposal unit.
2
Remove the thread protecting cap from the end of the
cleaner’s drain pipe. This will expose the white teflon sealing tape on the drain pipe’s threads.
Page 9
3
Hand tighten the drain valve onto the drain pipe over the
white teflon sealing tape. Finish tightening the valve in place
using on adjustable or a 21mm wrench. Tighten the valve no
more than one full turn when using the wrench until the
handle is on top.
CAUTION: Over tightening of the valve can cause damage
to the ultrasonic tank. Always use teflon sealing tape or a
sealing paste designed for use with stainless steel if retightening or refitting of the drain valve is required.
VALVE
ELBOW
PROTECTIVE CAP
DRAIN TUBE
4
Hand tighten the hose adaptor into the end of the drain
valve. Slide the drain tube over the barbed hose adaptor
end.
ASSEMBLED
DRAIN
5
Close the drain valve by turning the handle perpendicular to
the valve body and the cleaner is ready to fill with solution.
To open the valve and drain the cleaner, turn the handle so
that it is in line with the valve body.
Page 10
Optimizing Your Cleaner
Tank Optimization
Cleaning - check the tank for contamination whenever you change
solution. If necessary, remove contaminants with a nonabrasive cloth
and water.
Emptying - always unplug the cleaner before draining the tank. Drain the
solution into an appropriate waste disposal unit.
Filling - always unplug the line cord before filling the tank. Fill the cleaner
to the operating level using warm tap water.
Low solution level - will cause the cleaner to fail. When you remove
heavy or bulky loads from the cleaner, the solution level may drop below
the operating level. If so, be sure to replace lost solution and degas, if
necessary, depending on the amount used.
Overload - do not rest any items on the tank bottom. Weight on the tank
bottom dampens sound energy and will cause damage to the transducer.
Instead, use a tray and/or other fixture to support all items. Allow at least
one inch between the tank bottom and the beaker or receptacle for
adequate cavitation.
Covers - allow the cleaner to heat up faster, to a higher temperature, and
avoid excessive liquid evaporation.
Solution Optimization
Solution activity - the amount of visible activity is not necessarily related
to optimum cavitation for cleaning.
Degassing - fresh solutions can contain dissolved gases (usually air)
which reduces effective ultrasonic action. Although solutions will naturally
degas over time, operating the ultrasonics without parts speeds up the
degassing process. Solutions that have been sitting unused for 24 hours
or longer have reabsorbed some gases.
Surface tension - can be reduced by adding solution to the bath.
Reduced surface tension will increase cavitation intensity and enhance
cleaning.
Page 11
Solvents - never use solvents. Vapors of flammable solutions will collect
under the cleaner, where ignition is possible from electrical components.
Renewal - cleaning solutions can become contaminated with use.
Suspended soil particles on the bottom of the tank, inhibit ultrasonic
activity. For optimum cleaning of general instruments in the medical and
dental applications, Midmark recommends replacing the cleaning solution
once per day. If cleaning heavily contaminated instruments, it may be
necessary to change solutions more frequently.
Application Hints
First time cleaning - first experiment with one piece, then proceed with
the remainder.
Solution level - Be sure to maintain solution level within 1/2 inch of the
tank’s “operating level” line. Surface activity can vary with liquid level.
Load size - It is faster and more efficient to run several small loads rather
than a single large load.
Placing items - Never allow items to sit on the bottom of the tank.
Always place them in a tray or beaker or suspend in the solution.
Rinsing items - After cleaning, use a clean water bath to rinse away
chemicals adhering to items.
Lubricating items - When necessary, re-lubricate items immediately
after cleaning.
Drying items - Air drying at room temperature works for some items.
Place parts requiring faster drying time under hot air blowers or in ovens.
Please call your local distributor if you have other application questions.
Page 12
Cleaning Methods
There are two methods of cleaning - direct and indirect. Each has advantages and disadvantages. When in doubt, run test samples using both
methods to decide which one produces the best results for you.
Direct Method
ITEMS IN PERFORATED
INSERT TRAY
ITEMS SUSPENDED
How it works:
•
Fill the tank with warm water and a cleaning solution.
•
Place the items to be cleaned in a perforated tray and lower them into
the tank. You can also suspend items on a wire and then immerse
them in the solution.
The advantages of this method are the simplicity of operation and cleaning effectiveness.
Page 13
Indirect Method
BEAKER POSITIONING TRAY
SOLID INSERT TRAY
BEAKERS
How it works:
•
Fill the tank with warm water and a cleaning solution.
•
Pour your solution medium into one or more beakers or into a solid
insert tray.
•
Place the beakers in a beaker positioning cover or a solid insert tray
to fit your cleaner. Beakers should not touch the tank’s bottom.
The advantages of this method are:
•
Removed soil stays in the beaker or tray so you can easily examine,
filter or discard it.
•
You can use one or more solutions at the same time.
- two completely different cleaning solutions.
- one beaker or tray with a cleaning solution and one with a rinse
solution.
•
Cleaning solution in your tank needs to be changed less often.
Page 14
Troubleshooting
If your cleaner does not operate satisfactorily, please check the tables
below for possible causes before calling your authorized service center.
WARNING
High voltage inside - dangerous shock hazard. DO NOT
attempt to disassemble or repair the cleaner.
Troubleshooting Guide
Problem
Cleaner will
not start.
Decreased
ultrasonic
activity.
Cause
What To Do
Cleaner not plugged in
properly.
Plug into functioning electrical outlet.
Mechanical timer not
ON.
Turn timer clockwise.
Blown fuse.
Call nearest authorized service center.
Solution is not
degassed.
Make sure that tank was
filled with warm tap water
plus cleaning solution and
has run 5-10 minutes.
NOTE: Refer to page 17
for cavitation check.
Solution is spent.
Change solution.
Solution level is incorrect for load.
Adjust solution to within 3/8
inch of the tank’s operating
level line with load.
Tank bottom is covered
with soil particles.
Empty, then clean tank with
warm water. Wipe with a
nonabrasive cloth.
Using deionized water in
the tank.
Deionized water does not
cavitate as actively as
soapy tap water.
Page 15
Service Center
With normal use, your Ultrasonic Cleaner should not require servicing.
However, if it fails to operate satisfactorily, first try to diagnose the problem by following the suggestions in the Troubleshooting Guide.
WARNING
You will void the warranty if you disassemble your cleaner.
High voltage inside the cleaner is dangerous.
If you find that your cleaner needs repair, carefully pack and return it to
your local distributor. If under warranty, remember to include proof of purchase.
Your cleaner will be shipped by ground service unless you specify otherwise.
Repair Parts
Part Number
Description
014-0594-00
Valve, Ball, 3/8 FPT.
014-0595-00
Plastic Elbow, 3/8’ MPT X 1/2” Barb
053-1795-00
Timer Knob,
053-1796-00
Drain hose
053-1797-00
Foot.
066-0997-00
M150 Carton (16 X 19 X 21)
066-0998-00
M250 Carton (19 X 19 X 19)
066-0999-00
M550 Carton (25 X 30 X 21)
Page 16
Cavitation Check
How to perform the “foil” test
Purpose: Used to Determine the Efficiency of an Ultrasonic Cleaner.
Regular testing of the ultrasonic cleaner to assure that it is operating
properly is recommended. The frequency of testing depends on the
particular application and frequency of use. Of course, testing should be
performed whenever deterioration in the cleaner performance is
suspected.
This foil test is relatively easy to perform and will provide a permanent
record for the future comparative evaluation of the ultrasonic cleaners
performance.
Step 1.) Obtain a roll of any standard weight household aluminum foil.
(Note: heavy weight foil is less sensitive to the pebbling
caused by ultrasonic cavitation and thus doesn’t work as well
for this testing)
Step 2 .) Make a rigid support to which the aluminum foil will be
attached. Cut a piece of wood dowel rod or small board
(e.g. 1” x 1”, etc.) 2 inches longer than the length of the
ultrasonic cleaner tank. The material this support is made of
isn’t critical it just needs to provide a rigid support that can be
laid across the top of the tank to provide a support to attach
the foil to.
Step 3.) Cut a piece of foil approximately 6” in length and long enough
to attach to the support prepared in step 2 and suspend almost
to the bottom of the tank. Attach the foil to the support using
tape or push pins to secure it. The foil must not touch the
bottom or sides of the tanks. Care should be taken to avoid
crinkling of the foil. (See photo below)
Page 17
Step 4.) With the foil test sample removed prepare a fresh ultrasonic
cleaner solution by filling the tank nearly full with water.
Add the recommended amount of Midmark cleaning solution
and finish filling the tank to specified level with water.
Step 5.) Turn the ultra cleaner on and set the timer for 10 minutes to
degas the solution.
Step 6.) With the ultrasonic cleaner off lower the foil sample into the
center of the tank positioning it so the foil isn’t touching the
sides or bottom of the tank. (See photo below) For larger units,
e.g. Midmark model M550, multiple samples should be used to
get a better sampling of the uniformity of the ultrasonic
cavitation in the tank.
Step 7.) Turn the ultrasonic cleaner on for 3 minutes. Remove the foil
sample allowing the excess cleaning solution to drain off
the foil. Allow the sample to air dry, being careful not to wrinkle
the foil.
Step 8.) The foil surface actually submerged in the solution should be
uniformly covered with a small dimpling or pebbling effect, over
the entire surface. There may also be some holes in the foil as
a result of erosion caused by the interaction between the
cleaning solution, the foil, and the ultrasonic action, but the
objective of this test is to see how uniform the pebbling is, not
how many holes are in the foil. If there are an excessive
number of holes in the foil sample, run another test decreasing
the exposure time to get a better sampling of the uniformity of
the dimpling.
Page 18
Results: The entire submerged area of the foil should be
uniformly pebbled with tiny dimples from the ultrasonic
implosions. Areas greater than 1”diameter, the size of the a
quarter, that doesn’t have pebbling, may indicate that there is a
problem with the ultrasonic unit. (See photo below)
Step 9.) If the results indicate a possible problem repeat the above
steps using a new foil sample. If the results are the same
contact your service provider to have the unit
evaluated / repaired.
Step 10.) If the results confirm uniform cavitation (dimpling / pebbling of
the foil) throughout the tank, label, date and file the foil test
sample for future comparative purposes.
Note: If the foil test is done at the beginning of the day, the ultrasonic
solutions should be removed from the tank prior to cleaning instruments,
as the solution left is foil contaminated.
How to perform the “glass slide” test
A. Wet the frosted portion of a glass slide with tap water and draw an "X"
with a No. 2 pencil from corner to corner of the frosted area. Making sure
that the tank is filled to the fill line, immerse the frosted end of the slide
into fresh cleaning solution. Turn on the ultrasonics. The lead "X" will
begin to be removed almost immediately, and all lead should be removed
within ten seconds.
Page 19
Midmark Corporation
60 Vista Drive
P.O. Box 286
Versailles, OH 45380-0286
U.S.A.
937-526-3662
Fax 937-526-5542
midmark.com