1
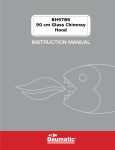
CHIMNEY COOKER HOOD
Contents
From the manufacturer…………………………………………………………………………1
FOR THE USER
1. Your safety
Warning ……………………………………………………………………………………………1
Installation………………………………………………………………………………………2
During use………………………………………………………………………………………2
Cleaning, Maintenance & Service……………………………………………………2
Electric Cord……………………………………………………………………………………3
2. Description
Main parts………………………………………………………………………………………3
Ducted or Re-circulating mode………………………………………………………4
Speed Control…………………………………………………………………………………4
3. Instructions for use
A. Push Button Control Panel…………………………………………………………4
B. Touch Control Panel……………………………………………………………………5
C. Micro-switch Square Panel…………………………………………………………5
D. Remote Control……………………………………………………………………………6
Cleaning & Maintenance…………………………………………………………………7
4. Installation…………………………………………………………………………………………7
Dimension chart………………………………………………………………………………9
5. Safety Information…………………………………………………………………………10
6. Troubleshooting………………………………………………………………………………11
7. Warranty…………………………………………………………………………………………12
2
From the Manufacturer
Please read this user manual carefully before attempting to operate the appliance and
store it in a safe place for future reference.
This appliance and its packaging are produced by processes that minimize waste and
respect the environment.
Please help us to continue this effort to protect the environment by using the appliance efficiently and dispose of the packaging in a responsible manner.
FOR THE USER
1. Your safety
Warning
PLEASE READ THIS SECTION THOROUGHLY BEFORE ATTEMPTING TO OPERATE THE APPLIANCE
1. There shall be adequate ventilation of the room when the range hood is used at the
same time as appliances burning gas or other fuels (not applicable to appliances that
only discharge the air back into the room).
2. There is a fire risk if cleaning is not carried out in accordance with the instructions.
3. Do not flambé under the range hood.
4. The air must not be discharged into a flue that is used for exhausting fumes from
appliances burning gas or other fuels (not applicable to appliances that only discharge
the air back into the room.
5. This appliance is not intended for use by persons (including children) with reduced
physical, sensory or mental capabilities, or lack of experience and knowledge, unless
the have been given supervision or instruction concerning use of the appliance by a
person responsible for their safety. Children should be supervised to ensure that they
do not play with the appliance.
6. Air exhausted must be accordant with local laws.
7. Accessible parts may become hot when used with cooking appliances.
3
Installation
This appliance must be installed or repaired by a qualified technician only.
It is dangerous to modify any part of this appliance.
The manufacturer declines all responsibility in case of failure to adopt proper safety
measures.
Ensure the location in which this appliance is installed has good, permanent ventilation.
In ducted mode, there must be one or more permanent air inlet. The air collected must
not be discharged into a duct used to blow off smoke from other appliances fed with
electricity.
The distance between the bench to the lower part of the hood must not be less than
65cm.
Use an electrical connector with earth that is correct for your location.
Check that the voltage in your area correspond to the appliance as indicated on the
rating label.
Do not connect the hood to a duct that carries combustion fumes (e.g. fireplace).
During use
This product is designed for household use only and should never be used for commercial applications.
After use, always ensure that all controls are in the "OFF" position.
When frying with a gas flame, take particular care not to allow the oil or grease in the
pan to catch fire.
Do not use the range hood lights as night lights.
Cleaning, Maintenance & Service
Clean the grease filters often (at least once monthly). Heavy oil deposits is a fire hazard. Hood surface should be cleaned with soft cloth and non-corrosive detergent.
Important: Never attempt to repair this appliance by yourself. Always refer to qualified
Service Technicians.
4
For your safety, insist on original parts.
Always switch off the electricity and unplug the connection before conducting maintenance or cleaning.
Electric Cord
Ensure the supply cord is not exposed to heat, chemicals or sharp objects.
If the supply cord is damaged, it must be replaced by the manufacturer or its service
agent or a similarly qualified person in order to avoid a hazard.
2. Description
Main parts
1A.Baffle filter (installed)
3.Main flue
4.Extension flue
2.Canopy
5.Control panel
5
Ducted or Re-circulating mode
Depending on your requirement, this appliance can be configured to operate in the
ducted or re-circulating modes.
DUCTED MODE: Fire proof ducting system of 150mm diameter vent the fumes
through a suitable outlet. In the ducted mode, only the aluminium grease filters are
installed.
RECIRCULATING MODE: Fumes are filtered for grease and odour through the aluminium grease filters and the charcoal filters respectively and re-introduced into the
kitchen environment. In re-circulating mode, both the aluminium grease filters and the
charcoal filters should be installed.
Speed Control
The hood is equipped with a 3 or 4 speed mechanical/electronic control.
Use the low speed for simmering, medium speed for light cooking. Use the high speed
for frying or heavy cooking.
3. Instructions for use
A. Push Button Control Panel
Turn on/off the hood
High speed setting
Medium speed setting
Low speed setting
Turn on/off the lamp
6
B. Touch Control Panel
low speed setting
middle speed setting
short touch
high speed setting
turn on/off lamp
long touch
turbo setting
★ filter service indicator
(touch for 3 seconds)
programmer ventilation 15
minutes per hour
delay shut off in 15 minutes
C. Micro-switch Control Panel
Turn on/off the hood
High speed setting
Medium speed setting
Low speed setting
Turn on/off the lamp
7
D. Remote Control
press
long press
② power
② low setting
② delay off 15 min
② medium setting
② ventilation 15min/hr
② lamp
② high setting
② turbo setting
Remark:
② short press: turn on/off the power.
② short press: turn on/off low speed setting.
② short press: medium speed setting.
② short press: light on/off control.
② short press: high speed setting.
② long press: (a) while no other blower function is active, work at low speed setting &
delay shut off in 15 minutes. (b) while any blower function is active, add a 15 minutes
delay shut-off.
② long press: work at medium speed setting & with Programmer ventilation 15
minutes per hour, only applicable while no other function is active.
② long press: work at turbo speed setting.
Note:
(a) to repeat short press or long press on a single button will switch On and Off status
of the present option.
(b) any latest option will replace the previous option.
8
Cleaning & Maintenance
ALWAYS SWITCH OFF AND UNPLUG FIRST!
SURFACES:
Wash with warm soapy water and a soft sponge. Never use abrasive detergent,
scouring pads, steel wool or solvents on any part of this appliance as this will cause
irreparable damage.
4. Installation
Use suitable bolts to mount the appliance on a secure surface.
The minimum distance between the bench top and the lowest part of the hood must
not be less than 65cm.
The location of the installation must have permanent openings for ventilation.
Regulations concerning the discharge of air have to be fulfilled.
It is strongly recommended that the hood be installed right over the exhaust air from
cooking.
It is better not to install the outlet of the pipe in the wind direction, as this could restrict
the flow of the exhaust air.
Fasten the components for the exhaust outlet with screws. To ensure a good flow of
exhaust air, the amount of bends must be limited, as each bend will cause a resistance and limit the air flow.
9
Every hood has two fixing screws to firmly fix the hood in its place.
10
Leveling Device
When mounting the hood on the wall ,the level can be adjusted by turning the two
screws on the motor housing.
Dimension chart
11
5. Safety Information
Connection to the electrical supply
Electrical connection must be made only in accordance to the local standards and
laws.
Ensure that the electrical supply complies with the setting on this appliance, otherwise, do not connect.
The electrical connection of this appliance must be earthed. If unsure, check with a
qualified electrician. Color code:
Green & Yellow = EARTH
Blue = NEUTRAL
Brown = LIVE
Ensure that the power supply cord is free from any heat source or sharp objects.
12
6. Troubleshooting
Symptoms
Possible Cause
Action
Check that the main switch is
turned on
No go
No electrical supply
Check that the plug is connected
Aluminium grease filters
clogged
Clean the filters and replace
when dry
Charcoal grease filters
clogged
Replace charcoal filters with
new sets
Butterfly valve jammed
Contact technician
High temperature safety
device activated
The kitchen is not sufficiently
ventilated
The hood is installed too
near the cooking Stove
The hood must be at least
65cm from stove
Charcoal filters are not
installed
Charcoal filters must be installed in re-circulating mode
Oil cup missing or not
installed
Remove aluminium filter and
replace oil cup
Aluminium grease filter
saturated
Wash the aluminium grease
filters
Foreign object in contact
with fan blade
Contact technician
Poor airflow
Motor running but
no airflow
Motor cuts after a
few minutes
Strong cooking
smell
Oil dripping onto
stove
Whirring sound
13
WARRANTY REGISTRATION CARD
THIS WARRANTY IS VALID IN NEW ZEALAND ONLY
Note:
Please complete the following details when you
unpack the product and return the bottom portion of
this card to:
Applico Ltd
Private Bag 92-900
Onehunga
Auckland, New Zealand
Warranty:
These products are covered by a warranty for a
period of 24 months from the date of purchase,
subject to the following conditions*. The Warranty
covers rectification free of charge of any fault arising
from defective materials or components, or faulty
workmanship or assembly.
* The conditions above mentioned are:
1. that the purchaser carefully follows all instructions
packed with the product;
2. that the purchaser carefully follows the installation
instructions provided and complies with electrical
wiring regulations, gas and or plumbing codes;
3. that the purchaser carefully follows instructions
provided in the owner’s handbook relating to the
proper use and care of the product and does not
use the product for any purpose other than the
domestic use for which it has been designed;
4. all appliances being used in a non residential
commercial situation are covered by a 3 month
warranty from the original date of purchase;
5. that the product was purchased and installed in
New Zealand;
6. that this warranty does not extend to:
a) optional glass lids for hobs apart from claims
which relate to mechanical or physical damage
thereof at the date of purchase;
b) light bulbs;
c) damage to ceramic glass caused by liquid
or solid spillovers, lack of maintenance, or
impact;
d) damage to surface coatings caused by
cleaning or maintenance using products not
recommended by the owner’s handbook;
e) defects caused by normal wear and tear,
accident, negligence, alteration, misuse or
incorrect installations;
f) a product dismantled, repaired or serviced
by any serviceman other than an authorised
service agent;
g) a product not in possession of the original
purchaser;
7. that if the product is a microwave or small
appliance it must be returned to the dealer for
servicing. These products, unless stated otherwise
have a 12 month warranty from original date
of purchase with 24 months on the microwave
magnetron; Waste disposers have a 12 month
warranty;
8. The provision of service under this Warranty is
limited by a 25km boundary from the retailer
where the product was purchased. Such travelling
outside of these limits will incur commercial cost
to be paid by you, regulated by the number of
kilometres travelled beyond the 25km limit (50km
return trip).
Nothing herein contained shall be construed in any
way as excluding or limiting your rights under the
Consumer Guarantees Acts 1993.
For service please contact the dealer/retailer from
whom you purchased the product. If you are unable
to establish the date of purchase, or the fault is not
covered by this Warranty, or if the product is found to
be in working order, you will be required to bear all
service call charges.
Note: Completion of this Warranty Registration
Card constitutes acceptance of the terms and
conditions of this Warranty.
Distributed by Applico Ltd
www.applico.co.nz
Please complete this section, detach and post to:
Applico Warranty, Private Bag 92-900, Onehunga, Auckland
or register online at www.applico.co.nz
PRODUCT TYPE: .................................................
MODEL NO:...................................................................
SERIAL NO: ..........................................................
DATE OF PURCHASE: ................................................
RETAILER:............................................................
INVOICE/SALES DOCKET NO: ................................
RETAILER ADDRESS: ...........................................................................................................................
PURCHASERS’ NAME: ......................................................................................................................
ADDRESS:........................................................................................................................................
PROCLAIM APL.AD.120
Affix
stamp
here
Applico Ltd
Warranty Department
Private Bag 92-900
Onehunga
Auckland
Z234