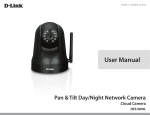
Download User Manual - D-Link
Transcript
Version 1.0 | 06/30/2014
User Manual
PowerLine HD Day/Night Cloud Camera
PowerLine HD Day/Night Cloud Camera kit
DCS-6045L/DCS-6045LKT
Manual Overview
D-Link reserves the right to revise this publication and to make changes in the content hereof without obligation to notify any
person or organization of such revisions or changes. Information in this document may become obsolete as our services and
websites develop and change. Please refer to the www.mydlink.com website for the most current information.
Manual Revision
Revision
Date
1.00
March 15, 2014
Description
Initial release
Trademarks
D-Link and the D-Link logo are trademarks or registered trademarks of D-Link Corporation or its subsidiaries in the United
States or other countries. All other company or product names mentioned herein are trademarks or registered trademarks of
their respective companies.
Copyright © 2014 by D-Link Corporation.
All rights reserved. This publication may not be reproduced, in whole or in part, without prior expressed written permission
from D-Link Corporation.
Table of Contents
Table of Contents
Product Overview............................................................... 4
Package Contents.......................................................................... 4
System Requirements.................................................................. 4
Introduction.................................................................................... 5
Features............................................................................................. 6
DCS-6045L Hardware Overview............................................... 7
Front View................................................................................. 7
Rear View.................................................................................. 8
DHP-308AV Hardware Overview.............................................. 9
Front View................................................................................. 9
Rear View................................................................................10
Rear View................................................................................11
Installation........................................................................14
Zero Configuration Setup.........................................................15
Camera Installation Wizard......................................................18
Windows Users.....................................................................18
Mac Users...............................................................................19
PLC - Push Button Setup...........................................................20
Manual Hardware Installation.................................................21
Mounting The Camera...............................................................22
mydlink............................................................................................24
Configuration....................................................................25
Using the Web Configuration Interface...............................25
Live Video.......................................................................................26
D-Link DCS-6045L User Manual
Setup................................................................................................27
Wizard......................................................................................27
Internet Connection Setup Wizard.........................28
Network Setup...............................................................30
DDNS .......................................................................................31
Image Setup..........................................................................32
Audio and Video...................................................................33
Time and Date.......................................................................34
Mail...........................................................................................35
FTP.............................................................................................37
SD Recording.........................................................................39
Motion Detection................................................................41
Sound Detection..................................................................42
SD Management..................................................................43
Maintenance.................................................................................44
Admin......................................................................................44
System.....................................................................................45
Firmware Upgrade...............................................................46
Status...............................................................................................47
Device Info.............................................................................47
Active User.............................................................................48
Troubleshooting...............................................................49
Technical Specifications...................................................52
3
Section 1 - Product Overview
Product
PackageOverview
Contents
• DCS-6045L PowerLine HD Day/Night Cloud Camera
• Mounting Kit with Screws
• Power Cord
• Quick Install Guide
• Manual and Software on CD
• DHP-308AV (Only included with the DCS-6045LKT Starter Kit)
Note: Using a power supply with a different voltage than the one included with your
product will cause damage and void the warranty for this product.
If any of the above items are missing, please contact your reseller.
System Requirements
• Computer with Microsoft Windows® 8/7/Vista/XP, or Mac with OS X 10.6 or higher
• PC with 1.3 GHz or above and at least 128 MB RAM
• Internet Explorer 7, Firefox 12, Safari 6, or Chrome 20 or higher version with Java installed and enabled
• Existing 10/100 Ethernet-based network
D-Link DCS-6045L User Manual
4
Section 1 - Product Overview
Introduction
Congratulations on your purchase of the DCS-6045L PowerLine HD Day/Night Cloud Camera. The DCS-6045L is a versatile and
unique solution for your small office or home. Unlike a standard webcam, the DCS-6045L does away with traditional wired or
wireless connections and instead uses your existing electrical wiring. The DCS-6045L plugs directly into a power outlet, and
does not require any additional cables. Designed to be used with any D-Link PowerLine adapter, which turns every power outlet
into a possible network connection to access digital media devices, game consoles, print servers, computers, and network
storage devices throughout your home. A complete system with a built-in CPU and web server, the DCS-6045L transmits high
quality video images for round-the-clock security and surveillance. The IR LED provides around the clock surveillance regardless
of the lighting conditions.
The DCS-6045L is a standalone surveillance camera that requires no special hardware or software, and can run independently
even without a PC. Send e-mail notifications with snapshots or video clips whenever motion or sound is detected using just
the DCS-6045L and an Internet connection. You can customize areas of the video to monitor for motion to keep watch over
entry ways, and you can set volume limits to detect when a loud sound is picked up by the camera. Night time monitoring is
possible with the built-in infrared LEDs which allow for night time viewing of up to 6 meters (19.6 feet), enabling round-theclock monitoring of a home or small office.
Built mydlink™ support DCS-6045L makes it easier and more convenient for you to look after your family, home, or office
environment. With a mydlink service enabled camera, you can stay connected to everything you love from anywhere, anytime.
The mydlink service can be accessed using a web browser, and there is also an optional downloadable mydlink app that allows
users to have a better experience on their mobile devices. With the mydlink app, you can quickly and easily view your camera
feed from anywhere using a Wi-Fi, 3G, or 4G connection.
D-Link DCS-6045L User Manual
5
Section 1 - Product Overview
Features
Easy to Use and mydlink-Enabled for Easy Access and Management
The DCS-6045L is a standalone surveillance camera that requires no special hardware or software, and can run independently even without a PC.
This camera is also mydlink-enabled, which means you can view and manage your camera through the mydlink website, or through the mydlink
mobile app for iPhone, iPad, iPod touch, and Android.
Data Transmission Over Electrical Wiring
The DCS-6045L plugs directly into a power outlet, and does not require any additional cables. Designed to be used with any D-Link PowerLine
adapter, which turns every power outlet into a possible network connection to access digital media devices, game consoles, print servers, computers,
and network storage devices throughout your home.
IR LEDs for Day and Night functionality
The built-in infrared LEDs enable night time viewing of up to 6 meters (19.6 feet).
H.264 Codec for Smooth, Space-Efficient Video
This camera supports use of the H.264 video codec, which gives you high-quality video with reduced bandwidth requirements. This means that
you can enjoy smoother, more reliable video streaming over the Internet, and less disk space is required to save recordings.
Motion and Sound Triggered Notifications and Recordings
The DCS-6045L can send e-mail notifications with snapshots or video clips whenever motion or sound is detected. You can customize areas of the
video to monitor for motion to keep watch over entry ways, and you can set volume limits to detect when a loud sound is picked up by the camera.
Supports a Variety of Platforms
Supports TCP/IP networking, HTTP, and other Internet related protocols. The DCS-6045L can also be integrated easily into other Internet/Intranet
applications because of its standards-based features.
Remote Monitoring Utility
This camera also includes the D-ViewCam software, which adds enhanced features and functionality that helps you create a full surveillance system
for up to 32 cameras. With D-ViewCam, you can view multiple cameras at the same time, record video, and set up scheduled and triggered recordings.
D-Link DCS-6045L User Manual
6
Section 1 - Product Overview
DCS-6045L Hardware Overview
Front View
Light Sensor
Camera Lens
IR LED
Microphone
Power LED PLC LED Link LED
D-Link DCS-6045L User Manual
7
Section 1 - Product Overview
Rear View
Power Connector
MicroSD Slot
Reset Button
D-Link DCS-6045L User Manual
PLC Sync Button
Power On/Off Switch
8
Section 1 - Product Overview
DHP-308AV Hardware Overview
Front View
Power LED
PLC Link LED
Network Connectivity LED
D-Link DCS-6045L User Manual
9
Section 1 - Product Overview
Rear View
Power Plug
D-Link DCS-6045L User Manual
10
Section 1 - Product Overview
Rear View
LAN Port
D-Link DCS-6045L User Manual
PLC Sync Button
11
Section 1 - Product Overview
PowerLine Installation Considerations
Plan the location of your PowerLine devices:
1. Connect PowerLine devices to electrical outlets that are not controlled by a wall
switch to avoid accidentally turning off power to the device.
2. Do not connect the PowerLine devices to an extension cord, surge protector, or
power strip as this might prevent it from working correctly, or reduce the network
performance.
3. Avoid using the PowerLine devices in an electrical outlet that is located near an
appliance that uses a lot of power, such as a washer or dryer, or a refrigerator.
This may prevent the adapter from working correctly, or negatively impact network performance.
4. Verify that your PowerLine devices are electrically rated to operate with the power available in your location.
5. To help prevent against electrical shock, be sure to plug the power cables into properly grounded electrical outlets.
6. The PowerLine device is equipped with a three-pronged plug to help ensure proper grounding. Do not use adapter
plugs or remove the grounding prong from the cable.
D-Link DCS-6045L User Manual
12
Section 1 - Product Overview
Important safety instructions
Please read all of the safety and operating instructions before using your device:
1.Do not open the device or attempt to repair or service the device.
2.Only use the included power adapter to power your device.
3. Ensure that the device is plugged into the wall in a vertical position, with the ports facing down.
4.The AC socket-outlet of equipment was intended to be connected with AC power supply cord only, and no any direct
plug-in equipment can be plugged.
5.Use the device in a dry location, and avoid placing it in humid environments.
6.Do not submerge the device in liquid or attempt to clean it with liquids or solvents. To clean the device, disconnect it
from the power outlet and use a damp towel.
7.Keep the device out of direct sunlight.
8.Do not cover or block the vents on the device.
9.Make sure that the device has adequate room for ventilation.
10. Avoid placing the device near a heater or radiator.
11. The device should be located only where sufficient ventilation can be ensured.
D-Link DCS-6045L User Manual
13
Section 2 - Installation
Installation
There are three ways to set up your camera:
Zero Configuration Setup: If you have a mydlink-enabled router, this is the easiest way to set up your camera. Refer
to page 15.
Camera Installation Wizard: If you do not have a mydlink-enabled router, use the Camera Installation Wizard to guide
you through setup and initial configuration of your camera. Refer to page 18.
Manual Hardware Installation: This section shows you how to manually set up your camera, though in order to use
the mydlink features of your camera, you will still need to run the Camera Installation Wizard. Refer to page 21.
D-Link DCS-6045L User Manual
14
Section 2 - Installation
Zero Configuration Setup
If you have a mydlink-enabled Cloud Router, you can take advantage of Zero Configuration. Zero Configuration automatically
configures your camera's settings for you, and adds it to your mydlink account automatically. This type of setup allows you to
set up your camera by simply plugging it in and connecting it to your router.
Connect your camera to your mydlink-enabled Cloud Router and Zero Configuration will automatically configure your DCS-6045L
and automatically add the camera to your mydlink account. After the short time it takes to do this you can remotely access
your camera from the www.mydlink.com website to manage and monitor your DCS-6045L.
Connect the PowerLine Adapter
DHP-308AV
Plug in the PowerLine adapter to a wall outlet. Connect an Ethernet cable
from the PowerLine adapter to your existing network.
Internet
Router
Connect the Camera
Plug in the camera power cord into the DCS-6045L. Move the power switch
to the ON position and wait for the PWR, PLC, and LNK to turn green. If you
have an existing PowerLine adapter, you will need to press and hold the PLC
button on the camera for 5 seconds. After the PLC LED on the camera begins
blinking, press the PLC button on your existing PowerLine adapter within the
next 60 seconds.
D-Link DCS-6045L User Manual
Green
15
Section 2 - Installation
Check Your mydlink Account
Open a web browser and login to your mydlink account. The mydlink page will
check for new devices and display a New Device Found! pop-up notification
in the bottom-left corner. Click the notification to continue.
A summary and confirmation notification will appear with the automatically
configured details. Make a note of the details and click Yes to add the camera
to your account.
DCS-6045L
D-Link DCS-6045L User Manual
16
Section 2 - Installation
Zero Configuration will navigate to the mydlink Live View tab for your camera
where you will see a screen similar to the following.
DCS-6045L
Your camera is now set up, and you can skip to “mydlink” on page 24 to learn
more about the mydlink features of this camera, or to “Configuration” on page
25 for advanced configuration of your camera.
D-Link DCS-6045L User Manual
17
Section 2 - Installation
Camera Installation Wizard
Windows Users
Insert the Installation CD-ROM into your computer’s optical drive to start the autorun program.
Simply click Set up your Cloud Camera to go through the Setup Wizard, which will guide you step-by-step through the
installation process from connecting your hardware to configuring your camera and registering it with your mydlink account.
Note: If the autorun program does not open, go to My Computer, browse to your CD drive,
and double-click on the autorun.exe file.
D-Link DCS-6045L User Manual
18
Section 2 - Installation
Mac Users
Insert the Installation CD-ROM into your computer’s optical drive. On the desktop, open your
CD drive and double-click on the SetupWizard file.
After about 20-30 seconds, the Setup Wizard will open, which will guide you step-by-step through the installation process
from connecting your hardware to configuring your camera and registering it with your mydlink account.
D-Link DCS-6045L User Manual
19
Section 2 - Installation
PLC - Push Button Setup
Alternatively, you may create a secure connection using the PLC Sync Button on the back of the camera.
To create a PLC connection:
Step 1
Make sure the camera is plugged in, then press and hold the PLC button for
three seconds. The green PLC status LED will start blinking.
Step 2
Press the PLC button on your PowerLine adapter within 60 seconds. The PLC
button is usually on the front or side. If you are not sure where the PLC button
is on your adapter, please refer to your adapter User Manual.
PLC Sync Button
The DCS-6045L will automatically create a secure connection to your
PowerLine adapter. While connecting, the green LED will flash and your
camera will reboot.
PLC Sync Button
D-Link DCS-6045L User Manual
20
Section 2 - Installation
Manual Hardware Installation
If you wish to set up your camera without using the Camera Setup Wizard, please follow these steps.
Note: In order to use the mydlink features of this product, you will need to go through the Camera Setup Wizard or Zero
Configuration Setup.
Connect the Camera
Plug in the camera power cord into the DCS-6045L. Move the power switch
to the ON position and wait for the PWR, PLC, and LNK to turn green. If you
have an existing PowerLine adapter, you will need to press and hold the PLC
button on the camera for 5 seconds. After the PLC LED on the camera begins
blinking, press the PLC button on your existing PowerLine adapter within the
next 60 seconds.
Green
Configure Your Camera
Refer to “Configuration” on page 25 for information on how to configure your
camera.
Use PLC to Connect
You can use PLC to connect your camera to your PowerLine adapter. For more
information, refer to “PLC - Push Button Setup” on page 20.
D-Link DCS-6045L User Manual
21
ENGLIS
Section 2 - Installation
mOUNTING TH
Mounting The Camera
Please refer to the steps below to assist you with mounting the camera. We suggest
that
you to
configure
the below
camerato
before
please
refer
the steps
assist you
mounting.
configure the camera before mounting.
Step 1:
Place the mounting bracket where you want to position the camera and
use a pencil to mark the holes.
Step 1:
place the m
and use a p
Step 2:
Depending on the material of the wall or ceiling, use proper tools to drill
two holes or screws where you placed the mounting sticker. If the wall is
made out of concrete, drill the holes first, insert the plastic anchors and
then the screws. The space between the camera and the screwheads should
be 3 mm.
Step 2:
Depending
drill two hol
the wall is m
anchors an
the screwhe
Step 3:
If desired, the camera power cord can be concealed behind the mounting
bracket. Run the cable through the back of the mounting bracket, securing
it with the built-in guides. Be sure to leave enough cable length protruding
from the top to allow connection to the camera.
Step 3:
If desired, t
mounting b
bracket, sec
cable length
camera.
D-Link DCS-6045L User Manual
Step 4:
22
Fasten the
camera.
Section 2 - Installation
Step 4:
Step 4:
Fasten the
Fasten the mounting bracket to the wall using the screws provided.
Step 5:
Using the supplied thumbscrew, fasten the camera to the mounting bracket.
Connect the camera power cord to the camera.
Step 6:
Adjust the angle of the arm on the mounting bracket as required. Tighten the
thumbscrew to lock the arm in place.
Step 5:
using the s
bracket. Co
Step 6:
adjust the a
tighten the
6
D-Link DCS-6045L User Manual
23
Section 2 - Installation
mydlink
After registering your DCS-6045L camera with a mydlink account in the Camera Installation Wizard, you will be able to remotely
access your camera from the www.mydlink.com website. After signing in to your mydlink account, you will see a screen similar
to the following:
DCS-6045L
For more details on using your camera with mydlink, go to the Support section of the mydlink website and check the User
Manual section for your product to find the latest instruction guide for your camera's mydlink features.
D-Link DCS-6045L User Manual
24
Section 3 - Configuration
Configuration
Using the Web Configuration Interface
After completing the Camera Installation Wizard, you are ready to use your camera. The camera’s built-in Web configuration interface is designed
to allow you to easily access and configure your DCS-6045L. At the end of the wizard, enter the IP address of your camera into a web browser, such
as Internet Explorer®. To log in, use the User name admin and the password you created in the Installation Wizard. If you did not create a password,
the default password is blank. After entering your password, click OK.
Note: If you are directly connecting your PC to the camera, or if you are using the camera on a closed network, the default IP is 192.168.0.20.
D-Link DCS-6045L User Manual
25
Section 3 - Configuration
Live Video
The Live Video screen shows you the live video feed from your camera. For information on how to configure your Live Video streams, refer to “Audio
and Video” on page 33.
Video Click the H.264 or MJPEG radio button to choose which stream to view.
Compression
Format:
Zoom: Click on these buttons to zoom in and out of the video.
Audio: Click on these buttons to turn audio playback on and off.
D-Link DCS-6045L User Manual
26
Section 3 - Configuration
Setup
Wizard
You may choose to configure your network by using the Internet Connection Setup
Wizard that includes step-by-step instructions. Otherwise, you may manually configure your
connection using the Manual Internet Connection Setup.
Note: To register your camera with mydlink and enable its mydlink-related features, you will
need to use the Camera Installation Wizard. Please refer to “Camera Installation Wizard” on
page 18 for more details.
D-Link DCS-6045L User Manual
27
Section 3 - Configuration
Internet Connection Setup Wizard
This wizard will guide you through a step-by-step process to configure your new D-Link
Camera and connect the camera to the Internet.
Click Next to continue.
Select what kind of Internet connection your camera should use:
• DHCP Connection (Default): If you are connected to a router, or are not sure which
connection to use, select DHCP Connection.
• Static IP Address: This will allow you to manually enter your network settings for the
camera. If you are not sure what settings to enter, check with your Internet service
provider or network administrator.
• PPPoE Connection: If your camera is directly connected to a DSL modem, you may
need to use PPPoE. Enter the username and password provided to you by your Internet
service provider.
Click Next to continue.
D-Link DCS-6045L User Manual
28
Section 3 - Configuration
If you have a Dynamic DNS account and would like the camera to update your IP address
automatically, select Enable and enter your host information. Otherwise, simply select
Disable.
Click Next to continue.
Enter a name for your camera. Click Next to continue.
Select the correct time zone to ensure that all events are triggered, captured, and scheduled
at the right time. Click Next to continue.
This page displays your configured settings. Click Apply to save and activate your changes,
or click Back to change your settings.
D-Link DCS-6045L User Manual
29
Section 3 - Configuration
Network Setup
This section allows you to configure your network settings.
DHCP Select this connection if you have a DHCP server running on your network
Connection: and would like a dynamic IP address to be updated to your camera
automatically.
Static IP You may obtain a static or fixed IP address and other network information
Address: from your network administrator for your camera. A static IP address will
ease you for accessing your camera in the future.
IP Address: The fixed IP address
Subnet Mask: The default value is “255.255.255.0.” Used to determine if
the destination is the same subnet.
Default Gateway: The gateway used to forward frames to destinations
in a different subnet. Invalid gateway settings may cause the failure of
transmissions to a different subnet.
Primary DNS: Primary domain name server that translates names to IP
addresses.
Secondary DNS: Secondary domain name server to backup the Primary
DNS.
PPPoE Settings: If you are using a PPPoE connection, enable it and enter the User Name
and Password for your PPPoE account. You can get this information from
your Internet service provider (ISP).
Port Settings: You may configure a Second HTTP port that will allow you to connect to
the camera via a standard web browser. The port can be set to a number
other than the default TCP ports 80. A corresponding port must be opened
on the router. For example, if the port is changed to 1010, users must type
http://192.168.0.100:1010 instead of only “http://192.168.0.100”.
UPnP Settings: Enable this setting to configure your camera as a UPnP device in the
network.
Bonjour: You can enable or disable Bonjour services. Bonjour provides a simple
way of sharing services on your camera to other clients on your network.
Bonjour Name: Enter a name that will be used with Bonjour to help identify your camera.
D-Link DCS-6045L User Manual
30
Section 3 - Configuration
DDNS
This section allows you to configure the DDNS setting for your camera. DDNS will allow all users to access your camera using a domain name instead
of an IP address.
Enable/Disable: Click to enable or disable the DDNS function.
Server Address: Select your Dynamic DNS Server from the pull down menu.
Host Name: Enter the host name of the DDNS server.
User Name: Enter your username or e-mail used to connect to the DDNS.
Password: Enter your password used to connect to the DDNS server.
Timeout: You can set a refresh timeout by entering the number of hours before the
current DDNS session will expire.
D-Link DCS-6045L User Manual
31
Section 3 - Configuration
Image Setup
This section allows you to configure the image settings for your camera.
Enable Anti If you have lights flickering in your camera video, try enabling anti flicker.
Flicker: Otherwise, you should leave this disabled.
Flip Image: Select this box to vertically flip the video.
Mirror: Horizontally flip the video.
Note: If the camera is installed upside down, Flip Image and Mirror should
both be checked
Brightness Allows you to adjust the brightness level.
Control:
Contrast Allows you to adjust the contrast level.
Control:
Saturation Allows you to adjust the saturation level.
Control:
Light Select the frequency used by your lighting and power to help reduce
Frequency: image flicker.
D-Link DCS-6045L User Manual
32
Section 3 - Configuration
Audio and Video
This section allows you to configure the audio and video settings for your camera.
Note: Please wait a few seconds for the camera to adjust the audio after making changes.
Video Profile: This section allows you to change the Resolution, FPS, and Quality.
Encode Type: Your camera has separate settings for the H.264 and MJPEG video streams.
Resolution: Select the desired video resolution from three formats: 1280 x 720, 640 x 480,
and 320 x 240.
Bit Rate: Higher settings offer better quality, but will require more bandwidth to stream.
Frame Rate: Select the frame rate(FPS) to use for the video stream. Higher settings offer
better quality, but will require more bandwidth to stream.
JPEG Quality: Select one of five levels of image quality: Highest, High, Medium, Low, and
Lowest.
Default View Select the default encoding to use when viewing your video on the Live Video
Mode: page.
Day/Night Mode: If Auto is selected, the camera will automatically switch between day and night
mode. If Manual is selected, you can select Day Mode or Night Mode from
the Live Video page. Always Day Mode or Always Night Mode will cause the
camera to only operate in that mode. Day Mode Schedule will allow you to
specify periods of time when the camera should be in Day Mode, otherwise it
will operate in Night Mode.
Microphone: You can enable or disable the onboard camera microphone by checking this
option.
Volume: If the microphone option is enabled, you can set the volume of the microphone
by selecting an option from the dropdown menu.
D-Link DCS-6045L User Manual
33
Section 3 - Configuration
Time and Date
This section allows you to configure the settings of the internal system clocks for your camera.
Time Zone: Select the time zone for your region from the drop down menu.
Synchronize Enabling this will allow the camera to update its clock automatically from
NTP Server: an NTP server. Select the NTP server closest to you, and select whether
you want to apply daylight saving corrections.
Set the Date If Synchronize NTP Server is disabled, you can set the date and time
and Time manually. You can also click on the Copy Your Computer’s Time Settings
Manually: to automatically set the date and time based on your computer’s settings.
D-Link DCS-6045L User Manual
34
Section 3 - Configuration
Mail
This section allows you to configure your camera to send snapshots and video clips to an e-mail address. If you are not sure what settings to use,
check with your e-mail service provider.
SMTP Server This is the domain name or IP address of your external e-mail server.
Address:
SMTP Server If your e-mail server uses a non-standard port, you can enter it here.
Port:
Sender e-mail This is the e-mail address listed as the sender for your notification e-mails.
Address:
Receiver e-mail This is the e-mail address that your notification e-mails will be sent to.
Address:
User Name: If the SMTP server uses authentication, enter your user name.
Password: If the SMTP server uses authentication, enter your password.
Use SSL-TLS/ If your e-mail server requires a secure authentication connection, you can
STARTTLS: select the type of authentication by choosing either SSL-TLS or STARTTLS.
D-Link DCS-6045L User Manual
35
Section 3 - Configuration
Enable the Enabling this will allow snapshots to be e-mailed to you in different ways:
e-mailing of
images to an
• Choosing Always will e-mail snapshots continuously based on the
e-mail account:
E-mail Interval specified.
• Choosing Schedule will allow you to schedule when to start and
stop the e-mailing of snapshots.
• Select Motion/Sound Detection if you would like the camera to
e-mail images only when motion or sound is detected. You can
choose whether to e-mail a snapshot immediately, or e-mail 6
snapshots together, with 3 frames before and after motion/sound
was detected. You can also set the Frame interval time to specify
how far apart the snapshots should be.
E-mail Interval: This sets the limit for how frequently e-mail notifications will be sent. This
can be set from 1 to 65535 seconds.
Enable the Enabling this will allow video clips to be e-mailed to you in different ways.
e-mailing of This is the same as e-mailing images, as specified above, but will take video
video clips clips according to the Video Limit settings you specify.
to an e-mail
account:
Test E-mail This will send a test e-mail according to the e-mail settings you have
Account: specified above.
D-Link DCS-6045L User Manual
36
Section 3 - Configuration
FTP
This section allows you to configure your camera to send snapshots and video clips to an FTP server.
Host Name: Enter the IP address of the FTP server that you will be connecting to.
Port: Enter the port of the FTP server that you will be connecting to.
User Name: Enter the user name of your FTP server account.
Password: Enter the password of your FTP server account.
Path: Enter the destination path/folder to save files to on the FTP server.
Passive Mode: Enabling passive mode may help you reach your FTP server if your camera
is behind a router protected by a firewall.
Enable the Enabling this will allow snapshots to be uploaded in different ways:
uploading of
images to an
• Choosing Always will upload snapshots continuously based on
FTP server:
the Image Frequency specified.
• Choosing Schedule will allow you to schedule when to start and
stop the uploading of snapshots.
• Select Motion/Sound Detection if you would like the camera to
upload images only when motion or sound is detected.
Image Set how frequently you want images to be taken and uploaded. You can
Frequency: choose to upload by frames per second, or by seconds per frame.
Base File Name: Set what you want the base file name to be for your snapshots.
D-Link DCS-6045L User Manual
37
Section 3 - Configuration
File: Select how you want uploading of snapshots to be handled:
• Overwrite will replace the old snapshot with the new one. This
means you will only have one snapshot that is updated every time
a new one is taken.
• Date/Time Suffix will add the date and time to the end of the
snapshot file name. You can also choose to make subfolders
based on a period of time you specify to help you organize your
snapshots.
• Sequence Number Suffix will add a number to the end of the
snapshot file name up to the number you specify, after which the
oldest files will be overwritten.
Test FTP Server: Clicking on the Test button will send a test JPEG snapshot to the FTP server
specified above to make sure that your settings are correct.
This will send a test e-mail according to the e-mail settings you have
specified above.
D-Link DCS-6045L User Manual
38
Section 3 - Configuration
SD Recording
This option allows you to configure and set a schedule for the recording feature of the camera to the local SD Card.
Enable recording Check this box to enable the recording feature for images.
of images to SD
card:
Trigger by: Select whether the event is activated by Motion, Schedule, or if the video is Always
recording.
Always: This will enable continuous recording to the SD card.
Schedule: Click day and time for SD recording during a specified time.
Motion/Sound Enables SD recording after motion or sound is detected.
Detection:
Recording Interval: You can set the interval of time in seconds the camera will wait for taking snapshots
when it is recording.
SD Card: You can set how much free space to keep in SD card and if recording should be
done cyclically or not.
Keep Free Space: Set the capacity of your local SD Card to prevent the system from becoming
unstable.
Cyclic: When this option is selected, it will cause the oldest image files to be deleted when
the system requires storage space for new image files.
Click Save Settings to save your changes.
D-Link DCS-6045L User Manual
39
Section 3 - Configuration
Enable recording Check this box to enable the recording feature for video.
of video clip to SD
card:
Trigger by: Select whether the event is activated by Motion, Schedule, or if the video is Always
recording.
Always: This will enable continuous recording to the SD card.
Schedule: Click day and time for SD recording during a specified time.
Motion/Sound Enables SD recording after motion or sound is detected.
Detection:
File Format: You can select recording type for video. Video profile options are found under the
Audio and Video setup tab).
Recording Length: You can set the recording time in minutes per file by selecting an option from the
dropdown menu. The camera will create individual files of the selected length
anytime the camera is actively recording.
SD Card: You can set how much free space to keep in SD card and if recording should be
done cyclically or not.
Keep Free Space: Set the capacity of your local SD Card to prevent the system from becoming
unstable.
Cyclic: When this option is selected, it will cause the oldest snapshot/video files to be
deleted when the system requires storage space for new snapshot/video files.
Test SD Card: You can test the the SD card by clicking on the Test button. This will write a small
file to the card.
Click Save Settings to save your changes.
D-Link DCS-6045L User Manual
40
Section 3 - Configuration
Motion Detection
Motion detection allows you to mark areas of your camera’s video to monitor for motion, which can be used to trigger snapshots or recordings.
Refer to “Mail” on page 35 and “FTP” on page 37 for more details.
Motion Select whether you want to enable or disable the motion detection feature
Detection: of your camera.
Time: Specify whether you want to Always have motion detection enabled, or
according to a Schedule that you define.
Sensitivity: Specify the amount of difference required to determine whether there
was motion.
Detection Use your mouse to click on the areas of the video that you would like to
Areas: monitor for motion.
D-Link DCS-6045L User Manual
41
Section 3 - Configuration
Sound Detection
Sound detection allows you to detect when there is a loud sound in the area, which can be used to trigger snapshots or recordings. Refer to “Mail”
on page 35 and “FTP” on page 37 for more details.
Sound Select whether you want to enable or disable the sound detection feature
Detection: of your camera.
Time: Specify whether you want to Always have motion detection enabled, or
according to a Schedule that you define.
Detection Specify the volume level that a sound must exceed in order to be “detected”.
Level:
D-Link DCS-6045L User Manual
42
Section 3 - Configuration
SD Management
Here you may browse and manage the recorded files which are stored on the SD card.
If your SD card is not available or not formatted correctly, you camera will not list any
pictures or videos, or display “SD Status : Not Ready”. If you insert a new SD card, you may
need to reboot the camera in order for it to recognize the newly inserted media.
View Recorded If the picture files are stored on the SD card, click on the Picture link and
Picture: choose the picture file you would like to view.
Playback If video files are stored on the SD card, click on the Video link and choose
Recorded Video: the video file you would like to view.
Refresh: Reloads the file and folder information from the SD card.
Format SD Card: Click this icon to automatically format the SD card and create “picture” &
“video” folders.
D-Link DCS-6045L User Manual
43
Section 3 - Configuration
Maintenance
Admin
This section allows you to change the administrator’s password and configure the server settings for your camera. You can also manage the user
account(s) that are allowed to access to your camera.
Admin To change the admin password used to log into the web interface, enter
Password the old password, then enter the new password and retype it in the next
Setting: text box, then click Apply.
Camera Name: Specify a name for your camera
LED Control: Select Normal to enable the LED on the front of the device, or select Off
to disable the LED. Turning this off may be useful if you do not want the
camera to be noticeable.
User Access Select Enable to enable user access control or Disable to allow only the
Control: administrator account to access the camera.
Snapshot URL Select Enable to allow access to the current camera snapshot via the web
Authentication: address indicated.
OSD Time: Select Enable to allow the current time to be added to the camera video,
and select a color to use for the text.
Add User You can create new users to provide viewing access for your camera’s
Account: video. User accounts will only be able to access the Live Video section
of the web configuration interface, but cannot access any other parts or
change any settings.
To create a new user, enter a user name, password, and retype the
password, then click Add. A maximum of 8 user accounts can be created.
User List: Displays the account names of authorized users. You can modify or delete
an account by clicking on its modify or delete icon.
D-Link DCS-6045L User Manual
44
Section 3 - Configuration
System
This section allows you to save and restore your configuration, restore the factory settings, and/or restart the camera.
Save To Local Click the Save Configuration button to save the current camera
Hard Drive: configuration to your local PC.
Load From To load a previously saved configuration, click the Browse... button, select
Local Hard your saved configuration file, then click the Restore Configuration From
Drive: File button.
Restore Click the Restore Factory Defaults button to reset all settings back to
To Factory the factory defaults. Please note that this will erase any changes you have
Default: made to the settings of the camera.
Reboot The Click the Reboot the Device button to reboot the camera.
Device:
D-Link DCS-6045L User Manual
45
Section 3 - Configuration
Firmware Upgrade
Your current firmware version and date will be displayed on your screen. You may go to the D-Link Support Page to check for the latest firmware
versions available.
To upgrade the firmware on your DCS-6045L, download the latest firmware from the D-Link
Support Page to your local hard drive. Click the Browse... button and select the firmware
file, then click the Upload button to start the firmware upgrade.
Warning: The firmware upgrade process must not be interrupted or the camera may be
damaged. When upgrading firmware, do not unplug the camera or your PC or close your web
browser until the process is complete. It is also highly recommended that you use a wired
connection for your camera and PC when upgrading firmware.
D-Link DCS-6045L User Manual
46
Section 3 - Configuration
Status
Device Info
This section displays all the detailed information about your device and network settings.
D-Link DCS-6045L User Manual
47
Section 3 - Configuration
Active User
This page lists all the active users’ information including the User Name, IP address, and the time that camera access began.
D-Link DCS-6045L User Manual
48
Section 4 - Troubleshooting
Troubleshooting
1. What is Remote Access? How do I enable it?
Remote Access allows you to access your camera from any PC connected to the Internet through a web browser. This lets you view your camera
feed and manage your camera’s settings when you’re away from home.
To enable Remote Access, simply go through the Camera Installation Wizard included on the Installation CD that came in your package.
After going through the wizard, you should see Remote Status: Enabled on the summary page.
If you see Remote Status: Disabled, make sure that:
...the front LED on your camera is lit solid green
...your Internet connection is working
...your router’s LAN & WAN connections are working properly
...your router has UPnP enabled (if your router does not support UPnP, please refer to Appendix A)
...your router can get a public IP
...your router is upgraded to the latest firmware
...you have tried rebooting your router by unplugging it, then plugging it back in
After checking the above items, you can click the Retry button to refresh the summary screen to see if Remote Access has been enabled.
2. What can I do if I forget my password?
If you forget your password, you will need to perform a hard reset of your camera. This process will change all your settings back to the factory
defaults.
To reset your camera, please use an unfolded paperclip to press and hold the RESET button for at least 10 seconds while your camera is plugged in.
3. Why does the LED not light up?
The power supply might be faulty. Confirm that you are using the provided DC 5V power supply for this network camera. Verify that the power
D-Link DCS-6045L User Manual
49
Section 4 - Troubleshooting
supply is correctly connected. If the camera is functioning normally, the LED may have been disabled. See “Admin” on page 44 for information about
how to enable the LED.
4. Why is the camera’s network connection unreliable?
There might be a problem with the network cable. To confirm that the cables are working, ping the address of a known device on the network. If
the cabling is OK and your network is reachable, you should receive a reply similar to the following (…bytes = 32 time = 2 ms).
Another possible problem may be that the network device such as a hub or switch utilized by the Network Camera is not functioning properly.
Please confirm the power for the devices are well connected and functioning properly.
5. Why does the Network Camera work locally but not remotely?
This might be caused by the firewall protection. Check the Internet firewall with your system administrator. The firewall may need to have some
settings changed in order for the Network Camera to be accessible outside your local LAN. For more information, please refer to the section about
installing your camera behind a router.
Make sure that the Network Camera isn’t conflicting with any Web server you may have running on your network.
The default router setting might be a possible reason. Check that the configuration of the router settings allow the Network Camera to be accessed
outside your local LAN.
6. Why does a series of broad vertical white lines appear through out the image?
It could be that the image sensor has become overloaded when it has been exposed to bright light such as direct exposure to sunlight or halogen
lights. Reposition the camera into a more shaded area immediately, as prolonged exposure to bright lights will damage the sensor.
7. The camera is producing noisy images. How can I solve the problem?
The video images might be noisy if the camera is used in a very low light environment.
8. The images are poor quality, how can I improve the image quality?
Make sure that your computer’s display properties are set to at least 6-bit color. Using 16 or 256 colors on your computer will produce dithering
D-Link DCS-6045L User Manual
50
Section 4 - Troubleshooting
artifacts in the image, making the image look as if it is of poor quality.
You may also need to check your image settings to make sure the brightness, contrast, and other settings are set properly. For more, refer to”Image
Setup” on page 32.
9. Why are no images available through the Web browser?
ActiveX might be disabled. If you are viewing the images from Internet Explorer make sure ActiveX has been enabled in the Internet Options menu.
You may also need to change the security settings on your browser to allow the ActiveX plug-in to be installed.
If you are using Internet Explorer with a version number lower than 6, then you will need to upgrade your Web browser software in order to view
the streaming video transmitted by the Network Camera.
D-Link DCS-6045L User Manual
51
Technical Specifications
Technical Specifications
SYSTEM REQUIREMENTS
• Microsoft Windows® 8/7/Vista/XP, or Mac with OS X 10.6 or higher
• PC with 1.3 GHz or above and at least 128 MB RAM
• Internet Explorer 7, Firefox 12, Safari 6, or Chrome 20 or higher
version with Java installed and enabled
NETWORKING PROTOCOL
• IPV4, ARP, TCP, UDP, ICMP
• DHCP Client
• NTP Client (D-Link)
• DNS Client
• DDNS Client (Dyndns and D-Link)
• SMTP Client
• FTP Client
• HTTP Server
• PPPoE
• UPnP Port Forwarding
BUILT-IN PROTOCOL
• HomePlug AV
RESET BUTTON
• Reset to factory default
VIDEO CODECS
• H.264
• MJPEG
• JPEG for still images
VIDEO FEATURES
• Adjustable image size and quality
• Time stamp and text overlay
D-Link DCS-6045L User Manual
• Configurable motion detection windows
• Flip and Mirror
• Pre-event snapshot
RESOLUTION
• 1280 x 720, 640 x 480, 320 x 240 at up to 30 fps
LENS
• Focal length: 3.3 mm, F2.0
SENSOR
• 1/4” 1 MP Progressive CMOS Sensor
IR LED
• 6 meter illumination distance
MINIMUM ILLUMINATION
• Color: 1 lux @ F2.0 (Day)
• B/W: 0 lux @ F2.0 (Night)
VIEWING ANGLE
• Horizontal: 68.88°
• Vertical: 37.85°
• Diagonal: 79.77°
DIGITAL ZOOM
• Up to 4x
3A CONTROL
• AGC (Auto Gain Control)
• AWB (Auto White Balance)
• AES (Auto Electronic Shutter)
52
Technical Specifications
POWER
• Input: 100-240 V AC, 50/60 Hz
DIMENSIONS (W X D X H)
• 113 x 114 x 139 mm
WEIGHT
• 262 grams (without stand)
• Stand: 60.8 grams
MAX POWER CONSUMPTION
• 8 W
OPERATION TEMPERATURE
• 0 ˚C to 40 ˚C (32 ˚F to 104 ˚F)
STORAGE TEMPERATURE
• -20 ˚C to 70 ˚C (-4 ˚F to 158 ˚F)
HUMIDITY
• 20-80% RH non-condensing
EMISSION (EMI), SAFETY & OTHER CERTIFICATIONS
• FCC Class B
• IC
• C-Tick
• CE
D-Link DCS-6045L User Manual
53


