1
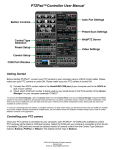
Rocosoft PTZJoy™ THD STUDIO Controller User Manual VISCA PTZ Camera Control Software for TriCaster™ and Livestream™ Sony Vaddio HuddleCam HD PTZOptics Minnray Lumens Datavideo All other VISCA protocol PTZ cameras Rocosoft PTZJoy THD STUDIO Controller User Manual 2 TABLE OF CONTENTS PROGRAM INTERFACE ............................................................................................................................................... 3 GETTING STARTED ..................................................................................................................................................... 4 CONTROLLING YOUR PTZ CAMERA ............................................................................................................................. 4 VIRTUAL JOYSTICK CONTROL ......................................................................................................................................... 4 USB JOYSTICK CONTROL .............................................................................................................................................. 5 CALIBRATING YOUR JOYSTICK .............................................................................................................................................5 USING YOUR JOYSTICK ......................................................................................................................................................6 JOYSTICK SHORTCUTS .......................................................................................................................................................6 ZOOMING WITH GAMING JOYSTICK .....................................................................................................................................9 SOFT JOYSTICK MODE .......................................................................................................................................................9 PTZ PAD CONTROL .................................................................................................................................................. 10 KEYBOARD HOTKEYS ................................................................................................................................................. 10 CONNECTING MUPLIPLE CAMERAS .......................................................................................................................... 10 HOME RUN CONNECTION .......................................................................................................................................... 10 HOW TO CONNECT .........................................................................................................................................................10 DAISY-CHAIN CONNECTION ........................................................................................................................................ 11 HOW TO CONNECT .........................................................................................................................................................11 NAMING CAMERAS IN DAISY-CHAIN MODE .........................................................................................................................11 WORKING WITH PRESETS ........................................................................................................................................ 11 SETTING AND RECALLING PRESETS ................................................................................................................................ 11 PRESET SCAN .......................................................................................................................................................... 12 USING THE WEB REMOTE ........................................................................................................................................ 12 USING THE SCHEDULE EVENT PLAYER....................................................................................................................... 13 HOW TO CREATE AN EVENT SCHEDULE .......................................................................................................................... 13 USING THE TIMELINE PLAYER ................................................................................................................................... 14 HOW TO CREATE A TIMELINE EVENT ............................................................................................................................. 14 ADDITIONAL CONTROL SETTINGS ............................................................................................................................ 14 ADDITIONAL VIDEO SETTINGS ................................................................................................................................. 15 2012-2015 Rocosoft. All rights reserved. Rocosoft.com Email Us: [email protected] Rocosoft PTZJoy THD STUDIO Controller User Manual *PTZJoy THD STUDIO THD STUDIO Controller has 4 control panels. By default, PTZJoy THD STUDIO opens with only the first panel visible. The second control panel can be opened and closed by clicking on the “Plus” and “Studio” buttons. 2012-2015 Rocosoft. All rights reserved. Rocosoft.com Email Us: [email protected] 3 Rocosoft PTZJoy THD STUDIO Controller User Manual 4 GETTING STARTED Before starting PTZJoy THD STUDIO THD STUDIO, connect your PTZ camera to your live production system (“system”) using a VISCA Control cable. Please make sure your PTZ camera is turned ON. 1) Connect the VISCA control cable to the Serial/USB COM port of your system and to the VISCA In jack of your camera. 2) Check which COM port number is being used by your serial device in the Ports section of the Device Manager* on your system (example: COM2)**. *To access the Device Manager, open the System folder from your Control Panel, and click on Device Manager. Expand the Ports section to view your active COM ports and double check that there are no yellow exclamation marks. If you see a yellow exclamation mark next to any of your COM ports, you will need to fix this issue. If there are no yellow exclamation marks, these ports are active and available to control cameras. ** If you are connecting only one camera, or multiple cameras in a daisy chain mode, you will need to know only one COM port number. If you have multiple cameras connected to multiple ports, you will need to know the COM port numbers being used in order to switch between cameras in the application. CONTROLLING YOUR PTZ CAMERA Once the PTZ camera is connected to your system, open PTZJoy THD STUDIO. If using a TriCaster system, PTZJoy THD STUDIO will automatically launch the TriCaster application and you can begin controlling your PTZ cameras from your system. All COM ports available to control PTZ cameras will be listed in COM port window. Select the COM port your camera is connected to from the list of available COM ports and choose the desired method of camera control from the Control Type Selection buttons: VirJoy, PTZPad, USBJoy, or KBoard. The default Control Type is VirJoy. VIRTUAL JOYSTICK CONTROL 1) Using your system mouse, click on any point on the virtual joystick and drag your system mouse in the direction you want to move your selected camera*. 2) To activate the Zoom In and Zoom Out feature, click and drag the Zoom Lever with your system mouse up to zoom in and down to zoom out*. 3) Adjust the focus of the camera but clicking and dragging the Focus Lever with your system mouse up to focus near, and down to focus far*. Click on the Auto button to auto focus the camera. *Regulate the speed of the pan, tilt, and zoom movements by the movement of the system mouse relative to the center point of the virtual controls - called the zero point, at which the speed is zero. The speed of pan and tilt movements is determined by they location of the mouse relative to the center point of the virtual joystick; the speed of the zoom in and out movement is determined by the location of the mouse relative to the center point of the zoom lever. The further away from the zero point of the virtual joystick or zoom lever that you move the mouse, the quicker the camera will rotate. The closer the mouse is to the zero point of the virtual joystick or zoom lever, the slower the camera will rotate. 2012-2015 Rocosoft. All rights reserved. Rocosoft.com Email Us: [email protected] Rocosoft PTZJoy THD STUDIO Controller User Manual 5 USBJOY JOYSTICK CONTROL We recommend checking if your cameras work with our Virtual Joystick first before trying to connect a USB Joystick. 1) Connect your joystick controller to an available USB port on your system and wait until your system initializes it. 2) Follow instructions below to calibrate your joystick. CALIBRATING YOUR JOYSTICK Calibrating your joystick controller will help the joystick work more accurately with the PTZJoy THD STUDIO application by finding the exact zero point and peripheral borders of the controller. 1) Open Control Panel open Devices and Printers 2) You should see a screen showing available devices: 3) Find your Joystick Controller and right click on the icon. Select Game Controller Settings. Highlight the controller you wish to calibrate and select Properties. 2012-2015 Rocosoft. All rights reserved. Rocosoft.com Email Us: [email protected] Rocosoft PTZJoy THD STUDIO Controller User Manual 6 4) To start the calibration process, select Calibrate under the Settings tab to initiate the Device Calibration Wizard: USING YOUR JOYSTICK Once your joystick is connected and calibrated, you can begin using it to control your connected PTZ cameras. 1) Click on the USBJoy Button. 2) Move your USB joystick in the desired direction to control your camera. Regulate the speed of the pan and tilt movements by the movement of the joystick relative to its center point, or zero point. The further you move the joystick away from it’s zero point, the quicker the camera will rotate. USING THE BUTTON SHORTCUTS ON YOUR JOYSTICK All USB joysticks are different, but most of them have special shortcut buttons that can be assigned specific commands. This is a list of the PTZJoy THD STUDIO pre-assigned functions for buttons on a USB joystick: Button # 1 2 3 4 5 6 7 Function Zoom In Zoom Out Previous Camera Next Camera Previous Preset Next Preset Call Preset 2012-2015 Rocosoft. All rights reserved. Rocosoft.com Email Us: [email protected] Rocosoft PTZJoy THD STUDIO Controller User Manual Here are some examples of different button locations for several common joysticks: 2012-2015 Rocosoft. All rights reserved. Rocosoft.com Email Us: [email protected] 7 Rocosoft PTZJoy THD STUDIO Controller User Manual 8 Your joystick may have a different button layout. To check your joystick’s button layout: 1) Open Control Panel open Devices and Printers 2) Find your Joystick Controller and right click on the icon. Select Game Controller Settings. Select your USB joystick from the list and click on Properties. 3) Select the Test tab. Press the buttons on your joystick and take note of which numbers light up under the Buttons section in this window. Once you know which buttons on your joystick correspond to a specific number, refer to our command table to see a list of functions and their corresponding buttons. 2012-2015 Rocosoft. All rights reserved. Rocosoft.com Email Us: [email protected] Rocosoft PTZJoy THD STUDIO Controller User Manual 9 CONTROLLING ZOOM FUNCTION ON A GAMING PTZ JOYSTICK If using a gaming joystick with a zoom lever, you can use this lever for controlling the zoom function with variable speeds. Since gaming joystick levers do not have a center, or zero, position like professional joystick levers do, they will not return to the zero position when you release the lever – it has to be done manually. You must manually find a zero position on you gaming joystick and always start the program with the lever in that position. By doing this, you will have full zoom control with variable speed of your camera. 1) Start PTZJoy THD STUDIO with the joystick’s lever in roughly the middle position. 2) Move the zoom lever up and down to zoom in and out to find the point where you can completely stop the zoom. This is your zero point. 3) Restart PTZJoy THD STUDIO with the lever in zero position. Your joystick is now configured to use the zoom lever with a zero point. 4) You can now regulate the speed of the zoom by the movement of the zoom lever relative to its zero point. The further you move the lever away from it’s zero point, the quicker the camera will zoom in and out. To stop the zoom, you must move the zoom lever back to the zero point. SOFT JOYSTICK MODE This mode allows for slower, more precise movements of the camera while using the Virtual or USB joystick. Click on the Soft Mode button to switch to Soft Joystick Mode. 2012-2015 Rocosoft. All rights reserved. Rocosoft.com Email Us: [email protected] Rocosoft PTZJoy THD STUDIO Controller User Manual 10 PTZPAD CONTROL This mode allows you to control your PTZ camera using precise directional buttons. 1) Activate this feature by clicking on the PTZPad button in the application. 2) Control your cameras by clicking on the directional buttons to move your camera in the corresponding direction. KEYBOARD HOTKEYS Control pan/tilt/zoom/focus functions, change speed settings, call on presets, and switch cameras using preassigned shortcuts or “hotkeys” on any standard keyboard. This is a diagram of the PTZJoy THD STUDIO preassigned keyboard hotkeys: CONNECTING MULTIPLE CAMERAS HOME RUN CONNECTION In a home run connection, multiple cameras are connected to different USB/Serial ports on one system and each camera is controlled through a separate COM port. HOW TO CONNECT: 1) Connect your cameras to the USB/Serial ports of your system using Serial/USB VISCA cables (described in detail in the Getting Started section). 2) Check which COM port numbers are being used by your cameras in the Ports section of the Device Manager. 3) Switch between cameras in the application by selecting the COM port number of the camera you wish to control from the list of active COM ports. Note: In Home Run Mode you can connect as many cameras as there are USB/Serial ports. 2012-2015 Rocosoft. All rights reserved. Rocosoft.com Email Us: [email protected] Rocosoft PTZJoy THD STUDIO Controller User Manual 11 DAISY-CHAIN CONNECTION In a daisy chain connection, the first camera is connected to a USB port/Serial port of your system and additional cameras are “daisy-chained” to the first camera using daisy chain cables. In this configuration, multiple cameras can be controlled through one COM port. HOW TO CONNECT: 1) Connect your first camera to the USB/Serial port of your system using a USB/Serial VISCA cable. 2) Connect additional cameras to the first camera with daisy chain cables. 3) Switch between cameras in the application with the plus and minus camera selection buttons. Note: You can Daisy Chain up to 7 Sony per COM port. Additional Daisy Chain connections can be added to additional available USB/Serial ports. NAMING CAMERAS IN DAISY CHAIN MODE Easily distinguish between multiple cameras by naming your connected cameras. 1) In the Camera Setup section, select the number of the camera you wish to name. 2) Type in the desired name for the camera in the camera name window, open the “Settings” Window, and click Save next to the camera section. Repeat for all cameras connected in the daisy chain. 3) Once all cameras are named, you can switch between cameras by selecting the camera from the list of camera number buttons and see which camera is currently chosen by name. WORKING WITH PRESETS SETTING AND RECALLING PRESETS 1) Use the Preset Selection Buttons to select the preset number you wish to set up for the selected camera. 2) Move your camera in the desired position, type the desired name for the preset in the preset name window, and click Save. 3) Repeat for up to 16 presets. 4) Recall on a preset by clicking on the desired preset number from the Preset Selection Buttons. The current preset number and name will appear on the screen. 5) If using your USB Joystick to select presets, the current preset number and name will also appear on the screen. 2012-2015 Rocosoft. All rights reserved. Rocosoft.com Email Us: [email protected] Rocosoft PTZJoy THD STUDIO Controller User Manual 12 PRESET SCAN Ideal for security applications, the Preset Scan feature allows you to command a selected camera to scan between presets at a specified time interval. Presets must already be configured. 1) Click Preset Scan to start the scan cycle. Click it again to stop it. 2) Adjust the time interval between the presets with the cycle slider. USING THE PTZ WEB REMOTE Control PTZ cameras connected to the Main Controller from the web browser of any mobile device over any LAN, Wi-Fi, and WAN IP network. Use it as a far-end controller to switch between cameras, control pan, tilt, zoom, and focus, change the speed settings of camera movements, and call on presets. 1) Turn ON Web Control access on the Main Controller. 2) The default port for Web Control is 80 and the current IP Address and access information of the Main Controller can be found by clicking on the About button. You can add security to the connection by changing the Web Control port number on the Main Controller. 3) Open the web browser on your mobile device and type in the IP Address of the Main Controller (see About) into the URL Bar on your mobile device. 2012-2015 Rocosoft. All rights reserved. Rocosoft.com Email Us: [email protected] Rocosoft PTZJoy THD STUDIO Controller User Manual 13 4) The WebRemote will appear in the web browser of your mobile device and you can now control the PTZ cameras connected to the Main Controller.* The WebRemote will appear full size in your web-browser – if you are using a system, you can resize the WebRemote to a more convenient-to-use size by simply changing the zoom settings in the browser. 5) The Camera Status Display will show relevant information such as which camera is being controlled, which presets position is active, the pan, tilt, and zoom speed, and focus mode. *Control cameras using the WebRemote from a device outside of your local area network by configuring your router and opening ports to accept outside signals. Once your router is configured, you can open a web browser on any device and type in the IP Address of the Main Controller and control your camera. USING THE SCHEDULE EVENT PLAYER Create play lists for pre-determined control of your camera(s). Use this feature to create schedules for your cameras to run presets, move in a specific direction at a specific speed, turn on and off, and execute other specific commands. Commands available for scheduling: Presets Directional movements with variable speeds – Left, Right, Up, Down, Up-Left, Up-Right, Down-Left, Down-Right Zoom In and Out with variable speeds Power On/Off Backlight On/Off White Balance On/Off Manual Focus Auto Focus Night Mode On/Off Camera Freeze On/Off Video Mute On/Off Negative Image On/Off B/W Image On/Off HOW TO CREATE EVENT SCHEDULE 1) 2) 3) 4) 5) 6) Input the time you want this even to occur. Select the camera you wish to create and event for from the drop down menu. Select the desired command from the drop down menu. Click Add to Playlist. Repeat for as many events you want to add to your playlist and click Save Playlist. Click on Open Playlist to run your saved playlist. 2012-2015 Rocosoft. All rights reserved. Rocosoft.com Email Us: [email protected] Rocosoft PTZJoy THD STUDIO Controller User Manual 14 You can edit the events on any playlist, add and delete playlists, and schedule playlists to play on specific days of the week. USING THE TIMELINE PLAYER Create playlists for predetermined control of your cameras that play on a timeline from a starting point. Commands available for scheduling: Presets Directional movements with variable speeds – Left, Right, Up, Down, Up-Left, Up-Right, Down-Left, Down-Right Zoom In and Out with variable speeds Power On/Off Backlight On/Off White Balance On/Off Manual Focus Auto Focus Night Mode On/Off Camera Freeze On/Off Video Mute On/Off Negative Image On/Off B/W Image On/Off HOW TO CREATE A TIMELINE EVENT 1) Using the plus (+) and minus (-) buttons, select how many seconds, minutes, or hours from the moment the timer starts that you wish to execute a specific command. 2) Select the camera you wish to create an event for from the drop down menu. 3) Select the desired command from the drop down menu. 4) Click Add to Timeline. 5) Repeat for as many events you want to add to your timeline playlist and click Save Timeline.. 6) Click on Open Timeline to run your saved playlist and click on the Play button to start playing timeline. You can add, edit, or delete the events on any timeline playlist. You can run the timeline playlist on repeat by clicking on the Loop button. ADDITIONAL CONTROL SETTINGS Minimize to Taskbar: Minimizes program to taskbar for quick access Start with Windows: Configure program to automatically start with Windows Startup. 1) Click on the Windows Logo Button to activate this feature 2012-2015 Rocosoft. All rights reserved. Rocosoft.com Email Us: [email protected] Rocosoft PTZJoy THD STUDIO Controller User Manual 15 2) Restart the system. 3) The program should start with Windows automatically. 4) If it does not start automatically, right click on the PTZJoy THD STUDIO program loader file and click “Run as Administrator”. Click on the Windows Logo Button in the program again, close the program, and restart your system. Pan, Tilt, Zoom Flip: The P-Flip, T-Flip and Z-Flip buttons inverse the Pan, Tilt, and Zoom directions of a selected camera. Camera ON/OFF: Turns selected camera ON or OFF Camera Initiation: Allows you to add or remove cameras in a Daisy Chain connection without restarting all cameras. Auto-Pan 1) Click Auto Pan to start the pan cycle. Click it again to stop it. 2) Adjust the length of the pan cycle with the cycle slider bar. ADDITIONAL VIDEO SETTINGS One Push Auto Focus: ON/OFF Tally Light: ON/OFF Video Mute: ON/OFF Negative Image: ON/OFF Black/White Image: ON/OFF Mirror Image: ON/OFF Image Freeze: ON/OFF Video Stabilizer: ON/HOLD/OFF Backlight: Backlight Compensation ICR Mode: Auto, ON, OFF Aperture Settings: Auto Mode. Manually adjust aperture with the scroll bar. White Balance Settings: Auto Mode, Indoor Mode, Outdoor Mode ATW, Call, Change. Manually adjust Rgain and B-gain with scroll bar. Exposure Control Settings: Auto, Bright, Iris, Shutter, and Gain. Manually adjust settings with slider bars. 2012-2015 Rocosoft. All rights reserved. Rocosoft.com Email Us: [email protected]