1
Quick Start Guide
Easy steps to getting started
1
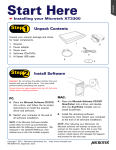
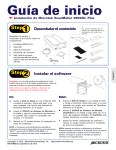
Unpack Contents
Unpack your digitizer package and check for
major components.
1.
2.
3.
4.
5.
6.
7.
Medi-7000
Output Tray (Main part)
Extension part of Output Tray
Feed Tray
Power Cord
Software CD
Hi-Speed USB Cable
2
1
3
4
5
7
6
2
Install Software
Important: You must install software before connecting
your digitizer. Always close any open programs and turn
off Anti-virus utilities before installing software.
A. Turn on your computer.
B. Place the Microtek CD-ROM into the CD-ROM drive, and follow the on-screen
instructions to install the driver and software.
C. Restart your computer at the end of installation.
NOTE: If the Software Installer screen does not come up automatically, double-click the following in
succession: “My Computer”; the CD-ROM icon; then cdsetup.exe to start the installer program.
Copyright © 2013
Microtek International, Inc.
I49-004575 B, September 2013
http://www.microtek.com
1
3
Feed Tray
Install Digitizer
Feed Tray Holes
Install Feed Tray
A. Look for two sets of the Feed Tray Holes
at both ends of the front-top of the
digitizer.
B. Insert and push down both sides of the
Feed Tray into its compartment holes,
making sure the Feed Tray snaps into
place.
Install Output Tracy
A. Look for two sets of Output Tray Holes at both ends of the front-bottom of the digitizer.
B. Hang the extension part onto the compartment holes of the Output Tray, making sure the
extension part snaps into place.
C. Insert and push down both sides of the main part of the Output Tray into its compartment
holes, making sure the Output Tray snaps into place.
Output Tray Holes
Output Tray
(Extension part)
Output Tray (Main part)
Output Tray
(whole unit)
2
4
Connect Digitizer
To the power cord
A. Connect the power cord to the left side of
the digitizer.
B. Plug one end of the power cord into a wall
outlet or other power source.
To the Hi-Speed USB cable
C. Connect one end of the Hi-Speed USB cable to your computer.
D. Connect the other end of the Hi-Speed cable to the digitizer’s USB port, locating at the
left side of the digitizer.
Power switch
E. Turn the power switch at the front-left panel of the
digitizer to “On”; once the scanner is detected by your
system, the LED lights on the front panel will brighten,
and the digitizer is ready to scan.
3
Scanning Basics
Warning: Do not place more than one piece of X-ray film on the Feed Tray, for doing so will damage
the original film during the feeding process.
1. Launch ScanWizard Medi
To launch ScanWizard Medi as a stand-alone program,
double-click the ScanWizard Medi icon on your desktop.
After ScanWizard Medi is started up the first time, the
Preview and Settings windows appear on the screen
automatically.
2. Load and Scan X-ray film
Load and insert the X-ray film into the Feed Tray, with
the side to be scanned facing up and with the top end of
the film directing upwardly.
X-ray Film
(Facing up)
Push the X-ray film into the tray until the edge of it
touches the bottom edge of the Feed Tray.
Guide Arms
(Used to
center the
film on the
tray)
Once the film is detected by the digitizer, the
ScanWizard Medi will automatically recognize, autocrop, and perform a scan of the film and save it in your
preferred folder or application.
3. View the Image
Double-click the “MSmart Images” icon on the desktop to view the images; or, retrieve it from
your preferred folder.
NOTE: Your scan job can be carried out automatically with your own scanning settings. For details on
how to customize your scanning settings, refer to the Medi-7000 User’s Manual.
Settings window
Preview window
4
Fixing Film Jams
1. Open the front cover by pressing the
Release buttons on the both sides of the
front cover.
Release button
2. After opening the front cover, let the
jammed film fall into the Output Tray and
then remove it.
Front cover
NOTE: To remove the jammed film from the
digitizer, you have to open the front cover first.
Otherwise, your film may be damaged if they are
forcedly removed.
5
Problems?
The LEDs on the front right panel of the digitizer indicate the status of the digitizer.
All Off - Digitizer is off
Flashing Orange - Warming up or
starting up the scanning
Green LED
Orange LED
Orange off - Scanning
All On - Ready to scan
First, make sure that you have followed installation steps as described in this guide. Then if
your problem is listed here, try the suggested solution.
1. No light comes on when the digitizer is turned on.
Make sure your digitizer is connected to your computer and plugged into a power source.
2. The Add/Remove Hardware Wizard appears on your screen.
Click the “Cancel” button and close the ScanWizard Medi software. Disconnect the HiSpeed USB cable from your computer, and refer to the installation instructions in this guide.
3. When trying to scan, an error message appears on your screen that reads, “Can’t Find
Scanners”.
Make sure your digitizer is connected to your computer and plugged in to a power source
(see Step 4).
Uninstall and reinstall the ScanWizard Medi software.
4. After clicking “Scan,” a blank screen appears.
Uninstall and reinstall the ScanWizard Medi software.
5. When trying to scan, an error message appears on your screen that reads, “Code -204,
Scanning lamp or image sensor circuit failure. Please don't select fast preview or draft
scan!”
This error message appears when the luminance of lamps is insufficient or surpassed.
Click OK first; then contact the professional technician or call the Microtek Customer
Service Department for the further help.
6
Do You Need Assistance?
Manuals
If you have additional questions and need further instruction or information, we provide
electronic manuals for:
1. Using your Medi-7000
2. Using the ScanWizard Medi scanning software
To access the electronic manuals: Insert the Medi-7000 CD-ROM into your computer’s CDROM drive. Next, locate and click the “Manuals” option when the software installer window
appears on your screen. Finally, select and click the title of the manual you wish to view.
Missing Items
If your package is missing items, please call the Microtek Customer Service Department.
Drivers & Software Upgrades
After you finish the installation of software, if you found that the installed drivers and software
cannot run your product or your computer system properly later, please go to the Microtek
Download Service site at ww7.microtek.com.tw/service.php to download and install any
updates you may require.
For additional information about Microtek products, please visit our website at
www.microtek.com.
Copyright © 2013 Microtek International, Inc. The following are trademarks or registered
trademarks of their respective companies: Microtek, ScanMaker, ScanWizard of Microtek
International, Inc. All other trademarks or registered trademarks are the property of their
respective holders. Specifications, software and hardware bundles are subject to change
without notice. Delivery of technical support services subject to change without notice.
Not responsible for typographical errors.
7
8