1
DA1500 USA 1langue:pdf print
22/09/08
9:54
Page 1
FIRST CLASS - TRAVEL IRON
9
6
7
8
0V
24
V
1
0
0
12
2
F
OF
3
4
5
www.rowenta.com
ref. 1103903537
ON
DA1500 USA 1langue:pdf print
22/09/08
9:54
Page 2
IMPORTANT SAFETY INSTRUCTIONS
When using your flatiron, basic safety precautions should always be followed, including the following:
READ ALL INSTRUCTIONS BEFORE USING
1. Use iron only for its intended use.
2. To protect against a risk of electric shock, do not immerse the iron in
water or other liquids.
3. The iron should always be turned to “Off” before plugging or unplugging from outlet. Never yank cord to disconnect from outlet; instead,
grasp plug and pull to disconnect.
4. Do not allow cord to touch hot surfaces. Let iron cool completely
before putting away. Loop cord loosely around iron when storing.
5. Always disconnect iron from electrical outlet when filling with water
or emptying and when not in use.
6. Do not operate iron with a damaged cord or if the iron has been dropped or damaged. To avoid the risk of electric shock, do not disassemble
the iron, take it to a qualified serviceman for examination and repair.
Incorrect reassembly can cause a risk of electric shock when the iron is
used.
7. Close supervision is necessary for any appliance being used by or
near children. Do not leave iron unattended while connected or on an ironing board.
8. Burns can occur from touching hot metal parts, hot water, or steam.
Use caution when you turn a steam iron upside down – there may be hot
water in the reservoir.
9. If the malfunction indicator goes on, the flatiron is not operating normally. Disconnect form the power supply and have the flatiron serviced
by qualified service personnel.
10. For use in North America, the voltage selector switch should be placed in the 120-volt position. For use in several countries overseas, the
voltage selector switch may need to be placed in the 240-volt position.
Confirm the voltage available at each overseas location before using the
flatiron. For connection to a 240-volt supply, use a suitable attachment
plug adapter of the proper configuration for the power supply receptacle.
11. Be sure dual voltage selector is in correct voltage position before
operating. Before plugging in, read the information about dual voltage
operation contained in the instruction section of this manual.
12. This appliance was set at the factory to operate at 120 volt. Refer to
the Operating Instructions section of this manual for conversion to 240
volt operation.
2
DA1500 USA 1langue:pdf print
22/09/08
9:54
Page 3
SPECIAL INSTRUCTIONS
1. To avoid a circuit overload, do not operate another high wattage
appliance on the same circuit.
2. If an extension cord is absolutely necessary, a 10-ampere cord should
be used. Cords rated for less amperage may overheat. Care should be
taken to arrange the cord so that it cannot be pulled or tripped over.
SAVE THESE INSTRUCTIONS
ENVIRONMENTAL PROTECTION FIRST!
Your appliance contains valuable materials which can be recovered
or recycled.
When disposing of it, take it to a collection point or an
approved service center.
3
DA1500 USA 1langue:pdf print
22/09/08
9:54
Page 4
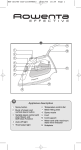
DESCRIPTION
5.
6.
7.
8.
9.
1. Voltage selector
2.
3.
4.
(120/240 V)
Temperature control
Steam switch
Microsteam 200 soleplate
High precision tip
Folding handle
Water filling inlet
Burst of steam button
Handle release
BEFORE IRONING
Remove the sticker on the soleplate
or the protector soleplate*.
Adjust the voltage selector.
• Adjust the iron to correct voltage for
your location, using a sharp object.
If the voltage selected is 120 V, the iron
will operate at 100 to 120 V.
If it is set at 240 V, the iron will operate
at 200 to 240 V.
0V
24
0V
12
Note!
If necessary, check that you are using an adapter which meets the
safety requirements of the country you are in.
Put the handle into the ironing position.
0
• Press the release button on the`
rear side and raise the handle
until it locks into position.
• For storing press release button
again to close the handle.
ON
OFF
240V
0
120V
ON
120V
240V
OFF
STEAM IRONING
Filling the water tank
OK
OF
F
OF
ON
120V
ON
240V
F
ON
OFF
Note !
Your iron has been designed to operate using untreated tap water.
Important: Heat concentrates the elements contained in water during
evaporation. The types of water listed below may contain organic waste,
or chemical elements that can cause spitting, brown staining, or premature
wear of the appliance :
*Depending on the model: these accessories are specific to certain models or available as an option.
4
DA1500 USA 1langue:pdf print
22/09/08
9:54
Page 5
water from clothes dryers, scented or softened water, water from refrigerators,
batteries, air conditioners, rain water, boiled, filtered or bottled water.
Important : Before filling the water tank, unplug the iron .
The steam selector should be switched into the “OFF” position.
Do not hold the iron under the tap while filling.
Setting the temperature
2 min
ON
OFF
OF
F
110V
ON
220V
Your iron will only produce steam when the control is set within the coloured zone
and the steam switch is in the on position.
USING BURST OF STEAM AND VERTICAL STEAM
To remove stubborn wrinkles and creases vertically.
ON
OFF
110V
220V
Hold down the burst of steam button and place the iron a few inches
away from the garment to avoid burning delicate fabrics.
IMPORTANT Never direct the steam at people or animals !
To remove stubborn wrinkles and creases.
MAX
220V
0
110V
OFF
ON
Steam
ironing
Steam control
Temperature
set to
set to
•••
5
Fabric
selected:
Cotton
Linen
Push burst of
steam button.
DA1500 USA 1langue:pdf print
22/09/08
9:54
Page 6
DRY IRONING
OF
F
ON
Steam control Temperature
set to
set to
•
••
•••
Dry
ironing
Burst of steam
Fabric
selected: Silk, Temperature
at setting
Synthetics
•••
Wool
Our advice :
With the iron in DRY mode, start by ironing fabrics at a low temperature
(•) before moving on to those requiring a higher temperature (•••).
If you turn the temperature control down, wait for approximately one minute
for the temperature to adjust before ironing again. If you are ironing fabrics
made from mixed fibers : set the iron temperature to the correct level for the
most delicate fibers.
220V
0
110V
OFF
ON
MAINTENANCE AND STORING OF YOUR IRON
Cleaning your iron.
NO
10 min
ON
OFF
F
OF
ON
110V
220V
NO
22
V0
V0
11
FF
O
NO
Note
6
NO
DA1500 USA 1langue:pdf print
22/09/08
9:54
Page 7
Important : Do not use sharp or abrasive cleaning agents or objects to
clean soleplate or other parts of the iron.
Do not use any cleaning or descaling products.
Never hold the iron under a running tap.
Always empty the water tank when you have finished ironing.
Storing your iron
NO
10 min
OF
F
NO
ON
FF
O
240
V
V
22
V0
V0
11
0
110
F
OF
0
ON
ON
120V
240V
OFF
Turn steam switch to off position. Unplug iron from electrical outlet.
Make sure the iron is cold before storing it.
IMPORTANT Do not wind the cord around the hot soleplate.
Never store your iron placed down onto the soleplate.
Problems
Solutions
and possible causes
Your iron produces little or no steam
• The temperature selected is too low.
• The steam control is set on OFF.
• There is no water in the tank.
Set the temperature control to •••
Switch the steam control to ON.
Fill the water tank.
Water is dripping from the holes in the soleplate
• You have been using the burst of
steam button too often.
• Steam is used before the iron is
hot enough.
• The iron is stored with water in the
tank.
Wait a few seconds between each burst.
Set the thermostat within the
colored steam zone and wait until
the iron is hot (approx. 2 min.)
Empty the tank before storing the
iron and set the steam control to OFF.
• The problem persists.
Take your iron to an Approved
Service Center.
7
DA1500 USA 1langue:pdf print
22/09/08
9:54
Page 8
In the interest of improving products, Rowenta reserves the
right to change specifications without prior notice.
LIMITED WARRANTY
This Rowenta product is warranted for 1 year from date of purchase
against defects in material and workmanship. During this period, any
Rowenta product that, upon inspection by Rowenta, is proved
defective, will be repaired or replaced, at Rowenta´s option, without
charge to the customer. If a replacement product is sent, it will carry
the remaining warranty of the original product. This warranty does
not apply to any defect arising from a buyer’s or user’s misuse of the
product, negligence, failure to follow Rowenta’s instructions, use on
current or voltage other than that stamped on the product, or
alteration or repair not authorized by Rowenta. Repair or disassembly
by anyone other than a Rowenta authorized service center will void
the warranty.
THE WARRANTIES SET FORTH HEREIN ARE EXCLUSIVE AND NO
OTHER WARRANTIES, EXPRESS OR IMPLIED, INCLUDING BUT NOT
LIMITED TO ANY WARRANTY OF MERCHANTABILITY OR FITNESS
FOR A PARTICULAR PURPOSE OR USE, ARE MADE BY ROWENTA OR
ARE AUTHORIZED TO BE MADE WITH RESPECT TO THE PRODUCT.
Some states do not allow limitations on how long an implied
warranty lasts or do not allow the exclusion of incidental or
consequential damages, so the above limitations may not apply to
you. This warranty gives you specific legal rights, and you may also
have other rights, which vary from state to state.
If you believe your product is defective, bring the product (or send it,
postage prepaid) along with proof of purchase to the nearest
authorized Rowenta Service Center (see below). If you send the
product, please include a letter explaining the nature of the claimed
defect.
8
DA1500 USA 1langue:pdf print
22/09/08
9:54
Page 9
CORRESPONDENCE CAN BE SENT TO:
Groupe SEB USA
2121 Eden Road
Millville, NJ 08332, USA
Tel: 1-800-526-5377
www.rowentausa.com
OFFICE LOCATION ONLY. Letters will be accepted at this address and
packages without a return authorization number will be refused or
forwarded to a service center. To service product see service center
information below.
SERVICE CENTER INFORMATION:
If your appliance needs service, ship the product to your nearest
regional service center. Be sure to put your name on the outside of the
shipping box (no P.O. boxes please), include a brief note describing the
issue, and include a copy of the sales receipt if the product is in
warranty. If in warranty, Rowenta will repair or replace the product at
their discretion. If the product is out of warranty, you will be advised of
the cost of repair before any work begins.
Turnpike Appliance
3495A Lawson Blvd.
Oceanside, NY 11572
516-483-5596
Authorized Appliance
1644 West Ogden Ave.
Downers Grove, IL 60515
630-852-1550
California Electric
1170G Burnett Ave.
Concord, CA 94520
925-827-1011
SERVICE CENTER INFORMATION IS SUBJECT TO CHANGE. Please
visit our website at www.rowentausa.com or call 781-396-0600 for
automated service center information.
9