1
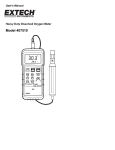
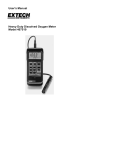
User's Manual
Heavy Duty Dissolved Oxygen Meter
Model 407510
Introduction
Congratulations on your purchase of Extech's Heavy Duty Dissolved Oxygen / Temperature
Meter which simultaneously displays Dissolved Oxygen, Oxygen in air, and Temperature. Units
o
o
of measure are mg/l for Dissolved Oxygen, % for Oxygen in air, and C/ F for temperature.
Oxygen is measured with a remote sensor that also contains a thermistor for measuring
temperature. Advanced features include RS 232 PC serial interface, data hold, auto shut off,
and Min/Max/Avg recording.
Specifications
General Specifications
Circuit
Custom one-chip LSI microprocessor circuit
Display
Dual function 0.5" (13 mm) 1999 count LCD w/ contrast adjust
Measurements
Dissolved O2: mg/l (milligrams per liter); Oxygen in air: %;
Temperature: °C/°F
Data hold
Data hold key freezes displayed reading
Sensor Structure
Remote Polarographic Dissolved Oxygen Sensor
Temperature sensor: Precision thermistor
Data recording
Min/Max/Avg readings stored for later recall
Auto power off
Meter turns off after 10 minutes
Sample rate
0.4 Sec (approx.)
Data Output
RS 232 PC serial interface
Operating conditions Temperature: 32 to 122 °F (0 to 50 °C); Humidity: < 80% RH
Battery power
9V alkaline battery
Power Consumption Approx. 6.6 mA DC
Weight
0.74 lbs. / 335 g (including batteries & probe)
Dimensions
Main instrument: 7.1 x 2.8 x1.3" (180 x 72 x 32mm)
Accessories
Carrying case, 9V battery, and 5 membranes
Optional
accessories
Membranes, data acquisition software & RS232 interface cable
Probe: 4.9" x 0.8" length/diameter (125 x 20mm)
Electrical Specifications
Measurement
Range
Resolution
Accuracy
0.0 - 19.9 mg/L
0.1mg/L
+ 0.4 mg/L
Oxygen in air
0 - 100% O2
0.1 % O2
+ 0.7% O2
Temperature
(probe only)
32 to 122 F
o
±1.5 F
Dissolved Oxygen
Compensation
adjustments
o
o
0.1 F/C
o
o
0 to 50 C
+ 0.8 C
o
o
Temperature (automatic)
32 to 122 F (0 to 50 C)
Salt
0 to 39% (1% = ppt)
Altitude
0 to 3900 meters
2
Model 407510
Ver. 2.1 May 2003
Meter Description
1
2
3
4
5
6
7
8
9
10
11
12
13
14
15
16
17
18
19
LCD Display
POWER ON/OFF key
Data HOLD key
°C/°F selection key
LCD Contrast Adjust
RECORD key
RECALL key
Factor adjust key
Probe top
Sensor body
Sensor plug
Sensor jack
RS-232 output jack
Battery cover (rear)
Altitude compensation key
DO/O2 key
Zero key
O2 calibration key
% Salt key
Calibration
For first time use or after long periods (several days) of non-use, calibrate the instrument using
the following steps. The procedure should be performed in an open, well-ventilated area.
1.
Ensure that the sensor is DISCONNECTED from the meter.
2.
Turn ON the meter.
3.
Slide the O2/DO selector to the O2 position.
4.
Press the zero key to null the meter (the display should indicate "OO").
5.
Connect the DO sensor to the top of the meter.
6.
Allow the meter to stand for at least five minutes until the display stabilizes.
7.
Press the O2 Cal key and the display will indicate approx. 20.9 (typical O2 in air).
3
Model 407510
Ver. 2.1 May 2003
Dissolved Oxygen (DO) Measurements
Measurement Preparation
Before taking measurements, perform the calibration described above if necessary. In addition,
perform the % SALT and ALTITUDE compensation adjustments as described below:
% SALT Compensation
Slide the O2/DO switch to the DO position. If the measured liquid is pure water or is known
not to have a salt content, set the % Salt factor to 0%.
1.
Press the % Salt key. The display will indicate 0% on the middle portion of the LCD
display and S on the bottom portion of the LCD.
2.
Pressing the Factor Adj. key once will add 1% to the salt factor.
3.
Press the Factor Adj. key until the correct factor is displayed.
4. Press the % Salt key to store the factor.
NOTE: 1% = 10 ppt (parts per thousand)
ALTITUDE Compensation
The meter has a default calibration for sea level operation (0 meters). Any significant
deviation from sea level requires a compensation adjustment. Perform the following steps to
do so:
1.
Press the ALTITUDE key and the display will indicate a “0” in the middle of the LCD
and an “H” on the lower portion of the LCD.
2.
Press the Factor Adj. key once to add 100 meters, twice to add 200 meters, and so on.
Maximum compensation is 3900 meters.
3.
Once the desired compensation is displayed, press the ALTITUDE key again to store
the value.
Taking Measurements
1.
2.
3.
4.
Immerse the probe in the solution under test. For best automatic temperature
compensation, immerse the probe to a depth of at least 4" (10 cm).
Wait until the display stabilizes.
The velocity of the liquid coming into contact with the probe must be at least 0.6 to 1
ft/min (0.2 to 0.3 m/s). If the solution is standing, stir the solution with the probe or use
an agitator.
Rinse the probe with clean water after each use.
Oxygen in Air (O2) Measurements
Follow the same steps above for DO measurements except for the variations described below:
1. Slide the O2/DO switch to the O2 position.
2. The display will indicate the oxygen air value in %.
Temperature Measurements
o
o
The lower display will indicate the temperature of the measured solution. Press the C/ F key to
change the temperature units.
4
Model 407510
Ver. 2.1 May 2003
Advanced Features
Data Hold
Press the Data Hold key to freeze the displayed value. The LCD will display DH for Data Hold
mode along with the held reading. Press the Hold key again to release the data hold function.
MIN/MAX/AVG Data Recording
When selected, the Data Recording function records the Min, Max, and Average readings. To
start a data recording session:
1. Press the RECORD key once. The REC indicator will appear on the display and the meter
will begin to record the lowest (min), highest (max), and average (avg) readings.
2. To recall the data, press the RECALL key once. The MAX indicator will appear along with
the highest reading recorded since the RECORD key was pressed.
3. Press the RECALL key again to view the MIN value.
4. Press the RECALL key again to view the AVG reading.
5. To exit the Record mode, press the RECORD key again. The display indicators REC,
MIN, MAX, and AVG will disappear.
Auto Power OFF
The meter includes an Auto shut off feature that preserves battery life. The meter will
automatically turn off if no function button is pressed in any 10 minute period. To disable this
feature press the RECORD key to engage the record function.
LCD Contrast Adjust
It may be necessary to adjust the display contrast due to a change in viewing angle or voltage
drift. Use the LCD Contrast adjustment located on the right side of the meter to set the
preferred contrast.
CPU Reset
Certain improper keystroke sequences can cause the meter to “hang” and become inoperable.
The following procedure will reset the meter.
1. Slide the O2/DO switch to the O2 position.
2. Turn the meter OFF and disconnect the DO probe.
3. Press and HOLD the O2 key and then press the POWER key.
4. Release the O2 key and then press the ZERO key.
5. Connect the DO probe.
6. Wait several minutes for the reading to stabilize and then press the O2 CAL key.
RS-232 PC Interface
The meter includes a RS-232 serial data port. This interface was designed to operate with the
Extech Data Acquisition Software/Hardware kit Part No. 407000. This kit enables the user to
capture, store and display readings using a PC.
5
Model 407510
Ver. 2.1 May 2003
Membrane & Electrolyte Replacement
The tip of the probe holds a thin Teflon® membrane and an electrolyte container. Calibration
or reading errors could indicate loss of electrolyte or a dirty/damaged membrane. The
membrane is very delicate and can easily be damaged if it comes in contact with solid objects.
Replace the electrolyte or the membrane as follows:
1. Unscrew the tip and well assembly from the probe handle and drain the old electrolyte
2. Unscrew the probe tip.
3. Remove the white O-ring, remove the old membrane and then carefully install the new
membrane and secure with the O ring.
4. Replace the tip on the well.
5. Fill the well to approximately the half way point with new electrolyte.
6. Screw the tip and well assembly back onto the probe handle. Excess electrolyte may be
forced out through the threads. Wipe clean.
7. Lightly tap the probe to remove any air bubbles.
Probe
Handle
Fill here
Electrode
Well
Membrane
O ring
Tip
6
Model 407510
Ver. 2.1 May 2003
Battery Replacement
The low battery indication LBT appears on the LCD when the battery runs low.
To replace the battery:
1. Remove the meter's rubber protective cover to access the rear battery compartment.
2. Remove the battery compartment cover using a small coin or screwdriver and remove the
9V battery.
3. Replace the 9V battery and reinstall the cover and holster.
Calibration and Repair Services
Extech offers complete repair and calibration services for all of the products we sell. For
periodic calibration, NIST certification or repair of any Extech product, call customer service for
details on services available. Extech recommends that calibration be performed on an annual
basis to ensure calibration integrity.
Warranty
EXTECH INSTRUMENTS CORPORATION warrants this instrument to be free of defects in parts and
workmanship for one year from date of shipment (a six month limited warranty applies on sensors and cables). If
it should become necessary to return the instrument for service during or beyond the warranty period, contact the
Customer Service Department at (781) 890-7440 ext. 210 for authorization or visit our website at
www.extech.com (click on ‘Contact Extech’ and go to ‘Service Department’ to request an RA number). A Return
Authorization (RA) number must be issued before any product is returned to Extech. The sender is responsible
for shipping charges, freight, insurance and proper packaging to prevent damage in transit. This warranty does
not apply to defects resulting from action of the user such as misuse, improper wiring, operation outside of
specification, improper maintenance or repair, or unauthorized modification. Extech specifically disclaims any
implied warranties or merchantability or fitness for a specific purpose and will not be liable for any direct, indirect,
incidental or consequential damages. Extech's total liability is limited to repair or replacement of the product. The
warranty set forth above is inclusive and no other warranty, whether written or oral, is expressed or implied.
Support Hotline (781) 890-7440
Tech support: Ext. 200; Email: [email protected]
Repair/Returns: Ext. 210; Email: [email protected]
Website: www.extech.com
Copyright © 2003 Extech Instruments Corporation. All rights reserved including
the right of reproduction in whole or in part in any form.
7
Model 407510
Ver. 2.1 May 2003