1
TRUSTED FOR OVER
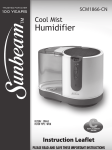
SCM3755-CN
100 YEARS
Cool Mist
Humidifier
FILTER# : SWF75
FILTER TYPE : WICK
Instruction Leaflet
PLEASE READ AND SAVE THESE IMPORTANT INSTRUCTIONS
P L E A S E R E A D A N D S AV E T H E S E
I M P O R TA N T S A F E T Y I N S T R U C T I O N S
When using electrical appliances, basic safety precautions
should always be followed to reduce the risk of fire, electric
shock, and injury to persons, including the following:
1. Read all instructions before using the appliance.
2. To avoid fire or shock hazard, plug the appliance directly
into a 120V AC electrical outlet.
3. Keep the cord out of heavy traffic areas. To avoid fire hazard,
NEVER put the cord under rugs or near heat registers.
4. DO NOT place humidifier near heat sources such as stoves,
radiators, and heaters. DO locate your humidifier on an
inside wall near an electrical outlet. The humidifier should be
at least 4 inches (10 cm) away from the wall for best results.
5. NEVER place humidifier in an area where it is accessible to
children. NEVER use humidifier in a closed room, particularly
where a child may be sleeping, resting, or playing (a closed
room may result in excessive humidity).
6. WARNING: Do not attempt to refill humidifier without
first unplugging the unit from its electrical outlet. Failure to
heed this warning may cause personal injury. Be sure to
unplug the unit by pulling on the plug and not the cord.
7. Never place anything over moisture outlet when the unit
is running.
8. NEVER drop or insert any object into any openings.
9. DO NOT operate any appliance with a damaged cord or
plug, after the appliance malfunctions, or if it has been
dropped or damaged in any manner. Return appliance to
manufacturer for examination, electrical or mechanical
adjustment, or repair.
10. Use appliance only for intended household use as described
in this manual. Any other use not recommended by the
manufacturer may cause fire, electric shock, or injury to
persons. The use of attachments not recommended or sold
by the manufacturer may cause hazards.
11. DO NOT use outdoors.
12. Always place humidifier on a firm, flat, level surface. A
waterproof mat or pad is recommended for use under
13.
14.
15.
16.
17.
18.
19.
20.
21.
22.
23.
24.
25.
the humidifier. NEVER place it on a rug or carpet, or on
a finished floor that may be damaged by exposure to
water or moisture.
DO NOT allow the Moisture Outlet to directly face the wall.
Moisture could cause damage, particularly to wallpaper.
Humidifier should be unplugged when not in use.
NEVER tilt, move, or attempt to empty unit while it is
operating. Shut off and unplug before removing the
water tank and moving the unit.
This humidifier requires daily and weekly maintenance
to operate appropriately. Refer to daily and weekly
cleaning procedures. Use only cleaners and additives
recommended by the manufacturer.
NEVER use detergents, gasoline, glass cleaner, furniture
polish, paint thinner, or other household solvents to
clean any part of the humidifier.
Excessive humidity in a room can cause water
condensation on windows and some furniture. If this
happens, turn the humidifier OFF.
Do not use humidifier in an area where humidity level is
in excess of 50%. Use a hygrometer, available at your
local retailer or through the manufacturer, to measure
the humidity.
DO NOT attempt to repair or adjust any electrical or
mechanical functions on this unit. Doing so will void
your warranty. The inside of the unit contains no user
serviceable parts. All servicing should be performed by
qualified personnel only.
Never place housing under water flow or immerse in liquids.
Do not plug in the cord with wet hands: electric shock
could result.
Do not pour water in any openings other than the water
tank.
To prevent damage to surfaces, do not place humidifier
under overhanging surfaces.
NEVER operate unit without water in the tank.
THIS APPLIANCE HAS A POLARIZED PLUG (one blade is wider than the
other). To reduce the risk of electric shock, this plug is intended to fit in a
polarized outlet only one way. If the plug does not fit fully in the outlet,
reverse the plug. If it still does not fit, contact a qualified electrician to
install the proper outlet.
DO NOT ATTEMPT TO MODIFY THIS PLUG OR DEFEAT THIS
SAFETY FEATURE IN ANY WAY.
F E AT U R E S - O P E R AT I O N S
26. Do not move unit after it has been used until unit cools
completely.
27. Use both hands when carrying full tank of water.
PLEASE READ AND SAVE
THESE IMPORTANT SAFETY
INSTRUCTIONS
CONSUMER SAFETY INFORMATION
PRE-OPERATING INSTRUCTIONS
1. Be sure the humidifier is switched to OFF ( ) and the
unit is disconnected from the electrical outlet.
2. Choose a location out of reach of children. DO NOT place
the humidifier on a finished floor or near furniture which
can be damaged by moisture or water.
Front Door Handle Assembly
Your humidifier is packed with a separate front door handle in
the box (placed on top of the unit). Take out the handle, line up
holes of the handle with tabs on the top of the front door. Snap
the handle until it is securely installed into the front door (see
Figure 1).
NOTE: This is an electrical appliance and requires attention
when in use.
Front Door Handle
Figure 1
NOTE: If moisture forms on the walls or windows of the
room, turn off the humidifier. The room already has plenty of
humidity and additional moisture may cause damage.
NOTE: DO NOT block air inlet or outlet.
Cord and Plug Installation Safety Instructions:
The length of cord used on this appliance was selected to reduce
the hazards of becoming tangled in, or tripping over a longer
Front Door
cord. If a longer cord is necessary an approved extension cord
may be used. The electrical rating of the extension cord must be
equal to or greater than the rating of the humidifier (refer to
FILLING THE WATER TANK
the rating information placed on the humidifier). Care must be
1. Remove the two tanks from the back of the humidifier
taken to arrange the extension cord so that it will not drape
and bring each tank to the faucet. Turn the tank upside
over the countertop or tabletop where it can be pulled on by
down and twist off the large tank cap by turning counterchildren or accidentally tripped over.
clockwise. Fill each tank with cool, fresh tap water.
Replace the cap on each tank FIRMLY.
HOW COOL MIST WORKS
NOTE:
Adding a water softening agent like Water Treatment
Your Sunbeam® Cool Mist humidifier draws dry air through
(Model S-1705) to the water will soften mineral deposits and
the air intake grill area. This air is then passed through a
prevent lime and scale build-up. It will also help prolong the
moisture–laden wick filter, which retains the minerals and
life of the wick filter and make cleaning easier.
deposits in the water. The resulting moist air is directed back 2. When full, carry each tank to the humidifier and place
into the room from the top air grill.
back to the unit (use both hands when carrying each
NOTE: This humidification system provides a cool,
tank). Each tank holds 1.22 gallons of water. When the
invisible moisture output. It is normal not to see the
water stops emptying, remove the tanks and refill each
mist.
again. Replace the tanks onto the humidifier housing.
The WATER LIMITING feature on the tank cap will prevent
NOTE: A humidity level below 20% can be unhealthy and
the tanks from overflowing. YOU NOW HAVE 1.22
uncomfortable. The recommended humidity level is between
GALLONS OF WATER IN EACH TANK FOR A TOTAL OF 2.44
40%-50%.
GALLONS OF WATER.
3. Plug the power cord into a 120V AC electrical outlet.
F E AT U R E S - O P E R AT I O N S
OPERATING INSTRUCTIONS
With the filter installed correctly (with filter support placed on
top of the filter - see Figure 2), front door closed, the tanks
filled and the plug correctly inserted in the outlet, you are
now ready to operate the humidifier.
NOTE: The humidifier produces clean, cool, INVISIBLE
moisture. It is normal not to see the moisture.
1. Press the Power Button ( ) to turn the humidifier on,
the humidifier will run at High setting and the High
indicator light will illuminate.
2. Allow up to 30 minutes for the filter to fully absorb
water and the unit to produce the maximum moisture
output.
3. If you want to switch to the Low setting, press the Speed
Button ( ) and the Lo indicator light will illuminate.
4. To shut the humidifier off at any setting, press the Power
Button ( ) until all indicator lights go off.
Digital Humidistat Control
Your humidifier is equipped with a digital humidistat that
allows you to set your humidifier to your desired comfort
level by pressing the +/- buttons to adjust the humidity
level ranging from 45% to Stay On setting. The corresponding
Humidity Indicator will illuminate once selected. When the
room humidity level rises above the set humidity, the
humidifier will stop. When the room humidity level drops
below the set humidity, the humidifier will turn on
automatically to maintain the preset humidity level.
NOTE: When the water tank is empty, and the base is almost
empty, you need to refill the tank. The fan will continue to
run to help dry the humidifier. Shut off and unplug the unit.
Please follow the Daily Cleaning Instructions. Refill the tank
as directed in Filling the Water Tanks Instructions.
NOTE: If moisture forms on the walls or windows, turn off
the humidifier.
Figure 2
A
C
B
D
E
F
G
A.
B.
C.
D.
Tank Handles (2)
Water Tanks (2)
LED Control Panel
Humidifier Housing
E. Filter Support
F. Front Door
G. Wick Filter
REPLACING THE FILTER
Through normal use, waterborne minerals and sediment
become trapped in the wick filter. The harder your water, the
greater the amount of minerals in the water, and the more
often you will need to change your filter.
Filter Life – Under normal conditions of continuous use, a
brand new filter will operate efficiently for 1 month. It is
strongly recommended that a new filter be replaced every 30
days of use.
To replace the filter, follow the steps below:
1. Remove both tanks from the unit and allow humidifier to
operate for 30-40 minutes to consume water in the tray
and in the filter. This will reduce water spillage when
removing the filter.
CLEANING / MAINTENANCE
2. Be sure the humidifier is switched OFF and the unit is
disconnected from the electrical outlet.
3. Hold the front door handle and open the front door to
access the filter. (see Figure 2).
4. Take off the top filter support and discard the old filter
and follow weekly cleaning instructions.
5. Insert a new filter and replace the filter support on top.
Place the filter back onto the humidifier base. Ensure
that the filter is seated correctly and can come in contact
with water.
6. Close the front door properly.
7. Repeat Operating Instruction steps.
It will take about 30 minutes for the humidifier to reach
maximum output.
NOTE: You can purchase replacement filters (model SWF75)
at a local retailer, by calling 1-888-264-9669, or by visiting
www.sunbeam.ca. It is recommended that a replacement filter
is purchased for uninterrupted use.
3. Carry the base of the unit to the sink, remove the wick
filter, place in sink, drain any remaining water. Wipe
clean, and dry with a clean cloth or paper towel.
4. Drain the water from the tanks into the sink and
rinse each tank thoroughly. Wipe clean, and dry with
a clean cloth or paper towel.
5. Put filter back with the filter support, close the front
door, then refill the tanks with cool tap water as
instructed earlier in the Filling Instructions. Do not
overfill.
6. Follow Operating Instructions.
Weekly Maintenance
Remove scale:
1. Repeat steps 1-4 above.
2. Partially fill the base with two 8 oz. cups of undiluted
white vinegar. Leave this solution in the base for 20
minutes, while cleaning all the interior surfaces with
a soft brush. Remove base scale by wiping the base
with a cloth dampened with undiluted white vinegar.
CLEANING AND MAINTENANCE
3. Rinse with clean warm water to remove the cleaning
INSTRUCTIONS
solution before disinfecting the tank.
To Disinfect Humidifier Base and Tank:
Humidifiers provide comfort by adding moisture to dry,
heated indoor air. To benefit most from the humidifier
1. Fill Humidifier Base with 2 gallons of water and 1
and avoid product misuse, follow all instructions carefully.
teaspoon of chlorine bleach.
Please note that this is an electrical appliance and
2. Fill each tank 1/2 full with water and 1 teaspoon of
requires attention when in use.
chlorine bleach.
3. Let the solution stand for 20 minutes, swishing every
In addition, if you do not follow the recommended care
few minutes. Wet all surfaces.
and maintenance guidelines, micro-organisms may be
able to grow in the water within the water tank. You must 4. Carefully empty the tank after 20 minutes, and rinse
with warm water until you cannot detect any bleach
routinely follow the cleaning procedures that follow in
smell. Dry with a clean cloth or paper towel.
order to ensure proper, efficient operation of your
humidifier. Proper maintenance and cleaning is essential 5. Depending on the water hardness in your area, it
may be necessary to change the filter every month.
to the continued performance of your unit and the
Re-insert the wick filter into the filter support.
avoidance of algae or bacteria build-up.
6. Refill the water tanks as directed with cool tap water,
Daily Maintenance
replace the humidifier housing, and turn the Control
Knob to ON.
1. Be sure the humidifier is switched OFF and the unit is
disconnected from the electrical outlet.
2. Remove the tanks from the humidifier and place them in
sink or tub.
TROUBLESHOOTING
F R E Q U E N T LY A S K E D Q U E S T I O N S
TROUBLESHOOTING
Trouble
Probable Cause
Solution
• Unit does not turn on.
☛ Not plugged in.
☛ Outlet not functioning.
✔ Plug in unit.
✔ Have outlet replaced by a licensed electrician.
• Mist output minimal to
none.
☛ Filter has not absorbed water.
☛ Cool Mist is invisible.
✔ Wait 30 minutes for filter to absorb water.
✔ Operate in High setting.
• Filter turns brown.
☛ The filter has absorbed
minerals.
✔ Replace your filter (SWF75) by calling
1-888-264-9669, or visiting www.sunbeam.ca.
FREQUENTLY ASKED QUESTIONS
Question
Answer
• What are the variables that affect
run time?
The estimated run time for this humidifier is based on average room
conditions. The actual run time of your humidifier is dependent on numerous
variables such as:
✔ Air exchange in the room where the humidifier is placed.
✔ Room construction of the room where the humidifier is placed.
✔ Temperature of the room where the humidifier is placed.
✔ Humidity levels in the room where the humidifier is placed.
✔ Movement of occupants and the opening and closing of doors in the room
where the humidifier is placed.
✔ Home furnishings in the room where the humidifier is placed.
• How do I remove film on water
tank?
✔ See Daily Maintenance instructions. Regular cleaning is recommended.
• How can I extend the run time?
✔ Run your unit on the lowest setting.
✔ If your unit has electronics, set it to your desired humidity level. The unit
will turn on and off, which will extend the run time.
✔ Fill the tank all the way full, place it on the base, let the water empty into
the base until it stops bubbling, then refill the tank full again. This ensures
maximum water capacity and will extend run time.
WA R R A N T Y I N F O R M AT I O N
1 YEAR LIMITED WARRANTY
Sunbeam Products, Inc. doing business as Jarden Consumer Solutions or if in Canada, Sunbeam Corporation (Canada)
Limited doing business as Jarden Consumer Solutions (collectively “JCS”) warrants that for a period of one year from
the date of purchase, this product will be free from defects in material and workmanship. JCS, at its option, will repair
or replace this product or any component of the product found to be defective during the warranty period.
Replacement will be made with a new or remanufactured product or component. If the product is no longer available,
replacement may be made with a similar product of equal or greater value. This is your exclusive warranty. Do NOT
attempt to repair or adjust any electrical or mechanical functions on this product. Doing so will void this warranty.
This warranty is valid for the original retail purchaser from the date of initial retail purchase and is not transferable.
Keep the original sales receipt. Proof of purchase is required to obtain warranty performance. JCS dealers, service
centers, or retail stores selling JCS products do not have the right to alter, modify or any way change the terms and
conditions of this warranty.
This warranty does not cover normal wear of parts or damage resulting from any of the following: negligent use or
misuse of the product, use on improper voltage or current, use contrary to the operating instructions, disassembly,
repair or alteration by anyone other than JCS or an authorized JCS service center. Further, the warranty does not
cover: Acts of God, such as fire, flood, hurricanes and tornadoes.
What are the limits on JCS’s Liability?
JCS shall not be liable for any incidental or consequential damages caused by the breach of any express, implied or
statutory warranty or condition.
Except to the extent prohibited by applicable law, any implied warranty or condition of merchantability or fitness for a
particular purpose is limited in duration to the duration of the above warranty.
JCS disclaims all other warranties, conditions or representations, express, implied, statutory or otherwise.
JCS shall not be liable for any damages of any kind resulting from the purchase, use or misuse of, or inability to use
the product including incidental, special, consequential or similar damages or loss of profits, or for any breach of
contract, fundamental or otherwise, or for any claim brought against purchaser by any other party.
Some provinces, states or jurisdictions do not allow the exclusion or limitation of incidental or consequential damages
or limitations on how long an implied warranty lasts, so the above limitations or exclusion may not apply to you.
This warranty gives you specific legal rights, and you may also have other rights that vary from province to province,
state to state or jurisdiction to jurisdiction.
How to Obtain Warranty Service
In the U.S.A.
If you have any question regarding this warranty or would like to obtain warranty service, please call
1-888-264-9669 and a convenient service center address will be provided to you.
In Canada
If you have any question regarding this warranty or would like to obtain warranty service, please call
1-888-264-9669 and a convenient service center address will be provided to you.
In the U.S.A., this warranty is offered by Sunbeam Products, Inc. doing business as Jarden Consumer Solutions located
in Boca Raton, Florida 33431. In Canada, this warranty is offered by Sunbeam Corporation (Canada) Limited doing
business as Jarden Consumer Solutions, located at 20 B Hereford Street, Brampton, Ontario L6Y 0M1. If you have any
other problem or claim in connection with this product, please write our Consumer Service Department. PLEASE DO
NOT RETURN THIS PRODUCT TO ANY OF THESE ADDRESSES OR TO THE PLACE OF PURCHASE.
CLEANING / MAINTENANCE
STORAGE INSTRUCTIONS
If your humidifier will not be in use for two days or more, or at the end of the season follow these instructions.
1. Clean, rinse and thoroughly dry the humidifier as directed in weekly maintenance. DO NOT leave any water inside
the base or tray.
2. Remove the tank cap. Do not store with the tank cap in place.
3. Place the humidifier in the original carton and store in a cool, dry place.
4. Always clean the humidifier before the next season begins.
5. Order your replacement filter for next year’s use.
REPLACEMENT ACCESSORIES
To order the replacement accessories you can do any of the following:
• Visityourlocalretailer
• Gotowww.sunbeam.ca
• CallConsumerServiceat1-888-264-9669
If you have any questions regarding your product or would like to learn more about other Sunbeam® products,
please contact our Consumer Service Department at 1-888-264-9669 or visit our website at www.sunbeam.ca.
© 2013 Sunbeam Products, Inc. doing business as Jarden Consumer Solutions. All rights reserved. Imported and
distributed by Sunbeam Corporation (Canada) Limited doing business as Jarden Consumer Solutions, 20B Hereford
Street, Brampton, Ontario L6Y 0M1.
Printed In China