1
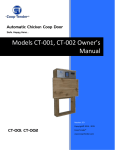
Automatic Chicken Coop Door Safe, Happy Hens… CT-001, CT-001-Solar Owner’s Manual Rev. 2.7 CT-001, CT-001-Solar Copyright© 2014 - 2015 Coop Tender® www.CoopTender.com Table of Contents Product Description........................................................................................................................................................................... 2 Key Features ..................................................................................................................................................................................... 2 Installation Requirements .................................................................................................................................................................. 2 Installation ......................................................................................................................................................................................... 2 Automatic Coop Door Operation ....................................................................................................................................................... 3 Power ............................................................................................................................................................................................ 3 CT-001 (AC powered) ............................................................................................................................................................... 3 CT-001-Solar (Solar powered) ................................................................................................................................................... 3 Backup Battery .......................................................................................................................................................................... 3 System status ................................................................................................................................................................................. 4 Status messages ........................................................................................................................................................................ 4 Status indicator lights ................................................................................................................................................................ 4 Keypad Interface ........................................................................................................................................................................... 6 Activating the menu .................................................................................................................................................................. 6 Navigating the menu ................................................................................................................................................................. 6 Scroll values .............................................................................................................................................................................. 6 Setting the desired value .......................................................................................................................................................... 7 Door override (Open, Close, Stop) ........................................................................................................................................... 7 Dawn Dusk Daylight Setting ...................................................................................................................................................... 7 Dawn Dusk Door Delay (minutes) ............................................................................................................................................. 7 Temperature Probe ........................................................................................................................................................................... 7 Internal Backup Battery ..................................................................................................................................................................... 8 Power / Battery Status ................................................................................................................................................................... 8 Power Save Mode .......................................................................................................................................................................... 8 Display Backlight............................................................................................................................................................................... 8 Maintenance ...................................................................................................................................................................................... 9 Troubleshooting .............................................................................................................................................................................. 10 Visit us online .................................................................................................................................................................................. 10 Contact us ....................................................................................................................................................................................... 10 Appendix A - Specifications ............................................................................................................................................................ 11 Appendix B – Coop Tender Menu Diagram ..................................................................................................................................... 12 Appendix C – Keypad Functionality ................................................................................................................................................ 13 Menu Navigation ......................................................................................................................................................................... 13 Scroll ........................................................................................................................................................................................... 13 Set Value ..................................................................................................................................................................................... 13 Appendix D – Power Switch / AC Fuse ............................................................................................................................................ 14 Appendix E – Battery Fuse............................................................................................................................................................... 14 Replacement and Warranty ............................................................................................................................................................. 15 1 Product Description Coop Tender is an automatic chicken door which opens your coop door at dawn or the time schedule you set, allowing your poultry to free range. At the end of the day, Coop Tender closes the door to keep predators out and your poultry safe. Key Features Automatically opens and closes the coop door at dawn and dusk or a set time schedule Door open and close override Programmable door open and close delays for dawn to dusk operation Adjustable daylight sensitivity for dawn to dusk operation Dawn and Dusk delay settings up to 999 minutes Door status at a glance Solid ¾ inch (1 inch dimensional) western red cedar construction Heavy duty, predator proof, door closure mechanism Coop temperature monitor (optional) alerts to extreme temperature conditions (below freezing, overly warm) Freeze protect feature keeps door closed in freezing weather. Solar powered (CT-001-Solar) Installation Requirements Most installations require only a screwdriver. A saw and hammer may be required if you need to close off your coop doorway above Coop Tender or install framing to make a coop opening which will accommodate the 13 ½ inch width of the unit. Installation Simply screw Coop Tender to your existing coop doorway with the 4 screws which are included. The control panel will face the outside of your chicken coop. 2 If you need to close off any open area above Coop Tender, simply cut an appropriate size piece of wood or other suitable, predator proof, material and secure it. If your coop door opening is too wide, you will need to add boards to narrow the opening sufficiently to accommodate and secure Coop Tender. Plug the power cord into an AC power receptacle or an extension cord and into the back of the Coop Tender controller. Turn the switch to the on position when you are ready to automatically control your chicken coop door. Automatic Coop Door Operation After installation, simply turn the power switch to the “On” position. You will be greeted with the Coop Tender startup screen and current door and system status. Most installations will occur during the day, so your Coop Tender automatic coop door will open after initialization. Power Coop Tender can be powered from a traditional AC electrical outlet or from solar energy. CT-001 (AC powered) Coop Tender has a built-in power converter which will run directly from your AC outlet or extension cord. CT-001-Solar (Solar powered) Power is provided by an 18 Volt 10 Watt solar array connected to a 12 volt 4.5Ah lead acid rechargeable battery Coop Tender’s built-in solar battery charger will charge your battery from the solar panel array even with minimal light. We recommend that the solar panels receive a minimum 3 to 4 hours of direct sunlight each day. Should Coop Tender be installed where this is not possible, you may remove the solar panel array from the front of the Coop Tender unit and splice into the existing wires to extend and move the panel to a more appropriate location or angle. Backup Battery The backup battery comes installed inside the controller unit which sits atop the door. The backup battery will power Coop Tender for up to 3 days without being recharged. When an external power source is available, AC or solar, Coop Tender automatically recharges the battery. When plugged into AC power, the battery will recharge within 4 to 6 hours. When connected to a solar panel array, charge time will vary based on available sunlight characteristics. 3 System status Coop Tender gives feedback with At-a-Glance lights and messages appearing on the display. Status messages Under normal operation, Coop Tender constantly monitors the ambient lighting and checks system status (door, time, temperature, battery, etc.). Status messages appear on the built-in LCD display panel. Status messages include the following and will appear based on the current settings as indicated: Date and time Coop temperature (if installed) Warning messages (if present) Battery status (if installed) Door control method (Dawn to Dusk, Schedule or Manual) Current ambient light value (helpful to determine what setting is best for your coop) Dawn / Dusk light setting (when Dawn Dusk active) Dawn and Dusk delay settings (when Dawn Dusk active) Schedule (when Schedule active) Freeze protect status Door status Status indicator lights Four status indicator lights provide “at a glance” status. Indicator At-a-Glance Status Display Green On Red On Red Green Blinking Blinking warning (LCD will display specifics) Coop Tender on Door Status closed open unknown Battery Charge/ Power charged charging/ on low discharged Easily spot check automatic door, battery and opening / power/charge status closing Coop Tender Status The Coop Tender status indicator lights solid green when there are no warnings. If a warning is generated during system monitoring, the indicator will blink red. Messages corresponding to the warning condition will appear on the LCD display for your review and subsequent reaction if necessary. Door Status The door status indicator light will be green when the coop door is closed (green is good) and red when the coop door is open. While Coop Tender is opening or closing the door, the indicator will flash green until the desired setting is achieved (i.e. coop door is closed, or open). At this point, the indicator light will change to the appropriate status color (green open, red closed). Door status is also displayed on the easy-to-read LCD display screen during normal system status checks. 4 Battery Status The battery status indictor gives visual indication of battery status (for solar powered units and units with the optional battery installed). Indicator states: Green: 100% charge Red: 50% charged Flashing Red: < 25% charged The LCD panel provides corresponding battery status via easy-to-read text and bar graph representation. Charge/Power The Charge/Power indicator will light green when connected to power. Solar powered Coop Tender will indicate a solar charge condition. When sunlight is sufficient to charge the battery and the battery needs charging, the indicator light will light green. Power Save Mode When Coop Tender is running from battery, it will enter power save mode within about 1 minute. Power Save Mode enables Coop Tender to use even less battery power than in normal mode. During power save mode, the system will “sleep” for 4 seconds between status checks. During a status check, the status LEDs will blink in a pattern one at a time starting with the Coop Tender status indicator and ending with Door Status indicator. Long blink (about ½ second) = LED On Series of short blinks (5 quick blinks) = LED Flashing 5 Keypad Interface Activating the menu Pressing any of the numbers on the keypad will active the Coop Tender menu. If Coop Tender is in Power Save mode, press and hold the key until the menu is activated. The menu system will timeout after about 5 seconds if no keys are pressed. See Appendix B for a diagram of the menu system. This will help to navigate the system Navigating the menu See Appendix B for a menu diagram and Appendix C for keypad navigation buttons diagram Up (2 key) During menu navigation, pressing the 2 key will navigate up through the menu. Down (8 key) During menu navigation, pressing the 8 key will navigate down through the menu. Back (4 key) During menu navigation, pressing the 4 key will navigate back to the previously selected menu item Select (6 key) During menu navigation, pressing the 6 key will select the menu option which is displaying on the screen Entering values When a menu item is selected in which a value needs to be entered (for example: the date), all number keys are available for entry and no longer function to navigate. Entering all of the values for a particular entry will automatically move the cursor to the next digit for entry. Scroll values See Appendix D for keypad scroll button diagram Two features provided through the menu permit the use of the [*] button to scroll values as described below: Setting freeze protect temperature When setting freeze protect temperature, you may press the * button to set a negative value for temperature. Repeatedly pressing, or keeping the key pressed will continue to decrement the temperature value. Setting Dawn to Dusk daylight value When setting the light value for dawn to dusk door control, you may use the [*] key to scroll through the default values 50 – Low (default) 100 – Medium 200 – High You may also enter a value using the numbers on the keypad if one of the preset values does not fit your needs. To do this, enter a 3-digit number instead of scrolling through the preset values. For example: If you read the light value from the LCD status display after all of your chickens are in and the light value reads “73”, then you would enter “073” for the light value. 6 Setting a light value below that which you have read from the display will be ok as long as there is not an external light source which is causing the light value to be higher Setting the desired value When entering setting values, you may set the value one of two ways: 1) Enter each number associated with the desired value and the menu system will automatically set the value after the last required entry has been made. For example: If you are presented with a 3digit number for entry such as daylight value, after keying in the 3 numbers the system will automatically save the value and continue to the next item to be set in the sequence or back to the previous menu depending on what functionality is being set. 2) Pressing the [#] key will save the value shown on the display and continue as indicated above. Door override (Open, Close, Stop) Should you need to override the coop door, you may do so using the keypad menu. 1. Activate the menu 2. Select the desired action (Open, Close) To stop the door from opening or closing, simply press and hold one of the buttons on the keypad down while the door is operating (opening or closing). Coop Tender will stop the door. When door control is activated through the menu (open, close or stop), Coop Tender is put into a manual door control state. This means that it will no longer “automatically” open and close the door until you reset the door control method. To return Coop Tender to automatic door operation, simply turn Coop Tender off and then back on. Note that you must use the power switch. Unplugging the unit will not properly power cycle Coop Tender if battery backup is installed. Alternatively, you may reactivate the desired automatic door control option via Coop Tender’s keypad menu. Dawn Dusk Daylight Setting When adjusting the daylight setting, you may enter a light value using the numbers on the keypad or scroll through the preset values by pressing the [*] key. A custom light value may be entered by simply pressing the numbers on the keypad to fill in the 3 digits presented. Dawn Dusk Door Delay (minutes) Dawn to Dusk door delay may be set in minutes for both dawn and dusk up to 999 minutes. Temperature Probe The temperature probe is installed before shipment. The probe is located under the power switch and may be extended from the controller unit. To extend the probe, simply pull on the end of the temperature probe which is sticking out from the back of the controller unit. The temperature probe may be positioned anywhere inside or outside of the coop. 7 Internal Backup Battery The internal backup battery comes installed before shipment. The 12 Volt, 4.5 Amp Hour battery will power Coop Tender for up to 3 days. When Coop Tender is running under battery power, battery charge may be monitored as follows: 1) Viewing the At-a-Glance status lights 2) Reviewing the status message on the display The battery charge light provides a quick assessment Green = Fully charged Red = Less than 50% charge Red Blinking – Less than 25% charge The backup battery is installed into the controller unit prior to shipment. Power / Battery Status While Coop Tender is plugged into an AC power supply (i.e. electrical outlet or extension cord), Power / Battery status will indicate 100% charged as Coop Tender reads the voltage of the incoming power source. When AC power is removed or in the case of a power outage, Coop Tender will begin displaying the charge status of the backup battery, if installed. Power Save Mode When Coop Tender is running from battery (solar or AC), it will enter power save mode within 1 minute. Power save mode reduces power consumption and extends battery life between charges. During power save mode, Coop Tender will Check system status every 4 seconds. Blink status indicator lights in a pattern o Long blink (about ½ second) = LED On o Series of short blinks (5 quick blinks) = LED Flashing Status messages will cycle every 4 seconds instead of every 2 seconds Display Backlight A backlight will appear when you first turn your automatic coop door on. The backlight will remain on for 30 seconds if none of the keys are pressed. Pressing any key will activate the backlight as well as invoke the functionality of the button pressed (buttons 0 through 9 will invoke the user menu, the * and # buttons will turn the backlight on and continue cycling through status messages). See the Keypad Interface section for more information. 8 Maintenance 1. Periodically remove debris from the door opening if it might prohibit full door closure. A large amount of debris may cause the door to not close properly 2. Remove any snow or ice which may prohibit proper opening and closing movement 3. On occasion, a little dab of lubricant (grease, oil or some WD-40) on the worm drive will help keep your door opening and closing smoothly. This is best achieved when the door is in the open state. At this time, the entire worm drive is visible / accessible from the back of the door. Simply spray some WD-40 along the shaft or a small amount of oil or grease near the top of the worm drive rod. 9 Troubleshooting Problem Door does not open or close Door still tries to close even though it looks closed The correct numbers don’t appear when using the keypad Things to check 1) Check to ensure that there is power to the unit 2) Check to ensure that the battery has sufficient charge if running from solar power. If the battery is below 25%, you may still see display messages, but it will not be sufficient to open and close the door. 3) Check to ensure that the power switch is in the on position 4) Check the fuse. The fuse is located between the switch and the power cord. Slide the compartment out. There is a spare fuse and then the installed fuse. Replace it with the spare fuse if necessary. 5) Review the door control status on the LCD. If it is set to Manual, then the door will not open and close automatically 6) Review the schedule or dawn / dusk settings depending on the door control method you desire to ensure that the settings are as expected 7) Review Quarantine and Freeze Protect settings to determine if one of these are overriding door control Check for debris prohibiting the door from completely closing. Coop Tender will continue to try to close the door when it is supposed to be closed. When the green door status light is lit, then Coop Tender knows that the door is closed. Calibrate the keypad by pressing the [*] button when Coop Tender is showing status messages. Visit us online http://www.CoopTender.com Updates to this manual may be accessed online by navigating to: http://www.cooptender.com/automatic_chicken_door_user_manual.pdf. Contact us We’d love to hear from you. Send us your comments, suggestions and pictures of your Coop Tender installed. Website: http://www.cooptender.com/contact eMail: [email protected] Phone: (888) 217-1958 sMail: Coop Tender 240 Executive Dr #1676 Cranberry Twp. PA 16066 10 Appendix A - Specifications Power consumption (normal operation) Power consumption (power save mode) Power consumption (chicken door opening or closing) Overall dimensions Coop tender door frame dimensions Coop Tender door opening dimensions Material Solar Panel (optional) Battery Drive mechanism Input Output DC motor Door opening time Door closing time Operating temperature 60mA 37mA 100mA – 120mA 26 ½ inches high x 17 ½ inches wide x 5 5/16 inches deep 26 ½ inches high x 13 ½ inches wide x 5 5/16 inches deep ~9 inches high x ~10 1/4 inches wide ¾ inch (1 inch dimensional) solid wood frame and door Metal faceplate and power panel Zinc coated steel drive mechanism 18 Volt, 10W 12 Volt, 5Ah 5/8” solid steel worm drive 85 - 240 Volts AC 15 volts DC 24V, 1A ~3 minutes ~3 minutes -40 to 185 degrees Fahrenheit 11 Appendix B – Coop Tender Menu Diagram 12 Appendix C – Keypad Functionality Menu Navigation Use the 2, 4, 6 and 8 keys to move up, left, down and right through the menu system Scroll The [*] key may be used to scroll through values for ambient light setting and to set a negative freeze protect temperature. Set Value Pressing the [#] key will set the value displayed on the LCD screen 13 Appendix D – Power Switch / AC Fuse The On position is marked with a line. The fuse compartment has a spare fuse and holds the active fuse for AC Power. Appendix E – Battery Fuse The battery fuse is located next to the power switch. The fuse must be installed after receiving your automatic chicken coop door. To install the fuse, use your fingernail or a slotted screwdriver. Gently press in while turning the fuse cap counter-clockwise until you feel slight resistance. The fuse cap will then come out. Place the fuse into the cap and then press in and turn clockwise until you feel slight resistance. The spare fuse located in the power switch may be used as a replacement for either the AC power fuse or the battery fuse. 14 Replacement and Warranty This product has been manufactured and tested to the highest quality standards by ITBS, Inc. d.b.a. Coop Tender® This Limited Warranty offered by ITBS, Inc. covers defects in material or workmanship. This warranty extends to the original purchaser only and is non-transferable. Only consumers purchasing products from authorized retailers or resellers or through the Coop Tender® website may obtain coverage under our limited warranties. ITBS, Inc. warrants this product against defects in material or workmanship as follows: ITBS, Inc. will replace at no charge for parts only or, at its option, replace any product or part of the product that proves defective because of improper workmanship and/or material, under normal installation, use, service and maintenance. If ITBS, Inc. is unable to provide a replacement and repair is not practical or cannot be made in a timely fashion, ITBS, Inc. may elect to refund the purchase price in exchange for the return of the product. Warranty period is 1 year from the documented date of purchase. Warranty does not cover any problem that is caused by: A. Conditions, malfunctions or damage not resulting from defects in material or workmanship. B. Conditions, malfunctions or damage resulting from, improper installation, improper maintenance, misuse, abuse, negligence, accident or alteration. C. Accessories, connected materials and products, or related products not manufactured by ITBS, Inc. Limited warranty is void if a product is returned with removed, damaged or tampered labels or any alterations (including removal of any component or external cover). ITBS, Inc. will not provide any warranty coverage unless claims are made in compliance with all terms of the controlling warranty statement included with your product and you follow proper return procedure. To request warranty service, you will need to provide: 1. 2. 3. 4. The sales receipt or other evidence of the date and place of purchase. A description of the problem. An RMA# (return merchandise authorization) Delivery of the product or the defective part, postage prepaid and carefully packed and insured, to: Coop Tender 240 Executive Dr #1676 Cranberry Twp., PA 16066 When warranty service is completed, any repaired or replacement product or part will be returned to you postage prepaid. To obtain an RMA# prior to filing a warranty repair claim, please contact us via e-mail with a description of the problem. We may be able to assist with a solution without the need for repair and shipping costs. REPAIR OR REPLACEMENT (OR, IN LIMITED CIRCUMSTANCES, REFUND OF THE PURCHASE PRICE) AS PROVIDED UNDER THIS WARRANTY IS THE EXCLUSIVE REMEDY OF THE PURCHASER. ITBS, Inc. NEITHER ASSUMES NOR AUTHORIZES ANY PERSON TO CREATE FOR IT ANY OTHER OBLIGATION OR LIABILITY IN CONNECTION WITH THIS PRODUCT. ITBS, Inc. SHALL NOT BE LIABLE TO PURCHASER OR ANY OTHER PERSON FOR ANY INCIDENTAL, SPECIAL OR CONSEQUENTIAL DAMAGES, ARISING OUT OF BREACH OF THIS WARRANTY OR ANY IMPLIED WARRANTY (INCLUDING BUT NOT LIMITED TO ANY IMPLIED WARRANTY OF MERCHANTABILITY). The laws of the State of Pennsylvania, USA, govern our warranties. It gives you specific legal rights, and you may also have other rights that vary from state to state. Our warranties do not affect any additional rights consumers have under laws in their jurisdictions governing the sale of consumer goods. Some states do not allow the exclusion or limitation of incidental or consequential damages, so the limitations or exclusions in our warranty statements may not apply. You may be required by law to give us a reasonable opportunity to correct or cure any failure to comply before you can bring any action in court against us under the Magnuson-Moss Warranty Act. 15