1
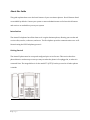
Ipiphony Phone System
User Manual
1|Page
About this Guide
This guide explains how to use the basic features of your new Aastra phones. Not all features listed
are available by default. Contact your system or network administrator to find out which features
and services are available to you on your system.
Introduction
The Aastra IP telephone has all the features of a regular business phone, allowing you to make and
receive calls, transfer, conference, and more. The IP telephone provides communications over an IP
Network using the SIP IP telephony protocol.
Getting Started
The Aastra IP phone must be set up and configured prior to its first use. This section describes
phone behavior and start up screens you may see when the phone is first plugged in, or when it is
restarted. Note: The image bellow is for the model 57i (6757i) but the process for all other phones
is similar.
2|Page
Plugging in and Starting the Phone
The IP phone automatically begins the start up sequence as soon as it is connected. Please make
sure that the network cable is connected to the LAN port and not the PC port. The phone goes
through this process the first time you plug it in and every time you restart it. The phone displays
the following startup screens.
The phone then checks settings and looks for new configuration and firmware updates from a
server. If a new update is found, the phone displays the message “Updating Configuration.” This
may take a few moments while the phone downloads the latest updates.
3|Page
Important: Do not unplug or remove power to the phone while it is checking or installing
firmware and configuring information.
If your phone did not successfully connect to the network, the "Network Disconnected" prompt
appears on the display and the telephone status light turns on.
Check that the cables are tightly connected to the phone and to the wall jack. The phone should
automatically detect when it is reconnected and display the "Network Connected" prompt for a few
seconds. However, if changes have been made to your phone’s network settings, you may need to
restart your phone.
Idle Screen
When the phone has successfully updated the configuration and connected to the network, it
displays the Idle State screen. The idle screen is shown whenever your phone is not in use (onhook). The Idle State screen lists your name and the date and time. The idle screen also displays (in
case of softkeys without an LCD screen they are just setup) the following default softkeys:
[Aastra53i]
------------------------------------------------------------------------------------------------------------------------------# Key 1:
Logout
# Key 2:
Delete
# Key 3:
Parking
# Key 4:
DND
# Key 5:
Call Forward
# Key 6:
Voice Mail
-------------------------------------------------------------------------------------------------------------------------------
4|Page
[Aastra55i]
------------------------------------------------------------------------------------------------------------------------------# Top Key 1:
Services
# Top Key 2:
Parking
# Top Key 3:
Speed Dial
# Top Key 4:
Presence
# Top Key 5:
Day/Night
# Top Key 6:
Intercom
# Key 1:
DND
# Key 2:
Call Forward
# Key 3:
Follow-me
# Key 4:
Voice Mail
# Key 5:
Meet-me
# Key 6:
ACD Agent
# Key 7:
Queues
# Key 19:
Keys
# Key 20:
Logout
------------------------------------------------------------------------------------------------------------------------------[Aastra57i]
------------------------------------------------------------------------------------------------------------------------------# Top Key 1:
Services
# Top Key 2:
Parking
# Top Key 3:
Speed Dial
# Top Key 4:
Presence
# Top Key 5:
Day/Night
# Top Key 6:
Intercom
# Key 1:
DND
# Key 2:
Call Forward
5|Page
# Key 3:
Follow-me
# Key 4:
Voice Mail
# Key 5:
Meet-me
# Key 6:
ACD Agent
# Key 7:
Queues
# Key 19:
Keys
# Key 20:
Logout
------------------------------------------------------------------------------------------------------------------------------[Aastra6730i]
------------------------------------------------------------------------------------------------------------------------------# Key 1:
Logout
# Key 2:
Parking
# Key 3:
DND
# Key 4:
Call Forward
# Key 5:
Presence
# Key 6:
Delete
# Key 7:
Directory
# Key 8:
Voice Mail
------------------------------------------------------------------------------------------------------------------------------[Aastra6731i]
template:Aastra6730i
[Aastra6739i]
------------------------------------------------------------------------------------------------------------------------------# Key 1:
Parking
# Key 2:
DND
# Key 3:
Call Forward
# Key 4:
Follow-me
# Key 5:
Presence
6|Page
# Key 6:
Speed Dial
# Key 7:
Intercom
# Key 8:
Day/Night
# Key 9:
Meet-me
# Key 10:
ACD Agent
# Key 11:
Queues
# Key 54:
Keys
# Key 55:
Logout
------------------------------------------------------------------------------------------------------------------------------When you lift the handset, the screen displays the default softkeys of:
• Dial
• Conference
• Xfer (Transfer)
Note: Some of the phones have dedicated keys for Transfer and Conference, and they are active
when the phone is off-hook.
Phone Options via the IP Phone UI
You can access specific options for the IP phone using the phone’s user interface (UI) via the
keypad. Pressing the Option button gives you a list of configurable options. These options allow you
to customize your phone’s settings.
1. Press the Options key on the phone to enter the options list.
2. To go to an option, use the up and down arrows to scroll through the list or press the
corresponding number.
3. Press the Show softkey, the right arrow button, or press the corresponding number to select an
option.
4. Use the softkeys that display for each option to change a selected option.
7|Page
5. Press the Done button to save the change.
6. Press the Options button, the left arrow button, or the red phone button at any time to exit
without saving changes.
Note: For more information about Options please refer to your Aastra phone manufacturer manual.
Using Your Phone
The following sections describe the various phone key functions and how they help you make and
manage your calls and caller information.
Making Calls
Dialing a Number
First, take the phone off-hook by:
• lifting the handset
• pressing the green speaker button or
• pressing a line/call appearance button.
At the dial tone, enter the number you wish to call. If you are unable to make calls within certain
area codes, check with your system administrator for any toll restrictions placed on your extension
that may restrict your access to long distance area codes or dialing prefixes.
Pre-dialing a Number
You can also make a call by pre-dialing a number. Pre-dialing lets you view a number before you
dial.
Using Handsfree Speakerphone
The handsfree feature allows you to speak to someone without using the handset.
• To dial using handsfree, first press and enter a number at the dial tone.
8|Page
• If in speaker audio mode, press to switch between handsfree and handset.
• If in speaker/headset audio mode, press to switch between handsfree and headset.
• When the handset is on hook, press to disconnect a handsfree call.
Redial
• Press the button with two up arrows to dial the most recent number you dialed from the phone.
• If you are off-hook and press the button with two up arrows the last number you called will be
called back.
• If you are on-hook and press the button with two up arrows, a Redial Directory list appears
onscreen.
The redial list stores up to the last 100 numbers you called, allowing you to scroll through and
select the number you wish to redial.
Mute
Press the Mute button (bottom right) at any time to mute handset, headset, or handsfree. The
speaker light will flash slowly and you can hear the caller, but they cannot hear you. To switch mute
on or off, press the button again.
Receiving Calls
When a call is ringing at your extension, you will see the "Inbound Call" Screen. The line/call
appearance light flashes quickly for the incoming call.
Answering an Incoming Call
To answer the call:
• For handsfree operation, press the green speaker button or the line/call appearance button to
accept the incoming call.
• Lift the handset for handset operation.
9|Page
If the phone is already connected to a call, pressing the line/call appearance button for the new
incoming call automatically places the connected call on hold and answers the new call. To
reconnect to a party, press the line/call appearance button for that call.
Placing a Call on Hold
When you place a call on hold, only your phone can retrieve the call.
1. Connect to the call (if not already connected).
2. Press the Hold key (phone with music note).
The line/call appearance light will begin to flash slowly and, after a short time, the phone will beep
softly to remind you that you still have a call on hold. The screen displays "Call Held" with the line
number that the call is being held on the phone.
Automatic Hold
When juggling between calls, you do not have to press the hold button to go from one call to the
next. The phone automatically puts your current call on hold as soon as you press a new line/call
appearance button. If you have more than one call on hold, you can reconnect to a held call by
pressing the line/call appearance button where that call is being held.
Retrieving a Held Call
If you have more than one call on hold, you can scroll through the held call information by pressing
the left and right arrow navigation keys. To reconnect to a call, press the line/call appearance
button where that call is being held. If you press the call/line appearance button again, you will
disconnect from the call.
Transferring Calls
When you lift the handset on the phone, the Xfer (Transfer) key displays on the bottom set of
softkeys by default (note: some of the phones have a dedicated transfer key). Use this key to
transfer calls. The softkey will be spelled out as Xfer. With a call on hold or still on the line, press
Xfer, then the extension or outside number you wish to transfer the call to, and then press Xfer
10 | P a g e
again. That way you will perform a “blind transfer.” If you would like to speak with the other party
first, press Dial instead of Xfer and that way you will be able to announce the call before
transferring.
Conferencing Calls
The Aastra phone system supports up to 3 parties, you included, in a conference call. When you lift
the handset on the phone, the Conference key displays on the bottom set of softkeys by default. Use
this key to create a conference call.
1. Connect to the first party you wish to include in the conference (if not already connected).
Note: A “Conference” softkey automatically appears in the display when on a call. For some models,
such as Aastra 53i, a programmable key must be enabled before using this feature.
2. Press the Conference key and a new line opens.
3. Press a line/call appearance button followed by the extension number of the person you wish to
add to the conference.
4. Wait for the new party to answer. You can consult with the new party first before adding them to
the conference.
5. If you do not wish to add the new party to the conference, press the line/call appearance button.
This disconnects the new party, leaving the original call on hold. To go back to the original call,
press the line/call appearance button for this call.
6. To add the new party to the conference, press the Conference key again.
7. To drop the new party from the conference, press the Conference key one more time.
Park/Pickup
The IP phone has a park and pickup call feature that allows you to park a call and pickup a call
when required. (Note: sometimes the Park and Retrieve options are associated with just one key).
Park a Call
1. While on a live call, press the "Park" softkey.
11 | P a g e
2. If the call is parked successfully, the response is either a greeting voice confirming that the call
was parked, or a hang up that displays a note that the call was transferred. The parked call party
will get music on hold.
Pickup a Parked Call
When a call is parked, your Park key will be flashing red. If you would like to retrieve a parked call,
press the Park softkey and select the call that you would like to retrieve. In the case of multiple
parked calls you can use the up or down arrow to select the call that you would like to retrieve. If
the call pick up is successful, you are connected with the parked call.
Intercom
To use the Intercom key:
1. Press the Intercom key.
2. Enter the extension number of the person you wish to intercom.
3. After a beep tone, your phone will automatically connect with the remote extension and you can
speak through its speaker.
4.To cancel intercom, press the red phone button or the Cancel softkey.
5. When you are finished speaking, hang up the phone by placing the handset back on-hook or by
pressing the red phone button or the line/call appearance button for the active call. When you hang
up, the remote phone will also hang up.
Do-Not-Disturb (DND)
If your DND softkey is pressed your phone will not ring and the callers will be routed straight to
your voicemail.
Call Forwarding
The call forwarding feature on the IP phone allows incoming calls to be forwarded to another
destination. The phone sends the SIP message to the SIP proxy, which then forwards the call to the
assigned destination. Call forwarding is disabled by default.
12 | P a g e
1. Select Call Fwd softkey.
2. Select Activate.
3. Enter the "Call Forward" number destination to which you want your incoming calls
forwarded. (Note: If you leave the "Number" field blank, call forwarding is disabled).
4. Press Submit to activate Call Forwarding.
If you would like to disable Call forwarding, select Call Fwd again and press Deactivate. You can also
set up a phone number under the My Numbers section of call forwarding so that you can select for
fast Call Fwd operation.
Follow-me
This feature allows the call to follow you to your cell phone after the initial ring time to your
extension. To enable this function, press Follow-me and follow the screen prompts. You can change
the Status, the Initial ring time, and the duration of the follow me until it ends up in your voicemail.
You can also confirm calls before taking them on your cell.
Voicemail
The envelope icon displays on the Idle State screen only if you have new messages waiting. The
number next to the envelope indicates how many new messages you have. The phone displays up
to 99 voicemails for a single account. You can access your voicemail by pressing the Voicemail
softkey. This way, you are entering into your visual voicemail menu. After entering your voicemail
password, you will be able to see details and play and/or delete your messages. By pressing
options, you can also enable functions such as: auto-login, password change, and greeting
recording. The other way of accessing your voicemail box is by dialing *97 from your extension.
The system will prompt you with a password and the menu is as follows:
13 | P a g e
Voicemail Main Menu
1 Play new voicemail messages
2 Change folders
3 Advanced options (note: these are only available when checking new voice messages)
1 Reply
3 Envelope
4 Play previous message
5 Repeat current message
6 Next message
7 Delete current message
8 Forward messages to another mailbox
9 Save message in a folder
* Rewind during message playback
# Skip forward during message playback
0 - Mailbox options
1 Record your unavailable message
2 Record your busy message
3 Record your name
14 | P a g e
4 Record your temporary message
5 Change your password
* Return to the main menu
* Help
# Exit
To call your VM from any phone in the office:
Dial *98
Enter your extension followed by the # key
Enter your password followed by the # key
To call your mailbox from outside the office:
Call your main phone number
If you have an Automated answering system then dial * followed by your extension
If you do not have an automated answering system then ask to be transferred to * plus your
extension (example *4100 will transfer that call directly to the VM box of extension 4100
instead of ringing the phone first). Wait for your greeting. Enter * followed by your
password.
To transfer a call directly to the VM box:
Press Transfer
Dial *followed by the extension number;
15 | P a g e
To access your VM from the web browser as well:
Enter http://ip_address_of_yourserver in any web browser
Enter your extension as your Login
Enter your password (same as password when dialing the voicemail system)
Meet-me
If your system administrator enables Conference bridges in your system, you will be able to see
them by pressing Meet-me. This is how you join a conference bridge.
Additional softkeys:
ACD Agent
If your system has Queues set up you will be able to login or off of a certain queue by using the ACD
agent softkey.
Queues
If your system has Queues set up you will be able to monitor the queue and take calls from it by
pressing callers followed by pickup.
Logout
You can logout from your phone using the voicemail password by pressing the Logout key. This way
you can log back in with your extension on another phone, saving you the process of physically
moving your phone to a different desk or office.
Services
By pressing Services, you will be able to access: Directory, Callers List, Voicemail, and Applications.
The Directory is the internal directory for your company, the Callers List displays the last 200 calls
16 | P a g e
that you have received, Voicemail is another access point for messages, and Applications will give
you access to sites such as CNN News, Google etc.
Speed Dial
By pressing speed dial, you can enter personal phone numbers (think of storing phone numbers on
your cell phone).
Presence
The Presence key will allow you to change your status from available to away, at lunch, etc. This
way, you can apply a temporary custom greeting that informs the caller that you are away.
Day/Night
The Day/Night key can be set up by your administrator to manually switch your phone system to
statuses such as after hours, general voicemail, etc.
Other features:
Missed Calls Indicator
The Aastra phone has a "missed calls" indicator that increments the number of missed calls to the
phone. This feature is accessible from the IP phone UI only. The number of calls that have not been
answered increment on the phone’s idle screen as "<number> New Calls." As the number of
unanswered calls increase, the phone numbers associated with the calls are stored in the Callers
List. The user can access the Callers List and clear the call from the list. Once the user accesses the
Callers List, the "<number> New Calls" on the idle screen is cleared.
Feature Codes
Call Forwarding
*52
Call Forward No Answer/Unavailable Activate – This feature will allow calls to be forwarded
to a predetermined number if no one is available to take the call. This will bypass the phone
system’s voicemail.
17 | P a g e
*53
Call Forward No Answer/Unavailable Deactivate – This function will allow calls to operate
normally within the phone system. Voicemails will be left on the phone system.
*72
Call Forwarding System – This function allows a user to configure a location for calls to be
forwarded unconditionally. This means that the local phone will not ring but the call will
automatically be forwarded to the provided number. This can be configured for any extension.
Enter the extension number followed by the pound key and then enter the number to call when a
call is being forwarded (with area code) followed by the pound key. This will be followed by a voice
confirmation.
*73
Disable Call Forwarding – This function removes all call forwarding information and turns
off the call forwarding feature for the extension at which the code is entered.
*74
Call Forward all prompting deactivate - This function removes all call forwarding
information and turns off the call forwarding feature for the extension at which the code is entered.
*90
Call Forward on Busy – This function allows a user to configure a location for calls to be
forwarded only when a busy signal is sent. A Busy signal is sent when a user is on the phone, if call
waiting is enabled, and when the user is on the phone with another call waiting for them and a third
call arrives. At this point, the call will automatically be forwarded to the provided number. This can
be configured for any extension. Enter the extension number followed by the pound key, and then
the number to call when a call is being forwarded (with area code) followed by the pound key. This
will be followed by a voice confirmation.
*91
Disable Call Forward on Busy - This function removes all call forwarding information and
turns off the call forwarding feature for the extension at which the code is entered.
*92
Call Forward Busy Prompting Deactivate – This function removes all call forwarding
information and turns off the call forwarding feature for the extension at which the code is entered.
18 | P a g e
Call Waiting
*70
Activate Call Waiting (deactivated by default) – This function will allow an extension to have
multiple phone calls ring at the same time.
*71
Deactivate Call Waiting – This function will send callers to the voicemail if the extension is in
use.
Do Not Disturb
*78
Enable Do-Not-Disturb – This function will disable all calls coming to the extension. Callers
will be sent directly to voicemail.
*79
Disable Do-Not-Disturb – This function enables calls to come through normally on the
extension.
Miscellaneous Functions
*60
Time – This function will bring up an automated voice and tell you the exact time up to the
second.
*62
Schedule wakeup call – This function will allow you to schedule a wakeup call. Enter the
time in a four digit format (i.e. 0930); the first two digits will represent the hour and the last two
digits will represent the minutes. A voice will then ask you to choose a.m. or p.m. and a
confirmation message will play.
*65
Speak your extension number (your extension is XXX) – This function will state the
extension number of the phone that it is entered into.
*69
Last Caller number/ID – This function will speak the digits of the last call made to that
particular extension. It will also connect you to the number if 1 is pressed.
19 | P a g e
Restarting your phone
You may want to restart your phone to check for updates on the server and you may
occasionally need to restart your phone to apply changes or updates to your phone or network
settings. You may also need to restart your phone if you have been asked to do so by your system
administrator, or should you experience any unexpected behavior.
1. Press the Options button on the phone to enter the options list.
2. Use the down arrow key to scroll down the list of options to Restart Phone and press Select.
3. Press Restart to restart of the phone. If you do not wish to restart your phone, press Cancel.
20 | P a g e