1
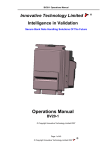
NV200 User Manual
GA794-A
Innovative Technology
Secure Banknote Handling Solutions Of The Future
NV200 User Manual – GA794-A
This is a draft version of the manual. Features and specification may change.
Revision History
INNOVATIVE TECHNOLOGY LTD
Title:
Drawing No
NV200 USER MANUAL
Author
GA794
RJS
Issue
A
Release Date
21/04/08
Date
Format
21/04/08
Modified By
RJS
First Draft
MS Word 2000
Comments
Page 2 of 29
A.u.S. Spielgeräte Gmbh www.aus.at © Copyright ITLtd 2008
®
NV200 User Manual – GA794-A
This is a draft version of the manual. Features and specification may change.
Contents
1
Introduction ...................................................................................................................................... 4
2
Specification..................................................................................................................................... 5
3
General Description ......................................................................................................................... 6
4
Ordering Information ........................................................................................................................ 7
5
Installation ........................................................................................................................................ 8
5.1
Mounting................................................................................................................................ 8
5.2
Lock installation..................................................................................................................... 8
6
Machine and User Interfaces ......................................................................................................... 11
6.1
16-way external connector .................................................................................................. 11
6.2
USB connection................................................................................................................... 11
6.3
Dip Switches........................................................................................................................ 12
6.4
Bezel LED’s......................................................................................................................... 12
6.4.1
Operational Colour........................................................................................................ 12
6.4.2
Diagnostic Codes.......................................................................................................... 12
6.5
Modes of Operation............................................................................................................. 13
6.5.1
Smiley® Secure Protocol (SSP) ................................................................................... 13
6.5.2
Parallel .......................................................................................................................... 14
6.5.3
Binary............................................................................................................................ 15
6.5.4
Pulse ............................................................................................................................. 16
6.5.5
MDB (Multi Drop Bus)................................................................................................... 17
6.5.6
ccTalk®......................................................................................................................... 18
6.5.7
Other interfaces ............................................................................................................ 18
7
Re-Calibration ................................................................................................................................ 19
8
Reprogramming the NV200 ........................................................................................................... 20
8.1
Dataflash® Memory Cards.................................................................................................. 20
8.2
Validator Manager Software................................................................................................ 21
8.3
Validator Programming System (DA3) ................................................................................ 21
9
Cash Box Removal ........................................................................................................................ 22
10 Note Path Access........................................................................................................................... 22
11 Bezel Installation ............................................................................................................................ 23
12 Validator Head Unit Removal......................................................................................................... 23
Appendix A – Dimensions .................................................................................................................... 24
Appendix B – Escrow Function............................................................................................................. 26
Appendix C – Implemented ccTalk® commands ................................................................................. 27
Appendix D – Parts List and Exploded Drawings................................................................................. 28
Page 3 of 29
A.u.S. Spielgeräte Gmbh www.aus.at © Copyright ITLtd 2008
®
NV200 User Manual – GA794-A
This is a draft version of the manual. Features and specification may change.
1 Introduction
This manual describes the operation of the NV200 Bank Note Validator, programmed with Firmware
Version 4.02 or greater, and is intended for those who will install the NV200 equipment
A.u.S. Spielgeräte GmbH
Scheydgasse 48
A-1210 Wien
Tel: +43 1-271 66 00
Fax: +43 1-271 66 00 75
E-mail: [email protected]
Web site: http://www.aus.at/
WARNING
ONLY SUITABLY TRAINED PERSONNEL SHOULD CARRY OUT ANY WORK ON THIS
EQUIPMENT IN ACCORDANCE WITH ALL CURRENT LOCAL, NATIONAL AND
INTERNATIONAL HEALTH AND SAFETY REGULATIONS.
Smiley® and the ITL Logo are international registered trademarks and they are the property of
Innovative Technology Limited.
Innovative Technology has a number of European and International Patents and Patents
Pending protecting this product. If you require further details please contact the factory.
Innovative Technology, Automated transactions or bellis technology are not responsible for
any loss, harm, or damage caused by the installation and use of this product. This does not
affect your local statutory rights. If in doubt please contact Innovative Technology for details of
any changes
CAUTIONS:
NEVER EXCEED THE RECOMMENDED ENVIRONMENTAL AND ELECTRICAL LIMITS.
DO NOT ATTEMPT TO LUBRICATE THE MECHANISMS AS THIS MAY AFFECT THE NOTE
TRANSPORT.
DO NOT POLISH THE LENS AS THIS MAY ALTER THE OPTICAL CHARACTERISTICS.
IF THE NV200 VALIDATOR IS DISASSEMBLED THE UNIT MUST BE RE-CALIBRATED AND RE
INITIALISED, FOLLOWING RE-ASSEMBLY.
Innovative Technology Ltd has a policy of continual product improvement. As a result the products
supplied may vary from the specification described here.
Page 4 of 29
A.u.S. Spielgeräte Gmbh www.aus.at © Copyright ITLtd 2008
®
NV200 User Manual – GA794-A
This is a draft version of the manual. Features and specification may change.
2 Specification
Electrical Supply
Supply Voltage (V DC) Absolute Limits
Supply Ripple Voltage
Supply Currents:
Standby
Validating
Peak (Motor Stall)
Minimum
+11V
0
Maximum
+13.5V
0.25V @100 Hz
0.4A
1.5A
3.0A
Table 1 - Electrical Supply Specification
Environment
Minimum
+3oC
5%
Temperature
Humidity
Maximum
+50oC
95% Non condensing
Table 2 - Environmental Specification
Interface Logic levels
Inputs
Outputs with 2K2Ω pull up
Maximum Current Sink
Logic Low
0V To +0.5V
0.6V
50mA per output
Logic High
+3.7 V +12V
Pull up voltage of host interface
Table 3 - Interface Logic Levels
Note sizes accepted
Weight
Note to note time
Escrow
Cash box capacity
Interface
Width: 60 – 85mm, Length: 115 – 167mm
2.8Kg
3 Seconds
Single note
500 street grade notes
SSP, Parallel, Pulse, Binary, ccTalk, MDB.
(Contact ITL for other interface availability)
Table 4 - General Specification
Page 5 of 29
A.u.S. Spielgeräte Gmbh www.aus.at © Copyright ITLtd 2008
®
NV200 User Manual – GA794-A
This is a draft version of the manual. Features and specification may change.
3 General Description
The NV200 is the next generation of note reader from Innovative Technology Ltd.
•
Simple, quick re-programming (approximately 30 seconds) with 128 bit encrypted memory
card, PIN number protected
•
Up to 16 channels (Depending on mode of operation)
•
Secure dual lock cash box with 500 used note capacity
•
Seamless note path
•
Can accept notes up to 85mm wide and 167mm long
•
3 seconds note to note
•
Reads industry standard barcodes in any direction
•
Note centring and straightening mechanism
•
Single note escrow function
•
User definable colour for bezel illumination
Figure 1 - The NV200
Page 6 of 29
A.u.S. Spielgeräte Gmbh www.aus.at © Copyright ITLtd 2008
®
NV200 User Manual – GA794-A
This is a draft version of the manual. Features and specification may change.
4 Ordering Information
When ordering NV200 the following information must be specified:
NV200 EUR01 404 CCT 255 255 255 N 12345 0 123456
Product
Dataset
Firmware Version
Firmware Interface
Red LED brightness
Green LED brightness
Blue LED brightness
Bezel Flash
Memory Card PIN
Number of re-tries
ccTalk key
Figure 2 - Order Code Example
Dataset – This code signifies the currency and notes included, for example, EUR01 contains 5, 10,
and 20 Euro notes, EUR02 contains the 5, 10, 20 and 50 Euro notes. For available datasets and
dataset codes, please refer to the currency download section of our website www.aus.at
Firmware – This code is the version of firmware required. If left blank, the latest current version will
be programmed
Interface – This is the 3 letter code of the required communications interface. For more details of
available interfaces, see chapter 6.5 - Modes of Operation.
SSP
MDB
PL1
CCT
PAR
BIN
–
–
–
–
–
–
Smiley Secure Protocol
Multi-Drop-Bus
Pulse Mode
ccTalk
Parallel
Binary
LED Brightness – The values of brightness for each colour of the bezel LED’s in the order Red,
Green, Blue between 0 and 255. If no colour is specified, the NV200 will be shipped with the bezel
colour set to magenta by default.
Bezel Flash – Y/N. If the bezel flash is set to Y, when enabled, the validator bezel will flash at a rate
of 1Hz. If set to N, the bezel will be illuminated constantly when the validator is enabled.
Memory Card PIN – The required PIN number for the memory card. Programming with a memory
card has the added security of setting a PIN number. The PIN programmed into the memory card
must match the PIN programmed into the NV200 for re-programming to take place.
Number of Re-tries – The number of times the NV200 will read the note should it not be recognised
on the first attempt. This value must be between 0 and 2
ccTalk Encryption Key – The required ccTalk encryption key if the selected interface is CCT. If left
blank, a key of 123456 will be used.
Page 7 of 29
A.u.S. Spielgeräte Gmbh www.aus.at © Copyright ITLtd 2008
®
NV200 User Manual – GA794-A
This is a draft version of the manual. Features and specification may change.
5 Installation
5.1
Mounting
The NV200 can be mounted via the mounting holes on either side of the chassis using 4 x M4 fixing
screws and a suitable mounting bracket. See Appendix A – Dimensions for the location of the
mounting holes.
NOTE:
• The length of the screw must be no more than 6mm plus the thickness of the mounting
bracket.
It is also possible to mount the NV200 via fixing holes in the rear of the chassis. Care must be taken
not to obstruct the cash box when using the rear fixing holes.
5.2
Lock installation
The NV200 has the provision of fitting three locks for extra security. One lock can be added to the
front of the NV200 that locks the validator head and cash box into position without the need of
external brackets. Another two locks can be added to the cash box itself for extra security. If the locks
are fitted to the cashbox, when it is removed from the validator, it is not possible to gain access to the
notes contained without first unlocking both locks.
The cams required for the lock are supplied with the NV200 attached to the back of the lock blanking
plugs. For lock fitting instructions, see drawing numbers GA605 and GA606 on the following pages.
Suggested lock:
Page 8 of 29
A.u.S. Spielgeräte Gmbh www.aus.at © Copyright ITLtd 2008
®
NV200 User Manual – GA794-A
This is a draft version of the manual. Features and specification may change.
Insert Drawing Number GA605
Page 9 of 29
A.u.S. Spielgeräte Gmbh www.aus.at © Copyright ITLtd 2008
®
NV200 User Manual – GA794-A
This is a draft version of the manual. Features and specification may change.
Insert Drawing Number GA606
Page 10 of 29
A.u.S. Spielgeräte Gmbh www.aus.at © Copyright ITLtd 2008
®
NV200 User Manual – GA794-A
This is a draft version of the manual. Features and specification may change.
6 Machine and User Interfaces
Figure 3 - Connector And Switch Location
6.1
16-way external connector
The function of pins 1-8 changes according to which machine interface is being used. See the
individual interface descriptions for details.
Pin
1
2
3
4
5
6
7
8
9
Name
Vend 1
Vend 2
Vend 3
Vend 4
Inhibit 1
Inhibit 2
Inhibit 3
Inhibit 4
Busy
Type
Output
Output
Output
Output
Input
Input
Input
Input
Output
10
Escrow
Input
11
12
13
14
15
16
Factory Use Only
Factory Use Only
+Vin
Power
0V
Ground
Description
Open collector outputs.
Function changes depending on machine interface protocol (see
individual interface descriptions for details)
Inputs are held high to internal +5V via 10KΩ.
Function changes depending on machine interface protocol (see
individual interface descriptions for details)
Active LOW when the NV200 is transporting, reading or stacking a
note
Enable the escrow function by holding LOW in Parallel, Pulse or
Binary modes (See Appendix B – Escrow Function)
Not connected
Not connected
Do Not Connect
Do Not Connect
Nominal 12V DC supply
0V supply
Table 5 - 16-way External Connector Pin Out
6.2
USB connection
The USB connector can be used to program the NV200 with the validator manager software, and for
communications when used in SSP and SIO modes. When used for programming only, no external
power supply is required.
If notes are to be inserted, power must be applied to the NV200 via the 16-pin external connector
before connecting the USB cable.
Page 11 of 29
A.u.S. Spielgeräte Gmbh www.aus.at © Copyright ITLtd 2008
®
NV200 User Manual – GA794-A
This is a draft version of the manual. Features and specification may change.
6.3
Dip Switches
The bank of 8 dip switches have the following function:
Switch No
1
2
3
4
5
6
7
8
Function
Disable Barcode
Channel 1 Inhibit
Channel 2 Inhibit
Channel 3 Inhibit
Channel 4 Inhibit
Channel 5 Inhibit
Channel 6 Inhibit
Programming Mode
Switch OFF (Ø)
Switch ON (×)
Barcode read enabled
Barcode read disabled
Channel 1 enabled
Channel 1 disabled
Channel 2 enabled
Channel 2 disabled
Channel 3 enabled
Channel 3 disabled
Channel 4 enabled
Channel 4 disabled
Channel 5 enabled
Channel 5 disabled
Channel 6 enabled
Channel 6 disabled
Switch from OFF to ON and back to OFF to activate
Table 6 - Dip Switch Functions
6.4
Bezel LED’s
6.4.1 Operational Colour
The operational colour of the bezel illumination can be set to a user definable colour by using the
BNV Currency Manager Software. Each of the three colours of LED in the bezel can be set to a
different brightness level (0-255) to achieve the desired colour. The colour is selected using the
sliders in the set validator options section of the BNV Currency Manager Software. The default colour
for the bezel is Magenta
Examples:
Red – 200, Green – 125, Blue – 255
Red – 255, Green – 255, Blue – 0
The Bezel LED’s can also be set to either solid or flashing at a rate of once per second when the note
validator is enabled.
Re-programming the NV200 with a memory card that has been programmed using the NV Card
Utilities software will also set the colour and operation of the LED’s.
6.4.2 Diagnostic Codes
If the NV200 detects an error that is preventing normal operation, the Bezel LED’s will indicate the
cause of the problem by flashing in a certain sequence as shown in Table 7 - Bezel LED Diagnostic
Codes. The LED’s will first flash red a number of times (at 300ms intervals) to indicate the general
area of the problem, then flash blue a number of times (at 120ms intervals) to give a more exact
cause. The full sequence repeats after a pause of 700ms.
Number of
RED flashes
1
2
3
4
1
Note Path Open
Cash Box removed
Firmware Checksum
PSU too Low
Number of BLUE flashes
2
3
Note Path Jam
Unit Not Initialised
Cash Box Jam
Interface checksum EEPROM Checksum
PSU too High
Card Not Formatted
4
Dataset Checksum
Table 7 - Bezel LED Diagnostic Codes
Page 12 of 29
A.u.S. Spielgeräte Gmbh www.aus.at © Copyright ITLtd 2008
®
NV200 User Manual – GA794-A
This is a draft version of the manual. Features and specification may change.
6.5
Modes of Operation
6.5.1 Smiley® Secure Protocol (SSP)
SSP is a secure serial interface specifically designed to address the problems experienced by cash
handling systems in gaming machines. Problems such as acceptor swapping, reprogramming
acceptors and line tapping are all addressed. This interface is recommended for all new designs.
The interface uses a master slave model, the host machine is the master and the peripherals (note
acceptor, coin acceptor or coin hopper) are the slaves.
Data transfer is over a multi-drop bus using clock asynchronous serial transmission with simple open
collector drivers. The integrity of data transfers is ensured through the use of 16 bit CRC checksums
on all packets.
SSP mode can be activated temporarily for the purpose of re-programming the NV200. This is done
by switching DIPSwitch 8 ON then OFF again.
NOTE: This mode can only be cancelled by re-programming via the Validator Manager
program or a DA3. Please ensure you are aware of all the NV200 programmed settings before
entering this mode. Failure to restore the original setting will stop the NV200 from operating in
the host machine
Connections:
Pin
1
2
3
4
5
6
7
8
9
10
11
12
13
14
15
16
Name
Type
Vend 1
Output
Vend 2
Output
Vend 3
Output
Vend 4
Output
Inhibit 1
Input
Inhibit 2
Input
Inhibit 3
Input
Inhibit 4
Input
Busy
Output
Escrow
Input
Factory Use Only
Factory Use Only
+Vin
Power
0V
Ground
1
15
2
16
Description
Serial Data Out (Tx)
Not Used
Not Used
Not Used
Serial Data In (Rx)
Not Used
Not Used
Not Used
Not Used
Not Used
Not connected
Not connected
Do Not Connect
Do Not Connect
Nominal 12V DC supply
0V supply
Table 8 - SSP Pin Description
Other Information:
Minimum time between polls: - 200ms
Default SSP address: - 0x00
For detailed information and full protocol specification please refer to SSP Interface Specification ITL
(Drawing GA138), this is available from the ITL website www.aus.at
To help in the software implementation of the SSP, ITL can provide DLL controls and Visual
Basic applications on request. Please contact [email protected] for more information.
Page 13 of 29
A.u.S. Spielgeräte Gmbh www.aus.at © Copyright ITLtd 2008
®
NV200 User Manual – GA794-A
This is a draft version of the manual. Features and specification may change.
6.5.2 Parallel
In parallel mode the NV200 will issue a 100ms (±3%) active LOW pulse on the relevant vend line. A
maximum of 4 channels can be used.
Connections:
Pin
1
2
3
4
5
6
7
8
9
Name
Vend 1
Vend 2
Vend 3
Vend 4
Inhibit 1
Inhibit 2
Inhibit 3
Inhibit 4
Busy
Type
Output
Output
Output
Output
Input
Input
Input
Input
Output
10
Escrow
Input
11
12
13
14
15
16
Factory Use Only
Factory Use Only
+Vin
Power
0V
Ground
1
15
2
16
Description
Channel 1 credit, 100ms (±3%) active LOW pulse.
Channel 2 credit, 100ms (±3%) active LOW pulse.
Channel 3 credit, 100ms (±3%) active LOW pulse.
Channel 4 credit, 100ms (±3%) active LOW pulse.
Inhibit channel 1 by holding this pin HIGH, hold LOW to enable.
Inhibit channel 2 by holding this pin HIGH, hold LOW to enable.
Inhibit channel 3 by holding this pin HIGH, hold LOW to enable.
Inhibit channel 4 by holding this pin HIGH, hold LOW to enable.
Active LOW when the NV200 is transporting, reading or stacking a
note
Enable the escrow function by holding LOW (See Appendix B –
Escrow Function)
Not connected
Not connected
Do Not Connect
Do Not Connect
Nominal 12V DC supply
0V supply
Table 9 - Parallel and Binary Pin Description
Vend signals: (pins 1 to 4) The four channels have their own individual outputs. If a note is
recognised then the relevant Vend line is set low for a period of 100ms ± 3%. Pulses outside these
limits should be rejected as a precaution against false triggering.
Inhibit inputs: (Pins 5 – 8) Channels 1 to 4 have their own inhibit input to allow the host machine to
refuse specified notes. To inhibit a channel, the relevant inhibit input must be held high. To enable a
channel, the corresponding inhibit must be latched low so that notes may be accepted.
If all four inhibits are high simultaneously then the NV200 will be disabled. In this state the bezel will
not illuminate and if a note is inserted the motor will run in reverse preventing the insertion of the
note.
All four inhibits may be connected together to create a 'global' inhibit. In this way the NV200 may be
brought in and out of operation by the host machine.
Busy Output: (Pin 9). This is a general-purpose busy signal. It is active low while the NV200 is in
operation.
Escrow Control: (Pin 10) Hold this pin Low to enable the single note escrow function.
(See Appendix B – Escrow Function).
Page 14 of 29
A.u.S. Spielgeräte Gmbh www.aus.at © Copyright ITLtd 2008
®
NV200 User Manual – GA794-A
This is a draft version of the manual. Features and specification may change.
6.5.3 Binary
In Binary mode, the NV200 will issue a binary pattern on vend lines 1 to 4 as shown in Table 10 Binary Credit Outputs. A maximum of 15 channels can be used.
Vend 1
LOW
HIGH
LOW
HIGH
LOW
HIGH
LOW
HIGH
LOW
HIGH
LOW
HIGH
LOW
HIGH
LOW
Vend 2
HIGH
LOW
LOW
HIGH
HIGH
LOW
LOW
HIGH
HIGH
LOW
LOW
HIGH
HIGH
LOW
LOW
Vend 3
HIGH
HIGH
HIGH
LOW
LOW
LOW
LOW
HIGH
HIGH
HIGH
HIGH
LOW
LOW
LOW
LOW
Vend 4
HIGH
HIGH
HIGH
HIGH
HIGH
HIGH
HIGH
LOW
LOW
LOW
LOW
LOW
LOW
LOW
LOW
Credit Channel
Channel 1
Channel 2
Channel 3
Channel 4
Channel 5
Channel 6
Channel 7
Channel 8
Channel 9
Channel 10
Channel 11
Channel 12
Channel 13
Channel 14
Channel 15
Table 10 - Binary Credit Outputs
Connections:
Connections in Binary mode are the same as for Parallel mode.
Note: Channels higher than four cannot be individually inhibited, but will be globally inhibited if inhibits
1 to 4 are held high.
Page 15 of 29
A.u.S. Spielgeräte Gmbh www.aus.at © Copyright ITLtd 2008
®
NV200 User Manual – GA794-A
This is a draft version of the manual. Features and specification may change.
6.5.4 Pulse
In Pulse mode the NV200 outputs a number of pulses on Vend 1. The number of pulses for each
channel is different and set to default values within the dataset. The number of pulses and the pulse
duration can be modified using the Validator Manager Software. A maximum of 16 channels can be
used.
Connections:
Pin
1
2
3
4
5
6
7
8
9
Name
Vend 1
Vend 2
Vend 3
Vend 4
Inhibit 1
Inhibit 2
Inhibit 3
Inhibit 4
Busy
Type
Output
Output
Output
Output
Input
Input
Input
Input
Output
10
11
12
13
14
15
16
Escrow
Input
Factory Use Only
Factory Use Only
+Vin
Power
0V
Ground
1
15
2
16
Description
Credit pulse stream output.
Not Used
Not Used
Not Used
Inhibit channel 1 by holding this pin HIGH, hold LOW to enable.
Inhibit channel 2 by holding this pin HIGH, hold LOW to enable.
Inhibit channel 3 by holding this pin HIGH, hold LOW to enable.
Inhibit channel 4 by holding this pin HIGH, hold LOW to enable.
Active LOW when the NV200 is transporting, reading or stacking a
note
Not Used
Not connected
Not connected
Do Not Connect
Do Not Connect
Nominal 12V DC supply
0V supply
Table 11 - Pulse Mode Pin Description
Note: Channels higher than four cannot be individually inhibited, but will be globally inhibited if inhibits
1 to 4 are held high.
Page 16 of 29
A.u.S. Spielgeräte Gmbh www.aus.at © Copyright ITLtd 2008
®
NV200 User Manual – GA794-A
This is a draft version of the manual. Features and specification may change.
6.5.5 MDB (Multi Drop Bus)
MDB is a serial bus interface commonly used in electrically controlled vending machines. This is a
9600 Baud Master-Slave system where the NV200 banknote validator is a slave to a master
controller. A Vending Machine Controller (VMC) has the capability of communicating with 32
peripherals or slaves.
Connections:
To use the NV200 in MDB mode, an IF5 external interface is required. The IF5 regulates the power
supply and opto-isolates the communication lines.
MDB Splitter Cable
16-way Ribbon Cable
Vending Machine
Controller
IF5 Interface
Coin Changer
Figure 4 - Connecting the NV200 in MDB mode
Other Information:
MDB address: - 0x30
NV200 supports the MDB Protocol Version 1, Level 1.
For detailed information and full protocol specification, please refer to www.vending.org
Page 17 of 29
A.u.S. Spielgeräte Gmbh www.aus.at © Copyright ITLtd 2008
®
NV200 User Manual – GA794-A
This is a draft version of the manual. Features and specification may change.
6.5.6 ccTalk®
ccTalk® is a serial communication protocol commonly used in gaming machines. The protocol allows
various types of cash handling equipment to be connected to the same 3-wire bus (+12V, 0V and
Data). To use the NV200 in ccTalk mode, pins 1 and 5 (Tx and Rx) must be connected together as
the data line.
Connections:
Data
1
2
Pin
1
2
3
4
5
6
7
8
9
10
11
12
13
14
15
16
Name
Type
Vend 1
Output
Vend 2
Output
Vend 3
Output
Vend 4
Output
Inhibit 1
Input
Inhibit 2
Input
Inhibit 3
Input
Inhibit 4
Input
Busy
Output
Escrow
Input
Factory Use Only
Factory Use Only
+Vin
Power
0V
Ground
5
+12V 0V
15
16
Description
Serial Data. Must also be connected to pin 5
Not Used
Not Used
Not Used
Serial Data. Must also be connected to pin 1
Not Used
Not Used
Not Used
Not Used
Not Used
Not connected
Not connected
Do Not Connect
Do Not Connect
Nominal 12V DC supply
0V supply
Table 12 - ccTalk Pin Description
Other Information:
For a list of supported commands please see Appendix C – Implemented ccTalk® commands
For detailed information and full protocol specification, please refer to www.cctalk.org
Default ccTalk address: - 0x28 (40 dec)
Encrypted ccTalk uses 16 bit CRC checksum. If the encryption is disabled, the user can select either
simple 8 bit or 16 bit CRC checksums.
6.5.7 Other interfaces
Any queries regarding interfaces not mentioned in this manual should be made to [email protected]
Page 18 of 29
A.u.S. Spielgeräte Gmbh www.aus.at © Copyright ITLtd 2008
®
NV200 User Manual – GA794-A
This is a draft version of the manual. Features and specification may change.
7 Maintenance and Re-Calibration
7.1
Routine Maintenance
The NV200 Validator has been designed to minimise any performance variation over time. Much of
this is achieved by careful hardware and software design. The protective positioning of the sensor
lenses prevents damage and airborne contamination reaching the optical sensors.
However, depending upon the environment the NV200 may at some time require cleaning.
CAUTION: DO NOT USE SOLVENT BASED CLEANERS SUCH AS ALCOHOL, PETROL,
METHYLATED SPIRITS, WHITE SPIRIT OR PCB CLEANER. THIS WILL RESULT IN
PERMANENT DAMAGE TO THE VALIDATOR, ONLY USE A MILD DETERGENT.
To clean, pull the top cover release latch forward and lift the upper cover. The note path is now
exposed for cleaning. Carefully wipe the surfaces with a soft lint free cloth that has been dampened
with a water and mild detergent solution (i.e. household washing up liquid). Take particular care
around all the sensor lenses, ensuring they are clean and dry.
7.2
Re-calibration
The NV200 has an in-built self-calibration system that maintains the optical sensors at their best
operating point. However if the NV200 is disassembled for any reason it will need to be re-calibrated.
Re-calibration may only be performed under license from ITL, contact [email protected] for further
details. Re-calibration can only be performed in conjunction with the diagnostics software option in
the ITL BNV Currency Manager Program.
Page 19 of 29
A.u.S. Spielgeräte Gmbh www.aus.at © Copyright ITLtd 2008
®
NV200 User Manual – GA794-A
This is a draft version of the manual. Features and specification may change.
8 Reprogramming the NV200
The NV200 can be updated in a number of ways as follows:
• Atmel Dataflash Memory Cards
• ITL Bank Note Validator Currency Manager Software
• Validator Programming System (DA3)
8.1
Dataflash® Memory Cards
The slot at the front of the NV200 can be used to reprogram the validator from an Atmel DataFlash®
Memory card, without the need to remove the validator from the host machine. The validator
firmware, dataset and optional settings can all be programmed in approximately 30 seconds by
simply inserting a programmed memory card into the slot at the front of the validator. If only the
dataset is to be reprogrammed this time is reduced to approximately 10 seconds (depending on the
number of notes in the dataset) and if only the optional settings are being changed (i.e. the bezel
illumination colour), programming is complete in less than one second.
For security reasons, the memory card is protected by 128 bit encryption and an optional 5 digit PIN
code. The PIN code programmed onto the card must match the code programmed into the NV200 to
enable the programming operation.
The card must first be programmed using a DA3 and the NV Card Utilities software following the
steps below clicking ‘next’ after each step (See document number GA796 – NV Card Utilities for more
information).
•
Run the NV Card utilities software and insert the dataflash card into the DA3 memory card
slot A
•
Select the required firmware/dataset file
•
Modify the dataset pulse settings, channel allocations etc as required
•
Select required firmware interface
•
Set desired operational bezel colour, illumination mode (steady or flashing) and the number
of retries
•
Set the 5 digit PIN number (if required)
•
Update card
Once the memory card has been programmed with the required information, the NV200 is reprogrammed by simply inserting the card into the memory card slot. During re-programming the Bezel
LED will flash, alternating from BLUE and MAGENTA, and change to solid GREEN when the
programming is complete. If there is an error, the Bezel LED’s will change RED instead of GREEN.
NOTE:
Only Atmel 8MB DataFlash® cards can be used. Standard SD memory cards will not function.
Page 20 of 29
A.u.S. Spielgeräte Gmbh www.aus.at © Copyright ITLtd 2008
®
NV200 User Manual – GA794-A
This is a draft version of the manual. Features and specification may change.
8.2
Validator Manager Software
The ITL BNV Currency Manager software offers the following functions:
• Program the Validator by downloading pre-prepared download file which contains the the
latest currency and firmware.
• Change the colour of the front bezel LED’s
• Check the version of firmware and currency already loaded on a NV200 unit.
• Adjust the channel and pulse configuration on a pre-programmed NV200 to your own
requirements.
• Use diagnostic functions to check Validators operation
The NV200 can be connected directly via the USB port, or with either a DA1 or DA2 kit connected to
the 16-way external connector.
When connected to a computer, the NV200 must be set to SSP mode. SSP programming mode is
activated temporarily for the purpose of re-programming the NV200. This is done by switching
DIPSwitch 8 ON then OFF again.
NOTES:
•
The Validator must be set to SSP Mode when connected to a computer and then
returned to the original settings when complete.
•
This mode can only be cancelled by re-programming via the Validator Manager
program or a DA3. Please ensure you are aware of all the NV200 programmed settings
before entering this mode. Failure to restore the original setting will stop the NV200
from operating in the host machine
•
ITL BNV Currency Manager 3.2.2 or higher must be used to access the NV200
functions
8.3
Validator Programming System (DA3)
The DA3 is a programming system designed to enable the programming of ITL Bank Note Validators
in the field without the use of a PC.
Once the DA3 has been programmed the user can:
•
Update the existing software within a validator to the latest versions using the BNV Match
Download function.
•
Reprogram the validator to accept a different currency using the BNV Override Download
function
•
Test the functionality of the validator away from the Host machine.
For full DA3 operation and functionality details please refer to the DA3 User Manual (Document
number GA339)
NOTE:
• The Validator must be set to SSP Mode when programming with a DA3 and then
returned to the original settings when complete.
•
This mode can only be cancelled by re-programming via the Validator Manager
program or a DA3. Please ensure you are aware of all the NV200 programmed settings
before entering this mode. Failure to restore the original setting will stop the NV200
from operating in the host machine
Page 21 of 29
A.u.S. Spielgeräte Gmbh www.aus.at © Copyright ITLtd 2008
®
NV200 User Manual – GA794-A
This is a draft version of the manual. Features and specification may change.
9 Cash Box Removal
To remove the cash box from the NV200, first unlock the ‘Cashbox & Head Release Lock’ (if fitted).
Pull the silver ‘Cashbox Release Handle’. The cashbox will slide forward for removal.
Cash box release handle
Figure 5 - Cashbox Removal
To replace the cashbox, simply slide it into the chassis and push until it clips into place.
10 Note Path Access
To access the note path of the NV200, pull the top cover release latch forward and lift the upper
cover.
Top cover release latch
Figure 6 - Note Path Access
To close the note path, simply push the cover down until it clicks into place.
Page 22 of 29
A.u.S. Spielgeräte Gmbh www.aus.at © Copyright ITLtd 2008
®
NV200 User Manual – GA794-A
This is a draft version of the manual. Features and specification may change.
11 Bezel Installation
To fit the bezel to the NV200 access to the note path is required. Lift the upper cover by pulling the
latch forward. Connect the cable from the bezel assembly to the socket located on the front of the
validator head unit and click the assembly down into place. Close the note path upper cover. M3
screws can be fitted to hold the bezel assembly securely in place if required.
12 Validator Head Unit Removal
To remove the head unit from the validator, first unlock the ‘Cashbox & Head Release Lock’ (if fitted).
Lift the silver ‘Head Release Latch’ located on the front of the validator, slide the head unit forward
and lift up away from the chassis.
Head Release Latch
Figure 7 - Validator Head Removal
To replace the head unit, align the lugs on the chassis with the groove on the underside of the head
assembly and slide the head assembly backwards until it clicks securely into place.
Page 23 of 29
A.u.S. Spielgeräte Gmbh www.aus.at © Copyright ITLtd 2008
®
NV200 User Manual – GA794-A
This is a draft version of the manual. Features and specification may change.
Appendix A – Dimensions
Drawing number GA604 on the following page shows the external dimensions of the NV200 with
mounting hole locations.
Page 24 of 29
A.u.S. Spielgeräte Gmbh www.aus.at © Copyright ITLtd 2008
®
NV200 User Manual – GA794-A
This is a draft version of the manual. Features and specification may change.
Insert Drawing number GA604
Page 25 of 29
A.u.S. Spielgeräte Gmbh www.aus.at © Copyright ITLtd 2008
®
NV200 User Manual – GA794-A
This is a draft version of the manual. Features and specification may change.
Appendix B – Escrow Function
The NV200 has a single note escrow facility (pin 10) used in Parallel and Binary modes. This allows
the Validator to hold onto the note once accepted, and then only stack the note in the cash box when
the host machine confirms that the Vend operation has been completed. If no confirmation of the
Vend is received then the note will be returned to the customer after 30 seconds, (see Figure 8 Escrow Timing Diagram).
30sec Max.
Do not wait more than 30
seconds for the 2nd vend
confirmation signal
Escrow
Vend Signal
100ms
100ms
Escrow
Vend Signal
Inhibit rejection can be at any
time during the 30 second
decision period after completion
of the vend
Inhibit
Figure 8 - Escrow Timing Diagram
If the host machine itself aborts the transaction by setting the corresponding inhibit input high, the
note is returned immediately.
The sequence of operations is as follows:
•
Pin 10 held low awaiting note insertion.
•
Note inserted. Validator issues a 100ms pulse on the appropriate channel.
•
The host machine initiates vend process.
•
The host machine sets pin 10 high to indicate that it wants the note. If this is not done within
30 seconds the Validator will return the note.
•
The Validator issues a 100ms pulse on the appropriate channel after pin 10 going high to
indicate final acceptance of the note.
NOTE: If the signal has not been received within 30 seconds it indicates the customer
has forcibly retrieved the note and the vend must be aborted.
•
The vend process is completed.
•
The host machine sets pin 10 low in expectation of the next vend.
The host machine can force the return of the note to the customer by setting the inhibit line high, at
any time before the end of the 30 second time-out. For channels above 4, setting all the inhibits high
will cause a note reject.
In the event of a note being forcibly removed from the mouth of the NV200 during the 30-second
interval, the NV200 will go out of service for 45 seconds.
Page 26 of 29
A.u.S. Spielgeräte Gmbh www.aus.at © Copyright ITLtd 2008
®
NV200 User Manual – GA794-A
This is a draft version of the manual. Features and specification may change.
Appendix C – Implemented ccTalk® commands
Command
SIMPLE_POLL
ADDRESS_POLL
ADDRESS_CLASH
ADDRESS_CHANGE
ADDRESS_RANDOM
REQUEST_POLLING_PRIORITY
REQUEST_MANF_ID
REQUEST_EQUIP_CAT_ID
REQUEST_PRODUCT_CODE
SERIAL_NUMBER
REQUEST_SOFTWARE_REVISION
READ_OPTO_STATES
PERFORM_SELF_CHECK
SET_INHIBITS
REQ_INHIBITS
SET_MASTER_INHIBIT
REQ_MASTER_INHIBIT
REQUEST_INS_COUNT
REQUEST_ACCEPT_COUNT
REQUEST_DATA_STORAGE_AVAIL
REQUEST_OPTION_FLAGS
CALCULATE_ROM_CHECKSUM
REQUEST_BUILD_CODE
REQUEST_BASE_YEAR
REQUEST_ADDRESS_MODE
READ_BUFFERED_BILL_EV
REQUEST_BILL_ID
REQUEST_COUNTRY_SCALING
REQUEST_BILL_POSITION
ROUTE_BILL
MODIFY_BILL_OPERATING_MODE
REQUEST_BILL_OPERATING_MODE
STACKER_CYCLE
OPERATE_BI_MOTORS
REQUEST_CURRENCY_REVISION
SWITCH_ENCRYPTION_CODE
STORE_ENCRYPTION_CODE
REQUEST_COMMS_REVISION
RESET_DEVICE
Header
254
253
252
251
250
249
246
245
244
242
241
236
232
231
230
228
227
226
225
216
213
197
192
170
169
159
157
156
155
154
153
152
147
146
145
137
136
4
1
Table 13 - Implemented ccTalk commands
Page 27 of 29
A.u.S. Spielgeräte Gmbh www.aus.at © Copyright ITLtd 2008
®
NV200 User Manual – GA794-A
This is a draft version of the manual. Features and specification may change.
Appendix D – Parts List and Exploded Drawings
The Following Assemblies are available as spares
Part Number
PA610
PA621
PA629
PA630
PM614
MC247
Description
Bezel assy
Validator final assy
Cashbox final assy
Chassis assy
Lock Cam Gear
Cashbox Lock Cam
Where Used
PA631
PA631
PA631
PA631
-
Page 28 of 29
A.u.S. Spielgeräte Gmbh www.aus.at © Copyright ITLtd 2008
®
NV200 User Manual – GA794-A
This is a draft version of the manual. Features and specification may change.
Insert Drawing Number PA631
Page 29 of 29
A.u.S. Spielgeräte Gmbh www.aus.at © Copyright ITLtd 2008
®