1
50GL
Single Package Electric Cooling Units
with Puron® (R-410A) Refrigerant
Visit www.carrier.com
Installation, Start-Up, and Operating Instructions
Sizes 024-060
NOTE: Read the entire instruction manual before starting the
installation.
Index
Page
SAFETY CONSIDERATIONS...................................................1
RULES FOR SAFE INSTALLATION AND OPERATION.1-4
GENERAL ................................................................................4
RECEIVING AND INSTALLATION..................................4-10
Step 1 — Check Equipment .......................................................4
IDENTIFY UNIT......................................................................4
INSPECT SHIPMENT .............................................................4
Step 2 — Provide Unit Support .................................................4
ROOF CURB ............................................................................4
SLAB MOUNT.........................................................................4
GROUND LEVEL....................................................................4
Step 3 — Field Fabricate Ductwork..........................................4
Step 4 — Provide Clearances .....................................................4
Step 5 — Rig and Place Unit......................................................4
INSPECTION............................................................................4
INSTALLATION ..................................................................4-6
Step 6 — Connect Condensate Drain........................................6
Step 7 — Install Duct Connections ........................................6-8
CONFIGURING UNITS FOR DOWNFLOW (VERTICAL)
DISCHARGE ..............................................................................7-8
Step 8 — Install Electrical Connections ..............................8-10
HIGH-VOLTAGE CONNECTIONS..................................8-10
STANDARD CONNECTION................................................10
SPECIAL PROCEDURES FOR 208-V OPERATION.........10
CONTROL VOLTAGE CONNECTIONS ............................10
TRANSFORMER PROTECTION .........................................10
PRE-START-UP.........................................................................11
START-UP.............................................................................11-14
MAINTENANCE ..................................................................15-20
TROUBLESHOOTING.............................................................22
START-UP CHECKLIST .........................................................23
NOTE TO INSTALLER — Before the installation, READ THESE
INSTRUCTIONS CAREFULLY AND COMPLETELY. Also,
make sure the User’s Manual and Replacement Guide are left with
the unit after installation.
SAFETY CONSIDERATIONS
Installation and servicing of air-conditioning equipment can be
hazardous due to system pressure and electrical components. Only
trained and qualified personnel should install, repair, or service
air-conditioning equipment.
Untrained personnel can perform basic maintenance functions of
cleaning coils and filters. All other operations should be performed
by trained service personnel. When working on air-conditioning
equipment, observe precautions in the literature, tags and labels
attached to the unit, and other safety precautions that may apply.
Follow all safety codes. Wear safety glasses and work gloves. Use
quenching cloth for unbrazing operations. Have fire extinguisher
available for all brazing operations. Consult a qualified installer or
C99064
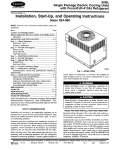
Fig. 1—Model 50GL
service agency for information or assistance. The qualified installer or agency must use only factory-authorized kits or accessories when modifying this product.
Before performing service or maintenance operations on
system, turn off power to unit. Turn off accessory heater
power switch, if applicable. Electrical shock can cause
serious injury or death.
Puron (R-410A) systems operate at higher pressures than
standard R-22 systems. Do not use R-22 service equipment or
components on Puron (R-410A) equipment. Ensure service
equipment is rated for Puron (R-410A).
RULES FOR SAFE INSTALLATION AND OPERATION
.
Recognize safety information. This is the safety-alert symbol
When you see this symbol in instructions or manuals, be alert to
the potential for personal injury.
Understand the signal words DANGER, WARNING, CAUTION,
IMPORTANT, and NOTE. These words are used with the safetyalert symbol. DANGER identifies the most serious hazards which
will result in severe injury or death. WARNING signifies a hazard
which could result in serious injury or death. CAUTION is used to
identify unsafe practices which would result in minor personal
injury or product and property damage. NOTE and IMPORTANT
are used to highlight suggestions which will result in enhanced
installation, reliability, or operation.
Manufacturer reserves the right to discontinue, or change at any time, specifications or designs without notice and without incurring obligations.
Book 1 4
PC 101
Catalog No. 565-013
Printed in U.S.A.
Form 50GL-1SI
Pg 1
6-00
Replaces: New
Tab 1b 1a
REQ’D CLEARANCES FOR OPERATION AND SERVICING. in. (mm)
REQ’D CLEARANCES TO COMBUSTIBLE MAT’L. in. (mm)
Evaporator coil access side . . . . . . . . . . . . . . . . . . 36 (914)
Power entry side (except for NEC requirements) . . . . . . . . . 36 (914)
Unit top . . . . . . . . . . . . . . . . . . . . . . . . . . 48 (1219)
Side opposite ducts . . . . . . . . . . . . . . . . . . . . . 36 (914)
Duct panel . . . . . . . . . . . . . . . . . . . . . . . . 12 (304.8)*
*Minimum distances: If unit is placed less than 12 in. (304.8 mm) from wall
system, then the system performance may be compromised.
Top of unit . . . . . . . . . . . . . . . . . . . . . . . . . 14 (355.6)
Duct side of unit . . . . . . . . . . . . . . . . . . . . . . . 2 (50.8)
Side opposite ducts . . . . . . . . . . . . . . . . . . . . . 14 (355.6)
Bottom of unit . . . . . . . . . . . . . . . . . . . . . . . 0.50 (12.7)
Flue panel . . . . . . . . . . . . . . . . . . . . . . . . . 36 (914.4)
NEC REQ’D CLEARANCES. in. (mm)
Between units, power entry side . . . . . . . . . . . . . . 42 (1066.8)
Unit and ungrounded surfaces, power entry side . . . . . . . . . 36 (914)
Unit and block or concrete walls and other grounded
surfaces, control box side . . . . . . . . . . . . . . . . . 42 (1066.8)
LEGEND
CG - Center of Gravity
COND - Condenser
EVAP - Evaporator
NEC - National Electrical Code
REQ'D - Required
Note: Dimensions are in in. (mm)
C00064
Fig. 2—50GL024-036 Unit Dimensions
CENTER OF GRAVITY
IN. [MM]
kg
UNIT HEIGHT
IN. [MM]
"A"
X
Y
Z
122.5
37.02 [940.3]
18.5 [469.9]
14.5 [368.3]
16.0 [406.4]
291
132.0
39.02 [991.1]
19.5 [495.3]
15.5 [393.7]
17.6 [447.0]
299
135.6
35.02 [889.5]
19.5 [495.3]
15.3 [387.4]
16.5 [419.1]
UNIT WEIGHT
UNIT
ELECTRICAL CHARACTERISTICS
lb
50GL024
208/230-1-60
270
50GL030
208/230-1-60, 208/230-3-60
50GL036
208/1-60, 208/230-3-60, 460-3-60
2
REQUIRED CLEARANCE FOR OPERATION AND SERVICING
REQUIRED CLEARANCE TO COMBUSTIBLE MATL.
in. [mm]
EVAP. COIL ACCESS SIDE..............................................................36.00 [914.0]
POWER ENTRY SIDE......................................................................36.00 [914.0]
(EXCEPT FOR NEC REQUIREMENTS)
UNIT TOP .........................................................................................36.00 [914.0]
SIDE OPPOSITE DUCTS ................................................................36.00 [914.0]
DUCT PANEL ...................................................................................12.00 [304.8] *
in. [mm]
TOP OF UNIT...................................................................................14.00 [355.6]
DUCT SIDE OF UNIT.........................................................................2.00 [50.8]
SIDE OPPOSITE DUCTS ................................................................14.00 [355.6]
BOTTOM OF UNIT .............................................................................0.50 [12.7]
ELECTRIC HEAT PANEL .................................................................36.00 [914.4]
NEC. REQUIRED CLEARANCES.
*MINIMUM DISTANCES: IF UNIT IS PLACED LESS THAN 12.00 [304.8] FROM
WALL SYSTEM, THEN SYSTEM PERFORMANCE MAYBE COMPROMISE.
MILLIMETERS [IN.]
BETWEEN UNITS, POWER ENTRY SIDE ....................................42.00 [1066.8]
UNIT AND UNGROUNDED SURFACES, POWER ENTRY SIDE ...36.00 [914.0]
UNIT AND BLOCK OR CONCRETE WALLS AND OTHER
GROUNDED SURFACES, POWER ENTRY SIDE.........................42.00 [1066.8]
C00065
Fig. 3—50GL042-060 Unit Dimensions
ELECTRICAL CHARACTERISTICS
lb
50GL042
208/230-1-60, 208/230-3-60, 460-3-60
321
50GL048
208-230-1-60, 208/230-3-60, 460-3-60
326
50GL060
208/230-1-60, 208/230-3-60, 460-3-60
399
CENTER OF GRAVITY
IN. [MM]
kg
UNIT HEIGHT
IN. [MM]
"A"
X
Y
Z
146
38.98 [990.2]
20.5 [520.7]
16.8 [425.5]
16.6 [421.6]
148
38.98 [990.2]
19.5 [495.3]
17.6 [447.6]
18.0 [457.2]
181
42.98 [1091.1]
20.5 [520.7]
16.2 [412.8]
17.6 [447.0]
UNIT WEIGHT
UNIT
3
openings. All ductwork should be secured to the flanges. Insulate
and weatherproof all external ductwork, joints, and roof openings
with counter flashing and mastic in accordance with applicable
codes.
The power supply (volts, phase, and hertz) must correspond to that
specified on unit rating plate.
The electrical supply provided by the utility must be sufficient to
handle load imposed by this unit.
Ducts passing through an unconditioned space must be insulated
and covered with a vapor barrier. If a plenum return is used on a
vertical unit, the return should be ducted through the roof deck to
comply with applicable fire codes. A minimum clearance is not
required around ductwork. Cabinet return-air static shall not
exceed -.25 in. wg.
This installation must conform with local building codes and with
NEC (National Electrical Code) and NFPA 70, NFPA 54/ANSI
Z223.1 latest revision, and NFGC (National Fuel Gas Code). Refer
to provincial and local plumbing or waste water codes and other
applicable local codes.
Approved for outdoor installation on wood flooring or on class A,
B or C roof covering materials.
Step 4—Provide Clearances
The required minimum operating and service clearances are shown
in Fig. 2 and 3. Adequate ventilation and condenser air must be
provided.
These instructions cover minimum requirements and conform to
existing national standards and safety codes. In some instances,
these instructions exceed certain local codes and ordinances,
especially those that may not have kept up with changing residential construction practices. We require these instructions as a
minimum for a safe installation.
Do not restrict condenser airflow. An air restriction at either
the outdoor-air inlet or the fan discharge can be detrimental to
compressor life.
GENERAL — The 50GL units are fully self-contained, and designed for outdoor installation (See Fig. 1). See Fig. 2 and 3 for
unit dimensions. All unit sizes have discharge openings for both
horizontal and downflow configurations, and are factory shipped
with all duct openings covered . Units may be installed either on
a rooftop, ground-level cement slab, or directly on the ground if
local codes permit. See Fig. 4 for roof curb dimensions.
The condenser fan draws air through the condenser coil and
discharges it through the top fan grill. Be sure that the fan
discharge does not recirculate to the condenser coil. Do not locate
the unit in either a corner or under an overhead obstruction. The
minimum clearance under a partial overhang (such as a normal
house overhang) is 36-in. above the unit top. The maximum
horizontal extension of a partial overhang must not exceed 48 in.
RECEIVING AND INSTALLATION
Step 1—Check Equipment
Do not place the unit where water, ice, or snow from an overhang
or roof will damage or flood the unit. Do not install the unit on
carpeting, tile, or other combustible materials.
IDENTIFY UNIT — The unit model number and serial number
are stamped on unit identification plate. Check this information
against shipping papers and job data.
Step 5—Rig and Place Unit
INSPECT SHIPMENT — Inspect for shipping damage while unit
is still on shipping pallet. If unit appears to be damaged or is torn
loose from its anchorage, have it examined by transportation
inspectors before removal. Forward claim papers directly to
transportation company. Manufacturer is not responsible for any
damage incurred in transit. Check all items against shipping list.
Immediately notify the nearest Carrier Air Conditioning office if
any item is missing. To prevent loss or damage, leave all parts in
original packages until installation.
Rigging and handling of this equipment can be hazardous for many
reasons due to the installation location (roofs, elevated structures,
etc.)
Only trained, qualified crane operators and ground support staff
should handle and install this equipment.
When working with this equipment, observe precautions in the
literature, on tags, stickers and labels attached to the equipment,
and any other safety precautions that might apply.
Step 2—Provide Unit Support
Follow all applicable safety codes. Wear safety shoes and work
gloves.
ROOF CURB — Install accessory roof curb in accordance with
instructions shipped with curb (See Fig. 4 for roof curb dimensions). Install insulation, cant strips, roofing, and flashing. Ductwork must be attached to curb.
INSPECTION — Prior to initial use, and at monthly intervals, all
rigging brackets and straps should be visually inspected for any
damage, evidence of wear, structural deformation, or cracks.
Particular attention should be paid to excessive wear at hoist
hooking points and load support areas. Brackets or straps showing
any kind of wear in these areas must not be used and should be
discarded.
IMPORTANT: The gasketing of the unit to the roof curb is critical
for a watertight seal. Install gasketing material supplied with the
roof curb. Improperly applied gasketing can also result in air leaks
and poor unit performance. Curb should be level to within 1/4 in.
(See Fig. 6). This is necessary for unit drain to function properly.
Refer to accessory roof curb installation instructions for additional
information as required.
INSTALLATION
1. Remove unit from shipping carton. Leave top shipping skid on
the unit as a spreader bar to prevent the rigging straps from
damaging the unit. If the wood skid is not available, use a
spreader bar of sufficient length to protect unit from damage.
SLAB MOUNT — Place the unit on a solid, level concrete pad
that is a minimum of 4 in. thick with 2 in. above grade. The slab
should extend 2 in. on sides of the unit. Do not secure the unit to
the slab except when required by local codes.
2. Position the lifting bracket assembly around the base of the
unit. Be sure the strap does not twist.
GROUND LEVEL — If local codes permit, the unit can be placed
directly on the ground. Prepare a level gravel foundation for proper
drainage.
3. Place each of the 4 metal lifting brackets into the handholds in
the composite pan.
4. Thread lifting bracket strapping around bottom perimeter of
unit as follows:
Step 3—Field Fabricate Ductwork
Secure all ducts to roof curb and building structure on vertical
discharge units. Do not connect ductwork to unit. For horizontal
applications, unit is provided with flanges on the horizontal
a. Open lever of tension buckle (ratchet type).
b. Feed strapping through tension buckle (See Fig. 8).
4
C
46 3/16
B
D
17 3/8
TYP.
44 5/16
1 TYP.
7/8
3
13/16
SUPPORT B
A
B
SUPPORT A (2)
SIDE
(2)
2
END VIEW
END
(2)
DECK PAN (INSULATED)
A99320
SIDE PANEL
0.75"
3.0"
SUPPORT RIB(S)
BASE PAN
BOTTOM SUPPLY
4.0"
SEAL STRIP
(FACTORY SUPPLIED)
COUNTER FLASHING
(FIELD SUPPLIED)
NAILER
ROOFING FELT
(FIELD SUPPLIED)
INSULATION
(FIELD SUPPLIED)
CANT STRIP
(FIELD SUPPLIED)
ROOFING MATERIAL
(FIELD SUPPLIED)
A99340
50GL
UNIT SIZE
024-036
ROOF CURB
042-060
A
IN. [MM]
B
IN. [MM]
C
IN. [MM]
D
IN. [MM]
CPRFCURB006A00
8 [203]
11-27/32 [301]
30-5/8 [778]
28-3/4 [730]
CPRFCURB007A00
14 [356]
11-27/32 [301]
30-5/8 [778]
28-3/4 [730]
CPRFCURB008A00
8 [203]
15-27/32 [402]
42-1/8 [1070]
40-1/4 [1022]
CPRFCURB009A00
14 [356]
15-27/32 [402]
42-1/8 [1070]
40-1/4 [1022]
ODS CATALOG ORDERING NO.
NOTES:
1. Roof curb must be set up for unit being installed.
2. Seal strip must be applied as required to unit being installed.
3. Dimensions in [ ] are in millimeters.
4. Roof curb is made of 16 gage steel.
5. Table lists only the dimensions per ODS Catalog Ordering Number that have changed.
6. Attach ductwork to curb (flanges of duct rest on curb).
7. Insulated panels: 1-in. thick fiberglass 1 lb density.
Fig. 4—Roof Curb Dimensions
5
OPTIONAL
RETURN
AIR
OPENING
HANDHOLD
OPTIONAL
SUPPLY
AIR
OPENING
HOOK
2"
FEED
EVAP. COIL
COND. COIL
C99067
C99014
Fig. 8—Belt Threading
Fig. 5—Slab Mounting Details
A
914-1371
(36”-54”)
914-137"
(36"-54")
“A”
DUCTS
927.57
(36”-52”)
B
“B”
SEAL STRIP MUST BE IN
PLACE BEFORE PLACING
UNIT ON ROOF CURB
1226.3
(48.28”)
DETAIL A
SCALE 0.250
PLACE RIGGING STRAPS IN
BASEPAN SLOT (BELOW HANDHOLDS)
BEFORE RIGGING
C99015
Fig. 6—Suggested Rigging
TIGHTEN STRAPPING SECURELY
WITH TENSION BUCKLE
SIZE
MAXIMUM WEIGHT
A
B
lb
kg
in.
mm
in.
mm
024
292
132.5
18.5
469.9
14.50
368.3
030
313
142.5
19.5
495.3
15.50
393.7
036
321
145.6
19.5
495.3
15.25
387.4
042
343
155.6
20.5
520.7
16.75
425.5
048
348
157.9
19.5
495.3
17.62
447.6
060
421
191.0
20.5
520.7
16.25
412.8
INSTALL SAFETY STRAPS TO
RIGGING CLEVIS AT 4 RIGGING BRACKETS
SEE DETAIL A
PLACE RIGGING BRACKET ASSEMBLY IN 4
HAND HOLES AND INSTALL TIE DOWN STRAP
AROUND PERIMETER OF UNIT AND THROUGH
SPACE IN BRACKET ASSEMBLY
C99066
Fig. 9—Lifting Point
8. Position lifting point directly over the unit’s center of gravity.
9. Lift unit. When unit is directly over the roof curb, remove the
2 safety straps. Lower the equipment onto the roof curb.
Step 6—Connect Condensate Drain
NOTE: When installing condensate drain connection be sure to
comply with local codes and restrictions.
A
Model 50GL disposes of condensate water through a 3/4 in. NPT
fitting which exits through the base on the evaporator coil access
side (See Fig. 2 and 3 for location).
C
Condensate water can be drained directly onto the roof in rooftop
installations (where permitted) or onto a gravel apron in groundlevel installations. Install a field-supplied condensate trap at end of
condensate connection to ensure proper drainage. Make sure that
the outlet of the trap is at least 1 in. lower than the drainpan
condensate connection to prevent the pan from overflowing (See
Fig. 10). When using a gravel apron, make sure it slopes away
from the unit.
MAXIMUM ALLOWABLE
DIFFERENCE (in.)
B
A-B
B-C
1/4
1/4
A-C
1/4
C99065
Fig. 7—Unit Leveling Tolerances
c. Pull strapping through tension buckle unit taut.
Connect a drain tube using a minimum of 3/4 -in. PVC or 3/4 -in.
copper pipe (all field-supplied) at the outlet end of the 2-in. trap.
Do not undersize the tube. Pitch the drain tube downward at a
slope of at least one in. for every 10 ft of horizontal run. Be sure
to check the drain tube for leaks. Prime trap at the beginning of the
cooling season start-up.
d. Snap lever down to lock strap in tension buckle. To release
strapping, squeeze safety latch, lift lever, and pull webbing
outward.
5. Tighten the tension buckle until it is taut. Lifting brackets
must be secure in the handholds.
Step 7—Install Duct Connections
6. Attach field-supplied clevis or hook of sufficient strength to
hole in the lifting bracket (See Fig. 9).
The unit has duct flanges on the supply- and return-air openings on
the side and bottom of the unit. For downshot applications the
ductwork can be connected to the roof curb (See Fig. 2 and 3 for
connection sizes and locations).
7. Attach the 2 safety straps directly to the clevis or hook at the
4 rigging brackets. DO NOT attach the safety straps to the
lifting brackets (See Fig. 9).
6
Table 1—Physical Data — Unit 50GL
UNIT SIZE
024
030
036
042
048
NOMINAL CAPACITY (ton)
2
2-1/2
3
3-1/2
4
5
OPERATING WEIGHT (lb)
270
291
299
321
326
399
COMPRESSOR
060
Scroll
REFRIGERANT (R-410A)
Quantity (lb)
5.0
5.5
6.9
9.0
9.5
10.0
Accurater® Piston
REFRIGERANT METERING DEVICE
Orifice ID (in.)
.057
.057
.065
.070
.073
.086
CONDENSER COIL
Rows...Fins/in.
Face Area (sq ft)
1...17
10.9
1...17
12.7
2...17
9.1
2...17
12.3
2...17
12.3
2...17
16.4
CONDENSER FAN
Nominal Cfm
Diameter (in.)
Motor Hp (Rpm)
2350
22
1/8 (825)
2350
22
1/8 (825)
2350
22
1/8 (825)
2350
22
1/8 (825)
3300
22
1/4 (1100)
3300
22
1/4 (1100)
EVAPORATOR COIL
Rows...Fins/in.
Face Area (sq ft)
3...15
3.7
3...15
3.7
3...15
3.7
3...15
4.7
4...15
4.7
4...15
4.7
EVAPORATOR BLOWER
Nominal Airflow (Cfm)
Size (in.)
Motor (hp)
800
10x10
1/4
1000
10x10
1/4
1200
10x10
1/2
1400
11x10
3/4
1600
11x10
3/4
1750
11x10
1
24x30x1
24x30x1
HIGH-PRESSURE SWITCH (psig)
Cutout
Reset (Auto)
610 ± 15
420 ± 25
LOSS-OF-CHARGE/LOW-PRESSURE SWITCH
(Liquid Line) (psig)
Cutout
Reset (Auto)
20 ± 5
45 ± 10
RETURN-AIR FILTERS (in.)*
Throwaway
20x20x1
20x20x1
20x24x1
20x30x1
* Required filter sizes shown are based on the larger of the ARI (Air Conditioning and Refrigeration Institute) rated cooling airflow or the heating airflow velocity of 300
ft/min for throwaway type or 450 ft/min for high-capacity type. Air filter pressure drop for non-standard filters must not exceed 0.08 in. wg.
2. Remove side duct covers to access bottom return and supply
knock out covers (See Fig. 12).
1” MIN.
TRAP
OUTLET
3. To remove supply and return duct covers, break front and right
side connecting tabs with a screwdriver and a hammer. Push
cover down to break rear and left side tabs.
2” MIN.
4. If unit ductwork is to be attached to vertical opening flanges
on the unit basepan (jackstand applications only), do so at this
time. Collect ALL screws that were removed. Do not leave
screws on rooftop as permanent damage to the roof may occur.
C99013
Fig. 10—Condensate Trap
5. It is recommended that the basepan insulation around the
perimeter of the vertical return-air opening be secured to the
basepan with aluminum tape. Applicable local codes may
require aluminum tape to prevent exposed fiberglass.
IMPORTANT: Use flexible connectors between ductwork and
unit to prevent transmission of vibration. Use suitable gaskets to
ensure weathertight and airtight seal. When electric heat is
installed, use fire proof canvas (or similar heat resistant material)
connector between ductwork and unit discharge connection. If
flexible duct is used, insert a sheet metal sleeve inside duct. Heat
resistant duct connector (or sheet metal sleeve) must extend 24-in.
from the unit connections flanges into the ductwork.
6. Cover both horizontal duct openings with the duct covers
shipped on the unit from the factory. Ensure opening is air-and
watertight.
7. After completing unit conversion, perform all safety checks
and power up unit.
Table 2 — Minimum Airflow for Safe Electric Heater
Operation (Cfm)
NOTE: The design and installation of the duct system must be in
accordance with the standards of the NFPA for installation of
nonresidence-type air conditioning and ventilating systems, NFPA
90A or residence-type, NFPA 90B; and/or local codes and
ordinances.
SIZE
024
030
036
042
048
060
800
1000
1200
1400
1600
2000
Adhere to the following criteria when selecting, sizing, and
installing the duct system:
CONFIGURING UNITS FOR DOWNFLOW (VERTICAL) DISCHARGE
8. Select and size ductwork, supply-air registers, and return-air
grilles according to American Society of Heating, Refrigeration and Air Conditioning Engineers (ASHRAE) recommendations.
Before performing service or maintenance operations on the
system, turn off main power to unit or electrical shock could
result.
9. Use flexible transition between rigid ductwork and unit to
prevent transmission of vibration. The transition may be
screwed or bolted to duct flanges. Use suitable gaskets to
ensure weathertight and airtight seal.
1. Open all electrical disconnects before starting any service
work.
7
Step 8—Install Electrical Connections
10. All units must have field-supplied filters or accessory filter
rack installed in the return-air side of the unit. Recommended
sizes for filters are shown in Table 1.
11. Size all ductwork for maximum required airflow (either
heating or cooling) for unit being installed. Avoid abrupt duct
size increases or decreases or performance may be affected.
The unit cabinet must have an uninterrupted, unbroken
electrical ground to minimize the possibility of personal
injury if an electrical fault should occur. This ground may
consist of an electrical wire connected to the unit ground lug
in the control compartment, or conduit approved for electrical
ground when installed in accordance with NEC (National
Electrical Code) ANSI/ NFPA (latest edition) (in Canada,
Canadian Electrical Code CSA [Canadian Standards Association] C22.1) and local electrical codes. Failure to adhere to
this warning could result in personal injury or death.
12. Adequately insulate and weatherproof all ductwork located
outdoors. Insulate ducts passing through unconditioned space,
and use vapor barrier in accordance with latest issue of Sheet
Metal and Air Conditioning Contractors National Association
(SMACNA) and Air Conditioning Contractors of America
(ACCA) minimum installation standards for heating and air
conditioning systems. Secure all ducts to building structure.
13. Flash, weatherproof, and vibration-isolate all openings in
building structure in accordance with local codes and good
building practices.
Failure to follow these precautions could result in damage to
the unit being installed:
1. Make all electrical connections in accordance with NEC
ANSI/NFPA(latest edition) and local electrical codes governing such wiring. In Canada, all electrical connections
must be in accordance with CSA standard C22.1 Canadian
Electrical Code Part 1 and applicable local codes. Refer to
unit wiring diagram.
2. Use only copper conductor for connections between
field-supplied electrical disconnect switch and unit. DO
NOT USE ALUMINUM WIRE.
3. Be sure that high-voltage power to unit is within operating
voltage range indicated on unit rating plate.
4. Do not damage internal components when drilling through
any panel to mount electrical hardware, conduit, etc. On
3-phase units, ensure phases are balanced within 2%.
Consult local power company for correction of improper
voltage and/or phase imbalance.
SUPPLY
DUCT
OPENING
HIGH-VOLTAGE CONNECTIONS — The unit must have a
separate electrical service with a field-supplied, water-proof,
disconnect switch mounted at, or within sight from, the unit. Refer
to the unit rating plate for maximum fuse/ circuit breaker size and
minimum circuit amps (ampacity) for wire sizing (See Table 3 for
electrical data).
RETURN
DUCT
OPENING
C99011
Fig. 11—Supply and Return Duct Opening
The field-supplied disconnect switch box may be mounted on the
unit over the high-voltage inlet hole when the standard power and
low-voltage entry points are used (See Fig. 2 and 3 for acceptable
location).
See unit wiring label and Fig. 13 for reference when making high
voltage connections. Proceed as follows to complete the highvoltage connections to the unit.
Single phase units:
1. Run the high-voltage (L1, L2) and ground leads into the
control box.
2. Connect ground lead to chassis ground connection.
3. Connect L1 to pressure lug connection 11 of the compressor
contactor.
4. Connect L2 to pressure lug connection 23 of the compressor
contactor.
Three phase units:
1. Run the high-voltage (L1, L2, L3) and ground leads into the
control box.
VERTICAL DUCT COVERS
2. Connect ground lead to chassis ground connection.
C99012
Fig. 12—Vertical Duct Cover Removed
3. Locate the black and yellow wires connected to the lines side
of the contactor.
8
Table 3—Electrical Data
UNIT 50GL
SIZE
024
V-PH-HZ
VOLTAGE
RANGE
COMPRESSOR
OFM
IFM
Min
RLA
FLA
FLA
Nominal kW*
FLA
MCA
Max Fuse or CRCT Breaker
MOCP
-/18.1/20.8
36.1/41.7
19.7/19.7
25.1/28.5
47.6/54.6
25/25
25/30
50/60
-
Max
LRA
ELECTRIC HEAT
208/230-1-60
187
253
13.5
61.0
0.8
2.0
-/3.8/5.0
7.5/10.0
208/230-1-60
187
253
14.7
73.0
0.8
2.1
-/3.8/5.0
7.5/10.0
-/18.1/20.8
36.1/41.7
21.3/21.3
25.2/28.7
47.8/54.7
25/25
25/30
50/60
-
208/230-3-60
187
253
9.6
63.0
0.8
2.1
-/3.8/5.0
7.5/10.0
-/10.4/12.0
20.8/24.1
14.9/14.9
15.7/17.7
28.7/32.7
20/20
20/20
30/35
-
208/230-1-60
187
253
15.4
83.0
0.8
3.6
-/3.8/5.0
7.5/10.0
11.3/15.0
-/18.1/20.8
36.1/41.7
54.2/62.5
23.7/23.7
27.1/30.5
49.6/56.6
72.2/82.6
30/30
30/30
50/60
-
80/90
208/230-3-60
187
253
12.2
77.0
0.8
3.6
-/3.8/5.0
7.5/10.0
11.3/15.0
-/10.4/12.0
20.8/24.1
31.3/36.1
19.7/19.7
19.7/19.7
30.6/34.6
43.6/49.6
25/25
25/25
35/35
45/50
-
460-3-60
414
506
5.1
35.0
0.8
1.9
5.0
10.0
15.0
6.0
12.0
18.0
9.1
9.9
17.4
24.9
15
15
20
25
-
4.1
-/3.8/5.0
7.5/10.0
11.3/15.0
15.0/20.0
-/18.1/20.8
36.1/41.7
54.2/62.5
72.2/83.3
28.2/28.2
28.2/31.2
50.3/57.2
72.8/83.3
95.4/109.3
35/35
35/35
60/60
-
80/90
100/110
4.1
-/3.8/5.0
7.5/10.0
11.3/15.0
15.0/20.0
-/10.4/12.0
20.8/24.1
31.3/36.1
41.6/48.0
22.2/22.2
22.2/22.2
31.2/35.2
44.2/50.2
57.1/65.1
30/30
30/30
35/40
45/60
-
60/70
2.0
5.0
10.0
15.0
20.0
6.0
12.0
18.0
24.1
10.7
10.7
17.5
25.1
32.6
15
15
20
30
35
-
4.1
-/3.8/5.0
7.5/10.0
11.3/15.0
15.0/20.0
-/18.1/20.8
36.1/41.7
54.2/62.5
72.2/83.3
31.3/31.3
31.3/31.3
50.3/57.2
72.8/83.3
95.4/109.3
40/40
40/40
60/60
-
80/90
100/110
4.1
-/3.8/5.0
7.5/10.0
11.3/15.0
15.0/20.0
-/10.4/12.0
20.8/24.1
31.3/36.1
41.7/48.1
24.1/24.1
24.1/24.1
31.2/35.2
44.2/50.2
57.1/65.1
30/30
30/30
35/40
45/60
-
60/70
2.0
5.0
10.0
15.0
20.0
6.0
12.0
18.0
24.1
11.0
11.0
17.5
25.1
32.6
15
15
20
30
35
-
6.2
-/3.8/5.0
7.5/10.0
11.3/15
15.0/20.0
-/18.1/20.8
36.1/41.7
54.2/62.5
72.2/83.3
42.3/42.3
42.3/42.3
52.9/59.8
75.4/85.9
98.0/111.9
50/50
50/50
60/60
-
80/90
100/125
6.2
-/3.8/5.0
7.5/10.0
11.3/15.0
15.0/20.0
-/10.4/12.0
20.8/24.1
31.3/36.1
41.6/48.0
30.4/30.4
30.4/30.4
33.8/37.8
46.8/52.9
59.7/67.7
35/35
35/35
35/40
50/60
-
60/70
3.2
5.0
10.0
15.0
20.0
6.0
12.0
18.0
24.1
15.4
15.4
19.0
26.6
34.1
20
20
20
30
35
-
030
036
208/230-1-60
042
208/230-3-60
460-3-60
208-230-1-60
048
208/230-3-60
460-3-60
208/230-1-60
060
POWER SUPPLY
208/230-3-60
460-3-60
187
187
414
187
187
414
187
187
414
253
253
506
253
253
506
253
253
506
18.6
13.8
6.3
20.5
14.7
6.5
27.6
18.1
9.0
105.0
88.0
39.0
109.0
91.0
46.0
158.0
137.0
62.0
1.6
1.6
0.9
1.6
1.6
0.9
1.6
1.6
0.9
* Heater capacity (KW) based on heater voltage of 208v, 240v, & 480v. If power distribution voltage to unit varies from rated heater voltage, heater KW will vary
accordingly.
9
FLA
LRA
MCA
MOCP
RLA
—
—
—
—
—
LEGEND
Full Load Amps
Locked Rotor Amps
Minimum Circuit Amps
Maximum Overcurrent Protection
Rated Load Amps
EXAMPLE: Supply voltage is 460-3-60.
AB = 452 v
BC = 464 v
AC = 455 v
452 + 464 + 455
3
1371
=
3
= 457
®
Average Voltage =
NOTES:
1. In compliance with NEC (National Electrical Code) requirements
for multimotor and combination load equipment (refer to NEC
Articles 430 and 440), the overcurrent protective device for the
unit shall be Power Supply fuse . The CGA (Canadian Gas
Association) units may be fuse or circuit breaker.
2. Minimum wire size is based on 60 C copper wire. If other than
60 C wire is used, or if length exceeds wire length in table,
determine size from NEC.
3. Unbalanced 3-Phase Supply Voltage
Never operate a motor where a phase imbalance in supply voltage is greater than 2%. Use the following formula to determine
the percentage of voltage imbalance.
Determine maximum deviation from average voltage.
(AB) 457 452 = 5 v
(BC) 464 457 = 7 v
(AC) 457 455 = 2 v
Maximum deviation is 7 v.
Determine percent of voltage imbalance.
7
% Voltage Imbalance = 100 x
457
= 1.53%
This amount of phase imbalance is satisfactory as it is below the
maximum allowable 2%.
% Voltage imbalance
max voltage deviation from average voltage
= 100 x
average voltage
IMPORTANT: If the supply voltage phase imbalance is
more than 2%, contact your local electric utility company
immediately.
4. Connect field L1 to black wire on connection 11 of the
compressor contactor.
CONTROL VOLTAGE CONNECTIONS
NOTE: Do not use any type of power-stealing thermostat. Unit
control problems may result.
5. Connect field wire L2 to yellow wire on connection 13 of the
compressor contactor.
Use no. 18 American Wire Gage (AWG) color-coded, insulated
(35 C minimum) wires to make the control voltage connections
between the thermostat and the unit. If the thermostat is located
more than 100 ft from the unit (as measured along the control
voltage wires), use no. 16 AWG color-coded, insulated (35 C
minimum) wires.
6. Connect field wire L3 to Blue wire from compressor.
SPECIAL PROCEDURES FOR 208-V OPERATION
Make sure that the power supply to the unit is switched OFF
before making any wiring changes. With disconnect switch
open, move yellow wire from transformer (3/16 in.) terminal
marked 230 to terminal marked 200. This retaps transformer
to primary voltage of 208 vac. Electrical shock could cause
serious injury or death.
HIGH VOLTAGE
POWER LEADS
(SEE UNIT WIRING
LABEL)
STANDARD CONNECTION — Remove knockout hole located
in the electric heat panel adjacent to the service access panel (See
Fig. 2 and 3). Remove the rubber grommet from the installer’s
packet (included with unit) and install grommet in the knockout
opening. Provide a drip loop before running wire through panel.
Run the low-voltage leads from the thermostat, through the inlet
hole, and into unit low-voltage splice box.
Locate five 18-gage wires leaving control box. These low-voltage
connection leads can be identified by the colors red, green, yellow,
brown, and white (See Fig. 10). Ensure the leads are long enough
to be routed into the low-voltage splice box (located below right
side of control box). Stripped yellow wire is located in connection
box. Route leads through hole in bottom of control box and make
low-voltage connections (See Fig. 13). Secure all cut wires, so that
they do not interfere with operation of unit.
POWER
SUPPLY
GND
FIELD-SUPPLIED
FUSED DISCONNECT
TRANSFORMER PROTECTION — The transformer is of the
energy-limiting type. It is set to withstand a 30-sec overload or
shorted secondary condition.
CONTROL BOX
YEL(Y)
GRN(G)
LOW-VOLTAGE
POWER LEADS
(SEE UNIT
WIRING LABEL)
RED(R)
BRN(C)
Y
G
THERMOSTAT
(TYPICAL)
R
C
SPLICE BOX
LEGEND
Field Control-Voltage Wiring
Field High-Voltage Wiring
NOTE: Use blue wire for 3-phase units only.
C99010
Fig. 13—High- and Control-Voltage Connections
10
PRE-START-UP
FAN GRILLE
MOTOR
Failure to observe the following warnings could result in
serious injury or death:
1. Follow recognized safety practices and wear protective
goggles when checking or servicing refrigerant system.
2. Do not operate compressor or provide any electric power to
unit unless compressor terminal cover is in place and
secured.
3. Do not remove compressor terminal cover until all electrical sources are disconnected.
4. Relieve and recover all refrigerant from both high- and
low-pressure sides of system before touching or disturbing
anything inside terminal box if refrigerant leak is suspected
around compressor terminals.
5. Never attempt to repair soldered connection while refrigerant system is under pressure.
6. Do not use torch to remove any component. System
contains oil and refrigerant under pressure. To remove a
component, wear protective goggles and proceed as follows:
a. Shut off electrical power to unit.
b. Relieve and reclaim all refrigerant from system using
both high- and low-pressure ports.
c. Cut component connecting tubing with tubing cutter and
remove component from unit.
d. Carefully unsweat remaining tubing stubs when necessary. Oil can ignite when exposed to torch flame.
1/8" MAX BETWEEN
MOTOR AND FAN HUB
MOTOR SHAFT
C99009
Fig. 14—Fan Blade Clearance
1. Locate leak and make sure that refrigerant system pressure has
been relieved and reclaimed from both high- and low-pressure
ports.
2. Repair leak following accepted practices.
NOTE: Replace filter drier whenever the system has been opened
for repair.
3. Charge unit with R-410A refrigerant, using a volumetriccharging cylinder or accurate scale. Refer to unit rating plate
for required charge.
START UP COOLING SECTION AND MAKE ADJUSTMENTS
Complete the required procedures given in the Pre-Start- Up
section before starting the unit. Do not jumper any safety
devices when operating the unit. Do not operate the compressor when the outdoor temperature is below 40°F (unless
accessory low-ambient kit is installed). Do not rapid-cycle the
compressor. Allow 5 min between ‘‘on’’ cycles to prevent
compressor damage.
Proceed as follows to inspect and prepare the unit for initial
startup:
1. Remove access panel.
CHECKING COOLING CONTROL OPERATION — Start and
check the unit for proper cooling control operation as follows:
2. Read and follow instructions on all WARNING, CAUTION,
and INFORMATION labels attached to, or shipped with, unit.
1. Place room thermostat SYSTEM switch in OFF position.
Observe that blower motor starts when FAN switch is placed
in ON position and shuts down when FAN switch is placed in
AUTO position.
3. Make the following inspections:
a. Inspect for shipping and handling damages such as broken
lines, loose parts, disconnected wires, etc.
2. Place SYSTEM switch in COOL position and FAN switch in
AUTO position. Set cooling control below room temperature.
Observe that compressor, condenser fan, and evaporator
blower motors start. Observe that cooling cycle shuts down
when control setting is satisfied. The evaporator fan will
continue to run for 30 sec.
b. Inspect for oil at all refrigerant tubing connections and on
unit base. Detecting oil generally indicates a refrigerant
leak. Leak test all refrigerant tubing connections using
electronic leak detector, halide torch, or liquid-soap solution. If a refrigerant leak is detected, see Check for
Refrigerant Leaks section under Start-Up.
3. When using an auto-changeover room thermostat, place both
SYSTEM and FAN switches in AUTO positions. Observe that
unit operates in heating mode when temperature control is set
to ‘‘call for heating’’ (above room temperature) and operates
in cooling mode when temperature control is set to ‘‘call for
cooling’’ (below room temperature).
c. Inspect all field- and factory-wiring connections. Be sure
that connections are completed and tight.
d. Inspect coil fins. If damaged during shipping and handling,
carefully straighten fins with a fin comb.
Verify the following conditions:
IMPORTANT: Three-phase, scroll compressor units (50GL030060) are direction-oriented. These units must be checked to ensure
proper compressor 3-phase power lead orientation. If not corrected
within 5 min, the internal protector will shut off the compressor.
Any two of the 3-phase power leads to the unit must be reversed
to correct rotation. When turning backwards, scroll compressors
emit elevated noise levels, and the difference between compressor
suction and discharge pressures may be dramatically lower than
normal.
a. Make sure that condenser-fan blade is correctly positioned
in fan orifice. Leading edge of condenser-fan blade should
be 1/2 in. maximum from fan orifice (See Fig. 14).
b. Make sure that air filter(s) is in place.
c. Make sure that condensate drain trap is filled with water to
ensure proper drainage.
d. Make sure that all tools and miscellaneous loose parts have
been
removed.
CHECKING AND ADJUSTING REFRIGERANT CHARGE
— The refrigerant system is fully charged with R-410A refrigerant, tested, and factory-sealed.
START-UP
CHECK FOR REFRIGERANT LEAKS — Proceed as follows to
locate and repair a refrigerant leak and to charge the unit:
11
NOTE: Adjustment of the refrigerant charge is not required
unless the unit is suspected of not having the proper R-410A
charge. The charging label and the tables shown refer to system
temperatures and pressures.
C00060
Fig. 15—208/230-1-60 Wiring Diagram
12
208/230-3-30
C00061
Fig. 16—208/230-3-60 Wiring Diagram
13
C00062
Fig. 17—460-3-60 Wiring Diagram
14
IMPORTANT: When evaluating the refrigerant charge, an indicated adjustment to the specified factory charge must always be
very minimal. If a substantial adjustment is indicated, an abnormal
condition exists somewhere in the cooling system, such as insufficient airflow across either coil or both coils.
change the speed, remove and replace with lead for desired blower
motor speed. Insulate the removed lead to avoid contact with
chassis parts.
FOR 460-V GE MOTORS — The motor leads are color coded as
follows:
Refrigerant charge
The amount of refrigerant charge is listed on the unit nameplate.
Refer to the Refrigeration Service Techniques Manual, Refrigerants section.
Unit panels must be in place when unit is operating during
charging procedures.
Use standard evacuating techniques. After evacuating system,
weigh in the specified amount of refrigerant (refer to system data
plate).
Low charge cooling
Measure outdoor ambient using Cooling Charging Charts (Figs.
18-23). Vary refrigerant until the conditions of the chart are met.
Note that charging charts are different from type normally used.
Charts are based on charging the units to correct superheat for the
various operating conditions. Accurate pressure gage and temperature sensing devices are required. Connect the pressure gage to the
service port on the suction line. Mount the temperature sensing
device on the suction line and insulate it so that the outdoor
ambient does not effect the reading. Indoor air CFM must be
within the normal operating range of the unit.
Take the outdoor ambient temperature and read the suction
pressure gage. Refer to the chart to determine what the suction
temperature should be.
NOTE: If the problem causing the inaccurate readings is a
refrigerant leak, refer to Check for Refrigerant Leaks section.
INDOOR AIRFLOW AND AIRFLOW ADJUSTMENTS
For cooling operation, the recommended airflow is 350 to 450
cfm for each 12,000 Btuh of rated cooling capacity.
Table 4 shows cooling airflows at various external static pressures.
Refer to these tables to determine the airflow for the system being
installed.
NOTE: Be sure that all supply- and return-air grilles are open,
free from obstructions, and adjusted properly.
Airflow can be changed by changing the lead connections of the
blower motor.
All 50GL units are factory wired for low speed and may need to be
wired for medium or high speed in the field.
FOR 208/230-V — The motor leads are color-coded as follows:
2-SPEED
blue = medium speed
-
red = low speed
red = low speed
blue = jumper
-
red = low
red = low
MAINTENANCE
To ensure continuing high performance, and to minimize the
possibility of premature equipment failure, periodic maintenance
must be performed on this equipment. This cooling unit should be
inspected at least once each year by a qualified service person. To
troubleshoot heating or cooling of units, refer to tables at the back
of the book.
NOTE TO EQUIPMENT OWNER: Consult your local dealer
about the availability of a maintenance contract.
Disconnect electrical power to the unit before changing
blower speed. Electrical shock can cause serious injury or
death.
black = high speed
violet = jumper
orange = medium
COOLING SEQUENCE OF OPERATION — With the room
thermostat SYSTEM switch in the COOL position and the FAN
switch in the AUTO position, the cooling sequence of operation is
as follows:
When the room temperature rises to a point that is slightly above
the cooling control setting of the thermostat, the thermostat
completes the circuit between thermostat terminal R to terminals Y
and G. These completed circuits through the thermostat connect
contactor coil (C) (through unit wire Y) and blower relay coil
(TDR) (through unit wire G) across the 24-v secondary of
transformer (TRAN).
The normally open contacts of energized contactor (C) close and
complete the circuit through compressor motor (COMP) to condenser (outdoor) fan motor (OFM). Both motors start instantly.
The set of normally open contacts of energized relay TDR close
and complete the circuit through evaporator blower (indoor) fan
motor (IFM).
NOTE: Once the compressor has started and then has stopped, it
should not be started again until 5 min have elapsed.
The cooling cycle remains ‘‘on’’ until the room temperature drops
to point that is slightly below the cooling control setting of the
room thermostat. At this point, the thermostat ‘‘breaks’’ the circuit
between thermostat terminal R to terminals Y and G. These open
circuits deenergize contactor coil C and relay coil TDR. The
condenser and compressor motors stop. After a 30-sec delay, the
blower motor stops. The unit is in a ‘‘standby’’ condition, waiting
for the next ‘‘call for cooling’’ from the room thermostat.
To use cooling charging charts
3-SPEED
2-SPEED
black = high
To change the speed of the blower motor (BM), remove fan motor
speed lead from the blower relay (BR) and replace with the lead
for the desired blower motor speed. The motor speed lead is
attached to terminal BM. For low and medium speeds black must
be connected to the jumper wire. Insulate removed lead end to
avoid contact with chassis parts. To select high speed on 460-v GE
motors, separate the black female quick connect (QC) from the
jumper lead male quick connect (QC) and connect the black lead
to the BR. Insulate the jumper to avoid contact with any chassis
parts.
No charge
black = high speed
3-SPEED
black = high
To change the speed of the blower motor (BM), remove the fan
motor speed leg lead from the blower relay (BR). This wire is
attached to terminal BM for single-phase and 3-phase units. To
15
Table 4—Wet Coil Air Delivery (Deduct 10% for 208v)*
Horizontal and Downflow Discharge
Unit 50GL024-060
230 AND 460 VOLT
Unit
Motor Speed
Low
024
Med
High
Low
30
Med
High
Low
36
Med
High
Low
42
Med
High
Low
48
Med
High
Low
60
Med
High
External Static Pressure (in. wg)
0.0
0.1
0.2
0.3
0.4
0.5
0.6
0.7
0.8
0.9
1.0
Watts
281
282
281
278
276
-
-
-
-
-
-
Cfm
833
776
702
638
554
Watts
-
-
-
375
370
363
357
352
-
-
-
Cfm
-
-
-
894
800
754
636
518
-
-
-
Watts
-
-
-
-
-
468
457
444
431
423
-
Cfm
-
-
-
-
-
884
802
697
467
397
-
Watts
246
244
243
241
-
-
-
-
-
-
-
Cfm
910
806
749
680
-
-
-
-
-
-
-
Watts
343
339
336
332
328
322
317
-
-
-
Cfm
1148
1104
1028
958
850
782
645
-
-
-
-
Watts
-
-
-
-
441
432
421
410
400
-
-
Cfm
-
-
-
-
1102
988
896
783
529
-
-
Watts
-
470
458
445
430
415
399
384
-
-
-
Cfm
-
1352
1257
1240
1199
1107
1015
924
-
-
-
Watts
-
-
514
501
487
471
455
438
422
-
-
Cfm
-
-
1338
1295
1288
1181
1111
968
813
-
-
Watts
-
-
-
646
636
626
614
602
589
-
-
Cfm
-
-
-
1385
1268
1196
1159
1032
948
-
-
Watts
-
625
614
605
593
574
549
518
485
454
-
Cfm
-
1540
1510
1473
1396
1348
1288
1192
1124
1037
-
Watts
-
-
-
-
726
695
661
625
591
561
540
1114
Cfm
-
-
-
-
1648
1593
1530
1446
1352
1237
Watts
-
-
-
-
-
-
-
790
766
742
713
Cfm
-
-
-
-
-
-
-
1616
1492
1394
1283
Watts
-
588
577
572
566
556
539
517
491
-
-
Cfm
-
1514
1543
1467
1408
1374
1324
1237
1161
-
-
Watts
-
756
738
719
699
676
650
623
596
572
555
1253
Cfm
-
1785
1765
1706
1628
1577
1503
1421
1357
1298
Watts
-
-
-
-
896
862
829
800
775
752
728
Cfm
-
-
-
-
1880
1804
1704
1547
1565
1406
1367
Watts
903
898
873
842
814
792
777
764
743
701
618
Cfm
2190
2158
2081
2026
1958
1866
1822
1744
1678
1535
1377
Watts
-
1002
978
960
941
914
880
839
798
764
750
Cfm
-
2389
2291
2216
2120
2020
1952
1852
1727
1617
1549
Watts
-
-
-
1080
1080
1066
1041
1008
972
938
-
Cfm
-
-
-
2316
2181
2122
2101
2000
1802
1672
-
* Air delivery values are based on operating voltage of 230 v or 460 v, wet coil, without filter or electric heater. Deduct filter and electric heater pressure drops to obtain
static pressure available for ducting.
NOTES: 1. Do not operate the unit at a cooling airflow that is less than 350 cfm for each 12,000 Btuh of rated cooling capacity. Evaporator coil frosting may occur at
airflows below this point.
2. Dashes indicate portions of table that are beyond the blower motor capacity or are not recommended.
The ability to properly perform maintenance on this equipment requires certain expertise, mechanical skills, tools, and
equipment. If you do not possess these, do not attempt to
perform any maintenance on this equipment other than those
procedures recommended in the User’s Manual. FAILURE
TO HEED THIS WARNING COULD RESULT IN SERIOUS INJURY OR DEATH AND POSSIBLE DAMAGE TO
THIS EQUIPMENT.
Failure to follow these warnings could result in serious injury
or death:
1. Turn off electrical power to the unit before performing any
maintenance or service on the unit.
2. Use extreme caution when removing panels and parts. As
with any mechanical equipment, personal injury can result
from sharp edges, etc.
3. Never place anything combustible either on, or in contact
with, the unit.
Errors made when reconnecting wires may cause improper
and dangerous operation. Label all wires prior to disconnection when servicing.
16
The minimum maintenance requirements for this equipment are as
follows:
f. Reinstall unit access panel.
1. Inspect air filter(s) each month. Clean or replace when
necessary.
3. Restore electrical power to unit. Start unit and check for
proper blower rotation and motor speeds during heating and
cooling cycles.
2. Inspect indoor coil, drain pan, and condensate drain each
cooling season for cleanliness. Clean when necessary.
CONDENSER COIL, EVAPORATOR COIL, AND CONDENSATE DRAIN PAN
3. Inspect blower motor and wheel for cleanliness and check
lubrication each heating and cooling season. Clean when
necessary.
Inspect the condenser coil, evaporator coil, and condensate drain
pan at least once each year.
The coils are easily cleaned when dry; therefore, inspect and clean
the coils either before or after each cooling season. Remove all
obstructions, including weeds and shrubs, that interfere with the
airflow through the condenser coil.
4. Check electrical connections for tightness and controls for
proper operation each heating and cooling season. Service
when necessary.
AIR FILTER
Straighten bent fins with a fin comb. If coated with dirt or lint,
clean the coils with a vacuum cleaner, using the soft brush
attachment. Be careful not to bend the fins. If coated with oil or
grease, clean the coils with a mild detergent-and-water solution.
Rinse coils with clear water, using a garden hose. Be careful not to
splash water on motors, insulation, wiring, or air filter(s). For best
results, spray condenser coil fins from inside to outside the unit.
On units with an outer and inner condenser coil, be sure to clean
between the coils. Be sure to flush all dirt and debris from the unit
base.
IMPORTANT: Never operate the unit without a suitable air filter
in the return-air duct system. Always replace the filter with the
same dimensional size and type as originally installed (See Tables
1 for recommended filter sizes).
Inspect air filter(s) at least once each month and replace
(throwaway-type) or clean (cleanable-type) at least twice during
each heating and cooling season or whenever the filter(s) becomes
clogged with dust and lint.
EVAPORATOR BLOWER AND MOTOR
NOTE: All motors are prelubricated. Do not attempt to lubricate
these motors.
Inspect the drain pan and condensate drain line when inspecting
the coils. Clean the drain pan and condensate drain by removing all
foreign matter from the pan. Flush the pan and drain tube with
clear water. Do not splash water on the insulation, motor, wiring,
or air filter(s). If the drain tube is restricted, clear it with a
‘‘plumbers snake’’ or similar probe device. Ensure that the
auxiliary drain port above the drain tube is also clear.
For longer life, operating economy, and continuing efficiency,
clean accumulated dirt and grease from the blower wheel and
motor annually.
CONDENSER FAN
Disconnect and tag electrical power to the unit before
cleaning the blower motor and wheel. Failure to adhere to this
warning could cause serious injury or death.
Keep the condenser fan free from all obstructions to ensure
proper cooling operation. Never place articles on top of the
unit. Damage to unit may result.
To clean the blower motor and wheel:
1. Remove and disassemble blower assembly as follows:
a. Remove unit access panel.
4. Remove 6 screws holding condenser grille and motor to top
cover.
b. Disconnect motor lead from blower relay (BR). Disconnect
yellow lead from terminal L2 of the contactor.
5. Turn motor/grille assembly upside down on top cover to
expose the fan blade.
c. On all units remove blower assembly from unit. Remove
screws securing blower to blower partition and slide
assembly out. Be careful not to tear insulation in blower
compartment.
6. Inspect the fan blades for cracks or bends.
7. If fan needs to be removed, loosen the setscrew and slide the
fan off the motor shaft.
d. Ensure proper reassembly by marking blower wheel and
motor in relation to blower housing before disassembly.
8. When replacing fan blade, position blade so that the hub is 1/8
in. away from the motor end ( 1/8 in. of motor shaft will be
visible).
e. Loosen setscrew(s) that secures wheel to motor shaft,
remove screws that secure motor mount brackets to housing, and slide motor and motor mount out of housing.
9. Ensure that setscrew engages the flat area on the motor shaft
when tightening.
2. Remove and clean blower wheel as follows:
10. Replace grille.
a. Ensure proper reassembly by marking wheel orientation.
ELECTRICAL CONTROLS AND WIRING — Inspect and check
the electrical controls and wiring annually. Be sure to turn off the
electrical power to the unit.
b. Lift wheel from housing. When handling and/or cleaning
blower wheel, be sure not to disturb balance weights (clips)
on blower wheel vanes.
Remove access panel to locate all the electrical controls and
wiring. Check all electrical connections for tightness. Tighten all
screw connections. If any smoky or burned connections are
noticed, disassemble the connection, clean all the parts, restrip the
wire end and reassemble the connection properly and securely.
c. Remove caked-on dirt from wheel and housing with a
brush. Remove lint and/or dirt accumulations from wheel
and housing with vacuum cleaner, using soft brush attachment. Remove grease and oil with mild solvent.
d. Reassemble wheel into housing.
After inspecting the electrical controls and wiring, replace the
access panel. Start the unit, and observe at least one complete
heating cycle and one complete cooling cycle to ensure proper
operation. If discrepancies are observed in either or both operating
e. Reassemble motor into housing. Be sure setscrews are
tightened on motor shaft flats and not on round part of
shaft.
17
115
46
1103
160
105
41
150
95
85
35
29
965
896
827
75
140
130
24
65
18
55
13
45
7
120
758
110
690
100
20.0
-7
30.0
40.0
50.0
60.0
SUCTION LINE TEMPERATURE (DEG. F)
70.0
80.0
-1
4
10
16
SUCTION LINE TEMPERATURE (DEG. C)
21
27
1241
180
1172
170
1103
160
1034
965
896
827
SUCTION LINE PRESSURE (PSIG)
52
170
SUCTION LINE PRESSURE (KILOPASCALS)
125
1172
1034
(030) 60 Hz CHARGING CHART
FOR USE WITH UNITS USING R410A REFRIGERANT
OUTDOOR
TEMP
F
C
180
SUCTION LINE PRESSURE (PSIG)
SUCTION LINE PRESSURE (KILOPASCALS)
(024) 60 Hz CHARGING CHART
FOR USE WITH UNITS USING R410A REFRIGERANT
1241
OUTDOOR
TEMP
F
C
150
125
115
105
52
46
41
95
35
85
29
75
24
140
65
18
55
45
13
7
130
120
758
110
690
100
20.0
-7
30.0
40.0
50.0
60.0
SUCTION LINE TEMPERATURE (DEG. F)
70.0
80.0
-1
4
10
16
SUCTION LINE TEMPERATURE (DEG. C)
21
27
C99079
C99080
Fig. 18—Cooling Charging Chart, 50GL024 Units
170
1103
1034
965
896
827
160
125
115
52
46
150
105
95
85
41
35
29
140
75
24
65
(042) 60 Hz CHARGING CHART
FOR USE WITH UNITS USING R410A REFRIGERANT
18
130
55
13
45
7
120
758
110
690
100
20.0
-7
30.0
40.0
50.0
60.0
SUCTION LINE TEMPERATURE (DEG. F)
70.0
80.0
-1
4
10
16
SUCTION LINE TEMPERATURE (DEG. C)
21
27
1241
180
1172
170
1103
1034
965
896
827
OUTDOOR
TEMP
F
C
125
52
115
46
105
41
95
85
35
29
75
24
160
SUCTION LINE PRESSURE (PSIG)
1172
OUTDOOR
TEMP
F
C
SUCTION LINE PRESSURE (KILOPASCALS)
180
SUCTION LINE PRESSURE (PSIG)
SUCTION LINE PRESSURE (KILOPASCALS)
(036) 60 Hz CHARGING CHART
FOR USE WITH UNITS USING R410A REFRIGERANT
1241
Fig. 19—Cooling Charging Chart, 50GL030 Units
150
140
65
18
55
13
45
7
130
120
758
110
690
100
20.0
-7
30.0
40.0
50.0
60.0
SUCTION LINE TEMPERATURE (DEG. F)
70.0
80.0
-1
4
10
16
SUCTION LINE TEMPERATURE (DEG. C)
21
27
C99081
C99082
Fig. 20—Cooling Charging Chart, 50GL036 Units
170
160
1103
1034
965
896
827
125
52
115
46
105
95
41
35
85
29
150
75
140
130
65
18
55
13
45
7
120
758
110
690
100
20.0
-7
24
30.0
40.0
50.0
60.0
SUCTION LINE TEMPERATURE (DEG. F)
70.0
80.0
-1
4
10
16
SUCTION LINE TEMPERATURE (DEG. C)
21
27
1241
180
1172
170
1103
160
1034
965
896
827
SUCTION LINE PRESSURE (PSIG)
1172
(060) 60 Hz CHARGING CHART
FOR USE WITH UNITS USING R410A REFRIGERANT
OUTDOOR
TEMP
F
C
SUCTION LINE PRESSURE (KILOPASCALS)
180
SUCTION LINE PRESSURE (PSIG)
SUCTION LINE PRESSURE (KILOPASCALS)
(048) 60 Hz CHARGING CHART
FOR USE WITH UNITS USING R410A REFRIGERANT
1241
Fig. 21—Cooling Charging Chart, 50GL042 Units
OUTDOOR
TEMP
F
C
125
115
105
52
46
41
95
35
85
29
75
24
150
140
65
18
55
13
45
7
130
120
758
110
690
100
20.0
-7
30.0
40.0
50.0
60.0
SUCTION LINE TEMPERATURE (DEG. F)
70.0
80.0
-1
4
10
16
SUCTION LINE TEMPERATURE (DEG. C)
21
27
C99084
C99083
Fig. 23—Cooling Charging Chart, 50GL060 Units
Fig. 22—Cooling Charging Chart, 50GL048 Units
18
1. Turn off all power to unit.
cycles, or if a suspected malfunction has occurred, check each
electrical component with the proper electrical instrumentation.
Refer to the unit wiring label when making these checkouts.
NOTE: Refer to the heating and/or cooling sequence of operation
in this publication as an aid in determining proper control
operation.
2. Disconnect leads on switch.
3. Apply ohmeter leads across switch. You should have continuity on a good switch.
COPELAND SCROLL COMPRESSOR (PURON REFRIGERANT — The compressor used in this product is specifically
designed to operate with Puron (R-410A) refrigerant and
cannot be interchanged.
REFRIGERANT CIRCUIT — Inspect all refrigerant tubing connections and the unit base for oil accumulations annually. Detecting oil generally indicates a refrigerant leak.
The compressor is an electrical (as well as mechanical) device.
Exercise extreme caution when working near compressors. Power
should be shut off, if possible, for most troubleshooting techniques. Refrigerants present additional safety hazards.
System under pressure. Relieve pressure and recover all
refrigerant before system repair or final unit disposal to avoid
serious injury or death. Use all service ports and open all
flow-control devices, including solenoid valves.
Wear safety glasses and gloves when handling refrigerants.
Keep torches and other ignition sources away from refrigerants and oils. Failure to follow this warning can cause a fire,
serious injury, or death.
If oil is detected or if low cooling performance is suspected,
leak-test all refrigerant tubing using an electronic leak-detector,
halide torch, or liquid-soap solution. If a refrigerant leak is
detected, refer to Check for Refrigerant Leaks section.
The scroll compressor pumps refrigerant throughout the system by
the interaction of a stationary and an orbiting scroll. The scroll
compressor has no dynamic suction or discharge valves, and it is
more tolerant of stresses caused by debris, liquid slugging, and
flooded starts. The compressor is equipped with an anti-rotational
device and an internal pressure relief port. The anti-rotational
device prevents the scroll from turning backwards and replaces the
need for a cycle protector. The pressure relief port is a safety
device, designed to protect against extreme high pressure. the
relief port has an operating range between 550 and 625 psi
differential pressure.
If no refrigerant leaks are found and low cooling performance is
suspected, refer to Checking and Adjusting Refrigerant Charge
section.
EVAPORATOR AIRFLOW — The heating and/or cooling airflow does not require checking unless improper performance is
suspected. If a problem exists, be sure that all supply- and
return-air grilles are open and free from obstructions, and that the
air filter is clean. When necessary, refer to Indoor Airflow and
Airflow Adjustments section to check the system airflow.
METERING DEVICE—ACCURATOR® PISTON — This metering device is a fixed orifice and is contained in the brass
hex-body in the liquid line.
The Copeland scroll compressor uses Mobil 3MA POE oil.
This is the only oil allowed for oil recharge.
PRESSURE SWITCHES — Pressure switches are protective devices wired into control circuit (low voltage). They shut off
compressor if abnormally high or low pressures are present in the
refrigeration circuit. These pressure switches are specifically
designed to operate with Puron (R-410A) systems. R-22 pressure
switches must not be used as replacements for the Puron (R410A) air conditioner.
REFRIGERANT SYSTEM
REFRIGERANT
This system uses Puron® (R-410A) refrigerant which has
higher operating pressures than R-22 and other refrigerants.
No other refrigerant may be used in this system. Gage set,
hoses, and recovery system must be designed to handle
Puron. If you are unsure consult the equipment manufacturer.
Failure to use Puron compatible servicing equipment or
replacement components may result in property damage or
injury.
LOSS OF CHARGE/LOW-PRESSURE SWITCH (AIR CONDITIONER ONLY) — This switch is located on the liquid line and
protects against low suction pressures caused by such events as
loss of charge, low airflow across indoor coil, dirty filters, etc. It
opens on a pressure drop at about 20 psig. If system pressure is
above this, switch should be closed.
To check switch:
1. Turn off all power to unit.
COMPRESSOR OIL — The compressor in this system uses a
polyolester (POE) oil, Mobil 3MA POE. This oil is extremely
hygroscopic, meaning it absorbs water readily. POE oils can
absorb 15 times as much water as other oils designed for HCFC
and CFC refrigerants. Take all necessary precautions to avoid
exposure of the oil to the atmosphere.
2. Disconnect leads on switch.
3. Apply ohmeter leads across switch. You should have continuity on a good switch.
NOTE: Because these switches are attached to refrigeration
system under pressure, it is not advisable to remove this device for
troubleshooting unless you are reasonably certain that a problem
exists. If switch must be removed, remove and recover all system
charge so that pressure gages read 0 psi. Never open system
without breaking vacuum with dry nitrogen.
SERVICING SYSTEMS ON ROOFS WITH SYNTHETIC MATERIALS — POE (polyolester) compressor lubricants are known
to cause long term damage to some synthetic roofing materials.
Exposure, even if immediately cleaned up, may cause embrittlement (leading to cracking) to occur in one year or more. When
performing any service that may risk exposure of compressor oil to
the roof, take appropriate precautions to protect roofing. Procedures which risk oil leakage include, but are not limited to,
compressor replacement, repairing refrigerant leaks, replacing
refrigerant components such as filter drier, pressure switch, metering device, coil, accumulator, or reversing valve.
HIGH-PRESSURE SWITCH — The high-pressure switch is located in the discharge line and protects against excessive condenser coil pressure. It opens at 610 psig.
High pressure may be caused by a dirty condenser coil, failed fan
motor, or condenser air recirculation.
To check switch:
19
SYNTHETIC ROOF PRECAUTIONARY PROCEDURE
components. Filter drier must be replaced whenever the refrigerant
system is opened. When removing a filter drier, use a tubing cutter
to cut the drier from the system. Do not unsweat a filter drier
from the system. Heat from unsweating will release moisture and
contaminants from drier into system.
1. Cover extended roof working area with an impermeable
polyethylene (plastic) drip cloth or tarp. Cover an approximate
10 x 10 ft. area.
2. Cover area in front of the unit service panel with a terry cloth
shop towel to absorb lubricant spills and prevent run-offs, and
protect drop cloth from tears caused by tools or components.
PURON (R-410A) REFRIGERANT CHARGING — Refer to unit
information plate and charging chart. Some R-410A refrigerant
cylinders contain a dip tube to allow liquid refrigerant to flow
from cylinder in upright position. For cylinders equipped with a
dip tube, charge Puron units with cylinder in upright position and
a commercial metering device in manifold hose. Charge refrigerant
into suction-line.
3. Place terry cloth shop towel inside unit immediately under
component(s) to be serviced and prevent lubricant run-offs
through the louvered openings in the base pan.
4. Perform required service.
5. Remove and dispose of any oil contaminated material per
local codes.
LIQUID LINE FILTER DRIER — The filter drier is specifically
designed to operate with Puron. Use only factory-authorized
20
AIR CONDITIONER WITH PURON® (R-410A)—QUICK REFERENCE GUIDE
Puron refrigerant operates at 50%-70% higher pressures than R-22. Be sure that servicing equipment and replacement components are designed
to operate with Puron.
Puron refrigerant cylinders are rose colored.
•
Puron refrigerant cylinders manufactured prior to March 1, 1999, have a dip tube that allows liquid to flow out of cylinder in upright
position. Cylinders manufactured March 1, 1999 and later DO NOT have a dip tube and MUST be positioned upside down to allow liquid
to flow.
•
Recovery cylinder service pressure rating must be 400 psig, DOT 4BA400 or DOT BW400.
•
•
Puron systems should be charged with liquid refrigerant. Use a commercial type metering device in the manifold hose.
Manifold sets should be 750 psig high-side and 200 psig low-side with 520 psig low-side retard.
•
Use hoses with 750 psig service pressure rating.
•
Leak detectors should be designed to detect HFC refrigerant.
•
Puron, as with other HFCs, is only compatible with POE oils.
•
Vacuum pumps will not remove moisture from oil.
•
•
Only use factory specified liquid-line filter driers with rated working pressures no less than 600 psig.
Do not install a suction-line filter drier in liquid-line.
• POE oils absorb moisture rapidly. Do not expose oil to atmosphere.
• POE oils may cause damage to certain plastics and roofing materials.
• Wrap all filter driers and service valves with wet cloth when brazing.
• A Puron liquid-line filter drier is required on every unit.
• Do not use an R-22 TXV.
• Never open system to atmosphere while it is under a vacuum.
• When system must be opened for service, break vacuum with dry nitrogen and replace filter driers.
• Always replace filter drier after opening system for service.
• Do not vent Puron into the atmosphere.
• Observe all warnings, cautions, and bold text.
• Do not leave Puron suction line driers in place for more than 72 hrs.
21
Table 5—Troubleshooting — Cooling
SYMPTOM
Compressor and condenser fan will not start
Compressor will not start but condenser fan
runs
Three-phase scroll compressor (50GL030-060)
makes excessive noise, and there may be a
low pressure differential
Compressor cycles (other than normally satisfying thermostat)
Compressor operates continuously
Excessive head pressure
Head pressure too low
Excessive suction pressure
Suction pressure too low
CAUSE
REMEDY
Power failure
Call power company
Fuse blown or circuit breaker tripped
Replace fuse or reset circuit breaker
Defective thermostat, contactor, transformer, control relay, high pressure, or loss-of-charge swtich
Replace component
Insufficient line voltage
Determine cause and correct
Incorrect or faulty wiring
Check wiring diagram and rewire correctly
Thermostat setting too high
Lower thermostat setting below room temperature
Faulty wiring or loose connections in compressor
circuit
Check wiring and repair or replace
Compressor motor burned out, seized, or internal
overload open
Determine cause. Replace compressor
Defective run/start capacitor, overload, start relay
Determine cause and replace
One leg of 3-phase power dead
Replace fuse or reset circuit breaker
Determine cause
Scroll compressor is rotating in the wrong direction
Correct the direction of rotation by reversing two
of the 3-phase power leads to the unit. Shut
down unit to allow pressures to equalize
Refrigerant overcharge or undercharge
Recover refrigerant, evacuate system, and recharge to capacities shown on nameplate
Defective compressor
Replace and determine cause
Insufficient line voltage
Determine cause and correct
Blocked condenser
Determine cause and correct
Defective run/start capacitor, overload or start
relay
Determine cause and replace
Defective thermostat
Replace thermostat
Faulty condenser-fan motor or capacitor
Replace
Restriction in refrigerant system
Locate restriction and remove
Dirty air filter
Replace filter
Unit undersized for load
Decrease load or increase unit size
Thermostat set too low
Reset thermostat
Low refrigerant charge
Locate leak, repair, and recharge
Leaking valves in compressor
Replace compressor
Air in system
Recover refrigerant, evacuate system, and recharge
Condenser coil dirty or restricted
Clean coil or remove restriction
Dirty air filter
Replace filter
Dirty condenser coil
Clean coil
Refrigerant overcharged
Recover excess refrigerant
Air in system
Recover refrigerant, evacuate system, and recharge
Condenser air restricted or air short-cycling
Determine cause and correct
Low refrigerant charge
Check for leaks, repair and recharge
Restriction in liquid tube
Remove restriction
High heat load
Check for source and eliminate
Refrigerant overcharged
Recover excess refrigerant
Dirty air filter
Replace filter
Low refrigerant charge
Check for leaks, repair and recharge
Metering device or low side restricted
Remove source of restriction
Insufficient evaporator airflow
Increase air quantity. Check filter — replace if
necessary
Temperature too low in conditioned area
Reset thermostat.
Outdoor ambient below 40 F
Install low-ambient kit
Field-installed filter-drier restricted
Replace
22
START-UP CHECKLIST
(REMOVE AND STORE IN JOB FILE)
I. PRELIMINARY INFORMATION
Model No...............................................................................................................................................................................................................
Serial No. ...............................................................................................................................................................................................................
Date ........................................................................................................................................................................................................................
Technician..............................................................................................................................................................................................................
II. PRE-START-UP
___ Verify that all packing materials have been removed from unit
___ Verify that condensate connection is installed per installation instructions
___ Check all electrical connections and terminals for tightness
___ Check that indoor (evaporator) air filter is clean and in place
___ Verify that unit installation is level
___ Check fan wheel and propeller for location in housing and setscrew tightness
III. START-UP
Supply Voltage L1-L2 __________ L2-L3 _________ L3-L1 __________
Compressor Amps L1 __________ L2 _________ L3 __________
Indoor (Evaporator) Fan Amps __________
TEMPERATURE
Outdoor (Condenser) Air Temperature __________ DB
Return-Air Temperature __________ DB __________ WB
Cooling Supply Air __________ DB __________ WB
PRESSURES
Refrigerant Suction __________ psig
Suction Line Temp* __________
Refrigerant Discharge __________ psig
Discharge Temp† __________
___ Verify refrigerant charge using charging tables
___ Verify that 3-phase scroll compressor (50GL030-060) is rotating in correct direction
* Measured at suction inlet to compressor
† Measured at liquid line leaving condenser
23
Copyright 2000 CARRIER Corp. • 7310 W. Morris St. • Indianapolis, IN 46231
50gl1si
Manufacturer reserves the right to discontinue, or change at any time, specifications or designs without notice and without incurring obligations.
Book 1 4
PC 101
Catalog No. 565-013
Printed in U.S.A.
Form 50GL-1SI
Pg 24
6-00
Replaces: New
Tab 1b 1a