1
GB
User Manual
(Translation of the originals
instructions manual)
Please read carefully before using your machine
rmcb - rmcs - RMHB
Contents
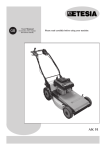
RMCB - RMCS - RMHB Mower
1.
Your safety and that of others........................................................................................................................................................ 3
2.
Key to diagrams............................................................................................................................................................................. 5
3.
Illustrations.................................................................................................................................................................................... 7
4.
Pictures.......................................................................................................................................................................................... 9
5.
Technical specifications............................................................................................................................................................... 13
6.
Preparation and getting started.................................................................................................................................................... 14
7.
Operating instructions.................................................................................................................................................................. 15
8.
Maintenance................................................................................................................................................................................. 16
9.
Winter storage - long stop............................................................................................................................................................ 18
10.
Day to day maintenance – Breakdowns and solutions................................................................................................................ 19
11.
Regular maintenance summary.................................................................................................................................................... 19
12.Warranty....................................................................................................................................................................................... 20
2
Y
ou are now the proud owner of an Etesia mower!
This extremely reliable and tough machine has been specially
designed to give many years of service.
• In order to prolong the life of your mower and keep it in excellent
working order, read this manual carefully and always follow the
safety recommendations and maintenance instructions.
• As part of our commitment to excellence, we are constantly
seeking new ways of improving our products.
• For this reason, your model may differ slightly from the description
in this manual.
• Up-to-date technical information can be obtained from your dealer
who will be happy to resolve any queries you may have.
• Before using your mower, make sure that you are completely
familiar with the controls and operating instructions so that you are
able to stop the machine quickly.
• Before mowing, always clear the lawn of stones, pieces of wood or
metal, wire, bones, plastic, branches and other debris liable to be
thrown out by the mower.
• Low branches liable to cause injury to the user should also be
removed.
• Before mowing each time, ensure that the cutting blade is in good
condition and tight and that the handlebar is locked.
• Loose clothing and short trousers should not be worn when using
the mower. Always wear stout and closed shoes. Always wear stout
and closed shoes. Never use the mower barefoot or wearing sandals.
Wear ear defenders.
Before using your mower
• Prior to use, check that safety labels are present on the mower as
indicated in the manual. Read these labels carefully. If any safety
labels are missing, inform your dealer immediately, as the mower is
required by law to carry them.
1• Your safety and that of others
• Always follow these instructions when using your mower.
• Never allow children under the age of 16 to drive the mower.
• Never allow anyone who is not familiar with the operating manual
to use your mower.
• Never drive your mower too close to embankments or ditches, on
soft ground, or where there is a risk of overturning.
• Never operate the machine when feeling tired or unwell, or after
consuming alcohol or taking medicine.
• The user is responsible for ensuring the safety of others within the
area where the mower is being used.
• Whilst mowing, take care to avoid injury to others caused by flying
stones and other objects.
• Keep a safe distance from people and animals when the engine is
running. Never start the machine when they are close by.
• Never remove warning labels or safety instructions.
• The mower must have its collection bag and/or its safety shield/deflector.
Frequently check that the collection bag shows no signs of wear or
deterioration. Never use the mower if the protection is defective.
• Never place hands or feet under the cutting deck.
•The mower has to be always equipped with its safety shield /
deflector and safety rubber flap.
• Keep your hands and legs clear of rotating or moving parts. Always
keep clear of the ejection opening.
• Before removing the grassbox or change the cutting height
adjustment, stop the engine or the blade rotation.
• The hydraulic transmission of your mower uses pressurized oil.
Never start the mower without the hydraulic transmission cowling.:
pressurized hydraulic fluid that could escape could have sufficient
force to penetrate the skin and cause serious injuries in which case
medical help would be needed right away.
• Avoid obstacles such as mole hills, concrete pedestals, tree stumps
and edging, which cannot be cut by the blade and which could
damage the cutting mechanism specially the blade.
• Change the blade after any shock.
• Operate the mower only in broad daylight or with good artificial lighting.
• Whenever possible, do not mow wet grass.
• Always stay behind the machine when mowing. Drive particularly
carefully by changing direction. Mowing on too steep slopes
to be avoided. Work according to the picture 1 – page 6. Mow
perpendicularly with respect to the slope, never up or down it.
• Never run but advance steadily and minding your step especially on slopes.
• Be very careful if you reverse the mower or pull it back towards yourself.
• Do not change the motor speed regulation settings or use the motor
at too high a speed.
• WARNING : NEVER ALLOW THE ENGINE TO RUN IN
CONFINED AREAS.EXHAUST GASES CONTAIN MONXIDE,
WHICH IS ODOURLESS AND CAN KILL.
• Stop the engine for any maintenance on the mower.
• The drive and blade clutch levers never have to be locked in
working position.
• If the mower has to be lifted or transported, stop the engine and
remove the spark plug cap.
• If you drive the mower out of the lawn, stop the engine and the
blade rotation.
• You should also comply with any legal requirements relating to self
propelled mowers (e.g. insurance, useful life, etc).
• These precautions are vital to your safety. However, the
recommendations given are not exhaustive and due care should
always be exercised when using your mower.
• By loading and unloading the machine it is recommended to use
ramps or to ask help for the loading operation.
Maintenance and storage
• Always maintain the machine and accessories in perfect working
conditions.
• Replace worn or damaged parts for greater safety.
• Cleaning or servicing the mower should not be started before
having stopped the engine and disconnected the spark plug.
• The spare blades must only be fitted on machines for which they are
designed, in accordance with the instructions.
• Switch the engine off before beginning any work on the machine.
• Always use recently purchased petrol. Old petrol could leave gum
deposits in the carburettor, lead to leaks or make the engine difficult
to start. Only buy unleaded petrol as for maxi one month.
• Store the petrol in a clean container not used for other purposes.
• WARNING: fuel is highly flammable.
• NEVER STORE, OR USE PETROL NEAR A NAKED FLAME or
near devices such as stoves, water-heaters with pilot lights or any
other device liable to produce sparks.
3
1• Your safety and that of others
• Always fill in the fuel tank outside a building in an open space. Do
not smoke during this operation.
• Add fuel before starting the engine.
• Never remove the fuel cap whilst the engine is running or hot.
• Leave the engine to cool for few minutes before filling.
• Ensure that the fuel cork and fuel tank are replaced correctly.
• If you have tiped over fuel, do not attempt to start the engine
remove the mower from the affected area and take care not to
ignite any undispersed fuel vapour.
• Do not modify the regulator springs, rods or other parts to increase
the engine speed. Operate the engine at the recommended speed.
• Do not check the spark by removing the spark plug. Use an
approved checking system.
• Do not pull the starter while the spark plug is removed. If the engine
is flooted, turn the fuel control to the Max. position and start the
engine until it starts up.
• Do not knock the engine wheel with a hammer or a hard object.
Otherwise, the wheel may break during operation. Have all major
servicing operations performed by an authorised ETESIA mechanic
who has the appropriate tools.
• Do not use the engine without the silencer. Check the silencer
regularly and have it replaced if it’s damaged or leaking.
• Do not touch the exhaust, cylinder or fins when hot. Otherwise, you
may get burnt.
• Do not use the mower in wooded areas, brush fallow or grassy
ground if the exhaust is not fitted with a spark arrester (the spark
arrester must be kept in good condition by the owner or the user).
• Do not start the engine when the air filter or its cover is removed.
• To prevent the engine from starting accidentally, remove the spark
plug cap during servicing operations.
• Clean the cylinder fins and regulator mechanism of any dirt, residue
of grass and other materials which could alter the engine speed.
• Pull the starter cord slowly until you feel resistance. Then pull it
energetically to prevent recoiling and hurting your hand or arm.
• Check the fuel pipe and connections for cracks and leaks and have
them changed if necessary.
• The spare blades must only be fitted on machines for which they are
designed, in accordance with the instructions.
• Use only original ETESIA spare parts. The use of inferior quality
parts can damage the engine.
4
Responsibility
• Etesia will not be held responsible in the event of failure to comply
with this manual or with current regulations.
• Never attempt to modify yourself your propelled mower without
any prior approval from the manufacturer.
• Unauthorized adjustments could be dangerous and result in
serious injury to the user. No responsibility will be accepted
by the manufacturer in the case of failure to comply with these
instructions.
Identification of the mower
• The serial number of your mower is on the identification label on
your mower on the top of the ejection channel. Always give this
number to your Dealer for all servicing on your mower.
• You will only be ready to use this mower after you read the safety
instructions.
2• Key to diagrams - SAFETY
This symbol appears in the instruction manual alongside
those sections which deal with user safety.
Exhaust fumes are very toxic and contain carbone monoxide
who is a deadly and odourless poison.
This symbol appears in the instruction manual alongside
important information on how to prolong the life of your
mower.
Do not run the engine in confined areas.
• Engine diagrams
To avoid any burn, do not touch the exhaust pipe
when it is hot.
Fuel is highly explosive and inflammable.
Stop the engine before fill the fuel tank.
DO NOT SMOKE.
Always fill the fuel tank in the open and never pour or
use petrol near a naked flame or near devices such as
stoves, water-heaters with pilots lights or any other deviceiable to produce sparks.
• Safety labels
a. CAUTION !
b. Before using, please read and follow the safety and maintenance
instructions of the instruction booklet
e. Risk of projected objects
c. Caution of the cutting blade. The blade continues to rotate after
stop of the engine Finger cut risks
g.CAUTION !
d. Stop the engine, disconnect the spark plug before proceeding any
services on the mower
f. Keep the third person away from the machine
h. Do not use the lawnmower if the grass collector and/or the shield
deflector are not in position
a
c
e
g
b
d
f
h
5
2• Key to diagrams - USE
THROTTLE CONTROL LEVER (RMHB)
a- START position to start by cold engine.
MOTOR STARTING AND STOPPING
CONTROL (RMCB-RMCS)
b- Engine rate setting range
1- Starting
1- Maximum rate
1- Press the safety lever against the handlebars.
2- Pull on the starter handle.
2- Stopping
2
- Release the safety lever.
2- Engine stop
1
a
BLADE CLUTCH CONTROL
START (RMHB)
SPEED VARIATOR CONTROL (RMHB)
a - Speed adjustement range
2
START
1- Swing the blade clutch lever towards top
1 - Maxi speed
2- Push the blade clutch lever hock towards front
2 - Mini speed
3- Fold the blade clutch lever on the handlebar
a
STOP
- To stop the blade release the blade clutch lever:
The blade is on stop and braked
1
DRIVE CONTROL
(RMCB-RMCS-RMHB)
Cutting height
(RMCB - RMCS - RMHB)
- To move forward, push the control lever
against the handlebar.
- Cutting height indicator in millimetres
- To stop, release the control lever.
6
3• Illustrations
15
1
2
13
3
12
4
5
6
13
11
7
5
12
10
8
14
9
RMCB - RMCS
1. Safety lever
2. Drive control lever
3. Deflector
4. Filling indicator
5. Gauge / Oil filler tube
6. Grassbox
7. Lever for adjusting the cutting height
8. Muffler
9. Spark plug
10. Fuel tap
9
11
10
11. Air filter
12. Fuel tank cap
13. Starter handle
14. Tank
15. Mulching insert
Spare parts :Blade : MZ46E
7
3• Illustrations
2
3
17
1
4
15
5
14
6
7
8
9
13
15
14
10
11
8
13
12
RMHB
1. Variator control lever
2. Throttle control lever
3. Blade clutch lever
4. Drive control lever
5. Deflector
6. Filling indicator
7. Gauge / Oil filler tube
8. Grassbox
9. Lever for adjusting the cutting height
10. Muffler
16
11. Spark plug
12. Fuel tap
13. Air filter
14. Fuel tank cap
15. Starter handle
16. Tank
17. Mulching insert
Spare parts :Blade : MZ46E
4• Pictures
1
b
a
2
3
4
9
4• Pictures
a
a
b
b
RMCB / RMCS
5
a
RMHB
5a
7
b
7a
6
a
a
b
b
8
2
3
1
8b
8a
MAXI 20°
9
10
4• Pictures
a
b
d
10
c
11
12a
12b
13
11
4• Pictures
15
16
14
b
c
b
a
a
18
17
KOHLER
18a
19
HONDA
20
12
5• TECHNICAL Specifications
940
500
880
Modèle
Engine
RMCB
510
1520
RMCS
RMHB
Kohler Courage XT-6.75 - 4 stroke OHV
Honda GCV 160 OHC 4 stroke
Piston displacement
149 cc
160 cc
Stroke
45 mm
50 mm
Bore
65 mm
64 mm
Maximum use rate
3000 rpm
Motor oil
SAE 30 or SAE 10W30
Oil tank capacity
0, 60 L
0,55 L
Starter
Recoil
Regulator
Mechanical
Fuel
Premium unleaded
Tank capacity
Carburetor
1,1 L
Float-type with ‘‘Smart Choke’’ automatic starter
Float-type with manual starter
Cooling
Air
Air filter
Paper cartridge
Ignition
Spark plug (special)
Electronic
Shell Ø 12 mm - Length of thread 19 mm
Shell Ø 14 mm - Length of thread 19 mm
0, 76 mm
0,75 mm
Spark plug gap
Maximum angle of use (oil level full)
20°
Maximum power at 3600 rpm
4,3 ch / 3,2 kW
5,5 ch / 4,1 kW
Transmission
Disc
X
Disc
Forward speed
3,6 kmph
X
3,3 to 4,3 kmph by variator
Theoretical efficiency
1650
m2 /h
Blade safety
Blade stop
Blade
1380
m2
1970 m2 /h
Shear washer
Transmission belt
Engine brake
Blade brake
Reference ETESIA : MZ46E
Cutting width
46 cm
Central height adjustment in mm
Cutting height
28 - 38 - 48 - 58 - 68 - 78 - 88
Carter de coupe
Xenoy
Box capacity
56 Litre
Mulching
Weight
/h
Yes (removable insert)
40 kg
36 kg
45 kg
Sound pressure level at operating
position*
83 dB (A)
85 dB (A)
Level of vibration in handlebar**
4,2 m/s² (ahw)
5,2 m/s² (ahw)
* Reference standard for the measurements : EN 836
** Reference standards for the measurements : EN 836, EN 1033, EN ISO 5349-1
13
6• Preparation and getting started
The handlebar
• Unfold the handlebar (picture 1), ensuring the remote control
cables are correctly positioned.
• Tighten the 2 wing-nuts (picture 2) of the intermediate handlebar
fastening.
• Position the handlebar at the required height according to how tall
you are (choice of 3 positions). Insert the positioning lug in the corresponding hole in the handlebar mounting (a picture 3) then screw
in and tighten the nut (b picture 3). Important: make sure you fasten
both lower parts at the same height.
Keep your fingers away from the joints to avoid injury.
There must no be any play in the handelbar
attachement.
Place the starter cord in its guide located in the right-hand sleeve of
the handlebars (picture 4). The starter cord must always be held in its
guide.
Engine preparation
Caution! Petrol is highly inflammable.
• Do not smoke while filling with petrol. The tank should always be
filled with the engine switched off.
• Never remove the fuel tank cap while the engine is running.
• If petrol has been spread, do not try to start the motor. Take the
machine away from the spoiled area and make sure there is no form
of ignition as long as the petrol vapour is not dispersed.
• Put the fuel tank cap and the fuel can properly.
• Avoid fuel overflow while filling the fuel tank. In spite of these
precautions should it happen, please :
a) Clean, as good as you can, all the contaminated parts.
b) Don’t start the machine as long as you’re not sure that all the
spread fuel has been eliminated.
Petrol is highly flammable.
Do not smoke while filling with petrol.
Never add oil to the petrol
14
Before to start the engine
Engine oil
• To enable transport make sure, the casing of your mower does not
contain oil. Never run the motor without oil, even for brief periods.
To avoid wear or serious damage to the engine, never run
the engine with the oil level above or below the limits
marked on the dipstick.
• Before starting the engine, fill it up with oil (picture 5). Use
excellent oil quality, duty class SJ for RMCB and RMCS or duty
class SG,SF for RMHB and viscosity SAE 30 or 10W30.
• Place the mower on a horizontal and unencumbered area.
• Check that the engine is cold.
• Clear the dipstick area of any debris.
• Pull out the dipstick (a picture 5 or 5a) and wipe off the oil with a
clean cloth.
RMCB/RMCS
RMHB
Insert the dipstick back into the tube, pushing it in as far as it will go, and turn a quarter of a turn.
Place the plug on the tube without screwing it.
• Take off the gauge and check the oil level. For RMCB/RMCS the
oil must reach the [F] mark (b picture 5), for RMHB the upper limit
(b picture 5). Top up if necessary.
• In the event of excess oil, remove the surplus by laying the mower
on its side. Do not fill the oil sump beyond the mark on the dipstick.
• Screw the filler neck cap firmly.
• Then top up with fuel.
• Clean the area around the fuel cap.
• Remove the fuel cap. Fill to the bottom of the filler neck. Do not
over-fill the fuel tank, to allow the fuel to expand.
• Replace the fuel cap and tighten firmly.
7• Operating instructions
Cutting height adjustment
Mowing
Proceed only after engine has been switched off and blade
has come to a complete standstill.
Wear strong shoes and trousers. Remove all objects such
as stones, wood, iron, string, bones, plastic, etc... from the
lawn.
Set the cutting height according to the height of the grass to be cut.
Never put your hand or foot under the mower while the
engine is running.
• Pull the centralised adjustment lever outwards to release it from its
notch, then turn it to the desired position and release it into its new
notch (picture 6). The numerical values on the indicator correspond
to the cutting height in millimetres.
Mow preferably when the grass is dry.If the grass is very
long or wet, cut it twice : firstly at maximum cutting height,
and then at the final height.
Adapt the cutting height to the height and density of the grass and
the weather conditions. If the grass to be cut is very dense or wet, the
cutting height will need to be raised.
When you are mowing on slopes, you must be particularly
careful and exercise a great deal of caution when changing
direction. You should not mow on slopes that are too steep.
When mowing slopes proceed as shown in the diagram (fig. 9).
Starting and stopping the engine
Before starting the engine, make sure that the blade is properly
installed and properly tightened.
Starting and stopping the engine
and the cutting blade
RMCB/RMCS/RMHB
• Before starting the engine, ensure that the blade is correctly tightened. The cutting blade is linked directly to the engine and
starts to rotate as soon as the engine is started.
• Do not start the engine when the cutting blade is in contact with long,
uncut grass as this would cause difficulties when starting. Never lift
your mower when starting it or when the cutting blade is rotating.
• Open the fuel tap (a picture 7).
Pull the safety lever on the handlebar (a picture 8).
• Stand behind the handlebar.
• Slowly pull on the starter handle until you feel a compression.
• Go back to the starting position before pulling the starter handle firmly to start the engine. Keep hold of the starter handle. The engine
and blade start simultaneously.
• To stop : release the blade clutch lever ; the blade is then on stop
and braked.
• Close the fuel tap (b picture 7).
RMHB
• Open the fuel tap (a picture 7a).
• Place the throttle lever on start (the choke valve will shut
automatically).
• Slowly pull on the starter handle until you feel a compression.
• Go back to the starting position before pulling the starter handle
firmly to start the engine. Keep hold of the starter handle.
• Hold on and follow the starter handle back to first position.
• When the engine has started, put the throttle lever on position ‘‘MAXI’’.
• If attempts to start the engine are unsuccessful, repeat the operation
after putting the throttle in position ‘‘MAXI’’.
•Do not use the choke to restart an engine which has just
been running (hot engine).
• To stop the engine and the cutting blade, move the gas lever to the
"STOP" position.
• Close the fuel tap (b picture 7a).
Do not change the original settings of the engine, do never
increase the engine rate. In the event of adjustment, contact
your specialist approved by ETESIA.
Disengageable blade system (RMHB):
This safety arrangement enables to drive the machine without blades
rotation, when cut is not required (during transport).
• Stand behind the handlebar and start engine
• Push the blade clutch lever hock towards front and fold the bladeclutch lever on the handlebar (see picture 7)
• To stop : release the blade clutch lever ; the blade is then on stop
and braked.
If the grass starts to clog under the deck, switch the engine
off and disconnect the plug lead before thoroughly cleaning
the cutting system.
As the wheel gauge corresponds to the width of the cutting deck, you
can easily visualise the cutting width. Furthermore, this allows you to
mow close up walls and flowerbeds and to go round trees. To obtain
a beautifully mown lawn, we recommend that you mow in parallel
lines overlapping slightly with the wheel each time.
forward speed
NOTE: Do not try to change the governor setting to increase the engine’s maximum speed. Racing the engine is dangerous and invalidates the warranty.
FORWARD MOVEMENT
- To move forwards, pull the advance lever back firmly against the
handlebars (b picture 8).
- To stop release the forward movement lever.
Be particularly careful when you have to pull the machine
towards yourself.
SPEED CONTROLLER (RMHB)
With its continuous speed variation the speed controller enables you
to adapt the speed of the lawnmower to all types of cut and use.
To change the driving speed start the motor then operate the variator
control (see picture 8b).
Your lawn will guide you in your choice of optimum speed :
- Select a slow speed if the conditions of shearing require it : high,
dense or wet grass, or inclined ground.
- Choose a faster speed if the conditions of shearing allow it : dry
grass, neither too high or too dense, and fl at ground.
Avoid moving the speed control knob when the engine is
stopped, because there is the danger of loosening the drive
belt. If it has been moved, put it in
position.
Control of the mower
Mowing
• Never touch the blade when it is rotating. Take special care when
changing directions on slopes. Never mow up or down the slope,
always mow across (picture 9). Always keep a safe distance away
from the lawnmower cutting deck.
• Stop the engine and disconnect the spark plug before removing any
jams, or clear the cutting deck volute.
• If you can not stop the engine with the main control, turn off the
petrol cock (this will stop the engine to within 3 minutes).
15
7• Operating instructions
Mowing with the grassbox
• First undo and remove the removable mulching insert (picture 10a & b).
When mowing with the grass collector, get used to working out
when it is full. Stop before the grass starts to accumulate under
the chassis. The grass collector has an indicator on top (photo
11) which signals that the grass is no longer going into the grass
collector, by indicating STOP. When this happens, the grass
collector needs to be emptied.
ATTACHING THE GRASS COLLECTOR
Always do this with the motor stopped.
• Lift the safety shield/deflector by its handle and introduce the mouth of the grass collector into the outlet duct (picture 12a).
• Hook the grass collector onto the lawnmower frame with its front
hooks (picture 12b) and replace the safety shield/deflector on top of
the grass collector.
Before you start mowing, check that the grass collector and
safety shield/deflector are correctly positioned and that they
are in good condition: have them replaced as soon as they
show any sign of deterioration.
Emptying the grassbox.
MOWING WITH THE INSERT (MULCHING
CONFIGURATION)
• Insert the removable “mulching” insert: insert its end into its slot (c
picture 10) at the back under the sump and push down firmly on its
retaining clip in the slot on the sump skirt (d picture 10).
• Always adjust the cutting height according to the height and density
of the grass to be cut and the weather conditions.
• Look at the mown area: there should be no grass clippings on the
surface. If there are grass tracks visible, the cutting height should be
raised high enough to achieve the result sought.
If you need to tilt your lawnmower for maintenance and
inspection make sure that you lay it on its side so that the
carburettor is facing upwards.
Mowing with rear ejection
For the occasional mowing of tall grass, you can use your
lawnmower without the grass collector or the removable mulching
insert. The deflector is designed to protect you. So only lift
when you need to remove the grassbox. It automatically
repositions itself afterwards.
Advice: after initially changing to the high position, you can
reinstall the housing insert (mulching configuration) and finish off
mowing by a second run at the required cutting height.
Always perform this operation with the motor turned off.
• Raise the deflector and take the grassbox by its handle.This
operation can be done either from any side of the mower.
• Empty the grassbox by the frontal opening.
DUST GRILL (Pictures 13A)
To reduce the amount of dust and cut grass escaping through the
sides of the grass collector, attach the extra grills supplied with your
lawnmower.
• Put the extra grills inside the grass collector, supported by the top
edge of its side walls, with the hooks facing the walls.
• Insert the mounting hooks into the corresponding openings in the
grass collector grill.
• Slide the extra grills forward to fasten them in place.
8• Maintenance
Before performing any maintenance operation, turn off the
engine, disconnect the power cable, close the fuel tap and
remove the spark plug cap.
The best maintenance is above all the regular cleaning of your
mower after each use (frame, wheels, transmission system...).
CLEANING
• Once the engine has been switched off and allowed to cool,
unhook the grass collector, undo the lower fastening nuts on the
handlebar as far as the screw collar so as to be able to straighten
the handlebar, and lift the chassis from the front to put it into the
vertical position (photo 14).
Tip: Do not undo the two middle fastening nuts: the upper part of
the handlebar stays aligned with lower parts.
• If you prefer to lay the lawnmower on its side, make sure that the
air filter is always facing upwards.
16
• After stopping the engine and having allowed it to cool, clean the
lawnmower particularly the inside of the cutting deck. Remove all
debris of cut grass, preferably using a scraper and a brush.
• Avoid turning the cutting blade when cleaning to ensure easier
starting later.
• If you are using a water jet, and particularly when using a high
pressure washer, take care not to splash water on engine elements
such as the carburettor, air filter, ignition, silencer.Never use hot
water pressure washers.
Check safety disposition
• Regularly check the condition of the safety scuttle, the collecting
bin and the anti-projection fl aps. Replace them as soon as they
show signs of deterioration.
• Ensure that the safety control works properly: safety lever released
= stoppage of cutting blade in less than 3 seconds.
• If you notice abnormalities in operation, have the safety system
checked by a service engineer approved by ETESIA.
8• Maintenance
MAINTENANCE OF THE CUTTING SYSTEM
Before each use, check that the blade, the blade attaching
screw and the cutting assembly are not worn or damaged.
A blade deformed or showing excessive wear (chipping on
the blade edges) must be replaced.
• All shocks against obstacles, or abnormal wear, may cause
unbalance and deterioration of the bearings or indeed of the engine
as a whole. In such cases the warranty becomes invalid. Use a
new blade rather than risk damage to the motor due to excessive
unbalance of a poor blade.
• Regularly make sure that the blade is well balanced (picture 14).
REMOVAL OF THE BLADE
• Change absolutely the blade after any shock.
• Some microcracks provoked by a shock can lead to the rupture of
the blade if it’s not replaced.
ENGINE MAINTENANCE
Before any maintenance operation and in order to avoid any
risk in case of accidental start of the mower, take out the
plug top and empty the engine outside.
Engine emptying
• The first emptying has to be done after the 5 first working hours.
These hours have to be considered like a burn in period during the
one you have to run the engine carefully.
• Next emptying has to be done every 50 hours or once a year. If the
mower is used in difficult conditions (high temperature), plan more
frequent emptying.
Be careful with used hot oil.
Emptying method
The engine crankshaft drives the cutting blade by means of a coupling washer. In the event of an impact of the blade against an
obstacle, the tabs are sheared off and the blade is no longer driven
normally.
Empty the oil out when the engine is still hot.
• Clean around the dipstick cap.
• Remove the dipstick cap. Turn the engine on its side, with the
air filter facing upwards. Drain the oil into an appropriate vessel.
• Once the sump is completely empty, put the engine upright
again. The oil level must reach the [F] mark of the gauge.
Remove the used oil in an approved recuperation station (fig 19).
This washer is a wear piece and it is normal to have to replace it.
Air filter
- Loosen the cutting blade fastening screw.
- Replace the cutting blade and the coupling washer, respecting the
direction of assembly (picture15).
RMCB/RMCS (SEE picture 18)
Wear gloves to avoid any accidents when handling the
cutting blade, which is extremely sharp on the sharpened
side. Remove the spark plug cover.
Check that the two cutting points are turning in the same plane.
Measure the distance between the end of the blade and the edge of
the cutting deck skirt. This distance must stay the same when you
move the other end of the blade to the measuring point and must not
be less than 3mm.
- After an impact to the cutting blade, it must be replaced immediately. Micro cracks caused by such an impact can lead to the blade
breaking subsequently, if it is not replaced.
SERVICING THE FORWARD GEAR
TRANSMISSION SYSTEM (picture 17)
After each use, clean the transmission system by removing any grass
that may have accumulated on it.
Important ! regularly check the correct adjustment of the drive
clutch cable.
Checking and adjusting the tension:
L0 = length of the spring at rest.
L1 = length of the spring when the corresponding control is activated.
The tension applied to the spring connecting the cable to the control
levers (Value L1-L0) must be maintained, in gear and with the engine
off, at a value of between 4 and 5 mm for the forward gear clutch
cable.
Any adjustments that are needed can be made by moving the screw
thrust bearings on the tightening screws on the sheathing on the handlebar:
• Loosen the lock-nuts, unscrew the thrust bearings by the necessary value, then tighten the lock-nuts again and check.
While the control levers are not being used, the spring should not
exert any tension on the cable.
It is inevitable that impurities will get into the air filter. Maintain the
engine filter regularly: every 25 working hours or once a year. In case
of use in dust atmosphere, the number of cleaning has to be increased.
Running the engine with loose or damaged air filter
components may cause premature wear or engine failure.
Replace all bent or damaged components.
Do not clean the fi lter with petrol or compressed air.
• Unscrew the button (a) and remove the air filter cover (b).
• Remove the paper element (c) from the bottom and replace it.
• Insert the element with the folded side facing outwards and place the rubber seal around the edge of the base.
• Replace the air filter cover and fasten with the button.
RMHB (SEE PICTURE 18A)
• Remove the cover of the air filter (a) by unhooking the two upper
tabs (b) situated on the air filter cover, then the two lower tabs (d).
• Remove the filter element (c). Check carefully that it is not
perforated or torn. Replace it if necessary.
• Tap it gently several times on a hard surface so that the execess dirt
drops off. Never try to remove dirt with a brush; brushing would
force the dirt inside the fibres.
• Replace the element if it is necessary dirty.
• Replace the element, then the cover of the air filter.
Do not use solvents or petrol or compressed air to clean the
air filter. Do not oil the cartridge.
Spark
Always use a spark plug with the right thermal value.
Clean the spark plug well. Remove the spark plug and replace it.
• Check the gap with a gauge. Adjust the gap (see Technical
Specifications page 13).
• Insert the spark plug into the cylinder head.
• Tighten the spark plug to a torque of 27 Nm.
17
8• Maintenance
COOLING SYSTEM
Suitable cooling is essential. To prevent overheating, clean the
filters, cooling fins, and other external surfaces on the engine. Avoid
spraying water on the cable bundle or the electronic components.
Check the periodic maintenance summary table.
TRANSPORT
If the machine has to be raised or transported, turn off the
motor.Allow it to cool for at least 15 minutes before loading
the mower into a vehicle. By precaution, disconnect the
spark plug cover.
Never transport the mower with petrol in the tank or with
the petrol tap open. The mower must be kept horizontal.
It is advisable to use a loading ramp or to have somebody help you
load and unload the mower.
Quick handle folding
To reduce the mower space requirement in order to make storage
easier, the handle has to be folded.
• Remove the grass collector.
• Remove the starter cord from its guide and keep hold of the handle
as the cord reels in towards the engine.
• Loosen the middle fastening nuts on the handlebar as far as the
screw collar, and allow the upper part of the handlebar to fold
backwards.
• Loosen the lower mounting nuts on the handlebar, move the lower
parts of the handlebar outwards at their lower mounting points to
release the positioning lugs and to be able to raise them.
• Fold the lower parts of the handlebar forward on your lawnmower
and rest the upper part of the handlebar on top of them, taking care
not to damage the cables.
9• Winter storage - long stop
PREPARATION
• Carefully clean the machine and in particular the underneath of the
cutter housing.
• Clean the air filter.
• Empty the petrol tank and turn the engine over until all the fuel still
in the pipes and the carburettor is used.
This operation must be carried out outdoors (in the open air).
• Whilst the engine is still hot, empty the oil from the oil sump and
fill up again with new oil of the right viscosity.
• Remove the spark plug and pour about 15 ml of engine oil into the
cylinder. Pull gently on the starter until you feel a compression : the
valves are then closed and protected against corrosion.
• Store the mulching mower in a clean, dry place, on planks or a
sheet of metal.
STARTING UP AGAIN
- Unscrew the spark plug, clean it with petrol and leave it to dry.
- Pull several times on the starter to eliminate the excess oil in the cylinder.
- Put back the dry spark plug.
- Fill up with fuel.
- Start the engine.
Of course you may leave this seasonal maintenance work to your
ETESIA dealer if you wish. He will check that your mulching mower
is in good condition...so that it starts first go the following spring.
18
10• DAY TO DAY MAINTENANCE – BREAKDOWNS AND SOLUTIONS
Most functioning troubles are due to bad uses and / or maintenance of the machine. Should breakdown remain, please contact your ETESIA
dealer.
Before doing anything, disconnect the spark plug cap and close the fuel valve.
PROBLEM
Machine does not want to start
Origin
SOLUTION
Lack of fuel
Fill the tank and open the fuel tap
Spark is full of dust
Clean and replace the spark
Too much fuel
Remove the spark and dry the engine by
pulling the rocket
Air filter needs cleaning
Clean or replace the filter
Irregular operation, strong vibration
Cutting blade off centred
Cutting blade loose
Balance or replace it
Tighten the attaching screws
Bad cutting, grassbox does not fill itself
correctly
Blunt blade
Sharpened or replace the blade
Blade does not turn on an horizontal plan
Replace the blade
Grass remains
Cutting height is too low
Lift it slightly
Too quick drive
Drive more slowly
Engine run is too low
Put the gas lever on [MAXI] position
Height adjustment too low
Lift the cutting height
Cutting deck clogged with grass remains
Clean the deck
Blade clutch not working properly
Long distance control trouble
Adjust the cable tension
Reduce forward speed slot
Long distance control trouble
Adjust control cables
Does not rest on disengaged position
Dead point stop needs adjustment
Ask your ETESIA dealer to adjust dead point
IMPORTANT : should you need to replace parts, please use original ETESIA ones. It will ensure the longevity of your machine. The use
of any non ETESIA part is at user risk and has for consequence the refusal of all warranty claims. ETESIA can not be responsible in case of
accident with non ETESIA parts.
11• REGULAR MAINTENANCE SUMMARY
Page
Element
Before each cutting
After the 5 first
hours
Every 50 h or each
season
17
Engine oil
Check the level and
adjust
Empty the
frame
Empty the
frame (*)
18
Air filter
Replace the
cartridge
Clean every 25
hours
18
Spark
Clean-adjust
electrodes
Replace if used too
much
18
Cooling system
17
Transmission
forward
Cleaning around the
muffler
Periodically
Observation
Necessary to be
able to claim for
warranty
Replace every 100
hours
Check and clean
Clean and check
tension of the cable
Keep it perfectly
clean
(*) Apply these procedures more frequently if the mower is used in difficult conditions (dust, heat, heavy loads).
19
12• Warranty
Definitions
• Dealer, importer = Distributor linked to ETESIA by an agreement
(dealership or importer contract). The dealer and the importer are in
charge of selling and servicing ETESIA machines.
• User, buyer = physical or moral person, company, collectivity or
association having bought legally a machine new or second hand
from a dealer.
• Domestic use = use of a machine on a private ground. Machine is
owned by the user and just use to clear its private piece of ground
(main or secondary residence).
• Professional use = use of an ETESIA machine, in exchange of
money or not, on public areas to maintain companies or institutions
like: hospitals, associations,….or on private fields being owned by
a third person.
• The user completes the warranty card indicating the type of use
for every machine. This declaration engages its responsibility and
defines the legal warranty period.
• Should ETESIA discover that the machine is not used in the use
initially declared, ETESIA allows itself to cancel the warranty.
• Wear parts/Consumable parts : parts needing to be changed
inevitably to enable an optimal normal use of the machine.
• Normal use: use of the machine according to all instructions
mentioned in the instruction book (including safety and
maintenance).
.
General warranty conditions
• In addition to the legal warranty, ETESIA offers a contractual
warranty.
The ETESIA warranty concerns the exchange of parts free of
charge in case of material, production or conception fault. This
warranty applies on the product as he leave ETESIA production
line.
• The delivery company is the only responsible in case of transport
damage. It is however the addresse responsibility when damages
occurs during transport to mention reserves on the delivery note
when receiving the goods and to inform ETESIA within 48H by
registered letter.
• The instruction book delivered with every machine contents all
information regarding machines use.
Any different use from the one described in the instruction book can
be dangerous for the user and reduce machine life. In such cases,
ETESIA can not be held responsible.
Contractual warranty
• The ETESIA contractual warranty is allowed for one year in
professional use and for 3 years on domestic use (warranty period
starting the first day when the machine is purchased by the user).
This warranty is just valid if :
1) Instructions from the instructions book have been respected.
2) The warranty card has been returned to ETESIA immediately after
the machine purchase or completed on the extranet site.
3) A revision is recommended after periods indicated in the
instruction book.
4) To require a repair under warranty claim, the buyer will contact
first the ETESIA dealer. Should it not be possible, he could
contact ETESIA who would propose an alternative solution.
5) Just repairs done in ETESIA dealers workshops can be taken under
warranty.
6) Any material, production or conception fault recognized by
ETESIA as such will be eligible to warranty (parts and labour). It
will therefore be paid back to the dealer according to charge scale
mentioned in the agreement. It is dealer responsibility to make
sure that the end user does receive the complete warranty allowed
20
by ETESIA. Should ETESIA not recognize any fault, the dealer
will be held responsible. ETESIA reserves the right to cancel the
decision with no compensation no warning.
Transportation cost for machines and parts are at user cost.
7) Any intervention done within warranty time, in particular in case of
parts exchange, will not give right to any new warranty period.
8) In case of parts exchange under warranty, ETESIA reserves the right
to use either new or second hand parts. Parts given free of charge by
ETESIA can required at any time by ETESIA.
They need to be sent back on simple request. Should ETESIA not
receive these parts, warranty claim would automatically be cancelled.
9) This warranty however does not cover :
- parts damaged during a repair action
- machines not having been serviced according to the repair
schedule mentioned in the instruction book
- parts with normal wear.
Please find a list (not complete) of wearing parts: spark plugs,
filters, exhaust, seals, membranes, blades, blade coupling parts,
belts, clutchs, batteries, battery electrolytes, control cables, sheath,
fuel pipes, durits, cooling liquid, hydraulic and lubrication liquids,
fuel, seat, bonnets, grassbox material, grassbox frame, mudguards,
pedal covers, running board cover, anti scalp kit, roll axle.
10) Warranty right is cancelled in the following cases :
- damages due to non respect of safety, maintenance use and storage
instructions. ETESIA will not be held responsible, legally in
particular, for damages resulting from other uses than the ones
described in the instruction book
- damages due to accident or collision
- damages due to a modification of the original machine or use of
non original spare parts
- damages on machines not having been maintained by the ETESIA
dealer network.
11) In case of owner change, the outstanding warranty period can be
transferred to the new owner. However to enable this transfer a
written request need to be sent to ETESIA after sales department.
This request needs to attest as well that the new end user has
received the instruction book for the machine as well as the
warranty terms.
12) ETESIA keeps the right to check that preliminary conditions for
warranty have been respected by the buyer.
13) When warranty application is requested, ETESIA does deliver the
parts as soon as possible. However an immediate delivery can not
be requested. A delay in delivery would in no case give right to
compensation or to warranty extension..
14) Any additional claims to ETESIA is excluded.
15) Any breakdown suspected as being a fault subject to warranty
has to be brought to attention to an ETESIA dealer. The ETESIA
dealer is in fact the only contact able to submit a warranty claim
to ETESIA. Should a dispute occur the competent tribunal is the
one mentioned in the ETESIA dealership.
Important note :
As soon as a machine purchase takes place, the warranty cards needs to
be:
- completed, signed and sent back to
ETESIA Warranty service
67165 WISSEMBOURG CEDEX or
- completed on line on the extranet.
CE declaration of conformity
In accordance with Directive EEC 2006/42/CE
We,
13, Rue de l’Industrie, 67165 WISSEMBOURG CEDEX
declare under our responsibility that the petrol lawnmower, type RMCB - RMCS - RMHB, to which this declaration refers, fulfil all the
relevant terms of directive 2006/42/CE applicable to them as well as to the provisions of all other applicable European directives :
- EC 2004/108Electromagnetic compatibility
- EC 2000/14 Sound emissions in the environment by equipment intended for use outside buildings
And guarantee that petrol lawnmower, type RMCB - RMCS - RMHB, meet the requirements of Directive 2000/14/EC regarding noise
emissions in the environment, and are subject to the internal production control procedure, with evaluation of the technical documents and
periodic inspection by a notified body, the CETIM, F-60304 SENLIS CEDEX.
- Average acoustic power level measured : 96 dB(A)
- Acoustic power level guaranteed : 96 dB(A)
Mr Treger Claude
13, rue de l'industrie 67165 Wissembourg CEDEX
is the person authorized to constitute the technical file :
Assessment of conformity ti in-house inspection of machine manufacture according to Annex VIII of directive 2006/42/EC.
Modell :
Serial number:
Done in Wissembourg, the 18/07/2013
Due to their permanent improvement policy, ETESIA reserves the
right to modify specifications, text and pictures without prior notice.
ETESIA SAS - F - 67165 WISSEMBOURG CEDEX - Strasbourg Trade & Commerce Register B343 510 996
The President
11099_02_072013i2
Mr. Patrick VIVES
Stamp
here
please
ETESIA
SERVICE GARANTIE
13 rue de l'Industrie
67165 WISSEMBOURG CEDEX
France
This card has to be returned completed to ETESIA upon the first setting up.
WARRANTY CERTIFICATE
Serial number
USERNAME____________________________ Forename__________________________
Street____________________________ Zip code___________________________
Tel. number_______________________
Day
Month
Year
@ Email : ________________________________________________________________________
Contact : __________________________Cell phone number for SMS information : ______________
- Dealer : _________________________________- Installer : _______________________________
- End user ________________________________ - Importer : _______________________________
Installation provided by : _____________________________________________________________
I already own an ETESIA q yes - q no
Area to be mown
q More than once the week
q Less than 1000 m2
q 5000 to 10 000 m2
q Once the week
q 1000 to 2000 m2
q 10 000 to 20 000 m2
q Twice the month
q 2000 to 5000 m2
q More than 20 000 m2
q Once the month
q Less than once the month
I am, I represent :
q A privat
q an association, a company________________________
q A council, a collectivity
q A landscaper (green areas professionnal)
q Other, specify __________________________________________________________________
Signature and confirmation of the user :
- that he has taken possession of a machine in perfect working order ;
- that the user has been handed over and that he thoroughly read the use instructions, safety and maintenance suggestions figuring in it ;
- that he has been informed of the warranty terms and that he accepts said terms without reserve or restriction ;
- that he has been informed by the ‘’Contract of breakdown service per alarm « GPS »’’ (automatic lawnmower ETMowers)
Dealer's stamp and signature
Automatic lawnmower ETMower - Track and Trace : User code query
Date :______________________________________________
Town_____________________________ Date of purchas _____ _____ 20____ Date_________________________
Signature____________________