1
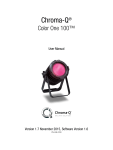
Chroma-Q®
Studio One 100 D™
User Manual
Version 1.0 September 2015, Software Version 1.6
PN: 638-0704
Warranty Statement
Chroma-Q warrants to the original purchaser, with proof of purchase, that its delivered products shall be free from defects in
material and workmanship under normal use for a period of 12 months from date of shipment.
Chroma-Q will repair, or at its option, provide an equivalent item or replace, the defective product during the stated warranty
period. This warranty applies only to the repair or replacement of the product and only when the product is properly handled,
installed and maintained according to Chroma-Q instructions. This warranty excludes defects resulting from improper
handling, storage, installation, acts of God, fire, vandalism or civil disturbances. Purchaser must notify Chroma-Q in writing
within 14 days of noticing the defect. This warranty excludes field labour or service charges related to the repair or
replacement of the product.
The warranty contained herein shall not extend to any finished goods or spare parts from which any serial number has been
removed or which have been damaged or rendered defective (a) as a result of normal wear and tear, wilful or accidental
damage, negligence, misuse or abuse; (b) due to water or moisture, lightning, windstorm, abnormal voltage, harmonic
distortion, dust, dirt, corrosion or other external causes; (c) by operation outside the specifications contained in the user
documentation; (d) by the use of spare parts not manufactured or sold by Chroma-Q or by the connection or integration of
other equipment or software not approved by Chroma-Q unless the Customer provides acceptable proof to Chroma-Q that
the defect or damage was not caused by the above; (e) by modification, repair or service by anyone other than Chroma-Q,
who has not applied for and been approved by Chroma-Q to do such modification, repair or service unless the Customer
provides acceptable proof to Chroma-Q that the defect or damage was not caused by the above; (f) due to procedures,
deviating from procedures specified by Chroma-Q or (g) due to failure to store, install, test, commission, maintain, operate or
use finished goods and spare parts in a safe and reasonable manner and in accordance with Chroma-Q’s instructions (h) by
repair or replacement of engines without factory training.
The warranty contained herein shall not apply to finished goods or spare parts which are sold “as is”, as “second-hand”, as
used”, as “demo” or under similar qualifications or to Consumables (“Consumables” is defined as any part(s) of goods or
part(s) for use with goods, which part(s) of goods or part(s) for use with goods are consumed during the operation of the
goods and which part(s) of goods or part(s) for use with goods require replacement from time to time by a user such as, but
not limited to, light bulbs).
The warranty contained herein shall not apply, unless the total purchase price for the defective finished goods or spare parts
has been paid by the due date for payment.
The warranty contained herein applies only to the original purchaser and are not assignable or transferable to any
subsequent purchaser or end-user.
This warranty is subject to the shipment of the goods, within the warranty period, to the Chroma-Q warranty returns
department, by the purchaser, at the purchasers’ expense. If no fault is found, Chroma-Q will charge the purchaser for the
subsequent return of the goods.
Chroma-Q reserves the right to change the warranty period without prior notice and without incurring obligation and
expressly disclaims all warranties not stated in this limited warranty.
www.chroma-q.com
Studio One 100 D User Manual
1
V1.0 September 2015
Disclaimer
The information contained herein is offered in good faith and is believed to be accurate. However, because conditions and
methods of use of our products are beyond our control, this information should not be used in substitution for customer's
tests to ensure that Chroma-Q products are safe, effective, and fully satisfactory for the intended end use. Suggestions of
use shall not be taken as inducements to infringe any patent. Chroma-Q sole warranty is that the product will meet the sales
specifications in effect at the time of shipment. Your exclusive remedy for breach of such warranty is limited to refund of
purchase price or replacement of any product shown to be other than as warranted.
Chroma-Q reserves the right to change or make alteration to devices and their functionality without notice due to our ongoing
research and development.
The Chroma-Q Studio One 100 range has been designed specifically for the lighting industry. Regular maintenance should
be performed to ensure that the products perform well in the entertainment environment.
If you experience any difficulties with any Chroma-Q products please contact your selling dealer. If your selling dealer is
unable to help please contact [email protected]. If the selling dealer is unable to satisfy your servicing needs, please
contact the following, for full factory service:
Outside North America:
North America:
Tel: +44 (0)1494 446000
Tel: 416-255-9494
Fax: +44 (0)1494 461024
Fax: 416-255-3514
[email protected]
[email protected]
For further information please visit the Chroma-Q website at www.chroma-q.com.
Chroma-Q and Studio One 100 D are trademarks, for more information on this visit www.chroma-q.com/trademarks.
The rights and ownership of all trademarks are recognised.
Important Notice:
As per the requirements in the Occupational Safety and Health Administration standards for product approval, please refer to
the OSHA web pages http://www.osha.gov/dts/otpca/nrtl/ for information on the list of Nationally Recognized Testing
Laboratories (NRTLs) and the scope of recognition.
www.chroma-q.com
Studio One 100 D User Manual
2
V1.0 September 2015
Table of Contents
1.
Product overview ................................................................
................................................................................................
................................................................................................
.................................................................
................................. 4
2.
Operation ................................................................
................................................................................................
................................................................................................
...........................................................................
........................................... 5
2.1
Unpacking the Units ....................................................................................................................................... 5
2.2
Cabling ......................................................................................................................................................... 5
2.3
Mounting ...................................................................................................................................................... 5
2.4
Optics ........................................................................................................................................................... 5
2.5
Control ......................................................................................................................................................... 6
2.6
DMX Protocol .............................................................................................................................................. 13
2.7
Thermal Performance .................................................................................................................................. 13
3.
Troubleshooting ................................................................
................................................................................................
................................................................................................
................................................................ 13
4.
Specification ................................................................
................................................................................................
................................................................................................
.....................................................................
..................................... 14
5.
4.1
Technical Specifications ............................................................................................................................... 14
4.2
Drawings – Dimensions ............................................................................................................................... 15
Maintenance
Maintenance ................................................................
................................................................................................
................................................................................................
.....................................................................
..................................... 15
www.chroma-q.com
Studio One 100 D User Manual
3
V1.0 September 2015
1. Product overview
The new ChromaChroma -Q® Studio One 100™ LED Par is designed to deliver the highest quality of white light from an LED based
fixture, for the most demanding applications.
Utilising core LED technology from the Chroma-Q premium performance lighting range, the multi-purpose fixture is ideal for
a wide range of environments and provides a powerful, creative lighting tool.
The Studio One's custom optical design and fully homogenised output provides a smooth, uniform and defined 18° beam.
Theatrical grade dimming emulates the extremely smooth dimming curve of tungsten fixtures.
The Studio One 100 offers adjustable dimming frequencies to ensure flicker-free operation on cameras.
With the advanced feature set also including convection cooling for silent operation and a versatile mounting yoke, the Studio
One 100 is suitable for numerous TV, film, studio, exhibition & entertainment lighting applications - complementing the
popular Chroma-Q Studio Force™ and Studio Force Phosphor™ LED fixtures ranges.
With a simple to use Infra-Red remote control included with each fixture, you can be up and running within minutes without
the requirement of a lighting console - saving time and labour with instant access to pre-set colour temperatures, on/off,
dimming and effects.
To enable maximum flexibility with users' existing production inventory, the Studio One accepts industry-standard 6.25"
accessories such as egg crates, barndoors and top hats.
Note: HANDHELD COLOUR METERS
• Handheld Colour Meters provide a limited measuring range for LED fixtures, which results in inconsistent and unreliable
data.
• All photometric values listed in this document are based on testing and measurements conducted by certified
independent laboratories with reference to the IES standards.
www.chroma-q.com
Studio One 100 D User Manual
4
V1.0 September 2015
2. Operation
2.1 Unpacking the Units
The Studio One 100 D package includes 1 unit fixture, power cord, power connector, colour frame, a Quick Start Guide and
an IR Remote.
We recommend that you keep the original packaging in case the item needs to be returned.
2.2 Cabling
The Studio One 100 D is built with chassis mount powerCon connectors for power input and through; chassis mount XLR 5pin connectors for DMX control data input and through.
The enclosure is ground bonded.
XLR 5-pin Cable:
Pin#
1
2
3
4
5
Function
Ground (Screen)
Data Minus
Data Plus
Spare Data Minus
Spare Data Plus
Power Cable:
International
North American
Connections
Colour Code
Green and Yellow
Blue
Brown
Colour Code
Green
White
Black
Earth (E)
Neutral (N)
Live (L)
Ground (Green)
Neutral (Silver)
Hot (Gold)
Important Notice: The use of an opto-splitter for DMX signal distribution is highly recommended when several fixtures are
not plugged into the same power source.
2.3 Mounting
The Studio One 100 D is built with a split yoke system for floor mounting and overhead hanging applications.
Secure the fixture with a safety bond when hung. A provision for a fixing hold is built into the fixture.
2.4 Optics
The Studio One 100 D is built with an optical lens that provides a fully homogenised beam angle of approximately ~ 18°.
www.chroma-q.com
Studio One 100 D User Manual
5
V1.0 September 2015
2.5 Control
The Studio One 100 D is controlled remotely via ANSI E1.11 USITT DMX512-A protocol or can operate as a standalone unit
with the wireless IR Remote. The control functions can be accessed through the LCD display at the rear of the fixture with 4
push buttons.
Back Arrow
(Enter) Stores the menu choice
Up Arrow
Increases (+) the mode level or value
Down Arrow
Decreases (-) the mode level or value
Exit
Back to the previous menu
Power-Up Display:
On power-up, the display shows the Brand, Model Name and Software Version for 5 seconds then goes on to show the Main
Menu. The Main Menu shows:
• Model Name
• DMX Status
• DMX Address
• Set Control Personality (Mode)
• Number of Assigned Channels
Display Mode:
The LCD is backlit when you access the menus. This will switch off when left undisturbed for 10 seconds.
Personality:
The Studio One 100 D features a single Cold White LED engine which can be controlled through three Personality modes:
Display
Ch
1-Dimmer
1
Description
1 DMX channel for the control of all LEDs
2-Master
The unit is set as the Master unit. All settings of the Master unit will be repeated on all Slave units.
3-Slave
The unit is set as the Slave unit. All settings of the Slave units follow the Master unit.
www.chroma-q.com
Studio One 100 D User Manual
6
V1.0 September 2015
Wireless IR Remote:
The Studio One 100 D can be controlled via wireless IR Remote in standalone operation. The fixture is set in IR Remote
control by selecting IR Remote in the menu No DMX Present.
Point the IR Remote towards the fixture.
The IR Remote features buttons for the following control options:
• On and Off
• Fade In and Out
• White
Color and Effects Buttons applicable to the Color One 100 units:
• 15 Colors
• 4 Effects: Full Color Scroll (Flash), Warm Color Scroll (Strobe), Fade In/Fade Out, and Cold Color Scroll
(Smooth)
www.chroma-q.com
Studio One 100 D User Manual
7
V1.0 September 2015
Control Menu
•
•
•
•
•
Use the Up and Down arrows to navigate the control menu options
Press Enter to select a control menu option
Press Enter to save the setting, display shows Done and returns to the previous menu
Press Exit to return to the previous menu without saving
The display goes back to the Main Menu
www.chroma-q.com
Studio One 100 D User Manual
8
V1.0 September 2015
Main Menu
The Main Menu displays the following:
•
Model name
•
DMX status
•
DMX start address
•
Personality (Control Mode)
•
Number of assigned channels
To set the DMX start address,
1.
From the Main Menu, press Enter.
Enter.
2.
Press Up or Down to adjust the DMX start address.
3.
Press Enter to save.
Display shows Done and returns to the Main Menu.
1-Personality
The Studio One 100 D can be set to operate in DMX controlled and standalone modes. Refer to the list below
for details.
To set the Personality,
1.
From the Main Menu, press Up or Down to access 1-Personality.
2.
Press Enter and then Up or Down to select the mode.
3.
Press Enter to save.
The display shows Done, returns to 1-Personality and then the Main Menu.
Personality – Software Version 1.6
Display
Ch
Description
1-Dimmer
1
All LEDs
2-Master
0
Set as master unit in standalone
3-Slave
0
Set as slave unit in standalone
www.chroma-q.com
Studio One 100 D User Manual
9
V1.0 September 2015
2-No DMX Present
If DMX control signal from an external source is not detected, various standalone output options can be
selected:
1-OFF
Fixture has no light output
2-Hold Last
Fixture holds the last valid DMX state
3-IR Remote
Fixture is controlled via remote infrared control unit
4-Look 1
Fixture snaps to saved Look
5-Look 2
Fixture snaps to saved Look
6-Look 3
Fixture snaps to saved Look
7-Look 4
Fixture snaps to saved Look
8-Look 5
Fixture snaps to saved Look
To set the option when there is No DMX Present,
1.
From the Main Menu, press Up or Down to access 2-No DMX Present.
2.
Press Enter,
Enter then press Up or Down to select the option.
3.
Press Enter to save.
The display shows Done, returns to 2-No DMX Present and then the Main Menu.
www.chroma-q.com
Studio One 100 D User Manual
10
V1.0 September 2015
3-Look Store
In this mode,
•
5 internal preset Looks are available for stand-alone operation (see No DMX Present).
•
Looks created from an external DMX console can be recorded in any of the 5 Look numbers and will be
preserved on power down.
•
Looks that have been recorded can be modified in stand-alone operation.
•
Looks will be returned to default setting if reset is performed.
To recall a Look in stand-alone operation,
1.
From the Main Menu, press Up or Down to access 3-Look Store.
2.
Press Enter and press Up or Down to select from Look 1 to 5.
3.
Press Enter after the display shows Recall?
4.
Press Up or Down to increase or decrease the intensity “II ” from 0 to 100.
5.
Press and hold Enter to save the Look, the display shows Recorded and the Look turns On.
To record a Look created from a remote DMX console:
1.
Set the fixture to the desired Personality.
2.
Use an external DMX console to adjust the assigned channel levels and create the desired look or effect.
3.
From the Main Menu, press Up or Down to select 3-Look Store.
4.
Press Enter,
Enter press Up or Down to select the Look number and the display shows Record?
5.
Press Enter to record the Look and the display shows Recorded.
To create or modify a Look in stand-alone operation:
1.
From the Main Menu, press Up or Down to select 3-Look Store.
2.
Press Enter,
Enter press Up or Down to recall the Look number.
3.
Press Enter and the display shows “I” (Intensity) at the top row and the value below.
4.
Press Up or Down to increase or decrease the Intensity value.
5.
Press and hold Enter until the display shows Recorded.
www.chroma-q.com
Studio One 100 D User Manual
11
V1.0 September 2015
4-Technical
In this mode,
•
Software Version is displayed.
•
DMX Data (value) of the channel is displayed.
•
Internal temperature is displayed.
•
The fixture can be set to 4 frequency options. The LED scan rate can be synchronised with the video
camera to avoid a flickering effect.
Frequency options:
750 Hz 1500 Hz
•
3000 Hz
6000 Hz
Calibration data of the channel is displayed.
To display the Software Version,
1.
From the Main Menu, press Up or Down to access 4-Technical.
2.
Press Enter,
Enter the display shows the Software Version.
To display DMX Data,
1.
From the Main Menu, press Up or Down to access 4-Technical.
2.
Press Enter,
Enter Up or Down and select DMX Data.
3.
Press Enter,
Enter the display shows the DMX channel value.
To display the temperature of the LED Engine in the fixture,
1.
From the Main Menu, press Up or Down to access 4-Technical.
2.
Press Enter,
Enter Up or Down and select Temperature.
3.
Press Enter,
Enter the display shows the LED Engine Temperature.
To set the Frequency,
1.
From the Main Menu, press Up or Down to access 4-Technical.
2.
Press Enter,
Enter Up or Down and select PWM Frequency.
3.
Press Enter,
Enter Up or Down and select a frequency option.
4.
Press Enter to save.
The display shows Done and returns 4-Technical and then Main Menu.
To display the Calibration data,
1.
From the Main Menu,
Menu press Up or Down to access 4-Technical.
2.
Press Enter,
Enter Up or Down and select Calibration.
3.
Calibration data of the channel is displayed.
www.chroma-q.com
Studio One 100 D User Manual
12
V1.0 September 2015
5-Reset
To reset the fixture to the factory default settings,
1.
From the Main Menu, press Up or Down to access 5-Reset.
2.
Press Enter,
Enter display shows reset?
Press and hold Enter for 2 seconds, display shows Hold for 2 sec. and Done, then back to the Main
Menu.
3.
All control menu commands are reset to factory defaults:
DMX address
1
Personality
Dimmer
No DMX Present
Hold Last
Look Store
1
PWM Frequency
750Hz
2.6 DMX Protocol
DMX Personality:
Studio One 100 D
V1.6
V1.
6
1-Dimmer
[1 ch]
Channel 1
All LED
Total
1 DMX channel
2.7 Thermal Performance
The internal cooling system of the Studio One fixture is by convection and built with automatic protection. The fixture’s
automatic protection reduces the output when the internal temperature reaches the maximum limit due to extreme ambient
conditions.
3. Troubleshooting
Troubleshooting is a process of elimination. First, rule out the other field factors (i.e. bad connections, faulty cables and
power supplies). For technical support and/or parts, please contact your selling dealer or the offices listed in this manual.
Symptom
Fixture does not respond to DMX
control.
Low LED output.
Possible Cause
Set to wrong or different DMX address.
Bad cable connecting DMX control and
fixture.
Bad in/through connection between
adjacent fixtures.
Internal temperature is over the limit.
Solution
Check DMX address and Mode
settings.
Check/replace DMX run from the
console.
Check area ventilation.
www.chroma-q.com
Studio One 100 D User Manual
13
V1.0 September 2015
4. Specification
4.1 Technical Specifications
Product Code
Net Dimensions**
(Without Fixings - Width x
Height x Depth)
Net Weight (Without Fixings)
Shipping Dimensions –
Width x Height x Depth
Shipping Weight
Power & Connections
Power Supply
Power Input Rating
Power Factor
Power Consumption
Inrush Current
Idle Power Consumption
Typical Power & Current
Power connector In/Out
Data Connectors In/Out
Control Protocol
Cooling System
Operating Temperature
Construction
Colour
Built-In Hardware
IP Rating
Approvals
Control & Photometric
LED Engines
LEDs Per Engine
Control Modes
Dimming Curve
Wireless Control
Hot Lumen Output (Combined)
Optics
Beam Angle
Beam Distribution
CCT
CRI
Lamp Life
CHSONE100D
214mm x 267mm x 232mm / 8.5" x 10.5" x 9" (Full open yoke)
3.8 kg / 8.5 lb
406mm x 228mm x 292mm / 16" x 9" x 11.5"
5.5 kg / 12 lb
Built-in
100-240V AC 50-60Hz 125VA
0.5
60W @ 120V AC; 61W @ 230V AC
15A @ 120V AC; 36A @ 230V AC
3W @ 120V AC; 5W @ 230V AC
Measurements done with all LEDs at maximum intensity. Measurements made at nominal voltage.
Allow for a deviation of +/- 10%.
powerCon
XLR 5-pin
ANSI E1.11 USITT DMX 512-A
Convection
0°C to 40°C
Cast machined aluminium
Black (custom colours available on request)
Split yoke, 6.25” Accessory Holder
IP20
CISPR 15/EN55015& EN61547, FCC Part 15 Subpart B:2012 /
ICES-003:2012, CSA C22.2, UL 1573, IEC 60598
1
Cold White
1 channel Dimmer, Master, Slave
Theatrical
On / Off, Fade In, Fade Out
2,500
Fully Homogenised
18° (approx)
Symmetrical direct illumination
6,100K (+/- 200K)
82
L70 at 50,000 hours
**For exact measurements please refer to the line drawings below
www.chroma-q.com
Studio One 100 D User Manual
14
V1.0 September 2015
4.2 Drawings – Dimensions
5. Maintenance
With care, the Studio One 100 requires little maintenance. However, as the unit is likely to be used in a stage environment
we recommend periodical internal inspection and cleaning of any resulting dust and cracked oil residue.
If the front enclosure requires cleaning, wipe with a mild detergent on a damp cloth.
www.chroma-q.com
Studio One 100 D User Manual
15
V1.0 September 2015