1
UM1451
User manual
Getting started with software development toolchains for the
STM32L-DISCOVERY and 32L152CDISCOVERY boards
Introduction
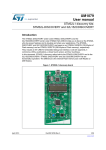
This document provides an introduction on how to use the following software development
toolchains with the STM32L-DISCOVERY and 32L152CDISCOVERY boards.
• IAR Embedded Workbench® for ARM (EWARM) by IAR Systems
• Microcontroller Development Kit for ARM (MDK-ARM) by Keil™
• TrueSTUDIO® by Atollic
• TASKING VX-toolset for ARM® Cortex™-M by Altium™.
It provides guidelines to novice users on how to build and run a sample program provided
with this document and allows them to create and build their own application.
When running the sample program supplied with this application note, the Red LED LD2
(PWR) lights up. Then the user will be able to run a series of functions (VDD voltage
measurement, STM32L current consumption...) by pressing the user button B1 to switch
from a function to an other (please refer to AN3413).
Although this application note cannot cover all the topics relevant to software development
environments, it demonstrates the first basic steps necessary to get started with the
compilers/debuggers.*
STM32L1xxDISCOVERY stands either for STM32L-DISCOVERY or 32L152CDISCOVERY
evaluation kit throughout the document.
Reference documents
• STM32L-DISCOVERY and 32L152CDISCOVERY user manual (UM1079)
• STM32L1x current consumption measurement and touch sensing demonstration
(AN3413)
The above documents are available at www.st.com/stm32l.
July 2013
DocID022073 Rev 2
1/40
www.st.com
Contents
UM1451
Contents
1
Overview of STLINK/V2 interface . . . . . . . . . . . . . . . . . . . . . . . . . . . . . . . 6
2
Hardware environment setup . . . . . . . . . . . . . . . . . . . . . . . . . . . . . . . . . . 7
3
Using the IAR Embedded Workbench® for ARM . . . . . . . . . . . . . . . . . . 8
4
5
6
7
2/40
3.1
Building an existing EWARM project . . . . . . . . . . . . . . . . . . . . . . . . . . . . . 8
3.2
Debugging and running your EWARM project . . . . . . . . . . . . . . . . . . . . . . 9
3.3
Creating your first application using the EWARM toolchain . . . . . . . . . . . 10
3.3.1
Managing source files . . . . . . . . . . . . . . . . . . . . . . . . . . . . . . . . . . . . . . 10
3.3.2
Configuring project options . . . . . . . . . . . . . . . . . . . . . . . . . . . . . . . . . . 12
Using the MDK-ARM microcontroller development kit by Keil™ . . . . 16
4.1
Building an existing MDK-ARM project . . . . . . . . . . . . . . . . . . . . . . . . . . 16
4.2
Debugging and running your MDK-ARM project . . . . . . . . . . . . . . . . . . . 17
4.3
Creating your first application using the MDK-ARM toolchain . . . . . . . . . 18
4.3.1
Managing source files . . . . . . . . . . . . . . . . . . . . . . . . . . . . . . . . . . . . . . 18
4.3.2
Configuring project options . . . . . . . . . . . . . . . . . . . . . . . . . . . . . . . . . . 20
Using the Atollic TrueSTUDIO®
. . . . . . . . . . . . . . . . . . . . . . . . . . . . . . . . . . . . . . . .23
5.1
Building an existing TrueSTUDIO project . . . . . . . . . . . . . . . . . . . . . . . . . 23
5.2
Debugging and running your TrueSTUDIO project . . . . . . . . . . . . . . . . . 26
5.3
Creating your first application using TrueSTUDIO toolchain . . . . . . . . . . 26
Using Altium TASKING toolset . . . . . . . . . . . . . . . . . . . . . . . . . . . . . . . 31
6.1
Building an existing TASKING project . . . . . . . . . . . . . . . . . . . . . . . . . . . 31
6.2
Debugging and running your TASKING project . . . . . . . . . . . . . . . . . . . . 34
6.3
Creating your first application using TASKING toolchain . . . . . . . . . . . . . 35
Revision history . . . . . . . . . . . . . . . . . . . . . . . . . . . . . . . . . . . . . . . . . . . 39
DocID022073 Rev 2
UM1451
List of tables
List of tables
Table 1.
Document revision history . . . . . . . . . . . . . . . . . . . . . . . . . . . . . . . . . . . . . . . . . . . . . . . . . 39
DocID022073 Rev 2
3/40
3
List of figures
UM1451
List of figures
Figure 1.
Figure 2.
Figure 3.
Figure 4.
Figure 5.
Figure 6.
Figure 7.
Figure 8.
Figure 9.
Figure 10.
Figure 11.
Figure 12.
Figure 13.
Figure 14.
Figure 15.
Figure 16.
Figure 17.
Figure 18.
Figure 19.
Figure 20.
Figure 21.
Figure 22.
Figure 23.
Figure 24.
Figure 25.
Figure 26.
Figure 27.
Figure 28.
Figure 29.
Figure 30.
Figure 31.
Figure 32.
Figure 33.
Figure 34.
Figure 35.
Figure 36.
Figure 37.
Figure 38.
Figure 39.
Figure 40.
Figure 41.
Figure 42.
Figure 43.
Figure 44.
Figure 45.
Figure 46.
Figure 47.
Figure 48.
4/40
Hardware environment . . . . . . . . . . . . . . . . . . . . . . . . . . . . . . . . . . . . . . . . . . . . . . . . . . . . 7
IAR Embedded Workbench IDE environment . . . . . . . . . . . . . . . . . . . . . . . . . . . . . . . . . . . 8
EWARM project successfully compiled. . . . . . . . . . . . . . . . . . . . . . . . . . . . . . . . . . . . . . . . . 9
Download and debug button . . . . . . . . . . . . . . . . . . . . . . . . . . . . . . . . . . . . . . . . . . . . . . . . . 9
IAR Embedded Workbench debugger screen . . . . . . . . . . . . . . . . . . . . . . . . . . . . . . . . . . . 9
Create new project dialog box . . . . . . . . . . . . . . . . . . . . . . . . . . . . . . . . . . . . . . . . . . . . . . 10
IDE interface . . . . . . . . . . . . . . . . . . . . . . . . . . . . . . . . . . . . . . . . . . . . . . . . . . . . . . . . . . . . 10
main.c example file . . . . . . . . . . . . . . . . . . . . . . . . . . . . . . . . . . . . . . . . . . . . . . . . . . . . . . . 11
Adding files to a project . . . . . . . . . . . . . . . . . . . . . . . . . . . . . . . . . . . . . . . . . . . . . . . . . . . 11
New project file tree structure . . . . . . . . . . . . . . . . . . . . . . . . . . . . . . . . . . . . . . . . . . . . . . . 11
Configuring project options . . . . . . . . . . . . . . . . . . . . . . . . . . . . . . . . . . . . . . . . . . . . . . . . . 12
General options . . . . . . . . . . . . . . . . . . . . . . . . . . . . . . . . . . . . . . . . . . . . . . . . . . . . . . . . . 12
Linker > Config tab . . . . . . . . . . . . . . . . . . . . . . . . . . . . . . . . . . . . . . . . . . . . . . . . . . . . . . . 13
Linker configuration file editor dialog box > Vector Table tab . . . . . . . . . . . . . . . . . . . . . . . 13
Linker configuration file editor dialog box > Memory Regions tab . . . . . . . . . . . . . . . . . . . 13
C/C++ Compiler > Preprocessor tab. . . . . . . . . . . . . . . . . . . . . . . . . . . . . . . . . . . . . . . . . . 14
Debugger > Setup tab. . . . . . . . . . . . . . . . . . . . . . . . . . . . . . . . . . . . . . . . . . . . . . . . . . . . . 14
Select Flash loaders . . . . . . . . . . . . . . . . . . . . . . . . . . . . . . . . . . . . . . . . . . . . . . . . . . . . . . 14
ST-Link communication protocol . . . . . . . . . . . . . . . . . . . . . . . . . . . . . . . . . . . . . . . . . . . . 15
MDK-ARM µVision4 IDE environment . . . . . . . . . . . . . . . . . . . . . . . . . . . . . . . . . . . . . . . . 16
MDK-ARM µVision4 project successfully compiled . . . . . . . . . . . . . . . . . . . . . . . . . . . . . . 16
Starting a MDK-ARM µVision4 debugging session . . . . . . . . . . . . . . . . . . . . . . . . . . . . . . 17
MDK-ARM IDE workspace . . . . . . . . . . . . . . . . . . . . . . . . . . . . . . . . . . . . . . . . . . . . . . . . . 17
Creating a new project . . . . . . . . . . . . . . . . . . . . . . . . . . . . . . . . . . . . . . . . . . . . . . . . . . . . 18
Device selection dialog box . . . . . . . . . . . . . . . . . . . . . . . . . . . . . . . . . . . . . . . . . . . . . . . . 18
Copy the STM32 Startup Code dialog box . . . . . . . . . . . . . . . . . . . . . . . . . . . . . . . . . . . . . 19
main.c example file . . . . . . . . . . . . . . . . . . . . . . . . . . . . . . . . . . . . . . . . . . . . . . . . . . . . . . . 19
Adding source files . . . . . . . . . . . . . . . . . . . . . . . . . . . . . . . . . . . . . . . . . . . . . . . . . . . . . . . 19
New project file tree structure . . . . . . . . . . . . . . . . . . . . . . . . . . . . . . . . . . . . . . . . . . . . . . . 20
Target Options dialog box - Target tab . . . . . . . . . . . . . . . . . . . . . . . . . . . . . . . . . . . . . . . . 20
Target Options dialog box - Debug tab . . . . . . . . . . . . . . . . . . . . . . . . . . . . . . . . . . . . . . . . 21
Target Options dialog box - Utilities tab . . . . . . . . . . . . . . . . . . . . . . . . . . . . . . . . . . . . . . . 21
MDK-ARM µVision4 project successfully built . . . . . . . . . . . . . . . . . . . . . . . . . . . . . . . . . . 22
TrueSTUDIO workspace launcher dialog box . . . . . . . . . . . . . . . . . . . . . . . . . . . . . . . . . . 23
Atollic TrueSTUDIO®/STM32 Lite import source select dialog box . . . . . . . . . . . . . . . . . . 24
Atollic TrueSTUDIO®/STM32 Lite import projects dialog box. . . . . . . . . . . . . . . . . . . . . . . 25
TrueSTUDIO® project successfully compiled . . . . . . . . . . . . . . . . . . . . . . . . . . . . . . . . . . . 25
TrueSTUDIO debug window . . . . . . . . . . . . . . . . . . . . . . . . . . . . . . . . . . . . . . . . . . . . . . . . 26
TrueSTUDIO workspace launcher dialog box . . . . . . . . . . . . . . . . . . . . . . . . . . . . . . . . . . 27
TrueSTUDIO® C Project dialog box . . . . . . . . . . . . . . . . . . . . . . . . . . . . . . . . . . . . . . . . . . 27
TrueSTUDIO® Build Settings dialog box . . . . . . . . . . . . . . . . . . . . . . . . . . . . . . . . . . . . . . 28
TrueSTUDIO® software configuration dialog box . . . . . . . . . . . . . . . . . . . . . . . . . . . . . . . . 29
TrueSTUDIO® Misc Settings dialog box . . . . . . . . . . . . . . . . . . . . . . . . . . . . . . . . . . . . . . . 29
TrueSTUDIO® project folder example . . . . . . . . . . . . . . . . . . . . . . . . . . . . . . . . . . . . . . . . 30
TrueSTUDIO® project successfully built . . . . . . . . . . . . . . . . . . . . . . . . . . . . . . . . . . . . . . . 30
TASKING workspace launcher dialog box . . . . . . . . . . . . . . . . . . . . . . . . . . . . . . . . . . . . . 31
TASKING VX-Toolset for ARM Cortex welcome screen. . . . . . . . . . . . . . . . . . . . . . . . . . . 31
TASKING import source select dialog box . . . . . . . . . . . . . . . . . . . . . . . . . . . . . . . . . . . . . 32
DocID022073 Rev 2
UM1451
Figure 49.
Figure 50.
Figure 51.
Figure 52.
Figure 53.
Figure 54.
Figure 55.
Figure 56.
Figure 57.
Figure 58.
List of figures
TASKING import projects dialog box . . . . . . . . . . . . . . . . . . . . . . . . . . . . . . . . . . . . . . . . . 33
TASKING project successfully compiled . . . . . . . . . . . . . . . . . . . . . . . . . . . . . . . . . . . . . . 33
TASKING debug window . . . . . . . . . . . . . . . . . . . . . . . . . . . . . . . . . . . . . . . . . . . . . . . . . . 34
TASKING Workspace Launcher dialog box . . . . . . . . . . . . . . . . . . . . . . . . . . . . . . . . . . . . 35
TASKING New C/C++ Project dialog box . . . . . . . . . . . . . . . . . . . . . . . . . . . . . . . . . . . . . . 35
Processor selection . . . . . . . . . . . . . . . . . . . . . . . . . . . . . . . . . . . . . . . . . . . . . . . . . . . . . . 36
Debug configurations . . . . . . . . . . . . . . . . . . . . . . . . . . . . . . . . . . . . . . . . . . . . . . . . . . . . . 36
TASKING Import dialog box . . . . . . . . . . . . . . . . . . . . . . . . . . . . . . . . . . . . . . . . . . . . . . . . 37
Adding a new source file window . . . . . . . . . . . . . . . . . . . . . . . . . . . . . . . . . . . . . . . . . . . . 37
Tasking project successfully built . . . . . . . . . . . . . . . . . . . . . . . . . . . . . . . . . . . . . . . . . . . . 38
DocID022073 Rev 2
5/40
5
Overview of STLINK/V2 interface
1
UM1451
Overview of STLINK/V2 interface
The STM32L1xxDISCOVERY board includes an ST-LINK/V2 embedded debug tool
interface that is supported by the following software toolchain versions:
•
EWARM Version 6.50.3 and later available from www.iar.com
Installing the EWARM toolchain (using the default settings) results in the toolchain
being installed in the C:\Program Files\IAR Systems\Embedded Workbench 6.2
directory on the PC’s local hard disk.
After installing EWARM 6.20.4, install the ST-LINK/V2 driver by running the STLink_V2_USB.exe from [IAR_INSTALL_DIRECTORY]\Embedded Workbench
6.2\arm\drivers\ST-Link \ST-Link_V2_USBdriver.exe
•
MDK-ARM Version 4.71 and later available from www.keil.com
Installing the MDK-ARM toolchain (using the default settings) results in the toolchain
being installed in the C:\Keil directory on the PC’s local hard disk; the installer creates a
start menu uVision4 shortcut.
When connecting the ST-LINK/V2 tool, the PC detects new hardware and asks to
install the ST-LINK_V2_USB driver. The “Found New Hardware wizard” appears and
guides you through the steps needed to install the driver from the recommended
location.
•
TrueSTUDIO Version 4.0.0 and later available from www.atollic.com
Installing the TrueSTUDIO toolchain (using the default settings) results in the toolchain
being installed in the “C:\Program Files\Atollic directory on the PC’s local hard disk.
The ST-Link_V2_USB.exe is installed automatically when installing the software
toolchain.
•
TASKING VX-toolset Version 4.4r1 available from www.tasking.com
The toolchain is installed by default in the “C:\Program Files\TASKING” directory on
your PC local hard disk. The ST-Link_V2_USB.exe is installed automatically when
installing the software toolchain.
6/40
DocID022073 Rev 2
UM1451
2
Hardware environment setup
Hardware environment setup
Before running your application, you should establish the connection with the
STM32L1xxDISCOVERY board as following.
Figure 1. Hardware environment
For more details on how to establish your hardware environment you can refer to the
STM32L-DISCOVERY and 32L152CDISCOVERY user manual (UM1079) user manual
available from http//www.st.com.
DocID022073 Rev 2
7/40
39
Using the IAR Embedded Workbench® for ARM
3
Using the IAR Embedded Workbench® for ARM
3.1
Building an existing EWARM project
1.
UM1451
Open the IAR Embedded Workbench® for ARM (EWARM).
Figure 2 shows the basic names of the windows referred to in this document.
Figure 2. IAR Embedded Workbench IDE environment
2.
8/40
In the File menu, select Open and click Workspace to display the Open Workspace
dialog box. Browse to select the STM32L-Discovery.eww workspace file and click
Open to launch it in the Project window.
3.
In the Project menu, select Rebuild All to compile your project.
4.
If your project is successfully compiled, the following window is displayed.
DocID022073 Rev 2
UM1451
Using the IAR Embedded Workbench® for ARM
Figure 3. EWARM project successfully compiled
3.2
Debugging and running your EWARM project
In the IAR Embedded Workbench IDE, from the Project menu, select Download and
Debug or, alternatively, click the Download and debug button the in toolbar, to program the
Flash memory and begin debugging.
Figure 4. Download and debug button
The debugger in the IAR Embedded Workbench can be used to debug source code at C
and assembly levels, set breakpoints, monitor individual variables and watch events during
the code execution.
Figure 5. IAR Embedded Workbench debugger screen
1. The above example is given for the 32L152CDISCOVERY board.
DocID022073 Rev 2
9/40
39
Using the IAR Embedded Workbench® for ARM
UM1451
To run your application, from the Debug menu, select Go, or alternatively click the Go
button in the toolbar.
3.3
Creating your first application using the EWARM toolchain
3.3.1
Managing source files
1.
In the Project menu, select Create New Project and click OK to save your settings.
Figure 6. Create new project dialog box
2.
Name the project, NewProject.ewp for example, and click Save to display the IDE
interface.
Figure 7. IDE interface
10/40
DocID022073 Rev 2
UM1451
Using the IAR Embedded Workbench® for ARM
To create a new source file, in the File menu, open New and select File to open an empty
editor window where you can enter your source code.
The IAR Embedded Workbench enables C color syntax highlighting when you save your file
using the dialog File > Save As… under a filename with the *.c extension. In this example,
the file is saved as main.c.
Figure 8. main.c example file
Once you have created your source file you can add this file to your project, by opening the
Project menu, selecting Add and adding the selected file.
Figure 9. Adding files to a project
If the file is added successfully, the following window is displayed.
Figure 10. New project file tree structure
DocID022073 Rev 2
11/40
39
Using the IAR Embedded Workbench® for ARM
3.3.2
UM1451
Configuring project options
1.
In the Project Editor, right-click on the project name and select Options to display the
Options dialog box
Figure 11. Configuring project options
2.
In the Options dialog box, select the General Options category, open the Target tab
and select either Device - ST -STM32L152xB (STM32L-DISCOVERY) or Device - ST
-STM32L152xC (32L152CDISCOVERY).
Figure 12. General options
1. The above example is given for the 32L152CDISCOVERY board.
12/40
DocID022073 Rev 2
Using the IAR Embedded Workbench® for ARM
UM1451
3.
Select the Linker category, open the Config tab, in the Linker configuration file pane
select Override default and click Edit. to display the Linker configuration file editor.
Figure 13. Linker > Config tab
4.
In the Linker configuration file editor dialog box, open the Vector Table tab and set
the .intvec.start variable to 0x08000000.
Figure 14. Linker configuration file editor dialog box > Vector Table tab
5.
Open the Memory Regions tab, and enter the variables as shown in Figure 15.
Figure 15. Linker configuration file editor dialog box > Memory Regions tab
6.
Click Save to save the linker settings automatically in the Project directory.
7.
If your source files include header files, select the C/C++ Compiler category, open the
Preprocessor tab, and specify their paths as shown in Figure 16. The path of the
include directory is a relative path, and always starts with the project directory location
referenced by $PROJ_DIR$.
DocID022073 Rev 2
13/40
39
Using the IAR Embedded Workbench® for ARM
UM1451
Figure 16. C/C++ Compiler > Preprocessor tab
8.
To set up the ST-Link embedded debug tool interface, select the Debugger category,
open the Setup tab and select ST-Link from the drop-down Driver menu.
Figure 17. Debugger > Setup tab
9.
Open the Download tab and select Use Flash loader(s).
Figure 18. Select Flash loaders
14/40
DocID022073 Rev 2
UM1451
Using the IAR Embedded Workbench® for ARM
10. Select the ST-Link category, open the ST6Link tab and select SWD as the connection
protocol.
Figure 19. ST-Link communication protocol
11. Click OK to save the project settings.
12. To build your project, follow the instructions given in Section 3.1: Building an existing
EWARM project on page 8.
13. Before running your application, establish the connection with the
STM32L1xxDISCOVERY board as described in Section 2: Hardware environment
setup on page 7.
14. To program the Flash memory and begin debugging, follow the instructions given in
Section 3.2: Debugging and running your EWARM project on page 9.
DocID022073 Rev 2
15/40
39
Using the MDK-ARM microcontroller development kit by Keil™
UM1451
4
Using the MDK-ARM microcontroller development kit
by Keil™
4.1
Building an existing MDK-ARM project
1.
Open the MDK-ARM µVision4 IDE, debugger, and simulation environment.
Figure 2 shows the basic names of the windows referred to in this document.
Figure 20. MDK-ARM µVision4 IDE environment
2.
In the Project menu, select Open Project... to display the Select Project File dialog
box. Browse to select the STM32L-Discovery.uvproj project file and click Open to
launch it in the Project window.
3.
In the Project menu, select Rebuild all target files to compile your project.
4.
If your project is successfully compiled, the following window is displayed.
Figure 21. MDK-ARM µVision4 project successfully compiled
16/40
DocID022073 Rev 2
UM1451
4.2
Using the MDK-ARM microcontroller development kit by Keil™
Debugging and running your MDK-ARM project
In the MDK-ARM µVision4 IDE, click the magnifying glass to program the Flash memory
and begin debugging.
Figure 22. Starting a MDK-ARM µVision4 debugging session
The debugger in the MDK-ARM IDE can be used to debug source code at C and assembly
levels, set breakpoints, monitor individual variables and watch events during the code
execution.
Figure 23. MDK-ARM IDE workspace
DocID022073 Rev 2
17/40
39
Using the MDK-ARM microcontroller development kit by Keil™
UM1451
4.3
Creating your first application using the MDK-ARM toolchain
4.3.1
Managing source files
1.
In the Project menu, select New µvision Project... to display the Create Project File
dialog box. Name the new project and click Save.
Figure 24. Creating a new project
2.
When a new project is saved, the IDE displays the device dialog box. Select the device
used for testing. In this example, we will use the STMicroelectronics device mounted
on the STM32L1xxDISCOVERY board. In this case, double-click on
STMicroelectronics, select either STM32L152xB (STM32L-DISCOVERY) or
STM32L152xC (32L152CDISCOVERY) and click OK to save your settings.
Figure 25. Device selection dialog box
1. The above example is given for the 32L152CDISCOVERY board.
18/40
DocID022073 Rev 2
UM1451
Using the MDK-ARM microcontroller development kit by Keil™
3.
Click Yes to copy the STM32 Startup Code to the project folder and add the file to the
project.
Figure 26. Copy the STM32 Startup Code dialog box
Note:
The default STM32 startup file includes the SystemInit function. You can either comment out
this file to not use it or add the system_stm32l1xx.c file from the STM32l1xx firmware library.
To create a new source file, in the File menu, select New to open an empty editor window
where you can enter your source code.
The MDK-ARM toolchain enables C color syntax highlighting when you save your file using
the dialog File > Save As… under a filename with the *.c extension. In this example, the file
is saved as main.c.
Figure 27. main.c example file
MDK-ARM offers several ways to add source files to a project. For example, you can select
the file group in the Project Window > Files page and right-click to open a contextual
menu. Select the Add Files... option, and browse to select the main.c file previously
created.
Figure 28. Adding source files
If the file is added successfully, the following window is displayed.
DocID022073 Rev 2
19/40
39
Using the MDK-ARM microcontroller development kit by Keil™
UM1451
Figure 29. New project file tree structure
4.3.2
Configuring project options
1.
In the Project menu, select Options for Target 1 to display the Target Options dialog
box.
2.
Open the Target tab and enter IROM1 and IARM1 start and size settings as shown in
Figure 30.
Figure 30. Target Options dialog box - Target tab
3.
20/40
Open the Debug tab, click Use and select the ST-Link Debugger. Then, click Settings
and select the SWD protocol. Click OK to save the ST-Link setup settings.
DocID022073 Rev 2
UM1451
Using the MDK-ARM microcontroller development kit by Keil™
4.
Select Run to main().
Figure 31. Target Options dialog box - Debug tab
5.
Open the Utilities tab, select Use Target Driver for Flash Programming and select
the ST-Link Debugger from the drop-down menu.
6.
Verify that the Update Target before Debugging option is selected.
7.
Click OK to save your settings.
Figure 32. Target Options dialog box - Utilities tab
8.
In the Project menu, select Build Target.
DocID022073 Rev 2
21/40
39
Using the MDK-ARM microcontroller development kit by Keil™
9.
UM1451
If your project is successfully built, the following window is displayed.
Figure 33. MDK-ARM µVision4 project successfully built
10. Before running your application, establish the connection with the
STM32L1xxDISCOVERY board as described in Section 2: Hardware environment
setup on page 7.
11. To program the Flash memory and begin debugging, follow the instructions given in
Section 4.2: Debugging and running your MDK-ARM project on page 17.
22/40
DocID022073 Rev 2
Using the Atollic TrueSTUDIO®
UM1451
5
Using the Atollic TrueSTUDIO®
5.1
Building an existing TrueSTUDIO project
1.
Open the TrueSTUDIO®/STM32 product folder and select the Atollic TrueSTUDIO®
STM32 product name. The program launches and asks for the Workspace location.
Figure 34. TrueSTUDIO workspace launcher dialog box
1. The above example is given for the 32L152CDISCOVERY board.
2.
Browse to select the AN3964-Temperature_sensor TrueSTUDIO workspace and click
OK to save your settings.
3.
To load the AN3964-Temperature_sensor project, select Import.. from the File menu to
display the Import dialog box.
4.
In the Import window, open General, select Existing Projects into Workspace and
click Next.
DocID022073 Rev 2
23/40
39
Using the Atollic TrueSTUDIO®
UM1451
Figure 35. Atollic TrueSTUDIO®/STM32 Lite import source select dialog box
24/40
DocID022073 Rev 2
Using the Atollic TrueSTUDIO®
UM1451
5.
Click Select root directory, browse to the TrueSTUDIO workspace folder and select
either STM32L152xB (STM32L-DISCOVERY) or STM32L152xC (32L152CDISCOVERY) project.
Figure 36. Atollic TrueSTUDIO®/STM32 Lite import projects dialog box
1. The above example is given for the 32L152CDISCOVERY board.
6.
In the Projects pane, select either the STM32L152xB (STM32L-DISCOVERY) or the
STM32L152xC (32L152C-DISCOVERY) and click Finish.
7.
In the Project Explorer, select either the STM32L152xB (STM32L-DISCOVERY) or
the STM32L152xC (32L152C-DISCOVERY) project. Open the Project menu, and click
Build Project.
8.
If your project is successfully compiled, the following window is displayed.
Figure 37. TrueSTUDIO® project successfully compiled
1. The above example is given for the 32L152CDISCOVERY board.
DocID022073 Rev 2
25/40
39
Using the Atollic TrueSTUDIO®
5.2
UM1451
Debugging and running your TrueSTUDIO project
In the Project Explorer, select the project and press F11 to start a debug session (see
Figure 38).
Figure 38. TrueSTUDIO debug window
1. The above example is given for the 32L152CDISCOVERY board.
The debugger in the Atollic TrueSTUDIO can be used to debug source code at C and
assembly levels, set breakpoints, monitor individual variables and watch events during the
code execution.
To run your application, from the Run menu, select Resume, or alternatively click the
Resume button in the toolbar.
5.3
Creating your first application using TrueSTUDIO toolchain
TrueSTUDIO includes a dedicated connection to the STM32LxxDISCOVERY board. When
choosing this connection, all required files (startup file, firmware library, etc.) are added to
the workspace and sample files are generated in the project folder to simplify development.
The debug settings are automatically configured by selecting either the STM32L152xB
(STM32L-DISCOVERY) or the STM32L152xC (32L152CDISCOVERY) as microcontroller.
1.
26/40
Open the TrueSTUDIO®/STM32 product folder and select the Atollic TrueSTUDIO®
STM32 product name. The program launches and asks for the Workspace location.
Browse to select an existing workspace, or enter a new workspace location and click
OK to confirm.
DocID022073 Rev 2
Using the Atollic TrueSTUDIO®
UM1451
Figure 39. TrueSTUDIO workspace launcher dialog box
1. The above example is given for the 32L152CDISCOVERY board.
2.
When the Atollic TrueSTUDIO® displays its Welcome window, click Start using
TrueSTUDIO to open the main window. In the File menu, select New and click C
Project.
3.
Name the new project, in the Project type pane select STM32 C Project and click
Next.
Figure 40. TrueSTUDIO® C Project dialog box
1. The above example is given for the 32L152CDISCOVERY board.
DocID022073 Rev 2
27/40
39
Using the Atollic TrueSTUDIO®
4.
UM1451
In the TrueSTUDIO® Build Settings dialog box, select either the STM32L152xB
(STM32L-DISCOVERY) or the STM32L152xC (32L152CDISCOVERY) as
microcontroller, and configure the other settings as shown in Figure 41 and click Next.
Figure 41. TrueSTUDIO® Build Settings dialog box
1. The above example is given for the 32L152CDISCOVERY board.
28/40
DocID022073 Rev 2
Using the Atollic TrueSTUDIO®
UM1451
5.
In the TrueSTUDIO® software configuration dialog box, you can select one of the two
available versions of newlib Runtime library and optimization options.
Figure 42. TrueSTUDIO® software configuration dialog box
6.
Verify that the JTAG Probe is ST-LINK and click Finish to confirm your settings.
Figure 43. TrueSTUDIO® Misc Settings dialog box
DocID022073 Rev 2
29/40
39
Using the Atollic TrueSTUDIO®
7.
UM1451
Your project is successfully created. Atollic TrueSTUDIO® generates target specific
sample files (main.c, stm32l1xx_it.c...) in the Project folder to simplify development.
You can tailor this project to your needs by modifying these sample files.
Figure 44. TrueSTUDIO® project folder example
8.
To build your project, in the Project menu, click Build Project.
9.
Your project is successfully compiled.
Figure 45. TrueSTUDIO® project successfully built
10. Before running your application, establish the connection with the
STM32L1xxDISCOVERY board as described in Section 2: Hardware environment
setup on page 7.
11. To program the Flash memory and begin debugging, follow the instructions given in
Section 5.2: Debugging and running your TrueSTUDIO project on page 26.
30/40
DocID022073 Rev 2
UM1451
Using Altium TASKING toolset
6
Using Altium TASKING toolset
6.1
Building an existing TASKING project
Follow these steps below to build an existing TASKING project:
1.
Open the TASKING VX-toolset for ARM Cortex IDE. The program launches and
requests the Workspace location.
Figure 46. TASKING workspace launcher dialog box
1. The above example is given for the 32L152CDISCOVERY board.
2.
Browse to select the AN3964-Temperature_sensor TASKING workspace and click OK
to save your settings and display the Welcome screen. To start using TASKING, click
Go to the workbench.
Figure 47. TASKING VX-Toolset for ARM Cortex welcome screen
3.
The AN3964-Temperature_sensor TASKING workspace contains a project for the
STM32L152RC (32L152C-DISCOVERY) and one for the STM32L152RB (STM32LDISCOVERY).To load this project, select Import... from the File menu to display the
Import dialog box.
DocID022073 Rev 2
31/40
39
Using Altium TASKING toolset
4.
UM1451
In the Import window, open General, select Existing Projects into Workspace and
click Next.
Figure 48. TASKING import source select dialog box
32/40
DocID022073 Rev 2
UM1451
Using Altium TASKING toolset
5.
Click Select root directory, browse to the TASKING workspace folder and select the
STM32L152RC (32L152C-DISCOVERY) and one for the STM32L152RB (STM32LDISCOVERY) project.
Figure 49. TASKING import projects dialog box
1. The above example is given for the 32L152CDISCOVERY board.
6.
In the Projects window, click Finish.
7.
In the Project Explorer, select either STM32L152RC (32L152C-DISCOVERY) and
one for the STM32L152RB (STM32L-DISCOVERY) project. Open the Project menu,
and click Build Project.
8.
If your project is compiled successfully, the following window is displayed.
Figure 50. TASKING project successfully compiled
1. The above example is given for the 32L152CDISCOVERY board.
DocID022073 Rev 2
33/40
39
Using Altium TASKING toolset
6.2
UM1451
Debugging and running your TASKING project
Figure 51 shows the first step for debugging and running your TASKING project. From the
project toolbar menu, select either Debug > Debug STM32L152RC(32L152C-DISCOVERY)
or Debug > Debug STM32L152RB(STM32L-DISCOVERY).
Figure 51. TASKING debug window
1. The above example is given for the 32L152CDISCOVERY board.
The TASKING debugger can be used to debug source code at C and assembly levels, to set
breakpoints, to monitor individual variables and to watch events during code execution.
To run your application, select Resume from the Run menu, or alternatively click the
Resume button in the toolbar.
34/40
DocID022073 Rev 2
UM1451
6.3
Using Altium TASKING toolset
Creating your first application using TASKING toolchain
The debug session is launched as follows:
1.
Open TASKING VX-Toolset for ARM Cortex. The program launches and requests the
workspace location. Browse to select an existing workspace, or enter a new workspace
location and click OK to confirm.
Figure 52. TASKING Workspace Launcher dialog box
2.
When the TASKING toolset displays the Welcome window, click Go to workbench to
open the main window. From the File menu, select New > TASKING VX-toolset for
ARM C/C++ Project.
3.
In the New C/C++ Project dialog box, enter the new Project name, then in the Project
type box, select TASKING ARM Application and click Next.
Figure 53. TASKING New C/C++ Project dialog box
DocID022073 Rev 2
35/40
39
Using Altium TASKING toolset
4.
UM1451
From the list of supported devices, select either STMicroelectronics >
STM32L152>STM32L152RC as shown below in Figure 54.
Figure 54. Processor selection
1. When using on STM32L-DISCOVERY, select STM32L152RB.
5.
To configure the project for STM32L1xxDISCOVERY board, select Debug > Debug
configurations and choose STMicroelectronics STM32L Discovery Kit.
Choosing STMicroelectronics STM32L Discovery Kit as the evaluation board,
automatically adds the needed linker file and configures the project as follows:
–
Microcontroller: STM32L152RC
–
Debug probe: ST-LINK
–
Connection: Serial Wire Debugging (SWD).
Figure 55. Debug configurations
1. The above example is given for the 32L152CDISCOVERY board.
36/40
6.
To add source file to your project, right-click on the project from the C/C++ project
window and select Import.
7.
From the Import dialog box, select General and the desired file as shown in Figure 56:
TASKING Import dialog box.
DocID022073 Rev 2
UM1451
Using Altium TASKING toolset
Figure 56. TASKING Import dialog box
8.
Click Next. Fill the displayed window as following and then browse to your source file.
Figure 57. Adding a new source file window
9.
Select main.c and click Finish.
10. To build your project, click on Project > Build Project from the toolbar menu.
11. If your project is compiled successfully, the message shown in Figure 58 is displayed.
DocID022073 Rev 2
37/40
39
Using Altium TASKING toolset
UM1451
Figure 58. Tasking project successfully built
12.
38/40
Before running your application, connect your STM32L1xxDISCOVERY board as
described in Section 1: Getting started.
DocID022073 Rev 2
UM1451
7
Revision history
Revision history
Table 1. Document revision history
Date
Revision
27-Sep-2011
1
Initial release.
2
Updated EWARM, MDK-ARM and TrueSTUDIO release numbers
and added TASKING toolchain in Section 1: Overview of STLINK/V2
interface.
Updated Figure 5: IAR Embedded Workbench debugger screen,
Figure 12: General options, Figure 21: MDK-ARM µVision4 project
successfully compiled, Figure 23: MDK-ARM IDE workspace,
Figure 25: Device selection dialog box, Figure 30: Target Options
dialog box - Target tab, Section 3.3.2: Configuring project options,
Section 4.3.1: Managing source files, Section 5.1: Building an
existing TrueSTUDIO project and Section 5.2: Debugging and
running your TrueSTUDIO project, and Section 5.3: Creating your
first application using TrueSTUDIO toolchain to support
32L152CDISCOVERY.
Added Section 6: Using Altium TASKING toolset
04-Jul-2013
Changes
DocID022073 Rev 2
39/40
39
UM1451
Please Read Carefully:
Information in this document is provided solely in connection with ST products. STMicroelectronics NV and its subsidiaries (“ST”) reserve the
right to make changes, corrections, modifications or improvements, to this document, and the products and services described herein at any
time, without notice.
All ST products are sold pursuant to ST’s terms and conditions of sale.
Purchasers are solely responsible for the choice, selection and use of the ST products and services described herein, and ST assumes no
liability whatsoever relating to the choice, selection or use of the ST products and services described herein.
No license, express or implied, by estoppel or otherwise, to any intellectual property rights is granted under this document. If any part of this
document refers to any third party products or services it shall not be deemed a license grant by ST for the use of such third party products
or services, or any intellectual property contained therein or considered as a warranty covering the use in any manner whatsoever of such
third party products or services or any intellectual property contained therein.
UNLESS OTHERWISE SET FORTH IN ST’S TERMS AND CONDITIONS OF SALE ST DISCLAIMS ANY EXPRESS OR IMPLIED
WARRANTY WITH RESPECT TO THE USE AND/OR SALE OF ST PRODUCTS INCLUDING WITHOUT LIMITATION IMPLIED
WARRANTIES OF MERCHANTABILITY, FITNESS FOR A PARTICULAR PURPOSE (AND THEIR EQUIVALENTS UNDER THE LAWS
OF ANY JURISDICTION), OR INFRINGEMENT OF ANY PATENT, COPYRIGHT OR OTHER INTELLECTUAL PROPERTY RIGHT.
ST PRODUCTS ARE NOT AUTHORIZED FOR USE IN WEAPONS. NOR ARE ST PRODUCTS DESIGNED OR AUTHORIZED FOR USE
IN: (A) SAFETY CRITICAL APPLICATIONS SUCH AS LIFE SUPPORTING, ACTIVE IMPLANTED DEVICES OR SYSTEMS WITH
PRODUCT FUNCTIONAL SAFETY REQUIREMENTS; (B) AERONAUTIC APPLICATIONS; (C) AUTOMOTIVE APPLICATIONS OR
ENVIRONMENTS, AND/OR (D) AEROSPACE APPLICATIONS OR ENVIRONMENTS. WHERE ST PRODUCTS ARE NOT DESIGNED
FOR SUCH USE, THE PURCHASER SHALL USE PRODUCTS AT PURCHASER’S SOLE RISK, EVEN IF ST HAS BEEN INFORMED IN
WRITING OF SUCH USAGE, UNLESS A PRODUCT IS EXPRESSLY DESIGNATED BY ST AS BEING INTENDED FOR “AUTOMOTIVE,
AUTOMOTIVE SAFETY OR MEDICAL” INDUSTRY DOMAINS ACCORDING TO ST PRODUCT DESIGN SPECIFICATIONS.
PRODUCTS FORMALLY ESCC, QML OR JAN QUALIFIED ARE DEEMED SUITABLE FOR USE IN AEROSPACE BY THE
CORRESPONDING GOVERNMENTAL AGENCY.
Resale of ST products with provisions different from the statements and/or technical features set forth in this document shall immediately void
any warranty granted by ST for the ST product or service described herein and shall not create or extend in any manner whatsoever, any
liability of ST.
ST and the ST logo are trademarks or registered trademarks of ST in various countries.
Information in this document supersedes and replaces all information previously supplied.
The ST logo is a registered trademark of STMicroelectronics. All other names are the property of their respective owners.
© 2013 STMicroelectronics - All rights reserved
STMicroelectronics group of companies
Australia - Belgium - Brazil - Canada - China - Czech Republic - Finland - France - Germany - Hong Kong - India - Israel - Italy - Japan Malaysia - Malta - Morocco - Philippines - Singapore - Spain - Sweden - Switzerland - United Kingdom - United States of America
www.st.com
40/40
DocID022073 Rev 2