Download User manual
Transcript
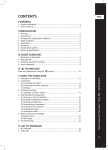
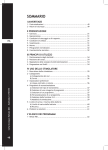
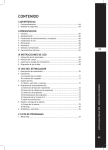
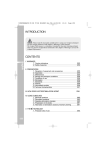
CONTENTS
ENG
I WARNINGS
1 - Counter-indications................................................................... 4
2 - Safety measures........................................................................ 4
II PRESENTATION
1
2
3
4
5
6
7
8
- Warranty . .............................................................................. 6
- Maintenance............................................................................ 6
- Storage and transportation conditions............................................. 6
- Usage conditions....................................................................... 6
- Elimination.............................................................................. 6
- Standards............................................................................... 7
- Standardized symbols................................................................. 7
- Technical specifications............................................................... 7
III USAGE GUIDELINES
1
2
3
4
- Placement of electrodes.............................................................. 9
- Body position........................................................................... 9
- Adjusting stimulation energies....................................................... 9
- Level progression...................................................................... 9
1 - Description of stimulator............................................................10
2 - Connections
A) Connecting the cables...........................................................11
B) Charging............................................................................11
3 - Preliminary settings
A) Language, contrast, volume....................................................11
4 - Neurostimulation programmes
A) Choosing a type of treatment ..................................................12
B) Choosing a programme category...............................................12
C) Choosing a programme...........................................................12
D) Personalizing a programme.....................................................13
E) Choosing the 2+2 function ......................................................13
F) Stimulation mode.................................................................14
5 - Battery status and recharging
A) Battery status.....................................................................15
B) Recharging.........................................................................16
6 - Troubleshooting.......................................................................16
V LIST OF PROGRAMS
1 - Rehab 400..............................................................................17
CefarCompex Rehab 400 - USER MANUAL
IV USING THE STIMULATOR
3
ENG
I - WARNINGS
1 - Counter-indications
• Do not treat persons with implanted
electronic equipment, such as pacemakers and intracardiac defillibrators.
• Avoid electrode placement at the
front and side areas of the neck.
• Pregnant women should not be
treated during the first trimester
(12 weeks).
• Do not use thoracic stimulation on
patients with cardiac arrythmia.
• Avoid lower limb stimulation in case
of venous thrombosis or servere arterial obstruction (ischemia).
• Avoid abdominal stimulation if you
have abdominal or inguinal hernia.
Important!
• Read this manual and the accompanying Practical Guide carefully.
2 - Safety measures
Important points to take into
account when using Rehab 400:
CefarCompex Rehab 400 - USER MANUAL
• Do not use the stimulator in water or
4
humid environments (saunas, hydrotherapy pools, etc.).
• If pregnant, do not place electrodes
directly over the uterus or connect
pairs of electrodes across the abdomen. The reason is that, theoretically,
the current could affect the foetus’s
heart (although there are no reports of
it being harmful).
• Observe caution if treating patients
with sensitivity problems or who are
unable to let you know if they feel any
discomfort, however slight.
• Observe caution when stimulating
in the immediate vicinity of cellular
phones that are switched on, since
this may affect the output power of
the stimulator.
• Do not use the stimulator on a patient
who is connected to a high-frequency
surgical instrument as this could cause
skin irritation or burns under the
electrodes.
• Do not use the stimulator within one
metre of short wave or microwave devices as this could alter the currents
generated by the stimulator.
• Only use stimulation cables, rechargeable battery units and charger supplied by CefarCompex.
• Always turn off the stimulator or make
sure that the intensity for each channel is 0 before disconnecting cables
from stimulator or electrodes.
• Never connect the stimulation cables
to an external power source due to
risk of electric shock.
• Do not use the Rehab 400 stimulator,
or charger if any of the elements are
damaged (case, cables, etc.) or if the
battery compartment is open. There is
a risk of electric shock.
• Unplug the charger immediately if
your Rehab 400 emits a continuous
beeping sound or if you notice any
abnormal heat, smell, or smoke from
either the charger or the stimulator.
• Never recharge the battery in a
confined space (carrying case, etc.)
as this could cause a fire or electric
shock.
• Keep Rehab 400 and its accessories out
of the reach of children.
• Keep the stimulator, battery compartment and charger clean.
• Sudden temperature changes can
cause condensation to build up inside
the stimulator. To prevent this, allow
it to reach ambient temperature
before use.
• Do not use your Rehab 400 while driving or operating machinery.
• Observe caution when using electrotherapy at the same time as the patient
is connected to monitoring equipment
with body worn electrodes. The stimulation might interfere with the signals
to the monitoring equipment.
ENG
Precautions when using the electrodes:
• Only use electrodes supplied by CefarCompex. Other electrodes may have
electrical properties that are incompatible with the Rehab 400 stimulator.
• Only place electrodes on healthy skin
and never on skin lesions of any kind
(wounds, swelling, burns, irritation,
eczema, etc.).
• Always turn off the stimulator or make
sure that the intensity for each channel is 0 before moving or removing the
electrodes.
• Do not place the electrodes in water.
• Do not apply solvents of any kind to
the electrodes.
• Do not use electrodes with a surface
< 18 cm2, as there will be a risk of
suffering a burn injury. Caution should
always be exercised with current
densities > 2mA/cm2
• For optimal results, wash, clean and
dry the skin before attaching the
electrodes.
• For hygiene reasons, each patient
must have his own set of electrodes.
Never use the same electrodes on different patients.
• Some people with very sensitive
skin may experience redness under
the electrodes after a session. This
redness is generally harmless and
normally disappears within 10 to 20
minutes. Do not start another stimulation session in the same area, as long
as the redness is still visible.
• When the electrodes loose their adhesiveness and do not stick properly to
the skin, the stimulation can feel unpleasant. Be sure that the electrodes
are in good condition, otherwise they
have to be replaced.
CefarCompex Rehab 400 - USER MANUAL
• Attach the electrodes so the entire
surface is in contact with the skin.
5
ENG
II PRESENTATION
1 - Warranty
This warranty is valid only if accompanied by proof of purchase. Your legal
rights are not affected by this warranty.
Your CefarCompex Rehab 400 stimulator is guaranteed for a period of 2 years
from the date of purchase. The warranty
covers the stimulator (material and
workmanship) but not the battery unit,
cables, or charger. All defects arising
from substandard material or workmanship are covered. The warranty does not
cover damage resulting from impact,
accident, improper use, insufficient
protection against damp, immersion
in water, or repair work conducted by
unauthorized personnel.
2 - Maintenance
• Clean with a soft cloth and an
alcohol-based, solvent-free cleaning
product. Use only a minimum amount
of liquid when cleaning the unit.
CefarCompex Rehab 400 - USER MANUAL
• Do not disassemble the stimulator or
charger as these all contain high-voltage components that could cause
electric shock. This may only be done
by persons or repair services authorized by CefarCompex.
6
• Your stimulator does not require
calibration. If your stimulator contains
parts that seem worn or defective,
please contact your nearest CefarCompex customer service centre
regarding an upgrade.
• Medical and health professionals are
obliged to service the unit in compliance with relevant national laws and
regulations. This involves testing
performance and safety parameters at
regular intervals.
3 - Storage and transportation conditions
The Rehab 400 contains rechargeable
batteries and so the storage and transportation conditions must not exceed
the following figures:
• Storage and transportation temperature: -20°C to 45°C
• Maximum relative humidity: 75%
• Atmospheric pressure: 700 hPa to
1060 hPa
4 - Usage conditions
Temperature: 0°C to 40°C
Relative humidity: 30% to 75%
Atmospheric pressure: 700 hPa to 1060 hPa.
Do not use in an explosion risk area.
5 - Elimination
Batteries must be disposed in compliance with relevant national regulatory
requirements.
Any products bearing the WEEE marking (a crossed-out wheeled bin) must
be separated from ordinary household
waste and sent to special collection
facilities for recycling and recovery.
6 - Standards
8 - Technical specifications
CefarCompex Rehab 400 is designed for
use by health professionals and as such
complies with relevant medical standards and regulatory requirements.
A) General information
To guarantee your safety, CefarCompex
Rehab 400 has been designed, manufactured, and distributed in compliance
with the requirements of the European
Directive 93/42/EEC on medical devices.
Battery chargers: Only battery chargers
bearing the following information can be
used to recharge the batteries supplied
with Rehab 400 stimulators.
CefarCompex Rehab 400 also complies
with the IEC 60601-1 standard on general
safety requirements for medical electrical devices, the IEC 60601-1-2 standard
on electromagnetic compatibility, and
the IEC 60601-2-10 standard on particular safety requirements for nerve and
muscle stimulators.
CefarCompex Rehab 400 also complies
with Directive 2002/96/EEC on waste
electrical and electronic equipment
(WEEE).
ENG
Battery 941213: Nickel metal hydride
(NiMH) rechargeable battery
(4.8 V, 2000 mAh).
Europe
683010
Type TR1509-06-E-133A03
Input 90-264 VAC /47-64 Hz/0.5 A max.
Output 9 V/1.4 A/15 W
UK
683012
Type TR1509-06-U-133A03
Input 90-264 VAC /47-64 Hz / 0.5 A max.
Output 9 V/1.4 A /15 W
B) Neurostimulation
Read the operating instructions before
use.
CefarCompex Rehab 400 is a class II
device with internal electric power and
type BF applied parts.
Waste electrical and electronic equipment (WEEE) marking according to EN
50419 standard.
1250
In compliance with the requirements of
the European Directive 93/42 EEC on
medical devices.
All electrical specifications are given
for an impedance of 500-1000 Ohm per
channel.
Channels: Four individually adjustable
channels that are electrically isolated
from each other and earthed.
Impulse shape: Constant rectangular
current with pulse compensation to
eliminate any direct current component
to prevent residual polarization at skin
level.
Maximum pulse intensity: 120 mA
Pulse intensity increments: Manual
adjustment of stimulation intensity: 0999 (energy units) – Minimum increment:
0.5 mA
Pulse width: 30 to 400 microseconds
Maximum electrical charge per pulse: 96
microcoulombs (2 x 48 μC, compensated)
Standard pulse ramp-up time: 3 microseconds (20%-80% of maximum current)
Pulse frequency: 1-150 Hz.
CefarCompex Rehab 400 - USER MANUAL
7 - Standardized symbols
7
ENG
C) Information related to electromagnetic compatibility (EMC)
The Rehab 400 is designed to be used in
typical domestic or clinical environments
and is approved according to the EMC
safety standard of EN 60601-1-2.
This device emits very low levels in the
radio frequency (RF) interval and is
therefore not likely to cause any interference with nearby electronic equipment (radios, computers telephones
etc.).
The Rehab 400 is designed to withstand
foreseeable disturbances originating
from electrostatic discharges, mains supply magnetic fields or radio frequency
transmitters.
Despite this, it is not possible to
guarantee that the stimulator is not
affected by strong RF (radio frequency)
fields emitting from for example mobile
phones.
CefarCompex Rehab 400 - USER MANUAL
More detailed information can be
received upon request by contacting
CefarCompex.
8
III USAGE GUIDELINES
For optimal results, use the electrode
positions recommended by CefarCompex. For the placement of electrodes,
refer to the electrode placement illustration.
It is crucial to choose the right size of
the electrodes and correctly position
these on the muscle group you want
to stimulate to ensure the efficacy of
the treatment. To do this, always use
the sizes and positions shown in the
pictograms unless otherwise required by
medical needs. Where necessary, look
for the best possible position by slowly
moving the electrode over the muscle
until you find the point that will produce
the best contraction (the motorpoint) or
the most comfort for the patient.
CefarCompex disclaims all responsibility for consequences arising from
electrodes placed in other positions.
2 - Body position
Refer to the pictures of the electrode
placement to determine the stimulation
position for your patient depending on
the placement of the electrodes and the
chosen program.
This position will vary depending on the
position of the electrodes, the muscle
group you wish to stimulate, and the
program you are using.
For programmes that do not involve
muscle contractions (Pain relief programmes, for example), make sure that
the patient is as comfortable as possible.
3 - Adjusting stimulation
energies
The number of fibres recruited in a
stimulated muscle depends on the
stimulation energies used. It is therefore
extremely important to use maximum
stimulation energies where possible in
order to recruit the maximum number
of fibres. If the stimulation energy is
too low, too few fibres will be obliged
to work and the improvement in muscle
quality will be negligible.
It takes at least 3 sessions to reach this
maximum energy level. The first few
sessions serve to introduce progressive increments in stimulation energy
(and muscle contraction) levels and to
help the patient to become used to the
method.
After an initial warm-up period, which
should produce very clear muscle twitches, increase the stimulation energies
gradually, contraction by contraction,
for the duration of the session.
4 - Level progression
Generally speaking, it is not advisable to
try to reach maximum stimulation levels
too quickly. The different levels in each
stimulation programme are designed to
reeducate the muscle gradually.
We recommend you to prioritize the
stimulation energies at each level to
recruit as many fibres as possible, before
moving on to the next level. Also seek to
progressively increase energy levels from
session to session.
For maintenance purposes, it is a good
idea to hold one session per week with
the energy level you used in the previous
cycle.
CefarCompex Rehab 400 - USER MANUAL
1 - Placement of electrodes
ENG
9
ENG
iV USING THE STIMULATOR
You are strongly advised to read the counter-indications and safety measures described at
the beginning of this manual (chapter 1 “Warnings”) prior to using your stimulator.
CefarCompex Rehab 400 - USER MANUAL
1 - Description of stimulator
10
A - On/Off button
B - i button. This is used to:
• Increase stimulation energies in
several channels simultaneously.
• Access the Top 5 menu (showing 5
most recently used programs.
• Access the contraction info menu
(showing number of contractions and
total contraction time).
C - +/- buttons for 4 stimulation channels
D - Sockets for 4 stimulation cables
E - Battery charger socket
F - Stimulation cables Channel 1 = blue
Channel 2 = green Channel 3 = yellow Channel 4 = red
G - Stimulation cable fitted with pin
connector
H - Rechargeable battery compartment
I - Belt clip socket
2 - Connections
A) Connecting the cables
The stimulator cables plug into the 4
sockets on the base of the device. All 4
cables can be connected simultaneously.
Both the +/- buttons and the cables
are colour-coded to simplify use and
facilitate identification of the different
channels.
1a: The stimulator has been charged for
7 minutes and 27 seconds (a full charge
may take 2-2,5 hours with the rapid
charger delivered with your device).
ENG
1b: Charging is in progress. When charging is completed, total charge duration
flashes and the battery symbol is completely full. The stimulator switches off
automatically as soon as you disconnect
the charger.
3 - Preliminary settings
The kit includes four 2,1 mm pin-connector cables.
B) Charging
The Rehab 400 is a portable muscle
stimulator powered by a rechargeable
battery unit.
Recharging
To recharge the Rehab 400, first disconnect the electrode cables from the
device, then plug the charger to a wall
socket and finally connect the stimulator
to the charger.
A) Language, contrast, volume
When you start the stimulator for the
first time, you will need to choose the
interface language you wish to use from
the options screen. See below for instructions on how to proceed. There are
a range of settings that you can adjust
to suit your needs (interface language,
display contrast, backlighting, volume).
To change any of these settings, bring up
the options screen by holding the On/Off
button on the front of the stimulator for
a few seconds.
3a
The charge menu illustrated below appears automatically.
1a
1b
3b
3c
3d
3e
3b: Use the channel 1 +/- button to
choose the language you wish to use.
3c: Use the channel 2 +/- button to
adjust the contrast of the screen.
3d: Use the channel 3 +/- button to
adjust the volume.
3e: Use the channel 4 +/- button to
adjust the backlighting.
On: Backlighting always on
Off: Backlighting always off
Auto: Backlighting activated whenever a
button is pressed.
3a: Use the On/Off button to confirm
and save your choices. The settings will
be applied immediately.
CefarCompex Rehab 400 - USER MANUAL
Rehab 400
11
ENG
4 - Neurostimulation
programmes
C) Choosing a programme
To start the stimulator, press the On/Off
button. To choose a programme, you
must first choose a type of treatment
and a programme category.
NOTE: Consult our Practical Guide for
help in choosing a programme. Once
you choose a category, the screen will
display a list of available programmes.
NOTE: There is a table summarizing the
different programmes and their functions at the end of this manual.
A) Choosing a type of treatment
6a
4a
4b
4e
4a: Press the On/Off button to turn off
the unit.
4b: Use the channel 1 +/buttons to
choose another type of treatment (for
ex Common Treatment or Conditioning).
4e: Press the channel 4 +/- button to
confirm your choice and access the programme category selection screen.
CefarCompex Rehab 400 - USER MANUAL
Press the i button to access the Top 5
menu.
12
6b
6e
6a: Press the On/Off button to return to
the previous screen.
6b: Use the channel 1 +/- button to
choose the programme you want.
6e: Press the channel 4 +/- button to
confirm your choice. Certain programmes start right away while others
allow you to specify additional options.
TOP 5
To access the Top 5 menu, press the
i button before selecting a programme.
The menu can be accessed from the
type of treatment screen (Figure 4), the
programme category screen (Figure 5),
or the programme list screen (Figure 6).
B) Choosing a programme category
7a
5a
5b
7b
7d
7e
5e
5a: Press the On/Off button to return to
the previous screen.
5b: Use the channel 1 +/- button to
choose a category.
5e: Press the channel 4 +/- button to
confirm your choice and access the
programme selection screen.
Press the i button to access the Top 5
menu.
7a: Press the On/Off button to return to
the previous screen.
7b: Use the channel 1 +/- button to
choose the programme you want.
7d: Use the channel 3 +/- button to
personalize the programme.
7e: Press the channel 4 +/- button to
start the programme.
Not all programmes have an option
screen.
In certain programmes, you will need
to choose the muscle group you want to
stimulate. The target area is shown in
black on the figure above channel 1.
8a
8b
8c
8d
8e
8a: Press the On/Off button to return to
the previous screen.
8b: Use the channel 1 +/- button to
choose the desired treatment area. You
can choose among 7 areas.
8c: Press the channel 2 +/- button to
delete the warming-up sequence and to
choose if you want to combine with any
of the 2+2 programs on channel 3 and 4.
8d: Use the channel 3 +/- button to
choose the programme difficulty level.
8e: Use the channel 4 +/- button to
confirm your choices and launch the
programme.
Adjusting stimulation energies
When you start a programme, you will
be prompted to increase the stimulation
energies. This is the key to the success
of any treatment.
9a
9b
9c
9d
9e
9a: Press the On/Off button to return to
the previous screen.
9 b c d e: The unit will beep and the
symbols for the 4 channels will alternate
between + and 000. The energy level
for the 4 channels is at 0. To start the
programme, you will need to increase
the energy levels in the channels you
are going to use. To do this, use the corresponding + buttons.
ENG
NOTE: If you want to increase the
energy levels in all 4 channels simultaneously, press the i button. Press it twice
to increase the levels in the first 3 channels, and 3 times to increase the levels
in the first 2 channels. Interdependent
channels will be highlighted in white
against a black background.
E) Choosing the 2+2 function
You now have the possibility to choose
the 2+2 function which means that you
can choose one program for the channel
1 and 2, then select one program from
the 2+2 program list for channel 3 and 4.
This means that you could treat two
different body parts at the same time or
combine two different programs on the
same body part.
10a
10b
10c
10d
10e
10a: Press the On/Off button to return
to the previous screen.
10b: Use the channel 1 +/- button to
choose the desired treatment area, You
can choose from 7 areas.
10c: Press the channel 2 + to delete the
warming up sequence, by pressing the
channel 2 – the 2+2 mode is selected and
the first program in the list is displayed.
Press the channel 2 – again in order to
display the next program in the list.
10d: Use the channel 3 +/- button to
choose the program difficulty level
10e: Use the channel 4 +/- button to
confirm your choices and launch the
program.
CefarCompex Rehab 400 - USER MANUAL
D) Personalising a programme
13
ENG
NOTE: The timer for ch 1+2 will control
the total session time. This means that
the total time for ch 3+4 could not exceed the session time for ch 1+2.
NOTE: The program for ch 3+4 is always
in one phase
NOTE: If a preset program uses more
than two channels, it’s not avalable for
the 2+2 mode.
The horizontal bars on top of the display
shows the total duration and different
phases of the programs. Left bar for P1
and right bar for P2
P1 shows the program chosen for
channel 1 and 2
P2 shows the program chosen for
channel 3 and 4
CefarCompex Rehab 400 - USER MANUAL
F) Stimulation mode
14
12a
12b
12c
12d
12e
12 b c d e: The different energies
reached during the contraction phase
are shown by a series of black bar
graphs. Active rest phase energies are
shown by hatched bar graphs.
NOTE: Active rest phase stimulation
energies are automatically set at 50%
of contraction intensities but can be
modified during the rest phase. Once
modified, they will be totally independent of the contraction intensities.
Pause mode
12a: Press the On/Off button to interrupt the programme momentarily. To
restart it, simply press the channel 4 +/–
button (12e). The session will resume at
80% of the energy levels that were being
used prior to the interruption.
NOTE: If your Rehab 400 emits a beeping sound and the + symbols under
the active channels begin to flash, the
stimulator is suggesting you to increase
the level of the stimulation energies. If
you are working at the patient’s maximum tolerance level, simply ignore this
message.
Different statistics are displayed
depending on the programmes and options used. It should be noted, however,
that statistics are not available for all
programmes.
At the end of each session, a small flag
will be displayed on the screen and a
short melody will be played.
NOTE: Press the i button to access the
contraction info screen.
To turn off the stimulator, press the ON/
OFF button.
5 - Battery status and
recharging
ENG
Never recharge the stimulator without first disconnecting the stimulation
cables.
Never recharge the battery with a
charger other than that supplied by
CefarCompex.
The Rehab 400 is powered by a rechargeable battery unit. The battery’s duration
varies according to the programmes and
stimulation energies used. We strongly
recommend you to fully charge the battery before using it for the first time as
this will extend battery duration and life
time. If you do not use your stimulator
for long periods of time, remember to
recharge the battery regularly.
A) Battery status
The status of the battery is indicated
by a battery icon on the screen. If the
battery icon contains just two lines, this
means that power is running low. Stop
the session and recharge the unit.
Battery charge state icon
If the START symbol normally displayed
above the channel 4 +/– button is not
visible and the battery icon is flashing,
this means that the battery is completely discharged. The stimulator can no
longer be used. Recharge immediately.
CefarCompex Rehab 400 - USER MANUAL
End of programme
15
ENG
B) Recharging
6 - Troubleshooting
Remove all stimulation cables from the
stimulator before recharging it. Connect
the charger to the mains and then connect the stimulator to the charger. The
charge menu shown below will automatically appear on the screen.
Electrode error
The duration of the recharging operation
is displayed on the screen. The charger
supplied with the stimulator fully
recharges the stimulator within 2-2,5
hours.
CefarCompex Rehab 400 - USER MANUAL
The battery icon is animated while
the battery is recharging. When fully
charged, the icon will be full and the
total time taken to recharge the battery
will flash on the screen. Simply disconnect the charger and the Rehab 400 will
turn off automatically.
16
The Rehab 400 will beep and alternately
display a pair of electrodes and an arrow pointing to the channel where the
problem was detected. In the example
above, the stimulator has detected an
error in channel 2.
The electrode error message can mean
that:
• there are no electrodes connected to
this channel,
• the electrodes are old, worn, and/
or the contact is poor: try using new
electrodes,
• the electrode cable is faulty: try connecting it to another channel. If the
problem persists, replace the cable.
If for any reason yor device seems to
present a malfunction other than those
presented above, please contact CefarCompex customer service.
V LIST OF PROGRAMS - Rehab 400
COMMON TREATMENT
CONDITIONING
PROGRAMS
PROGRAMS
Optional 2+2
REHABILITATION
ENG
Optional 2+2
SPORT
DISUSE ATROPHY
x
POTENTIATION
x
PREV. OF DISUSE ATROPHY
x
ENDURANCE
x
REINFORCEMENT
x
RESISTANCE
x
NEURO REHAB Slow start
x
STRENGTH
x
BACK-TRUNK/Stabilization
x
EXPLOSIVE STRENGTH
x
ATROPHY (Mod Freq)
x
HYPERTROPHY
x
FORCE (Mod Freq)
x
ACTIVE RECOVERY
x
INCREASE CIRCULATION
x
RECOVERY PLUS
x
MUSCLE LESION
x
MUSCLE BUILDING
x
TENS 100Hz
x
MUSCLE DEFINITION
x
TENS 80Hz
x
POWER
x
FREQ MODULATED TENS
x
ENDORPHINIC
x
MASSAGE
DECONTRACTION
x
TONING MASSAGE
x
PW MODULATED TENS
x
RELAXING MASSAGE
x
BURST TENS
x
MIXED TENS
x
SPECIFIC TREATMENT
PROGRAMS
Optional 2+2
AESTHETIC
2+2
PROGRAMS
FREQ MODULATED TENS
PW MODULATED TENS
Burst TENS
TONING
x
Endorphinic
FIRMING
x
SHAPING
x
REINFORCEMENT (smaller muscle
groups)
REFINEMENT
x
ELASTICITY
x
REINFORCEMENT (LARGER muscle
groups)
Disuse Atrophy (smaller muscle
groups)
Disuse Atrophy (LARGER muscle
groups)
CefarCompex Rehab 400 - USER MANUAL
FITNESS
PAIN RELIEF
17


