Download USER MANUAL
Transcript
USER MANUAL
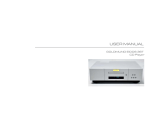
GOLDMUND EIDOS 36A
CD/SACD Player
Table of Contents
1. FEATURES AND COMPATIBILITY
2. UNPACKING
3. POWER SUPPLY VOLTAGE SELECTION
4. CHOICE OF THE PLAYER LOCATION
5. POWER CONNECTION
6. BACK PANEL CABLE CONNECTIONS
7. KEYBOARD CONTROLS
8. REMOTE CONTROL FUNCTIONS
9. SWITCHING ON
10. CLEANING
11. MAINTENANCE
2
5
5
6
6
7
7
8
11
11
13
13
W
A
R
N
I
N
G!
This high quality universal player possesses
technical features which are necessary for
accurate tracking of today's best CDs, Audio
DVDs and SACDs.
Only careful use can provide all the satisfaction
you are expecting.
All handling must be performed according to the
following instructions to avoid to damaging the
player. Nevertheless, if the instructions are
followed in detail, you will notice that using the
GOLDMUND EIDOS 36A Player is quite simple
and convenient.
WARNING!: PLEASE DO NOT CONNECT
ANY WIRES OR MOVE ANY PARTS BEFORE
READING THE FOLLOWING INSTRUCTIONS.
3
1
FEATURES AND COMPATIBILITY
Compatibility
Please note that the Goldmund Eidos 36A is compatible with the following formats:
- Audio CD 12 and 8 cm size, single-sided.
- CD-R/RW
- DVD – Audio
- SACD
- MP3 CD
Associated Equipment
For technicians, musicians, or users who demands the very best in sound transcription, you
may decide the use of one of our separate D/A converters, such as the Goldmund Mimesis
20M. The D/A converters built into the Eidos 36A, however, are a very high quality standard
and are provided for use in most systems and especially for formats requesting them such
as SACD.
4
2
UNPACKING
You will find in the packaging (see note):
- The Player itself,
- The power cord,
- The remote control and 2 x AA batteries,
- This user manual.
NB: If you need to return the player to the factory or to your local representative for a
warranty repair, please note that it must be repackaged in the original packing. This
packaging has been designed specifically to protect the Eidos 36A in transit. Use of
alternative packaging is likely to result in damage, invalidating warranty.
3
POWER SUPPLY VOLTAGE SELECTION
The power supply of your unit has been adjusted to operate with the AC voltage of your
area. Check on the back panel of the unit if in any doubt. If you move after purchasing the
Universal player to an area using different mains voltage, do not forget to switch the back
panel selector to the new voltage of your area. The unit can operate at 50 or 60 Hz mains.
5
4
CHOICE OF THE PLAYER LOCATION
Due to the specific quality of its Goldmund "Mechanical Grounding" construction, the
Goldmund Eidos 36A Player is less critical than other designs in placement selection.
Feedback is mostly so low that no special precaution is required. Nevertheless, position the
player as far as you can from the speakers if you want to totally avoid the air coupling
between the speakers and the player.
Locate the Player to provide the most rigid possible connection to the building construction.
Solid coupling is essential and the support used (Rack, Table, Shelf) must be as rigid and
solid as possible.
5
POWER CONNECTION
Plug the AC power cord to the back of the Eidos 36A and in a wall socket. Switch the back
power switch to ON. The front display will light up as soon as you press any key or when
pressing the remote control STANDBY button, meaning the unit is now powered on.
6
6
BACK PANEL CABLE CONNECTIONS
Audio Connections
The Eidos 36A is equipped with the following stereo output connectors to connect your
player to a D/A converter or digital preamplifier:
o
o
75 Ohms RCA coaxial SPDIF connector.
TOSLINK optical cable output.
Goldmund recommends that the greatest care is taken when selecting the cable linking the
player to the D/A converter or digital preamplifier. The very accurate signal provided by the
Eidos 36A can easily be ruined by an imperfect connection. Use a "Goldmund Lineal™"
cable from the coaxial output if you want to achieve the most accurate jitter-free connection
for CD playback.
Additionally, there are the following Analog Audio Outputs:
o 2 x RCA (Left/Right) coaxial stereo analogue outputs.
o 6 x RCA 6 channel coaxial analogue outputs (needed for multi-channel DVD-Audio
and SACD connection).
7
7
KEYBOARD CONTROLS
Keyboard Keys
- <<
:
Press to go back to previous chapters/tracks. Press and hold to perform
reverse playback scanning.
- STOP :
Press to stop playback. Pressing twice causes the disc to return to the
beginning of the disc if playback starts again.
- >>
:
Press to advance to chapters/tracks. Press and hold to perform fast-forward
scanning.
- SACD :
Use to select stereo audio (2CH AREA), multi-channel audio (MULTI-CH
AREA) and for hybrid CDs standard CD audio area (CD AREA).
- STOP :
Press to stop playback. Pressing twice causes the disc to return to the
beginning of the disc if playback starts again.
- PAUSE :
Key used for the pause function. When the "Pause" function is switched off
by pressing the "Start" key, the selection will start back at the exact location
where it was interrupted.
- PLAY :
This key is used to start or resume Playback. It also cancels the "Pause"
function.
- OPEN :
this button opens the tray to load the disc. The same button closes the tray
when it is open. When loading a disc, place discs in the disc tray with the
label side facing up.
These functions, accessible from the keyboard can also be achieved by the remote-control
transmitter (see below for all Remote Control functions)
8
Front Panel Display
1 5.1CH
Lights when analog 5.1 channel output is selected (see below)
2 V-PART
Lights when playing a video part of a DVD disc
3 (camera)
Lights during multi-angle scenes on a DVD disc (see below)
4 GUI (Graphical User Interface)
Lights when a menu is displayed on-screen
5 GRP
Indicates that the character display is showing a DVD-Audio group number
6 TITLE
Indicates that the character display is showing a DVD-Video title number
7 (●)
Lights when Dolby V/TruSurround is active (see below)
9
8 TRK
Indicates that the character display is showing a track number
9 CHP
Indicates that the character display is showing a DVD chapter number
10 REMAIN
Lights when the character display is showing the time or number of tracks/titles/chapters
remaining
11 Character display
12 Pause
Lights when a disc is paused
13 Play
Lights when a disc is playing
14 DolbyDigital
Lights when a Dolby Digital soundtrack is playing
15 DTS
Lights when a DTS soundtrack is playing
10
8
REMOTE CONTROL FUNCTIONS
PLAY
Press to start or resume playback
PAUSE
Press to pause playback; press again to restart.
BACK/FORWARD
Press to jump to the start of the previous/next chapter/track
STOP
Press to stop the disc (you can resume playback by pressing play)
FAST FORWARD/REVERSE
Use for reverse/forward slow motion playback, frame reverse/advance and reverse/forward
scanning (see below)
11
9
SWITCHING ON
After making sure that everything is connected properly and that the player is plugged in,
press STANDBY on the remote control or any key on the keyboard of the Eidos 36A to
switch the player on.
You can also use the OPEN/CLOSE button to switch on the player and open the disc tray
at the same time.
Playing discs
The basic playback controls for playing CD, SACD discs are covered here.
1 - If the player isn’t already on, press STANDBY/ON on remote to switch it on.
2 - Press OPEN/CLOSE to open the disc tray.
3 - Load a disc.
Load a disc with the label side facing up, using the disc tray guide to align the disc. Never
load more than one disc at a time.
4 - Press (play) to start playback.
Basic playback controls
The controls on the remote for playing discs are listed below. The following chapter covers
playback features in more detail.
PLAY :
PAUSE :
STOP :
FAST REVERSE :
Starts playback.
Pauses a disc that’s playing, or restarts a paused disc.
Stops playback.
Press to start fast reverse scanning. Press (play) to resume normal
playback.
12
FAST FORWARD :
PREVIOUS :
NEXT :
Numbers :
Press to start fast forward scanning. Press (play) to resume normal
playback.
Skips to the start of the current track or chapter, then to previous
tracks/chapters.
Skips to the next track or chapter.
Use to enter a title/group/track number. Press ENTER to select (or
wait a few seconds).
Note : If the disc is stopped, playback starts from the track number.
If the disc is playing, playback jumps to the start of the selected chapter or track (within the
current group for DVD-Audio).
Front panel controls
The (play), (stop), and (pause) buttons on the front panel work in exactly the same way as
their remote control equivalents. The combined scan/skip buttons on the front panel work
slightly differently from the remote buttons.
Press and hold for fast scan; press for track/chapter skip.
13
10
CLEANING
Always disconnect the power cord from the wall socket before cleaning your Eidos 36A
player.
To clean the external metal parts use a clean, very soft, damp cloth to avoid scratching the
surface. Dampen with clear water or a mild detergent solution. Avoid harsh abrasives
(such as products containing sodium carbonate).
11
MAINTENANCE
The Goldmund Eidos 36A universal player does not require any specific maintenance.
Rear Panel Eidos 36A
14


