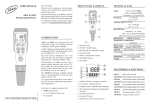
Download USER MANUAL AD100 & AD101 pH Testers
Transcript
ERROR MESSAGES
USER MANUAL
Ec: use a fresh buffer solution.
Eb: batteries should be replaced.
AD100 & AD101
pH Testers
ACCESSORIES
AD70004P
AD70007P
AD70010P
ERROR MESSAGES
Ec: use a fresh buffer solution.
Eb: batteries should be replaced.
AD70004P
•
•
•
•
Microprocessor-based pH tester
Automatic temperature compensation
Splash-proof keypad
Automatic shut-off
AD70007P
AD70010P
pH 4.01 buffer solution
20 ml sachet (25 pcs.)
pH 7.01 buffer solution
20 ml sachet (25 pcs.)
pH 10.01 buffer solution
20 ml sachet (25 pcs.)
www.adwainstruments.com
SPECIFICATIONS
AD100
Battery Life/Type
Dimensions
-2.0 to 16.0 pH
0.1 pH
± 0.1 pH
Automatic
0 - 50 °C
95 % Relative
Humidity
250 Hrs./4x1.5 V
173 x 41 x 22 mm
Battery Life/Type
Dimensions
ISTRAD100 09/14
-2.00 to 16.00 pH
0.01 pH
± 0.02 pH
Automatic
0 - 50 °C
95 % Relative
Humidity
250 Hrs./4x1.5 V
173 x 41 x 22 mm
•
•
•
•
Microprocessor-based pH tester
Automatic temperature compensation
Splash-proof keypad
Automatic shut-off
www.adwainstruments.com
SPECIFICATIONS
AD100
Dear Customer,
Thank you for choosing an ADWA product.
Please read carefully this manual before
starting operations.
For additional technical information, please
e-mail us at:
[email protected]
Range
Resolution
Accuracy
Temp.compensation
Environment
Battery Life/Type
Dimensions
AD101
Range
Resolution
Accuracy
Temp.compensation
Environment
AD100 & AD101
pH Testers
ACCESSORIES
pH 4.01 buffer solution
20 ml sachet (25 pcs.)
pH 7.01 buffer solution
20 ml sachet (25 pcs.)
pH 10.01 buffer solution
20 ml sachet (25 pcs.)
Range
Resolution
Accuracy
Temp.compensation
Environment
USER MANUAL
-2.0 to 16.0 pH
0.1 pH
± 0.1 pH
Automatic
0 - 50 °C
95 % Relative
Humidity
250 Hrs./4x1.5 V
173 x 41 x 22 mm
AD101
Range
Resolution
Accuracy
Temp.compensation
Environment
Battery Life/Type
Dimensions
ISTRAD100 09/14
-2.00 to 16.00 pH
0.01 pH
± 0.02 pH
Automatic
0 - 50 °C
95 % Relative
Humidity
250 Hrs./4x1.5 V
173 x 41 x 22 mm
Dear Customer,
Thank you for choosing an ADWA product.
Please read carefully this manual before
starting operations.
For additional technical information, please
e-mail us at:
[email protected]
CONDITIONING
OPERATION
CONDITIONING
OPERATION
Remove the cap. If white crystals have
formed, they will be dissolved during
conditioning.
To condition, soak the tip of the tester in
pH 7.01 buffer solution for ten minutes.
1. Remove the protective cap from the
bottom of the tester.
2. Press ON/OFF button to turn the tester
on.
3. Place the tip of the tester into the sample
to be measured.
4. Stir the sample and record the reading
when the value has stabilized. The tester
will automatically compensate temperature
variations.
5. Press ON/OFF button to turn the tester
off.
Remove the cap. If white crystals have
formed, they will be dissolved during
conditioning.
To condition, soak the tip of the tester in
pH 7.01 buffer solution for ten minutes.
1. Remove the protective cap from the
bottom of the tester.
2. Press ON/OFF button to turn the tester
on.
3. Place the tip of the tester into the sample
to be measured.
4. Stir the sample and record the reading
when the value has stabilized. The tester
will automatically compensate temperature
variations.
5. Press ON/OFF button to turn the tester
off.
CALIBRATION
Calibrate your tester once a week or at
any time you suspect a problem with the
readings. ADWA pH testers can be
calibrated at 4, 7 and 10 pH values.
ALWAYS CALIBRATE AT pH 7 FIRST.
1. Put the tip of the tester in pH 7.01 buffer
solution and press the ON/OFF button.
2. Press CAL button: “7.0” and “pH” will
start flashing. When the sign “pH” stops
flashing, the reading has stabilized. Then
press READ button: “4.0” and “pH” will
start flashing.
3. Rinse the tip of the tester with deionized
water.
4. Put the tip of the tester in pH 4.01 buffer
(for acidic measurements) or in pH 10.01
buffer (for alkaline measurements): “4.0”
(or “10.0”) and “pH” will start flashing.
5. When the sign “pH” stops flashing, the
reading has stabilized. Press READ. The
calibration is completed.
ALWAYS USE A FRESH BUFFER
SOLUTION FOR CALIBRATION.
MAINTENANCE
The sensor should be kept moist at all times.
This can be done by storing the tester with
a few drops of pH 7.01 buffer solution in
the protective cap. Rinse the electrode after
each measurement with tap water.
WARNING: DO NOT USE DEIONIZED
OR DISTILLED WATER FOR STORAGE
PURPOSES.
BATTERY REPLACEMENT
When the batteries need to be replaced,
the “Eb” error message will appear on the
display and the tester will turn off automatically
to prevent the unreliable measurement result.
Open the battery compartment at the top
of the tester. Place the batteries noting the
polarity listed in the battery compartment.
CALIBRATION
Calibrate your tester once a week or at
any time you suspect a problem with the
readings. ADWA pH testers can be
calibrated at 4, 7 and 10 pH values.
ALWAYS CALIBRATE AT pH 7 FIRST.
1. Put the tip of the tester in pH 7.01 buffer
solution and press the ON/OFF button.
2. Press CAL button: “7.0” and “pH” will
start flashing. When the sign “pH” stops
flashing, the reading has stabilized. Then
press READ button: “4.0” and “pH” will
start flashing.
3. Rinse the tip of the tester with deionized
water.
4. Put the tip of the tester in pH 4.01 buffer
(for acidic measurements) or in pH 10.01
buffer (for alkaline measurements): “4.0”
(or “10.0”) and “pH” will start flashing.
5. When the sign “pH” stops flashing, the
reading has stabilized. Press READ. The
calibration is completed.
ALWAYS USE A FRESH BUFFER
SOLUTION FOR CALIBRATION.
MAINTENANCE
The sensor should be kept moist at all times.
This can be done by storing the tester with
a few drops of pH 7.01 buffer solution in
the protective cap. Rinse the electrode after
each measurement with tap water.
WARNING: DO NOT USE DEIONIZED
OR DISTILLED WATER FOR STORAGE
PURPOSES.
BATTERY REPLACEMENT
When the batteries need to be replaced,
the “Eb” error message will appear on the
display and the tester will turn off automatically
to prevent the unreliable measurement result.
Open the battery compartment at the top
of the tester. Place the batteries noting the
polarity listed in the battery compartment.


