1
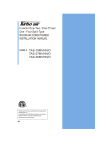
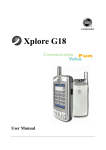
…… … … > 7" LCD Combo DVR
USER MANUAL
<V1.0>
H.264 Integrated DVR
◈ Declaration:
Copyright ©2010
Any unite or individual shall not extract, copy the contents of some or all of manual without
written consent of the Company. Considering the product renew or other reasons, this manual
will be updated continuously. Unless otherwise confirm, this manual only used as a guide. All
statements, information and suggestions in this manual do not constitute any expression or
implied.
◈
Note:
1. The adapter of this DVR is DC12V, check the power outlet before installation;
2. Please do not place the DVR in wet places or rain;
3. Device should avoid severe vibration environment when installed;
4. Device should avoid direct sunlight or heat and high temperature environment when
installed.
5. In order to facilitate cooling temperature,The distance should be more than15cm from
installed device to the other items;
6. Keep device working at a suitable environment which have a normal temperature, humidity
and voltage;
7. Device should not be placed in the room where includes corrosive chemicals, which will
affect the life of the DVR;
8. Device should avoid excessive dust when installed;
9. Make sure the device connect to earthed correctly during working;
10. Device must be connected well with other devices when operation;
11. Please purchase the standard hard disk to meet the requirements of large date reading and
writing of DVR.
1
H.264 Integrated DVR
◈ INSTRUCTION
This manual used to describe Embedded DVR (Digital Video Recorder).
There are detailed specification of the DVR, including remarks and description for every
functions. This Manual is structured in six chapters.
Chapter1 Introduction. Introduce the main function, features and typical applications.
Chapter2 Environmental Adaptability. Introduce briefly about the requirements of
environment when installation.
Chapter3 Operation Manual. Introduce instructions of controller keys and every menu
interface or meaning of options
Chapter4 IE Operation. Introduce function of IE menu interface and meaning of every
options.
Chapter 5 Installation Instructions. Introduce the appearance of the device, the size of the
hole and the signal cable routing and Plug-ins of the blackboard and external cable definition;
definition of front panel and ports..
Chapter 6 FAQ.
2
H.264 Integrated DVR
CONTENTS
1. INTRODUCTION
4
1.1 Main Features
4
4
4
5
1.2 Product Features
1.2.1 Basic Working Parameter
1.2.2 Parameter
2. Environment Adaptability
6
3. Operation Manual
6
3.1 Instruction of Remote Controller keys
3.1.1 Remote Controller
3.1.2 Mouse Oeration
3.1.3 Menu Structure
3.2 System Setup and Operation
3.2.1 User Login
3.2.2 Start-up
3.2.3 System Login
3.2.4 Menu Operation
4. IE OPERATION
6
6
7
9
10
10
10
10
11
24
4.4 Operation Interface
24
24
24
26
5. Installation Instruction
33
4.1 Features of function
4.2 Constraints
4.3 IE Login
5.1 Appearance and Definition of panel
6. FAQ
33
36
3
H.264 Integrated DVR
1. INTRODUCTION
◈ 1.1 Main Features
This product is 4CH real-time CIF DVR which comes with 7 inch LCD screen. Support
local recording, playback, triple stream encode, remote network surveillance, data backup,
parameter setting , motion detection alarm, I/O alarm setting and PTZ control, USB mouse,
USB data backup.
◈ 1.2 Product Features
H.264 compression
Two USB interface , USB2.0 for data backup, USB1.1 for mouse operation
In order to avoid recording debris and ensuring the data confidentiality during segment
video file, document management system which regular PC operating system does not
recognize was used.
16 bit nature translucence GUI, note for menu selected
Four channel playback simultaneous
Double level user management
Support the live view, parameter setting and copy, video playback via network.
◈ 1.2.1 Basic Working
Parameter
Remark
Item
Parameter
Voltage input
DC12V
Video input
impedance
7 5Ω
Video output
1Vp-p
1Vp-p CVBS analogue signal
0-2V
Low lever alarm
DC12V。
75Ω each channel.
I/O
5V-30V
RS485
Connect to PTZ protocol (Pelco-D,Pelco-P)
SATA HDD
Operating
temperature
4
Height lever alarm.
One SATA supporting any capability
- 1 0 - 6 0℃
Environment temperature in well ventilated
condition.
H.264 Integrated DVR
◈ 1.2.2 Parameter of
Item
Setup
System
Video
Audio
Technical index
Device
Language
GUI
Chinese/English
Graphic menu(OSD menu))
password
user password, administrator password, two level
Video in
4CH complex video input 1.0Vp-p,impedance75Ω,BNC
Video out
1CH complex video output 1.0Vp-p,impedance75Ω,BNC
Video display
1/4 channel switch
Video standard
PAL,25f/s,CCIR 625line,50scene
NTSC,30f/s,CCIR 525line,60scene
Audio input
2CH audio input,impedance600Ω,RAC
Audio output
1CH audio output,impedance600Ω,RAC
Basic level output
Record style
Audio compression
Linearity level
Audio, video recorded simultaneously
ADPCM
Picture compression H.264 VBR/CBR
Picture resolution
CIF
Video stream standard ISO14496-10
Picture
proceeding Audio stream standard
ADPCM
and store
Audio code rate
32KB/s
Data storage
SATA HDD supporting any capacity
Alarm
Connector
Alarm input
4 alarm input
Alarm output
1 alarm output
Serial interface
Network port
USB
USB1.1
U disk
USB2.0
IE Remote view
Video preview, recording download, parameter setting
via cable network
Mobile monitor
Real time monitor via 3G using mobile port of machine
Support USB, network upgrade
Electric input
others
RJ45,10M/100M
Mouse
Software
Software
upgrade
Support 1 RS485
Power input
power
AC:110~240V
DC:12V@3A
6W(without hard disk and Peripherals)
5
H.264 Integrated DVR
2. Environment Adaptability
◈ 2.1 Remark
In order to ensure the safe use of DVR and satisfactory performance and prolong device
life, please pay attention to following details when installing:
1) When installing device, please comply with all the electric product safety criterion,
requirements of vehicle and other connection device.
2) Power and grounding:
Do not touch the power or DVR with wet hands
Do not drop liquid on DVR to avoid internal short or catching fire.
Do not put others things on the DVR
Please using soft dry cloth to clean DVR, do not use chemical solvent.
When the power line have been connected with electrical outlet, even if don't start up device,
it still have internal voltage.
If you do not use device for long time, it is better to cut off the power and take the power line away
from electrical outlet.
3) Humidity:
Select a dry environment installing equipment, avoid damp, dripping, water spraying and other
places. Don't make the equipment installed in the workplace or depression will water the liquid, will
drip of wet places.
3. Operation Manual
◈ 3.1 Instruction of Remote Controller keys
In device operation, the 【OK】 key on remote controller has the same function with mouse left click.
【0~9】: Enter the number or change the channel; for viewing channels 1, 2, 3 and 4, use 1, 2, 3
and 4 on numeric keypad respectively.;
【+】、【-】:analog parameters adjustment Increase and decrease parameter value;
【▲】:Up directional key
【▼】:Down directional key
【◀】:Left directional key;
【▶】:Right directional k
【
】:Output the video to the 4CH screen;;
【OK】:Confirm the selection, setting, and play and of parameter of system setting and so on ;
6
H.264 Integrated DVR
【▶】:Video data for the normal speed playback,
Restore normal speed
【
】:Reduces playback speed to 1/2X、1/4X、1/8X
mode. Press PLAY to return to normal playback speed.;
【
】:Freezes playback to single frame and can advance
one frame at a time. To advance the frame press Pause/Step
to move frame by frame. Press 【PLAY】to return to normal
playback speed.
【
】:Fast forward the video while playback. X2, X3,
X8 modes available. Press FWD to switch, press 【PLAY】
to return to normal speed;
【
】:Reverse the video while playback, 2X, 4X, 8X,
modes are available. Press REW to switch, press【PLAY】
to return to normal speed;
【STANDBY】:Enter to standby status;
【LOGIN/LOCK】:Get operation permission when
entering system
【MENU】:Return to the main Menu in the preview interface;
【PTZ】:PTZ control,press this key to enter into PTZ
control interface
【EXIT】:Exit to the monitor interface or return to the last menu;
【
】:When monitor interface in four channels, can start manual record, when monitor interface in
single channel can start manual record in single channel;
【
】:Stop manual record (this function can't stop the recording or timing recording) .
◈ 3.1.2 Mouse Operation
User can use mouse to make operation of the menu except remote controller. (The operation usage is
the same as PC Windows).Please inserts the mouse into USB interface (PnP).
7
H.264 Integrated DVR
Click right key
Enter into main menu: Click the right key on the live view.
Click the left key to enter into the setting interface in function menu options icon.
Click the left key to zoom in the window on the live view and playback video.
Double click the left key can exit to the live view and playback multi-window
interface.
Click left key
1. Volume adjustment, colour adjustment, PTZ setting and VGA border
operation. It is for setting the single channel for volume adjustment, PTZ
control and colour adjustment. If it is multi-window, please use the left key to
select the single window.
2. The remark when click the left key for volume adjustment,
colour adjustment, VGA border is as follow:
a. There is and on the PTZ setting to adjust parameter, click it can make the
setting for PTZ.
b. There is a sticker to show the volume on the volume adjustment interface.
Move the mouse to the corresponding position and click the left key, The right
side of sticker will show the volume ,click “x” to exit;
c. Colour adjustment and VGA border operation can refer to the volume
adjustment interface operation.
When there are many options in the option frame, click left key to ball out
down-pull menu.
To click the left key on the playback interface can make >> means forward,
<< means REW, >>I means Slow play, I> means frame play,> means Play,
X means exit.
Click left
Mouse move
8
1. In the input frame, click the left key can activate the soft keyboard. The
number, symbol, English can be input by clicking the mouse left.
2. Pinyin also can be input by the soft keyboard when enter Chinese, the method
is the same as remote controller. You can use the left key to turn over the page
when check on Pinyin/Chinese word.
3. When input number, firstly right-click the digital frame and pop-up digital
soft keyboard, use the left key to select the corresponding value. Also click the
left key to exit the number keyboard.
1. Press the left key to move the mouse can adjust the parameter on the volume,
colour. And the corresponding parameter will be display at the same time.
2. In the Motion Detection setting interface, you can use the left key to drag the
frame to set the motion detection area.
H.264 Integrated DVR
◈ 3.1.3 Menu Structure
User can control the DVR by a lot of menu operation. This chapter will introduce the menu structure
and it will be in details in the chapter that follow.
SEARCH
SYSTEM LANGUAGE
DATE/TIME
BASIC SETUP
USER PASSWORD
DISPLAY
MAIN MENU
HDO MANAGE
VIDEO/AUDIO
ALARM
RECODR
INFO
MD
ADVANCE SETUP
MOBILE
MAINTAIN
PIZ
NETWORK
9
H.264 Integrated DVR
◈ 3.2 System Setup and Operation
◈ 3.2.1 User Login
◈ 3.2.2 Start-up
Connect the DC12V/3A adapter to DVR. When start up the DVR, 【POW】LED will be on and 4
images will be display on the screen. If it has setup ignition recording or time recording, the system will
record automatically and the corresponding LED will be on, the system work normally.
Remark 1: If there is no HDD in device, or device didn't read the HDD, or HDD installed is not
formatted. It will display an 【H】 in video preview.
Remark 2: Newly installed HDD must be formatted though this machine to use normally. The following
step for reference: main menu>HDD management>HDD Format. After formatted, the system will be
restart。
◈ 3.2.3 System Login
Remark: The original device ID is: 00000 and there is no password. User can login the main menu
directly. In order to concern the system security, please setup the user password and change the device
ID in the 【Base Setup 】.It can setup user password and admin password, administrator has all
operation authorities, user has limited authorities which only watch, record search and playback.
(The host will match automatically when user input the password, different passwords will have
different authorities)
Click the left key of mouse after starting the host. When input the user password, user will login the
interface as follow:
Unit ID: Users just need to enter the number by unit ID “000010” as the right frame. When operate by
mouse, the unit ID will lead to the number box acquiescently; when the controller operate with many
devices, user must input the unit ID to the number box.
Password: enter the admin password or user password.
10
H.264 Integrated DVR
◈ 3.2.4 Menu Operation
The main menu includes “SEARCH”,”RECORD”,
”HDD”,”BASIC”,“ADVANCE”, and“ Exit”.:
Remark: You must after pressing 【Enter】 to make
the setting for submenu valid. It will be no use when exit
directly. This DVR have a special feature: when you move
the mouse to everywhere, there will have the explanation
information showed automatically.
▶ 1. Record Search
Move the cursor to 【RECORD SEARCH】(Icon highlighted when selected),press【Enter】to
enter into the setting interface. There are 3 different ways for record search.
The first way for playback is by timing
Input Time: User can adjust the checking date and time, press
【Enter】and input the number directly to adjust the year,
month, date. After finishing the time setting, move the
cursorto 【Playback】,can see the recording status of this
date.
The second way for playback is by record status
Press【Enter】to input number directly to setup
playback time. After setting ,move the cursor to
【Search】 and then can enter into video playback of the
time. As follow::
Instruction:
1> MONTH: It will show the record status of everyday in this month. Green means normal recording,
Red means alarm recording, Grounding means no recording. Click any date in this frame can search the
recording status of that day, the searching result will be showed in the below date frame.
2>.DATE: It will show the record status with different time of this day. Every square stands one hour,
every half hour stands for record status and the record status is the same as above.Click the time by a half
hour of this day directly and then can view the record playback.
11
H.264 Integrated DVR
The third way for playback is by record file list
Setup the searching date and then press【Search】,can view the recording status, click one day by
【Month】and click 【File List】.Then it will come up the interface window of【File List】.
Choose Channel: There is 1,2,3,4 and all channel,
totally 5 options. Press 【Enter】to select.
Record Type: There are all, normal and alarm,
totally 3 options. Press 【Enter】 to select. The search
record will display as list automatically. As follows:
Instruction:
1. 【FILE LIST】,“CHANNEL” is the recording file which belong to which channel, “SIZE” is
display the size of this file(Unit:MB),“TYPE” is display the type of recording file,there are
two types: normal and alarm,press “BACKUP” button can export the selected files to USB storage;
2. After moving the cursor up and down and select the files, and press【APPLY】to enter into playback
interface。If the all channels have recording files, it will playback all windows at the same time;
3. If setup as “on” in the【RECORD TIME】in 【BASIC SETUP】,it will show the date/time when
playback record file;If setup as “off” it will not display time;
4. When playback,can press【SLOW】to play slowly;press【FORWARD】、【REVERSE】to
speed、reverse play;also can press【PAUSE/STEP】to pause and frame by frame play;Press
【Exit】to exit from playback and return to the former menu;
5. When finished playback files, it will return to the file list interface if no continuous record files.
▶ 2 . File Backup
User can use USB for backup,should insert USB device into the USB2.0 port before backup files.
And it is support USB Plug and Play.
Select the recording file by direction keys , and enter 【BACKUP】and then click【Enter】
(There is a “√” at the end of the selected recording files)we can start export the recording files
after selecting, and press【BACKUP】to start to backup, as follow:
Instruction:
1.When the space in backup device is less than
recording file, the system will note “Space no enough”.
2.You can move USB device directly when backup
finished。
12
H.264 Integrated DVR
▶ 3. Record Setup
Move the cursor to 【RECORD】(Icon highlighted
when selected),press【Enter】to enter into the setting
interface. Press【Confirm】 and enter into the setup
interface, and you can use direction keys and cursor to
change the options.
CHANNEL:ON: Means the channel enable for
recording.
RESOLUTION:Setup resolution and code rate for
recording, there are HIGEST, HIGH, NORMAL three
options, corresponding to D1、HD1、CIF resolution.
QUALITY :There are b est , fine and normal
three options, corresponding highest, hingand normal
data stream standard
AUDIO:ON: Means enable the audio recording for
all channels, OFF: Means disable audio recording
REC.MODE:
POWER UP: Means the device will start recording
when it startup.
TIME: Recording as the schedule, you can setup the
schedule as you want as follow.
CHANNEL:You can select all channel or just one channel.
SCHEDULE SETUP:Firstly, the user should select the recording mode. There are alarm,
normal, and on rec three modes. Then you can select all every day, weekend, workday or each
day (blue means has selected) to setup. Different color means different record mode: Red means alarm
record, green means normal record, grounding means no record.
RECORD SIZE:There are 15min, 30min, and 45min, 60min four options that mean it will pack
as the mode you selected.
13
H.264 Integrated DVR
▶ 4. HDD Management
Move the cursor to 【HDD】(Icon highlighted when
selected),press【Enter】to enter into the setting
interface, and you can use direction keys and cursor
to change the options.:
HDD STATUS:There are three status available,
normal, un-formats, No HDD. If HDD cannot run
ace less than 4G, it will delete HDD earliest recording
file, and it will stop deleting when the space is 10G;
DISABLE:Means when HDD space less than 500M it will stop recording, and an prompt will display
in live view “please shutdown and replace HDD”
HDD FORMAT:Move cursor there to select device and press【APLLY】 to start format
USB FORMAT:Move cursor there to select device and press【APLLY】 to start format
Remark: The device will restart only when the HDD format success.
▶ 5. Basic Setup
Move cursor to select “BASIC SETUP” (The big icon
means select ok)and press【ENTER】to enter into the
system language setup interface.
Basic setup includes system language, time/date, user
password, display, and video/audio and exit six options.
▶ 6. System Language Setup
Move cursor to select “system language” (The big
icon means select ok)and press【ENTER】to enter into
the system language setup interface.
System language have Chinese and English two
options, you can press【ENTER】 to setup the language
Remark: The device will restart when you setup
system language success.
14
H.264 Integrated DVR
▶ 7. Date/Time Setup
Move cursor to select “date/time” (The big icon means
select ok)and press【ENTER】to enter into the date/time
setup interface.(As following picture)
DATE: Setup system date via numeric key.
DATE FORMAT: Press ENTER to switch between
the date patterns, there are YY-MM-DD and MM/DD/YY
two options.
TIME: Setup system time via numeric key.
TIME FORMAT: Press ENTER to switch between
the date patterns, there are 12 HOURS and 24 HOURS
two options.
Remark: You must move the cursor to the
【MODIFY TIME AND DATE】 and press 【APPLY】
to save it, otherwise it won't save the modify if you
exit this interface.
DST: haven't finished yet.
▶ 8. Password
Move the cursor to【SECURITY】(Icon highlighted
when selected), press【Enter】to enter into the setting
interface.(As following picture)
DEVICE ID:Press number key to setup the unite ID
PASSWORD:Press【APPLY】 to start or close user
password. If it is “ENABLE”, you must input password
when log in, otherwise, you can enter into main menu
directly.
USER PASSWORD:Press number keys to setup
user password.
ADMIN PASSWORD:Press number keys to setup
admin password.
15
H.264 Integrated DVR
▶ 9. Display Setup
Move the cursor to【DISPLAY SETUP】(Icon
highlighted when selected), press 【Enter】to enter
into the setting interface.
NAME: press【Enter】to enter into the setting interface.
POSITION: press【Enter】 to switch name location,
there are 5 options: Bottom left, top left, bottom right,
top right and OFF.
COLOR:press【Enter】to enter into setting interface,
as following: (As following picture) Press【Enter】or
directly drag the cursor to set colors, including chroma,
brightness, contrast and saturation, press【APPLY】to
save the parameters.
PREVIEW:ON: Means the channel is allowed to view
the live mode, OFF means not.
PREVIEW TIME: ON: Means insert clock in live view,
OFF means not.
RECORD TIME :ON: Means insert clock in record file,
OFF means not
▶ 10. Video/Audio Setup
Move the cursor to【VIDEO/AUDIO SETUP】(Icon
highlighted when selected),press【Enter】to enter
into setting interface.
VGA RESOLUTION:press【Enter】key to setup
the VGA resolution, there are
1024*768、800*600 and 600*480 three options.
CAMERA SYSTEM: press【Enter】to switch camera
system, has PAL and NTSC two options
INTERVAL: setup the time of screen automatic
switchover.
VOLUME SETUP: move cursor to【VOLUME SETUP】,press【Enter】to enter into volume setup
interface, press number keys or directly drag the cursor to adjust volume.
EDGES ADJUST: setup the edge distance of the screen.
Remark: The device will restart when you setup the camera system.
16
H.264 Integrated DVR
▶ 11. Advance Setup
Move the cursor to【ADVANCE SETUP】(Icon
highlighted when selected),press【Enter】to enter
into setting interface.
Advanced Features include Alarm settings, system
information, Motion detection, mobile phone
monitoring, system maintenance, PTZ and network
setting.
▶ 12. Alarm Setup
Move the cursor to【ALARM SETUP】(Icon
highlighted when selected),press【Enter】to
enter into setting interface.
I/O CHANNEL: Each channel correspond an I/O
status, that is, when an alarm triggered, it will
activate the corresponding channel to start alarm
recording.
N.O:Indicate I / O input level from high to low effective
N.C:Indicate I / O input level from low to high effective
HDD LOSS:ON means it will trigger a alarm if there is no HDD, and it will display an 【H】
On the bottom left of channel 1 in the live view
HDD SPACE:ON:If the space less than 500M, there is a remark in live view:No enough space,
please change HDD after shutdown.
VIDEO LOSS:ON:When one channel has no video input, it will display “video loss “in live view.
ALARM MANAGE:There are alarm output, buzzer and post REC three items.
OUTPUT:When an alarm triggered, the alarm output time will be:0 second、10 seconds,20
seconds,40 seconds and 60 seconds
BUZZER:buzzer calling time setup when alarm triggered: 0 second,10 seconds,20 seconds,40
seconds and 60 seconds
POST REC.:post recording time setup: 30 seconds,1 minute,2 minutes and 5 minutes
Email Setup: please refer to appendix.
▶ 13. System Info
Move the cursor to【SYSTEM INFO】(Icon
highlighted when selected),press【Enter】to enter
into setting interface, at this interface mainly display
system hardware features and firmware version,
include : device type, firmware version, MAC address,
serial number.(as following picture)
17
H.264 Integrated DVR
▶ 14. Motion Detect
Move the cursor to【MOTION DETECT】(Icon
highlighted when selected),press【Enter】to enter
into setting interface.
STATUS:Each channel has corresponding channel
switch, press 【Enter】to turn on or turn off the motion
detection for each channel..
SNESITIVITY:each channel has corresponding
sensitivity setting, including four standards high,
higher, medium and low, press【Enter】key to switch
MD AREA: each channel has corresponding
regional motion detecting setting, move the cursor
to corresponding【setting】,press【Enter】to
enter regional setting interface, red area means it
have activated motion detection, transparent block
means it have not activated motion detection.
Move the direction key on remote control to make
cursor move in the small pane, green frame means
the cursor has moved to this pane, press【Enter】to
select or cancel motion detection of this small pane,
when setup finished, press【exit】to back to MD
setup interface, it will save automatically.
Remark:
Remote controller Operation: press [Menu] key to select or cancel the entire screen.
Mouse operation: click left and drag the frame to setup the region for motion detection
▶ 15. Mobile
Move the cursor to【MOBILE】(Icon highlighted when
selected),press【Enter】to enter into setting interface.
MOBILE NETWORK: Select different mobile network
from the options of 3G, 2.5G and 2.75G, and press
[Enter] to switch different network.
3G:CDMA1X/EV-DO, WCDMA/HSPA;
2.5G: GPRS
2.75G: CDMA, EDGE
MOBILE PORT:Must different form local network
port, (000000-999999)
Remark: Please refer to the attachment for detail information
18
H.264 Integrated DVR
▶ 16. System Protect
Move the cursor to 【SYSTEM Protect】(Frame turns
red means selected), and press【Enter】 to enter into
system maintain setup interface.
AUTO RESET: When switch is on, you can setup the
time for device to restart.
SYSTEM UPDATE: Copy the update file to the root
directory of the thumb driver, and insert it into
USB 1.0, then press [Enter] to upgrade the firmware,
and it will display the process of the system
upgrading, as following:
DEFAULT SETTINGS: Restore all the settings as the
factory setting.
Remark: Make sure the power supply and U disk
normally during the update.
▶ 17. PTZ setup
Move the cursor to【PTZ SETUP】(Icon highlighted
when selected),press【Enter】to enter into setting
interface, you can setup the parameters for each
channel separately. You can use direction keys. Move
the cursor to the option which need to be settled and
enter【Enter】to switch in various options
CHANNEL: The channel of PTZ connected.
PROTOCOL: select the protocol of different PTZ, there
are two protocols to switch, and the default is Pelco-D
BAUD RATE: select the different baud rate for your PTZ,
there are 1200, 2400, 4800, and 9600.
DATA BIT: there are 5,6,7,8 options to select, default
setting is 8.
STOP BIT: There are 1 and 2 to select, the default
setting is 1
VERIFY: there are None/Odd/Even/Mark/Space to select,
the default setting is none.
ADDRESS: Fill the code of respective PTZ.
19
H.264 Integrated DVR
▶ 18. Network setup
Move the cursor to [NETWORK SETUP] (Icon highlightened
when selected), and press 【Enter】 to enter into setting
interface .as follows.
TYPE: There are PPPOE, DHCP & Static three options
Static Configuration: in the type, Select [Static] and
press [Enter] to enter into the interface as follows.
MEDIA PORT:Port number communication of the
DVR device and PC through private protocol using,
generally, use default: 9000. If the port of computer
is used by other service, please use a idle port.
WEB Port number: http port, generally, use default:
80. If administrator change from WEB port to other
port, such as 8088, increase extra port number behind IP.
IP ADDRESS: Input IP address according to network.
Subnet mask: input the Subnet mask according to network.
Gateways: setup gateways according to network. If no
Router device in the network, please distribute IP
address of same network segment.
DHCP
Select the DHCP, and enter into the interface as follows.
Media port: the same as Static configuration
Web port: the same as Static configuration
Note: after selecting DHCP, enter and restart system,
after restarting, the system will automatically establish
connection with DHCP, Successful connection, the device
are distributed an IP address and show in the interface.
PPPOE
Select the PPPOE, and enter the interface as follows
.
Media port: the same as static configuration
Web port: the same as static configuration
PPPOE username and password: fill the username and
password of the internet service offer, and apply it and reboot
the system. After rebooting, the device will saveit and set
the PPPOE as default network type. If succeed, the IP
address will be automatically configured as dynamic IP
of WAN.
20
H.264 Integrated DVR
DDNS
DNS: Set IP address of DNS, can refer to setup of computer
DNS:
DDNS: move the cursor to it and press [Enter] to enter
into the interface as followings.
DDNS: There are [ON/OFF], and if there is a DDNS
\service, please setup it as ON.Server address: there are 3
services to select, 3322, DynDNS, perfecteyes.
HOST NAME: Input the name of the host server in the
dynamic DNS.
USERNAME: Input in the name of the user in the dynamic
DNS.
PASSWORD: Input the password in the dynamic DNS.
▶ 19. Application of DDNS
You should Register a host name, user name and
password from DDNS manufacture, now we are take
DynDNS for example, to show you how to register.
Please type in the IE address as follow: to Register a
new user.
(1) Fill out all the information then submit.
(2) Minutes later, you will get a mail from
DynDNS, which include the primary password for
the user you just register.
(3)Then please login http://www.dyndns.
com/ with the new user and password, click “domain
name management” to enter into the operating
interface, then select “new” under the Dynamic
DDNS.
(4)Create a mane you need, then press apply; now
you have Registered a host name success.
▶ 20. An example
This chapter mainly describes how to access DVR through internet in commonly kinds of connecting
network. Example of Establishing Network as follows.
1.Network: apply ADSL, only one DVR need to connect to internet.
1)Make sure the DVR has connected to ADSL modem success; the LED is flashing means success.
2)Network type: PPPOE
3)Input media port and web port; please refer to the relevant chapter of “installation manual”
network setting.
4)Type in the PPPOE user name and password from internet server.
5)Fill in the IP of DNS server, such as, 202.96.128.166 or 10.95.0.3 and so on. Also can refer to
DNS setting of computer connecting internet locally.(input the order ipconfig/all to search in DOS)
21
H.264 Integrated DVR
6).Since the public IP will change after restart, please use DDNS function, and mapping the public IP
to a fixed domain name. please refer to chapter of DDNS Setting to finish application and setting of DDNS.
7).Save and restart device, it will connect to internet via PPPOE mode automatically, if success, it
will got a dynamic public IP.
8).Use another computer connecting internet. Use ping xxx.xxx.xxx.xxx(The public IP of DVR) to
check whether the network is ok, and ping xxx.xxx.xxx(the domain name of DVR)to check whether the
DDNS settings is ok.
9).Open IE browser, and type in the domain name of DDNS (if WEB port is not 80, you should add a
port, such as: http://members.dydns.com:8088 )
10).Please download the IE control, then enter into login interface, the default setting has no password.
2.Network: apply ADSL, more than one DVR need to connect internet sharing.
1).Confirm with Internet server, ADSL server you apply is permitted to connect internet sharing.
2).Need to purchase a Router, at present, there are many small Router built-in 4 ports Hub. Or you
ADSL Modem itself have routing functions.
3).Please refer to the instruction of Router and make sure whether the connection of the device is right
or not.
4).Enable PPPOE function of Router; make use of Router for ADSL dialing.
5).The advice is that prohibiting the DHCP function, using static IP mode for DVR and computer of
sharing internet. Attention: DVR, computer with internet access, and IP of Router itself have to be in the
same subnet and make sure that the right setting of Subnet mask, Gateways and DNS.
Network setup of Router:
22
H.264 Integrated DVR
Network setup of DVR:
Computer network setup:
6).Browsing the webpage trough the computer, checking whether the setting is right or wrong.
7).Entering IP address of DVR in IE address bar.
8).In router setting, Increasing the port forwarding or DVR mapping relationship, put DVR which will be
settled and its media port and WEB ports added, as follows.
23
H.264 Integrated DVR
9).Use the remote computer linking internet(not the local computer sharing internet), making use of
Ping xxx.xxx.xxx( the domain name of DVR)
10).In the address bar of remote computer sharing internet, entering DDNS domain name of DVR. If
settin the port of web is not 80, have to add extra port number, please refer to chapters and sections of IE
operation.
11).After finishing auto-downloading of IE controls, enter the logging interface, no password in the
system default, press entering key to access the preview interface.
3. Proprietary Network, fixed IP and router the company applied, DVR have to access internet
1).Assure whether DVR access internet is right or wrong.
2).Networking mode: Using the static configuration
3).Please refer to “installation manual” networking set chapter, finishing setting of port number, IP
address, Subnet mask, Gateways.
4).Seek the help of network administrator, in setting of Router, increasing the port forwarding or DVR
mapping relationship.
5).Use a LAN computer, input IP and port number of LAN of DVR, can access the DVR in LAN.
6).Use the remote computer sharing internet, input IP and port number of public network of Router in
address bar of IE. Access DVR through internet, you also can enable DDNS function, after finishing the
registering and setting of DDNS, can access DVR through domain name of DDNS and port number, can
avoid memorizing multifarious public network IP.
4. IE OPERATION
◈ 4.1 Features of function
◈ 4.2 Constraints
◈ 4.3 IE Login
To protect the PC can access the DVR product stability, recommended Windows XP, Windows Vista
operating system, recommended IE6.0, IE7.0 browser. User Login
IE-side should be inputted in the current IP, if the WEB port number is 80 (), then directly in the IE address
bar enter the IP address can be; if you modify the port for other non-WEB port 80, you need to append the
port IP number, such as equipment IP is 192.168.15.145, the set port 8088, you access the device need to
enter: http://192.168.15.145:8088.
24
H.264 Integrated DVR
In the case of ensuring network connectivity, IE will automatically download plug-in which are be
stored in serve to PC, see the picture as followings:
The process, as the network conditions may last 1 to 2 minutes.
The process of download may be unsuccessful because of PC configuration problems. please
click“
”
or click“
”。
“If your browser does not support the ActiveX to download, please click here”
After the success of Plug-in download, it will automatically enter interface, see the picture as follows:
English interface or Chinese interface
PASSWORD: Administrator has all authorities, operator has limited authorities who they can
only watch, playback, please change the unit No. and default password in time for system security.
NETWORK: LAN/WAN. Depend on the type of network between the computer and DVR.
After what you have done, click【Login】into the IE-side interface. If you make a mistake, you can
click Reset, repeat again.
25
H.264 Integrated DVR
◈ 4.4 OPERATION INTERFACE
There are Live view, Playback and Setup options in the main interface, please press them to access it.
▶ 1. Live Preview
Click
live
to enter into the interface as followings
▶ 2. PTZ CONTROL
Change the focus, preset aperture to control the PTZ.
Click
to up/down/left/right control movement of the PTZ.When hold on the one
direction key, the PTZ will keep circling as that direction after user press the stop key in the center of
the wheel.
26
H.264 Integrated DVR
▶ 3. Focus
Click
to focus
▶ 4. Zoom
Click
to zoom in and out.
▶ 5. Iris
Click
to change the size of aperture
▶ 6. PTZ PRESET
Setup preset point.
You can control it via the below three buttons:
▶ 7. PLAY
Move cursor to the icons, it will highlighted when selected
Open all video .
Capture picture, save in local disk, system save default route is C:/DVR
Quickly start all channels' recording video, here the left up corner of each channel have normal
recording video symbol 【R】, click icon to switch betweensignal screen
nine
/16 split
,
/quad
/
Volume adjust button
▶ 8.OTHER OPERATION
1. Select one channel at preview screen (the selected channel's
frame will be change to RED), double click left key, enter to the
selected channel single screen display.
2. Click one Chanel via left key at preview screen, then click
right key, will occur window shortcut Menu, see below picture
You can open, shut down and start this channel's record via shortcut
menu.
3. Click right key at one live view screen, click” open all windows”
or “ close all windows”, will quickly open/close all windows.
27
H.264 Integrated DVR
▶ 9. PLAYBACK
Click REPLAY to enter into playback interface.
The following video is from DVR hard drive for remote playback
Click right up of calendar interface
and
, to setup the month for searching, click” refurbish”, at
the calendar interface will display the recording information of current month
The highlighted date means that day have recording video, RED FRAME means the date is system date,
click the date will search that days' recording file list. For example, the above picture display 2008, Dec.
3 rd,4 th,5 th,6 th,8 th,9 th,10 th,11 th,12 th,17 th,18 th have recording video, and system date is 18 th, Dec, 2008, currently
search date is 17 th, Dec.
At the below of calendar select channel and type, click SEARCH, the result will display, as follows.
28
H.264 Integrated DVR
Double click one item of listed recording video, the
recording video will playback, meanwhile the file icon will
change to
, and will occur the below picture play buttons:
The above purple progress bar shows download progress, green progress bar shows playback progress
Switch between pause/play
Stop play
Fast play
Slow play
Pause at next frame
Convert H.264 file to H.avi file, click this button access into file convert setting
interface, as follow.
29
H.264 Integrated DVR
SOURCE FILE: Click
to setup the H.264 file to convert
DESTINATION FILE: Click
to setup the directory for saving H.avi file
After setting, click
, file convert start, the convert progress bar (see below picture)
will see the progress of convert.
▶ 10. SETUP
Click
to enter into setup interface, this interface include record, alarm, PTZ,
network, setting and system information six menus.
▶ 11.RECORD
Click
of DVR as following.
to enter into setup interface; you can check the parameter settings as in GUI
Parameters set with reference to serve
▶ 12.ALARM
Click
of DVR as following:
to enter into setup interface; you can check the parameter settings as in GUI
Parameters set with reference to serve.
30
H.264 Integrated DVR
▶ 13. PTZ Control
Click
to enter into setup interface; you can check the parameter settings as in GUI
of DVR as following.
Parameters set with reference to device
▶ 14. Network Settings
Click
,then enter into Network Settings interface, as the following:
Setting up the parameters refers to device.
31
H.264 Integrated DVR
▶ 16. System settings
Click
,then enter into System settings interface, as the following:
Network environment:There are 128k、192k、256k、384k、512k and 1024k options of network
flows in setting Wan connecting. Users may choose different network flows according to the Uplink
bandwidths of the real Internet environment. Generally speaking, the Uplink bandwidths of ADSL are
approximately 256 or 384kbps, but a little difference exists in differ place.
Places for file saving:Places to save the recording files
The setting of IE login code and Daylight saving time please refer to device。
▶ 16. Host information
Click
,then enter into the host information interface(as follows,),this interface
vividly displays the HDD state ,the rest time of recording, the software version and MAC address, both of
which cannot be modified by users.
32
H.264 Integrated DVR
5. Installation Instruction
◈ 5.1 Appearance and Definition of panel
AppearanceDimensions(unit:mm):230(L) ×220(W) ×150(H)
33
H.264 Integrated DVR
2. The buttons of the front and the rear panel and the definition
of port
【POWER】 instructional lights for power
【REC】 instructional lights for recording
【ALARM】 instructional lights for alarming
【
】 LCD backlight on/off
【USB】 USB interface support backup by USB storage equipment or USB mouse
Other buttons are the same as remote controller; please refer to the definition of remote controller.
34
H.264 Integrated DVR
3. The rear panel and its interface
NO
Physical Interface
Instructions
1
Power input
DC12V/3A
2
Video output
Connect to the television or monitor, standard BNC joint
3
Video input
Connect with Analog (Camera) signals, standard BNC joint
4
Audio input
5
Rs485 interface
6
Network interface
Alarm input
Connect to active audio signals For example, sound pick-up
Connect to PTZ and other device with RS485 port
Connect to the Ethernet
connect to alarm input,4CH alarm input
7
Alarm output
8
Audio output
9
Fan
Connect to alarm output
Connect to audio output
Help to release heat, check it in daily maintenance, replace
promptly fan with problems
35
H.264 Integrated DVR
6. FAQ
If you have encountered the problems which are out of the following problems, please feel free to
contact our local customer service colleagues or telephone our Headquarter, We will serve you
wholeheartedly.
1、Q:After booting up, video recorder cannot start normally.
Answer:possible reasons:
(1)Power input error
(2) Switch, power line are not well connected
(3) Switch, power damage
(4) mistakes happen in program upgrade
(5) broken main board of DVR
2、Q:DVR reboots after starting several minutes or crash frequently.
Answer:possible reasons:
(1)unstable voltage or low voltage
(2) bad meatus of HDD or broken HDD power cord
(3) Insufficient power
(4) unstable video signal
(5) poor cooling, too much dust, bad machine operation environment
(6) main boards connect badly with other boards
(7) hardware failure
3、Q: no video output in one channel, multi-channels or all channels.
Answer:possible reasons:
(1) Please check whether the power connecting to the camera is looseness or not.
(2) Please make sure the connecting cord of DVR video output and input in the rear board well.
(3) Insert the video cord with the monitor directly, to determine whether the problem is in video cord
or monitor or not.
(4) Please check the image brightness 0, and restore default Settings.
(5) No video input or low signal input.
(6) Shutting down preview in the display settings.
(7) Hardware failure
4、Q: DVR boots up but cannot record normally, with an “H” on the screen.
Answer:possible reasons:
(1) Make sure the machine use DC19V Power adapter.
(2) Make sure that the new HDD had already formatted
(3) HDD power or data cord are not well connected or broken.
(4) HDD Broken
(5) Interface SATA broken
36
H.264 Integrated DVR
5、Q: What is the meaning of “R”“M”“I”“H” on the screen?
Answer:possible reasons:
(1) “R” stands for recording in this channel.
(2)“M” stands for causing motion detection in this channel.
(3)“I” stands for causing outside I/O alarm in this channel.
(4)“H” means that this machine has not connected to HDD or HDD failure or HDD is full.
6、Q: real time image problems, for example, Video image distortion of color, and brightness.
Answer:possible reasons:
(1)Image will become black and white when choose the wrong system (N/P).
(2) The impedance of DVR isn't match with the monitor's.
(3) The distance of video transferring is too far or video transferring becomes weak.
(4) Erroneously setting on the color and brightness.
7、Q: monitor without sound
Answer:possible reasons:
(1)Users can directly judge two signals by means of signal circuit short-out to make out active pick-up
and active speakers.
(2) Users can click the channel in full screen to check that video channel has already connected to the
audio.
(3) Hardware failure
8、Q:Monitor with sound while playback without sound.
Answer:possible reasons:
(1)The audio record has shut down.
(2) In the playback interface, mute is set.
9、Q: Incorrect time show
Answer:possible reasons:
(1) Wrong setting or time revise but it didn't come into effect according to “revise time and date”.
(2) Batteries are not well connected.
(3) Please change the batteries after long time usage.
10、Q: DVR cannot control PTZ
Answer:possible reasons:
(1)PTZ failure
(2)Incorrect setting, connecting and installing of PTZ decoder.
(3)Incorrect connecting
(4)The wrong setting of PTZ in DVR
(5)PTZ decoder didn't match with the protocol.
(6)PTZ decoder didn't match with the DVR address.
(7)You need to add 120ohm Resistance to release reflection or impedance in the farthest edge when
joining more decoder. Or else it will cause PTZ control unstably.
(8)Too far distance
37
H.264 Integrated DVR
11、Q: When fail to press the right key of mouse to stop record, what should we do?
Answer:possible reasons:
(1)It cannot stop start-up record or schedule record, when pressing the right key of mouse in that it fits
to manual record.
(2)If you need to stop record, please enter into the record schedule, and set this time interval to
unrecorded.
12、Q: How much will it take up the HDD for one hour record?
Answer:possible reasons:
(1)Audio record takes up 14Mbyte for one channel.
(2)The space video taking HDD not only relates with video mode bit rate: excellent, good, normal, but
also relates with the quantity and size of the motion at this time. For example, if the image is still, then it
takes less space; if not, it takes more space. When choosing “excellent”, it takes 320Mbyte per channel for
one hour ; when choosing“good”,it takes about 100~150Mbyte per channel for one hour,when
choosing“normal”,it takes about 50~100Mbyte.
13、Q: motion detection failure
Answer:possible reasons:
(1)The setting of motion detection area is not suitable.
(2) Low sensitivity
14、Q: Mistakes happen when USB backup or CD-ROM burn.
Answer:possible reasons:
(1)That data backup more than equipment capacity can lead to burning error
(2)Backup device is not compatible to the equipment.
(3)Backup device has been broken.
15、Q: I/O alarm failure.
Answer:possible reasons:
(1)incorrect alarm setting
(2)incorrect alarm connecting
(3)incorrect alarm signal input
(4)one alarm equipment connects with two loops at the same time
16、Q: Remote controller fails to control
Answer:possible reasons:
(1)Remote controller address is wrong
(2)far remote distance or remote angel
(3)batteries are out of power
(4)remote controller or the DVR front panel are broken
17、Q: WEB cannot be login
Answer:possible reasons:
(1)Make sure that the Net is connected, or check the panel link or 100M LED displays normally;Use
the ping xxx.xxx.xxx.xxx (DVR IP) to check the Net.
(2) It is advisable to use Windows XP or Vista operation system,IE6.0 or IE7.0 browser.
(3) Please manually install ActiveX if ActiveX is prevented.
(4) Please upgrade Video driver if you don't install dx8.1 or the above version.
38
H.264 Integrated DVR
18、Q: when previews image in Internet or playbacks recording file, Mosaic exists or no image.
Answer:possible reasons:
(1) If you visit the DVR via Internet, please choose the WAN in the “network environment” and then
choose the proper Network bandwidth in “set up >system set up >network environment”.
(2) Please try to shut down the window and restart the window again.
19、Q: why setting up the IE, it says “other clients are configuring……”
Answer:possible reasons:
(1)Make sure that interface configuration of DVR is on the starting state, please exit.
39