1
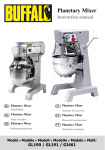
Planetary Mixer
Instruction manual
Model • Modèle • Modell • Modello • Modelo • Malli:
GL190-A / GL191-A / GJ461-A
Exploded diagram and spare parts list
GL190
Exploded diagram and spare parts list
GL190
No.
Description
1 Flat Beater
2 Dough Hook
3 Wire Whip
No.
Description
48 Bearings
49 Seal
50 Bearings
4
5
6
7
8
9
10
11
12
13
14
15
16
17
18
19
20
21
22
23
25
26
27
28
29
30
31
32
33
34
51
52
53
54
55
56
57
58
59
60
61
62
63
64
65
66
67
68
69
70
71
72
73
74
75
76
77
78
79
80
Gear Box
Circlip
Worm Gear
Seal
Key
Motor
Fan
Rear Outer
Nut
M5 x 60
Casing
Washer
Connector
Nut M4 x 8
Red Button
Green Button
Nut M4 x 8
Panel
Brand
Nut M4x 20
Micro Switch
Distance
Housing
Switch
Handle
Assembly
Bearings
Washer
Spring
Roller 6 x 10
Gear Shaft
Key: 5x10
Key: 5x10
Gear
Circlips
Gear
Circlips
Bearings
Bearings
Key: 5x14
Shaft
Worm Gear
Circlips
Bearings
Control Nut
Spring
Fork Pin
Shaft
Shifting Yoke
Inner Gear
Hexagon Socket
Circlips
Cap Screw
Planet Gear
Operating Shelf
Bearing
Shaft Support
Bearing
Seal
Key: 5x20
Spindle
No.
Description
93 Support
94 Washer
95 Type 1
Hexagon Nut
96 Screw
97 Lifting Support
98 Hexagon
99 Flat
Washer
Locking
Nut
100 Spring
101 Flat Washer
102 Pin
103 Connecting Rod
104 Cotter Pin
105 Retainer Pin
106 Crank Lever
107 Handle
108 Rear Pillar
109 Hexagonal Bolt
110 Base
111 Hexagonal Bolt
112 Power Cord
113 Gland
114 Screw
115 Contact Switch
116 Type 1
117 AC
connector
Hexagonal
Nut
118 Fixing Plate
119 Screw
120 Screw
121 Capacitor
122 Capacitor
123 Screw
124 Fixing Plate
125 Screw
Exploded diagram and spare parts list
35
36
37
38
39
40
41
42
43
44
45
46
47
Gear
Cog
Ring Gasket
Gear
Shaft sleeve
Claw Clutch
Key: 5x25
Key: 5x30
Key: 5x30
Main Shaft
Shaft Sleeve
Gear
Washer
81
82
83
84
86
87
85
88
89
90
91
131
92
Retainer Pin
Bowl
Screw
Washer
Rear Guard
Bolt
Front Guard
Assembly
Taper Pin
GL190
126
127
128
129
130
132
133
134
135
Type 1
Bracket
Hexagonal Nut
Distance Switch
Screw
Type 1
Shaft
Pin Nut
Hexagonal
Split Washer
Spring
Overload
Switch
Exploded diagram and spare parts list
GL191
Exploded diagram and spare parts list
No.
1
2
3
4
5
6
7
8
9
10
11
12
13
14
15
16
17
18
19
20
21
22
23
24
25
26
27
28
29
Description
Wire Whip
Spiral Dough
Flat
HookBeater
Safety Guard
Bowl Assembly
Cap
Spring
Pin Shaft
Shifting Yoke
Cam Gear
Transmission
Panel
Plate
Lever
Handle
Hood
Nut
Pressing Plate
Cap
Cog
Shaft
Washer
Nut
Main Shaft
Gear Box
End Cap
Internal Gear
Gear
Operating Shaft
Bearing
No.
30
31
32
33
34
35
36
37
38
39
40
41
42
43
44
45
46
47
48
49
50
51
52
53
54
55
56
57
58
GL191
Description
Seal
Working Shaft
Retainer Pin
Spring
Pressing Plate
Transmission
Bearing
Support
Spacer
Circlips
Ring Gasket
Gear
Bushing
Shaft Sleeve
Claw Gear
Washer
Bearing
Bushing
Seal
Locking Clamp
Bowl Support
Bowl Support
Nut
Bracket
Bearing
Gear
Key
Circlips
Gear
Bushing
Gear
No.
59
60
61
62
63
64
65
66
67
68
69
70
71
72
73
74
75
76
77
78
79
80
81
82
83
84
85
Description
Washer
Worm Wheel
Seal
Green Button
Red Button
Panel
Motor Housing
Key
Shaft Worm
Gear
Motor
Rear Casing
Rear Panel
Crank Arm
Crank
Connecting
Pillar
Rod
Clamping Plate
Clamping Plate
Spring
Distance
Overlaid
Switch
Power
Switch Cord
Gland
Contact Switch
Capacitor
Capacitor
Exploded diagram and spare parts list
GJ461
Exploded diagram and spare parts list
No.
1
2
3
4
5
6
7
8
9
10
11
12
13
14
15
16
17
18
19
20
21
22
23
24
25
26
27
28
29
30
31
32
33
Description
Dough Hook
Flat Beater
Wire Whip
Safety Guard
Bowl
Upper Panel
Screw
Spring
Pin Shaft
Shifting Yoke
Cam Gear
Transmission
Plate Shaft
Drive
Gear Mech
Knob
Extension Bar
Attachment
Hub
Overload
Switch
Power Cable
Gland
Contact
Switch
Hood Ring
Circlips
Planet Gear
Operating
Shelf
Bearing
Seal
Pin
Working Shaft
Shaft
Pressing Plate
Main Shaft
Nut
No.
33
34
35
36
37
39
38
40
41
42
43
44
45
46
47
48
49
50
51
52
53
54
55
56
57
58
59
60
61
62
63
64
65
66
GJ461
Description
Top Hat Valve
Cap
Flat Valve Cap
Bearing
Spacer
Gear
Gear
Bushing
Shaft Sleeve
Gear
Clamping Plate
Bearing
Bushing
Seal
Pillar
Locking Clamp
Support
Clamping Plate
Nut
Base
Bearing
Transmission
Shaft
Key Support
Circlips
Gear
Bushing
Gear Box
Worm Wheel
Panel
Casing
Rear Panel
Internal Gear
Switch Axle
Seal
No.
67
68
69
70
71
72
73
74
75
76
77
78
79
80
81
82
83
84
85
86
87
88
89
90
91
92
93
94
95
96
97
98
99
Description
Gear Shaft
Gear
Bushing
Gear
Gear
Pressing Plate
Spacer
Nut
Pressing Plate
Bearing
Worm Gear
and
Key Shaft
Circlips
Circlips
Spacer
Motor
Rubber
StopperButton
Green
Red Button
Crank
Crank lever
Connecting
Rod
Spring
Plate
Clamping Plate
Distance
Switch
Capacitor 1
Capacitor 2
Switch
Mounting
Spring
Washer
Fin (left-hand
side)(right-hand
Fin
side)
Telephone Helpline: 1300 225 960
Safety Tips
THE PLANETARY MIXER IS A
DANGEROUS APPLIANCE AND MUST ONLY BE
USED BY TRAINED PERSONNEL IN ACCORDANCE WITH THESE INSTRUCTIONS
Position on a flat, stable surface.
•
A service agent/qualified technician should carry out installation and any repairs if required. Do not
remove any components on this product.
•
Consult Local and National Standards to comply with the following:
• Health and Safety at Work Legislation
• BS EN Codes of Practice
• Fire Precautions
• IEE Wiring Regulations
• Building Regulations
•
Always stand BEHIND the safety guard when operating the appliance.
•
DO NOT place hands near the rotating attachments when in use. This can result in severe injury.
•
DO NOT remove food from the appliance until the mixing attachments have come to a complete stop.
•
DO NOT immerse the appliance in water.
•
DO NOT attempt to mix items that this machine is not designed for. This can damage the mixing
attachments.
•
DO NOT use with a damaged mixing attachment.
•
DO NOT bypass the safety interlocks.
•
Always switch off and disconnect the power supply to the appliance when not in use.
•
NEVER leave the appliance unattended when in use.
•
The appliance is heavy. Take care when moving.
•
This appliance must only be used in accordance with these instructions and by persons competent to do so.
•
This appliance is not intended for use by persons (including children) with reduced physical, sensory
or mental capabilities, or lack of experience and knowledge, unless they have been given supervision
or instruction concerning use of the appliance by a person responsible for their safety.
•
Keep all packaging away from children. Dispose of the packaging in accordance to the regulations of
local authorities.
•
If the power cord is damaged, it must be replaced by an Apuro agent or a recommended qualified
technician in order to avoid a hazard.
Product Description
GL190-A - 10 litre planetary mixer
GL191-A - 20 litre planetary mixer
GJ461-A - 30 litre planetary mixer
The Apuro Planetary Mixer is a freestanding machine that consists of a large bowl mounted below a motor
and gearbox arrangement to which a mixing tool can be attached.
1
Introduction
The Apuro Planetary Mixer has been designed to mix a range of foodstuffs, varying from cream to dough.
Please take a few moments to carefully read through this manual. Correct maintenance and operation of
this machine will provide the best possible performance from your Apuro product.
Pack Contents
The following is included:
•
Apuro Planetary Mixer
•
Spiral Dough Hook
•
Whisk
•
Mixing Bowl
•
Beater
•
Instruction Manual
Apuro prides itself on quality and service, ensuring that at the time of packaging the contents are supplied
fully functional and free of damage. Should you find any damage as a result of transit, please contact your
Apuro dealer immediately.
Installation
Ensure the location of the Planetary Mixer is capable of supporting its weight.
WARNING: The Planetary Mixer is very heavy, care must be taken when moving it.
Assembly
WARNING: The bowl must be attached and raised into position prior to starting the
Planetary Mixer.
Apuro accept no responsibility for any injury caused by incorrect assembly of this appliance.
Note: Ensure the feet are level to reduce vibration during operation.
2
Telephone Helpline: 1300 225 960
Remove the appliance from all packaging.
Fitting/Removing the Bowl
1.
Turn Off the appliance.
2.
Open the safety guard by turning it to the left
(GL190 & GL191) or lifting it above the mixer
(GJ461).
3.
Lower the bowl with the bowl handle.
4.
Release the locking catches either side of the
bowl.
5.
Lift the bowl. The bowl is held in place by two pins
securing the handles to the cradle and a hole at
the back of the appliance which houses the lug on
the bowl lip.
6.
Reverse the procedure to fit the bowl.
Securing pins
Note: Ensure the handle is fully pushed
back and the bowl is completely raised or
the mixer will not work.
Note: Regularly grease the bowl lift mechanism to ensure smooth operation .
Changing the Mixer Attachment
1.
Turn Off the appliance.
2.
Open the safety guard by turning it to the left (GL190 & GL191) or lifting it above the mixer (GJ461).
3.
Lower the bowl with the bowl handle.
4.
Push the mixer attachment up and to the left to release it.
5.
Insert the desired attachment. Push up and to the right to lock it into place.
6.
Raise the bowl.
Apuro recommend the following uses for each attachment:.
Spiral Dough hook
Heavy mixes
dough, pie pastry etc.
Suitable Gears: 1
Slow
3
Beater
Firm mixes
light pastry, cake/biscuit mix, icings,
fillings and mashed vegetables
Suitable Gears: 1, 2
Medium
Whisk
Light mixes
whipped cream, mayonnaise, egg
whites, pancakes and soufflés
Suitable Gears: 1, 2, 3
Fast
Layout of Controls
Gear lever
ON switch
OFF switch
ON button - Press to start the mixer.
OFF button - Press to stop the mixer. Twist clockwise to release and reset (GJ461 only).
GEAR LEVER - Use to adjust the speed of the mixer.
4
Telephone Helpline: 1300 225 960
Operation
Note: Ensure that these instructions have been read thoroughly and the operation of the
appliance is fully understood before use.
All personnel must be fully trained on the operation and safety precautions of the Planetary Mixer.
Mixing
WARNING: Always ensure the appliance is turned off before placing hands in the mixing
bowl.
1.
Open the safety guard.
2.
Fill the bowl.
3.
Select the desired speed and close the guard.
Note: Apuro recommend that you start with the slowest speed and increase the speed
gradually as necessary.
Ensure the safety guard is fully closed or the mixer will not work.
4.
Press the START button to begin mixing.
Note: If the appliance is straining to mix then turn the appliance Off and remove some
of the contents of the bowl before restarting.
Mixing Capacity
Model
Bowl
Volume
Max Flour
Max
Dough
GL190
10l
2kg
3.2kg
GL191
20l
5kg
8kg
GJ461
30l
7.5kg
11.3kg
Changing Mixing Speed
Note: ALWAYS stop the mixer before attempting to change the mixing speed.
With the appliance turned Off:
1.
Select the required gear using the gear change lever.
2.
Restart the appliance.
5
Overload Switch
The Overload switch is situated at the back of the machine
beside the cable entry. If the appliance becomes too hot the
Overload switch will stop the machine automatically. If this
happens:
1.
Turn Off the mixer.
2.
Reduce the load in the mixing bowl.
3.
Push the Overload switch back in to reset it.
4.
Allow the appliance to cool for 20 minutes.
Overload
switch
Note: In the event of a power cut the Overload switch will cut in to prevent the
appliance from restarting automatically when power is restored.
Note: Always disconnect the Planetary Mixer from the mains powers supply when not
in use.
Cleaning, Care & Maintenance
•
Always turn off the mixer and disconnect from the power supply before cleaning.
•
Use warm soapy water to clean the bowl and mixing attachments. Do not use abrasive cleaning
chemicals as these can leave harmful residues.
•
Clean the exterior of the appliance with a damp cloth.
•
Dry all parts thoroughly after cleaning.
•
Do not use jet/pressure washers to clean the appliance.
•
Clean the appliance regularly.
6
Telephone Helpline: 1300 225 960
Troubleshooting
If your Apuro appliance develops a fault, check the following table before making a call to the Helpline.
Fault
Probable Cause
The appliance is not
working
Action
The unit is not switched on
Check the unit is plugged in
correctly and switched on
The Stop button not released (GJ461) Turn button clockwise to release
Plug and lead are damaged
Call Apuro agent or qualified
Technician
Fuse in the plug has blown
Replace the fuse
Power supply
Check power supply
The overload switch has activated
See overload switch information in
the Operation section of this
manual
Safety Guard not closed
Close Safety Guard fully
Appliance not in gear
Put in gear
Bowl not fully raised
Ensure the Bowl lever is pushed
back fully
Bowl will not fit back in to
place
Bowl pins or surrounding area clogged Clean the appliance
with mix
The appliance is
overheating
The mixing bowl is overloaded
Turn off the appliance and empty
some of the contents
The appliance has been operating for
too long
Turn off the appliance and allow to
cool down for 30 minutes
Bowl or mixing attachment not
correctly fitted
Remove and refit bowl/mixing
attachment
Worn bearings/damaged gears
Call Apuro agent or qualified
Technician
The mixing attachment
fails to rotate properly
The belt has become loose
Call Apuro agent or qualified
Technician
Cannot select gear
Gearing cogs misaligned
Turn Off appliance and manually
turn the whisk attachment slightly.
Select the gear again.
The appliance is noisy
Technical Specifications
Model
Voltage
Power
Current
Dimensions
h x w x d mm
Weight
Bowl
Volume
GL190
230V 50Hz
550W
1.8A
610 x 395 x 395
38kg
10l
GL191
230V 50Hz
1100W
4.7A
794 x 555 x 558
112kg
20l
GJ461
230V 50Hz
1500W
6.5A
1142 x 579 × 611
170kg
30l
7
Electrical Wiring
The plug is to be connected to a suitable mains socket.
This appliance is wired as follows:
•
Live wire (coloured brown) to terminal marked L
•
Neutral wire (coloured blue) to terminal marked N
•
Earth wire (coloured green/yellow) to terminal marked E
This appliance must be earthed, using a dedicated earthing circuit.
If in doubt consult a qualified electrician.
Electrical isolation points must be kept clear of any obstructions. In the event of any emergency
disconnection being required they must be readily accessible.
Compliance
The WEEE logo on this product or its documentation indicates that the product must
not be disposed of as household waste. To help prevent possible harm to human
health and/or the environment, the product must be disposed of in an approved and
environmentally safe recycling process. For further information on how to dispose of
this product correctly, contact the product supplier, or the local authority responsible
for waste disposal in your area.
Apuro parts have undergone strict product testing in order to comply with regulatory
standards and specifications set by international, independent, and federal
authorities.
Apuro products have been approved to carry the following symbol:
All rights reserved. No part of these instructions may be produced or transmitted in any form or by any means, electronic,
mechanical, photocopying, recording or otherwise, without the prior written permission of Apuro.
Every effort is made to ensure all details are correct at the time of going to press, however, Apuro reserve the right to change
specifications without notice.
8
DECLARATION OF CONFORMITY
Equipment Type
Model
Planetary Mixer
GL190-A/GL191-A/GJ461-A
Serial Number
Year of Manufacture
Application of Council Directives(s)
C-TICK
AS/NZ 3820 Essential Safety Requirements for Low
Voltage Electrical Equipment
Standards
AS/NZS CISPR14.1:2013
IEC60335-2-64:2008 (Third Edition) +A1 in conjunction
with IEC60335-1:2010 (Fifth Edition)
Producers Name
Apuro
Producers Address
Nisbets Australia PTY Ltd
15 Badgally Road
Campbelltown
NSW 2567
Australia
I, the undersigned, hereby declare that the equipment specified above conforms to the above Directive(s) and Standard(s).
Date
06/03/2015
Signature
Full Name
Position
Richard Cromwell
Commercial Director
GL190_1_GJ461_Aus_A5_v1