1
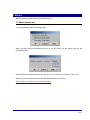
J. S. Software
AG Link User Manual
For
J. S. Software
May 16, 2003
Version 1.1
Submitted by:
Donna Hicks
CONFIDENTIALITY: The contents of this document are confidential and should not be disclosed or
discussed with any persons outside of J. S. Software.
DOCUMENT INFORMATION
Revision History
Date
Version
Author
Revision Summary
16-05-2003
1.0
Donna Hicks
Created Document
11-06-2003
1.1
Donna Hicks
Completed Document: Added download steps provided by Janet
Long
C:\Documents and Settings\Donna\My Documents\Documentation\Completed Manuals\AG Link User Document 01162004 .doc1
Page 1
TABLE OF CONTENTS
Purpose............................................................................................................................ 4
1 Weekly........................................................................................................................... 5
1.1 Weekly Downloads ......................................................................................................................5
2 Catalogue Updates....................................................................................................... 6
2.1 New Items....................................................................................................................................7
2.2 Changed Items ............................................................................................................................8
2.3 Deleted Items ..............................................................................................................................8
3 PA’s ............................................................................................................................... 9
3.1 Selection List ...............................................................................................................................9
3.2 Select Items...............................................................................................................................11
3.3 Process Items............................................................................................................................12
3.4 Changed PA’s............................................................................................................................13
4 Specials: Advertised.................................................................................................. 15
4.1 Print Items .................................................................................................................................15
4.2 Select Items...............................................................................................................................17
4.3 Process Items............................................................................................................................18
5 In-Store........................................................................................................................ 20
5.1 Print Items .................................................................................................................................20
5.2 Select Items...............................................................................................................................22
5.3 Process Items............................................................................................................................23
6 Custom In-Store ......................................................................................................... 25
6.1 Print Items .................................................................................................................................25
6.2 Select Items...............................................................................................................................25
6.3 Process Items............................................................................................................................25
7 Price Changes ............................................................................................................ 26
7.1 Print Items .................................................................................................................................26
7.2 Process Items............................................................................................................................28
7.3 Print EDLC Items.......................................................................................................................30
7.3.1 Price Changes .................................................................................................................................30
7.3.2 Catalogue ........................................................................................................................................31
8 Catalogue.................................................................................................................... 33
8.1 Selection List .............................................................................................................................33
8.2 Select Items...............................................................................................................................36
8.3 Process Items............................................................................................................................38
8.4 UPC Exceptions ........................................................................................................................39
C:\Documents and Settings\Donna\My Documents\Documentation\Completed Manuals\AG Link User Document 01162004 .doc2
Page 2
8.5 Catalogue Download .................................................................................................................39
8.6 Purge Catalogue........................................................................................................................39
8.7 Update POS File........................................................................................................................40
9 Families....................................................................................................................... 42
9.1 Families Maintenance................................................................................................................42
9.2 Families Download ....................................................................................................................44
9.3 Initial Setup................................................................................................................................44
10 System ...................................................................................................................... 45
10.1 AG Link Options ......................................................................................................................45
10.1.1 Download Options .........................................................................................................................45
10.1.2 Update POS ..................................................................................................................................46
10.1.3 Promotional Allowance Options.....................................................................................................46
10.1.4 Special Description........................................................................................................................47
10.1.5 POS Default Options .....................................................................................................................48
10.1.6 Bar Code Options ..........................................................................................................................48
10.1.7 AG Link Version.............................................................................................................................49
10.2 Passwords ...............................................................................................................................49
11 Appendix I: AG Link Download Steps ................................................................... 50
12 Within AG Link ......................................................................................................... 51
12.1 1. Weekly Download ...............................................................................................................51
12.2 Catalogue Updates ..................................................................................................................52
12.3 PAs ..........................................................................................................................................53
12.4 (a.) Specials – Advertised........................................................................................................54
13.4 (b.) Specials - In Store .............................................................................................................54
12.4 (c.) Specials – Custom In Store ...............................................................................................54
12.5 Price Changes .........................................................................................................................55
12.6 UPC Exceptions ......................................................................................................................56
13 Within POINT OF SALE............................................................................................ 57
13.1 Updated Items .........................................................................................................................57
13.2 Price Changes .........................................................................................................................57
13.3 Specials ...................................................................................................................................58
13.4 Print Shelf Talkers ...................................................................................................................59
13.5 Print Shelf Labels ....................................................................................................................62
13.6 Ad ............................................................................................................................................64
C:\Documents and Settings\Donna\My Documents\Documentation\Completed Manuals\AG Link User Document 01162004 .doc3
Page 3
PURPOSE
To provide documentation on how to use the AG Link software.
C:\Documents and Settings\Donna\My Documents\Documentation\Completed Manuals\AG Link User Document 01162004 .doc4
Page 4
1 WEEKLY
Will download the weekly files from Associated Grocers
1.1 Weekly Downloads
You will be prompted with the following screen:
When you select Receive Download and click on the OK button, you will specify how you will
download the files:
Select Modem to download the files by modem, or Drive A or B if the files are sent by disk or CD.
When you select Process Download, the downloaded files will be processed.
See Appendix I for complete AG Link Download Steps
C:\Documents and Settings\Donna\My Documents\Documentation\Completed Manuals\AG Link User Document 01162004 .doc5
Page 5
2 CATALOGUE UPDATES
Catalogue Updates include items that will be added to the previous catalogue. Each of the selections
in this area will print reports to be reviewed.
You will be prompted with the Print Setup box where you can indicate if you wish to print the report.
Click on OK to print a preview of the report:
C:\Documents and Settings\Donna\My Documents\Documentation\Completed Manuals\AG Link User Document 01162004 .doc6
Page 6
2.1 New Items
The following is a screen print of the print preview for New Items:
At this point, you can either print the report by selecting the File menu and choose Print or by clicking
on the printer icon. You can exit out by selecting the File menu and choose Exit.
C:\Documents and Settings\Donna\My Documents\Documentation\Completed Manuals\AG Link User Document 01162004 .doc7
Page 7
2.2 Changed Items
The following is a screen print of the print preview for Changed Items:
At this point, you can either print the report by selecting the File menu and choose Print or by clicking
on the printer icon. You can exit out by selecting the File menu and choose Exit.
2.3 Deleted Items
Once the print preview of the report is displayed for Deleted Items, you can either print the report by
selecting the File menu and choose Print or by clicking on the printer icon. You can exit out by
selecting the File menu and choose Exit.
C:\Documents and Settings\Donna\My Documents\Documentation\Completed Manuals\AG Link User Document 01162004 .doc8
Page 8
3 PA’S
Within this area, Promotional Allowance items can be listed and then selected.
3.1 Selection List
You can create a selection list by entering in selected criteria. All Items includes both Current and
New Items in the Inventory Maintenance, where as Current Items will base the selection list only on
what is currently in the Inventory Maintenance. New Items will base the selection list only on items
that are in the catalogue and not in the Inventor Maintenance.
You then select between All PAs or New PAs. Once you have selected the specific Item selection,
you can then choose between Key and Selected Families. A Starting Family and Ending Family
number is required. A list of the Family numbers can be created by clicking on the button with the 3
dots, or by clicking F6 when you are in the appropriate field.
C:\Documents and Settings\Donna\My Documents\Documentation\Completed Manuals\AG Link User Document 01162004 .doc9
Page 9
Enter in an Active Date and click on OK. You will be prompted with the Print Setup box:
Click on OK to print a preview of the Selection List:
C:\Documents and Settings\Donna\My Documents\Documentation\Completed Manuals\AG Link User Document 01162004 .doc10
Page 10
At this point, you can either print the report by selecting the File menu and choose Print or by clicking
on the printer icon. You can exit out by selecting the File menu and choose Exit. You will be
prompted to save the items for Selection:
3.2 Select Items
Within this list, you will select which items you’d like to be updated in to POS. Select the items using
the right arrow button, and deselect items using the left arrow:
Click on the Find menu button to find an item by Item Code:
C:\Documents and Settings\Donna\My Documents\Documentation\Completed Manuals\AG Link User Document 01162004 .doc11
Page 11
The Selection List can be deleted by clicking on the Delete menu button, or by CTRL F12. You will
be prompted to confirm deletion of the list:
3.3 Process Items
Specify the Date Options for Processing the items, including entering the Starting and Ending Dates:
C:\Documents and Settings\Donna\My Documents\Documentation\Completed Manuals\AG Link User Document 01162004 .doc12
Page 12
Click on OK to display the Print Setup Screen. Once you click on OK at this screen, the Selected
Promotional Allowances Printout will automatically print for you to review. You will then be prompted
to either Cancel or Continue with the process:
When the items are processed, they will go into Update Specials in POS.
3.4 Changed PA’s
A report will be printed for review, of all PA’s that have changed in this current download. You will be
prompted with the Print Setup box:
Click on OK to print a preview of the Selection List:
C:\Documents and Settings\Donna\My Documents\Documentation\Completed Manuals\AG Link User Document 01162004 .doc13
Page 13
At this point, you can either print the report by selecting the File menu and choose Print or by clicking
on the printer icon. You can exit out by selecting the File menu and choose Exit.
C:\Documents and Settings\Donna\My Documents\Documentation\Completed Manuals\AG Link User Document 01162004 .doc14
Page 14
4 SPECIALS: ADVERTISED
4.1 Print Items
Advertised Specials reports can be printed through the following options:
Once you have chosen the Print Option and click on OK, you will be prompted with the Print Setup
box:
C:\Documents and Settings\Donna\My Documents\Documentation\Completed Manuals\AG Link User Document 01162004 .doc15
Page 15
Click on OK to print a preview of the Weekly Ad Specials Printout:
At this point, you can either print the report by selecting the File menu and choose Print or by clicking
on the printer icon. You can exit out by selecting the File menu and choose Exit.
C:\Documents and Settings\Donna\My Documents\Documentation\Completed Manuals\AG Link User Document 01162004 .doc16
Page 16
4.2 Select Items
Within this list, you will select which items you’d like to be updated in to POS. Select the items using
the right arrow button, and deselect items using the left arrow:
Click on the Find menu button to find an item by Item Code:
C:\Documents and Settings\Donna\My Documents\Documentation\Completed Manuals\AG Link User Document 01162004 .doc17
Page 17
4.3 Process Items
Specify the Week Number for the Selected Weekly Ad Specials (obtained from the Ad Requisition
that is sent every week), and enter in a comment if applicable:
C:\Documents and Settings\Donna\My Documents\Documentation\Completed Manuals\AG Link User Document 01162004 .doc18
Page 18
Once you click on the OK button, you will be prompted with the Print Setup box:
Clicking on OK will automatically print the printout, then prompt you to Cancel or Continue with the
process:
When the items are processed, they will go into Update Specials in POS.
C:\Documents and Settings\Donna\My Documents\Documentation\Completed Manuals\AG Link User Document 01162004 .doc19
Page 19
5 IN-STORE
5.1 Print Items
In Store Specials reports can be printed through the following options:
Once you have chosen the Print Option and click on OK, you will be prompted with the Print Setup
box:
C:\Documents and Settings\Donna\My Documents\Documentation\Completed Manuals\AG Link User Document 01162004 .doc20
Page 20
Click on OK to print a preview of the In Store Specials Printout:
At this point, you can either print the report by selecting the File menu and choose Print or by clicking
on the printer icon. You can exit out by selecting the File menu and choose Exit.
C:\Documents and Settings\Donna\My Documents\Documentation\Completed Manuals\AG Link User Document 01162004 .doc21
Page 21
5.2 Select Items
Within this list, you will select which items you’d like to be updated in to POS. Select the items using
the right arrow button, and deselect items using the left arrow:
Click on the Find menu button to find an item by Item Code:
C:\Documents and Settings\Donna\My Documents\Documentation\Completed Manuals\AG Link User Document 01162004 .doc22
Page 22
5.3 Process Items
Specify the Week Number for the Selected In Store Specials, and enter in a comment if applicable:
Once you click on the OK button, you will be prompted with the Print Setup box:
C:\Documents and Settings\Donna\My Documents\Documentation\Completed Manuals\AG Link User Document 01162004 .doc23
Page 23
Clicking on OK will automatically print the printout, then prompt you to Cancel or Continue with the
process:
When the items are processed, they will go into Update Specials in POS.
C:\Documents and Settings\Donna\My Documents\Documentation\Completed Manuals\AG Link User Document 01162004 .doc24
Page 24
6 CUSTOM IN-STORE
6.1 Print Items
Custom In Store reports will be printed from this area. If there are no Custom In Store Specials, you
will be prompted with the following screen:
6.2 Select Items
Within this list, you will select which items you’d like to be updated in to POS. If there are no Custom
In Store Specials, you will be prompted with the following screen:
6.3 Process Items
If there are no Custom In Store Specials selected to process, you will be prompted with the following
screen:
C:\Documents and Settings\Donna\My Documents\Documentation\Completed Manuals\AG Link User Document 01162004 .doc25
Page 25
7 PRICE CHANGES
7.1 Print Items
Price Change reports can be printed through the following options:
Once you have chosen the Print Option and click on OK, you will be prompted with the Print Setup
box:
C:\Documents and Settings\Donna\My Documents\Documentation\Completed Manuals\AG Link User Document 01162004 .doc26
Page 26
Click on OK to print a preview of the Price Change Printout:
At this point, you can either print the report by selecting the File menu and choose Print or by clicking
on the printer icon. You can exit out by selecting the File menu and choose Exit.
C:\Documents and Settings\Donna\My Documents\Documentation\Completed Manuals\AG Link User Document 01162004 .doc27
Page 27
7.2 Process Items
Processing Price Changes can be completed through the following options:
Once you have chosen the Print Option and click on OK, you will be prompted with the Print Setup
box:
C:\Documents and Settings\Donna\My Documents\Documentation\Completed Manuals\AG Link User Document 01162004 .doc28
Page 28
Click on OK to print a preview of the Price Change Printout:
At this point, you can review the price changes and either print the report by selecting the File menu
and choose Print or by clicking on the printer icon. You can exit out by selecting the File menu and
choose Exit. You will then be prompted to either Cancel or Continue with the process:
C:\Documents and Settings\Donna\My Documents\Documentation\Completed Manuals\AG Link User Document 01162004 .doc29
Page 29
When the items are processed, they will go into Update Specials in POS.
7.3 Print EDLC Items
7.3.1 Price Changes
If there are no Every Day Low Cost item price changes to print, you will get the message:
C:\Documents and Settings\Donna\My Documents\Documentation\Completed Manuals\AG Link User Document 01162004 .doc30
Page 30
7.3.2 Catalogue
Once you have chosen the Print Option for the Every Day Low Cost Items Catalogue and click on
OK, you will be prompted with the Print Setup box:
At this point, you can review the Every Day Low Cost Catalogue Printout and either print the report by
selecting the File menu and choose Print or by clicking on the printer icon. You can exit out by
selecting the File menu and choose Exit:
C:\Documents and Settings\Donna\My Documents\Documentation\Completed Manuals\AG Link User Document 01162004 .doc31
Page 31
C:\Documents and Settings\Donna\My Documents\Documentation\Completed Manuals\AG Link User Document 01162004 .doc32
Page 32
8 CATALOGUE
8.1 Selection List
You can create a selection list by entering in selected criteria. All Items includes both Current and
New Items in the Inventory Maintenance, where as Current Items will base the selection list only on
what is currently in the Inventory Maintenance. New Items will base the selection list only on items
that are in the catalogue and not in the Inventor Maintenance.
Once you have selected the specific Item selection, you can then choose between Key and Selected
Families. A Starting Family and Ending Family number is required. A list of the Family numbers can
be created by clicking on the button with the 3 dots, or by clicking F6 when you are in the appropriate
field.
C:\Documents and Settings\Donna\My Documents\Documentation\Completed Manuals\AG Link User Document 01162004 .doc33
Page 33
Once you click on OK, you will be prompted with the Print Setup box:
Click on OK to print a preview of the Selection List:
C:\Documents and Settings\Donna\My Documents\Documentation\Completed Manuals\AG Link User Document 01162004 .doc34
Page 34
Once you have confirmed the selection, you can either print the report by selecting the File menu and
choose Print, or you can exit out by selecting the File menu and choose Exit. You will then be
prompted to save the selection list for selection:
Once a Selection List has been saved, each time you go in to Catalogue > Selection List, you will be
prompted to add to the current list, or replace the current list:
C:\Documents and Settings\Donna\My Documents\Documentation\Completed Manuals\AG Link User Document 01162004 .doc35
Page 35
8.2 Select Items
Within this list, you will select which items you’d like to be updated in to POS. Select the items using
the right arrow button, and deselect items using the left arrow:
Click on the Find menu button to find an item by Item Code:
C:\Documents and Settings\Donna\My Documents\Documentation\Completed Manuals\AG Link User Document 01162004 .doc36
Page 36
Items from the catalogue can be added to the Selection List by clicking on the Insert button:
Items may be added by Item Code, UPC, Family, Description or a Slow Search.
The Selection List can be deleted by clicking on the Delete menu button, or by CTRL F12. You will
be prompted to confirm deletion of the list:
C:\Documents and Settings\Donna\My Documents\Documentation\Completed Manuals\AG Link User Document 01162004 .doc37
Page 37
8.3 Process Items
When processing the items you have selected, you will be prompted with a Print Setup box:
Click on OK to print the Selected Catalogue Items Printout automatically. It will not create a print
preview on the computer screen. After printing, you will be prompted to Cancel or Continue with the
process:
Continuing with the Process will move the selected items in to Updated Items in POS.
C:\Documents and Settings\Donna\My Documents\Documentation\Completed Manuals\AG Link User Document 01162004 .doc38
Page 38
8.4 UPC Exceptions
Provides a list of items that have the same Item code, but different UPC Codes. An item that appears
on this list will usually have an incorrect or duplicate UPC code from the wholesaler, as UPC’s in the
store are the correct ones as that is what is on the product. If there is no list “There are no UPC
Exceptions” “Press RETURN to continue”. Press Enter and you will be returned to the AG Link
Menu.
8.5 Catalogue Download
To download the AG Catalogue, specify the source you wish to use:
Follow the prompts provided.
8.6 Purge Catalogue
This function will purge deleted Catalogue Items from the Catalogue. AG will send the deleted items
during the download process. This procedure is a maintenance procedure and should be done
monthly. You will be prompted to confirm purging the catalogue:
C:\Documents and Settings\Donna\My Documents\Documentation\Completed Manuals\AG Link User Document 01162004 .doc39
Page 39
8.7 Update POS File
The POS Inventory Maintenance file can be updated through the Update POS File selection:
A list of the Update By selections can be created by clicking on the button with the 3 dots, or by
clicking F6 when you are in the Update By field. The update can be created by the following
selections:
C:\Documents and Settings\Donna\My Documents\Documentation\Completed Manuals\AG Link User Document 01162004 .doc40
Page 40
Enter in the Starting and Ending numbers corresponding with the Update By criteria:
Select the Update Options from the list. These will be the items that will be updated in the POS file.
Once you select Retail Price, the Retail Update Options will become enabled for selection. Only
items in the POS file with the Pricing Type equal to the Retail Update Option will be updated, once a
Retail Update Option is selected.
When the Update Options have been selected, click on the OK button. You will be prompted to start
the Update, which will move the selected items in to Updated Items in POS:
C:\Documents and Settings\Donna\My Documents\Documentation\Completed Manuals\AG Link User Document 01162004 .doc41
Page 41
9 FAMILIES
9.1 Families Maintenance
Family groups will be created for grouping in POS Report Codes. The Report Codes are used for
categorizing items in more detail than what you have programmed under subdepartments:
A list of the current Family Numbers can be created by clicking on the button with the 3 dots, or by
clicking F6 when you are in Family Number field.
To add a new Family, enter in the new Family Number, Family Name and Group Number. The Group
Name should automatically populate based on the Group Number that was selected.
Enter a Subdepartment number. A list of the current Subdepartments can be created by clicking on
the button with the 3 dots, or by clicking F6 when you are in Subdepartment field. If you get a
message on the screen “The Subdepartment should be entered using Subdepartment Maintenance
before continuing” “Press RETURN to continue”. This means that the Group Number is new to your
system and has not been assigned a Subdepartment number. You will need to assign a valid
Subdepartment number in order to be processed in POS Inventory Item File. A list of the current
C:\Documents and Settings\Donna\My Documents\Documentation\Completed Manuals\AG Link User Document 01162004 .doc42
Page 42
Subdepartment numbers can be created by clicking on the button with the 3 dots, or by clicking F6
when you are in Subdepartment field.
Enter a Location number. A list of the current Locations can be created by clicking on the button with
the 3 dots, or by clicking F6 when you are in Locations field.
Indicate whether the Family will be a Key Family. This will identify only those Groups that you are
interested in on a regular basis and is used for reporting Catalogue Items. A Y (Yes) or N (No) input
is required.
Indicate whether you want this Family to follow the Subdepartment Settings for Till Flags. A Y (Yes)
or N (No) input is required. If Y is selected, the till flags will automatically default to the
subdepartment till flags. If N is selected, the Till Flags indicated on this tab will be defaulted to for this
Family:
C:\Documents and Settings\Donna\My Documents\Documentation\Completed Manuals\AG Link User Document 01162004 .doc43
Page 43
9.2 Families Download
9.3 Initial Setup
The Initial Family Setup is pulled automatically from the Catalogue:
C:\Documents and Settings\Donna\My Documents\Documentation\Completed Manuals\AG Link User Document 01162004 .doc44
Page 44
10 SYSTEM
10.1 AG Link Options
The AG Link Options will allow the user to define how the AG Link data is managed in the AG Link
and Point Of Sale modules.
10.1.1 Download Options
Customer Number:
The customer ID# needed for the download.
Automatic Download Day:
Enter from the selection list the assigned day by AG should the
download dial-up during the Overnight Update in the POS. Enter a “0” if the call is to be placed by
the user from the menu, when the user requires the download files.
Link to POS:
POS module
This option should default to Y (Yes) to enable AG Link to link to the
C:\Documents and Settings\Donna\My Documents\Documentation\Completed Manuals\AG Link User Document 01162004 .doc45
Page 45
10.1.2 Update POS
Indicate, by selecting Y (Yes) or N (N), which POS fields you wish to be updated through AG Link
download.
Once you have entered all applicable options within screen 1, Click on OK, or Press Enter until
options are saved, and a second screen of the AG Link Link Options will be displayed for data entry.
10.1.3 Promotional Allowance Options
Auto-Update NEW PAs
Indicate by Y (Y) or N (N) if you would like the download to
automatically select and transfer the New PA’s to Updated Items in the POS.
Special Type
Indicate the default Special Type.
Shelf Talker Type
Indicate the default Shelf Talker Type.
Special Description
Enter a unique Special Description.
Automatically Select
Items, or 2 – New Items.
Click on the down arrow to choose between 0 – No Items, 1 – Active
Recalculate Retail
recalculated.
Indicate by Y (Y) or N (N) if you would like the Retail to be
Special Type
Indicate the default Special Type.
C:\Documents and Settings\Donna\My Documents\Documentation\Completed Manuals\AG Link User Document 01162004 .doc46
Page 46
Shelf Talker Type
Indicate the default Shelf Talker Type.
Once you have entered all applicable options within screen 1, Click on OK, or Press Enter until
options are saved, and a second screen of the AG Link Link Options will be displayed for data entry.
10.1.4 Special Description
Special Description
Enter a unique Special Description.
Automatically Select
Click on the down arrow to select one of the following: 0 – No Items,
1 – Active Items, or 2 – New Items.
Recalculate Retail
recalculated.
Indicate by Y (Y) or N (N) if you would like the Retail to be
Special Type
Indicate the default Special Type.
Shelf Talker Type
Indicate the default Shelf Talker Type.
Once you have entered all applicable options within screen 1, Click on OK, or Press Enter until
options are saved, and a second screen of the AG Link Link Options will be displayed for data entry.
C:\Documents and Settings\Donna\My Documents\Documentation\Completed Manuals\AG Link User Document 01162004 .doc47
Page 47
10.1.5 POS Default Options
Vendor Number
Indicate the default Vendor Number.
Subdepartment
Indicate the default Subdepartment.
Location Code
Indicate the default Location Code.
Pricing Type
Indicate the default Pricing Type. Click on the down arrow to select
from one of the following: 0 – Fixed Gross, 1 – Fixed Retail or 2 – Suggested Retail.
Sign Comment
Enter a default Sign Comment.
Print All Mixmatch
Indicate by Y (Y) or N (N) if you would like to print All Mixmatch.
10.1.6 Bar Code Options
Bar Code Type
from the available list.
Indicate the default bar Code type. Click on the down arrow to select
Item Code Format
Indicate the Item Code Format.
C:\Documents and Settings\Donna\My Documents\Documentation\Completed Manuals\AG Link User Document 01162004 .doc48
Page 48
10.1.7 AG Link Version
Select from the drop down arrow, which AG Link version you are on. 1 – AG indicates that you are
still using the 6 digit AG Item Code. 2 – Buy Low indicates that you are using the 7 digit Buy Low
Item Code.
Once you have entered all applicable options within screen 1, Click on OK, or Press Enter until
options are saved. This will exit out of the AG Link Options.
10.2 Passwords
To utilize the Password capability in AG Link, the password protection must be enables using System
Options.
C:\Documents and Settings\Donna\My Documents\Documentation\Completed Manuals\AG Link User Document 01162004 .doc49
Page 49
11 APPENDIX I: AG LINK DOWNLOAD STEPS
C:\Documents and Settings\Donna\My Documents\Documentation\Completed Manuals\AG Link User Document 01162004 .doc50
Page 50
12 WITHIN AG LINK
12.1 1. Weekly Download
o
o
o
o
From the J.S. Software main menu, go to INVENTORY > AG Link.
From the AG Link main menu, go to Weekly > Weekly Download.
Check to ensure that the date above Weekly Download is the current date.
Select Receive Download and click on OK:
o
Select the source and click on OK:
It will then prepare to call AG. Once it has connected a graph will appear with 1 - 100% on it.
o
Once this has been completed it will then process Item Changes, Price Changes, Promotional
Allowance and Advertised Specials.
o
You will then be returned to your AG Link Main Menu.
C:\Documents and Settings\Donna\My Documents\Documentation\Completed Manuals\AG Link User Document 01162004 .doc51
Page 51
12.2 Catalogue Updates
o
o
From the AG Link main menu, go to Weekly > Weekly Download.
There is no process in this routine. Changed Items you carry are sent directly to your Point of
Sale in Updated Items. Any items that are being deleted from the warehouse will go into
Updated Items. These items will end up with “Delete” on the label. The New Items are updated
to the Catalogue.
o
Reports to be pulled are:
New Items
Changed Items
Deleted Items
o
o
Once the print preview of the report is displayed, you can either print the report by selecting
the File menu and choose Print or by clicking on the printer icon.
You can exit out by selecting the File menu and choose Exit.
C:\Documents and Settings\Donna\My Documents\Documentation\Completed Manuals\AG Link User Document 01162004 .doc52
Page 52
12.3 PAs
Within this area, Promotional Allowance items can be listed and then selected.
o
o
o
o
o
From the AG Link main menu, go to PAs > Selection List.
Enter in the criteria to build the selection list.
Click on OK. You will be prompted with the Print Setup box.
Click on OK to print a preview of the Selection List.
At this point, you can either print the report by selecting the File menu and choose Print or by
clicking on the printer icon. You can exit out by selecting the File menu and choose Exit.
You will be prompted to save the items for Selection:
o
o
o
From the AG Link main menu, go to PAs > Selection Items.
Select items by using the right arrow button, and deselect items using the left arrow.
Once you have selected the items, you can then exit by clicking F4.
o
o
o
From the AG Link main menu, go to PAs > Process Items.
Specify the Date Options, including a Starting and Ending Date.
Click on OK to display the Print Setup Screen. Once you click on OK at this screen, the
Selected Promotional Allowances Printout will automatically print. You will then be prompted
to Cancel or Continue with the process:
o
Once the processing has completed, you will return to the AG Link > PAs menu.
C:\Documents and Settings\Donna\My Documents\Documentation\Completed Manuals\AG Link User Document 01162004 .doc53
Page 53
12.4 (a.) Specials – Advertised
There are three different Specials you will be working with under Specials: Advertised, In-Store and
Custom In-Store.
o
o
From the AG Link main menu, go to Specials > Advertised > Select Items.
If you are set up for your system to automatically select the items on sale you will have a > sign
beside the items that are active in your store. At this time you can select items that have a “*”
beside them, but are not active in your store, by using the right arrow button, and deselect
items using the left arrow. Once you have selected “*”(new items) you can then exit by
clicking F4. Any new item that was selected will end up in Updated Items in Point of Sales.
o
o
o
o
o
From the AG Link main menu, go to Specials > Advertised > Process Items.
Enter the Week # obtained from the Ad Requisition sent weekly.
Enter the Date the Sale Starts (cost date).
Enter the Date the Sale Ends (cost date).
Click on OK to display the Print Setup Screen. Once you click on OK at this screen, the
Selected Specials report, which includes bar codes for ordering specials, will automatically
print. You will then be prompted to Cancel or Continue with the process:
o
The only time you would cancel this process is if you wish to exit the program.
Once the processing has completed, you will return to the AG Link > Specials menu.
13.4 (b.) Specials - In Store
o
o
From the AG Link main menu, go to Specials > In Store > Select Items.
Follow the same procedure as Specials – Advertised.
o
o
From the AG Link main menu, go to Specials > In Store > Process Items.
Follow the same procedure as Specials – Advertised.
12.4 (c.) Specials – Custom In Store
o
o
From the AG Link main menu, go to Specials > Custom In Store > Select Items.
Follow the same procedure as Specials – Advertised.
o
o
From the AG Link main menu, go to Specials > Custom In Store > Process Items.
Follow the same procedure as Specials – Advertised.
C:\Documents and Settings\Donna\My Documents\Documentation\Completed Manuals\AG Link User Document 01162004 .doc54
Page 54
12.5 Price Changes
o
o
From the AG Link main menu, go to Price Changes > Process Items.
You will be prompted to select a Process Option:
Associated Grocers suggest that Grocery Items be selected as Produce and Meat should be
keyed from the invoice as those prices change daily.
o
o
o
o
o
Click on OK to display the Print Setup Screen. Once you click on OK at this screen, a print
preview of the Price Change report will be displayed, showing the old and new cost, as well
as the retail amount.
At this point, you can either print the report by selecting the File menu and choose Print or by
clicking on the printer icon.
You can exit out by selecting the File menu and choose Exit.
You will then be prompted to Cancel or Continue with the process:
Once the Price Changes have been processed, items having AG’s Item Code are put into
Price Changes in Point of Sales
C:\Documents and Settings\Donna\My Documents\Documentation\Completed Manuals\AG Link User Document 01162004 .doc55
Page 55
12.6 UPC Exceptions
o
o
o
o
o
o
o
From the AG Link main menu, go to Catalogue > UPC Exceptions.
The Print Setup Screen will be displayed. Once you click on OK at this screen, a print preview of
the UPC Exception report will be displayed.
At this point, you can either print the report by selecting the File menu and choose Print or by
clicking on the printer icon.
You can exit out by selecting the File menu and choose Exit.
This routine provides a list of items that have the same Item code, but different UPC Codes.
An item that appears on this list will usually have an incorrect or duplicate UPC code from the
wholesaler, as UPC’s in the store are the correct ones as that is what is on the product.
If there is no list “There are no UPC Exceptions” “Press RETURN to continue”.
Press Enter and you will be returned to the AG Link Menu.
C:\Documents and Settings\Donna\My Documents\Documentation\Completed Manuals\AG Link User Document 01162004 .doc56
Page 56
13 WITHIN POINT OF SALE
•
•
If any changes need to be done, or a print out is needed for any reports this
should be done before posting.
13.1 Updated Items
o
o
o
From the J.S. Software main menu, go to INVENTORY > POINT OF SALE > MAINTENANCE >
UPDATED ITEMS. This is where your Changed Items are now sitting waiting for you to activate.
Click on the Print button to view a print preview of all the items in Updated Items.
At this point, you can either print the report by selecting the File menu and choose Print or by
clicking on the printer icon.
You can exit out by selecting the File menu and choose Exit.
o
To Activate the Updated Items, click on the Options menu button and choose Activate
Updated items.
o
When you click on OK, you will be prompted to activate the updated items:
o
Once the Updated Items have been activated, you will return to the Updated Item Maintenance
screen.
To exit, click on the Exit button, or use the F4 button.
13.2 Price Changes
o
o
o
o
o
o
o
o
o
From the J.S. Software main menu, go to INVENTORY > POINT OF SALE > MAINTENANCE >
Price Changes.
Click on the Options menu button and choose Activate Price Change Batch.
Enter in today’s date as the Effective Date.
When you click on OK, you will be prompted to activate the price changes.
When answering Yes, once the price changes have been activated, you will be prompted with
the Print Setup box.
Click on OK to preview the Edit List.
You can either print the report by selecting the File menu and choose Print or by clicking on
the printer icon.
You can exit out by selecting the File menu and choose Exit.
When the Price Changes have been posted, you will be returned to the Price Change screen.
If a label type was indicated for the item, the Price Change will sit in the Shelf Labels until
ready to print.
C:\Documents and Settings\Donna\My Documents\Documentation\Completed Manuals\AG Link User Document 01162004 .doc57
Page 57
13.3 Specials
o
o
o
o
o
o
o
o
o
o
o
From the J.S. Software main menu, go to INVENTORY > POINT OF SALE > SPECIALS
>SPECIALS ENTRY.
Click on the Options menu button.
Select Post Specials Batch and click on the OK button.
Indicate the Special Type by choosing a selection from the drop down box:
Enter in the Price Date Range, which should be the same dates as on your processed report
from AG Link.
Click on the OK button. You will be prompted to post the batch:
When you click on OK, the specials batch will post. When that has completed, you will
prompted with the Print Setup Screen. Once you click on OK at this screen, a print preview of
the Updated Specials Printout will be displayed.
At this point, you can either print the report by selecting the File menu and choose Print or by
clicking on the printer icon. You don’t have to print this report as you should have the one
from AG Link
You can exit out by selecting the File menu and choose Exit.
You will be returned to the Specials Entry Screen
Once done posting your specials, your signs will be ready to print.
* The same steps above are to be used to post your In-Stores and Custom In-Store Specials.
C:\Documents and Settings\Donna\My Documents\Documentation\Completed Manuals\AG Link User Document 01162004 .doc58
Page 58
13.4 Print Shelf Talkers
o
o
o
o
o
From the J.S. Software main menu, go to INVENTORY > POINT OF SALE >
LABELS/TALKERS > SHELF TALKERS.
To print an edit list of the talkers currently in the batch, click on the Print menu button. You will
be prompted to choose the type of Shelf Talker:
Once you have chosen the type, click on OK and you will be prompted with the Print Setup
Screen. Once you click on OK at this screen, a print preview of the Shelf Talker Edit List will be
displayed.
At this point, you can either print the edit list by selecting the File menu and choose Print or
by clicking on the printer icon.
You can exit out by selecting the File menu and choose Exit.
o
From the J.S. Software main menu, go to INVENTORY > POINT OF SALE >
LABELS/TALKERS > CUSTOM PRINTING > PRINT CUSTOM TALKERS.
o
Choose the Talker Name and Special Type from the lists:
C:\Documents and Settings\Donna\My Documents\Documentation\Completed Manuals\AG Link User Document 01162004 .doc59
Page 59
o
Enter in the Date the sale ends. You can enter through this area to select ALL dates.
o
Enter the starting Talker Position number:
o
Select the Sort Options from the pull down list:
o
Put proper sign stock in the printer and click on OK.
C:\Documents and Settings\Donna\My Documents\Documentation\Completed Manuals\AG Link User Document 01162004 .doc60
Page 60
o
You will prompted with the Print Setup Screen. Once you click on OK at this screen, the signs
will print. Once they have completed printing, you will be taken to a Talker Options screen where
you can Exit, Reprint or Clear the Talkers:
o
o
Clear the Talkers only if the signs are OK.
This routine must be completed for each type of Specials to get the signage.
C:\Documents and Settings\Donna\My Documents\Documentation\Completed Manuals\AG Link User Document 01162004 .doc61
Page 61
13.5 Print Shelf Labels
o
o
o
o
o
From the J.S. Software main menu, go to INVENTORY > POINT OF SALE >
LABELS/TALKERS > SHELF LABELS.
To print an edit list of labels currently in the batch, click on the Print menu button. You will be
prompted to choose the type of Shelf Label:
Once you have chosen the type, click on OK and you will be prompted with the Print Setup
Screen. Once you click on OK at this screen, a print preview of the Shelf Talker Edit List will be
displayed.
At this point, you can either print the edit list by selecting the File menu and choose Print or
by clicking on the printer icon.
You can exit out by selecting the File menu and choose Exit.
o
From the J.S. Software main menu, go to INVENTORY > POINT OF SALE >
LABELS/TALKERS > CUSTOM PRINTING > PRINT CUSTOM LABELS.
o
Choose the Label Name from the list:
C:\Documents and Settings\Donna\My Documents\Documentation\Completed Manuals\AG Link User Document 01162004 .doc62
Page 62
o
Enter the Starting Label Position:
o
Select the Sort Options from the pull down list:
o
o
Put proper Labels in the printer and click on OK.
You will prompted with the Print Setup Screen. Once you click on OK at this screen, the signs
will print. Once they have completed printing, you will be taken to a Label Options screen where
you can Exit, Reprint or Clear the Labels:
C:\Documents and Settings\Donna\My Documents\Documentation\Completed Manuals\AG Link User Document 01162004 .doc63
Page 63
13.6 Ad
*Remember that the Meat, Produce and drop shipments that are on Ad, need to
be entered into the computer with the sale prices.
C:\Documents and Settings\Donna\My Documents\Documentation\Completed Manuals\AG Link User Document 01162004 .doc64
Page 64