Transcript
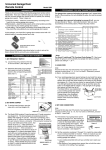
PROGRAMMING YOUR NEW TRANSMITTER FOR CHAMBERLAIN® , SEARS® (made by Chamberlain® only), LIFT-MASTER® ,
WAYNE DALTON® or MASTER MECHANIC® OPERATORS (390 MHz)
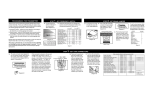
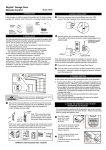
3. Use a pen to set the switches
to '+' (positive), '0' (middle),
'-' (negative) to match their
corresponding positions of
your existing transmitter or
receiver.
4. Test the transmitter and then
close the cover.
2. For code setting :
Open your existing transmitter,
or the cover on receiver located
on your operator and follow the
steps corresponding to your
brand of garage door opener.
Then re-close the cover.
+1
2
3
4
5
6
7
8
9
+
WARNING
Batteries are included with transmitter,
to replace :
If this transmitter tirggers other
garage doors in your
neighbourhood, change all your
transmitters and receiver to a
new code setting.
+
If your existing transmitter has an 8 position DIP switch, set the
first 8 switches of this
new transmitter to match
the switch settings of
your existing transmitter.
Then, make sure you set
the last switch (position
9) to '0' (center position)
on your new transmitter.
Note - "LEARN CODE'
5.
If your transmitter / receiver does not
have a DIP switch, that means it can
"LEARN" new code settings. Set your
new transmitter to any code combination. Then, simulttaneously activate
both the transmitter button and the
"learn" button on the receiver, for approximately two seconds.The receiver indicator light will flash, verifying that the
new code set1
2
3
ting has been
learned.
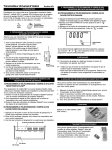
If your Sears®, Chamberlain® or Lift-Master® transmitter
has three buttons (two small, one large) then the button
that operates the unit will determine how to set the
number 1 dip switch of the Skylink transmitter. If the large
button is used to operate the unit, set the #1 dip switch to
" - " position; if the middle button is used, set the #1 dip
switch to the center position; if the button at the end is
used, set the # 1 dip
switch to " + " position.
Set the other dip
switches (dip switch #2
onward) to match the
setting of your existing
transmitter.
Learn
Green
Button Indicator Light
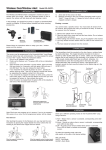
BATTERY
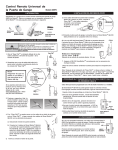
1. Open the top cover as shown.
2. Remove the screw and lift out the circuit
board.
3. Replace two fresh CR2032 lithium batteries,
follow the polarity shown on the case.
4. Test the transmitter by pressing the button.
Fasten the board
onto the case
with the screw.
Note :
DO NOT let children use
the garage door transmitter
without adult supervision.
Children can injure themselves or others by the
garage door.
WARRANTY
FCC
The Garage Door Remote Control
If, within one year from
is approved by the FCC and it comdate of purchase, this
plies with Part 15 of the FCC Rules.
product should become
defective (except battery), Its operation is subject to the following two conditions :
due to faulty workmanship or materials, it will be 1. This device may not cause harmful interference.
repaired or replaced, with2. This device must accept any interout charge. Proof of purference that may cause undesired
chase is required.
operation.
WARNING:
Changes or modifications to this unit
not expressly approved by the party
responsible of compliance could void
the user's authority to operate the
equipment.
Skylink will not be liable or
responsible for any misuse or
application of this product
other than for its intended use.
CUSTOMER SERVICE
17 Sheard Avenue, Brampton,
Ontario, Canada L6Y 1J3
Fax: (800) 286-1320
Email:[email protected]
Customer Service: (800) 304-1187
From 9am to 5pm EST (Mon-Fri)
http://www.skylinkhome.com
US Patent. D377458, 5680134,
6005508.
©2005 SKYLINK GROUP
101A066-001
® are registered trademark of their respective corporations
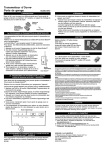
1. Open the case, as shown.
®
GARAGE DOOR
REMOTE CONTROL
USER'S INSTRUCTIONS
(MODEL 200C)