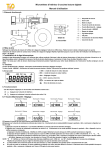
1
Questo manuale include il tagliando di
garanzia. (pagina n. I-15)
E N H
A
N
C
E D
BZ03
GCE-8160B
English
CAUTION :
The laser used in the CD-R/RW drive can damage your eyes.
Do not attempt to open the cover.
To reduce the risk of electric shock, do not remove cover (or back).
No user-serviceable parts inside.
Refer servicing to qualified service personnel.
Use of controls or performance of procedures other than those specified
here in may result in hazardous radiation exposure.
WARNING : To reduce the risk of fire or electric shock, do not expose this appliance
to rain or moisture
Industry Canada requirement
This class B digital apparatus meets all requirements of the Canadian InterferenceCausing Equipment Regulations.
Cet appareil numérique de la classe B respecte toutes les exigences du Règlement
sur le matériel brouilleur du Canada.
FCC COMPLIANCE STATEMENT
Note : This equipment has been tested and found to comply with the limits for a Class
B digital device, pursuant to Part 15 of the FCC Rules.
These limits are designed to provide reasonable protection against harmful
interference in a residential installation. This equipment generates, uses, and
can radiate radio frequency energy and, if not installed and used in accordance
with the instructions, may cause harmful interference to radio communications.
However, there is no guarantee that interference will not occur in a particular
installation. If this equipment does cause harmful interference to radio or television reception, which can be determined by turning the equipment off and on,
the user is encouraged to try to correct the interference by one or more of the
following measures:
- Reorient or relocate the receiving antenna.
- Increase the separation between the equipment and receiver.
- Connect the equipment into an outlet on a circuit different from that to which the
receiver is connected.
- Consult the dealer or an Authorized Service Center for help.
• FCC WARNING
Changes or modifications not expressly approved by the party responsible for compliance could void the user’s authority to operate the equipment.
• This CD-R/RW Drive is for use only with UL listed personal computers that have
installation instructions detailing user installation of card cage accessory.
i
This product is manufactured to comply with the radio interference requirements
of EEC DIRECTIVE 89/336/EEC, 93/68/EEC and 73/23/EEC.
CAUTION - INVISIBLE LASER RADIATION WHEN OPEN AVOID EXPOSURE TO BEAM.
VARNING-OSYNLIG LASERSTRÄLNING NÄR DENNA DEL ÄR ÖPPNAD STRÄLEN
ÄR FARLIG.
CLASS 1
KLASSE 1
LUOKAN 1
KLASS 1
LASER PRODUCT
LASER PRODUKT
LASER LAITE
LASER APPARAT
■ PC DOS is a trademark of IBM Inc.
■ Roxio and the Roxio logo are trademarks of the Roxio Corporation.
■ MS-DOS, Windows, and Windows® 95 are trademarks registered in the United States
and other countries by the Microsoft Corporation.
■ The company names and product names written in this manual are trademarks or
registered trademarks of the respective companies.
This unit uses CD-ROM discs with the following mark
When you use this unit as a CD player, use compact
discs with the following mark
This unit uses CD-R discs with the following mark.
Recordable
This unit uses CD-RW discs with the following mark.
ReWritable
High Speed
ReWritable
This unit uses High Speed CD-RW discs with the following mark.
WARNING: Only CD-RW drivers (such as the GCE-8160B) bearing the logo “Compact
Disc ReWritable High Speed” can write or erase High Speed CD-RW media.
High Speed CD-RW Media may be recognized by the same “Compact Disc ReWritable
High Speed” logo on the disc label or packaging material, or by the fact that it lists recording
speeds of “4X to 10X, or “Up to 10X”
Attempted writes to High Speed CD-RW media using CD-RW drives NOT bearing the
logo “Compact Disc ReWritable High Speed” may result in data loss.
ii
DirectCDTM v2.5b(s)
Contents
Introduction
Features . . . . . . . . . . . . . . . . . . . . . .
Important Precautions . . . . . . . . . . .
System Environment . . . . . . . . . . . .
Location and Function of Controls .
Installation
Installing the Drive. . . . . . . . . . . . . . . . . . . . . . . . . . . 6
Device Drivers . . . . . . . . . . . . . . . . . . . . . . . . . . . . . 11
Operation
How to Use the Discs. . . . . . . . . . . . . . . . . . . . . . . . 12
Appendix
Troubleshooting . . . . . . . . . . . . . . . . . . . . . . . . . . . . 13
Specifications. . . . . . . . . . . . . . . . . . . . . . . . . . . . . . 14
Warranty . . . . . . . . . . . . . . . . . . . . . . . . . . . . . . . . . . 15
1
.
.
.
.
.
.
.
.
.
.
.
.
.
.
.
.
.
.
.
.
.
.
.
.
.
.
.
.
.
.
.
.
.
.
.
.
.
.
.
.
.
.
.
.
.
.
.
.
.
.
.
.
2
3
4
5
DirectCDTM v2.5b(s)
Introduction
Thank you for
Features
purchasing this
• Running OPC* gives a flatter writing signal that improves reliability.
• Enhanced-IDE (ATAPI) interface.
• Power tray loading and ejection of disc.(The disc can also be
ejected manually.)
• The recorded CD-RW media can be played in a DVD player or
a multiread CD-ROM Player, maintaining future compatibility.
• Supports UDF for easy writing to CD-RW discs.
• Supports Windows 95, 98, 2000 & ME/NT4.0
• 16XRecord/10XReWrite/40XRead
Writing speed depends on capabilities of discs.
As a result, for high speed write/rewrite, you should use media
labelled high speed ReWritable discs
• Automatic buffer underrun error prevention technology - “Super
Link”.
* Continuously monitors the signal level during recording and adjusts the
CD-R/RW Drive.
laser power to compensate when the disc is dirty, insuring a flat signal.
Package
Items
Item
2
Quantity
- Internal CD-R/RW Drive
1
- CD Recording Software
1
- Blank CD-RW Disc
1
- E-IDE (ATAPI) cable
1
- Audio Cable
1
- Mounting Screws
4
- Manual for CD-R/RW Drive
1
- Manual for CD Recording Software
1
DirectCDTM v2.5b(s)
Important Precautions
Follow these precautions when handling the drive or discs.
Precautions
• Please take notice that the manufacturer of this equipment does
not offer any warranty against data loss due to inappropriate
installation or handling, or direct or indirect damages.
• Please take notice that the manufacturer will bear no responsibility
for direct or indirect damages caused by the use of this product or
its malfunction.
• Please take notice that the manufacturer will bear no responsibility
for damage to data caused by this product.
• Please backup (copy) all important data as protection against
data loss.
Installation
• Avoid placing the drive in a location subject to:
- high humidity
- high temperature
- excessive dust
- mechanical vibration
- direct sunlight
We recommend using the drive in a horizontal or vertical position.
Do not use it in tilted position.
Operation
• Don’t move the drive suddenly from a cold place to a warm one or
raise the room temperature suddenly. Condensation may occur,
causing abnormal operation.
• Make sure to remove the disc before moving the drive. The disc
may be damaged, causing data loss.
• Be careful to prevent foreign objects, such as liquids or metal,
from entering the drive. In case a foreign object enters the drive,
please consult the dealer where the drive was purchased.
• Don’t interrupt the electric power while the drive is operating.
• When connecting two IDE devices to the Primary or Secondary
connectors, make sure that the two devices are not configured as
both Master, or both Slave. If they are both set the same,
Windows may fail to run or recognize the drives.
• The total length of the IDE cable should be no more than 18 inches
(about 45 cm).
3
DirectCDTM v2.5b(s)
System Environment
Computer
This unit can be operated in the system environment explained
here.
233MHz (or faster) Pentium (for 16x speed,
CPU
System
350MHz or faster recommended)
requirements
Memory Windows 95/98 : 64MB or greater.
Windows NT Workstation Ver. 4.0: 64MB or
greater (128MB or over recommended)
Windows 2000: 128MB or greater(256MB or
over recommended)
Windows ME: 64MB or greater
Hard disk
Hard disk with average access time of 19 msec
or less, and data transfer speed of 2400KB/sec
or greater. 75MB or more free space.
(The free space needed for writing depends on
the quantity of data.)
Interface
Enhanced-IDE interface (as Primary Slave,
Secondary Master or Slave)
Drive bay
5.25-inch half-height bay required
Power
+5V/+12V power socket required
Software Required OS Windows 95/98/2000/ME, Windows NT
Workstation Ver.4.0 or later
CD-R, CD-RW discs
CD-R : Ricoh, Mitsubishi Chemical, Verbatim,
Taiyo Yuden, Fugi Film, Kodak, or Imation
discs are recommended.
CD-RW : Ricoh, Mitsubishi chemical, Verbatim,
Imation, Sony discs are recommended..
❏ Occasionally the CD-R and CD-RW discs written by the CD-R/RW
drive cannot be read by other CD drives*. These unreadable discs
may need to be read using the CD-R/RW drive on which require
written.
* The disc written using the CD-R/RW drive might not be readable
by CD-ROMs other than Multi-read compatible (UDF compatible)
CD-ROMs.
Multiread compatible (UDF compatible) CD-ROMs are:
1. CD-ROMs that can read low reflectance.
2. CD-ROMs that support Packet Write.
Software
Install the supplied CD Recording Software before using this unit.
4
DirectCDTM v2.5b(s)
Location and Function of Controls
Front Panel
7
6
WRITE
RE AD
1
2
34
1. Headphone jack
2. Volume control
3. Emergency Eject Hole
4. Play/Skip button
5. Stop/Eject button
6. Disc tray
5
7. Drive activity indicators
Two colored LEDs are used to indicate
the operation of CD-R/RW Drive.
(1) Read
The orange color is displayed when the
spindle motor begins the Spin up operation: accessing data, reading data,
playing Audio, and up loading tray.
(2) Write
The green color is flashed during disc
writing sessions.
Rear Panel
POWER
INTERF
DIGITAL
AUDIO
D G
ANALOG
AUDIO
C S M
R G L S L A
ACE
1
2
+5
GND
+12
39
40
1 2 3
4
5
1. Digital Audio Output Connector
2. Analog Audio Output Connector
3. Jumper Connector
This jumper determines whether the drive is configured as a master or slave.
Changing the master-slave configuration takes effect after power-on reset.
4. IDE Interface Connector
Connect to the IDE (Integrated Device Electronics) Interface using a 40-pin
flat IDE cable.
NOTE : Do not connect or disconnect the cable when the power is on, as this
could cause a short circuit and damage the system. Always turn the power
OFF when connecting or disconnecting the cable.
5. Power Connector
5
DirectCDTM v2.5b(s)
Installation
Installing the Drive
Before
Installation
Before installing the drive, please note the following points.
■ You will need the following:
• A screw driver of a suitable size to fit the securing screws for the
drive unit.
• The manual for the computer, so you can find the mounting
positions for the IDE controller cable.
■ Turn off all peripheral appliances of the computer and the computer
itself, and disconnect their power cords from the wall sockets.
■ Discharge any static electricity on your person by touching the
computer covers, etc.
Removing
the
Computer
Cover
Make sure all peripheral devices of the computer and the computer itself
are turned off, and then remove the cover. Refer to the manual for the
computer for details about removing the cover.
Mounting
the Drive
1. Remove the 51/4″ drive bay panel from the computer. Refer to the
manual for the computer for details.
2. Insert the drive unit into the bay. Do not apply excessive pressure to
the cables inside the computer.
3. Secure the drive with the screws provided. If there is not enough
space behind the drive, connect the IDE and other cables before
securing the drive.
NOTE : There may be sharp edges inside the computer so take care to
avoid injury.
READ
WRITE
READ
WRITE
NOTE : This is a general installation guide. If your PC hardware appears
different, please consult your hardware manual for installing peripheral
devices.
6
DirectCDTM v2.5b(s)
Connecting
the Power
Connector
Connect the power cable from the computer’s power supply to the socket
on the drive unit, fitting the connector firmly into the power in connector.
If there is no spare power cable available in the computer, you will have
to purchase a splitter cable of a suitable type.
POWER
+5
POWER
DIGITAL
AUDIO
D G
1
2
INTERFACE
ANALOG
AUDIO
+5
GND
GND
+12
+12
39
40
C S M
R G L S L A
Beveled edge up
NOTE : Improper connection may damage the drive and void the warranty.
Generally, the Power connector can only fit one way.
Connecting
the
Interface
Connector
Connect the 40 pin IDE cable to the back of the CD-R/RW Drive,
making sure the coloured (red) stripe on the IDE cable is connected
to pin 1 on the CD-R/RW drive. Pin 1 is closest to the Power
Connector.
NOTE : Generally, the IDE connector is keyed and will only fit one way.
POWER
INTERFACE
DIGITAL
AUDIO
D G
ANALOG
AUDIO
C S M
R G L S L A
1
2
+5
GND
+12
Pin1
39
40
Red-edge
Connecting
the Sound
Card
If the computer is using a sound card, the drive is connected to the
sound card with an audio cable. The supplied analog audio cable fits
most sound cards or one can be purchased at a local computer store.
Refer to the manual for the sound card for detailed
information regarding connection.
DIGITAL
AUDIO
INTER
DIGITAL
AUDIO
D G
ANALOG
AUDIO
C S M
R G L S L A
R
D G
ANALOG
AUDIO
G
L
INTERFACE
C S M
S L A
39
40
POWER
1
2
+5
GND
+12
39
40
marking L-R
L
R
Sound card
7
DirectCDTM v2.5b(s)
Jumper
Setup
Before installation, set the jumper on the jumper connector on the
rear panel.
The drive can be connected as the Master or Slave on an EIDE
(ATAPI) interface. When several (up to four) EIDE devices are connected, each must be set in a unique way. Specific knowledge of
hardware and software is necessary to install the drive.
NOTE : If two peripheral devices with the same settings are both
connected to the Primary or to the Secondary EIDE bus, the host
computer may fail to run or may malfunction. Careful attention is
necessary.
POWER
INTERFACE
DIGITAL
AUDIO
D G
ANALOG
AUDIO
C S M
R G L S L A
1
2
+5
GND
CS: Cable Select(CSEL)
SL: Slave
MA: Master
+12
39
40
L
ANALOG
AUDIO
G
L
C S M
S L A
39
40
NOTE : Only one jumper should be installed on the jumper connector.
If more than one jumper is installed, the drive may malfunction or be
damaged.
Master/Slave setting is determined by jumper installation on the
Jumper Connector. The following table shows the possible jumper
settings.
Name
Function
MA
(Master)
Drive set as Master
SL
(Slave)
Drive set as Slave
CS
(Cable Select)
Drive mode set by CSEL on the
host IDE interface
C
S
S
L
M
A
If you use CSEL setting, the MASTER/SLAVE setting will be made
automatically, depending on the hardware configuration.
For details refer to the manual of your computer.
8
DirectCDTM v2.5b(s)
PC
Connection
The CD-R/RW drive connects to the motherboard of the host computer using an IDE interface cable. You may connect the CD-R/RW
Drive as a Slave or Master device, depending on your computer.
To Install as
a Master
Drive
To install the drive as a Master, the jumper can be left as supplied
from the factory.
Master drive
(CD-R/RW drive)
(Jumper left as
MAster)
Master drive
(Booting hard disk)
DIGITAL
AUDIO
ANALOG
AUDIO
DG
R G L
CS M
S L A
INTERFA
39
40
CE
POWER
1
2
+5 GND
+12
Motherboard
Secondary
connector
Primary
connector
- OR Master drive
(Booting hard disk)
DIGITAL
AUDIO
ANALOG
AUDIO
DG
R G L
CS M
S L A
INTERFA
CE
39
40
POWER
1
2
DIGITAL
AUDIO
+5 GND
+12
Master drive
(CD-R/RW drive)
(Jumper left as
MAster)
ANALOG
AUDIO
DG
R G L
CS M
S L A
INTERFA
39
40
CE
POWER
1
2
+5 GND
+12
Slave drive
(Other IDE drive)
Primary
connector
Secondary
connector
NOTE : A hard disk is normally installed as the Primary Master on
the EIDE (ATAPI) interface. Other EIDE peripheral devices such as
hard drives and CD-ROMs are then set differently.
9
DirectCDTM v2.5b(s)
To Install as
a Slave
Drive
To install the drive as a Slave, change the jumper setting on the
rear panel to SL.
Master drive
(Booting hard disk)
DIGITAL
AUDIO
ANALOG
AUDIO
DG
R G L
CS M
S L A
INTERFA
39
40
CE
POWER
1
2
+5 GND
+12
Slave drive
(CD-R/RW drive)
(Jumper set to
SLave)
- OR -
Master drive
(Booting hard disk)
Master drive
(Other IDE drive)
DIGITAL
AUDIO
ANALOG
AUDIO
DG
R G L
CS M
S L A
INTERFA
CE
39
40
POWER
1
2
DIGITAL
AUDIO
ANALOG
AUDIO
DG
R G L
CS M
S L A
INTERFA
39
40
CE
POWER
1
2
Primary connector
Replacing
the
Computer
Cover
+5 GND
+12
+5 GND
+12
Slave drive
(CD-R/RW drive)
(Jumper set to
SLave)
Secondary connector
When the installation of the drive unit is complete, replace the
computer cover.
10
DirectCDTM v2.5b(s)
Device Drivers
When using Windows 95/98/2000/ME or Window NT
Workstation Ver.4.0, no special device driver is required.
Your system, upon Power On and bootup after installing and
connecting the new CD-RW drive, will recognize and load native
software drivers automatically.
The DOS and Windows 3.1 users can download the DOS Device
drivers anytime via internet.
For your information, please consult the following internet sites:
http://www.lge.com
http://www.lgeservice.com/drivers.html
For
Windows
95/98/2000
Users
■ In order to ensure normal drive operation, please check the
following:
• The drive is displayed in
Windows 95/98 : [Control Panels]-[System]-[Device Manager]-[CD-ROM]
Windows 2000 : [Control Panels]-[System]-[Hardware]-[Device
Manager]-[DVD/CD-ROM-Drive]
• 32-bit is displayed in
[Control Panels]-[System]-[Performance]
■ If the drive is not recognized by your computer, please check the
following items.
indicator is displayed on the IDE controller in [Control
• If a
Panels]-[System]-[Devices Manager]-[Hard Disk Controller],
you will need to contact your PC’s manufacturer or the
motherboard’s manufacturer and get the appropriate IDE
controller driver.
■ Run Add New Hardware in Control Panel to let PC search again
for new device.
For
Windows
NT
Workstation
Ver.4.0 Users
■ In order to ensure normal drive operation, please check to see if
the drive is displayed on the IDE controller in [Control Panels][SCSI Adapter]-[Devices]
■ If the drive is not recognized by your computer, a
indicator is
displayed on the IDE controller in [Control Panels]-[SCSI
Adapter]-[Devices], you will need to contact your PC’s manufacturer
or the motherboard’s manufacturer and get the appropriate IDE
controller driver.
11
DirectCDTM v2.5b(s)
Operation
How to Use the Discs
When using CD-ROM discs, CD-R discs or CD-RW discs, don’t
attach any stickers or labels to the discs. Using discs with them
attached not only causes read and write errors, but data on the disc
may be lost due to damage to the disc itself.
The Discs in this unit operate at a very high speed!
DO NOT use damaged, cracked or warped discs. The drive’s optical
unit may be damaged if they break.
DO NOT use non-standard discs. NON-standard discs may not play
or store data properly.
Emergency
Eject
This drive has a feature that allows the CD to be ejected manually if
this becomes necessary in an emergency, such as failure of the
drive or a power outage.
NOTE: Don’t use this feature except in an emergency.
1) Turn the power to OFF.
2) Poke a fine-tipped object (such as a straightened heavy duty
paper clip) into the small hole above the eject button. The front
door will pop open and the disk tray will come partway out.
3) Pull the front door to open it all the way, then grip the disc tray
between thumb and forefinger and gently pull it straight out.
WRITE
READ
NOTE: This feature is a last measure to be used only in an
emergency. Using it excessively will cause malfunction.
* If you cannot get a good grip on the disc tray with your fingers, use
a steel binder clip or spring clamp to pull it out.
12
DirectCDTM v2.5b(s)
Appendix
Troubleshooting
Before
Requesting
Service
Before calling for service, check this list.
• The drive doesn’t have power.
• Is the power supply cable from the host computer plugged in?
• Is the Power Connector to the drive securely attached?
• The system doesn’t start.
• Are the Primary and Secondary connections and the Master
and Slave settings correct?
• Is the total length of the IDE cable 18 inches or less?
• Is each connector completely attached?
Movement of the PC may loosen connections.
• Cannot Read or Write Discs.
• Is the condition of everything else in the system (CPU, hard
disc, and others) as it should be? (See system environment
page 4.)
• Does the CD-R or CD-RW disc have dirt or scratches?
• Did a screen saver or other application operate while writing to
the disc?
• Is there enough free space on the CD-R/RW disc?
• Does writing fail even using the simulation test?
• Is the disc loaded in the drive with the read/write surface facing
the right direction? (label up)
• Is the drive installed in the correct orientation?
• Was the drive or disc moved from a low temperature environment
to a high temperature environment? (There is a possibility of
condensation on the lens in the drive or on the surface of the
disc.)
When you call for service, be prepared to give as much information
as possible of your system, environment, and the specific problem.
(What happened? When? How long? What was going on? Were
there any error messages displayed? etc.)
13
DirectCDTM v2.5b(s)
Specifications
Type
Internal type (bare drive)
Interface
Enhanced-IDE (ATAPI)
Data buffer memory
2MB
Disc diameter
12cm, 8cm, standard size CD's
∗ Sustained
Read : 16 to 40x CAV: 2.4MB to 6.0MB/s
CD-RW : 2x: 300KB/s
Write : CD-R : 4x: 600KB/s
4x: 600KB/s
8x: 1200KB/s
10x: 1500KB/s
12x: 1800KB/s
16x: 2400KB/s
Data Transfer Rate
∗ Burst (ATAPI)
16.67MB/s (PIO Mode 4, MULTI-DMA Mode 2)
Average access time
Random 110ms. <Typical>
Mounting direction
Horizontal/Vertical
Compatible formats
Format
CD-DA
CD-ROM
CD-Extra
CD-ROM XA
Photo CD
CD-I
CD-ROM+CD-DA
Video CD
<Write>
<Read>
<Play>
•
•
•
•
•
•
•
•
•
•
•
•
•
•
•
•
•
Loading system
Tray type (automatic loading/eject)
Power
DC5V, DC12V
Weight
Less than 2lbs.(0.90Kg)
Dimensions (WxHxD)
5.75"x7.27"x1.63" (146 x 184.7 x 41.3 mm)
Error Rate
10-12 bits or less
MTBF
120,000 hours Power On Hours (Duty Cycle 10%)
MTTR
Within 30 minutes
Audio Output Level
Environmental Conditions
Line out : 0.7 Vrms at 47 kohm
Headphone : 0.6 Vrms at 32 ohm
When not operating
When operating
Temperature
5 °C to 40 °C (No air cooling)
-20 °C to 60 °C
Humidity
10% to 80% R.H.
(No condensation)
10% to 80% R.H.
(No condensation)
The drive’s appearance and specifications may change without prior notice.
14
•
•
•
•
CD-R/RW LIMITED WARRANTY
will repair or at its option replace*, without charge, your product which proves to be defective in
material or workmanship under normal use, during the warranty period listed below from the date of
original purchase.
WARRANTY PERIOD
Div.
MODEL #
GCE-8160B
Labor & Parts
Personal or Non-Income
producing use:
1 Year
Commercial or Income
producing use:
90 days
No other express warranty is applicable to this product. THE DURATION OF ANY IMPLIED
WARRANTIES, INCLUDING THE IMPLIED WARRANTY OF MERCHANTABILITY, IS LIMITED TO
THE DURATION OF THE EXPRESS WARRANTY HEREIN. WE SHALL NOT BE LIABLE FOR
THE LOSS OF THE USE OF THE PRODUCT, INCONVENIENCE, LOSS OR ANY OTHER
DAMAGES, DIRECT OR CONSEQUENTIAL, ARISING OUT OF THE USE OF, OR INABILITY TO
USE, THIS PRODUCT OR FOR ANY BREACH OF ANY EXPRESS OR IMPLIED WARRANTY,
INCLUDING THE IMPLIED WARRANTY OF MERCHANTABILITY APPLICABLE TO THIS
PRODUCT.
Some states do not allow the exclusion or limitation of incidental or consequential damages or
limitations on how long an implied warranty lasts; so these limitations or exclusions may not apply to
you. This warranty gives you specific legal rights and you may also have other rights which vary
from state to state.
THE ABOVE WARRANTY DOES NOT APPLY:
1. To damages or problems which result from delivery or improper installation.
2. To damages or problems which result from misuse, abuse, accident, alteration, or incorrect
electrical current or voltage, maintaince conditions.
3. To service calls which do not involve defective workmanship or material and explaining the
operation of the unit.
4. If the serial number of the drive is defaced or missing.
Therefore these costs are paid by the consumer.
CUSTOMER ASSISTANCE NUMBERS:
If you have questions about using this product, check your user’s manual first. You will find answer
to most of your questions there. If you need futher assistance, please contact us. We offer the
following support and information services.
To Prove Warranty Coverage:
Retain your Sales Receipt to prove date of purchase.
Copy of your Sales Receipt must be submitted at the time
warranty service is provided.
To Obtain Product, Customer,
or Service Assistance:
Call 1-800-243-0000 24 hrs/7 days
Push appropriate menu code.
or http://www.LGEservice.com/techsup.html for support by E-mail.
For Exchange Service:
Call 1-800-243-0000 (Mon~Fri 8am~5pm CST)
Push appropriate menu code.
*
Replacement is a factory-reconditioned unit. Free replacement applies only within the initial
one-year period. Factory-reconditioned units are available at a low, fixed cost after the oneyear warranty expires.
*
Although the information (specifications, contacts, etc.) was correct at the time of printing,
anything in this manual is subject to change without prior notice.
English
Copyright © 2001
Deutsch
LG Electronics U.S.A. Inc.
1000 Sylvan Ave. Englewood Cliffs
NJ 07632 U. S. A.
LG Electronics Canada Inc.
235 Superior Blvd, Mississauga
Ontario, Canada
Français
LG Electronics Deutschland GMBH
Jakob-Kaiser-Straße 12,
D-47677 Willich, Germany
LG Electronics U. K. Ltd.
LG House, 264 Bath Road,
Slough Berkshire SL1 4DT
United Kingdom
Italiano
Goldstar France SARL
12, Rud Lech Walesa-Z.I. Pariest
77185 Lognes, France
LG Electronics Italia S.P.A.
Centro Direzione “IL Quadrate” Via Modigliani,
20090 Segrate (MI) Italy
Español
LG Electronics España
Adva, De Europa, 21
28108 Alcovendas (Madrid) Spain
LG Electronics Australia Pty Ltd.
23, pike st Rydalmere NSW 2116
or http://www.lge.com.au
Website ; http://www.lge.com
http://www.LGEservice.com
P/NO. 3828HM1029C
Printed in Korea