1
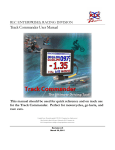
RLC ENTERPRISES, RACING DIVISION
Race Logger Technical/Setup Manual – Micro Pod
This manual should be used for initial install and setup of the
Micro Pod.
Copyright Notice. All materials copyright © 2009, R.L.C. Enterprises, Inc., all rights reserved.
Micro Pod and the Micro Pod Logo are Trademarks of R.L.C. Enterprises, Inc.
R.L.C. Enterprises Reserves the Right to Change Specifications without Notice.
Revision 2.1
May 05, 2009
Table of Contents
Logging Preferences
CHAPTER 1 - INTRODUCTION
Start Logging a Session File
What’s In the Box
Stop Logging a Session File
Powering Up the Unit
Venues
Boot Up
Backup Files
Getting Around
Scrolling Wallpaper Setup
CHAPTER 2 - INSTALLING WIRING HARNESS
Save Different Car Configurations
CHAPTER 3 – HOOKING UP THE TACH SIGNAL
Ignition Box
CHAPTER 6 – PERIPHERALS
Diagnostic Box
Adding a Peripheral
Spark Plug Wire
Removing a Peripheral
MSD Sensor – Coil Over System
CHAPTER 7– SENSOR SETUP
CHAPTER 4 - CONNECTIVITY
Loading a Pre-Defined Sensor
USB Keyboard and Mouse
Adding Sensors
USB Memory Stick
Adding a Analog Sensor
Optional Connectivity
Adding a Digital Input Sensor
GPS and Synchronized Video
Adding a Digital Output
Adding an ECU Sensor
CHAPTER 5 – CAR SETUP
Creating a New Analog Sensor
Loading a Pre-Defined Car
Analog Sensor Calibration
Creating a New Car
Deleting an Unused Sensor
Setting the Redline
Set Alarms and Limits
Setting Ideal Shift Points
Adding An OBD-II CAN Sensor
Set Gears
Set LED Start RPM
CHAPTER 8 – BACKUP & RESTORE
Set Units
Complete System Backup & Restore
Set Wheel Size
System Date/Time
CHAPTER 9 – SOFTWARE UPDATES
LED Scheme
Update Procedure
Power Save
Starting Update Mode
Hold Lap Time
Updating the Unit
Brightness Level
Serial Numbers
Ch.1
Introduction
First and foremost, thank you for buying our products. You are a valued customer and R.L.C. looks forward
towards a mutually beneficial relationship with you. In order to help insure your success, we have prepared this
technical manual for you. This manual will take you step by step through the process of installing the unit in your
car, how to pick up a tach signal, configuring your unit, setting up your car, adding sensors, and how to backup or
restore your files. Read the Race Logger User Manual after you have completely installed the unit and set up your
car to familiarize yourself with the unit and its functionality. You are going to need to connect a USB hub to the
Micro Pod so that you can connect a mouse and keyboard to make navigation and naming files easy. We highly
recommend that you order the Micro Pod Setup Kit, MP-Setup, because it includes everything that you will need
to setup your Micro Pod unit.
What’s in the Box
The first thing you should do when you receive your Micro Pod is open the box, unpack and verify you received
everything you ordered. You should have a Micro Pod unit, wiring harness, GPS unit, and any sensors that you
may have ordered. We also highly recommend the Micro Pod Setup Kit, MP-Setup, which includes the USB
mouse, USB memory stick, USB hub, USB keyboard, and power supply. The wiring harness plugs directly into
the back of the Micro Pod. Simply line up the connector, press and twist the locking ring until it stops. The USB
hub connects to the harness to expand the USB connector so you can plug in more than one USB device in at a
time, i.e. the USB mouse and USB memory stick. The USB mouse plugs into either the harness or the hub and is
used to help navigate the Micro Pod unit. You will need the mouse when you set up your car. The USB keyboard
plugs into either the harness or the hub and is only used when you set up your car. The USB memory stick also
plugs into either the harness or the hub and has a back up of your Micro Pod as it is shipped. It is also what you
will use to download logged session files from the race logger, save your car configuration, and back up of your
whole system once you have set everything up, covered later in this manual. A power supply is included in your
kit so that you can power up the Micro Pod and familiarize yourself with the unit before putting it in your vehicle.
Powering the Unit
Every RLC Race Logger has been set up to allow you to power up the unit with out installing it in your car. This
feature allows you to familiarize yourself with the race logger and evaluate its capabilities before you actually install
it. The Micro Pod Setup Kit, MP-Setup, has a wall outlet power supply you can use to power the unit before it is
installed. The Micro Pod units are powered through the wiring harness. Attach the wiring harness to the Micro
Pod unit and connect the power supply to the barrel connector on the harness. Figure 1 shows what a barrel
connector looks like.
Figure 1 - Typical Barrel Connector
1
Ch.1
Boot Up
Once you have powered the unit, you should see a startup screen (Fig 2). This screen will display while the system
is loading for a few seconds and then you will see the race screen (Fig 3). The race screen is the screen which you
will use during races.
Tap here to navigate
Tap here to navigate to
to another screen.
Figure 2 – Startup Screen
Figure 3 – Race Screen
another sub-screen.
Figure 4 – Sensor / Calibration Screen
Getting Around
Navigating through the different screens and sub-screens of the race logger systems is easy, simply use the touch
screen on the Micro Pod to get around. You can also use the mouse that is included in the Micro Pod Setup Kit
to navigate your way through your unit but you probably won’t be using the mouse at the track. To navigate to
the different screens, tap the top portion of the screen, as indicated in Figure 3, and the next screen will appear.
To navigate to the different sub-screens, tap the bottom right portion of the screen, as indicated in Figure 4, and
the next sub-screen will appear. The Micro Pod has a very responsive touch screen so you do not need to press
hard on the screen, even when you have gloves on.
2
Ch.2
Installing the Wiring Harness
The first step to installing one of R.L.C.’s race logger units is to install the wiring harness, hook up to a tach signal,
and connect the sensors. The harness is able to adapt to any car and was designed so installation is quick and easy.
All channels have been labeled, but please be careful and make sure that you connect the correct type of sensor
with the correct type of signal, i.e. an analog type sensor to an analog channel. The harness is divided into two
parts, the signal portion and the connectivity portion. The signal portion has each individual signal arranged in a
grouping that consists of the power, ground, and signal. Every analog input, digital input, and digital output is
arranged this way so you can quickly and easily hook up the grouping to the appropriate sensor. There are
drawings at the RLC web site that show you in detail how to connect a sensor to our harness. Also available on
the RLC web site is a drawing of a typical car setup with typical sensors. These drawings should answer any
questions you have about hooking your unit up into your car. The other portion of the wiring harness consists of
all the connectivity that you need to download your sessions to a USB flash stick, connect to your PC, and
connect to the GPS and video camera. The connectors are industry standard so there are no special cables needed
to connect to the Micro Pod.
The Micro Pod Sport is an easy plug-n-play unit so installation is much easier. You need to snap the Micro Pod
Sport into the suction cup mount and attach the mount to the windshield. Plug the OBD-II CAN cable into the
OBD-II CAN port on the car and then apply power to the Micro Pod Sport unit with the cigarette lighter power
plug that was provided with the Micro Pod Sport. The Micro Pod Sport only works with OBD-II CAN so make
sure with the car’s manufacturer that your OBD-II port is CAN interface.
On the wiring harness there is a standard USB port. We recommend that you leave this in an easy access place so
when you go to download logged files or backup your unit onto your USB stick it will be easy to do.
The first step in installing the wiring harness is to lay the harness in the car and route the appropriate channels to
the correct sensors. We recommend that you give the connector end of the harness plenty of play so that
connecting and disconnecting the unit will be easy. After the channels are routed to the sensors it is time to cut
the wires and attach the connectors. Sensors ordered from RLC come with the connector already attached. The
mating connector, the side that is used to connect to the harness, can be purchased from RLC. Connect the
sensors to the harness by snapping the connectors together and proceed to the section below to set up your car.
RLC also offers preconfigured wiring harnesses that already have the lengths cut and the connectors attached to
the harness, please see the website for available preconfigured wiring harnesses.
When mounting the Micro Pod in your vehicle, be careful not to press hard on the screen. For suggestions on
where to mount the Micro Pod unit please visit the photo gallery on our website.
The Micro Pod Lite requires a clean 7-18V to power properly. We highly recommend that you power the Micro
Pod by connecting it directly to the battery or the main kill switch (also connected directly to the battery) which
most all race cars have. By connecting it directly to the battery you will get a clean, uninterrupted voltage. We do
not recommend connecting to the ignition or some auxiliary power source. These sources can be intermittent
and cause the Micro Pod Lite to work improperly.
3
Ch.3
Hooking Up The Tach Signal
The tachometer connection is one of the most important connections to get working on your car. RLC sells a few
different types of tachometer sensors depending on your car’s setup. You need to find where a clean tachometer
output is on your car, it could be from an ignition box, diagnostic port, or on a spark plug wire. The Micro Pod
Sport does not need a tach sensor since it gets the tach pickup from the OBD-II CAN port.
Ignition Box
If your car has an ignition box such as a MSD you should be able to get a clean tach signal from it. The ignition
box will have a tach digital output that you can connect directly to the Micro Pod (Fig 5). RLC offers a tach direct
connect pigtail wire, CAB-DI-TACH, that you can use to connect to the tach output on the ignition box. Simply
connect the tach pigtail to the digital input signal on the wiring harness of the Micro Pod, ground the ground wire
properly (may or may not need to do this, try both ways), and then connect the signal wire to the tach output pin
on the ignition box. Figure 5 shows how we connected to the tach output on a MSD ignition box on our
Formula Mazda.
Figure 5 – MSD Ignition Box Tach Pickup
Once you are sure that you have a good connection start the car and observe the tach signal. Make sure to rev the
engine over the whole limit of the tachometer. If you notice that the tach signal is jumpy please see the
troubleshooting section below.
Diagnostic Box
For cars that do not have an ignition box but have a diagnostic box, you can plug directly into the tach output on
the diagnostic port. Check with your car’s manufacturer to locate which port is the tach output. Again connect
the tach direct connect pigtail, CAB-DI-TACH, to the digital input signal on the wiring harness of the Micro Pod,
ground the ground wire properly (may or may not need to do this, try both ways), and then plug the signal wire
into the tach output port on the diagnostic port (Fig 6). Figure 6 shows how we connected to the tach output
signal on a diagnostic box on a 2000 Spec Miata. We found that on late model Spec Miatas you only need the
CAB-DI-TACH but on earlier models you will need the ITS-RLC-SPK sensor to get a clean tach signal (with out
the ground wire grounded).
4
Ch.3
Figure 6 – Diagnostic Port Tach Pickup On A Spec Miata
Once you are sure that you have a good connection start the car and observe the tach signal. Make sure to rev the
engine over the whole limit of the tachometer. If you notice that the tach signal is jumpy please see the
troubleshooting section below.
Spark Plug Wire
The second way to get a tach signal from your car would be to use the ITS-RLC-SPK to wrap around the spark
plug wire. Wrap the stiff wire around the spark plug wire approximately 6 to 7 times to ensure a good pick up
(Fig 7). Once you are sure that you have a good connection start the car and observe the tach signal. Make sure to
rev the engine over the whole limit of the tachometer. This type of tach signal pick up is ideal on cars with
magneto engines, go karts, and motorcycles. If your car has a wasted fire system this method of wrapping around
the spark plug wire will not work. In a wasted fire system the car fires inconsistently per revolution, the Micro
Pod tach will appear to jump around a lot. If this is the case you will need to choose another method of hooking
up to the tach.
Figure 7 – Spark Plug Wire Tach Pickup
MSD Sensor – Coil Over System
The last way to pick up a tach signal would be to use the ITS-8918-MSD sensor. This sensor would be used if
your car does not have an ignition/diagnostic box or spark plug wires but instead is a coil over system. Again this
sensor would not work on a wasted fire system. The sensor comes with the manufacturer’s directions on how to
hook up this sensor to a primary lead wire, follow the directions carefully. This sensor is used to hook up to the
primary lead that fires the coil (Fig 8). You will need to identify the primary lead wire that is connected to the
5
Ch.3
spark plug by process of elimination. You have to hook up to each wire, in both directions to see if it is the
primary lead wire. This sensor is directional so make sure that you take your time and try both directions on each
wire before you rule it out as the primary lead. Figure 8 shows the ITS-8918-MSD sensor hookup up to the
primary lead wire on a 2006 Mini Cooper.
Figure 8 – MSD Sensor Tach Pickup
Trouble Shooting the Tach Connection
If you notice that the tach signal is jumpy we recommend that you order the ITS-RLC-SPK sensor from RLC.
This sensor is used to clean up or amplify a weak tach signal. It will connect the same way as the tach direct
connect pigtail. Connect the sensor to the digital input signal on the wiring harness of the Micro Pod, ground the
ground wire properly (may or may not need to do this, try both ways), and then plug the stiff wire into either the
ignition box (Fig 5) or the diagnostic port (Fig 6). This RLC sensor will clean up and amplify the tach signal so
that you can get a smooth tach signal on the Micro Pod.
If you are still seeing a jumpy tach you can try to clean up the signal by connecting either a resistor Fig 9 or two
capacitors Fig 10 to a digital input cable, CAB-DI-PT. Figure 9 shows a 3.3K resistor connected to the +12V and
Digital Input signal on the digital input cable. Figure 10 shows two .01uF capacitors connected between both the
+12V and Digital Input signal and the Ground and Digital Input signal. These circuits have worked well to clean
up the tach signal on motorcycle engines.
Figure 9 – 3.3K Resistor Connected
Figure 10- 0.01 uF Capacitor Connected
6
Ch.4
Connectivity
You can connect to the R.L.C. race loggers through a variety of standard methods such as USB memory sticks,
mouse, and keyboard. Connectors are on the harness of the Micro Pod units. Connecting to the race loggers are
much like connecting to your standard PC.
USB Keyboard and Mouse
A USB port is provided on the harness of the Micro Pod. The USB port is used to connect the keyboard, mouse,
and/or USB hub that is provided in the optional Micro Pod Setup kit. Being able to connect a mouse and
keyboard makes configuring and setting up your car fast and easy. You can select the file you want, rename a
sensor, or navigate the race logger with ease. There is no need for special connectors, simply use items that you
can find in your local office store to connect to the Micro Pod units. Once your car has been setup you probably
won’t need to use the mouse or keyboard because the units have been setup so you don’t need them to navigate
around, but they may be useful to have at the track.
USB Memory Stick
The USB memory stick that is provided in the optional Micro Pod Setup kit is used to download/upload files to
and from the race logger to the PC. You can use the USB memory stick to back up your entire unit or restore it.
The USB memory stick is also used to transfer logged session files from the Micro Pod to the Race Analyzer
software. Using standard items that can be found at your local office store eliminates the need for special and
expensive connectors. You can also leave the USB stick plugged in your unit while out on the track and the
logged file will automatically download to it after the session is over.
Optional Connectivity
An optional way to connect the Micro Pod unit to a PC is using a standard USB cable that can be found at your
local office store. We recommend that you use the USB memory stick instead because it is much easier.
Connecting PC through an USB cable requires that ActiveSync 4.2 or later to be installed on your PC before you
can connect to a dash logger system. You can download Active Sync from the Microsoft web site. Once this
software is installed and you have connected to the unit you can drag and drop files between the race logger and
the PC. This method is not recommended because it requires knowledge of the file structure of the race logger
units.
GPS and Synchronized Video
There are two RS-232 serial ports on the harness of the Micro Pod units. One port is used to connect directly to
the GPS system sold by RLC and the other is used to plug directly into a video camera system, sold by Chase
CAM, for truly synchronized video.
7
Ch.5
Car Setup
Setting up a car on the Micro Pod is painless and easy. This section describes how to set up your car from setting
the date and time to adding sensors. You will need the use of both the mouse and keyboard that came in the
optional Micro Pod Setup kit so please connect the USB hub to the harness so you can plug both the mouse and
keyboard into the race logger. The mouse makes it easier to navigate and the keyboard allows you to name files.
The technical manual is written assuming the mouse and keyboard have been plugged in.
There are two ways to set up your car; you either load in a pre-configured car or start from scratch with a new car
setup. Loading in a pre-configured car setup is the easiest way as long as you have the same sensors installed in
your car and have them hooked up to the same channels. You can always edit the pre-existing car set up by
adding sensors, deleting sensors, or modifying existing sensors in your cars set up.
Loading a Pre-Defined Car
Standard Car configuration files have been pre-loaded on your unit. To initialize one of the standard car
configuration files click the ‘Car Setup’ button then click the ‘Load’ button. A pop-up box will appear (Fig 11).
Choose any one of the standard pre-configured cars from the dropdown box and click load. The Micro Pod
Sport is shipped with the OBD-II car pre-loaded so you do not need to load a new car.
You can load a full system backup file given to you by a friend, dealer, or even RLC. To do this you must have
the full backup file from a pre-configured car. Please see the backup and restore chapter in this manual on how to
make a full backup file. Copy the backup car file onto the USB memory stick and plug it into your Micro Pod
unit. Click the ‘File Manager’ button and select ‘Complete System – Backup & Restore’ from the drop down list.
Select the full system backup file given to you from the USB area and click ‘Restore’. For more details on how to
backup and restore car file please see the backup and restore section.
You can also choose to load a car configuration file given to you by a friend. We recommend that you load a
complete backup file as described above. To load a car configuration file you must have the backup file from a
pre-configured car. Please see the backup and restore chapter in this manual on how to make a car configuration
file. Copy the pre-configured car file onto the USB memory stick and plug it into your Micro Pod unit. Click on
the ‘File Manager’ button in the main menu then select ‘Car Configuration – Copy To/From USB Stick’ from the
dropdown box (Fig 12). Now the car configuration will appear in the ‘USB Stick’ box. Select the car file from
button to copy the file over. Once the file has copied, you can see the car
the USB stick box and click the
configuration in the ‘Local Cars’ box. To initialize the car configuration on your unit click the ‘Car Setup’ button
then click the ‘Load’ button. A pop-up box will appear (Fig 11). Choose the pre-configured car that you just
copied over from the USB stick from the dropdown box and click load. All of the cars configurations have now
been initialized on your unit
8
Ch.5
Figure 11 - Loading a Car Configuration
Figure 12 - Copying a Car Configuration from a USB Stick
decrease the limit click on the left side of the box.
The RPM redline increases and decreases in 100
RPM increments.
Creating a New Car
If a car configuration file is not provided, then you
will have to create a new car file from a blank
template. To create a new car click on the ‘Car
Setup’ button and click the ‘Save Car’ button. A
pop-up box will appear. Select ‘<New>’ from the
dropdown box (Fig 13). Type in the name you wish
to call your car then click the ‘Save’ button. Now
any modifications you make to your car will be saved
to your cars configuration file.
Setting Ideal Shift Points
The ideal shift point of the car is set in the car setup
screen (Fig 14). Click on the ‘Ideal Shift Rpm’ box
to change the limit. To increase the RPM limit click
on the right side of the box and to decrease the limit
click on the left side of the box. The RPM limits
increase and decrease in 100 RPM increments. Be
sure to save the car when finished.
Figure 13 – Saving a New Car
Setting the Redline
Figure 14 – Car Setup Screen
To set the redline of the engine navigate to the car
setup screen (Fig 14). Click on the ‘Redline Rpm’
box to change the redline limit. To increase the
RPM limit click on the right side of the box and to
9
Ch.5
Set Number of Gears
You have to set the number of gears so that when
you run the gear position calibration routine the unit
knows how many gears to look for. A description of
the gear position calibration routine can be found in
the users manual. To set the number of gears click
on the ‘Gears’ box on the car setup screen (Fig 14)
until the number of gears appears.
Set LED Start RPM
To set the RPM level when the LED lights will
become active, click on ‘LED Start RPM’ box (Fig
14). To increase the RPM limit click on the right
side of the box and to decrease the limit click on the
left side of the box. The RPM redline increases and
decreases in 100 RPM increments.
Figure 15 - Wheel Size Setup
Brightness Level
The shift light LEDs and the LCD has 3 brightness
levels, low, mid, and high, that the user can. To set
the brightness of the unit, navigate to the screen
setup screen (Fig 16). Click on the ‘Brightness’ box
until your desired brightness appears. The brightness
will scroll through low, mid, and high settings. We
recommend using the high setting for daytime racing
and the mid or low settings for nighttime use.
Set the Units
Select whether you want the Micro Pod to measure
in standard units (mph, psi, F, etc) or in metric (kph,
Kpa, C, etc.) by clicking on the ‘Units’ box (Fig 14).
Set Wheel Size
System Date/Time
If you are using a wheel speed sensor the wheel size
needs to be specified because it is used for speed
calculations. If you are using GPS for speed, which
is recommended and more accurate, wheel size is
not important. Wheel size is specified in the car
setup menu. To set the wheel size click on the
wheel icon located in the bottom right hand corner.
A pop-up box will appear. Click the ‘Up’ button to
increase the size and the ‘Down’ button to decrease
the size (Fig 15). When you have selected your
circumference click the ‘Done’ button. Be sure to
save the car when finished.
The system date and time needs to be set so your
logged files will be time stamped with the correct
dates and times. The system date and time are set in
the screen setup screen (Fig 16). To set the date
click on the month, day, or year. To set the time
click on the hour, minute, or second. The time and
date are battery backed and remembered when the
race logger is powered off.
10
Ch.5
Figure 17 - Logging Preferences Screen
Figure 16 – Display Setup Screen
Click on the dropdown box under ‘Start Logging
Options’. Select either ‘When Speed hits X’ or
‘When Engine is Started’. Enter the mph you would
like to start logging at (if that option is selected) by
clicking the up or down arrows. Click the ‘Save’
button to save these changes to the logging setup.
LED Scheme
The LED scheme box controls the pattern of the
shift lights as the RPM goes through its range. There
are 2 settings which will be previewed when you
click on the box (Fig 16). One pattern will have the
shift lights growing from left to right while the other
grows from the outside in.
Stop Logging a Session
Your Micro Pod unit will stop logging a session
when your engine is turned off or if the car is
stopped for X amount of time. These options are
set in the logging screen (Fig 17). Click on the
dropdown box under ‘Stop Logging Options’.
Select either ‘When Stopped For X Sec’ or ‘When
Engine is Turned Off’. Enter the amount of
seconds you would like to stop logging at (if that
option is selected) by clicking the up or down
arrows. Click the ‘Save’ button to save these changes
to the logging setup.
Hold Lap Time
To set how long you want a lap time, predictive, or
split lap time to appear on the screen of the Micro
Pod click on the ‘Hold Lap Time’ box in the screen
set up screen (Fig 16). Click on the right side of the
box to make the values increase or click on the left
side of the box to make the values decrease.
Logging Preferences
Venues
Start Logging a Session
The RLC race loggers are able to organize your
logged sessions by venues. This way you can easily
find the particular logged session you are looking for
at any time. This is totally optional and does not
have to be set up.
Your Micro Pod unit will not start logging a session
until either a certain speed is reached or when your
engine starts. These options are set in the logging
screen (Fig 17).
To create a venue, navigate to the logging screen (Fig
17). Venues are created by clicking on the ‘New’
button from the ‘Venue’ dropdown list (Fig 17). A
pop-up box appears (Fig 18). Enter the name of the
11
Ch.5
venue with the keyboard provided in your kit and
click ‘Create’. Now you should see your venue in the
dropdown list. After the venue has been created, use
the venue whenever racing at that particular venue to
store all logged files when racing there. In order to
log in that venue folder you must select that venue
from the dropdown list ahead of time.
copy it to the ‘Scrolling Pictures’ box. You will have
to reboot the unit in order for the change to take
effect.
Figure 19 - Applying New Scrolling Wallpaper
Save Different Car
Configurations
Figure 18 – Create New Venue Options
Each time you press the ‘Save’ button it saves off
your car’s configuration automatically and overwrites
the current car configuration. You can save different
configurations of your car under different names so
you don’t have to re-calibrate different sensors.
The reason you would want to save off different car
configuration files is that you have different car
setups for different tracks. For example, your gear
ratios could vary from track to track and instead of
running the gear calibration routine, described in the
users manual, you could load in a different car
configuration. You can make a backup of your car
for each one of these tracks so you just have to load
the car configuration for that track and not have to
re-calibrate sensors or gear ratios.
Backup Files
The Micro Pod automatically makes a backup file of
each log file when it is offloaded onto a USB stick.
The logging screen (Fig 17) shows you how many
backup files you have on the Micro Pod unit and
gives you the option of copying the backup files
onto a USB stick or deleting them. If you click the
‘Delete All’ button the backup files are permanently
deleted from the Micro Pod.
Scrolling Wallpaper Setup
The scrolling wallpaper you see on the main menu
can easily be changed to one of your preference. To
change the wallpaper create a custom bitmap image
(.bmp file) and copy it onto the USB memory stick
that is provided in the Micro Pod Setup kit. Plug the
USB memory stick into the Micro Pod. Navigate to
the file manager screen and select the ‘Scroll Photo –
Copy To/From USB’ from the dropdown box (Fig
19). Select your custom bitmap image (.bmp file)
from the ‘USB Stick’ box and click the
button to
To save a different car configuration, click on the
‘Car Setup’ button and click the ‘Save Car’ button. A
pop-up box will appear. Select your current car’s
configuration file from the dropdown box (Fig 20).
Type in the name you wish to call your car then click
the ‘Save’. Now any modifications you make to your
car will be saved to your cars configuration file. We
12
Ch.5
recommend that the name of the new car
configuration file has something to do with the car
setup or the track that you would use that particular
setup.
Figure 20 – Save a New Car Configuration File
13
Ch.6
Peripherals
Peripherals are items found in a car that are not
digital or analog sensors. These devices typically
have a serial or Controller Area Network (CAN)
interface. Current peripherals supported by the
Micro Pod are ECUs, Chase CAM camera, OBD-II
CAN port, Expander cable, and GPS devices. RLC
will continue to add and update peripherals as they
become available. If you have a peripheral that is
not currently supported, please contact RLC. If you
give us the name of the peripheral, its manufacturer,
or send us the peripheral we will create the file for
you and send it to you. We are constantly looking
for new peripherals to add to our lineup.
Figure 21 - Adding a Peripheral
Peripherals require a software update and cannot be
added as easily as a sensor or car file. Review the
section on software updates for information on how
to update your Micro Pod.
Adding a Peripheral
To add a peripheral, navigate to the peripherals
screen (Fig 21). Click the ‘Add’ button and the
‘Choose Peripheral To Add’ screen will appear (Fig
22). From the dropdown box choose which
peripheral you would like to add and click the ‘Add’
button.
Some peripherals may have options
associated with them. For example, the GPS option
will ask you to choose which serial port to add it to.
To see if the peripheral is correctly installed, navigate
to the calibration screen. A peripheral will say N/C
or none if it is not correctly installed.
Figure 22 – Choose Peripheral to Add
Removing a Peripheral
Double clicking on a peripheral will bring up a dialog
box with an option to remove that peripheral (Fig
23). Simply click the delete button and acknowledge
the confirmation box to remove the peripheral.
Figure 23 - Removing a Peripheral
14
Ch.7
Sensor Setup
Each sensor needs to be added to your Micro Pod unit by loading its sensor file. There are two ways to add
sensor files to your unit, either by loading a sensor file that has already been created or by creating a new sensor
file on the unit. Look on the RLC website for a list of sensors available from RLC. All sensors sold by RLC have
the sensor files loaded on the Micro Pod and on the USB memory stick in the Micro Pod Setup kit. These sensor
files contain descriptive information regarding each sensors characteristics like operating ranges, characteristic
equation, type, warning limits, etc . . .
may not have subtype options. For example, if you
are adding a set of brake sensors, the subtype would
be ‘front brakes’ or ‘rear brakes’. Click ‘Add to Car’
to complete the sensor addition.
Adding Sensors
This section describes how to add a sensor to a car
configuration; the sensor file must already be added
to the unit. Each sensor added will be assigned to
the coordinating channel that it was hooked up to on
the wiring harness when the sensor was installed in
the car. If you set up the car the same way as the
typical car setup drawing you can just load in one of
the pre-defined car configurations loaded on your
unit. The typical car setup drawing can be found on
the RLC website. If you do not use one of the predefined cars or need to add a sensor you will have to
add the different sensors manually. To add a sensor
to your car configuration, navigate to the car setup
menu and click the ‘Add’ button. A pop-up screen
will appear and you will need to select which type of
sensor to add from the dropdown list.
Figure 24- Adding an Analog Sensor
Adding a Digital Input Sensor
Adding a sensor to the Micro Pod Sport is a
different process, please see the section below.
To add a digital input sensor select ‘Add Digital
Input Sensor to Car’ from the drop down menu.
The ‘Adding Digital Input Sensor Options’ screen
will appear (Fig 25). Type in the sensor name with
the keyboard provided in the Micro Pod Setup kit
and select the harness channel to associate it with the
sensor. If the digital input type is a driver
pushbutton select which function the button should
perform from the ‘Controlling’ box.
Adding an Analog Sensor
Add an Analog sensor by selecting ‘Add Analog
Input Sensor to Car’ from the dropdown menu.
The ‘Adding Analog Sensor Options’ screen will
appear with the options for the sensor (Fig 24).
Enter the sensor name (e.g. ‘Oil temp’), select the
harness channel to associate it with the sensor, select
the sensor type, select the subtype, and the warning
information for the sensor. Please review the ‘Set
Alarms and Limits’ section of this manual to learn
how to set the alarm and limits of the sensor.
Depending on the type of sensor added, it may or
15
Ch.7
Figure 25 - Adding a Digital Input
Figure 26 - Adding a Digital Output
The last drop down box has options for the way the
Micro Pod interprets the digital input. If this is an
input that may trigger more than once, there is an
option to ignore ensuing pulses for a specified
period of time. This would be useful if you were
setting up a button and wanted the button to be debounced or if you were setting up an external lap
timer and wanted to make sure the lap timer was
only triggered once per lap. Another option is the
scale rate. If the frequency of an input sensor is not
a 1:1 ratio this option can scale the sensor for you.
For example, if an engine tachometer sensor gives 2
pulses for every 1 engine revolution, scaling the
input sensor by 0.5 would give the correct
tachometer reading.
Adding an ECU Sensor
In order to add an ECU sensor to the car
configuration you must first add the ECU as a
peripheral. Please review the ‘Peripherals’ section of
this manual on how to add a peripheral. After the
ECU has been added as a peripheral in the
peripherals screen, you can add the ECU sensor to
the car configuration. Click the ‘Add ECU Sensor to
Car’ from the dropdown menu. The ‘Adding ECU
Sensor Options’ screen will appear (Fig 27), fill in the
ECU Sensor options. Note: there is no option for
calibration for a sensor coming from an ECU.
Adding a Digital Output
A digital output sensor can be added to drive various
external functions of a car. Typical examples would
be sounding a warning buzzer, turning on a fan,
lighting an LED, killing the engine, etc…. To
configure a digital output select ‘Add Digital Output’
from the dropdown menu. The ‘Adding Digital
Output Sensor Options’ screen will appear (Fig 26).
Type in the sensor name, select the harness channel
to associate it with the sensor, the sensor that the
digital output is triggered from, and the way the
digital output will be triggered. Click the ‘Add To
Car’ button to complete adding a digital output
sensor.
Figure 27 – Adding an ECU Sensor
16
Ch.7
respective manufacturer and manufacturer’s part
number. Next select the type of sensor that is being
created from the dropdown box. Select how
frequently the sensor needs to be sampled. To save
log file space and system resources choose the
smallest number to adequately sample the sensor.
For example, if a temperature sensor is being
installed choose 1 sample/sec since temperature
does not change rapidly. If a shock sensor is being
installed, choose 100 samples/sec since shock
vibrations happen very quickly. The Micro Pod
units sample 400 times/sec and then averages those
samples to get extremely accurate data.
Currently RLC only supports one ECU and because
of limited interest we have not expanded on our
support. RLC is only interested in supporting new
ECUs or ECUs that are involved with a race series.
We will happily add an ECU to our list of
peripherals if the ECU company or race series
representatives contact us.
Creating a New Analog Sensor
RLC recommends that you either purchase your
sensors from us or send us your sensor for us to
create the sensor file for you. If you give us the
name of the sensor, its manufacturer, or send us the
sensor we will create the file for you and send it to
you. We are constantly looking for new sensors to
add to our arsenal. To create your own sensor file
follow the directions below.
If the sensor came with a datasheet, look on the
datasheet to see if the sensor’s characteristic
polynomial equation came with the datasheet. If the
datasheet came with graphs, it is possible to derive
the polynomial equation from the graph. If no
equation can be derived, leave these values blank for
now; they can be automatically calibrated later. See
the ‘Sensor Calibration’ section of this manual to see
how to use the automatic sensor calibration.
If the sensor file for the sensor installed in your car is
not available from the RLC website or from another
car, a new sensor file will have to be created. To
create a new sensor on your own, navigate to the car
setup screen and click on the ‘Add’ button. Select
‘Create New Analog Sensor Type’ from the
dropdown menu. A pop-up box appears that allows
you to enter the sensor information and input
parameters (Fig 28).
Finally, enter the minimum and maximum values
expected for the sensor. For example, if a
temperature sensor is being installed, you could
select 0 for the min and 300 for the max.
After all this information has been entered, click the
‘Create Sensor’ button to finish creating the sensor.
The sensor is now ready to be added to a car
configuration.
Analog Sensor Calibration
RLC recommends that you either purchase your
sensors from us or send us your sensor for us to
create the sensor file for you. If you want to create
your own sensor file and calibrate it yourself, follow
the directions below.
If an analog sensor file does not exist for a particular
sensor the analog sensor can be calibrated
automatically. The automatic calibration routine
Figure 28 - Sensor Input Parameters
In the name box type a descriptive name for the
sensor. RLC names all the sensors by their
17
Ch.7
associates a known voltage with a known value that
the user provides. These values are entered into the
race logger calibration routine where it will produce
an equation. This equation is what you enter into
the ‘Create New Analog Sensor Type Options’
screen (Fig 28). The more values typed in the more
accurate the equation will be. This is not a hard
process but if you give us the name of the sensor, its
manufacturer, or send us the sensor we will create
the file for you and send it to you. We are constantly
looking for new sensors to add to our arsenal.
Figure 30 – Advanced Sensor Options Screen
Example of and analog sensor calibration: if an oil
temperature sensor is being added, a thermometer
and a small batch of oil that can be heated are
required.
Starting at a minimum temperature, probably, room
temperature, record the temperature from the
thermometer into the equation box and click the
‘Add’ button. After the ‘Add’ button is pressed, the
race logger will associate that temperature with the
voltage read from the sensor. The software will then
create an equation. Heat the oil incrementally; say 30
degrees at a time to the maximum expected
temperature.
At each increment, record the
temperature. Click the ‘Add’ every time you enter a
new value. With each value added the equation gets
more accurate. When finished click the ‘Back’
button to return to the ‘Advanced Sensor Options’
screen (Fig 30). Click the ‘Save’ button to save the
new calibration when finished.
Figure 29 - Analog Sensor Options
To calibrate the sensor you would navigate to the car
setup menu and double click on one of the analog
sensors in the sensor box. The ‘Analog Sensor
Options’ screen will appear (Fig 29). Click the
‘Advanced’ button and the ‘Advanced Sensor
Options’ screen will appear (Fig 30). Click the
‘Calibrate’ button and the screen in Figure 31 will
appear. This is where you would enter the measured
sensor values and the calibration routine would
create an equation. Again this is not difficult but we
would love to do it for you so that we can add the
sensor to our list of supported sensors.
18
Ch.7
the driver knows when there is a problem with the
car. The initial warning limit is meant to let the
driver know that there is an impending problem.
The final warning limit is point at which you want to
shut the car down as quickly as possible so you don’t
damage it. When the initial warning level is reached
it flashes the corresponding sensor box on the
screen of the Micro Pod. When the final warning
limit is reaches it flashes the entire screen red and
requires the driver to acknowledge this warning with
a tap. To set these values navigate to the car setup
screen. Select which sensor you want to set limits
for in the sensor box and double click on it. A popup box will appear with the sensors information (Fig
29). Enter the appropriate warning levels with the
keyboard and click the ‘Exit’ button.
Figure 31 - Analog Sensor Calibration
Deleting an Unused Sensor
If a sensor is not used for a particular car it can be
deleted to remove confusion. Select the sensor file
to delete from either the ‘USB Stick’ box or the
‘Local Sensors’ box and press the
button (Fig
32). If you want to re-add the sensor file at a later
date follow the instructions on how to add a sensor
file.
Adding An OBD-II CAN Sensor
Add an OBD-II CAN by selecting ‘Add OBD-II
Sensor to Car’ from the dropdown menu. The
‘Adding OBD-II Sensor Options’ screen will appear
with the options for the sensor (Fig 33). Enter the
sensor name (e.g. ‘Throttle’) and select which sensor
you want to add from the dropdown list. RLC has
selected 8 different sensors from the OBD-II CAN
port that you can select to log.
Delete Sensor
Figure 32 - Deleting a Sensor
Set Alarms and Limits
Figure 33 – Adding an OBD-II Sensor
Alarms and limits are used to inform the driver of
car malfunction or impending failure. Two types of
alarms are available: initial warning level and final
warning level. These levels are set for each sensor so
19
Ch.8
Backup and Restore
Once you have completed your cars setup you will want to backup the cars configuration. If you used one of the
car configuration files that we shipped with the unit and did not make any changes to it, you do not have to make
a backup of the car configuration file. If you changed a car configuration file or created your own, you will want
to make a backup. The Micro Pod units allow the user to fully backup and restore a car’s configuration, sensor
files, or the complete system. It is recommended to back up the entire unit once you have completely set it up.
We also recommend that you backup your unit anytime you make significant changes to the car. Once you have
made a backup save it on your PC so that if anything were to happen to your unit you can restore all of its
configurations and sensors without having to redo everything.
The Micro Pod requires that you connect a mouse when backing up or restoring files. With the mouse plugged in
you are able to fully access the main menu screen which allows you to access the file manager screen. You will
also need the keyboard plugged in to name files when backing up files.
To create a backup or restore files to the Micro Pod you will need the USB memory stick that is included in the
Micro Pod Setup kit but also available at your local office store. If you are backing up a file you will need the USB
hub, mouse, and keyboard plugged into the harness.
Complete System Backup &
Restore
To make a full system backup, tap the ‘File Manager’
button and select ‘Complete System – Backup &
Restore’ from the drop down list (Fig 34). Enter a
name for your back up and click the ‘Backup’
button. Now a complete system backup has been
created on the USB memory stick. We recommend
that you keep a copy of this on your PC.
To restore a complete configuration insert the USB
memory stick with the backup files and select the file
from the USB stick area and click the ‘Restore’
button. WARNING: the entire car is overwritten
during a restore process.
Figure 34 - Full System Backup
20
Ch.9
If no information is displayed you may be using the
wrong file or there was an error while downloading
the file. The ‘Click to Update’ button will be grayed
out if an invalid file is selected.
Software Updates
From time to time, RLC will offer updates to your
unit’s software. Updates will come out for many
reasons but the main reason of an update is to add a
feature that wasn’t there before. We will be offering
these updates at the RLC Racing website where you
will have the opportunity to download them and
install them on your unit.
Serial Numbers
Updates may or may not be matched to serial
numbers. Special customized updates may require
the serial number from the race logger and the serial
number from the update file to match for an update
to occur.
For basic systems, updates will not be required to
match serial numbers and these updates will be
available free of charge from the RLC racing website.
Update Procedure
Each Micro Pod unit can be put into update mode
that will bring up a special update screen. From this
screen you can update to a new software version.
Starting Update Mode
Files on USB Stick
To update the Micro Pod plug the USB host port
into the USB client port of the harness. Now plug in
the power supply that is provided in the Micro Pod
Setup kit and allow the unit to power up. The unit
will power up to the Update screen, if not power the
unit on and off again with the USB ports still
plugged together. Directions for updating the Micro
Pod can also be found at the website.
Updating the Unit
When RLC issues an update it will be available from
our website. After you download the update copy it
to your USB memory stick that is provided in the
Micro Pod Setup kit. Insert the memory stick into
the race logger and the file system from the USB
memory stick will appear in the lower right hand
corner of the screen (Fig 35). Select the update file
and the ‘Software Update Utility’ box in the lower
left hand corner will display the information from
that file. Click the ‘Click to Update’ button to begin
the update. Normal update time will take about 3
minutes and the unit will prompt you to reset when
it is finished. If any errors occur during this process
simply try the update again.
Figure 35 - Software Update Screen
Start Software Update
21